Teachers Thank You Gift Using Stampin’ Up! Tropical Chic Bundle

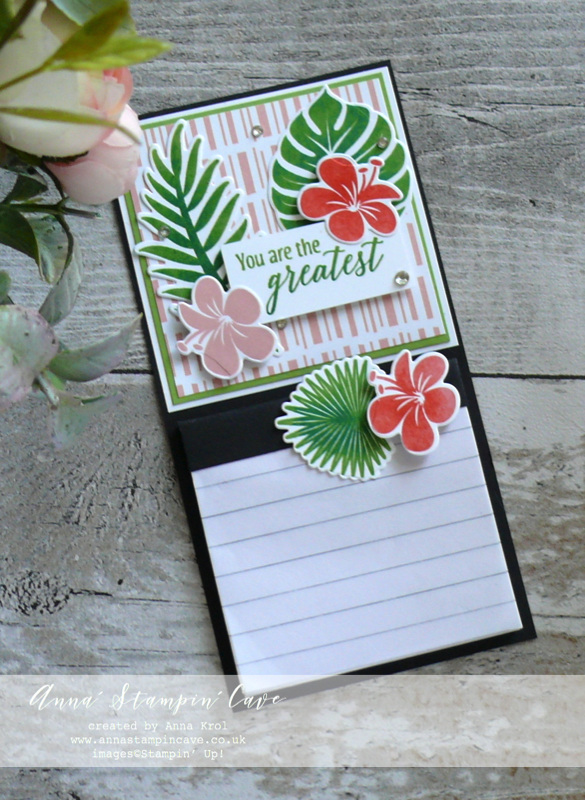
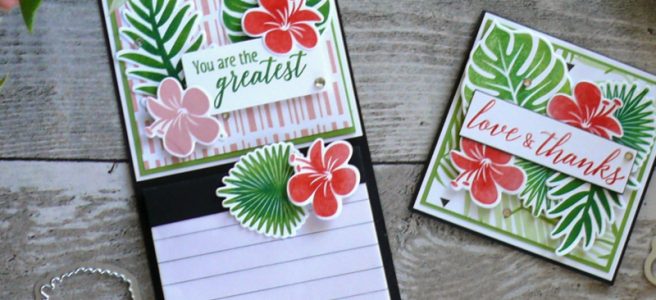
Anna' Stampin' Cave - Teacher's Thank You Gift Fridge Magnet and Thank You card using Tropical Chic Stamp Set and Tropical Thinlits Dies from Stampin' Up!

Anna’ Stampin’ Cave – Teachers Thank You Gift Using Tropical Chic Bundle

Thanks for coming to my blog today! We are being highlighted internationally by Kylie Bertucci and you are able to vote for my project. The top ten winners will get to be part of an international blog hop so please vote for my project. My project is under the number 20. You can do it here or use a button at the end of my post.

A theme for this month’s highlight is ‘Teachers Gifts’. And however, it’s been a long time since our daughter finished primary school (she starts Uni after summer break) I thought why not make a cute little set of a fancy fridge magnet and a mini 3×3″ Thank You card.

To make these I’ve used Stampin’ Up! Tropical Chic Stamp Set & Tropical Thinlits Dies. I also used coordinating Tropical Escape DSP.
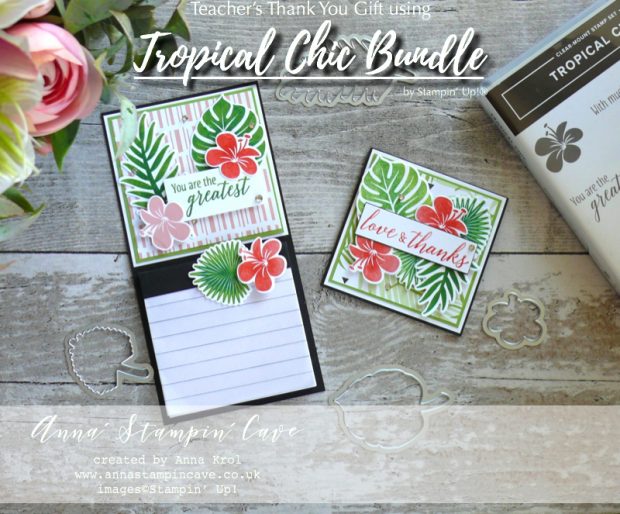
Anna' Stampin' Cave - Teacher's Thank You Gift Fridge Magnet and Thank You card using Tropical Chic Stamp Set and Tropical Thinlits Dies from Stampin' Up!

Teachers Gift Fridge Magnet dimensions:

  • Basic Black cardstock for the base: 3-1/4″ x 6-1/2″
  • Basic Black cardstock for the notebook: 1-1/2″ x 3″
  • Whisper White cardstock: 3-1/8″ x 3-1/8″
  • Granny Apple Green cardstock: 3″ x 3″
  • Tropical Escape DSP: 2-7/8″ x 2-7/8″
  • Whisper White cardstock for stamping & die-cutting
  • Rhinestones
  • magnet sheet 3″ x 4″

Teachers Thank You Card dimensions:

  • Basic Black cardstock: 3″ x 6″
  • 2x Whisper White cardstock: 2-7/8″ x 2-7/8″
  • Granny Apple Green cardstock: 2-6/8″ x 2-6/8″
  • Tropical Escape DSP: 2-5/8″ x 2-5/8″
  • Whisper White cardstock for stamping & die-cutting
  • Rhinestones

Anna' Stampin' Cave Teacher's Thank You Gift Fridge Magnet using Tropical Chic Stamp Set and Tropical Thinlits Dies from Stampin' Up!

First, I created the base for my magnet: I cut Basic Black cardstock to 3-1/4″ x 6-1/2″ and using liquid glue I adhered the magnetic sheet at the back. Next, I created the notes area. I have found this little notebook in my drawer but it had a navy spine and was a little too long (3″ x 4″) and I needed a square one. So I removed the old spine and shortened notebook using the guillotine.

To create new spine I cut a 1-1/2″ x 3″ piece of Basic Black cardstock and scored it at 7/8″ and 1″. Adhered it to the notebook and adhered notebook to the base.Anna' Stampin' Cave Teacher's Thank You Gift Fridge Magnet using Tropical Chic Stamp Set and Tropical Thinlits Dies from Stampin' Up!
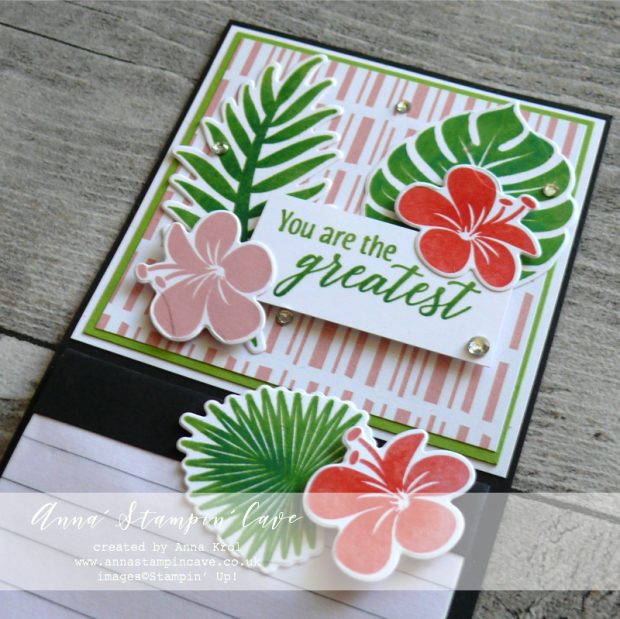
To finish off the top of my magnet, I took a Whisper White cardstock square, glued Granny Apple Green on top and layered a slightly smaller square of Tropical Escape DSP and adhered them all to the base.

For stamping the foliage I’ve used Stamparatus: I stamped each greenery image in Granny Apple Green ink, followed by Shaded Spruce but dabbed off some colour from the edges of the images.

I did the same with flowers but I used Blushing Bride with Poppy Parade. I decided to leave one flower just in Blushing Bride. I die cut all my images using coordinating dies, arranged and adhered them to the magnet using liquid glue and dimensionals.

For the sentiment, again, I’ve used Granny Apple Green with Shaded Spruce.
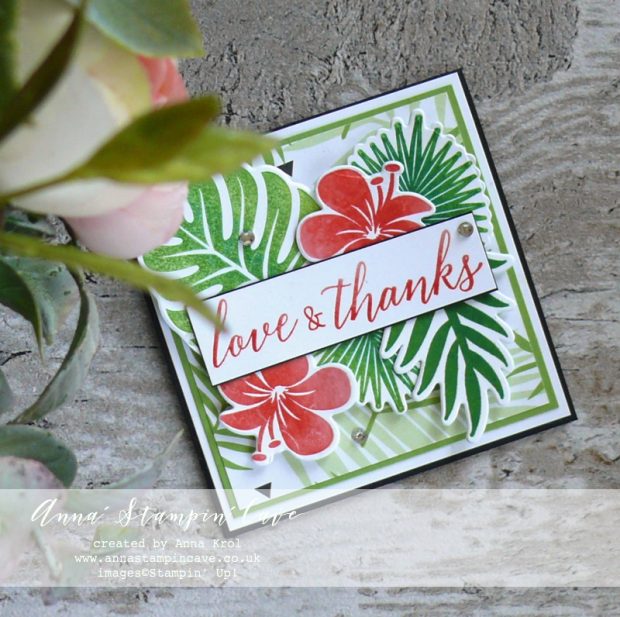
Anna' Stampin' Cave - Teachers Thank You card using Tropical Chic Stamp Set and Tropical Thinlits Dies from Stampin' Up!

For the card, I’ve used a 3″ x 6″ piece of Basic Black, scored at 3″. Same as with a magnet piece, I layered Whisper White with Granny Apple Geen and Tropical Escape DSP on top and adhered them all to the card base.
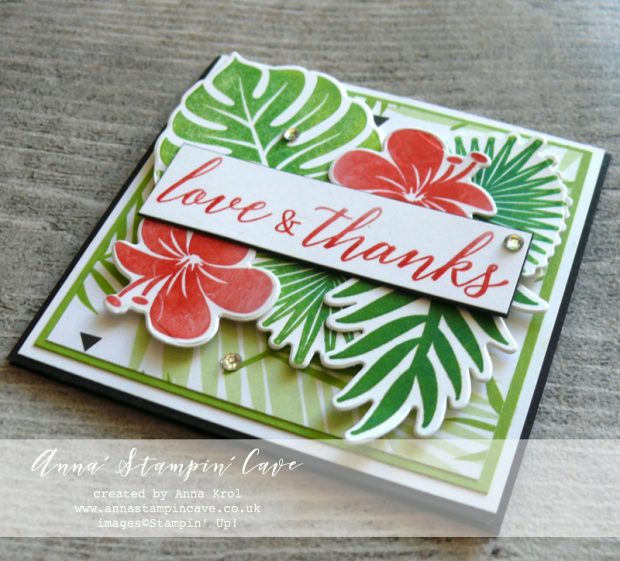
Anna' Stampin' Cave - Teacher's Thank You Gift Fridge Magnet and Thank You card using Tropical Chic Stamp Set and Tropical Thinlits Dies from Stampin' Up!

Using Stamparatus, again, I stamped each of my images and die cut them using coordinating dies.

The sentiment comes from the same stamp set but I stamped only ‘Love & Thanks’ with Blushing Bride at full strength and Poppy Parade dabbed off for gradient look.

Few rhinestones finish off my little projects.

I truly hope you’ve enjoyed coming to my blog today.

Now, make sure you head over to Kylie’s blog to check all lovely projects and vote for your favourites. Hope my project will be among them. My project is under number 20!

As always, if you wish to purchase any of the products I have used, simply click the images below to go directly to my online store.
My exclusive special offer this month only: FREE Stampin’ Up! Pearlised Doilies

How it works…

  • Place a product order of £50 or more (excl. shipping) in my online store in the month of August. 
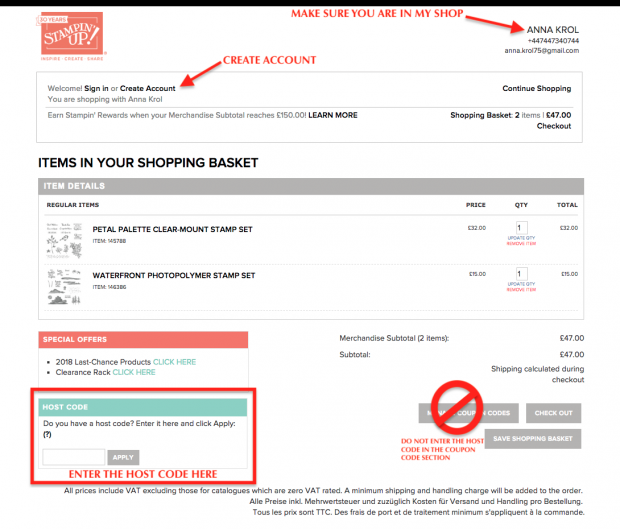
  • Add Host Code U6KK4ACY. To claim your reward you must include this code in your ordering process.
  • This August Special Offer will be applied to all qualifying orders placed through my shop using Host Code U6KK4ACY between 1 August – 31 August.
  • If your order is £150 or more do not use Host Code. You will earn your own Host Rewards to spend.
  • IMPORTANT:  My FREE Special Host Gift giveaways are mailed separately from any order and will arrive mid-September.

Stamparatus

£46.00

Big Shot

£102.00

Pin me

Summary of the project which gives all the views of the card in one photo. I’d love if you pinned and called by on Pinterest xx

Anna' Stampin' Cave - Teacher's Thank You Gift Fridge Magnet and Thank You card using Tropical Chic Stamp Set and Tropical Thinlits Dies from Stampin' Up!

DON’T FORGET TO CHECK

Request Autumn/Winter Catalogue below –
Stampin' Up! Autumn Winter 2018 Catalogue

How can you get a FREE copy of the new Autumn/Winter 2018 Catalogue?

For those living in the UK and Northern Ireland, you may request a catalogue using the form below and I will add you to my mailing list for this catalogue.

You can also opt-in to receive my customer email newsletter, featuring tips, product shares, news of Stampin’ Up! specials and my personal promotions.

  • Do not forget to give your full address
  • It’s open to the United Kingdom and Northern Ireland only.

Earn in August – redeem in September –> click here for more details

All-new, limited-time Colour Your Season products – Products available while supplies last or until 31 August 2018 – order yours today –> click here

International Highlights Winners Blog Hop

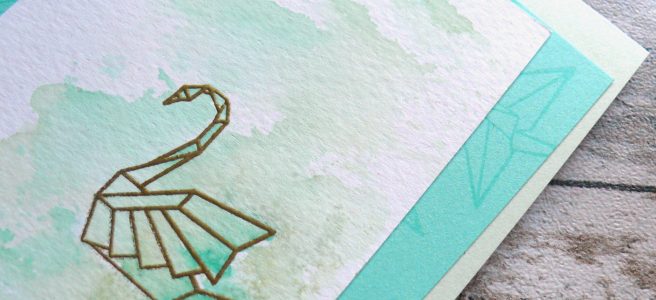
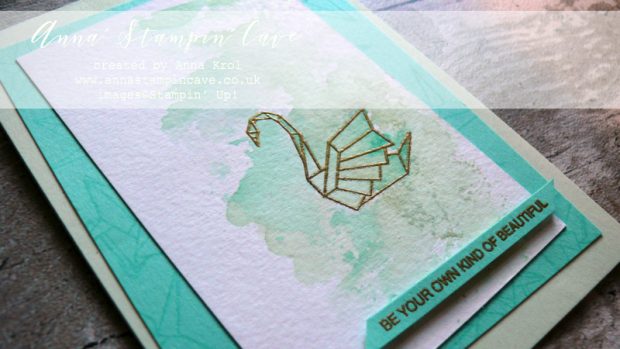
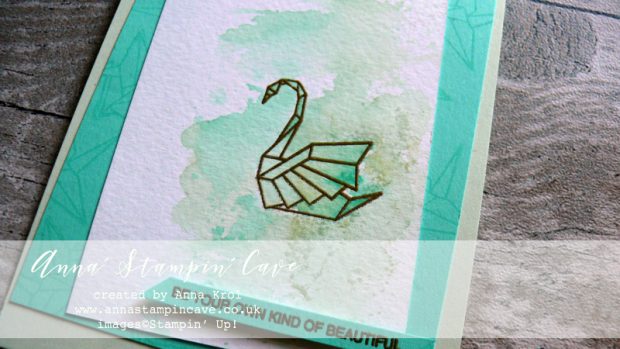
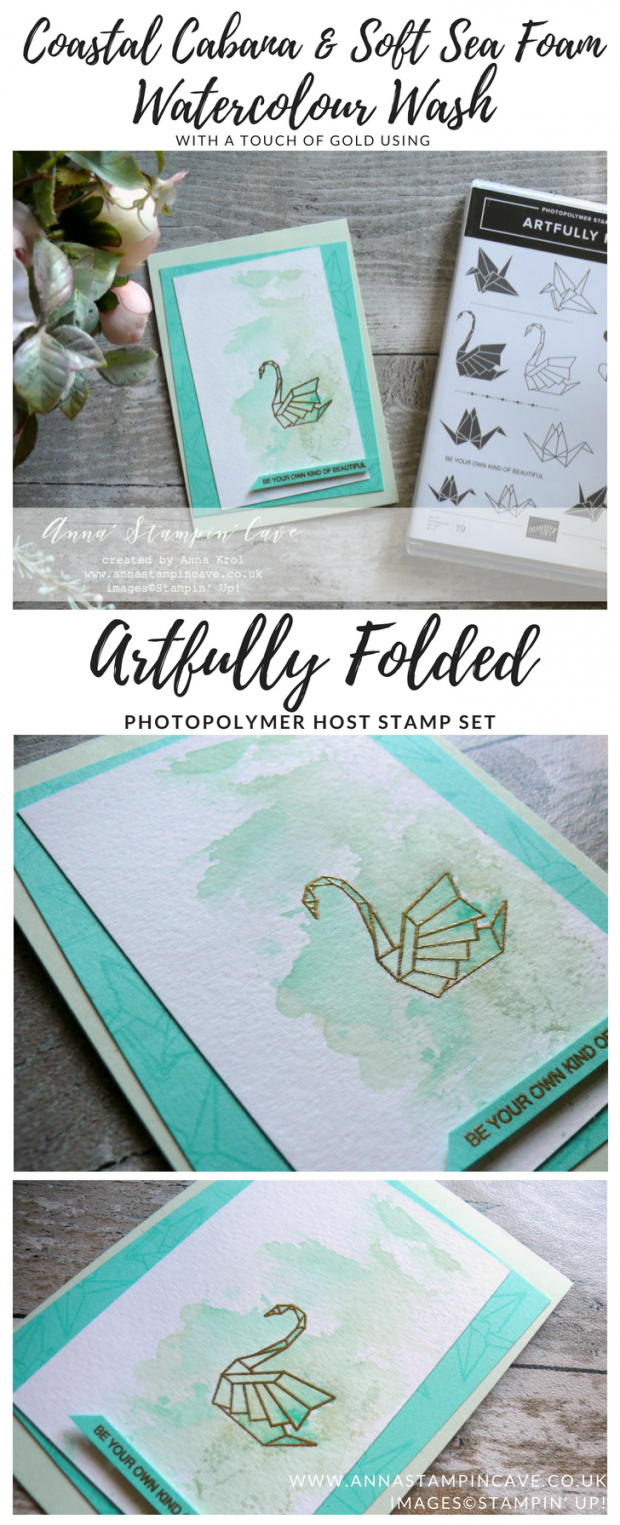
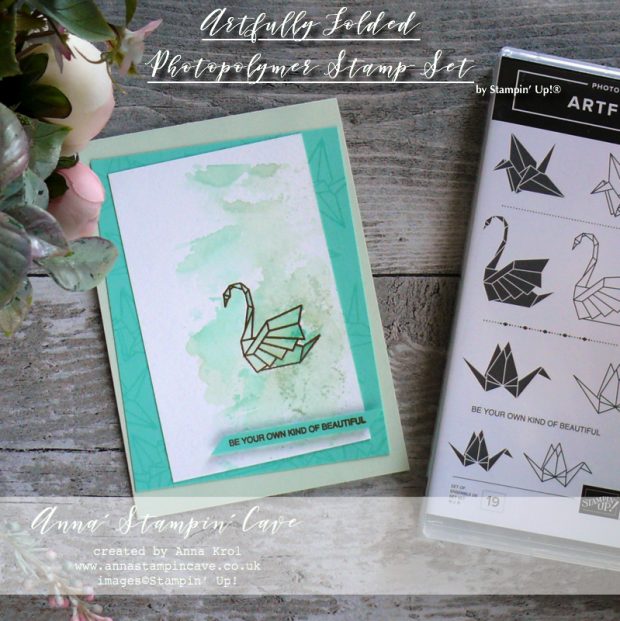
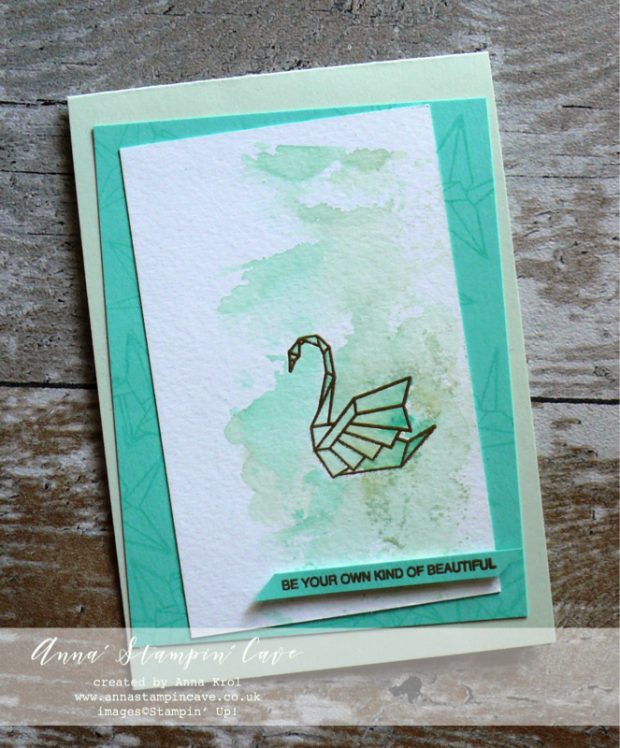
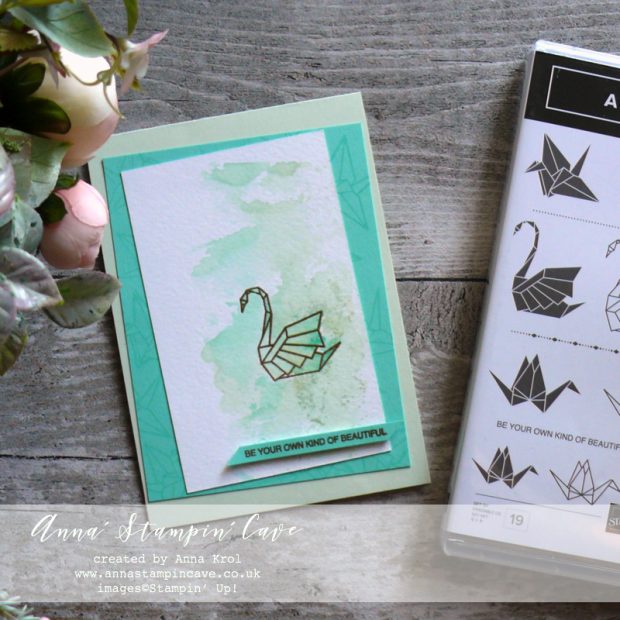
Anna' Stampin' Cave - Soft Sea Foam & Coastal Cabana Watercolour Wash with a touch of gold using Artfully Folded Stamp Set by Stampin' Up!

Anna’ Stampin’ Cave – International Highlights Winners Blog Hop

I was so absolutely thrilled that Kylie Bertucci has chosen me to hop amongst the top ten winners of her International Blog Highlight from June.

Every month, the ‘top ten’ get to blog hop with Kylie, using the same theme, and this time the theme was Friendship.

A month ago I’ve used Detailed With Love Stamp Set. This time, however, I decided to use beautiful host stamp set called Artfully Folded.Anna' Stampin' Cave - Soft Sea Foam & Coastal Cabana Watercolour Wash with a touch of gold using Artfully Folded Stamp Set by Stampin' Up!

Artfully Folded card dimensions:

  • Soft Sea Foam: 11-6/8″ x 4-1/8″ scored in half at 5-7/8″ (29.7 x 10.5 cm scored in half at 14.8 cm)
  • Coastal Cabana cardstock: 3-3/4″ x 5″ (9.6 cm x 12.7 cm)
  • Watercolour Paper: 3″ x 4-3/4″ (7.6 cm x 12 cm)
  • Coastal Cabana strip for the sentiment: 1/4′ x 2-3/4″ (0.6 cm x 7 cm)

Anna' Stampin' Cave - Soft Sea Foam & Coastal Cabana Watercolour Wash with a touch of gold using Artfully Folded Stamp Set by Stampin' Up!

First I heat embossed the image from Artfully Folded Stamp Set on watercolour paper, using Gold Stampin’ Emboss Powder.

Once the image was heat embossed, I took an Aqua Painter and using Soft Sea Foam ink pad I started adding the colour to my image. I also added some of the Coastal Cabana ink to the image.

Anna' Stampin' Cave - Soft Sea Foam & Coastal Cabana Watercolour Wash with a touch of gold using Artfully Folded Stamp Set by Stampin' Up!

Next, I took a transparency sheet that comes with photopolymer stamps and used it as my palette: I squashed some of both colours onto it, added some water from Aqua Painter and pressed it to my watercolour panel. I love how it turned out.

Anna' Stampin' Cave - Soft Sea Foam & Coastal Cabana Watercolour Wash with a touch of gold using Artfully Folded Stamp Set by Stampin' Up!

I took the Coastal Cabana panel and stamped it with various images from the set using Versamark ink and adhered it to the base at a wonky angle. Next, I also added my watercolour panel.

On a strip of Coastal Cabana, I heat embossed a sentiment from this same stamp set (be your own kind of beautiful) and added to the card with dimensionals.

Anna' Stampin' Cave - Soft Sea Foam & Coastal Cabana Watercolour Wash with a touch of gold using Artfully Folded Stamp Set by Stampin' Up!

I really hope you enjoyed visiting my blog today and I would love to encourage you to hop along with us and see the rest of beautiful projects designed by amazing artists.

Below is a list of the top ten winners participating in this hop, all very talented demonstrators from all around the world!

As always, if you wish to purchase any of products I have used, simply click the images below to go directly to my online store.

HOST CODE for the month of JULY is D369YGBB. Orders of £50+ (excl. p&p) will receive a Surprise Thank You Gift from me. You won’t be disappointed!

Thank You Gifts will be shipped in the first 2 weeks of the following month they were earned (mid-August).

Aqua Painters

£15.50

Stamparatus

£46.00


Pin me

Summary of the project which gives all the views of the card in one photo. I’d love if you pinned and called by on Pinterest xx

Anna' Stampin' Cave - Soft Sea Foam & Coastal Cabana Watercolour Wash with a touch of gold using Artfully Folded Stamp Set by Stampin' Up!


HOW TO USE HOSTESS CODE


DON’T FORGET TO CHECK

1-31 July – GET 10 FREE INK PADS (up to a £63 added value) with the £99 Starter Kit.  Choose one of the five colour collections (In Color, Brights, Neutrals, Regals or Subtles). For the full details on the Stampin’ Up! July Special Joining Offer –> click here

1-31 July Stampin’ Up! BUY 3 GET 1 FREE on select Designer Series Paper –> click here
The New Stampin’ Blends Marker Colours Are Now Available –> click here
Kylie Bertucci’s International Project Highlights

Anna’ Stampin’ Cave – Kylie Bertucci’s International Project Highlights

Thanks for coming to my blog today! We are being highlighted internationally by Kylie Bertucci and you are able to vote for my project. The top ten winners will get to be part of an international blog hop so please vote for my project. My project is under number  27!  You can do it here or use a button at the end of my post.

A theme for this highlight is ‘Friendship’. So I thought I will use some of the new products to create my card.

To create this card I used the sketch from the Global Design Project:

I slightly re-engineered it though (lol)

And here’s my card:

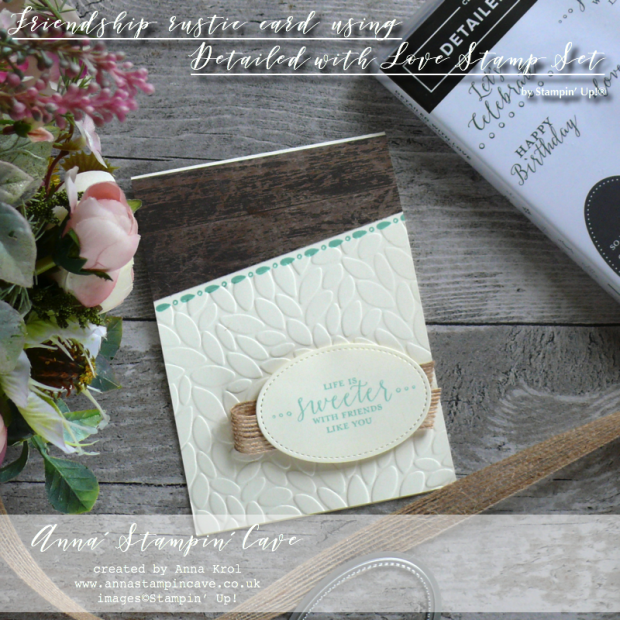
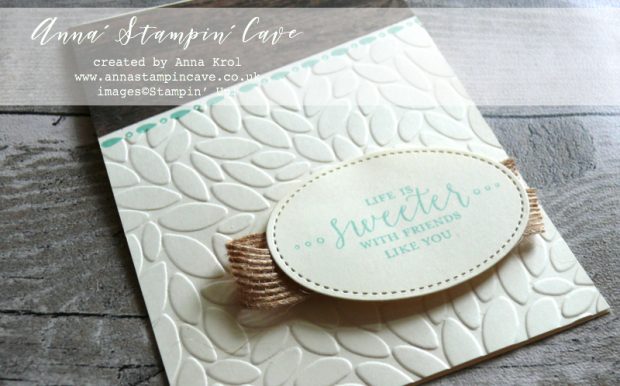
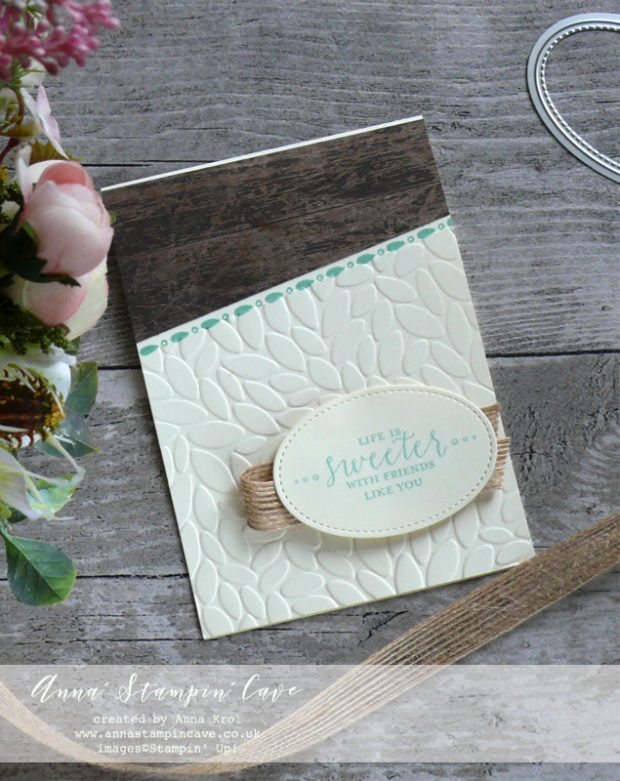
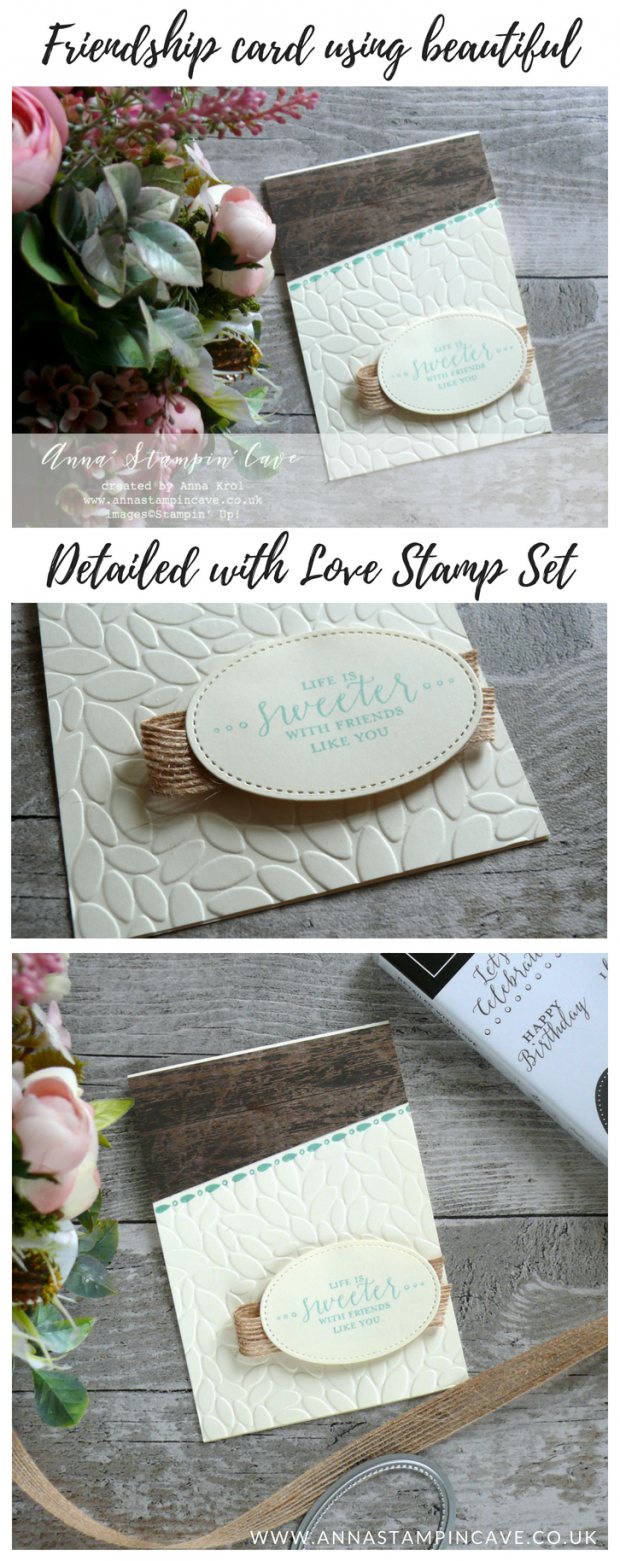
Anna' Stampin' Cave - friendship rustic card using Stampin' Up! Detailed with Love Stamp Set

Friendship card dimensions:

  • Very Vanilla Thick Cardstock: 11-6/8″ x 4-1/8″ scored in half at 5-7/8″ (29.7 x 10.5 cm scored in half at 14.8 cm)
  • Very Vanilla regular cardstock for stamping
  • Wood Textures DSP Stack: 2″ x 4-1/8″ (5.08 cm x 10.5 cm)
  • 5/8″ Burlap Ribbon 7″ approx (17.8 cm)

First, I created the base. Next, I cut DSP at a slight angle – the narrower end measures 1-2/8″ (3.2 cm). I adhered it to the base using snail adhesive.

Anna' Stampin' Cave - friendship rustic card using Stampin' Up! Detailed with Love Stamp Set

Now the Stamparatus came in handy. I wanted to create a little border where DSP ended. I placed my card in the Stamparatus at an angle so the grid at the Samparatus base and the edge of DSP created ‘one line’.

I placed the border stamp where I wanted it to stamp, and using the plate I lift it up. I inked my stamp with a Pool Party Ink Pad and made my first impression. Now taking advantage of hinges, I moved the plate one spot in the right direction, inked and stamped again. Moved it, inked and stamped it one more time. Perfect alignment each time!

Next, I took the Petal Burst embossing folder and placed it on the bottom part of the card base, so it ended just by my stamped Pool Party border and run it through the Big Shot.

Anna' Stampin' Cave - friendship rustic card using Stampin' Up! Detailed with Love Stamp Set

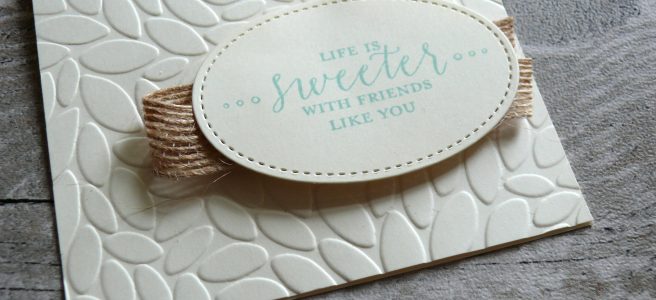
For the sentiment, I chose ‘Life is sweeter with friends like you’ also from Detailed With Love Stamp Set. I thought it would fit well. I stamped it in a Pool Party on a piece of regular Very Vanilla cardstock and next die cut it using the second largest oval die from Stitched Shapes Framelits Dies.

I took a piece of burlap ribbon, fold it in half and adhered under the oval. Next, using dimensionals I mounted it on my card.

I truly hope you’ve enjoyed coming to my blog today.

Now, make sure you head over to Kylie’s blog to check all lovely projects and vote for your favourites. Hope my project will be among them. My project is under number 27!

As always, if you wish to purchase any of products I have used, simply click the images below to go directly to my online store.

I also add this card to:


Host Code for the month of June is XEYXTEPE. Orders of £50+ (excl. p&p) will receive a Surprise Thank You Gift from me. You won’t be disappointed!

Thank You Gifts will be shipped in the first 2 weeks of the following month they were earned (mid-July).


Stamparatus

£46.00

Big Shot

£102.00

Anna' Stampin' Cave - friendship rustic card using Stampin' Up! Detailed with Love Stamp Set


HOW TO USE HOSTESS CODE


I would also love to invite you to join my team. I have a small team which is called Serendipity Crew. We are little but growing. And we are part of one of the biggest teams in the UK – a really wonderful group of women, of whom many have become dear friends of mine. We all support and inspire each other. So when you join my crew, you don’t get just me to help and support you, we all are a big friendly group! And we would love to welcome you.

Thank you for stopping by and have a blessed day,

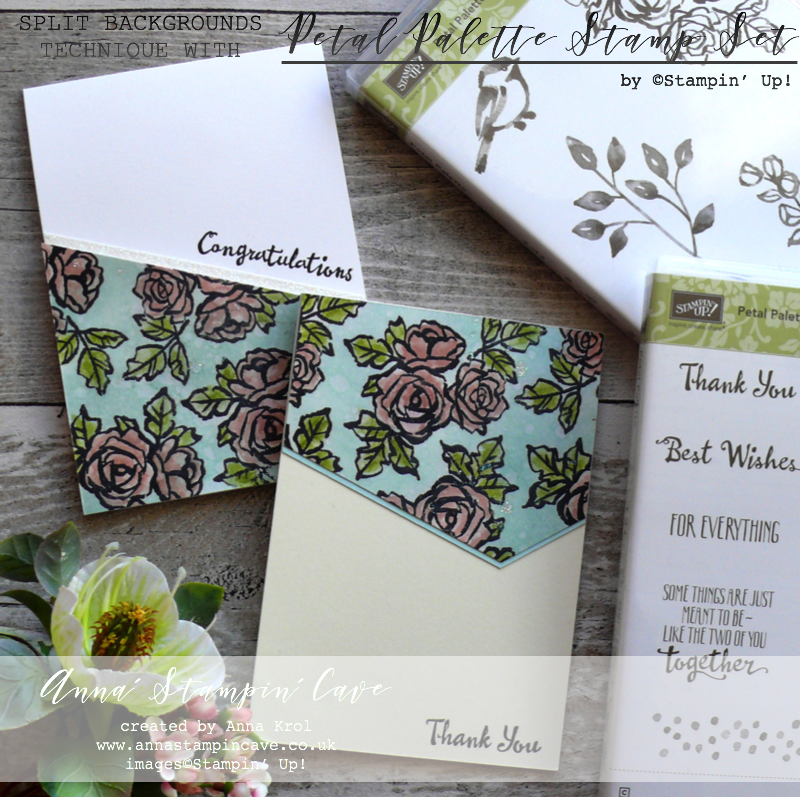
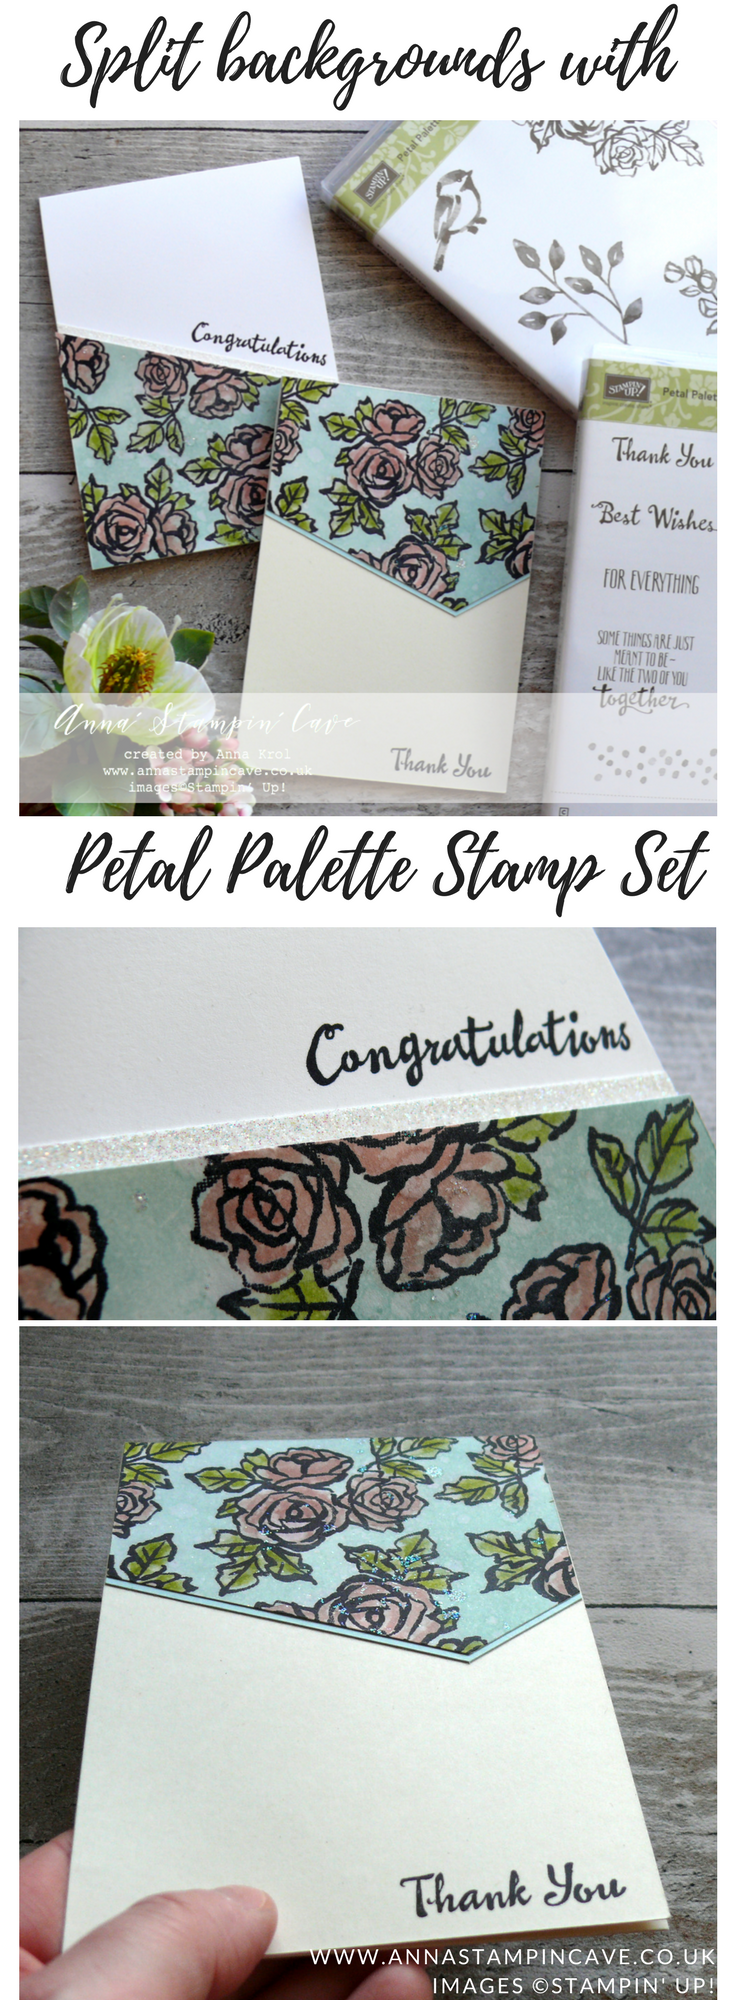
Petal Palette Split Background 1 For 2

Anna’ Stampin’ Cave – Petal Palette Split Background 1 For 2 for Kylie Bertucci’s International Project Highlights

Thanks for coming to my blog today! We are being highlighted internationally by Kylie Bertucci and you are able to VOTE  for my project. The top ten winners will get to be part of an international blog hop so please vote for my project. My project is under number 7!  You can do it here or use a button at the end of my post.

Our theme for this highlight is, again, ‘Favourite Sale-a-bration Or Occasions Catalogue Products’ – because they are so amazing!! Last time I’ve used my ever favourite medium: Brusho Crystal Colour – you can check that post HERE.

This time, however, I decided to use a stamp set I seem to be using a lot lately, called Petal Palette. And this is also my second project in ‘Bedazzled‘ series, as I have a thing (or two lol) for a glitter lately too haha

Dimensions for both cards:

  • card base: 11-6/8″ x 4-1/8″ scored in half at 5-7/8″ (29.7 x 10.5 cm scored in half at 14.8 cm) – Whisper White Thick & Very Vanilla cardstock
  • Shimmery White cardstock: 4-1/4″ x 5-3/4″ (10.8 cm x 14.6 cm)
  • Soft Sky cardstock: 3-2/8″ x 4-1/8″ (8.26 cm x 10.5 cm)
  • Dazzling Diamonds Glimmer Paper: narrow, long strip – 4-1/2″ x 1/2″ (11.4 cm x 1.3 cm) approx

First I created the background. I didn’t have a plan for my cards yet, I just played – but this is how many of projects start.

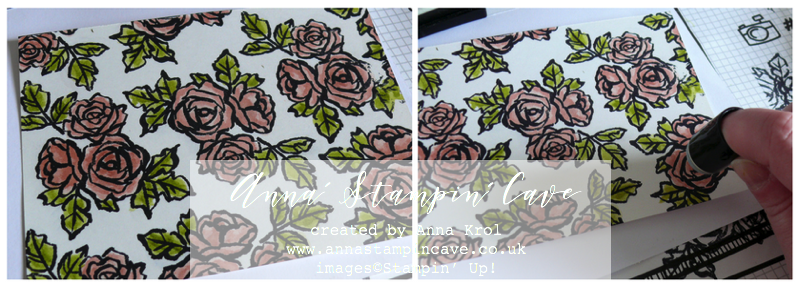
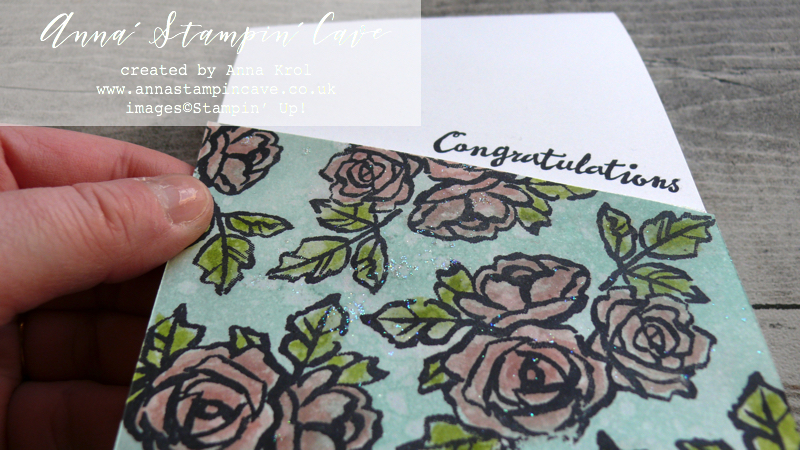
I stamped the cluster of roses from Petal Palettes Stamp Set all over the piece of Shimmery White cardstock using Basic Black Archival ink pad. Next, I watercoloured them. I’ve used my ink pads as palettes: Powder Pink with Blushing Bride for roses and Pear Pizzazz with Old Olive for leaves.

When my piece dried, I decided I want to add some colour to the background. I’ve used a sponge dauber to add Versamark ink to my flowers and let it dry. Next, I sponged Soft Sky ink over my piece. Versamark helped my roses not to be stained with blue ink, but it also allowed the blueish hue to make it’s ‘mark’ (hope you know what I mean).

Once happy with the background, I flicked some water droplets on and picked them up with a paper towel. I truly love subtle texture that those droplets create.

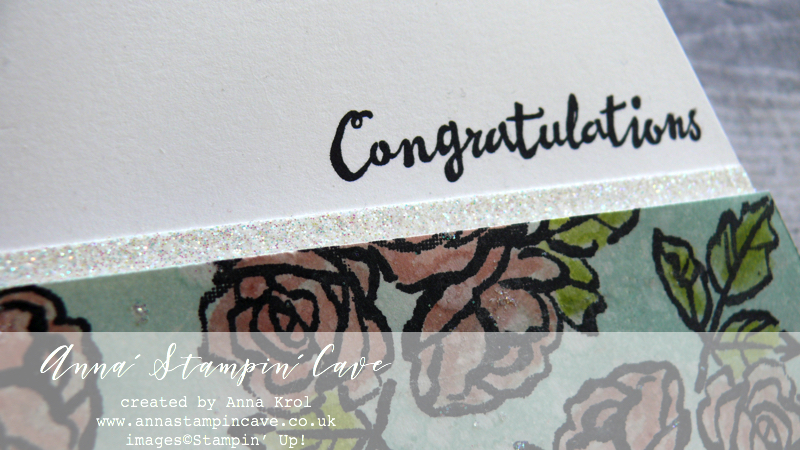
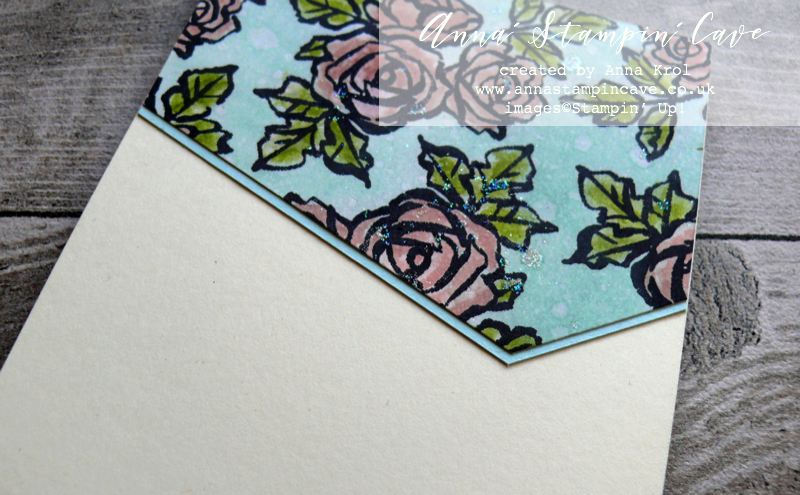
Now the ‘bedazzled’ part: I flicked some more water on my background, sprinkled with clear embossing powder and heat set it. Next, I re-heat it once again, added Dazzling Diamonds Stampin’ Glitter and heat set it again so the glitter stays put. And I cut my piece diagonally to create two cards.

Because of the bold design, I decided to keep the rest of my cards clean & simple.

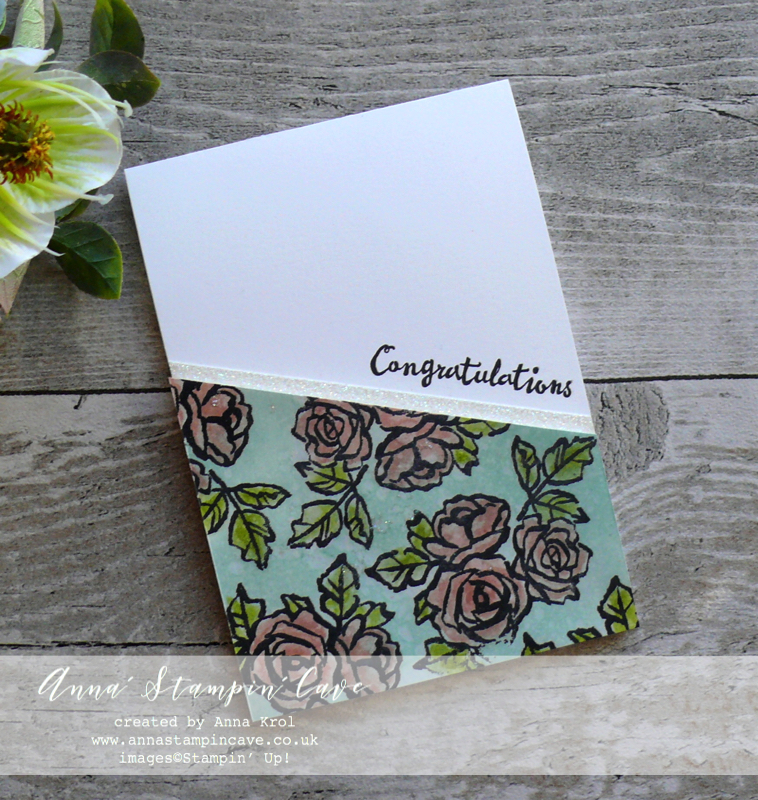
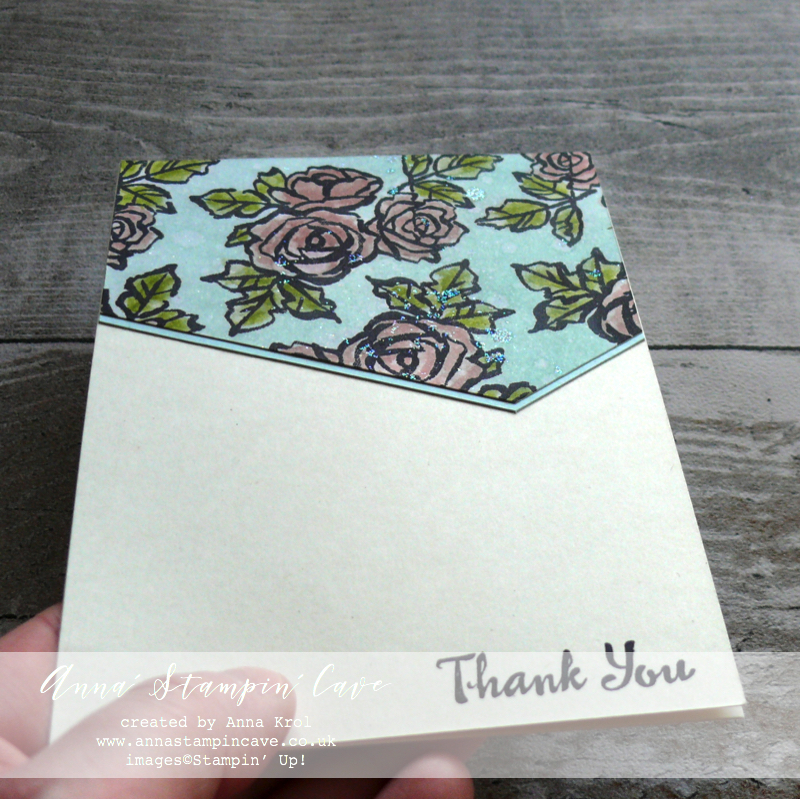
For first card, I decided to mount my diagonal piece at the very bottom of the card. But first, I stamped the sentiment, with help of Stamp-a-ma-jig, in Basic Black Archival ink.

I stamped it diagonally, just above where the diagonal piece will go and I  added a strip of Dazzling Diamonds Glimmer Paper just below my sentiment. Next, using Foam Adhesive Strips I adhered my background to the card base

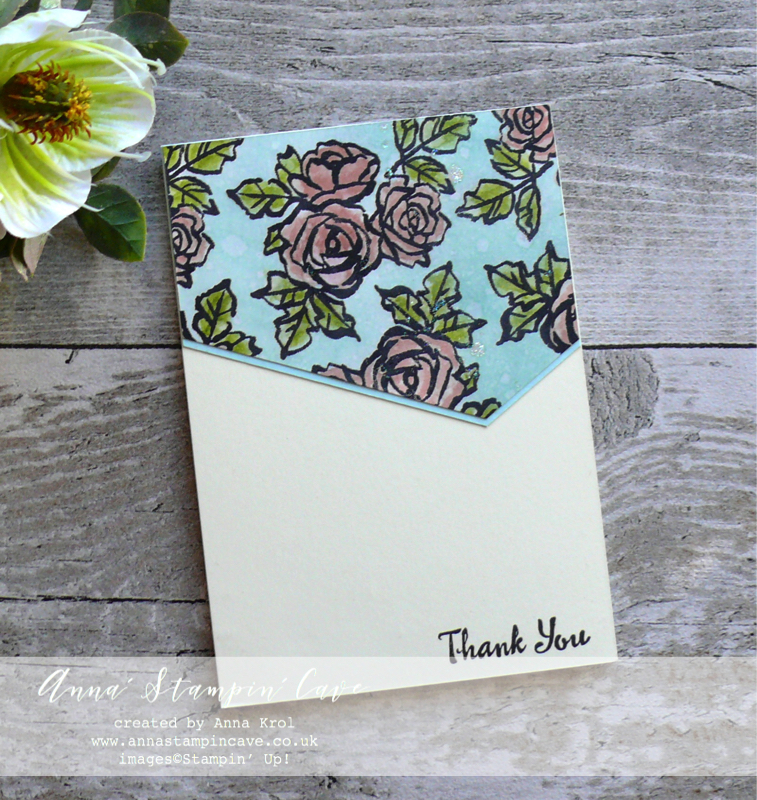
For the second card’s card base I’ve used Very Vanilla thick cardstock and I tweaked the layout slightly.

This time background landed on top of my card and I also cut off the end of my diagonal panel.

I backed it with a piece of Soft Sky cardstock and adhered it to the card base flat with snail adhesive.

I stamped the sentiment at the bottom Right corner of the card base, in Basic Black Archival ink.

I really had fun creating these cards and I hope you like them too. And can you spot soft, blueish shiny speckles of Dazzling Diamond Stampin’ Glitter on my backgrounds? Just yummy!

Thank you so much for visiting my blog today! Make sure you head over to Kylie’s blog to check all lovely projects and vote for your favourites. Hope my project will be among them. My project is under number 7!

If you wish to purchase any of products I have used, simply click the images below to go directly to my online store and don’t forget to enter the hostess code RRMR76JH to receive a gift from me.

Thank you for stopping by and have a blessed day

Hostess Code for February: RRMR76JH – Use this code in the month of February and receive a gift from me. Spend £50 or more and use the code, and you will receive a Whisper White 1/4″ (6.4mm) Organza Ribbon + a handmade gift from me

Special Notes: 1) Make sure you select Anna Krol as your demonstrator;
2) If you select “No Contact” box I do not have access to your name and can’t send you a gift;
3) If your order is £150 or more do not use the code and grab your own Stampin’ Rewards + gift from m

Aqua Painters

£15.50

Pin me

Summary of the project which gives all the views of the card in one photo. I’d love if you pinned and called by on Pinterest xx

Don’t forget to check:

New Sale-a-bration release is LIVE. Click here for more details –>
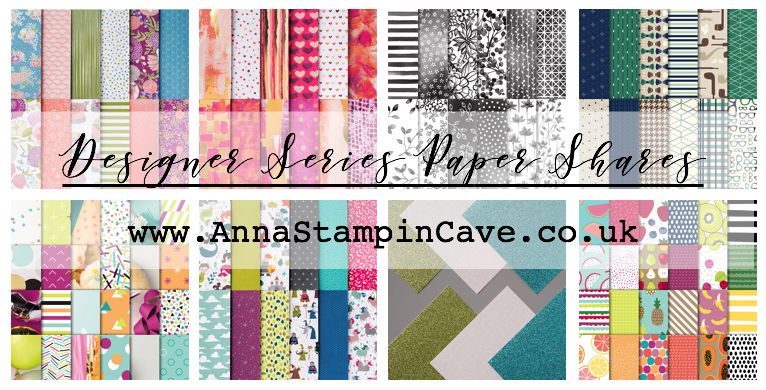
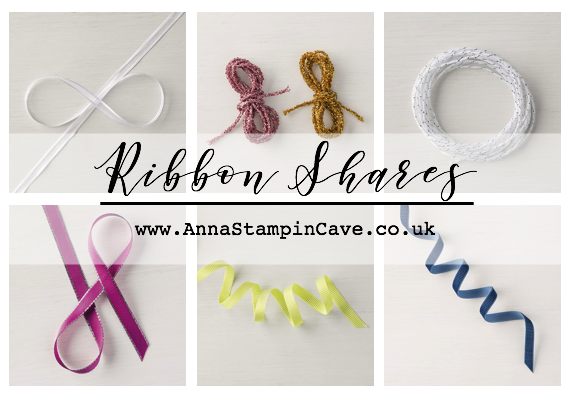
Spring Summer Catalogue Paper & Ribbon Shares. Shares are open to Austria, France, Germany, Netherlands & United Kingdom. 102 sheets of DSP & 2 yards of each type of ribbon from Spring/Summer Catalogue. Click here for more details —>
The New Stampin’ Up! Spring/Summer 2017 Catalogue and Sale-A-Bration are LIVE and it’s AMAZING! For every 60 €/£45, you spend either from Spring Summer Catalogue or Annual Catalogue, you will get to choose one FREE  level 1 product from SAB brochure! If you spend 120 €/£90, you get one FREE level 2 product, OR, you can choose two level 1 items. If you spend 180 €/£135, you have the option to choose three level 1 items or one level 1 item and one level 2 item. Click here for more details —>

Ever wondered what it’s like to join Stampin’ Up!’s community? I may have few answers for you. Click here for more details –>

Brusho Love – Kylie Bertucci’s International Project Highlights

Anna’ Stampin’ Cave – Brusho Love for Kylie Bertucci’s International Project Highlights

Thanks for coming to my blog today! We are being highlighted internationally by Kylie Bertucci and you are able to VOTE  for my project. The top ten winners will get to be part of an international blog hop so please vote for my project. My project is under number 7!  You can do it here or use a button at the end of my post.

Our theme for this highlight is ‘Favourite Sale-a-bration Or Occasions Catalogue Products’. So what else could it be for me if not Brusho Crystal Colour!!

I literally squealed with delight (ask my hubby haha) when I saw them in our new Spring Summer Catalogue!! Truly couldn’t ask for more!

They are high quality, highly pigmented paint powders, water-based and most of all completely non-toxic.

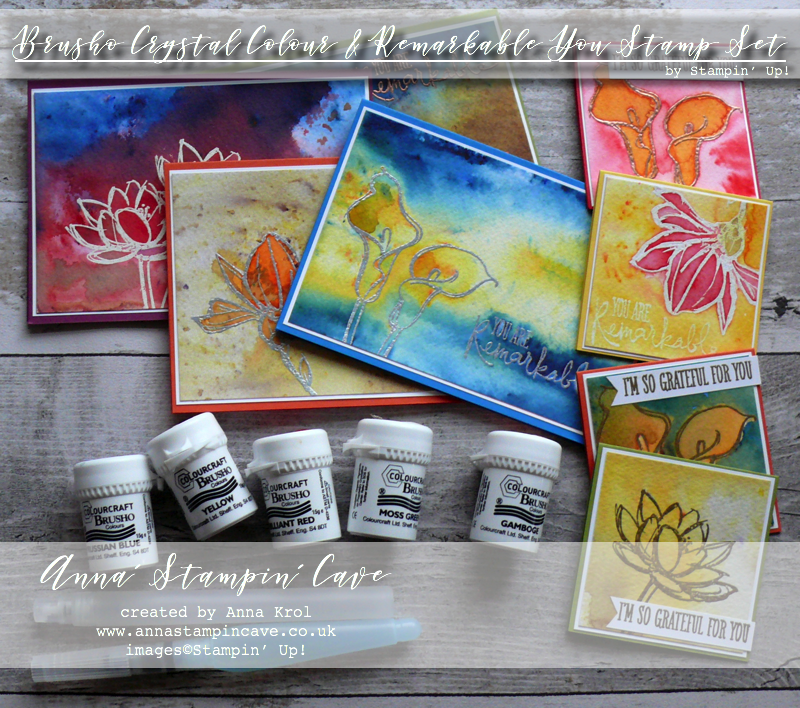
They come in a selection of five colours:

  • Brilliant Red – the name says it all
  • Gamboge – orange with hints of yellow
  • Moss Green – beautiful earthy green colour with speckles of purple
  • Prussian Blue – very vibrant blue, must be my fav
  • Yellow – again, very vibrant

These are not a Stampin’ Up! colours, but as you will see in a minute, you can easily match them.

Brusho is not a product that you can bring to the table, create one card and then put it back. Nope, it won’t happen. Once you take it out and start playing with these colours, the fun has no end! And I warn you: It’s highly addictive!

You can use these colours separately but you can also mix &match and just have fun with them. Add more or less water to create more vibrant, or softer look.

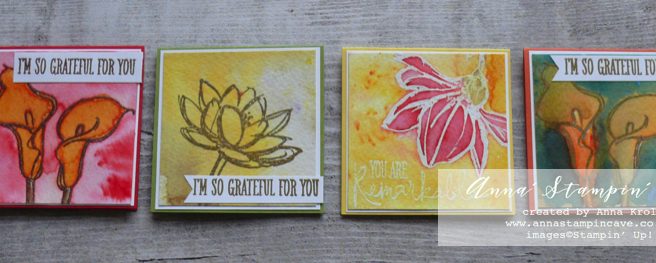
To highlight this amazing product I created eight cards: four standard A6 size and four tiny 3×3″.

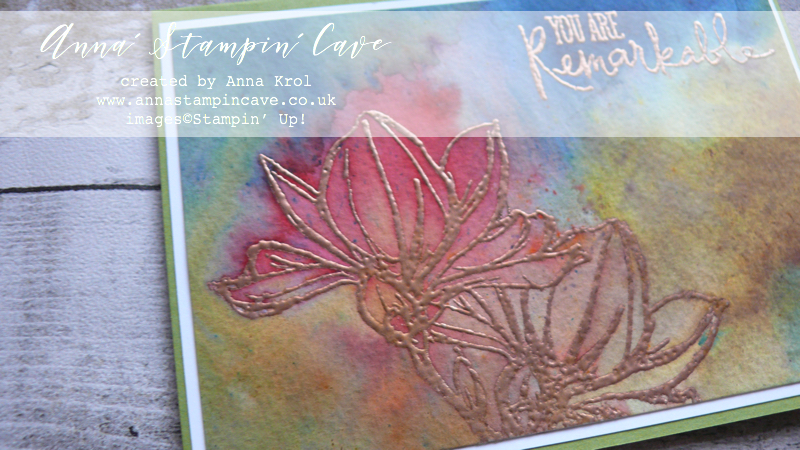
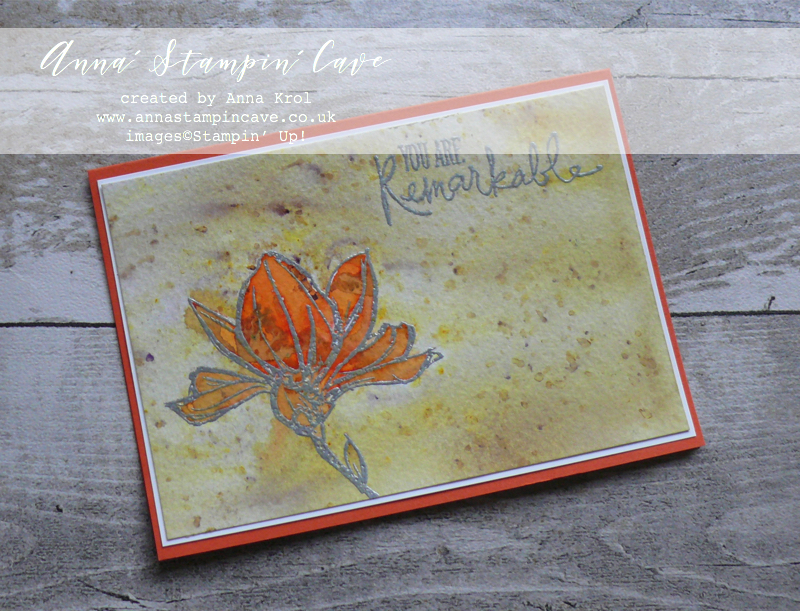
Before I start few details: I only used watercolour paper; to keep it as easy as possible I only used one stamp set: Remarkably You; each card has been heat-embossed first in either white, silver, gold or copper before I added Brusho.

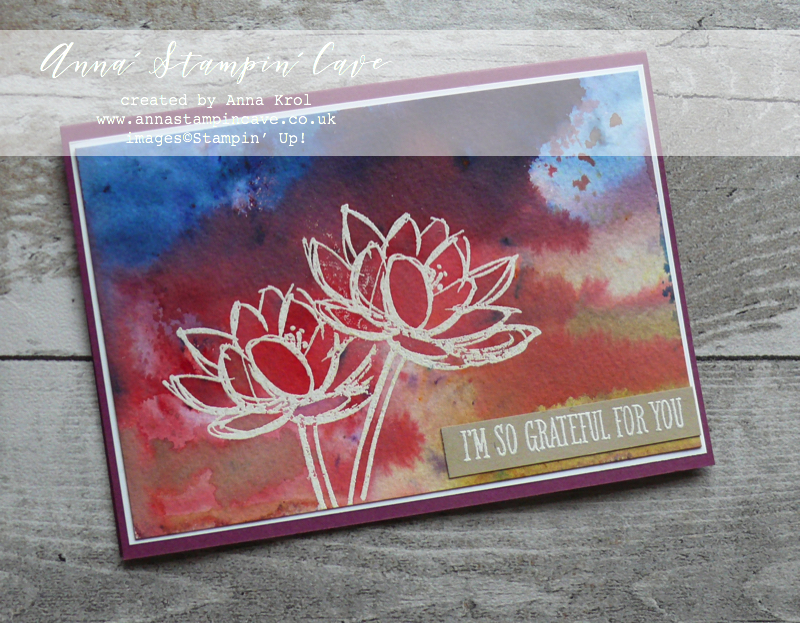
Card base: Rich Razzleberry

For this first card, I simply wet paper entirely with my aqua painter and sprinkled brusho crystals over the surface. It’s actually quite therapeutic to watch how the colour travels. And…I’ve used all 5 colours of brusho too! Brave, I know haha, but how fun! Once I’ve added my first batch of crystals, I spritz it with water to help the colours move and I added more colour. I kept adding water and colour until I was happy.

I looked at my still quite wet paper and had a thought, that I’ve got so much pigmented water pool on this piece, I could actually create another card so…I took next piece of watercolour paper, pressed it to the top, and waited few moments for the water/colour to transfer.

Card base: Old Olive

And this is what it looked like. Nearly, because I spitz it once or two and sprinkled some Moss Green sparingly. I love how much softer this card came out.
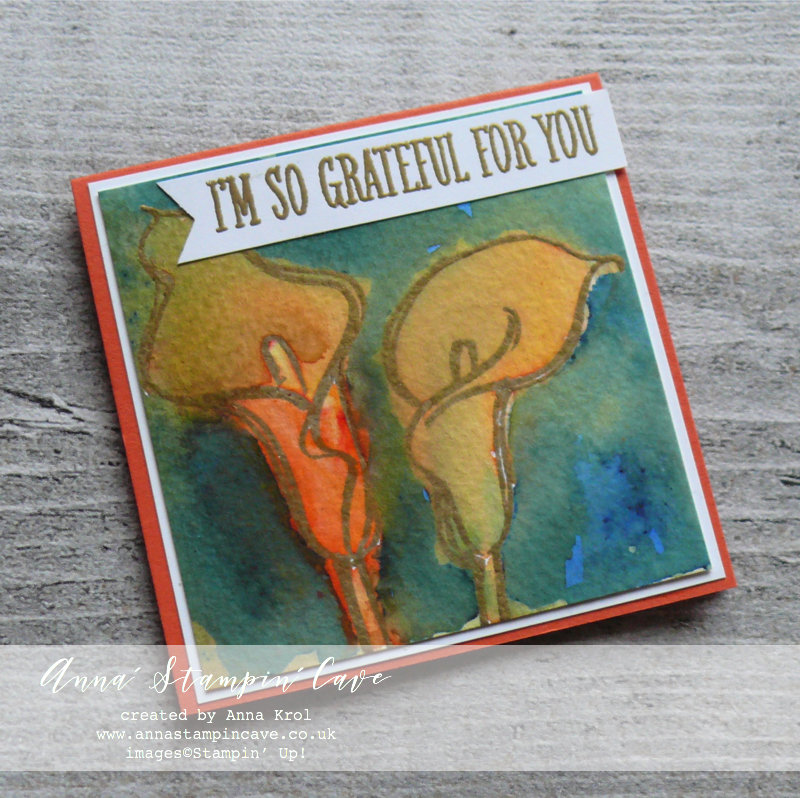
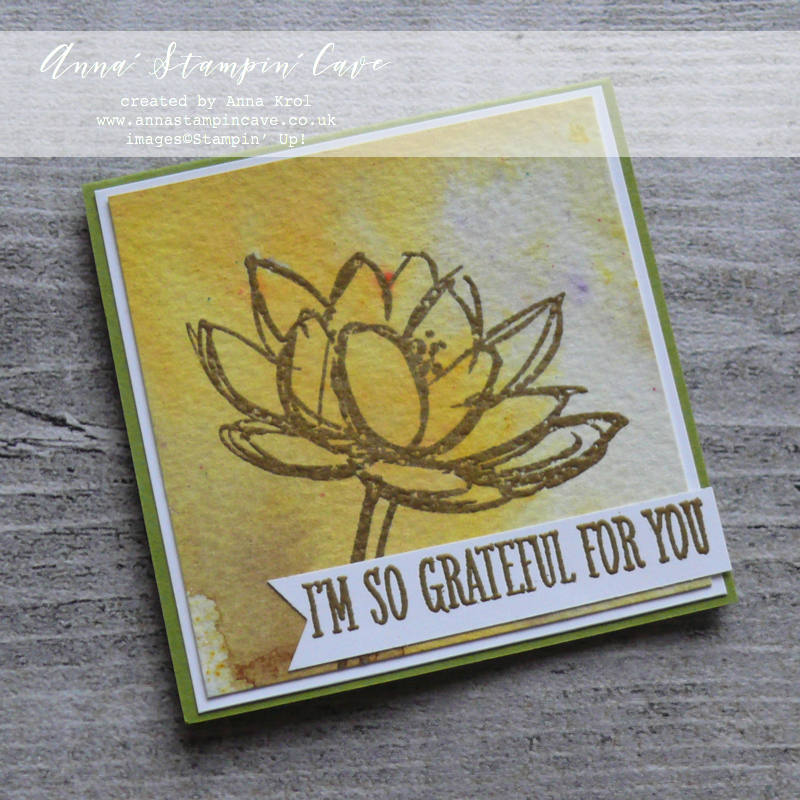
Same technique, brusho to wet, I’ve used for this cute 3×3″ card

Brusho: Yellow, Moss Green; card base: Old Olive

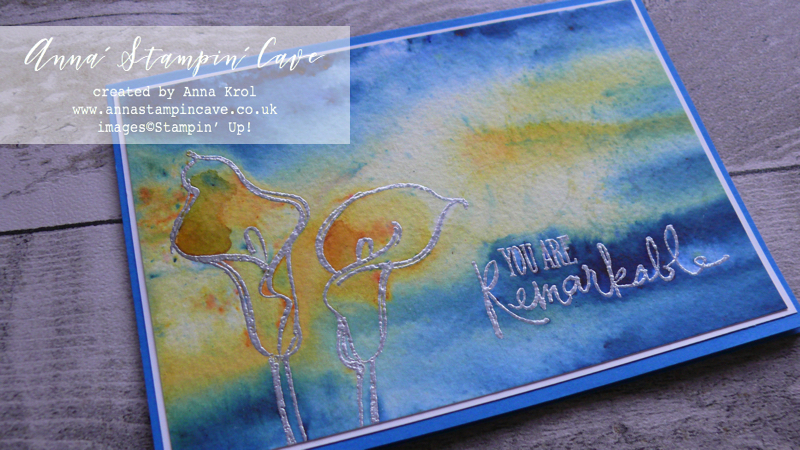
For this next card, I decided to sprinkle Brusho on the dry watercolour panel first, and spritz it with water later.

Card base: Pacific Point

I’ve used Prussian Blue and Yellow and tried hard not to mix both colours too much. I really loved this effect! Which gave me an idea of ‘colour-blocking with Brusho’ technique. Not sure if there was such a technique before (never heard of). So if not, now it is, and I invented it hahaha (j/k)

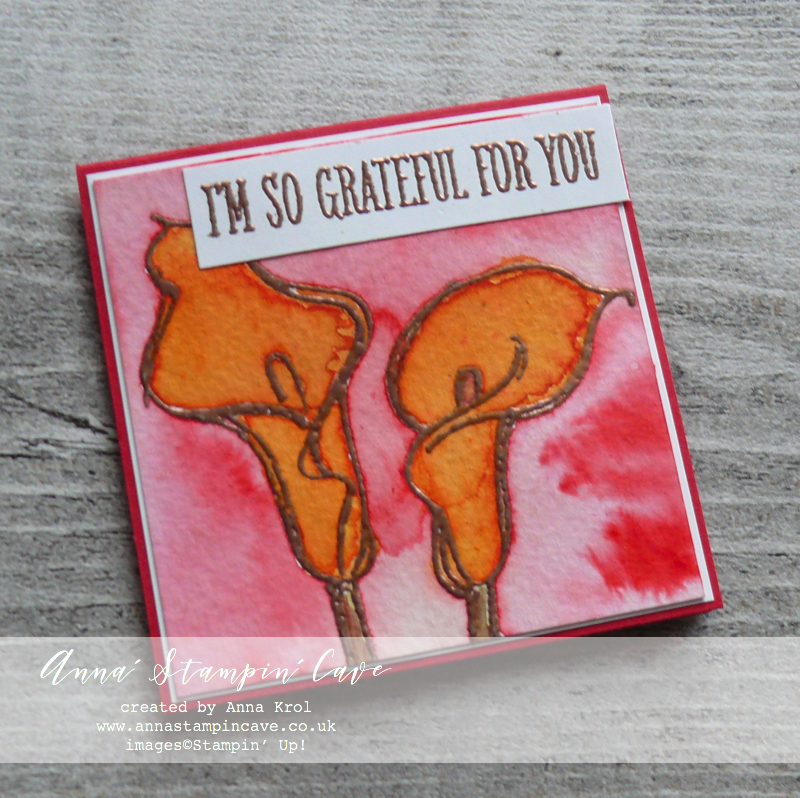
Flower: Gamboge; background: Brilliant Red; stem: Moss Green; card base Real Red
Flower: Gamboge; background: Moss Green and Prussian Blue; card base Tangerine Tango
Flower: Brilliant Red; background: Yellow; stem: Moss Green; card base: Pacific Point

For each of these cards above, I’ve added a solid pool of water inside the flowers, sprinkled with Brusho powder and moved the colour around using aqua painter. Once flowers were dry, I wet the background and added brusho in contrasting colour. Again, I helped the colours move around with aqua painter. Please do not stress if the colours bleed into each other. It creates beautiful, organic, watercolour look.

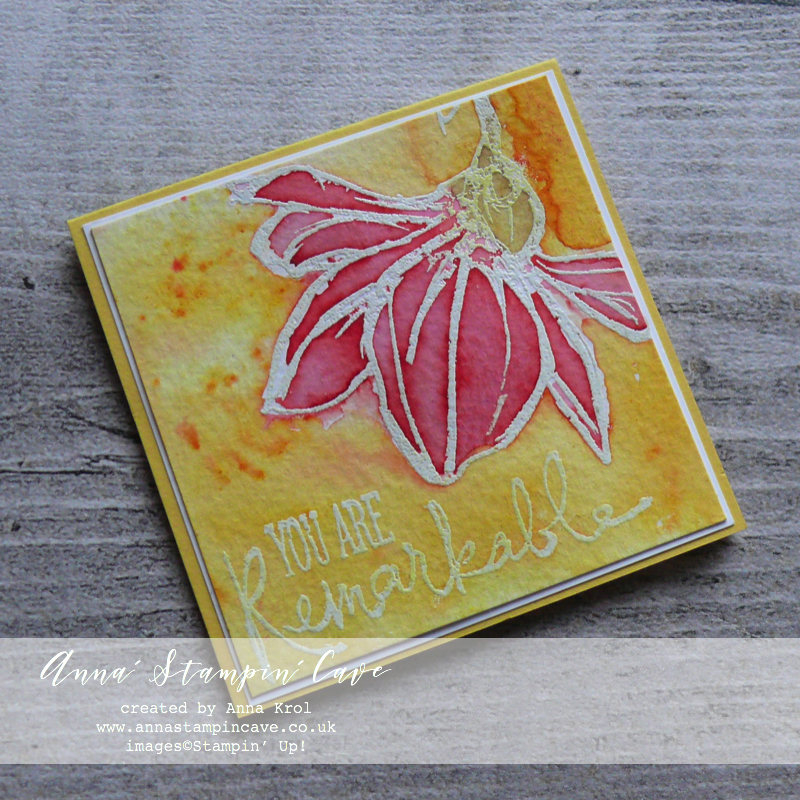
Card base: Tangerine Tango

I really love the effect brusho created on my last card. I’ve used same ‘colour-blocking with Brusho’ technique. For the flower, I’ve used this amazingly vibrant Gamboge. Once my Flower was dry I masked it with a piece of copy paper (smaller than a flower itself, I didn’t aim for perfection here). I sprinkled Moss Green powder all-over the background and spritz it with water very well until all powder dissolved. When the background was still slightly wet, I’ve added some more of the Moss Green powder. But this time I let the powder dry itself, without adding more water to it. I love these speckles of purple it created!

And these are all my cards for today. I hope that it inspired you to give your brusho some love too. Just take a watercolour paper, brusho, and have some fun. Let your imagination run wild. There’s no right or wrong. Can’t wait to see what you come up with!
Thank you so much for visiting my blog today! Make sure you head over to Kylie’s blog to check all lovely projects and vote for your favourites. Hope my project will be among them. My project is under number 7!

As always, if you wish to purchase any of products I have used, simply click the images below to go directly to my online store and don’t forget to enter the hostess code for the month of January GK3G3AR3  to receive a gift from me.

Thank you for stopping by and have a blessed day,

Hostess Code for January 2018 GK3G3AR3 Use this code in the month of January and receive a gift from me.

Special Notes:1) Make sure you select Anna Krol as your demonstrator;
2) If you select “No Contact” box I do not have access to your name and can’t send you a gift;
3) If your order is £150 or more do not use the code and grab your own Stampin’ Rewards + gift from me

Aqua Painters

£15.50


Don’t forget to check:

Spring Summer Catalogue Paper & Ribbon Shares. Shares are open to Austria, France, Germany, Netherlands & United Kingdom. 102 sheets of DSP & 2 yards of each type of ribbon from Spring/Summer Catalogue. Click here for more details —>

The New Stampin’ Up! Spring/Summer 2017 Catalogue and Sale-A-Bration is LIVE and it’s AMAZING! For every 60 €/£45, you spend either from Spring Summer Catalogue or Annual Catalogue, you will get to choose one FREE  level 1 product from SAB brochure! If you spend 120 €/£90, you get one FREE level 2 product, OR, you can choose two level 1 items. If you spend 180 €/£135, you have the option to choose three level 1 items or one level 1 item and one level 2 item. Click here for more details —>