Brusho Love – Kylie Bertucci’s International Project Highlights

Anna’ Stampin’ Cave – Brusho Love for Kylie Bertucci’s International Project Highlights

Thanks for coming to my blog today! We are being highlighted internationally by Kylie Bertucci and you are able to VOTE  for my project. The top ten winners will get to be part of an international blog hop so please vote for my project. My project is under number 7!  You can do it here or use a button at the end of my post.

Our theme for this highlight is ‘Favourite Sale-a-bration Or Occasions Catalogue Products’. So what else could it be for me if not Brusho Crystal Colour!!

I literally squealed with delight (ask my hubby haha) when I saw them in our new Spring Summer Catalogue!! Truly couldn’t ask for more!

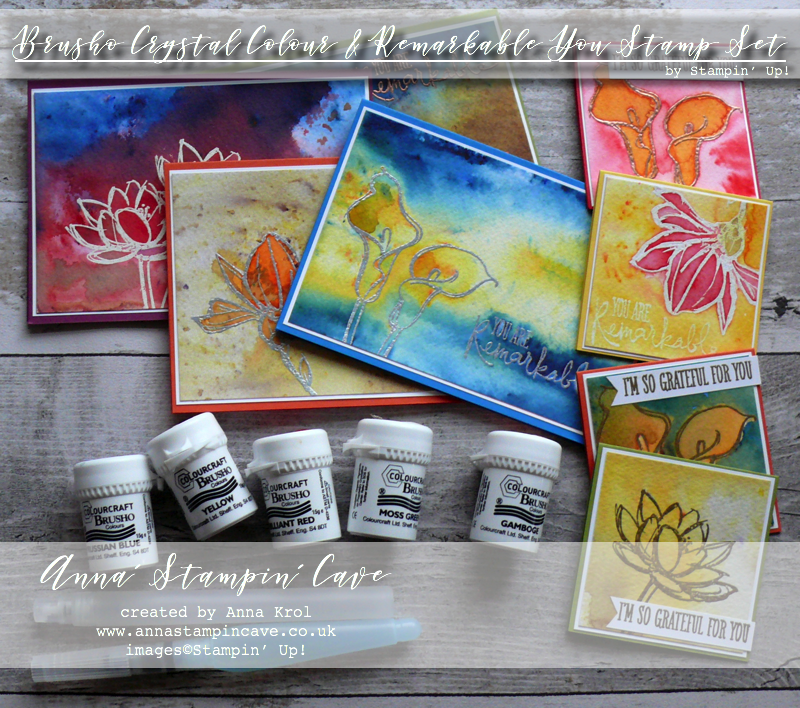
They are high quality, highly pigmented paint powders, water-based and most of all completely non-toxic.

They come in a selection of five colours:

  • Brilliant Red – the name says it all
  • Gamboge – orange with hints of yellow
  • Moss Green – beautiful earthy green colour with speckles of purple
  • Prussian Blue – very vibrant blue, must be my fav
  • Yellow – again, very vibrant

These are not a Stampin’ Up! colours, but as you will see in a minute, you can easily match them.

Brusho is not a product that you can bring to the table, create one card and then put it back. Nope, it won’t happen. Once you take it out and start playing with these colours, the fun has no end! And I warn you: It’s highly addictive!

You can use these colours separately but you can also mix &match and just have fun with them. Add more or less water to create more vibrant, or softer look.

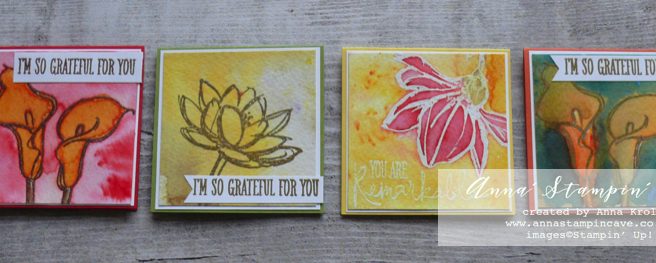
To highlight this amazing product I created eight cards: four standard A6 size and four tiny 3×3″.

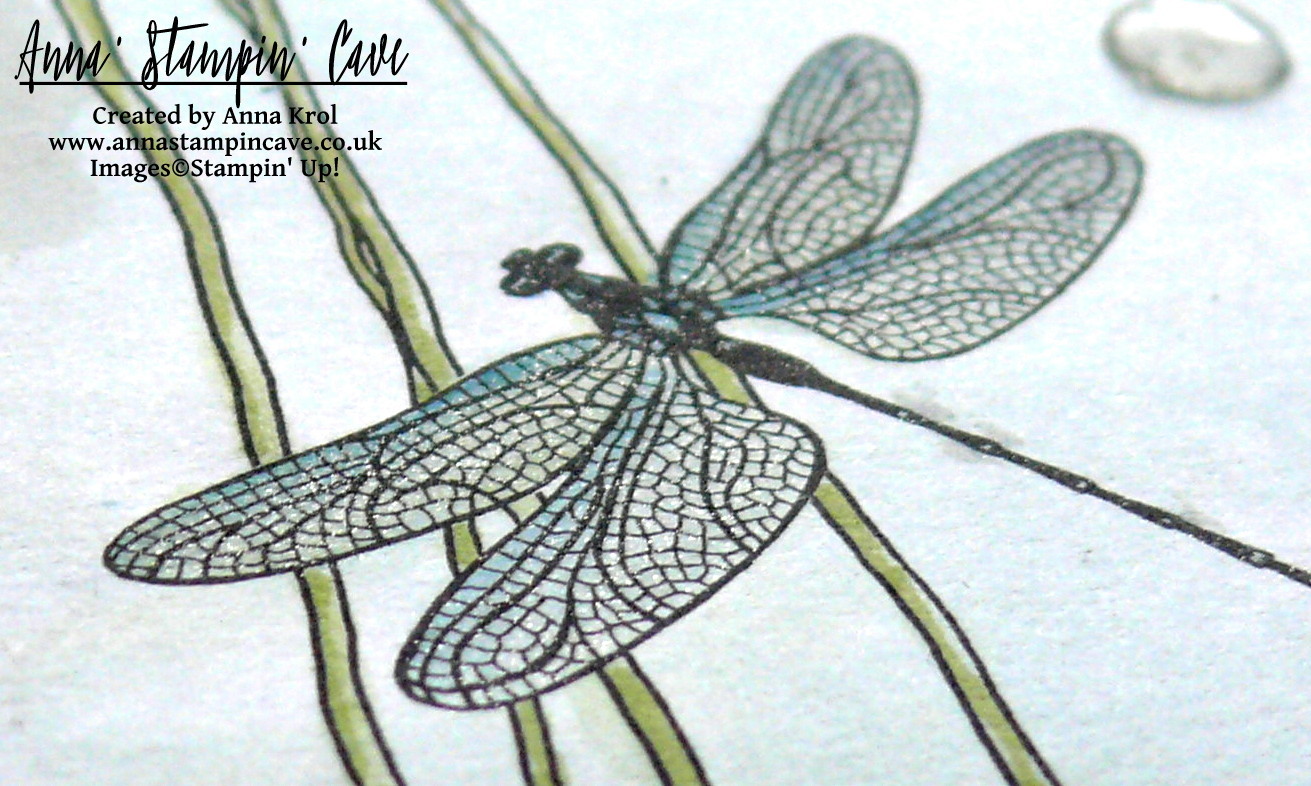
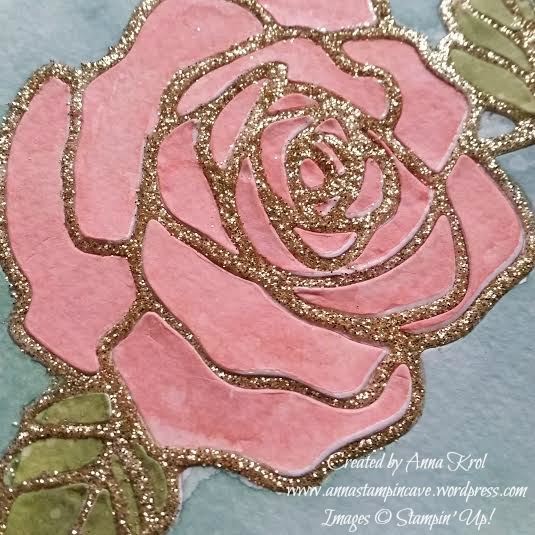
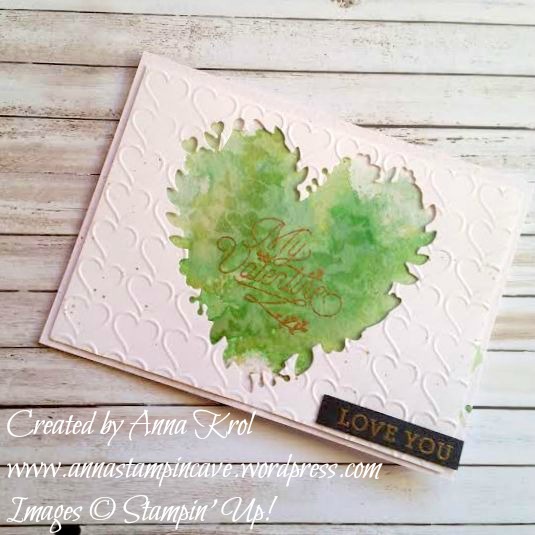
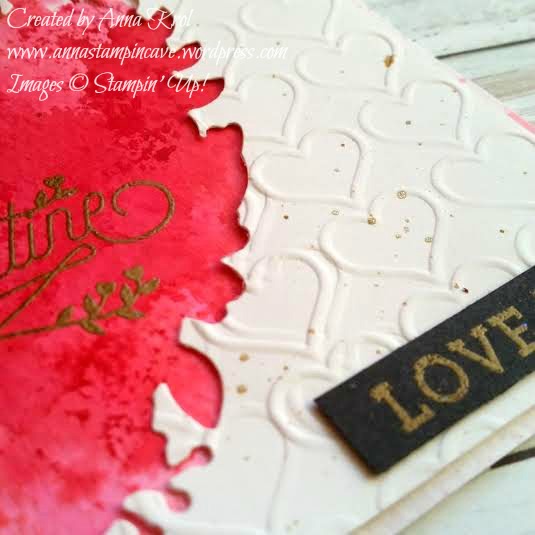
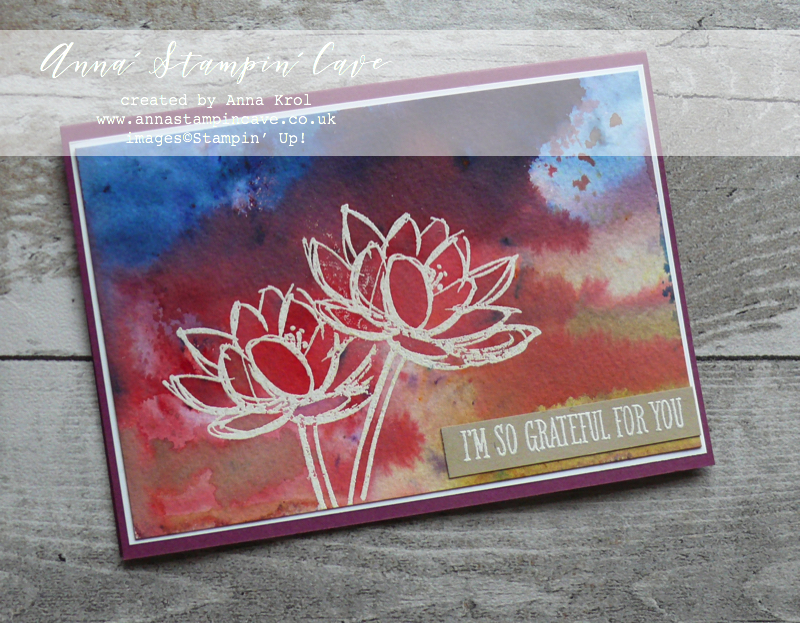
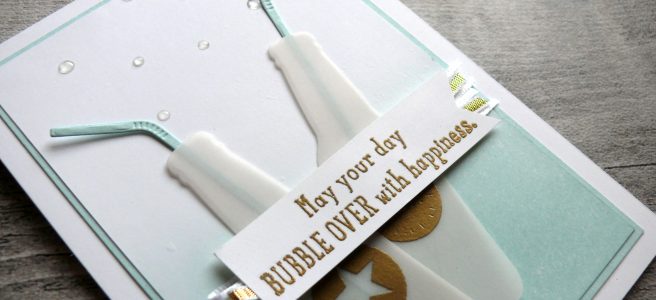
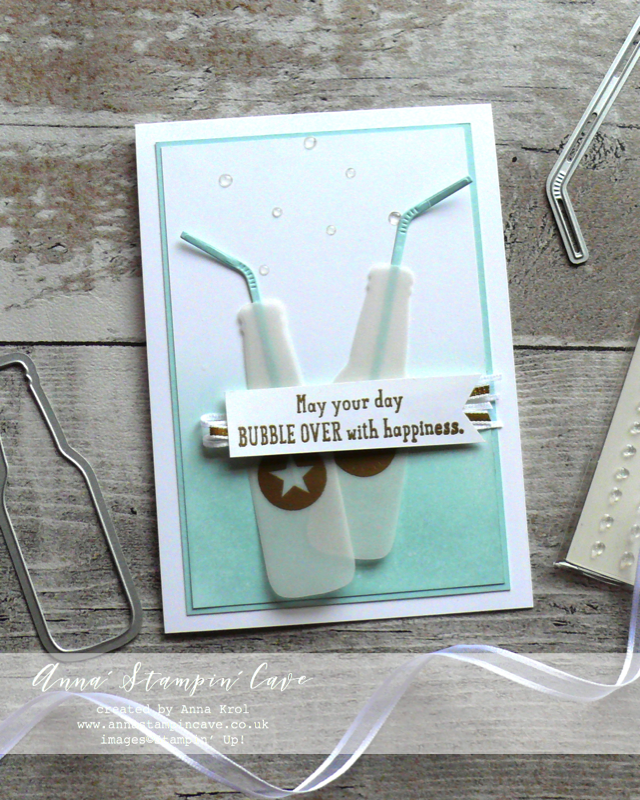
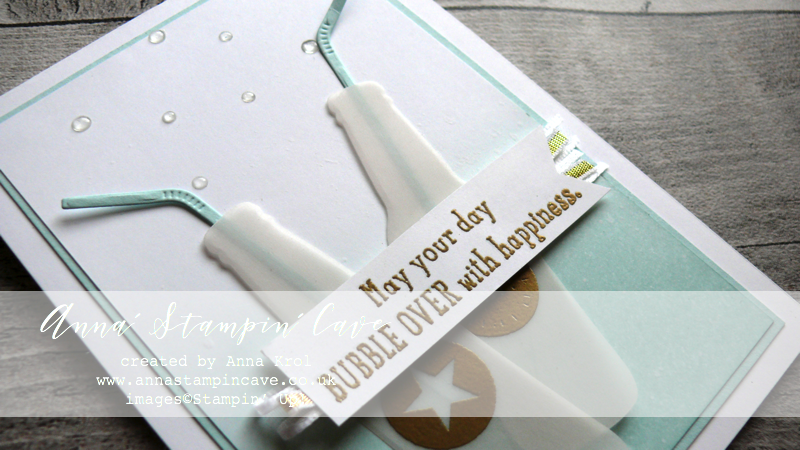
Before I start few details: I only used watercolour paper; to keep it as easy as possible I only used one stamp set: Remarkably You; each card has been heat-embossed first in either white, silver, gold or copper before I added Brusho.

Card base: Rich Razzleberry

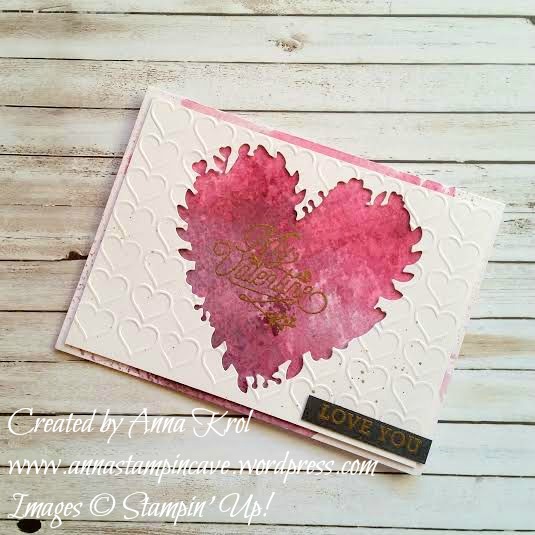
For this first card, I simply wet paper entirely with my aqua painter and sprinkled brusho crystals over the surface. It’s actually quite therapeutic to watch how the colour travels. And…I’ve used all 5 colours of brusho too! Brave, I know haha, but how fun! Once I’ve added my first batch of crystals, I spritz it with water to help the colours move and I added more colour. I kept adding water and colour until I was happy.

I looked at my still quite wet paper and had a thought, that I’ve got so much pigmented water pool on this piece, I could actually create another card so…I took next piece of watercolour paper, pressed it to the top, and waited few moments for the water/colour to transfer.

Card base: Old Olive

And this is what it looked like. Nearly, because I spitz it once or two and sprinkled some Moss Green sparingly. I love how much softer this card came out.

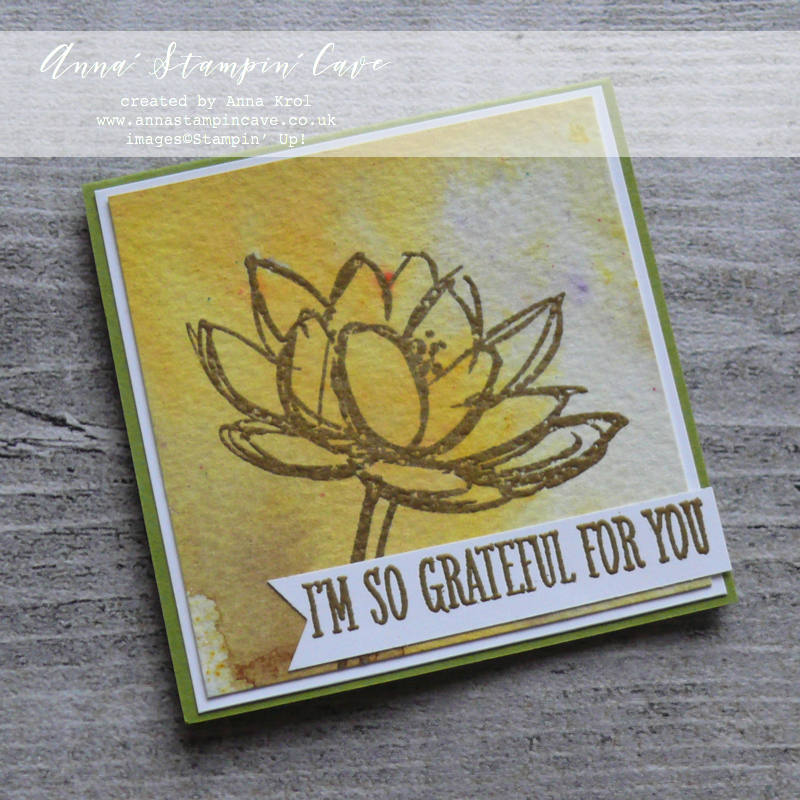
Same technique, brusho to wet, I’ve used for this cute 3×3″ card

Brusho: Yellow, Moss Green; card base: Old Olive

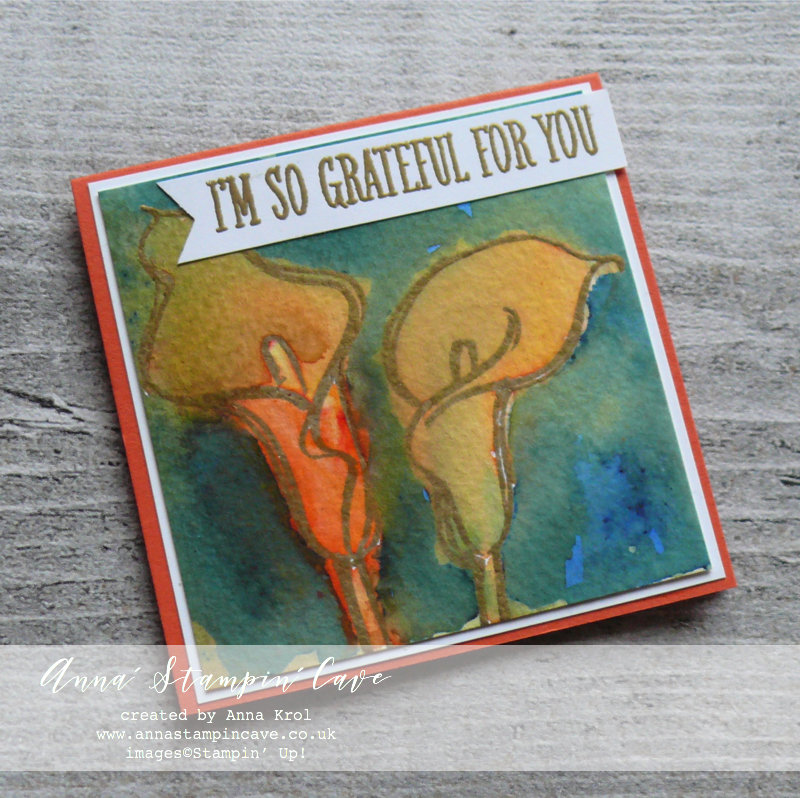
For this next card, I decided to sprinkle Brusho on the dry watercolour panel first, and spritz it with water later.

Card base: Pacific Point

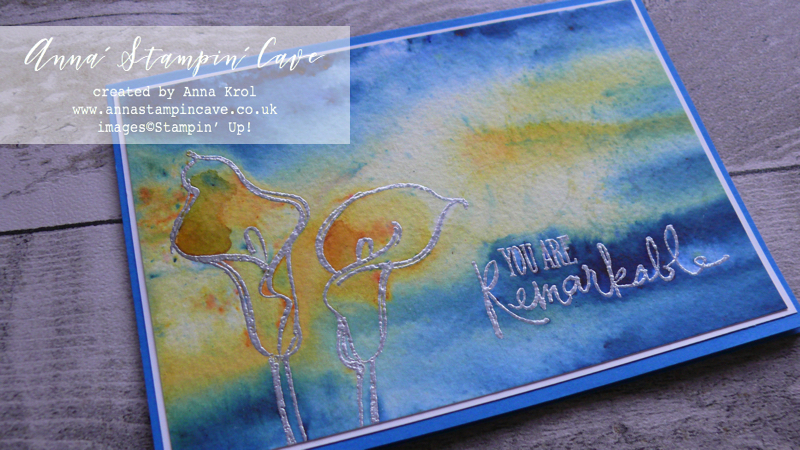
I’ve used Prussian Blue and Yellow and tried hard not to mix both colours too much. I really loved this effect! Which gave me an idea of ‘colour-blocking with Brusho’ technique. Not sure if there was such a technique before (never heard of). So if not, now it is, and I invented it hahaha (j/k)

Flower: Gamboge; background: Brilliant Red; stem: Moss Green; card base Real Red
Flower: Gamboge; background: Moss Green and Prussian Blue; card base Tangerine Tango
Flower: Brilliant Red; background: Yellow; stem: Moss Green; card base: Pacific Point

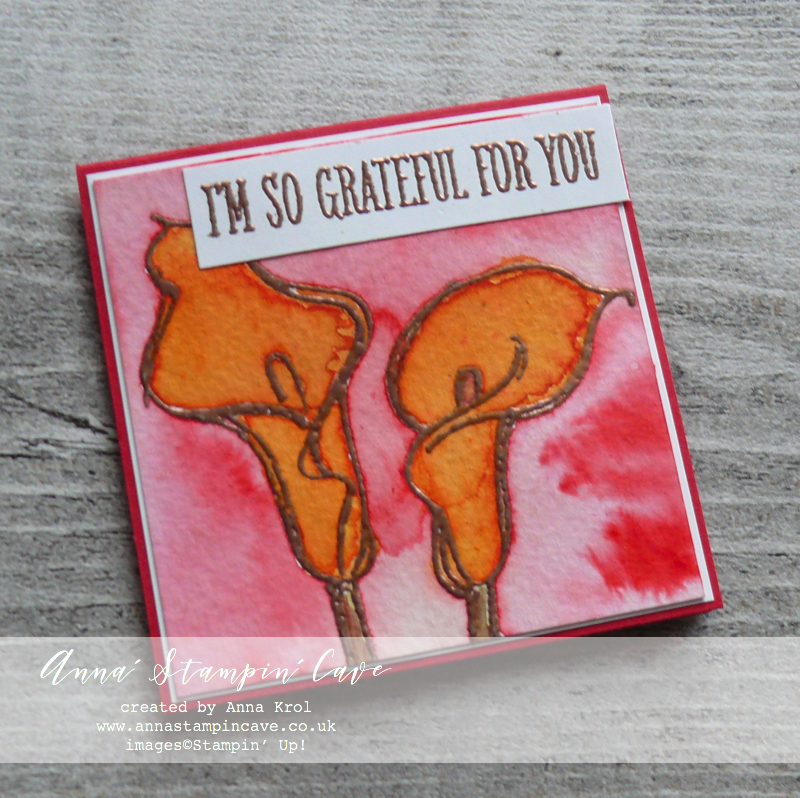
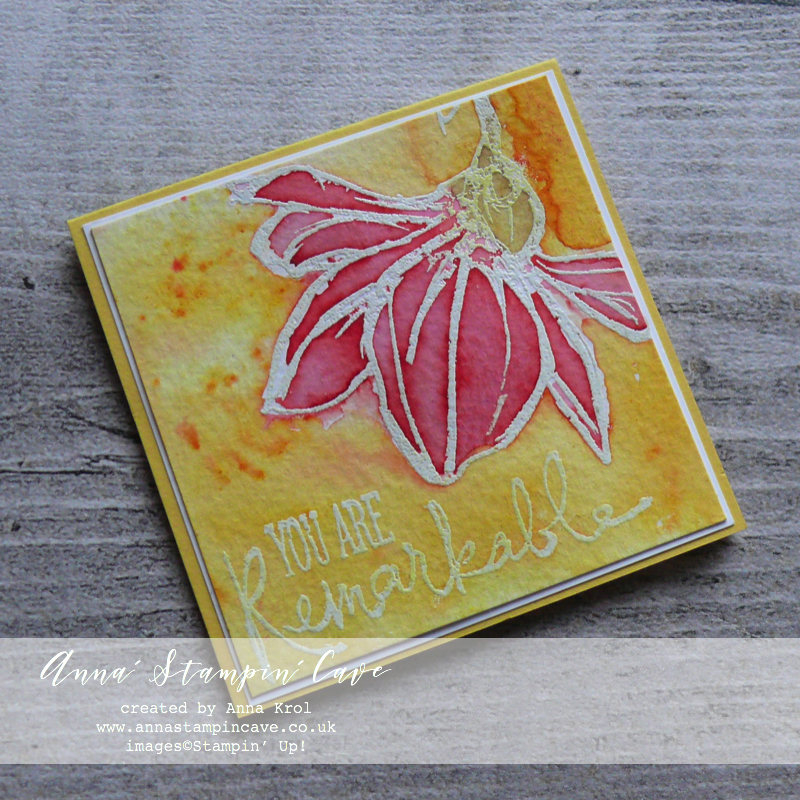
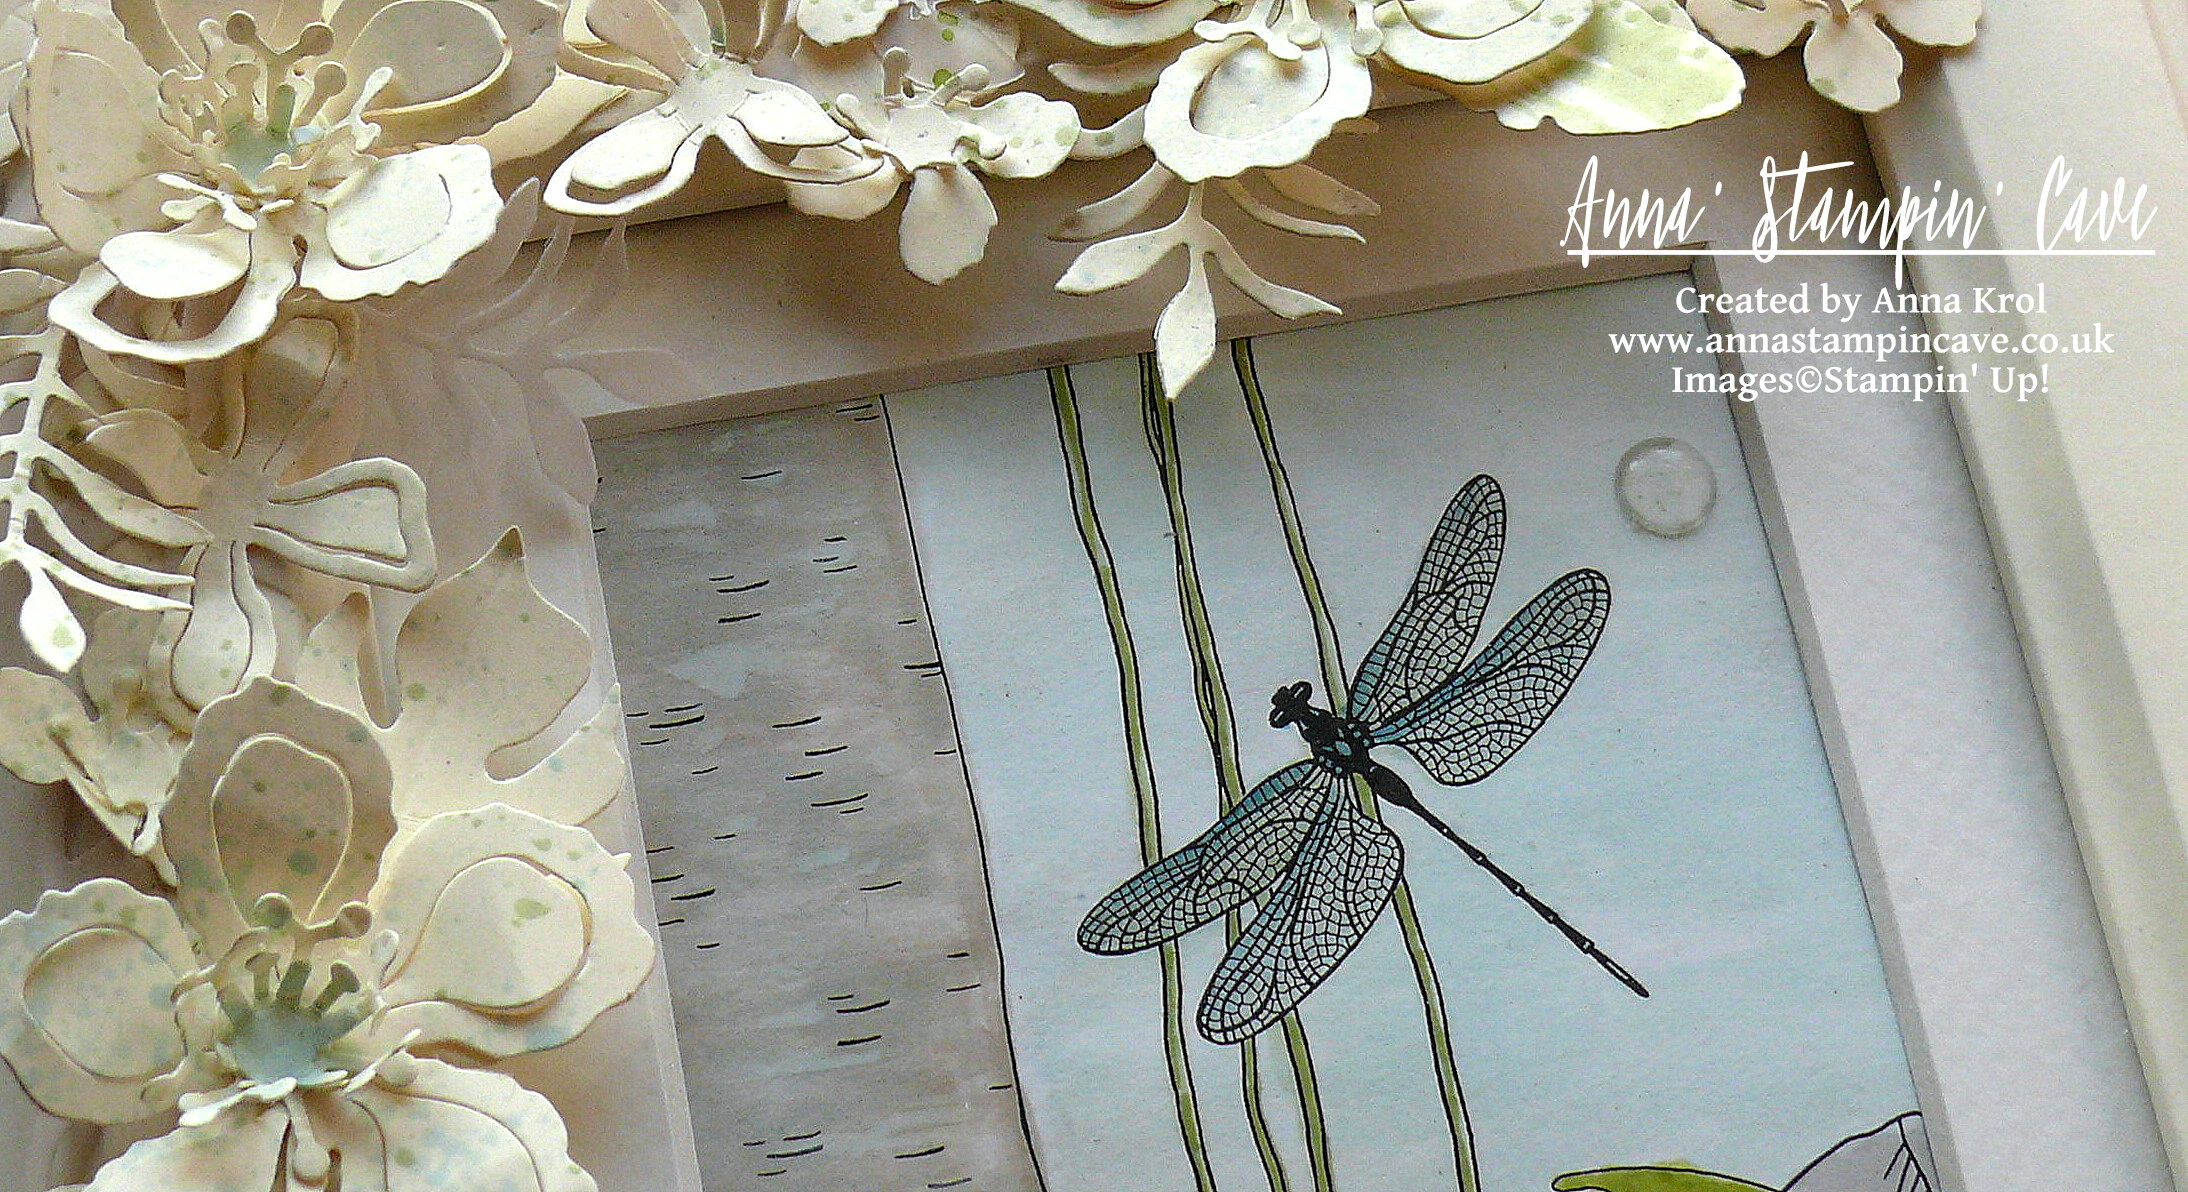
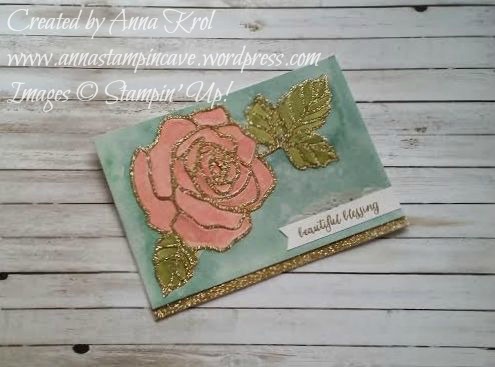
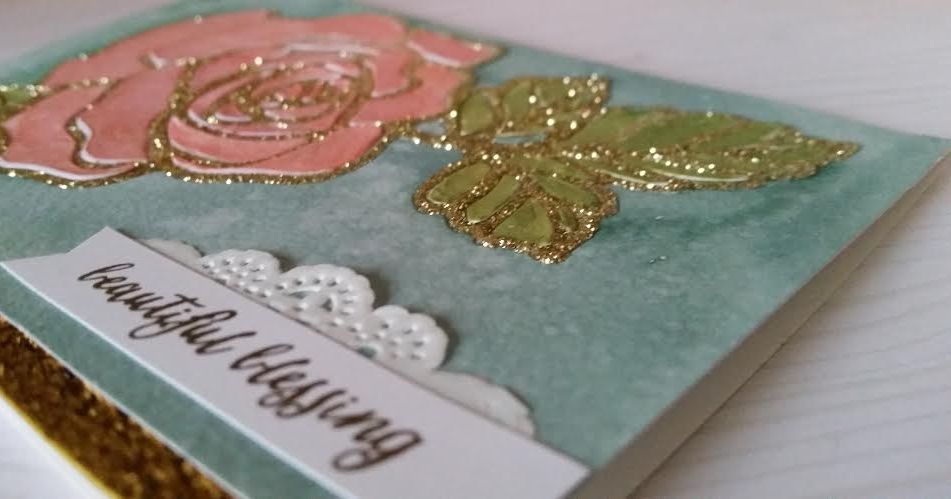
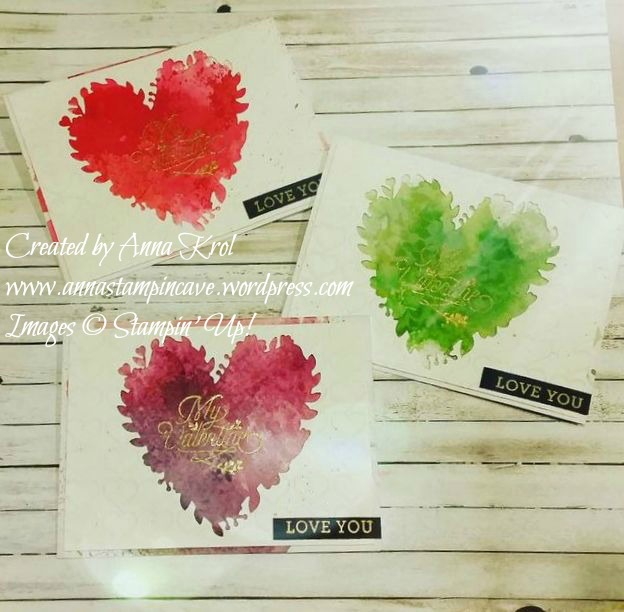
For each of these cards above, I’ve added a solid pool of water inside the flowers, sprinkled with Brusho powder and moved the colour around using aqua painter. Once flowers were dry, I wet the background and added brusho in contrasting colour. Again, I helped the colours move around with aqua painter. Please do not stress if the colours bleed into each other. It creates beautiful, organic, watercolour look.

Card base: Tangerine Tango

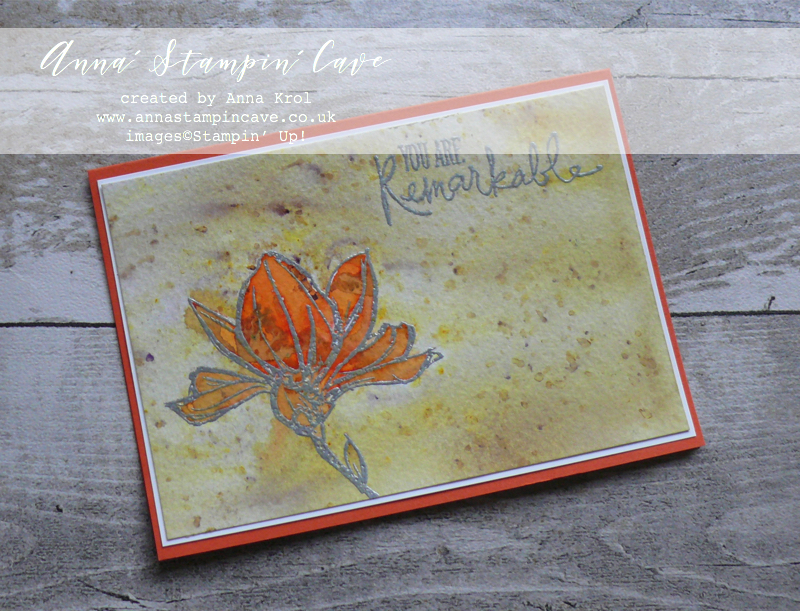
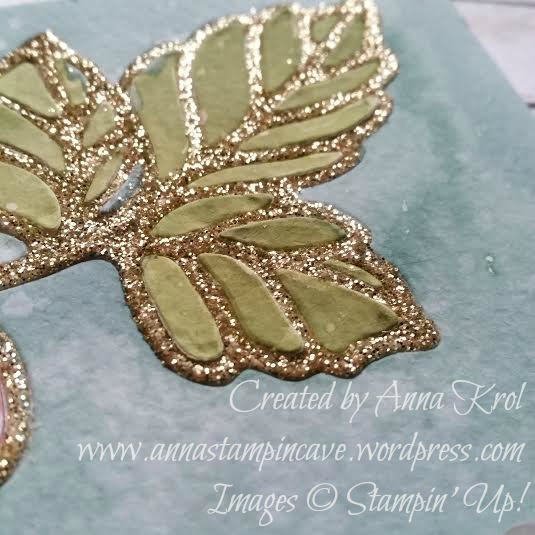
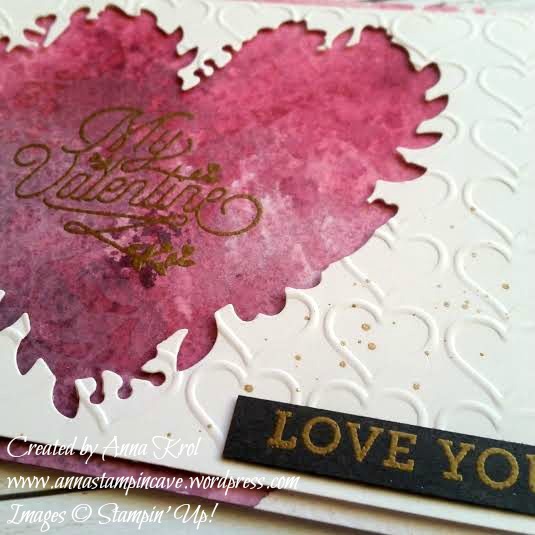
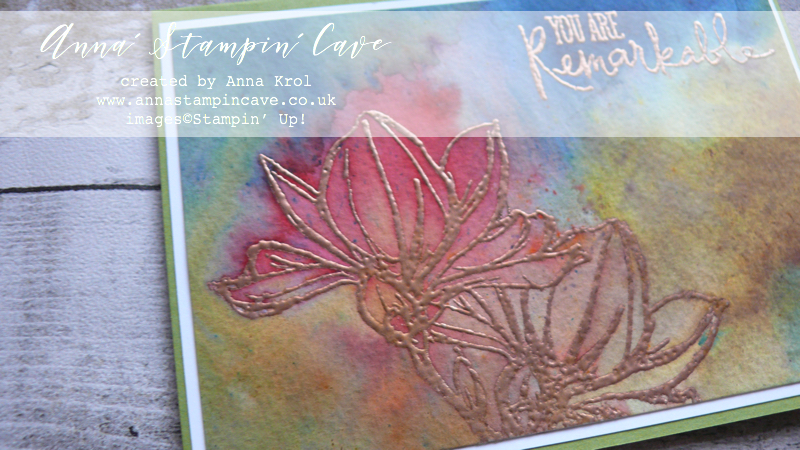
I really love the effect brusho created on my last card. I’ve used same ‘colour-blocking with Brusho’ technique. For the flower, I’ve used this amazingly vibrant Gamboge. Once my Flower was dry I masked it with a piece of copy paper (smaller than a flower itself, I didn’t aim for perfection here). I sprinkled Moss Green powder all-over the background and spritz it with water very well until all powder dissolved. When the background was still slightly wet, I’ve added some more of the Moss Green powder. But this time I let the powder dry itself, without adding more water to it. I love these speckles of purple it created!

And these are all my cards for today. I hope that it inspired you to give your brusho some love too. Just take a watercolour paper, brusho, and have some fun. Let your imagination run wild. There’s no right or wrong. Can’t wait to see what you come up with!

Thank you so much for visiting my blog today! Make sure you head over to Kylie’s blog to check all lovely projects and vote for your favourites. Hope my project will be among them. My project is under number 7!

As always, if you wish to purchase any of products I have used, simply click the images below to go directly to my online store and don’t forget to enter the hostess code for the month of January GK3G3AR3  to receive a gift from me.

Thank you for stopping by and have a blessed day,

Hostess Code for January 2018 GK3G3AR3 Use this code in the month of January and receive a gift from me.

Special Notes:1) Make sure you select Anna Krol as your demonstrator;
2) If you select “No Contact” box I do not have access to your name and can’t send you a gift;
3) If your order is £150 or more do not use the code and grab your own Stampin’ Rewards + gift from me

Aqua Painters

£15.50


Don’t forget to check:

Spring Summer Catalogue Paper & Ribbon Shares. Shares are open to Austria, France, Germany, Netherlands & United Kingdom. 102 sheets of DSP & 2 yards of each type of ribbon from Spring/Summer Catalogue. Click here for more details —>

The New Stampin’ Up! Spring/Summer 2017 Catalogue and Sale-A-Bration is LIVE and it’s AMAZING! For every 60 €/£45, you spend either from Spring Summer Catalogue or Annual Catalogue, you will get to choose one FREE  level 1 product from SAB brochure! If you spend 120 €/£90, you get one FREE level 2 product, OR, you can choose two level 1 items. If you spend 180 €/£135, you have the option to choose three level 1 items or one level 1 item and one level 2 item. Click here for more details —>

Global Design Project #120 Case The Designer Challenge

Anna’ Stampin’ Cave – Global Design Project #120 Case The Designer Challenge

Hello and welcome! Finally, I’ve found some time to have a play with this new & fun Bubble Over bundle from Spring Summer Catalogue. And as my inspiration, I have used beautiful card created by amazingly talented Canadian demonstrator, Krista Frattin.

CASE = Copy And Selectively Edit

And here’s my card:

Bubble Over card dimensions:

  • Whisper White Thick cardstock: 11-6/8″ x 4-1/8″ scored in half at 5-7/8″ (29.7 x 10.5 cm scored in half at 14.8 cm)
  • Sky Blue cardstock: 5-3/8″ x 3-5/8″ (13.7 cm x 9.2 cm)
  • Whisper White cardstock: 5-2/8″ x 3-1/2″ (13.3 cm x 8.8 cm)
  • Whisper White for sentiment: 6/8″ x 3″
  • White Vellum and Soft Sky cardstock for die-cutting
  • Whisper White 1/4″ Organza & Gold 1/8″ Ribbon: approx. 7″ each

First, I sponged the bottom of Whisper White panel with Soft Sky ink. To add some more interest to the background I lightly sprinkled the panel with water using big, dry brush.

I die-cut two bottles from the vellum. First I thought about creating ‘labels’ for my bottles, but I end up stamping straight onto the die-cuts. For this I’ve used two circle stamps from Bubble Over Stamp Set, one with a star and and second with ‘yay’ in the middle. You can’t really see it as it’s hidden under the banner. I also die-cut two straws from Soft Sky cardstock.

I played a bit with the placing of my elements and once I was happy, I assembled the card.

For the final touch I’ve scattered some clear epoxy shapes from the Glitter & Clear Epoxy Shapes, also new from Spring Summer Catalogue. You will get 176 elements in the pack: 1 sheet each (clear and with glitter).

Purchase this amazing Bubble Over Photopolymer Bundle, add Glitter & Clear Epoxy Shapes and Whisper White 1/4″ Organza Ribbon to your oreder and you will earn for FREE level 1 product from Sale-a-bration Brochure.  Like this cute Designer Series Paper Bubbles & Fizz, that coordinates with Bubble Over Bundle. 

Above is just an idea, but you can add any product you wish from the brochure.

I really want to encourage you to visit the Global Design Project challenge blog to see other beautiful projects from all around the world. Just click on the logo below to visit their website

If you wish to purchase any of products I have used, simply click the images below to go directly to my online store and don’t forget to enter the hostess code for the month of January GK3G3AR3 to receive a gift from me.

Thank you for stopping by and have a blessed day

Big Shot

£99.00


Hostess Code for January 2018 GK3G3AR3 Use this code in the month of January and receive a gift from me.

Special Notes:1) Make sure you select Anna Krol as your demonstrator;
2) If you select “No Contact” box I do not have access to your name and can’t send you a gift;
3) If your order is £150 or more do not use the code and grab your own Stampin’ Rewards + gift from me

Don’t forget to check:

Spring Summer Catalogue Paper & Ribbon Shares. Shares are open to Austria, France, Germany, Netherlands & United Kingdom. 102 sheets of DSP & 2 yards of each type of ribbon from Spring/Summer Catalogue. Click here for more details —>

The New Stampin’ Up! Spring/Summer 2017 Catalogue and Sale-A-Bration is LIVE and it’s AMAZING! For every 60 €/£45, you spend either from Spring Summer Catalogue or Annual Catalogue, you will get to choose one FREE  level 1 product from SAB brochure! If you spend 120 €/£90, you get one FREE level 2 product, OR, you can choose two level 1 items. If you spend 180 €/£135, you have the option to choose three level 1 items or one level 1 item and one level 2 item. Click here for more details —>

Inside The Lines Altered Photo Frame

Anna’ Stampin’ Cave – Inside The Lines Altered Photo Frame

In my project today I decided to create altered photo frame with beautiful, Inside The Lines Designer Series Paper. With an ever-growing trend in adult colouring books, this paper is just spot on.

inside-the-lines-dsp

I don’t know about you, but I love these bold botanical designs. They coordinate with Dragonfly Dreams Stamp Set & Dies, but you can use them on their own too. Colour them in with markers, inks or watercolour pencils – it’s fun and very therapeutic…or leave them black&white. Whatever tickles your fancy.

anna-stampin-cave-stampin-up-sale-a-bration-inside-the-lines-dsp-frame

The frame is from Ikea and is called Virserum. It measures 7-1/2 x 9-1/2″ (19 x 24 cm) and comes with inside mount, hence I only needed 4″x 6″ (10 x 15 cm) piece of DSP to fit inside.

I’ve chosen this lovely, jungle-like design and cut it into 4″x 6″ rectangle. Because I was aiming for a subtle look I decided to watercolour my piece.

Bear in mind this is not watercolour paper so you can’t add too much water to it.

For the foliage, because it’s such a small area, I’ve used Stampin’ markers: Pear Pizzazz, Wild Wasabi, Old Olive, Garden Green and Always Artichoke. First, I scribbled my markers on a craft mat. I also spritz some water on my craft mat, next to the markers. I did it deliberately, to have more control of how much water I use. Next, I took dry aqua painter, picked up some water with its brush, next picked up some colour from the mat and started colouring my foliage. I was adding more colour and more water to the mat when needed. There are 4-5 layers of colour on leaves, each layer added when the first one was dry.

anna-stampin-cave-stampin-up-sale-a-bration-dsp-inside-the-lines

To colour in the rest of the image, I’ve used ink pads as my palettes.

I’ve used Soft Sky for sky and dragonfly (with a little dab of Island Indigo marker). Mountains are coloured with Smoky Slate.

For the tree trunk, I’ve used Tip Top Taupe ink pad. To add some highlights I’ve used Whisper White Craft Ink (yes, I’ve used it with aqua painter too).

anna-stampin-cave-stampin-up-sale-a-bration-inside-the-lines

Polypores or conks (I’m not sure how they are called in the UK so forgive me if I’m wrong) are watercoloured with a mix of Sahara Sand, Crushed Curry and again some white craft ink for highlights.

For the final touch, I’ve added White Perfect Accents as dew drops (one on the sky is hiding a little boo-boo). And as a must, I had to add some shimmer with clear of Wink of Stella to the dragonfly, mountain tops, and polypores. Sadly it’s really hard to capture this lovely shimmer on photos. But now to the frame.

anna-stampin-cave-stampin-up-sale-a-bration-inside-the-lines-dragonfly

Believe it or not, this is my first ever altered photo frame. I knew I want flowers, but for a long time, I couldn’t decide on a colour. First, I wanted to go with quite a feminine look, so pinks and oranges. But once I had all my flowers ready I didn’t really like it. Typical haha. But no worries, I will use them to something else. And then I had this revelation: how about Very Vanilla?! Genius!

I die-cut oodles of flowers and leaves from Very Vanilla and Vellum cardstock. Arranged them around the frame and once I was happy with the placing, I adhered them with glue dots.

anna-stampin-cave-stampin-up-sale-a-bration-inside-the-lines-dsp-picture-frame

But as you may know me already, nothing can be too easy haha And when I looked at my frame something was missing, in my humble opinion. Oh right, it was too ‘clean’, too ‘white’. I needed some ‘controlled mess’.

I pressed Pear Pizzazz and Soft Sky ink pads next to each other on the craft mat and spritz it with water. I covered the glass with a piece of paper, and using a clean brush I added random and less random splatters to the flowers and leaves. And I have to say I love it now! And I hope you like my little project too.

I also want to add this project to the #071 Theme Challenge over at Global Design Project Challenge Blog. This weeks theme is ‘3D Or Off The Page’

gdp071

As always, if you wish to purchase any of products I have used, simply click the images below to go directly to my online store.

Thank you for stopping by and have a blessed day!


Inside The Lines Designer Series Paper

Inside The Lines Designer Series Paper
[143830]
£0.00

Botanical Builder Framelits Dies

Botanical Builder Framelits Dies
[140625]
£30.00

Very Vanilla A4 Card Stock

Very Vanilla A4 Card Stock
[106550]
£8.25

White Vellum A4 Card Stock

White Vellum A4 Card Stock
[106584]
£6.00

Many Marvelous Markers

Many Marvelous Markers
[131264]
£99.00

Crushed Curry Classic Stampin' Pad

Crushed Curry Classic Stampin’ Pad
[131173]
£6.00

Pear Pizzazz Classic Stampin' Pad

Pear Pizzazz Classic Stampin’ Pad
[131180]
£6.00

Tip Top Taupe Classic Stampin' Pad

Tip Top Taupe Classic Stampin’ Pad
[138325]
£6.00

Sahara Sand Classic Stampin' Pad

Sahara Sand Classic Stampin’ Pad
[126976]
£6.00

Smoky Slate Classic Stampin' Pad

Smoky Slate Classic Stampin’ Pad
[131179]
£6.00

Soft Sky Classic Stampin' Pad

Soft Sky Classic Stampin’ Pad
[131181]
£6.00

Whisper White Craft Stampin' Pad

Whisper White Craft Stampin’ Pad
[101731]
£7.25

Clear Wink Of Stella Glitter Brush

Clear Wink Of Stella Glitter Brush
[141897]
£7.25

Aqua Painters

Aqua Painters
[103954]
£15.50

White Perfect Accents

White Perfect Accents
[138416]
£4.50

Liquid Multipurpose Glue

Liquid Multipurpose Glue
[110755]
£3.75

Glue Dots

Glue Dots
[103683]
£4.75

Stampin' Trimmer

Stampin’ Trimmer
[129722]
£27.00

Big Shot

Big Shot
[143263]
£99.00

Pootlers Spring / Summer Celebration Blog Hop

pootler's blog hop

Thank you for joining us on another Pootlers Blog Hop! We’re showcasing lots of gorgeous projects using products from the new Stampin’ Up!® Spring/Summer Catalogue. Simply use the buttons at the end of each post to keep hopping!

If you have arrived here from Jerim Dickins, a big welcome to you. To continue your journey simply use the buttons at the end of each post to keep hopping!

I hope you had a chance to look through our Spring/Summer catalogue and you’ve got your favourites already. I have chosen to use Rose Wonder Bundle from page 18.

Rose Wonder Bundle Watercolour

I know I said that many times but I will say it again: I love everything about this bundle. I’ve played with this stamp set many times, but in today’s project, I incorporated watercolour with inlaid die-cutting. And yes, I’ve used these two techniques with this bundle already in this project.

This time I stamped my image straight onto watercolour paper with Versamark and heat embossed it in white. I’ve added water to the rose petals first and used Calypso Coral and Blushing Bride as my watercolours.

Rose Wonder Bundle Watercolour 4

I let the flower dry completely before I moved to the leaves. And again I added water first. For the leaves, I choose Pear Pizzazz, Wild Wasabi and just a hint of Old Olive.

Rose Wonder Bundle Watercolour 3.jpg

When my rose and leaves were dry I added water to the background. I didn’t want it to be as intense as last time so I mixed Lost Lagoon with Mint Macaron. I love how these two colours complement each other.

When my background was dry I gave it a little spray with water, and “lifted” those water droplets with a paper towel. As you can see it lifted some colour from background too – beautiful effect.

When my card was dry I’ve used Rose Garden Thinlits Dies to die-cut rose straight from my watercolour piece.

Rose Wonder Watercolour 4.jpg

I separated the “frame” and put all these “inside” tiny pieces aside. I dabbed the frame in Versamark, added Heat & Stick powder and heat embossed it for a second. Enough to melt the powder. When it was nice and sticky I cover it with Gold Stampin’ Glitter and heat set it again.

My base is Whisper White. I trimmed the watercolour piece to be slightly smaller than the base. I added Gold Glitter to the bottom of my WW base so this gold will peek a little from underneath the panel.

Now I could assemble the card. I added background panel first, then the frame and all the little die-cuts at the end. I have to say it was really time-consuming but well worth the effect.

Rose Wonder Watercolour bundle 5

For the sentiment, I choose “What a  beautiful blessing you are to me” but decided to use only part of the sentiment. I heat embossed it in gold on a strip of Whisper White and finish it with a piece of a doily.

I truly hope you enjoyed coming to my blog and see my card. Now, be sure to hop along and see more inspiring projects. Below is the list of all the participants but you can also use the buttons to keep hopping. Your next stop is lovely Kathleen Rintoul-Waite  go and see what she has made using the new products.

Thank you for stopping by and have a blessed day!

next pootler blog

previous pootler blog

Full blog line up:

 Sam Hammond

Mandy Barton

Sandra Ronald

Camille Moriaty

Heidi Smith

Hannah McCurley

Louise Thomas

Karen Taylor

Jerim Dickins

Anna Krol –> you are here

Kathleen Rintoul-Waite

Angelina Clark

Ink Smooshing With Bloomin’ Hearts Thinlits Dies – Using Die-cut Negatives

Hello guys! I’m back today with ink smooshing technique again. But this time I’ve used die-cut negatives I’ve saved from my previous project.

bloomin love

For these cards, I decided to choose different colours: shades of red, green and purple. The base of my cards is again a watercolour paper as it’s perfect for watercolour techniques. I explained ink smooshing technique in my post here.

To add some more detail to the die-cut pieces I run them through my big shot with Happy Heart Embossing Folder. I love how they stand out from busy backgrounds.

bloomin love green

To stamp main sentiments I have used my die-cut as a guide to make sure I stamp it exactly in the middle of my card. I stamped it in Versamark and heat embossed in gold. Before adhering the panels I’ve made few “splotches” using Gold Wink Of Stella Glitter Brush.

To finish off my cards I took a strip of black cardstock and heat embossed “love you” sentiment in gold. My husband’s friend came over at the weekend and “nicked” one card for his girlfriend straight away haha Hope she will like it.

If you like my project or got any questions please let me know in the comments below.

Thank you for stopping by. Have a blessed day,