Double Layer Stamping With Painted Seasons Stamp Set

Anna' Stampin' Cave - Painted Seasons Stamp Set double layer stamping technique, Coastal Cabana, Soft Sea Foam, So Saffron

Hello everyone! Long time no see, hey?

I’ve been MIA due to multiple sclerosis (that’s a surprise, right hahaha). I had a major MS relapse two months ago when I lost control over my body, or I should rather say over the right-hand side of my body. I couldn’t walk, write (I am right-handed) or brush my teeth. Thank God for hubby and electric toothbrushes! I didn’t even feel my right cheek, seriously.

After a few series of steroids (5 days) and time, time and more time, I can finally do most of the things on my own. Maybe except walking outside – still need hubby’s hand in that matter. But I can finally create! Woohoo! I so missed my inks and stamps. And I have some serious delays in sending customers ‘thank yous’. In sorting ATM!

There’s one thing that MS has thought me for sure: PATIENCE!

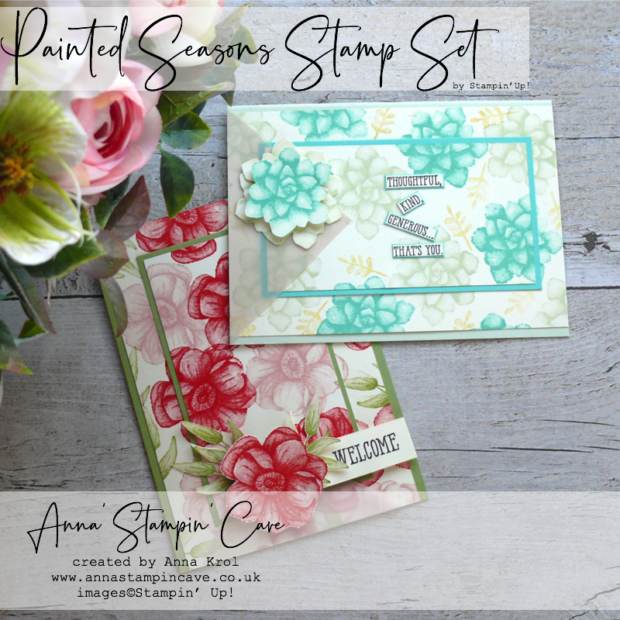
I know it’s with a slight delay, as Sale-a-bration just ended. But I really wanted to share with you these two beauties I created using a free stamp set from SAB exclusive Painted Seasons Bundle.
Anna' Stampin' Cave - Painted Seasons Stamp Set double layer stamping technique

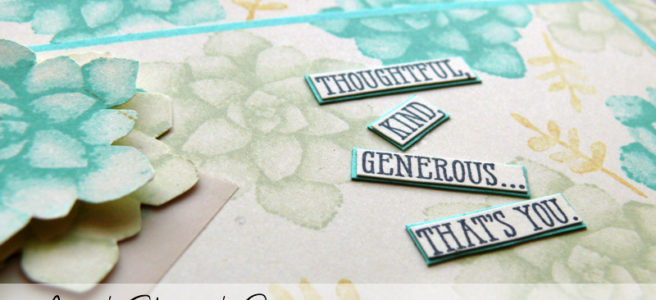
How cute are these, right? And so easy to make. Both are created with a double layer stamping technique and involved some fussy-cutting.

First, I prepared my Very Vanilla double layers and stamped them with my chosen ink pads: Poppy Parade with Pear Pizzazz for a floral card, and Coastal Cabana, Soft Sea Foam and So Saffron ink pads for a succulent one.
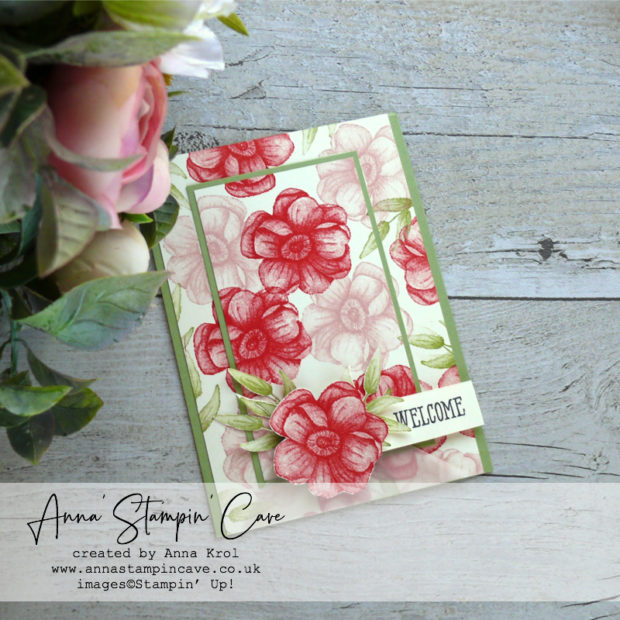
Anna' Stampin' Cave - Painted Seasons Stamp Set double layer stamping technique with bright Poppy Parade and Pear Pizzazz

Once my double layers were stamped I mount them on to coordinating cardstock panels: Pear Pizzazz and Coastal Cabana.

Next, I adhered them to the card bases. For the floral card, I’ve used the same cardstock for a card base: Pear Pizzazz.

But for a succulent card, I decided to use Soft Sea Foam cardstock for a base instead of Coastal Cabana.
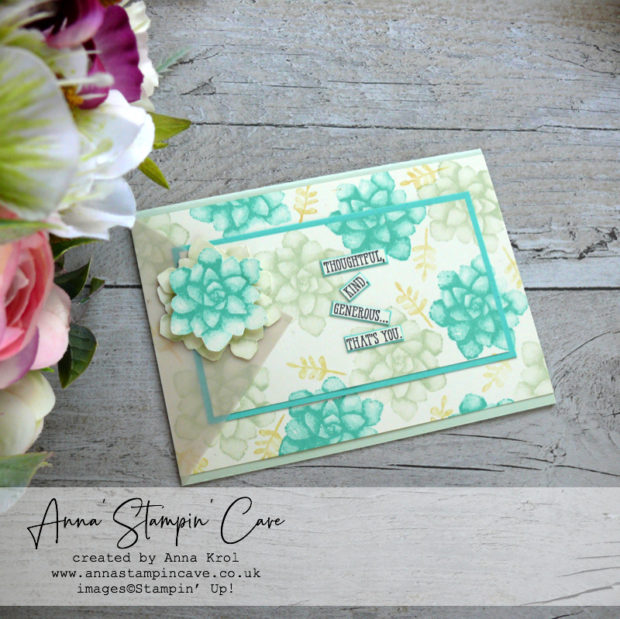
Anna' Stampin' Cave - Painted Seasons Stamp Set double layer stamping technique with Coastal Cabana blue and Soft Sea Foam pastel green

Vellum to the rescue

Because I’ve made some ‘booboos’ while stamping my panels, as my hands are not fully working yet,  I needed to ‘hide’ these. So I cut a square from vellum, briefly 4″ x 4″, cut it in half, and when assembling both cards, I adhered these vellum triangles where needed. Mistakes? What mistakes?! haha
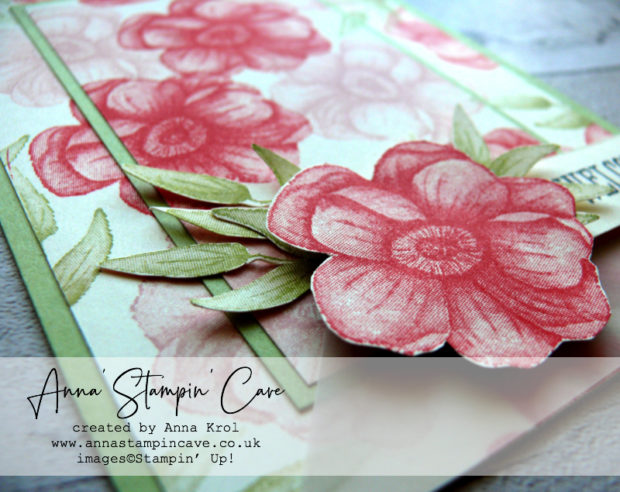
Anna' Stampin' Cave - Painted Seasons Stamp Set double layer stamping technique with bright Poppy Parade and Pear Pizzazz

Adding more details

I took a scrap of Very Vanilla cardstock stamped few flowers, leaves and succulents in corresponding colours and fussy-cut all my florals and foliage with paper snips.  Quite easy and fun, and great exercise for my hands too.
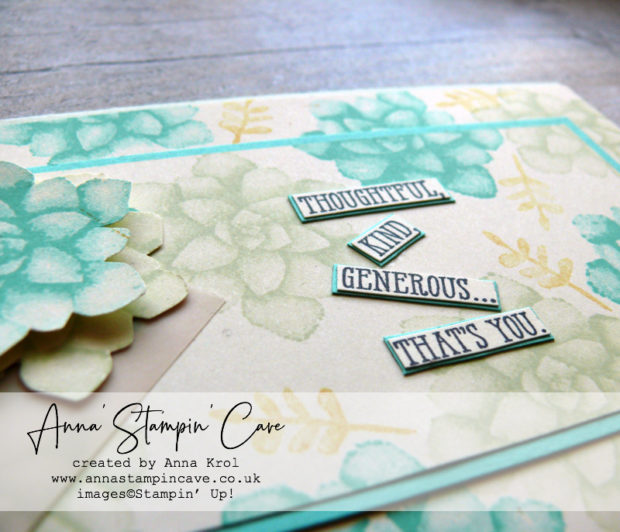
Anna' Stampin' Cave - Painted Seasons Stamp Set double layer stamping technique with Coastal Cabana blue and Soft Sea Foam pastel green

Because the Painted Seasons Stamp Set comes with images only it opens up endless possibilities as to what sentiment stamps to use.

For my cards, I decided to use Well Said Cling Stamp Set.
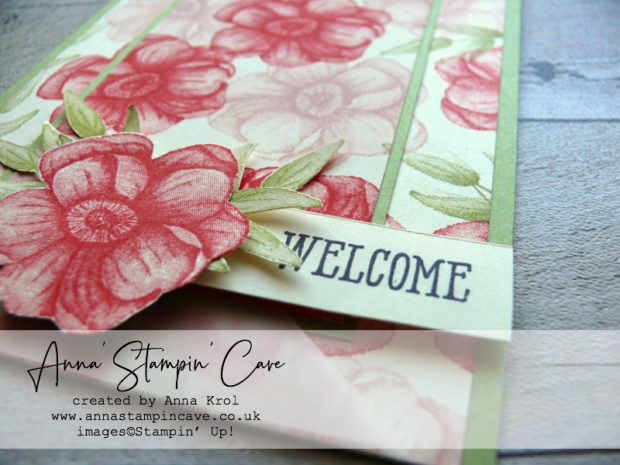
Anna' Stampin' Cave - Painted Seasons Stamp Set double layer stamping technique with bright Poppy Parade and Pear Pizzazz

Assembling the cards

First, I took my vellum triangles and my fussy-cut florals and tried few arrangments before I decided where to stuck things down permanently.

I adhered vellum pieces, flush to the edges of my cards, and placed the adhesive strategically where I knew it will be covered by my fussy-cut elements.
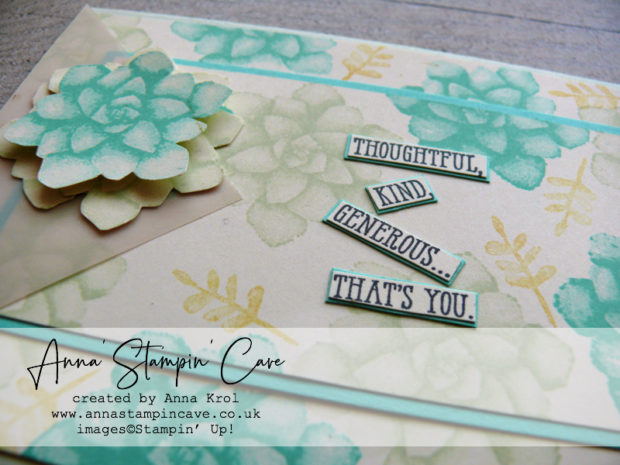
Anna' Stampin' Cave - Painted Seasons Stamp Set double layer stamping technique with Coastal Cabana blue and Soft Sea Foam pastel green

Next, I adhered each of the elements and my sentiments, and I call it done. I have to admit, I’m quite pleased with these cards.

As always, if you wish to purchase any of the products I have used (except for Painted Seasons bundle), simply click the images below to go directly to my online store.
HOST CODE for the month of April is CD6WHE36. Use this code to receive special rewards from me.

Product List

Glue Dots

£5.00

Pin me

Summary of the project which gives all the views of the card in one photo. I’d love if you pinned and called by on Pinterest xx

Clean & Simple New Home Card For #GDP123

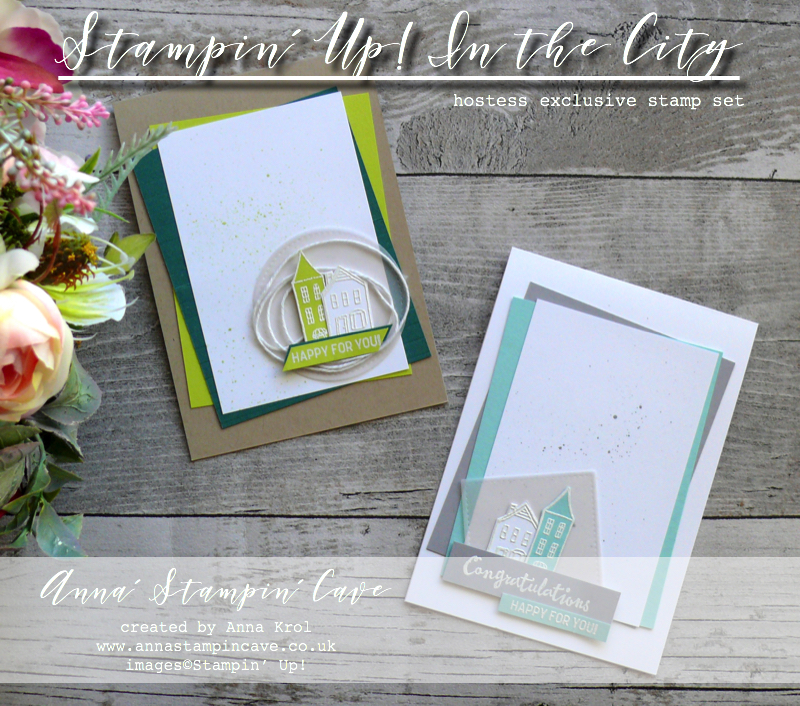
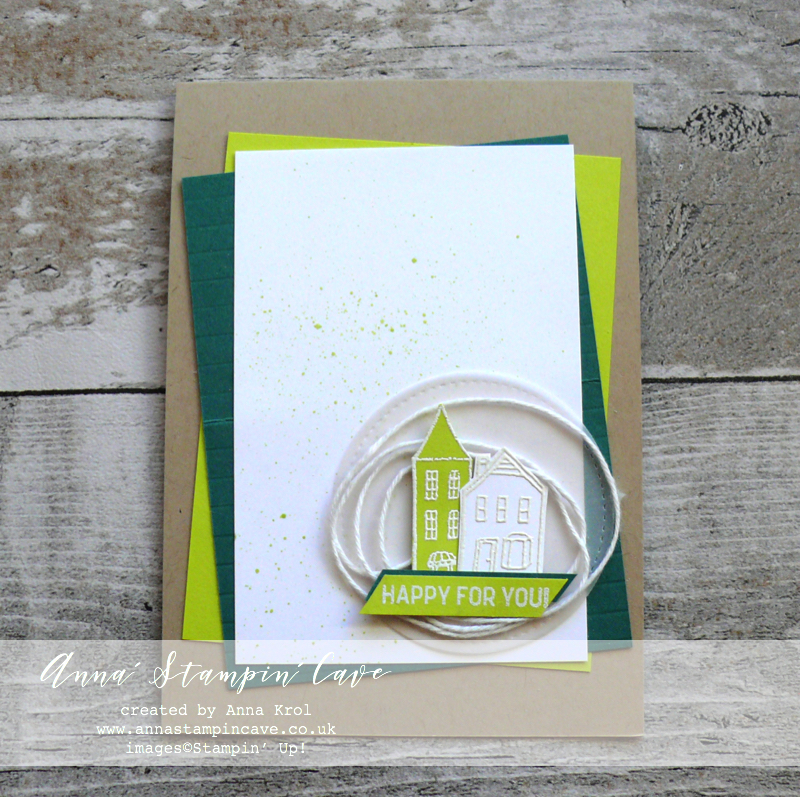
Anna’ Stampin’ Cave – Clean & Simple New Home card featuring ‘In The City’ Stamp Set from Stampin’ Up!

Hello and welcome! I’m so happy you popped in to visit my stampin’ cave. Today I’ve got for you beautiful, clean & simple cards using ‘In the City’ Stamp Set from Stampin’ Up!

My hubby’s younger sister & her husband are in the middle of buying their first house, hence the theme of my cards. There are still few weeks, maybe even a month until the completion date, but we are so, SO happy for them!

Dimensions for both cards:

  • card base: 11-6/8″ x 4-1/8″ scored in half at 5-7/8″ (29.7 x 10.5 cm scored in half at 14.8 cm) – Whisper White Thick & Crumb Cake cardstock
  • colour cardstock panels: 4-1/2″ x 3-1/2″ (11.4 cm x 8.9 cm) – Smoky Slate, Pool Party, Lemon Lime Twist & Tranquil Tide
  • Whisper White panels: 4-1/2″ x 3″ (11.4 cm x 7.6 cm)
  • scraps of cardstock & vellum for die-cutting and stamping
  • Whisper White Baker’s Twine: 20″ (approx)

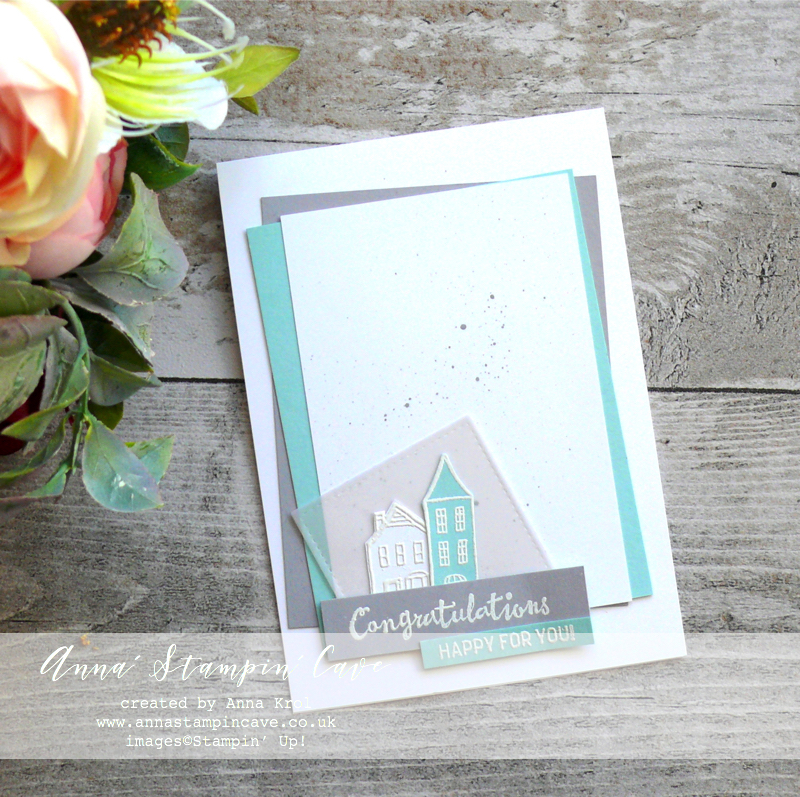
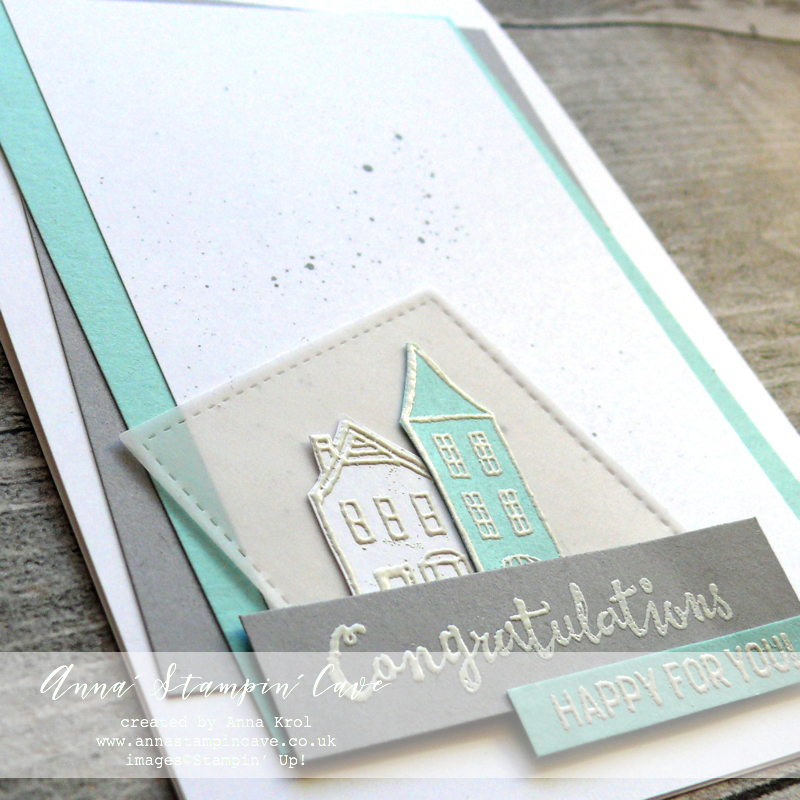
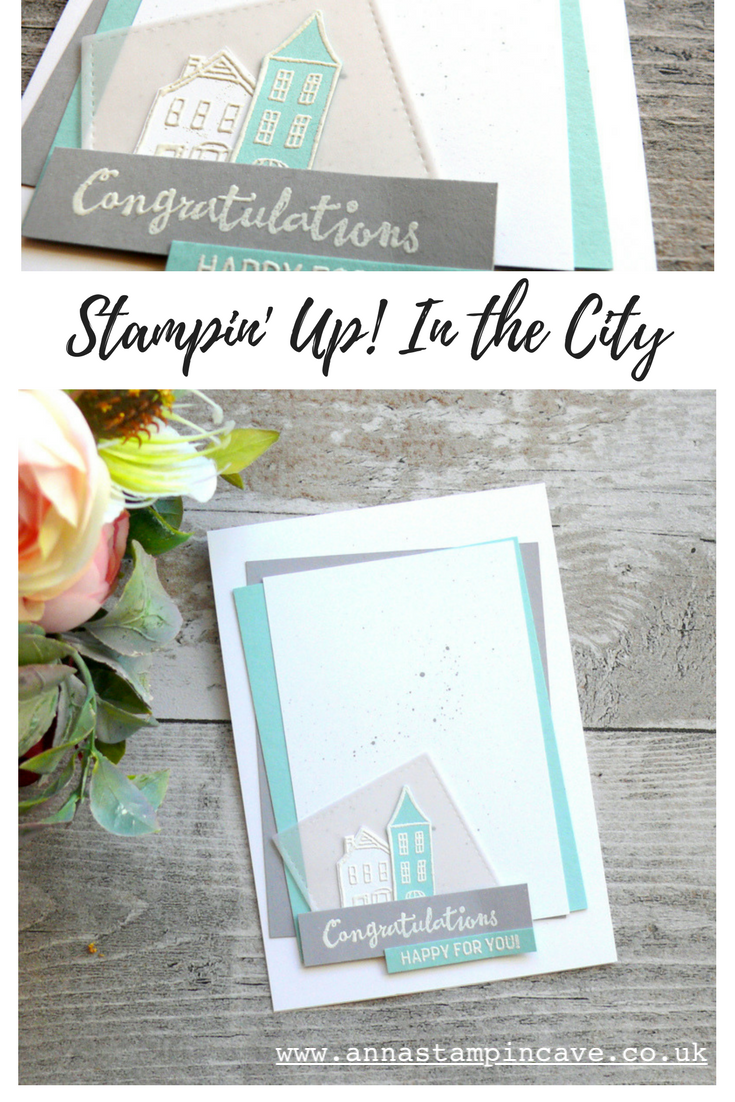
For this first card, I decided to use soft colours. Smoky Slate and Pool Party accompanied by Whisper White make such an elegant combination.

First, I adhered all panels to the card base with snail adhesive. To add some interest to the layout, I assembled them at wonky angles.

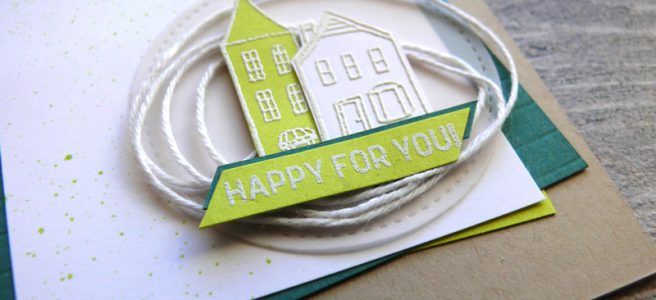
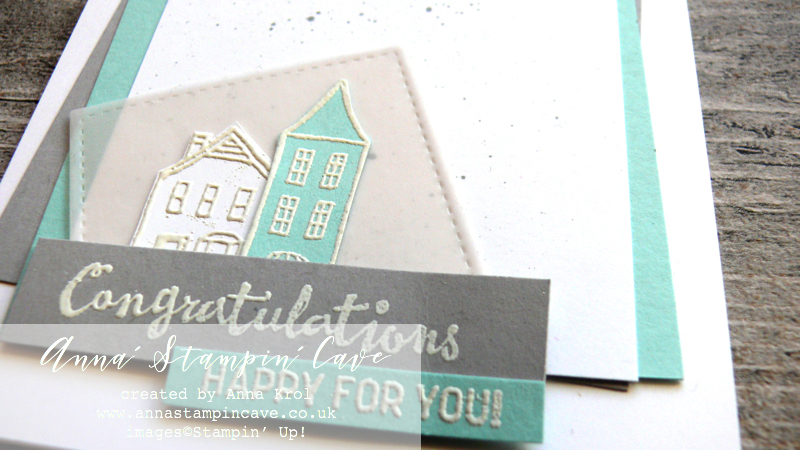
I stamped two tiny houses from In The City Stamp Set in Versamark ink; taller on a scrap of Pool Party cardstock, and lower one on Whisper White; and heat embossed them in white. This set stamp set doesn’t come with coordinating dies, but images are so easy to fussy-cut I did it in no time.

Sentiments are stamped in Versamark on two separate pieces of cardstock: I stamped ‘congratulations’ from Petal Palette Stamp Set on a strip of Smoky Slate cardstock, and ‘happy for you’ from In The City Stamp Set on a smaller strip of Pool Party and heat embossed both in white.

I die-cut a square of vellum using 2nd largest square die from Stitched Shapes Thinlits Dies. While playing with placement, I thought it would look cool if the square was kinda wonky too (to echo panels) so once happy, I adhered my tiny houses briefly in the middle of that’ wonky’ square. Next, I adhered them to the card and added sentiments using dimensionals.

I know this card supposed to be CAS (clean & simple) but too much white hurts my eyes, honest haha. So before I finished assembling it, I took Smoky Slate ink pad and transferred some ink onto an acrylic block. Next, using aqua painter I flicked few tiny ‘splatters’ of ink into the top Whisper White panel.

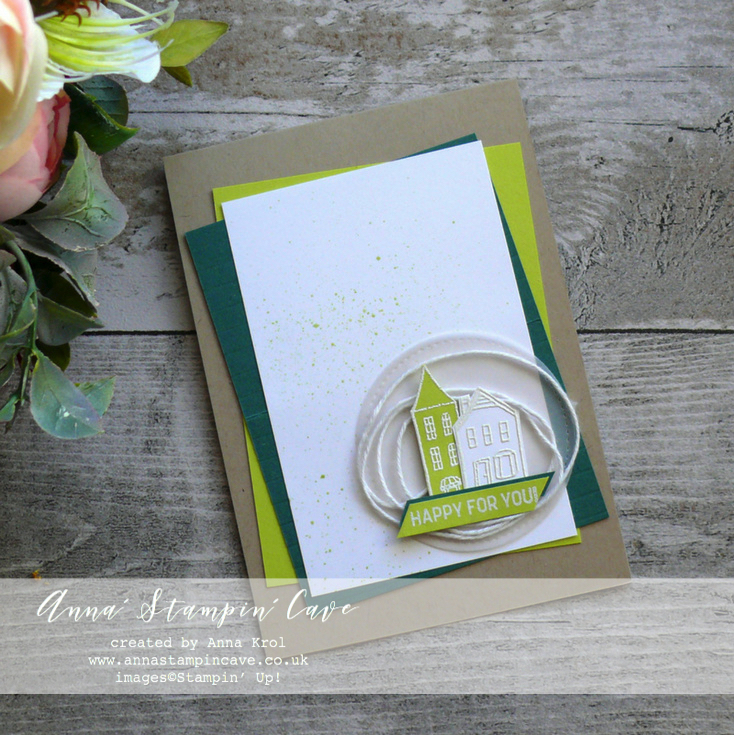
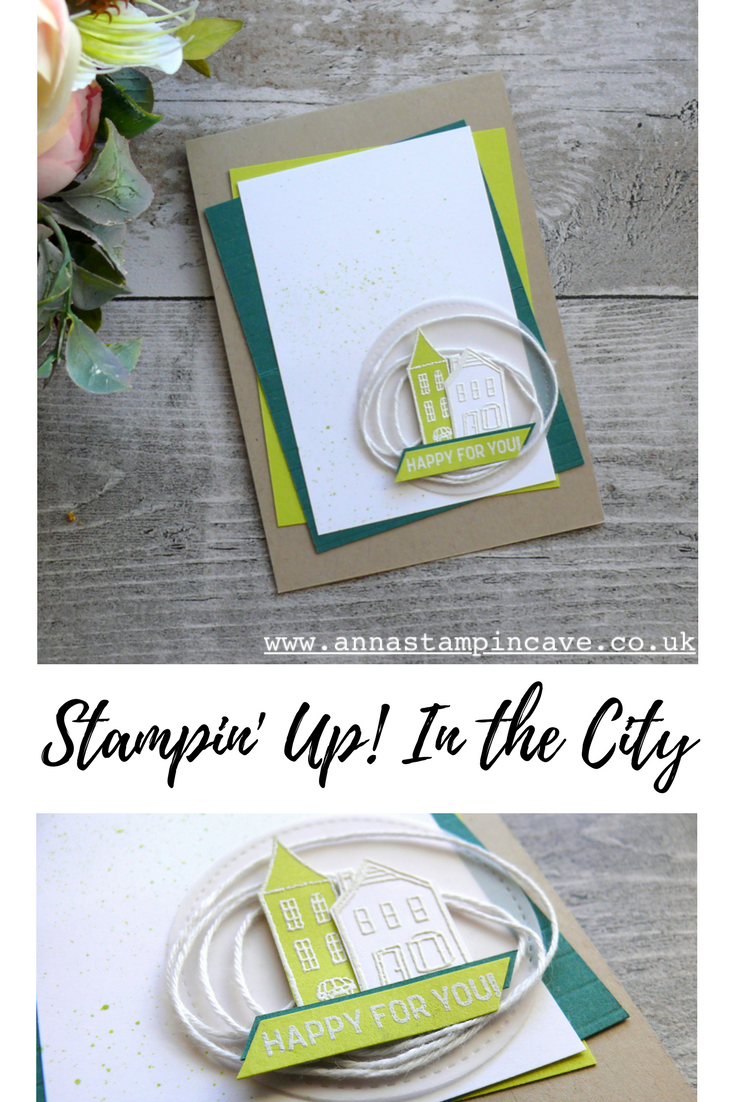
For this second card, I decided to use brighter colours. I chose Tranquil Tide and Lemon Lime Twist for some fun pop of colour. The base is Crumb Cake.

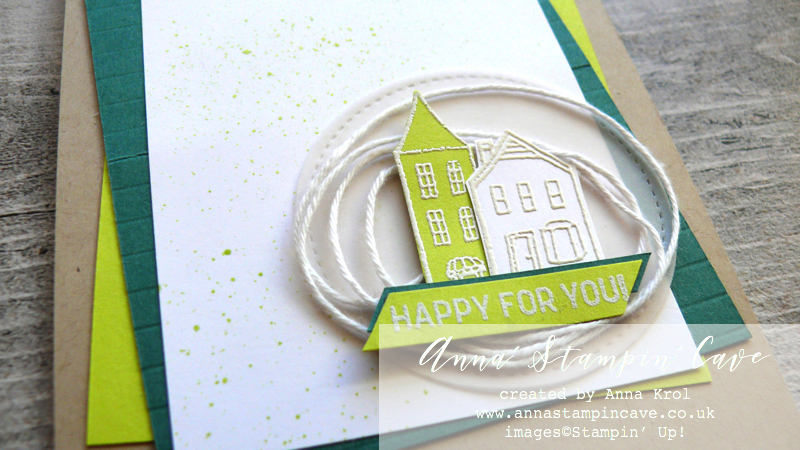
I wanted to add some extra texture and interest to this card. I really like the Simply Stripes Textured Embossing Folder from Spring Summer catalogue. But because I don’t have it yet I decided to imitate the look. I took my Tranquil Tide panel and with a help of Stampin’ Trimmer, I scored it every 1/4″. I love how it looks.

I also added Lemon Lime Twist splatters to Whisper White panel and adhered all the layers to the card base.

To soften up wonky angles I die-cut a circle from vellum using the 2nd largest circle from Stitched Shapes Framelits Dies. I wrapped some Whisper White Baker’s Twine around my fingers to create ‘wreath-like’ shape, and add it in the centre of the vellum circle with a dab of glue (snail adhesive).

I took tiny buildings and simple sentiment strip, put dimensionals to the back and mounted them onto my circle. Dimensionals not just keep all elements together, but they also secure twine from slipping off. I adhered my circle to the card with snail adhesive.

I love how these cards turned out. And to be honest, with a little tweak, they could easily fit any occasion really.

As always, I really want to encourage you to visit the Global Design Project challenge blog to see other beautiful projects from all around the world. Just click on their logo below to visit the website

I’m also adding my cards to Simon Says Stamp – Anything Goes Challenge

If you wish to purchase any of products I have used, simply click the images below to go directly to my online store and don’t forget to enter the hostess code RRMR76JH to receive a gift from me. Just a reminder that In The City Stamp Set is an exclusive Hostess Set, which means you can’t buy it, you can only earn it (choose) free when you spend £150 or more in my online store.

Thank you for stopping by and have a blessed day

Hostess Code for February: RRMR76JH – Use this code in the month of February and receive a gift from me.

Special Notes:1) Make sure you select Anna Krol as your demonstrator;
2) If you select “No Contact” box I do not have access to your name and can’t send you a gift;
3) If your order is £150 or more do not use the code and grab your own Stampin’ Rewards + gift from me

Product List

Aqua Painters

£15.50

Big Shot

£99.00

Pin me

Summary of the project which gives all the views of the card in one photo. I’d love if you pinned and called by on Pinterest xx

Don’t forget to check:

Spring Summer Catalogue Paper & Ribbon Shares. Shares are open to Austria, France, Germany, Netherlands & United Kingdom. 102 sheets of DSP & 2 yards of each type of ribbon from Spring/Summer Catalogue. Click here for more details —>

The New Stampin’ Up! Spring/Summer 2017 Catalogue and Sale-A-Bration are LIVE and it’s AMAZING! For every 60 €/£45, you spend either from Spring Summer Catalogue or Annual Catalogue, you will get to choose one FREE  level 1 product from SAB brochure! If you spend 120 €/£90, you get one FREE level 2 product, OR, you can choose two level 1 items. If you spend 180 €/£135, you have the option to choose three level 1 items or one level 1 item and one level 2 item. Click here for more details —>

Ever wondered what it’s like to join Stampin’ Up!’s community? I may have few answers for you. Click here for more details –>

Global Design Project #120 Case The Designer Challenge

Anna’ Stampin’ Cave – Global Design Project #120 Case The Designer Challenge

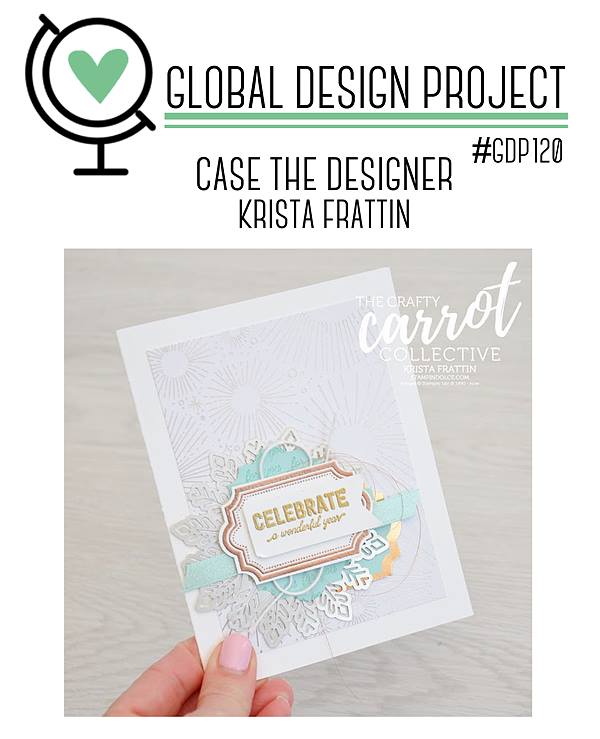
Hello and welcome! Finally, I’ve found some time to have a play with this new & fun Bubble Over bundle from Spring Summer Catalogue. And as my inspiration, I have used beautiful card created by amazingly talented Canadian demonstrator, Krista Frattin.

CASE = Copy And Selectively Edit

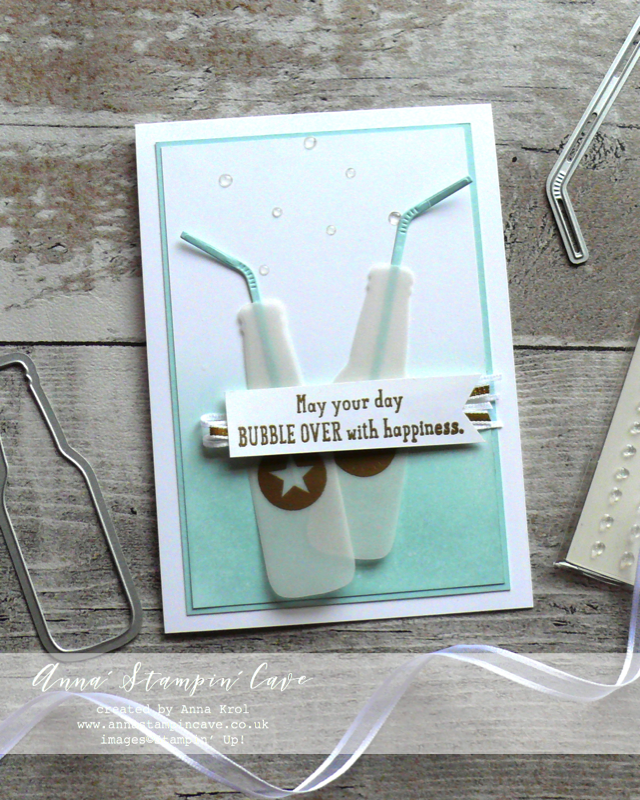
And here’s my card:

Bubble Over card dimensions:

  • Whisper White Thick cardstock: 11-6/8″ x 4-1/8″ scored in half at 5-7/8″ (29.7 x 10.5 cm scored in half at 14.8 cm)
  • Sky Blue cardstock: 5-3/8″ x 3-5/8″ (13.7 cm x 9.2 cm)
  • Whisper White cardstock: 5-2/8″ x 3-1/2″ (13.3 cm x 8.8 cm)
  • Whisper White for sentiment: 6/8″ x 3″
  • White Vellum and Soft Sky cardstock for die-cutting
  • Whisper White 1/4″ Organza & Gold 1/8″ Ribbon: approx. 7″ each

First, I sponged the bottom of Whisper White panel with Soft Sky ink. To add some more interest to the background I lightly sprinkled the panel with water using big, dry brush.

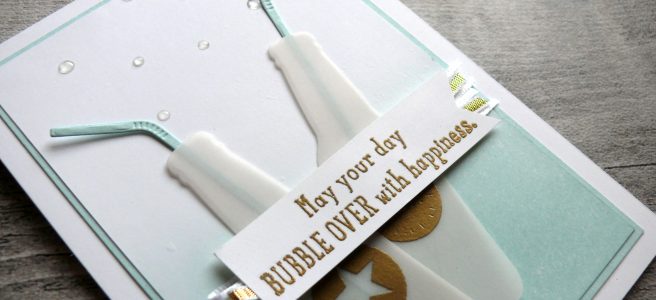
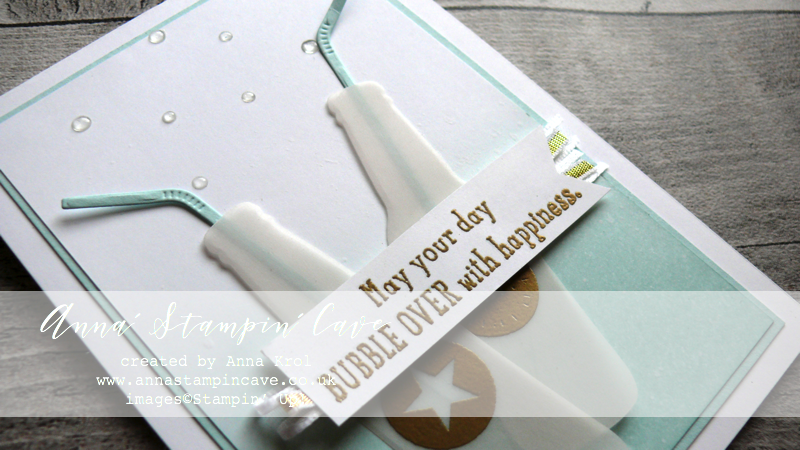
I die-cut two bottles from the vellum. First I thought about creating ‘labels’ for my bottles, but I end up stamping straight onto the die-cuts. For this I’ve used two circle stamps from Bubble Over Stamp Set, one with a star and and second with ‘yay’ in the middle. You can’t really see it as it’s hidden under the banner. I also die-cut two straws from Soft Sky cardstock.

I played a bit with the placing of my elements and once I was happy, I assembled the card.

For the final touch I’ve scattered some clear epoxy shapes from the Glitter & Clear Epoxy Shapes, also new from Spring Summer Catalogue. You will get 176 elements in the pack: 1 sheet each (clear and with glitter).

Purchase this amazing Bubble Over Photopolymer Bundle, add Glitter & Clear Epoxy Shapes and Whisper White 1/4″ Organza Ribbon to your oreder and you will earn for FREE level 1 product from Sale-a-bration Brochure.  Like this cute Designer Series Paper Bubbles & Fizz, that coordinates with Bubble Over Bundle. 

Above is just an idea, but you can add any product you wish from the brochure.

I really want to encourage you to visit the Global Design Project challenge blog to see other beautiful projects from all around the world. Just click on the logo below to visit their website

If you wish to purchase any of products I have used, simply click the images below to go directly to my online store and don’t forget to enter the hostess code for the month of January GK3G3AR3 to receive a gift from me.

Thank you for stopping by and have a blessed day

Big Shot

£99.00


Hostess Code for January 2018 GK3G3AR3 Use this code in the month of January and receive a gift from me.

Special Notes:1) Make sure you select Anna Krol as your demonstrator;
2) If you select “No Contact” box I do not have access to your name and can’t send you a gift;
3) If your order is £150 or more do not use the code and grab your own Stampin’ Rewards + gift from me

Don’t forget to check:

Spring Summer Catalogue Paper & Ribbon Shares. Shares are open to Austria, France, Germany, Netherlands & United Kingdom. 102 sheets of DSP & 2 yards of each type of ribbon from Spring/Summer Catalogue. Click here for more details —>

The New Stampin’ Up! Spring/Summer 2017 Catalogue and Sale-A-Bration is LIVE and it’s AMAZING! For every 60 €/£45, you spend either from Spring Summer Catalogue or Annual Catalogue, you will get to choose one FREE  level 1 product from SAB brochure! If you spend 120 €/£90, you get one FREE level 2 product, OR, you can choose two level 1 items. If you spend 180 €/£135, you have the option to choose three level 1 items or one level 1 item and one level 2 item. Click here for more details —>

Stampin’ Up! Daisy Delight Sneak Peek

Anna’ Stampin’ Cave – Stampin’ Up! Daisy Delight Sneak Peek

Hello, everyone! What a beautiful day we had today down here in Coventry, Warwickshire. Even though I can’t fully enjoy the weather (yet) I managed to spend few minutes in the garden. And oh, boy, what a wonderful feeling it was.

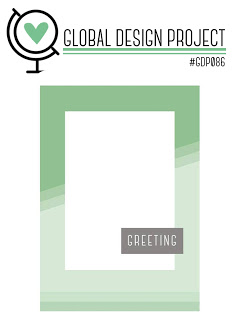
Today I’m back with a lovely card I created for this week’s sketch over at Global Design Project Challenge Blog. I truly enjoy their challenges as each week they have a new challenge based on either a colour combination, a sketch, theme and CASE-ing the Designer. Lot’s of fun!

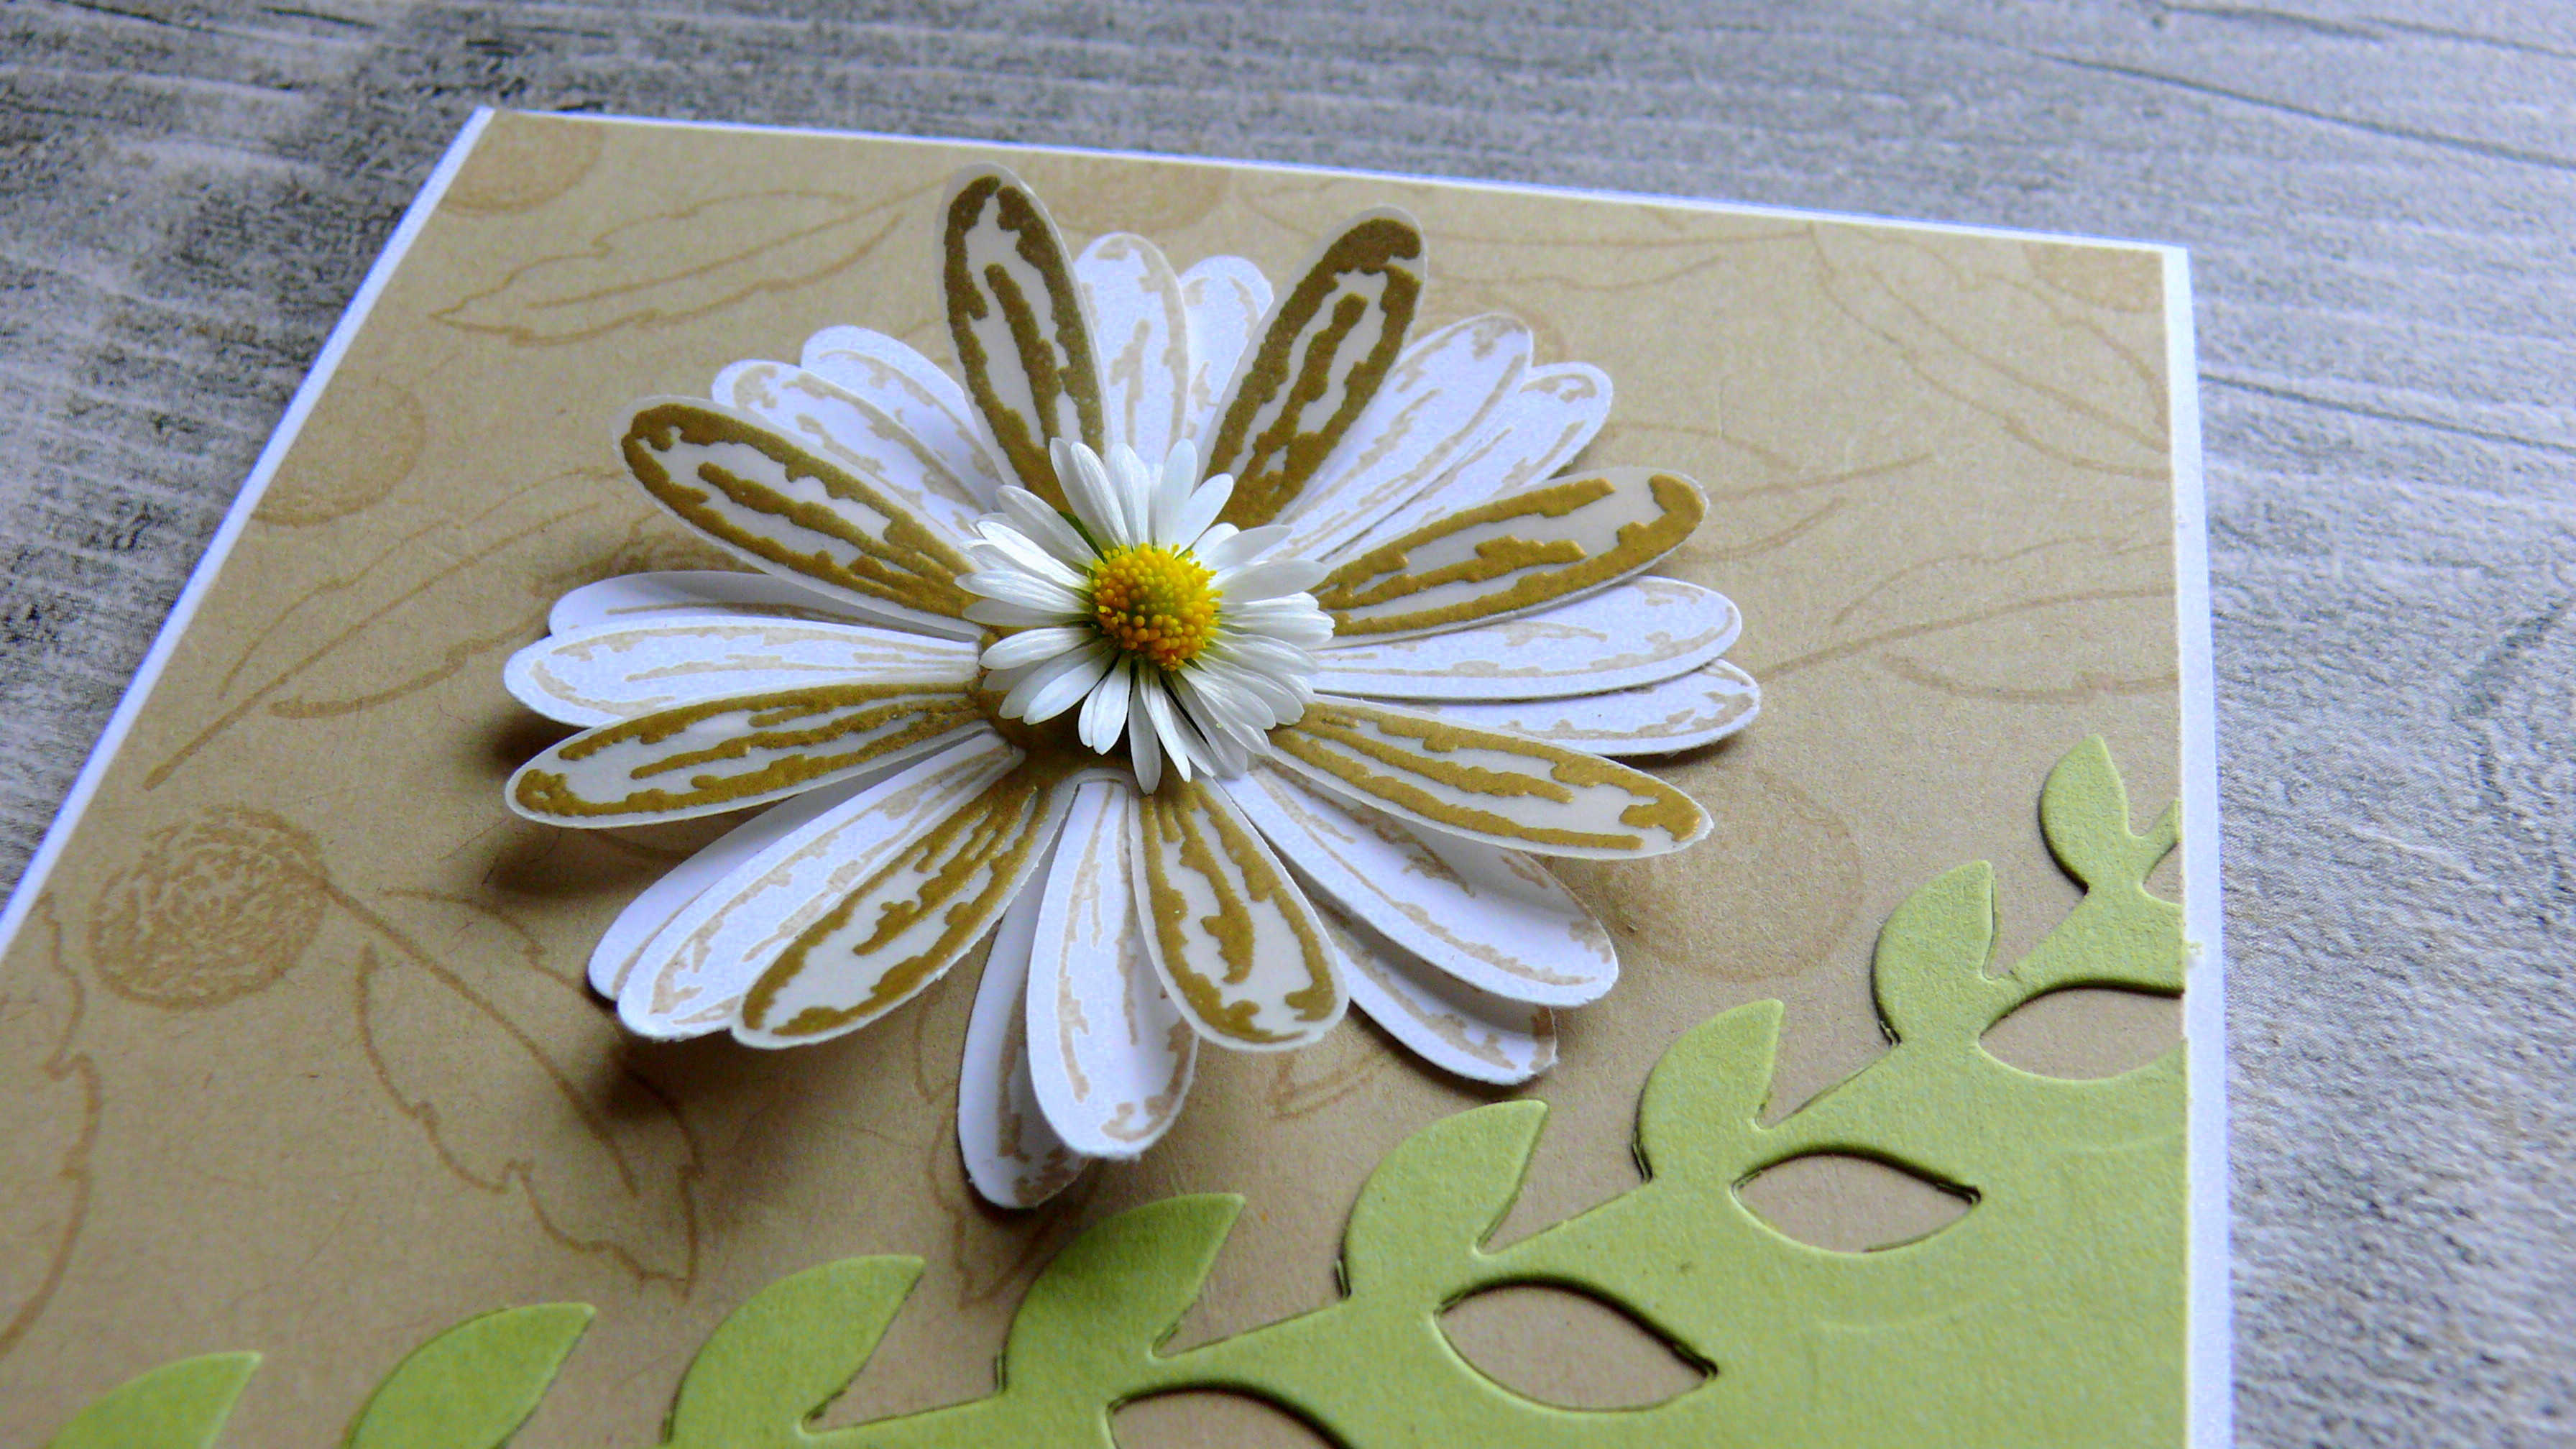
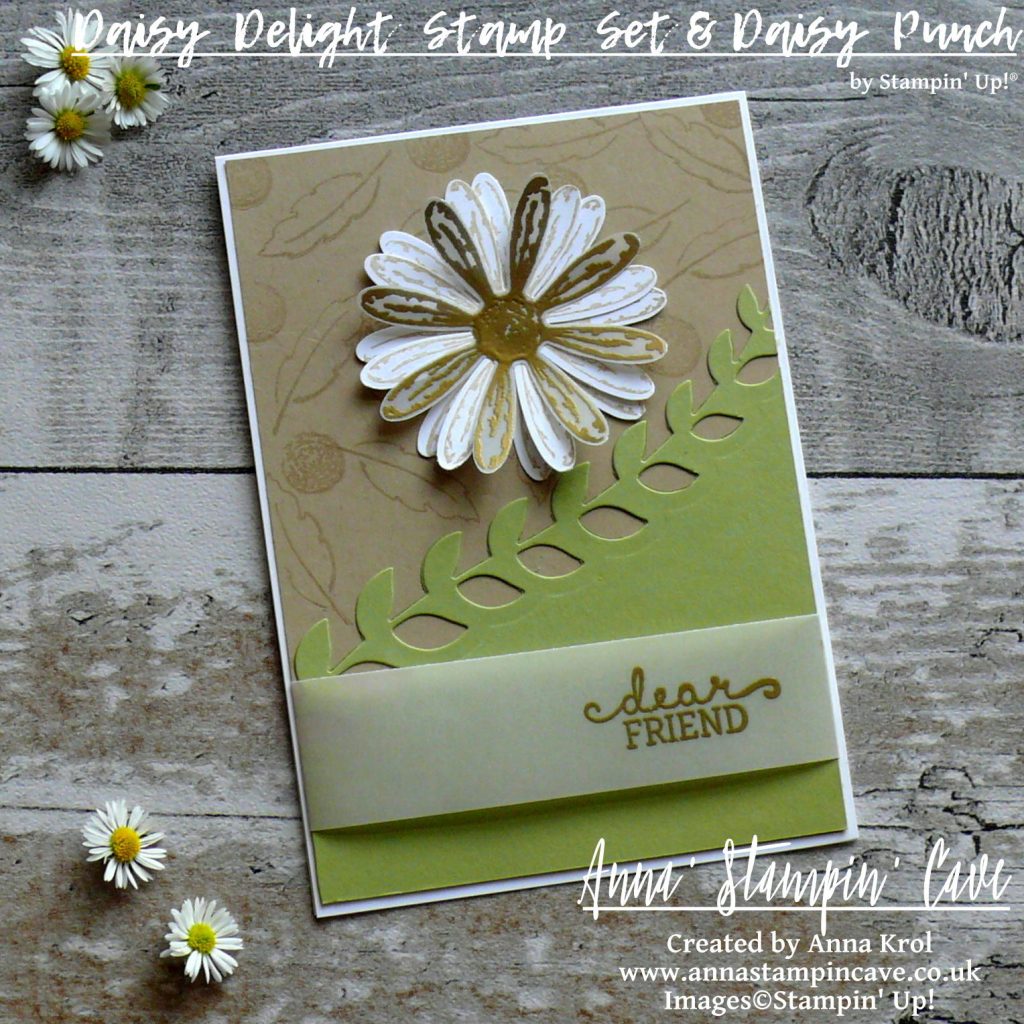
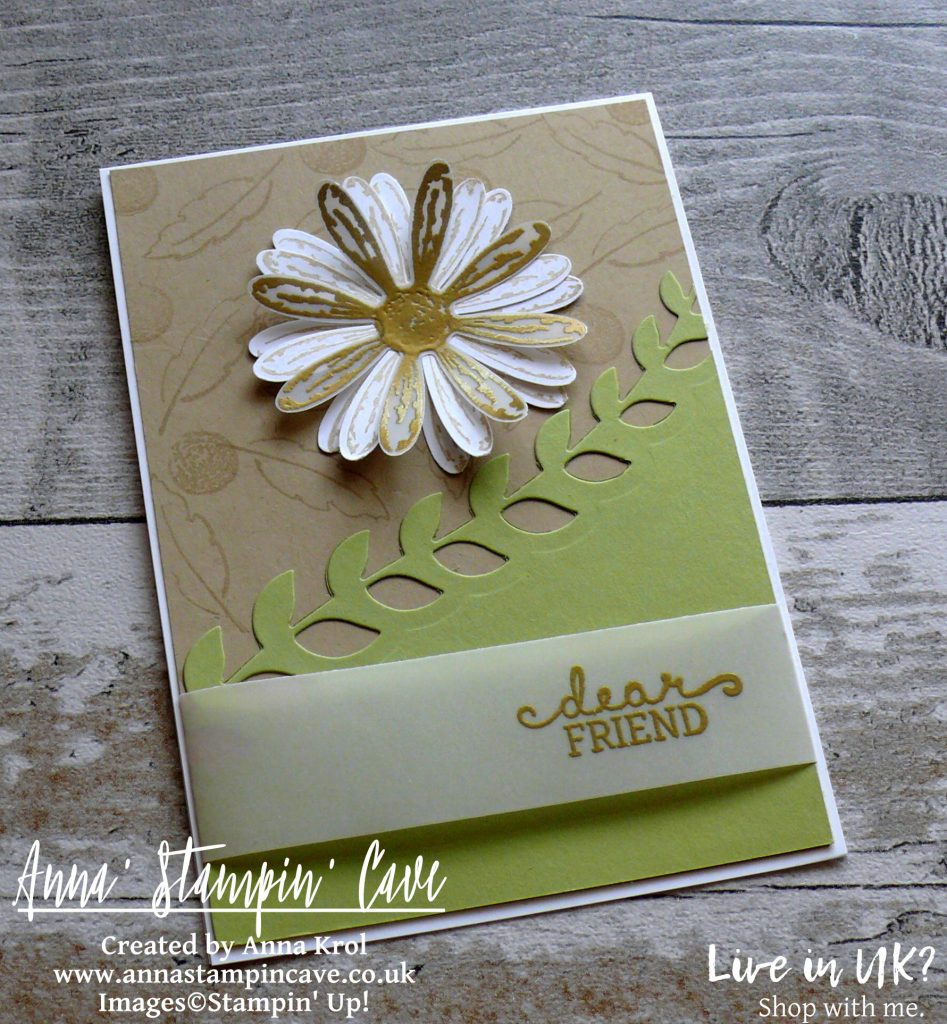
For my card today I decided to use some old favourites, as well as a sneak peek of new, coming soon bundle: Daisy Delight Stamp Set and coordinating Daisy Punch.

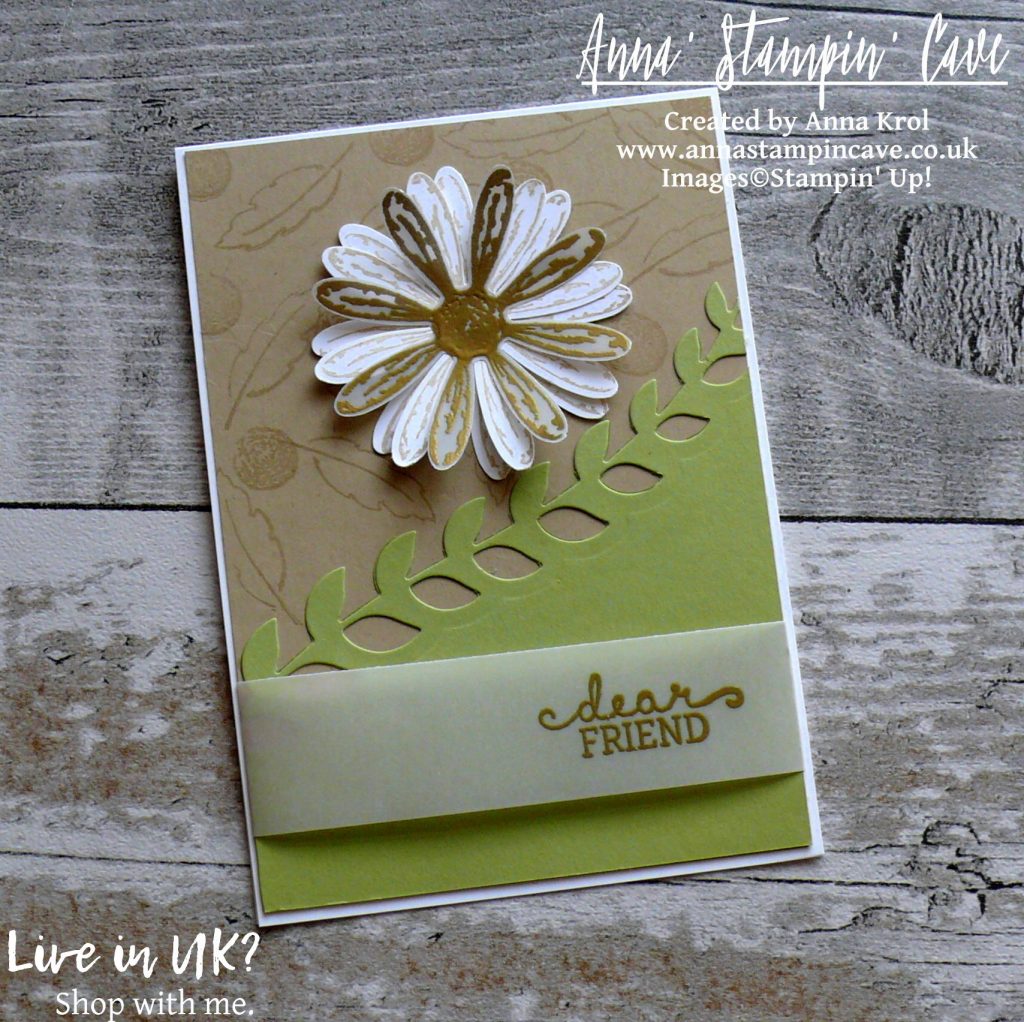
Dear Friend card dimensions:

  • Whisper White cardstock: 11-6/8″ x 4-1/8″ scored in half at 5-7/8″ (29.7 x 10.5 cm scored in half at 14.8 cm)
  • Crumb Cake cardstock: 5-6/8″ x 4″ (14.6 cm x 10.2 cm)
  • Pear Pizzazz cardstock: 5″ x 4″ (12.6 cm x 10.2 cm)
  • White Vellum cardstock: 1-1/8″ x 5-1/2″ strip
  • White Vellum and Whisper White cardstock scraps to stamp and punch daisies

First, I created the bottom half of my panel using the border die from retiring Botanical Builder Framelits Dies. I die-cut it at a slight angle, so it creates a diagonal ‘line’, and adhered it to the Crumb Cake panel. I also randomly stamped a couple of images from Daisy Delight Stamp Set: centre of the flowers and outline of the leaves, on the Crumb Cake panel.

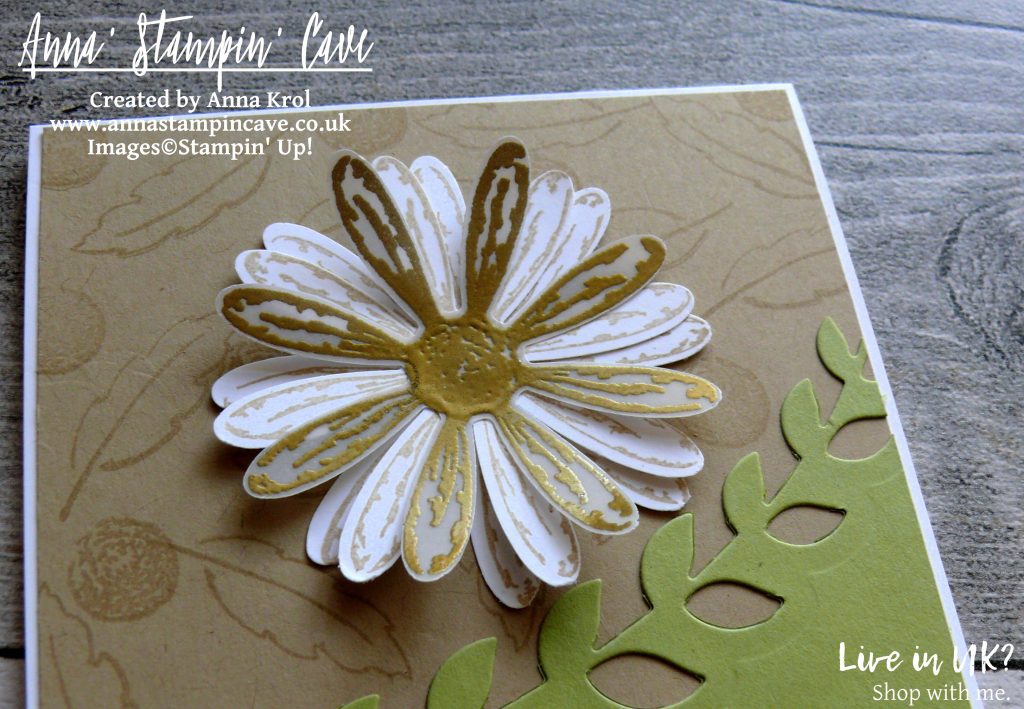
Next, I took a Crumb Cake ink pad and a scrap of Whisper White cardstock. I stamped two flowers from Daisy Delight Stamp Set and punched them out using coordinating Daisy Punch.

I also stamped one daisy and daisy centre onto vellum with Versamark ink, heat embossed it in gold and punched out as well. I layered all flowers together with vellum as a top layer, offsetting them slightly for extra dimension. I adhered them to my panel, just above Pear Pizzazz piece, using liquid adhesive.

The sentiment comes from Birthday Blooms Stamp Set and I heat embossed it in gold on a strip of White Vellum. Because my vellum strip was wider than the Crumb Cake piece I was able to adhere the ends to the back of my panel. This way I didn’t have to worry how to hide the adhesive. I mounted my panel to the card base.

And that’s my card for today. I hope you like it. I also hope you’ve enjoyed seeing a sneak peek of Daisy Delight Stamp Set and Daisy Punch. These both will be available in my shop on 1 June 2017. But if you don’t want to wait, and want to be able to order new products earlier, it’s as easy as 1…2…3… -> simply join the fun and order your Starter Kit. If you have more questions why don’t you drop me a message?

As always, I really want to encourage you to visit the Global Design Project challenge blog to see other beautiful projects from all around the world. Just click on their logo below to visit the website

If you wish to purchase any of products I have used, simply click the images below to go directly to my online store and don’t forget to enter the hostess code for the month of May SS3AK62K to receive a gift from me.

Just a reminder: Botanical Builder Framelits Dies are still available at a fraction of a price! But only until the end of May. After that date, you won’t be able to purchase them. So if you waited for a better moment to buy them – this moment is now.

Thank you for stopping by and have a blessed day,


Don’t forget to check:

Stampin’ Up! Spring Summer & Annual Catalogue 2016 2017 Retiring List

Anna' Stampin' Cave Stampin' Up! Retiring Products 2017

It’s that time of the year again, when Stampin’ Up! is getting ready to retire stamps and accessories from both the Annual and Spring Summer catalogues. As sad as it is to see these products go, there’s still time for you to get them before they’re gone. Retiring products will only be available until 31 May, or while supplies last. So if there’s something from retiring products on your wishlist, don’t wait until last day – once they’re gone, they’re gone. And they are selling fast! Click here for more details ->

Colourful Striped Background For Global Design Project – I am Guest Designer

Anna’ Stampin’ Cave – Colourful Striped Background For Global Design Project – I am Guest Designer

Hello, my friends! I am so excited as today I am a Guest Designer for Global Design Project. How amazing is that?! I’m so humbled and honoured that GDP team has chosen me to join them for this week’s Colour Challenge. And boy, what a great colours we have to play with!

Choose your fav three wasn’t an option for me because I love all of these and wouldn’t know which to choose, to be honest. So I decided to be a rebel and for my project today I’ve used all five. Let’s say this post is a farewell to these beautiful In Colours.

Colourful Striped Background card dimensions:

  • Mint Macaron cardstock: 11-6/8″ x 4-1/8″ scored in half at 5-7/8″ (29.7 x 10.5 cm scored in half at 14.8 cm)
  • Very Vanilla cardstock: two panels, one for the card front, one for the inside of the card 5-7/8″ x 4″ (14.8 cm x 10.2 cm) each
  • cardstock for building the background: 5-7/8″ x 3-1/2″ (14.8 cm x 8.9 cm)
  • scraps of cardstock in colours: Mint Macaron, Delightful Dijon, Watermelon Wonder, Cucumber Crush and Tip Top Taupe
  • White Vellum for stamping and die-cutting

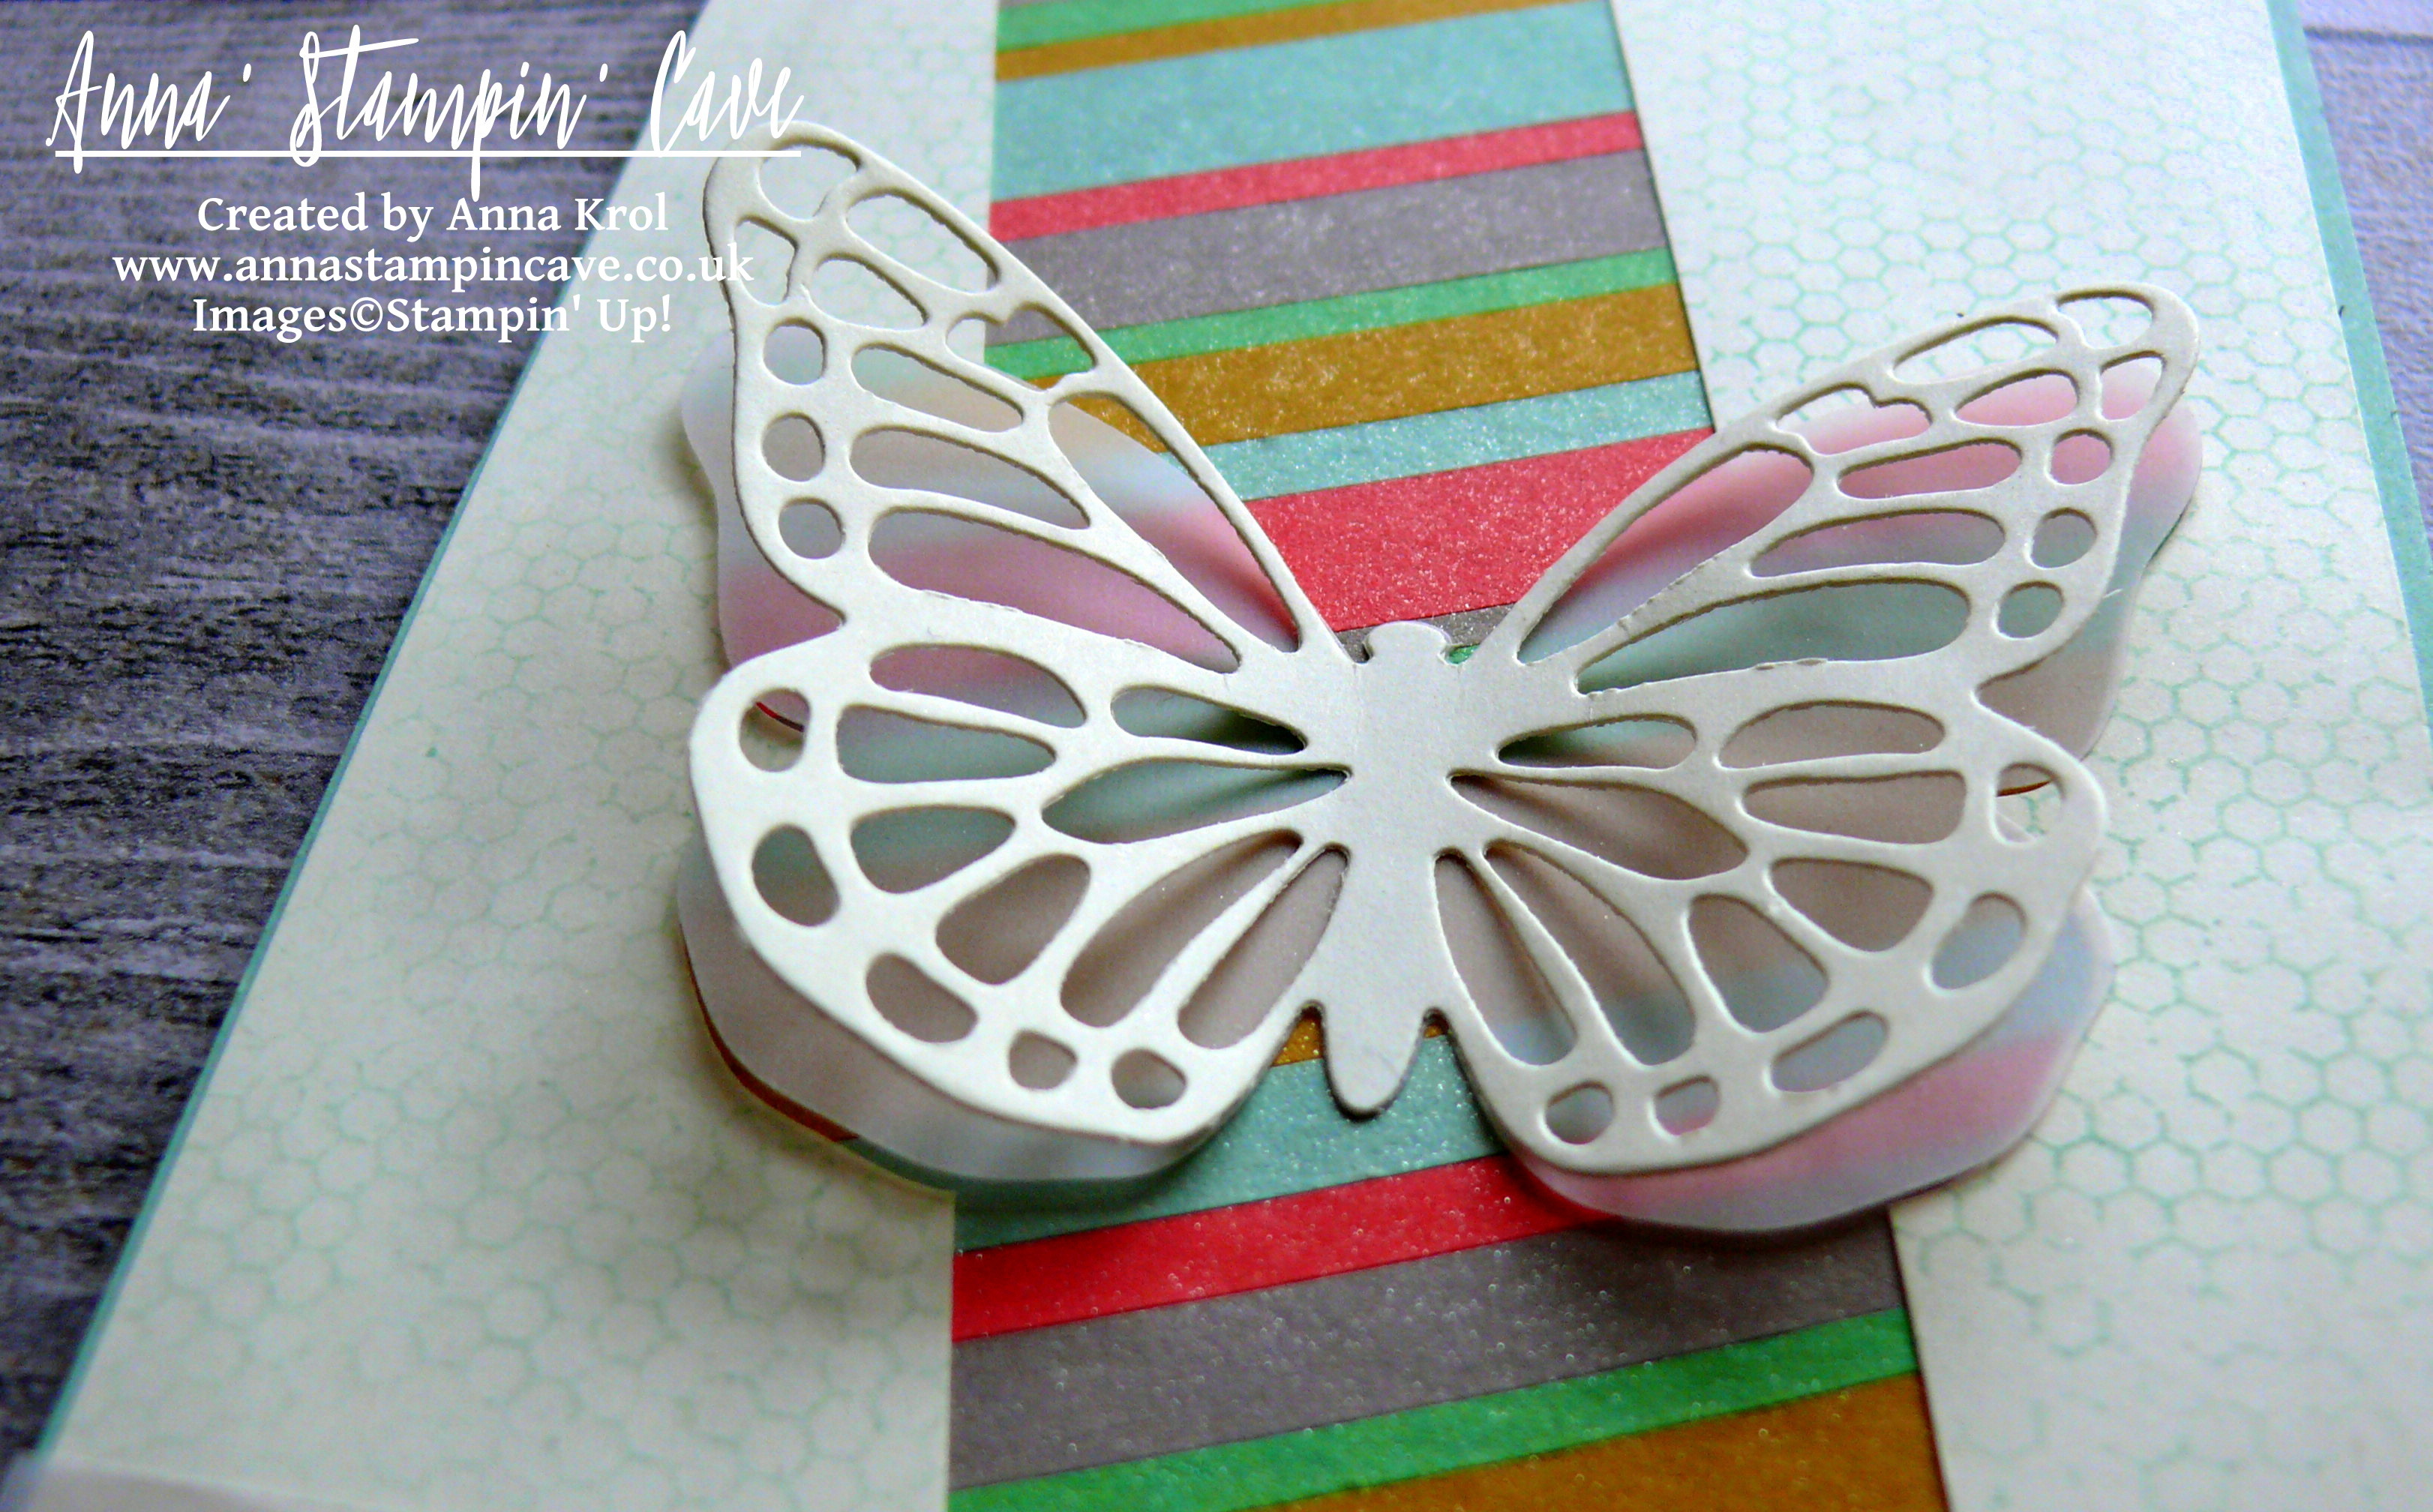
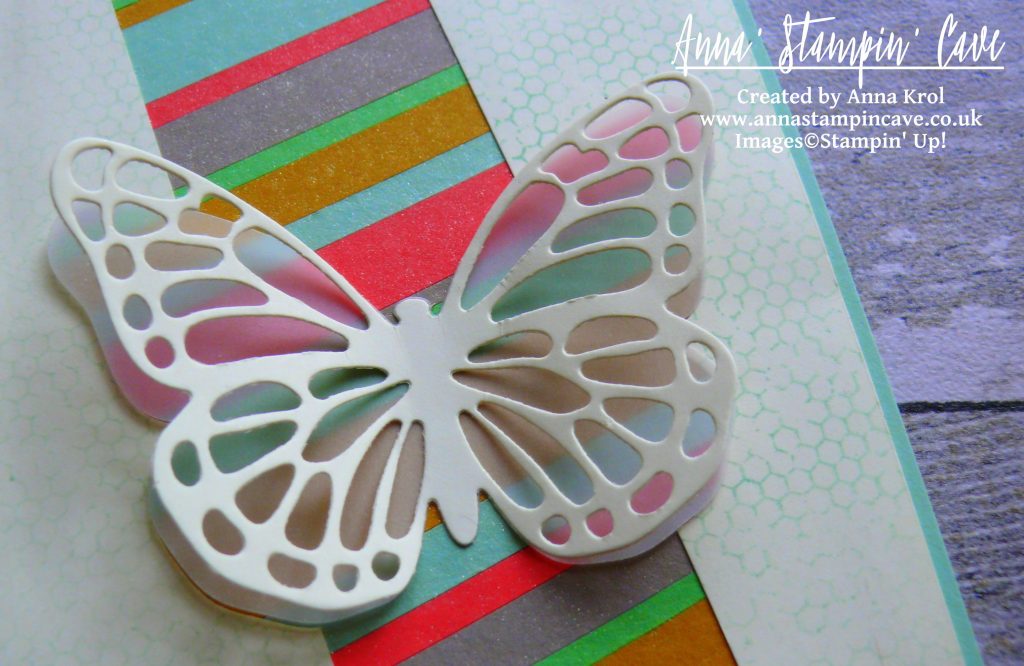
I started my card by creating this fun and colourful striped background. I took my scraps of cardstock of 2015-2017 In Colours and I cut it into strips of different widths. Next, I took a piece of cardstock (random colour as it won’t be seen anyway), covered it in glue,  using snail adhesive, and adhered my strips diagonally, mixing colours and widths, making sure there’s no space left in-between the strips. When the whole panel was covered, I trimmed any overhanging stripes.

Can you see the shimmer on this panel? I took empty spritzer bottle and fill it with water. Next, I took Clear Wink of Stella Glitter Brush and squeezed pretty few drops of it into the spritzer. I shake it really well, spritz my entire panel with this glittery mist and let it dry.

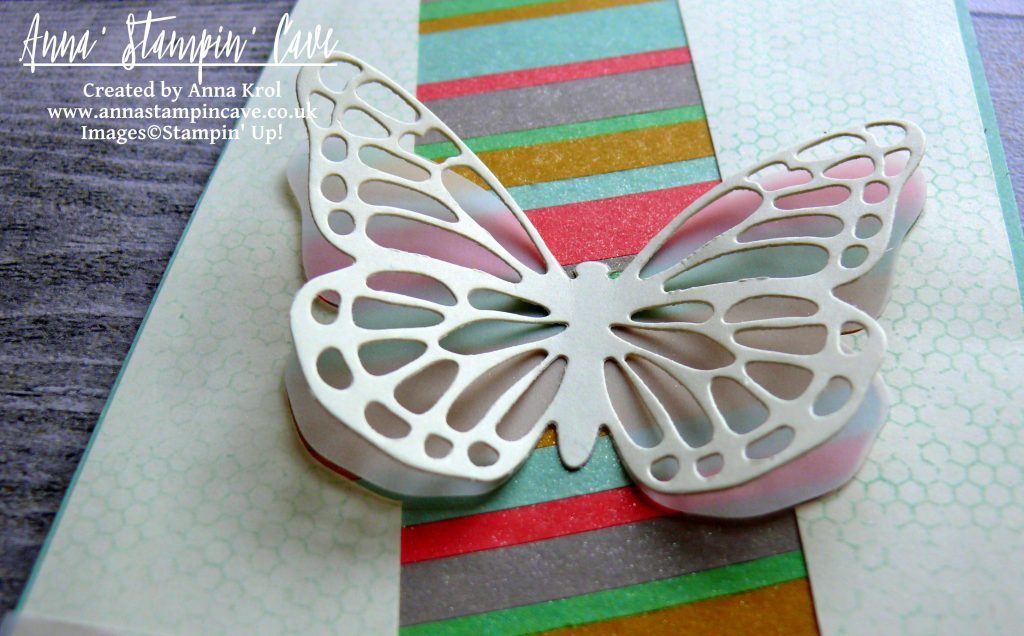
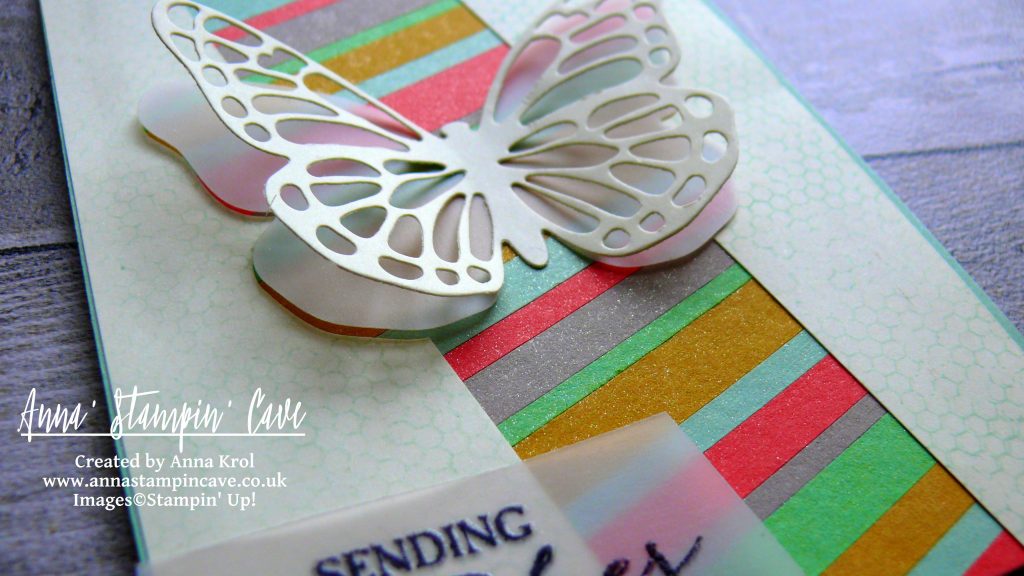
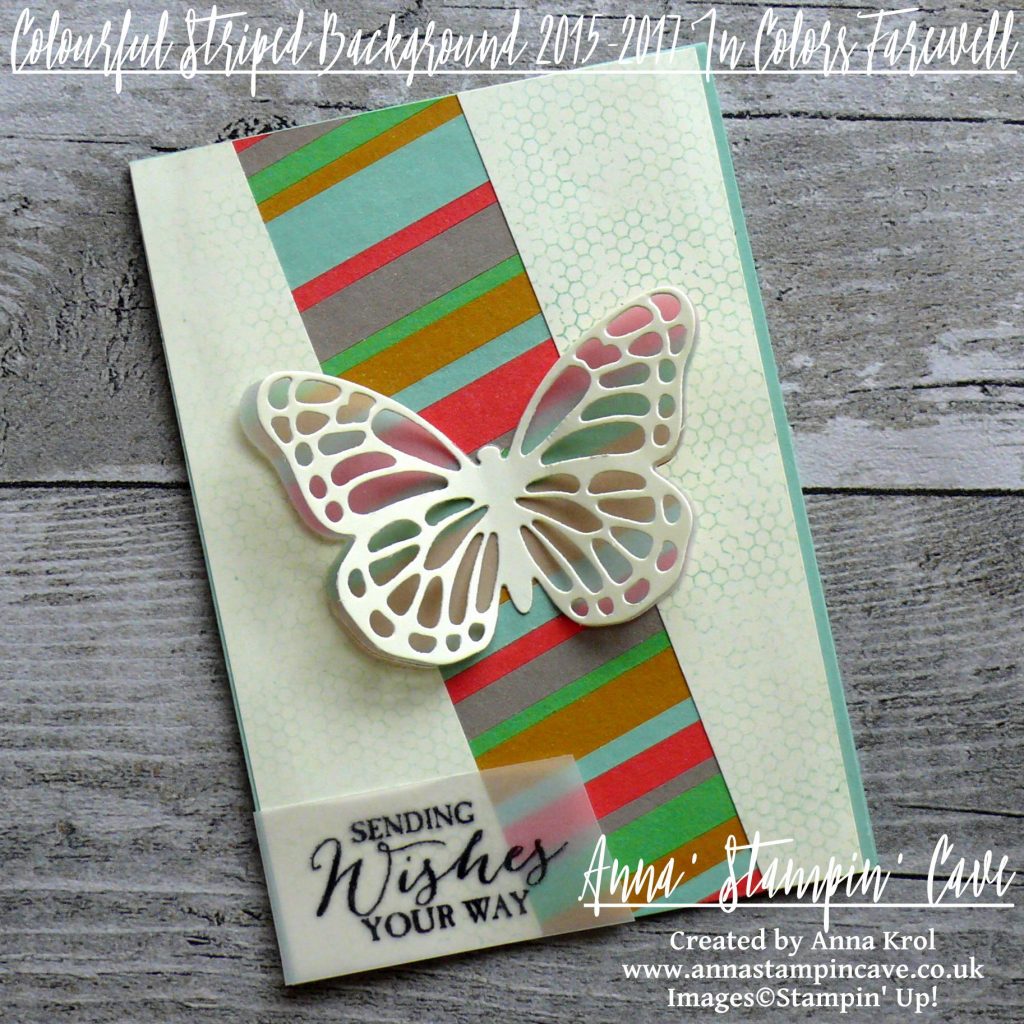
I took the Very Vanilla panel and die-cut this intricate butterfly from Butterflies Framelits Dies in the middle of it. I also die-cut solid butterfly from vellum using Bold Butterfly Framelit Dies.

Using t-ruler, I draw two diagonal (and parallel) lines at the back of my panel. Using these lines as guides, I cut my panel into three and discarded the middle piece. Next, I stamped this lovely chicken wire (kinda) pattern from Butterfly Basics Stamp Set all over the other two pieces. I stamped it in Mint Macaron and to create this faded look I stamp off twice before I stamped on the cardstock.

I adhered my Very Vanilla pieces to the background panel, with butterflies inlaid between them: vellum butterfly at the bottom and vanilla one on the top, and added the whole panel to the card base with liquid adhesive.

For the sentiment, I chose “Sending Wishes Your Way”, also from Butterfly Basics Stamp Set. I prepared vellum with embossing buddy, dabbed my stamp in Versamark and straight away in Basic Black Archival ink, and stamped it onto vellum. Sprinkled it with clear embossing powder and heat set it.  Adhered it to the card with few tiny drops of Fine-Tip Glue Pen. All that’s left was to add second Very Vanilla panel inside of the card. Done!

Once again I wanted to thank amazing GDP team for this opportunity and privilege, that I could showcase my project alongside such wonderful artists. Thank you from the bottom of my heart.

As always, I really want to encourage you to visit the Global Design Project challenge and play along. You too have a chance to be the next Guest Designer

Thank you for stopping by and have a blessed day,