Swirly Scribbles See-Through Window Shaker Card

Anna’ Stampin’ Cave – Simply Sketched Saturday Challenge – Swirly Scribbles See-Through Shaker Card

SSSC Header

Thank you for joining us for another Simply Sketched Saturday Challenge!  We’re so excited to be sharing this hop with you. The products used are all available in the current Annual, or seasonal, Stampin’ Up!®  Catalogues*. Simply use the buttons at the bottom of the post to keep hopping!

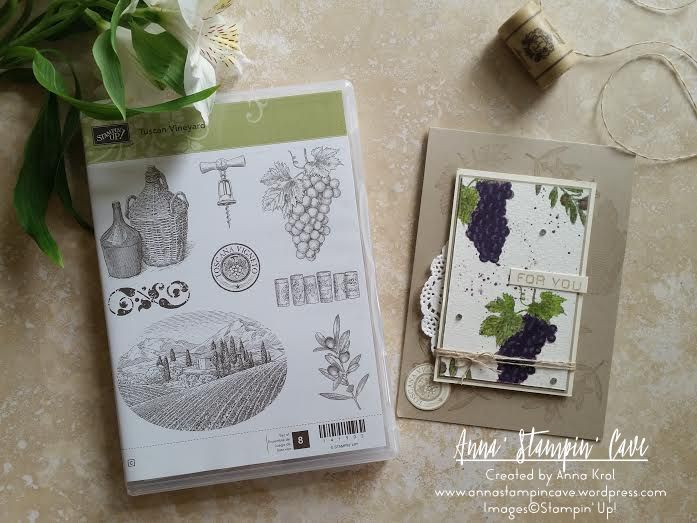
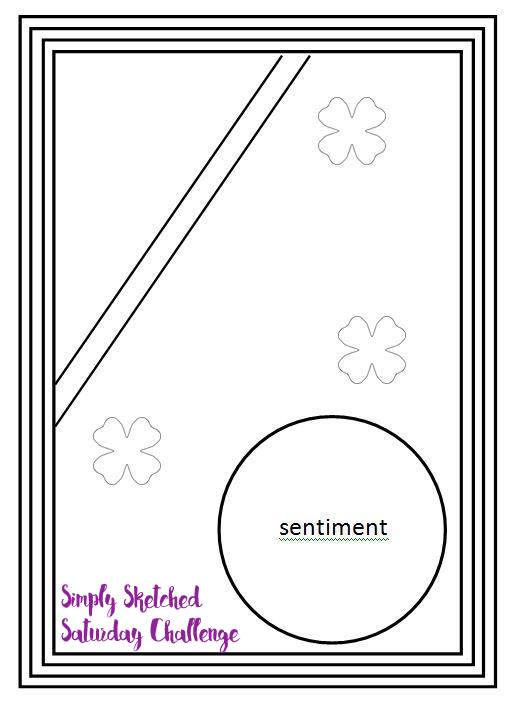
The sketch we’re working today with was designed by talented Keren Howell.

SSSC 11

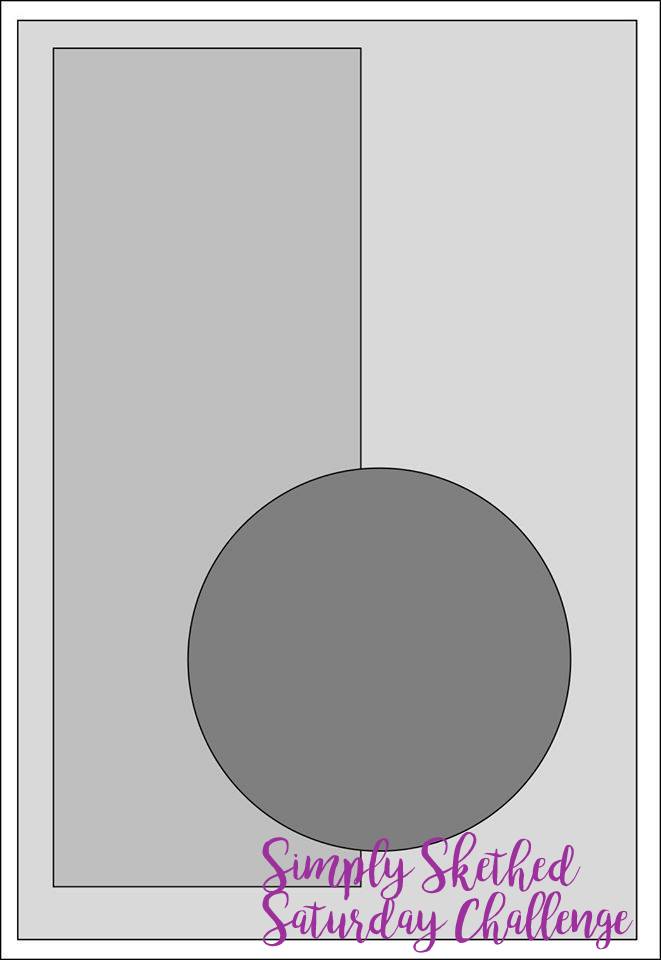
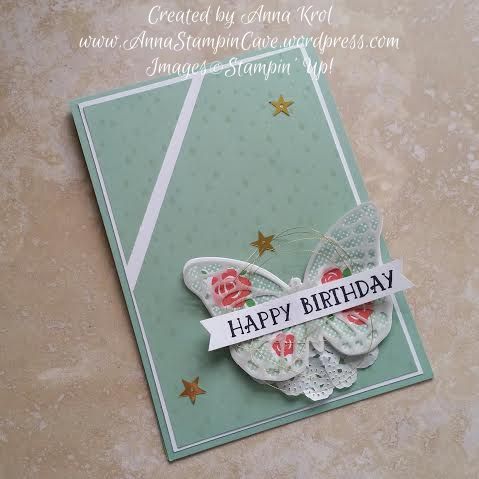
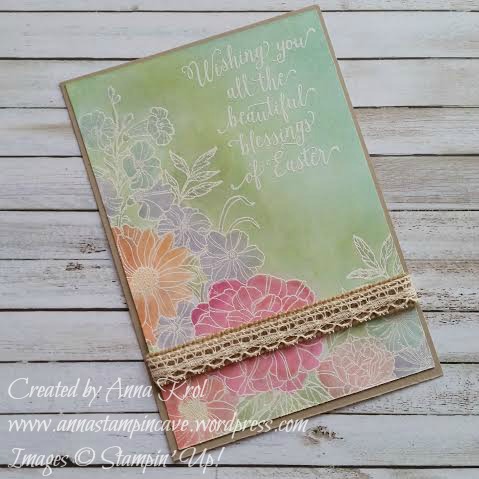
I really like this sketch. And funny how many cards I created recently could fit this sketch perfectly. But today I wanted to make something slightly different: a see-through window shaker card.

Swirly Ccribbles See-Through Window Shaker Card

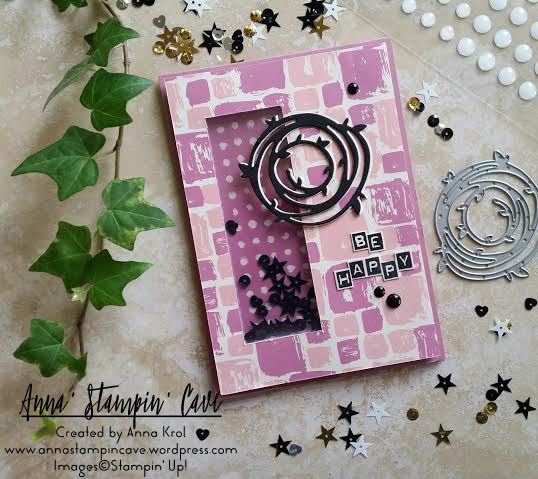
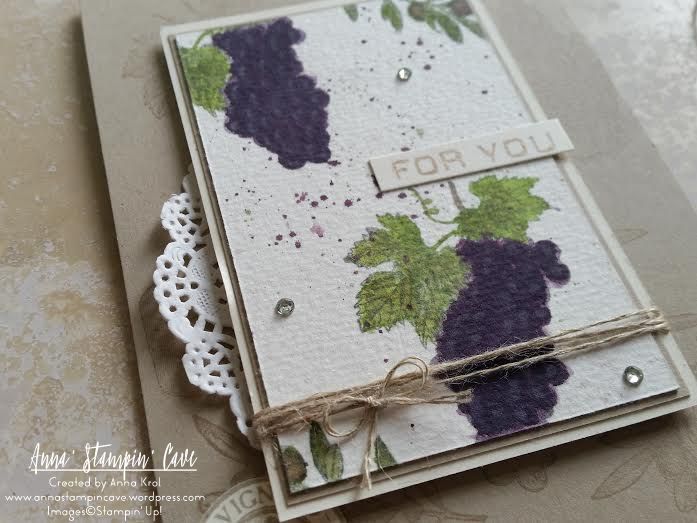
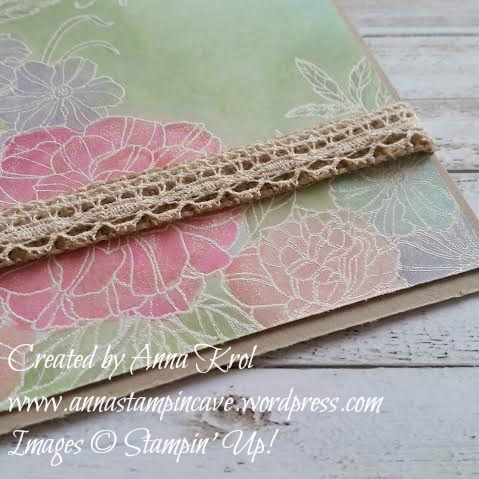
Don’t you just love Playful Palette Designer Series Paper Stack?! 48 sheets of such fun designs! I couldn’t decide which one to choose. But because I wanted to use Sweet Sugarplum cardstock for my base, these fun, wonky squares were perfect.

I cut out the window in my base first. Next, I traced the “window” on my DSP and cut it out too. Save that piece as you will need it later. I’ve used our new Foam Adhesive Strips to create the shaker. I added them around the window on the base and adhered a piece of acetate. I’ve used more foam strips around the base to adhere my piece of DSP. To finish my shaker window, I added black sequins and adhered another piece of acetate on the inside of the card.

Swirly Ccribbles See-Through Window Shaker Card 2

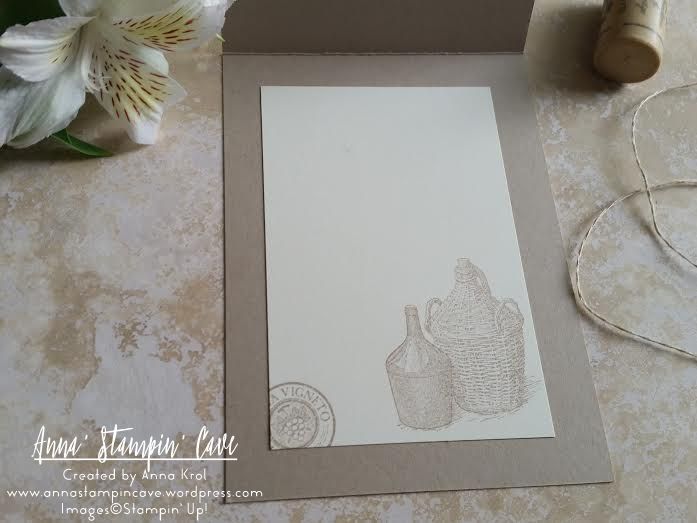
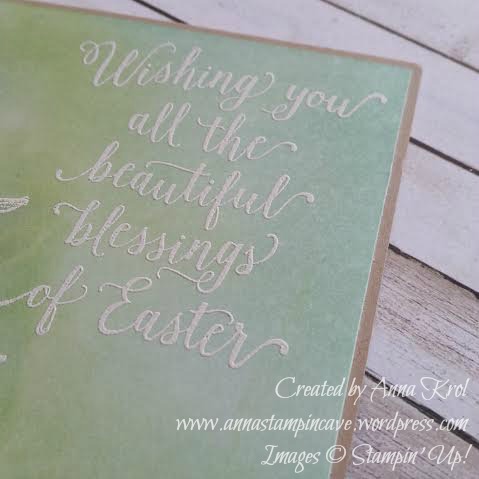
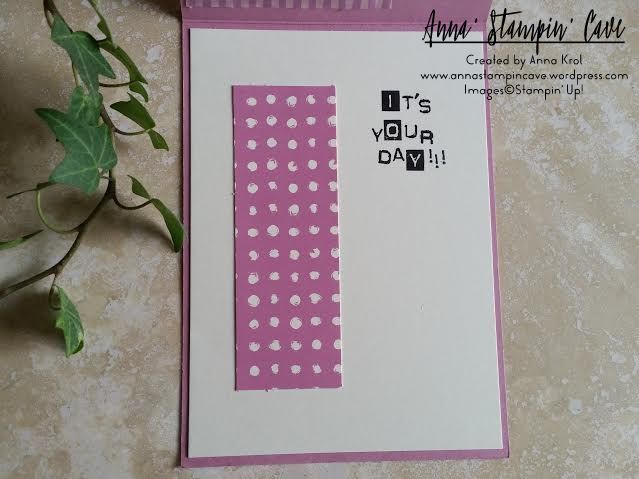
For the inside, I’ve used a Very Vanilla panel and a piece of DSP that I cut out when creating the window. But this time I’ve used the reverse side of that DSP. The placing is the key, so when the card is closed, you can see that piece through the window. The sentiment “It’s Your Day” was stamped in Basic Black Archival Ink, using Labeler Alphabet Stamp Set (which I truly love). And yes, I stamped it wonky on purpose 😉

Swirly Ccribbles See-Through Window Shaker Card inside

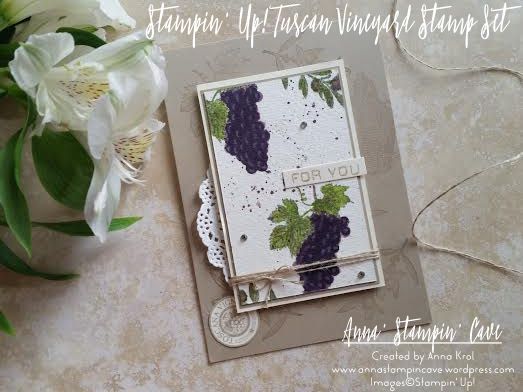
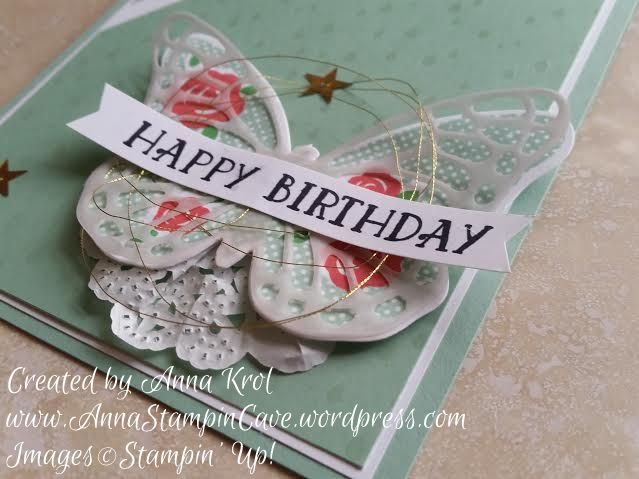
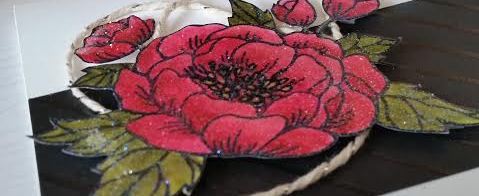
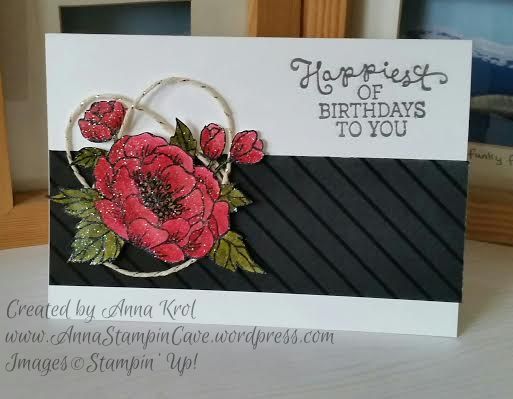
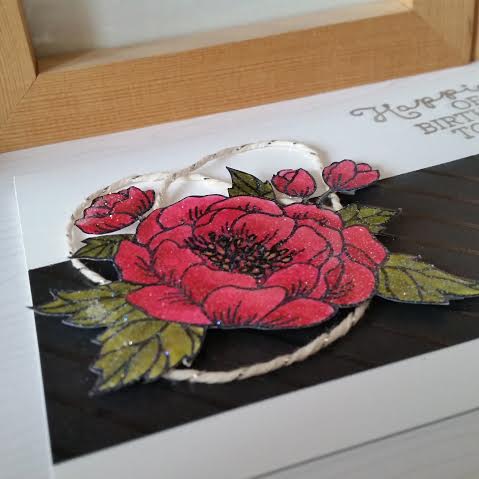
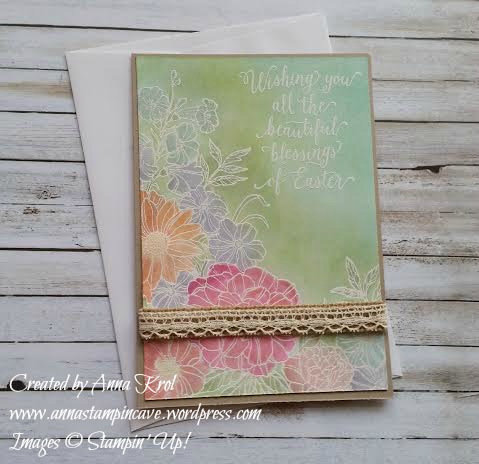
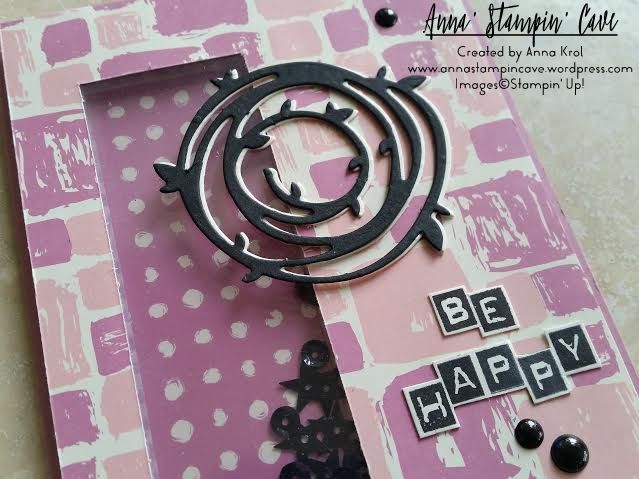
When the shaker bit and the inside of the card were done I could concentrate on the front. I die-cut two wreaths using Swirly Scribbles Thinlits Dies. One in Basic Black, and one in Very Vanilla. I glued them together slightly off-setting, so the Very Vanilla is peeking from underneath. I adhered it to the base with Multipurpose Liquid Glue. My sentiment, again, was stamped using Labeler Alphabet Stamp Set. I stamped it on a piece of Very Vanilla, and hand-cut it leaving a little border around the letters. Adhered it with liquid glue.

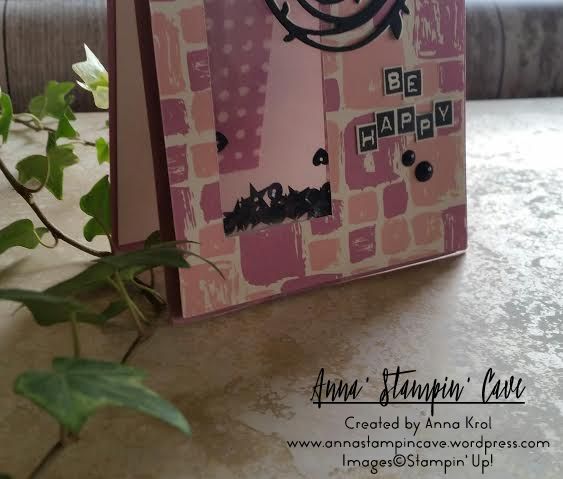
For embellishments, I’ve used White Perfect Accents, which I coloured black using a permanent marker. And that finish off my card.

Do you like my project?! If so please leave me a comment. I would love to hear from you!

Now, be sure to hop along and see more inspiring projects. Your next stop is Helen’s blog  go and see what she has made for you.

Thank you for stopping by and have a blessed day,


SSSC Previous   SSSC Next Blog

Pinkies Annual Catalogue Blog Hop – Tuscan Vineyard

blog hop logo

Thank you for joining us on another Pinkies Blog Hop! We’re showcasing lots of gorgeous projects using products from the new Stampin’ Up!® Annual Catalogue. Simply use the buttons at the end of each post to keep hopping!

Tuscan Vineyard Stamp Set

When Chris, my husband, saw Stampin’ Up! Tuscan Vineyard Stamp Set he said: “we have to have it” ;). In our home, we love to have a glass of good wine on special occasion, or when friends come over. We also make our own wine from the fruits of our garden. Chris (my husband) is very passionate about it. When he was young he’s spent some time on a French vineyard, and he fell in love with the art of making wine.

Tuscan Vineyard for you card

I think this set is perfect for collages, but I decided to use my favourite technique – watercolour. First, I randomly stamped the base of my card using various images from the stamp set. I used Crumb Cake cardstock and ink pad for tone on tone look. Next, I took a piece of watercolour paper and I stamped bunches of grapes and olive branches using Basic Grey Archival ink and water coloured them with an aqua painter. For fine lines, I’ve used Blender Pens.

Tuscan Vineyard for you card - close up

When I was happy with the results I made some random splotches with Perfect Plum and Wild Wasabi. To assemble my card I backed my watercolour panel with a piece of Crumb Cake and Very Vanilla. I wrap linen thread around the panel, added a piece of new doily underneath, and adhere it to the card base using dimensionals. I stamped round image from the same set, that reads Toscana Vigneto on a piece of Very Vanilla and tucked it underneath the panel. Few rhinestones, simple sentiment, and my card was done. I also stamped inside of the card.

Tuscan Vineyard - inside of the card

I truly hope you enjoyed coming to my blog today and see my card. As always, if you wish to purchase any of the products I have used, simply click the images below to go directly to my online shop.

Now, be sure to hop along and see more inspiring projects. Your next stop is lovely Kim  go and see what she has made using the new products.

next

previous

Thank you for stopping by and have a blessed day! Product List

Aqua Painters

£15.50

Blender Pens

£10.75

Linen Thread

£4.25

Simply Sketched Saturday Challenge #10 – Butterfly Birthday

Anna’ Stampin’ Cave – Simply Sketched Saturday Challenge #10 – Butterfly Birthday

SSSC Header

Thank you for joining us for another Simply Sketched Saturday Challenge!  We’re so excited to be sharing this hop with you. The products used are all available in the current Annual, or seasonal, Stampin’ Up!®  Catalogues*. Simply use the buttons at the bottom of the post to keep hopping!

And today’s sketch was designed by lovely Kathleen from Lilypopcrafts.

SSSC 10

This is such a great sketch, with lots of layers, which I truly love. But I challenged myself to create CAS (clean and simple) card. And I think I did well.

butterfly birthday

The base of my card is top folded A6 Mint Macaron, with layers of Whisper White and Color Me Irresistible Specialty DSP.

butterfly birthday 3

I decided to use beautiful (and retiring) stamp set Floral Wings. I stamped the butterfly in Mint Macaron, roses in Watermelon Wonder and leaves in Cucumber Crush. Next, I die cut the butterfly using Bold Butterflies Framelits and another one on vellum using a middle of Butterflies Thinlits and layered them together. I cut 1/4 of a Tea Lace Paper Doily and attached it underneath my butterfly and adhere it to the card base with dimensionals.

butterfly birthday 2

The sentiment comes from Number Of Years. I stamped it in Basic Black Archival Ink on a strip of Whisper White and punched both ends into banners using Banner Punch (also retiring).  I took Gold Metallic thread, created some messy loops and add it underneath the banner. Few gold sequins finished off the card.

butterfly birthday 4

Do you like my project?! If so please leave me a comment. I would love to hear from you!

Now, be sure to hop along and see more inspiring projects. Your next stop is Karen’s blog  go and see what she has made for you.

Thank you for stopping by and have a blessed day,


SSSC Previous   SSSC Next Blog

CAS Card – Birthday Blooms Meets Wink Of Stella

Anna’ Stampin’ Cave – CAS Card – Birthday Blooms Meets Wink Of Stella

Birthday Blooms 3

Today I’ve got for you beautiful, clean and simple (CAS) birthday card. I am so happy that Birthday Blooms stamp set staying with us for another year. I love this set for it’s stunning, bold flower image.

For the base, I took a piece of  Whisper White cardstock that measures 5-7/8″x 8-2/8″ and fold it in half at 4-1/8″. Next, I cut a strip of this beautiful, embossed Color Me Irresistible DSP in Basic Black and adhere it to my base. The strip measures 2″ x 5-7/8″.

Birthday Blooms

I stamped the flower image in Basic Black Archival ink and watercolour it. For the petals, I’ve used Watermelon Wonder and Rose Red. Center of the flower is Crushed Curry – I fell in love with this shade of yellow just recently. And leaves are a mix of Old Olive with a gentle touch of Always Artichoke.  First, I added my colours and shadings with blender pens. Next, I used my Aqua Painter to blend it nicely and to add more colour or shading if required.

I let my flower dry completely and then fussy cut it. I should probably mention that as I knew I will fussy cut it, I’ve used regular Whisper White cardstock for the flower. Because my hands are quite numb and I find it hard to do more intricate things, I cut off tiny leaves from the flower. Really wasn’t able to fussy cut them. However I’m pretty chuffed with myself that I managed to fussy cut the little buds, it took me a while, though.

Birthday Blooms 3

While the flower was drying I stamped the sentiment, from the same stamp set, in Versamark and heat embossed it with silver embossing powder. I really like this curly font. I assembled the flower using dimensionals and added some Silver Metallic Baker’s Twine underneath.

Birthday Blooms 2

I stamped the inside of my card too. I used the single flower from the set, but this time, I colour it only with blender pen so it doesn’t bleed through. I also added a strip of the same DSP (5-7/8″ x 1/2″), to match the card front.

The last touch was to add some shimmer to my beautiful flower, using Clear Wink Of Stella Glitter Brush Pen. I love this stuff!

Birthday Blooms 5

I love how this card turned out! I have to admit that CAS cards are growing on me but I still have a tendency to overthink and overcomplicate them. I’m a grungy-distress at heart, you know haha

I’m adding my card to Crazy 4 Challenges #C4C333 – April Showers bring May flowers!

Now I would love to hear from you. Do you like my today’s card?

Thank you for stopping by! Have a blessed day,

Embossing Resist Technique With Corner Garden Background Stamp By Stampin’ Up!

Embossing Resist Technique With Corner Garden Background Stamp By Stampin’ Up!

Corner Garden Easter Card 4

While Easter is just around the corner, today I’ve got for you beautiful Easter card using embossing resist technique. I love this technique as it has a real WOW factor to it! I love how the colours just POP on the card when sponged or water coloured over the heat embossing.

But first thing first – I wanted to apologise for being absent on the blog for a long time. I didn’t mean to neglect anyone of you but I’ve been struggling with a very nasty bacterial chest infection, which knocked me down, literally. I wasn’t able to do anything around the house, or even myself (not to mention crafting). So blessed to have a wonderful husband who took care of the house and our family, cooking, cleaning, etc and most of all – me.

The project I share today was made for our team swap at the end of February. But since the infection kicked in I wasn’t able to share it with you at all.

Corner Garden Easter Card

To create my card I stamped a beautiful image from Corner Garden background stamp in Versamark on the piece of regular Whisper White. Remember to always use an antistatic tool on your card before stamping your image if you want to heat emboss it, as it will take all the static from your card, and embossing powder will stick only to your stamped image. The sentiment is stamped in Versamak too. Both: flowers and sentiment are heat embossed in white.

Now the fun part starts – water colouring! You may think: oh no! You should use a watercolour paper. But to be honest, if you don’t plan to soak your cardstock in water, use your aqua painters gently, and your layer will be mounted on the base – you can add your water colouring on regular cardstock without any problem. Just like I did. Believe me or not, I coloured all my flowers and leaves using aqua painter. As they say, the devil is in the detail. You can’t allow aqua paint brush to carry lots of water, it needs to be slightly wet. You only use it to pick the colour from the lid of your ink pad ( to have some ink on your lid you have to squeeze you ink pad gently when it’s closed). And you pick more colour with every stroke or two. You can’t paint with water only as it will damage your paper if using regular Whisper White.

Corner Garden Easter Card 2

When all the colouring was done I sponged the background using Pear Pizzazz, Wild Wasabi and Pool Party. Any place of the background that I thought was too dark, I lightened with Whisper White Craft ink pad. I also lightened the look of some flowers, especially the Melon Mambo one, the large at the bottom of my card. I also added some Clear Wink of Stella to my flowers for a shimmer.

Corner Garden Easter Card 3

To embellish my card I cut a narrow strip of Burlap Ribbon, added Venetian Crochet Trim at the top and add it at the bottom of my layer. Next, I mount it on my Crumb Cake base.

I love that slight rustic feel to my card, even though there’s lots of shimmer on the flowers from Wink of Stella. It may not be your traditional Easter card but I love it! And you can always change a sentiment and make it into the birthday card, get well or congratulations card maybe? Possibilities are endless. If it comes to Easter I personally prefer cards with the strong message like this one I’ve made last year:

he is risen 6

Now I would love to hear from you! Do you prefer more traditional Easter cards? Or maybe you’re a fan of fun and cheeky ones (I’ve seen lots of these lately)? Let me know in the comments below.

Have a blessed day,