Brusho Love – Kylie Bertucci’s International Project Highlights

Anna’ Stampin’ Cave – Brusho Love for Kylie Bertucci’s International Project Highlights

Thanks for coming to my blog today! We are being highlighted internationally by Kylie Bertucci and you are able to VOTE  for my project. The top ten winners will get to be part of an international blog hop so please vote for my project. My project is under number 7!  You can do it here or use a button at the end of my post.

Our theme for this highlight is ‘Favourite Sale-a-bration Or Occasions Catalogue Products’. So what else could it be for me if not Brusho Crystal Colour!!
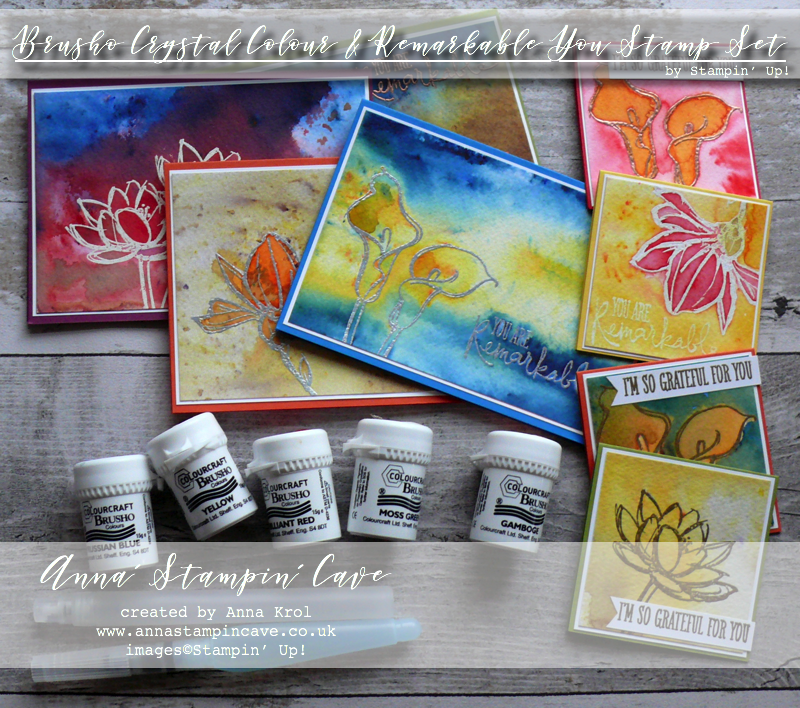
I literally squealed with delight (ask my hubby haha) when I saw them in our new Spring Summer Catalogue!! Truly couldn’t ask for more!

They are high quality, highly pigmented paint powders, water-based and most of all completely non-toxic.

They come in a selection of five colours:

  • Brilliant Red – the name says it all
  • Gamboge – orange with hints of yellow
  • Moss Green – beautiful earthy green colour with speckles of purple
  • Prussian Blue – very vibrant blue, must be my fav
  • Yellow – again, very vibrant

These are not a Stampin’ Up! colours, but as you will see in a minute, you can easily match them.

Brusho is not a product that you can bring to the table, create one card and then put it back. Nope, it won’t happen. Once you take it out and start playing with these colours, the fun has no end! And I warn you: It’s highly addictive!

You can use these colours separately but you can also mix &match and just have fun with them. Add more or less water to create more vibrant, or softer look.

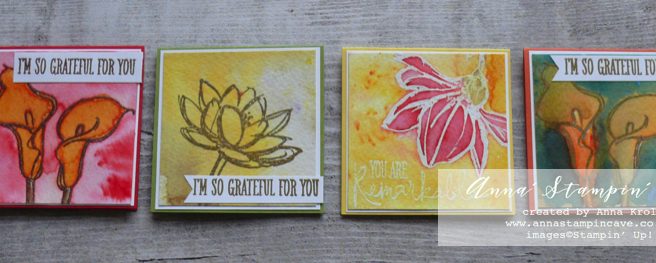
To highlight this amazing product I created eight cards: four standard A6 size and four tiny 3×3″.

Before I start few details: I only used watercolour paper; to keep it as easy as possible I only used one stamp set: Remarkably You; each card has been heat-embossed first in either white, silver, gold or copper before I added Brusho.
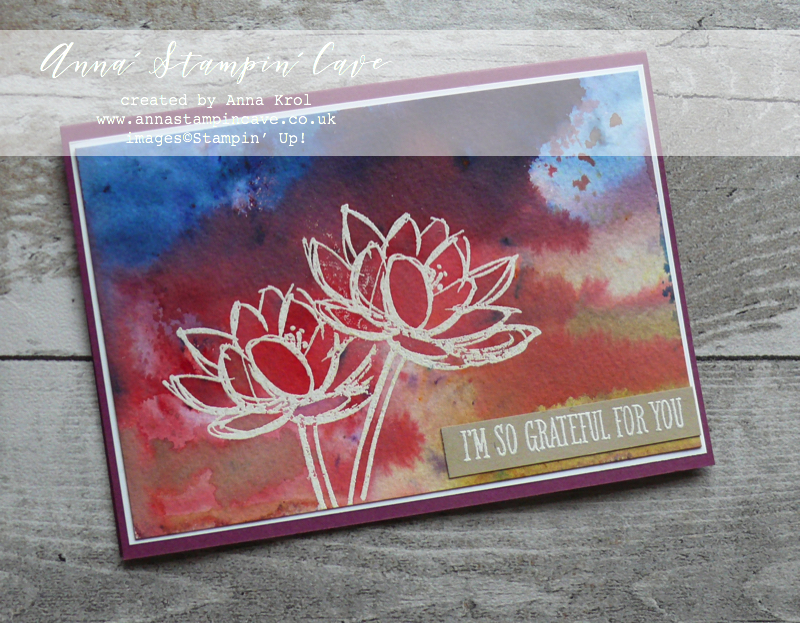
Card base: Rich Razzleberry

For this first card, I simply wet paper entirely with my aqua painter and sprinkled brusho crystals over the surface. It’s actually quite therapeutic to watch how the colour travels. And…I’ve used all 5 colours of brusho too! Brave, I know haha, but how fun! Once I’ve added my first batch of crystals, I spritz it with water to help the colours move and I added more colour. I kept adding water and colour until I was happy.

I looked at my still quite wet paper and had a thought, that I’ve got so much pigmented water pool on this piece, I could actually create another card so…I took next piece of watercolour paper, pressed it to the top, and waited few moments for the water/colour to transfer.
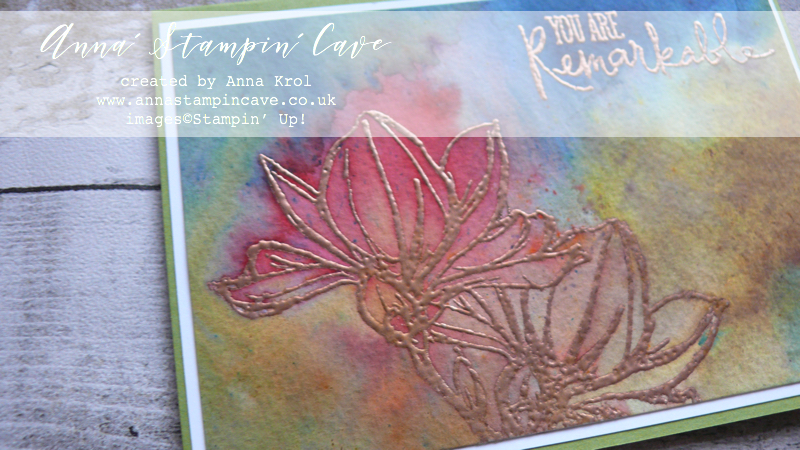
Card base: Old Olive

And this is what it looked like. Nearly, because I spitz it once or two and sprinkled some Moss Green sparingly. I love how much softer this card came out.

Same technique, brusho to wet, I’ve used for this cute 3×3″ card
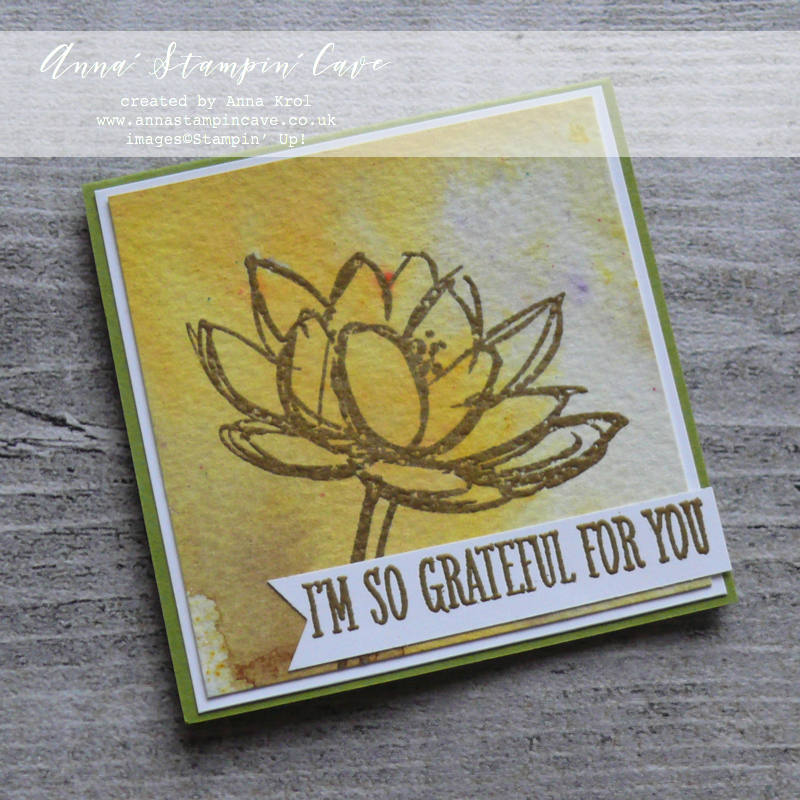
Brusho: Yellow, Moss Green; card base: Old Olive

For this next card, I decided to sprinkle Brusho on the dry watercolour panel first, and spritz it with water later.
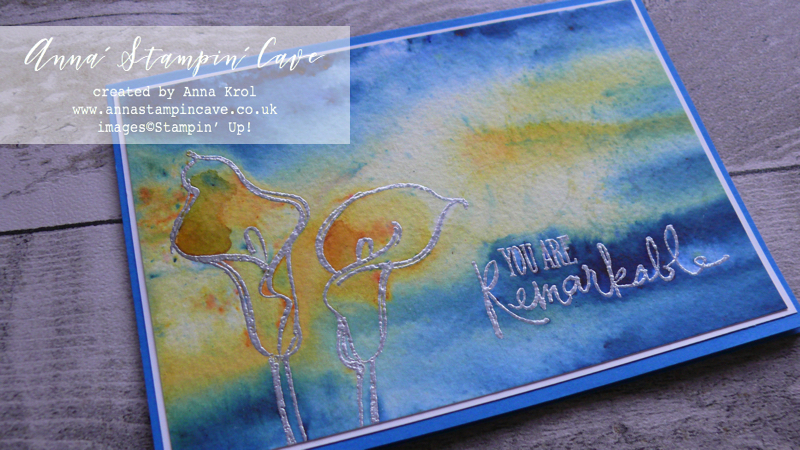
Card base: Pacific Point

I’ve used Prussian Blue and Yellow and tried hard not to mix both colours too much. I really loved this effect! Which gave me an idea of ‘colour-blocking with Brusho’ technique. Not sure if there was such a technique before (never heard of). So if not, now it is, and I invented it hahaha (j/k)
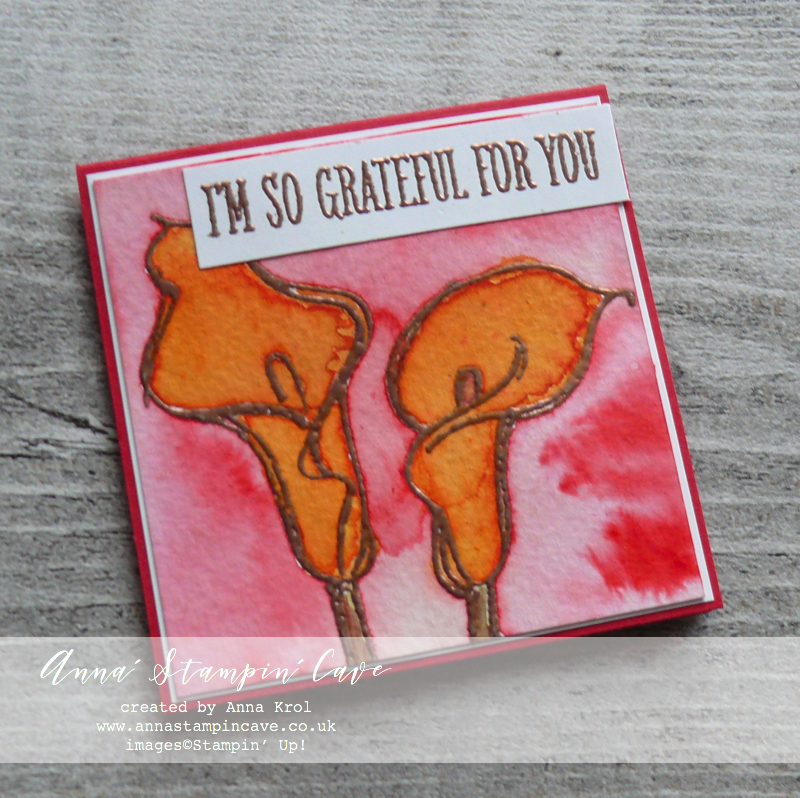
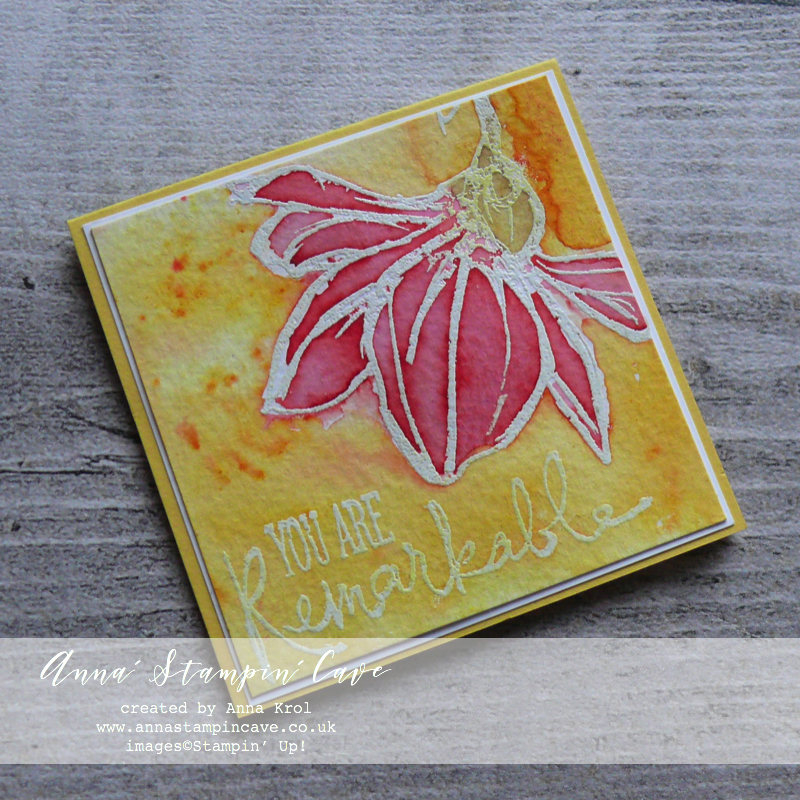
Flower: Gamboge; background: Brilliant Red; stem: Moss Green; card base Real Red
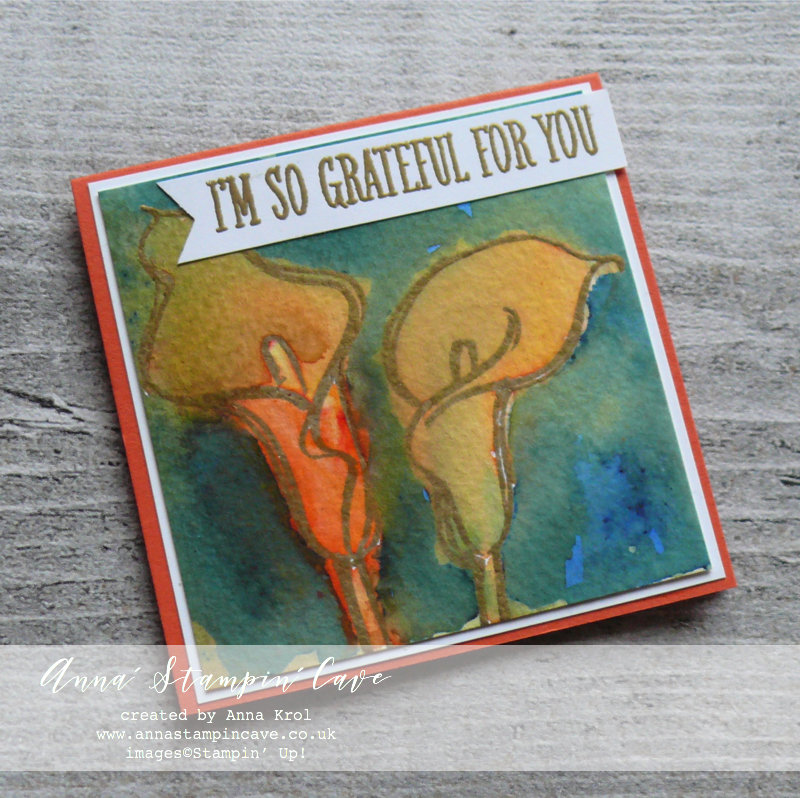
Flower: Gamboge; background: Moss Green and Prussian Blue; card base Tangerine Tango
Flower: Brilliant Red; background: Yellow; stem: Moss Green; card base: Pacific Point

For each of these cards above, I’ve added a solid pool of water inside the flowers, sprinkled with Brusho powder and moved the colour around using aqua painter. Once flowers were dry, I wet the background and added brusho in contrasting colour. Again, I helped the colours move around with aqua painter. Please do not stress if the colours bleed into each other. It creates beautiful, organic, watercolour look.
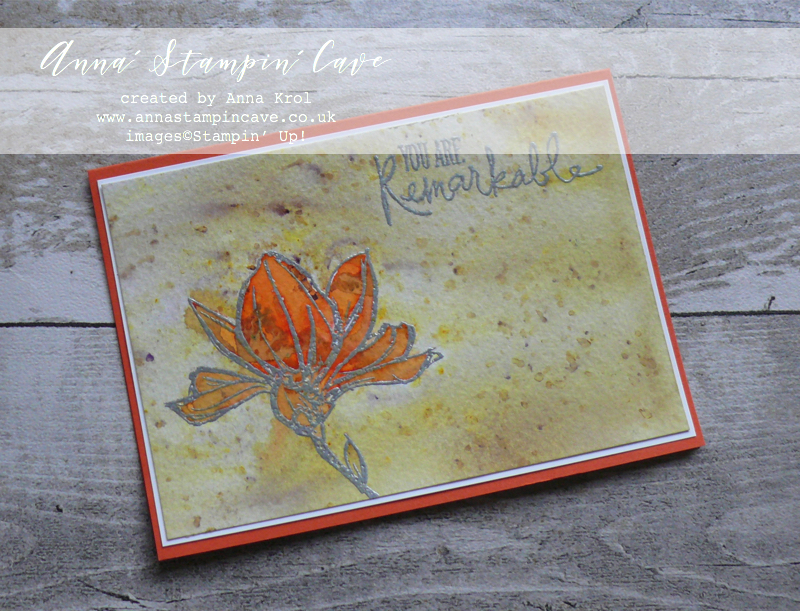
Card base: Tangerine Tango

I really love the effect brusho created on my last card. I’ve used same ‘colour-blocking with Brusho’ technique. For the flower, I’ve used this amazingly vibrant Gamboge. Once my Flower was dry I masked it with a piece of copy paper (smaller than a flower itself, I didn’t aim for perfection here). I sprinkled Moss Green powder all-over the background and spritz it with water very well until all powder dissolved. When the background was still slightly wet, I’ve added some more of the Moss Green powder. But this time I let the powder dry itself, without adding more water to it. I love these speckles of purple it created!

And these are all my cards for today. I hope that it inspired you to give your brusho some love too. Just take a watercolour paper, brusho, and have some fun. Let your imagination run wild. There’s no right or wrong. Can’t wait to see what you come up with!

Thank you so much for visiting my blog today! Make sure you head over to Kylie’s blog to check all lovely projects and vote for your favourites. Hope my project will be among them. My project is under number 7!

As always, if you wish to purchase any of products I have used, simply click the images below to go directly to my online store and don’t forget to enter the hostess code for the month of January GK3G3AR3  to receive a gift from me.

Thank you for stopping by and have a blessed day,

Hostess Code for January 2018 GK3G3AR3 Use this code in the month of January and receive a gift from me.

Special Notes:1) Make sure you select Anna Krol as your demonstrator;
2) If you select “No Contact” box I do not have access to your name and can’t send you a gift;
3) If your order is £150 or more do not use the code and grab your own Stampin’ Rewards + gift from me

Aqua Painters

£15.50


Don’t forget to check:

Spring Summer Catalogue Paper & Ribbon Shares. Shares are open to Austria, France, Germany, Netherlands & United Kingdom. 102 sheets of DSP & 2 yards of each type of ribbon from Spring/Summer Catalogue. Click here for more details —>

The New Stampin’ Up! Spring/Summer 2017 Catalogue and Sale-A-Bration is LIVE and it’s AMAZING! For every 60 €/£45, you spend either from Spring Summer Catalogue or Annual Catalogue, you will get to choose one FREE  level 1 product from SAB brochure! If you spend 120 €/£90, you get one FREE level 2 product, OR, you can choose two level 1 items. If you spend 180 €/£135, you have the option to choose three level 1 items or one level 1 item and one level 2 item. Click here for more details —>

Simply Sketched Saturday Challenge #17 – Paisleys & Posies

Anna’ Stampin’ Cave – Simply Sketched Saturday Challenge #17 – Paisleys & Posies

SSSC Header

Thank you for joining us for another Simply Sketched Saturday Challenge!  We are so excited to be sharing this hop with you. The products used are all available in the current Annual, or seasonal, Stampin’ Up!®  Catalogues*. Simply use the buttons at the bottom of the post to keep hopping!

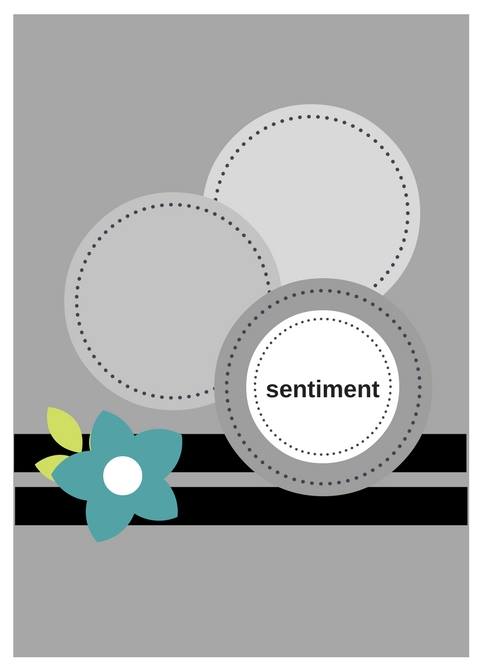
Hello and welcome after a long break. Today’s brilliant sketch has been designed by lovely Sam from Sam’s Sentiments blog. Just check how beautiful this sketch is?! Sadly Sam wasn’t able to take a part in the hop. Such a shame.

sssc-17

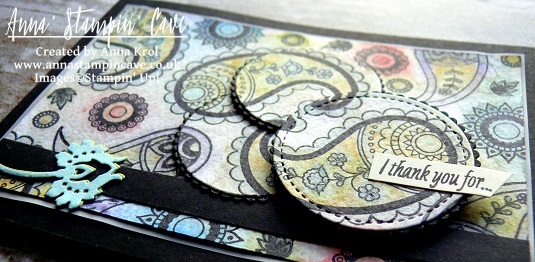
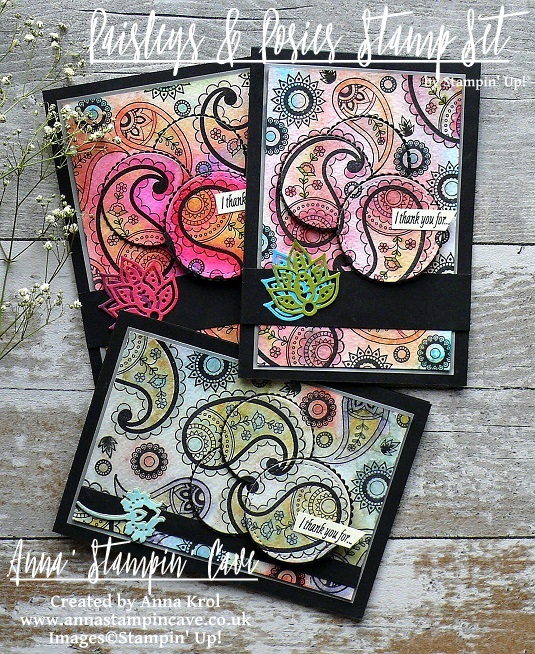
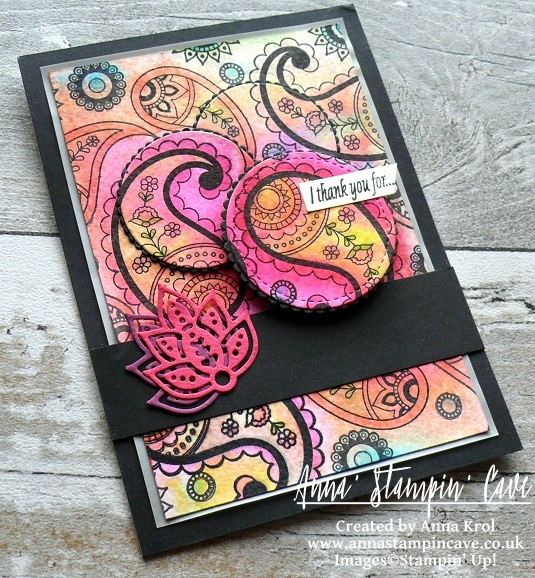
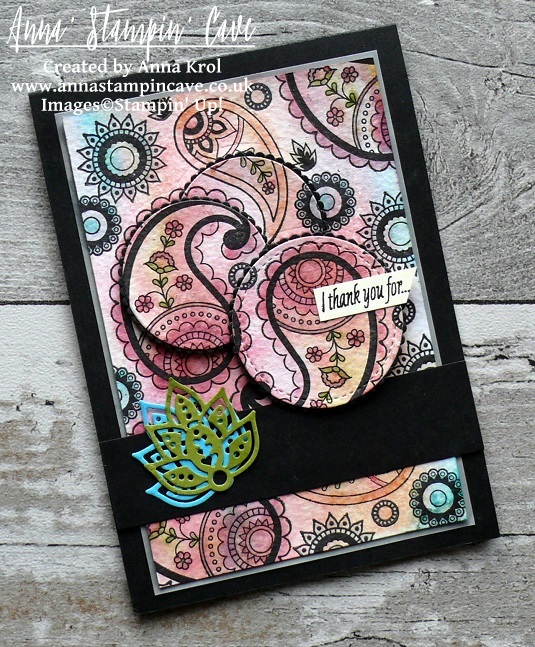
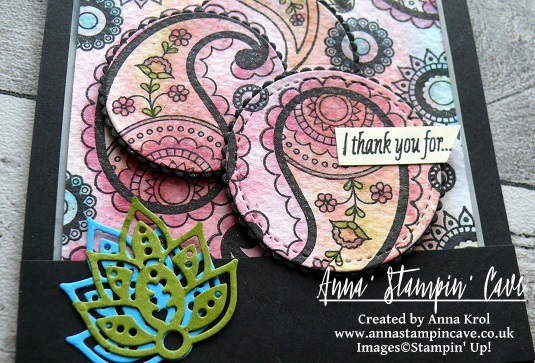
I’ve been so busy lately with home renovating and night shifts, that only a couple of days ago I realised our monthly blog hop is today. I panic slightly first but the moment I sit down to the sketch, I knew exactly what I wanted to make. I decided to ‘dig out’ my favourite stamp set from Autumn-Winter catalogue: Paisleys & Posies, as it seemed perfect for the technique I wanted to try: watercolour with markers. Well, it’s kinda watercolour. Anyhow. I had so much fun that I created not one but three cards.

anna-stampin-cave-stampin-up-paisleys-posies-stamp-set-diy-watecolour-dsp

Aren’t these gorgeous?! Such bold designs! And they really super easy to make.

Paisleys & Posies cards dimensions:

  • 3x Basic Black cardstock: 11-6/8″ x 4-1/8″ scored in half at 5-7/8″ (29.7 x 10.5 cm scored in half at 14.8 cm) + 2 x strips 1″x 4-1/8″ + 1 stripe 3/8″x 5-2/8″
  • 3x White Vellum cardstock: 3-5/8″ x 5-3/8″(9,2 x 13,6 cm)
  • 3x Water Colour Paper: 3-1/2″ x 5-2/8″ (8,9 x 13,3 cm)
  • 3x Very Vanilla cardstock: 3-1/2″ x 5″ for the inside panels + scraps for sentiments
  • scraps of the following cardstocks for die-cutting: Basic Black, Rich Razzleberry, Melon Mambo, Tempting Turquoise, Old Olive, Pool Party & Pear Pizzazz

To start off, I stamped various images from Paisleys & Posies Stamp Set onto the watercolour panel in Basic Black Archival Ink.

Tip of the day: Because I did my cards late at night, I had no time for the ink to dry completely but I didn’t want to smear black all over my watercolour panels. So I sprinkled clear embossing powder over the whole piece once I was done with stamping. But I didn’t heat set it, I just let embossing powder to ‘soak in’ all the ‘moisture’. I let it sit for couple of minutes and then brush off the powder.

When my panels were ready I started to colour them in with Stampin’ Markers. Nothing fancy really, and no need to stay in lines either.

anna-stampin-cave-stampin-up-paisleys-posies-stamp-set-diy-watecolour-dsp-vivid-brights

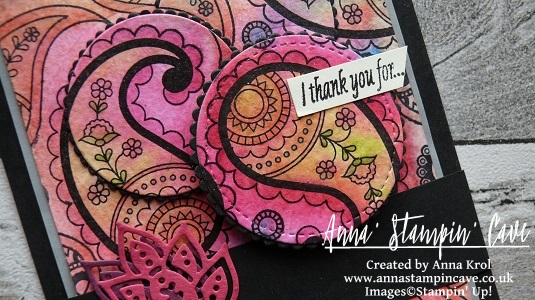
For the first card, I’ve used Melon Mambo, Tangerine Tango, Daffodil Delight, Old Olive and Tempting Turquoise. When all the images were coloured in, I spritzed the whole panel with water. And that’s when all the ‘magic’ happen, as all the colours blend together nicely creating a beautiful watercolour piece. It’s like making your own watercolour DSP. And each piece is different.

To add more colour I dried my panel with a heat tool. Next,  I colour it in again with markers and spritz it with water. You can build up the colour as much as you wish, just remember to dry your panel in-between.

For my next card, I decided to use all markers from Brights family. But this time I only spritz it once, hence much more subtle look.

anna-stampin-cave-stampin-up-paisleys-posies-stamp-set-diy-watecolour-dsp-brights

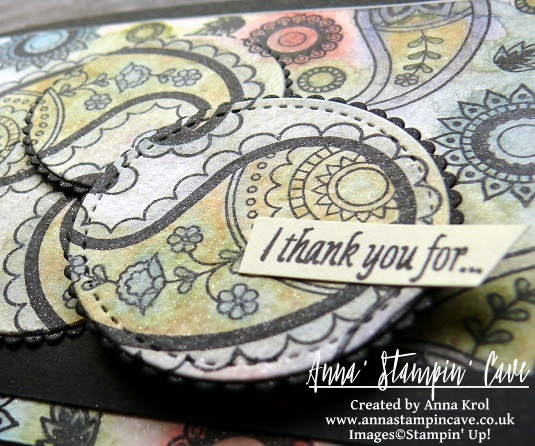
For the last cardI’ve used Subtles Stampin’ Markers and I have to say they needed the most work. I had to dry my piece and keep adding more colour several times until I was happy with the outcome. Once all my panels were created I decided to add some shimmer to them. I added few drops of Clear Wink of Stella to the water in my spritzer, and I spritzed all the panels.

anna-stampin-cave-stampin-up-paisleys-posies-stamp-set-diy-watecolour-dsp-subtles

Once the panels were dry I die-cut three circles from each panel: full circle using 1-7/8” circle from Stitched Shapes Framelits Dies and two ‘partial’ circles using Layered Circle Framelits Dies. I also die-cut slightly bigger scalloped circles from Basic Black cardstock to go underneath.

anna-stampin-cave-stampin-up-paisleys-posies-stamp-set-subtles

To assemble my cards I adhered vellum to card bases and watercolour panels on top. Next, I glued black scalloped circles underneath the watercolour ones and in-laid them back into the panels. I also adhered Basic Black strips, sliding them slightly underneath the die-cut circles.

anna-stampin-cave-stampin-up-paisleys-posies-stamp-set-vivid-brights

I stamped my sentiments (masking a part of it) on a 3/8″ strip of Very Vanilla cardstock, and adhered it to the card with liquid glue. The full sentiment is stamped inside of the card.

anna-stampin-cave-stampin-up-paisleys-posies-stamp-set-brights

For the final touch, I die-cut some leaves and flowers using a couple of intricate dies from Paisleys Framelits Dies and adhered them to the black stripes.

And these are my cards for today. I hope you like my take on the sketch. Now be sure to hop along to see more inspiring projects. Your next stop is very talented Hannah.

Thank you for stopping by and have a blessed day,

SSSC Previous  SSSC Next Blog

The Creative Flow Blog Hop – No Red Romance With Large Letters Framelits Dies

Anna’ Stampin’ Cave – The Creative Flow Blog Hop – No Red Romance With Large Letters Framelits Dies

the-creative-flow-header

Thank you for joining us on our Creative Flow Blog Hop. Each month we are set a challenge to creatively stretch our imaginations. The products we have used are all available in the current Annual and/or seasonal Stampin’ Up!® catalogues. To hop along, please use the buttons at the bottom of the post to keep hopping.

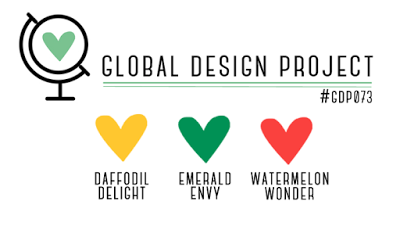
Today’s challenge was to create no-red Valentines Day card, and for some time I wasn’t sure what colour scheme to use. But Global Design Project came to the rescue with their #073 Colour Challenge. I really love this unusual, bright and oh-so-not-valentine’s colour mash-up, so I decided to combine these two together 🙂

gdp_colour_challenge73_png

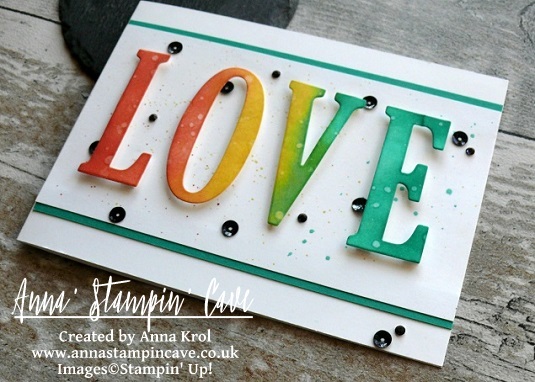
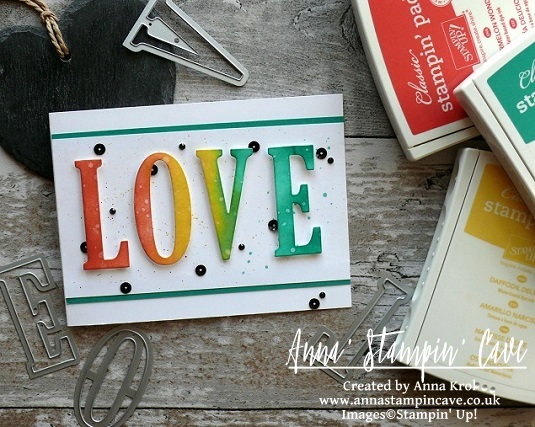
I know it supposed to be no-red, but Watermelon Wonder is rather orangy red right lol And here’s what I came up with: a perfect card to give to my hubby on that special day.

anna-stampin-cave-stampin-up-large-letters-framelits-dies-no-red-valentines-day-card

No-Red Romance card dimensions:

  • Whisper White cardstock: 11-6/8″ x 4-1/8″ scored in half at 5-7/8″ (29.7 x 10.5 cm scored in half at 14.8 cm)
  • Whisper White panel: 5-7/8″x 3″
  • Emerald Envy cardstock: 2 strips 5-7/8 long and briefly 2/8″wide
  • a piece of Whisper White for die-cutting

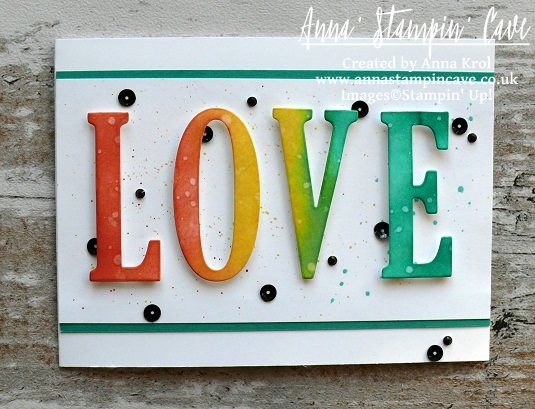
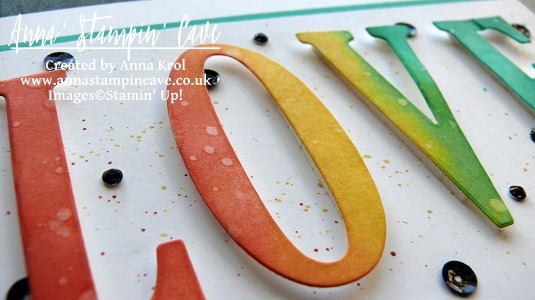
The first step was to die-cut word ‘LOVE’ using Large Letters Framelits Dies. I’ve used regular Whisper White cardstock for this. I’ve sponged the letters with my inks as follows: Watermelon Wonder first, Daffodil Delight next, and Emerald Envy as the last one creating ‘rainbow’ effect. I’ve paid special attention there’s smooth transition from one colour to another.

anna-stampin-cave-stampin-up-large-letters-framelits-dies-no-red-valentines-day-distressed-card

When I was done and happy with blending, I took a small paintbrush and flicked some water droplets all over the letters. I love how the water reactivates the ink. Such a simple step but add so much interest and texture to the (otherwise) flat surface.

Next, I took Whisper White panel and using the same small brush and my ink pads as a palette, I speckled some inks over the whole panel. I tried to keep my speckles somehow under control colour-wise, so the speckles match the letters that go over them.

Remember: The smaller is the brush, the smaller are the speckles.

When speckles dried, I adhered two strips of Emerald Envy cardstock underneath, one on top and one on the bottom of the panel.

anna-stampin-cave-stampin-up-large-letters-framelits-dies-no-red-valentines-card

Now to assemble the card. I adhered the panel to the card base using Fast Fuse adhesive. And I have to say I’m happy to say it seems I finally made friends with this adhesive haha.

I wanted to pop-out my letters so I’ve used Foam Adhesive Strips to adhere them to the panel. You could use any regular foam adhesive, but these strips are perfect for adhering die-cuts that are quite narrow in shape. They are long but you can easily cut them to the length you want/need.

I was really happy how nicely this card was coming together, but I was desperate to add some embellishments to it. Yes I know, a card for a hubby and embellishments?! I must have lost my mind, haha. But why not?

anna-stampin-cave-stampin-up-large-letters-framelits-dies-no-red-valentines-day-card

So I scattered black sequins from Metallics Sequin Assortment pack all over my card and tried to figure out the placing and how many I will use. Once I was happy I adhered them with Fine-Tip Glue Pen. For the final touch, I coloured some rhinestones with black Sharpie and added them to the card too.

That’s it from me for today. I really hope you enjoyed my step by step directions.

For those of you who asked about stretching your stitched dies using partial die-cutting – I will have a short how-to post for you soon. So watch this space.

Now be sure to hop along our tiny blog hop to see more inspiring projects. Your next stop is lovely and talented Helen.

Thank you for stopping by and have a blessed day,

the-creative-flow-previous-button the-creative-flow-next-button

Large Letters Framelits Dies

Large Letters Framelits Dies
[141712]
£89.00

Whisper White A4 Card Stock

Whisper White A4 Card Stock
[106549]
£8.25

Emerald Envy A4 Cardstock

Emerald Envy A4 Cardstock
[141420]
£7.25

Watermelon Wonder Classic Stampin' Pad

Watermelon Wonder Classic Stampin’ Pad
[138323]
£6.00

Daffodil Delight Classic Stampin' Pad

Daffodil Delight Classic Stampin’ Pad
[126944]
£6.00

Emerald Envy Classic Stampin' Pad

Emerald Envy Classic Stampin’ Pad
[141396]
£6.00

Stamping Sponges

Stamping Sponges
[141337]
£3.25

Metallics Sequin Assortment

Metallics Sequin Assortment
[138390]
£4.50

Rhinestone Basic Jewels Embellishments

Rhinestone Basic Jewels Embellishments
[119246]
£4.50

Fast Fuse Adhesive

Fast Fuse Adhesive
[129026]
£9.00

Foam Adhesive Strips

Foam Adhesive Strips
[141825]
£7.25

Fine-Tip Glue Pen

Fine-Tip Glue Pen
[138309]
£6.25

Stampin' Trimmer

Stampin’ Trimmer
[129722]
£27.00

Big Shot

Big Shot
[143263]
£99.00