International Highlights Winners Hop: You Are The Greatest

Anna’ Stampin’ Cave – International Highlights Winners Hop: You Are The Greatest

Hello and welcome to my stampin’ cave today.

First of all, I wanted to say a massive THANK YOU to all my followers and visitors to my blog for VOTING on my project for this month’s International Project Highlights! My little fridge magnet and card took the 5th place. I’m so humbled!
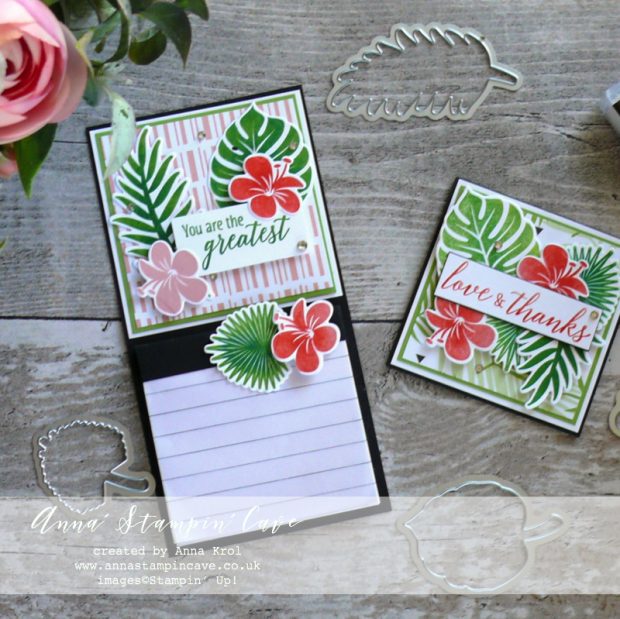
Anna' Stampin' Cave - Teacher's Thank You Gift Fridge Magnet and Thank You card using Tropical Chic Stamp Set and Tropical Thinlits Dies from Stampin' Up!

Every month, the ‘top ten’ get to blog hop with Kylie, using the same theme, which was a “Teachers Gifts”.

You Are The Greatest

For today’s project, I decided to go back to one of my favourite products and techniques – watercolour with Brusho® Crystal Colour.

Here’s my card –
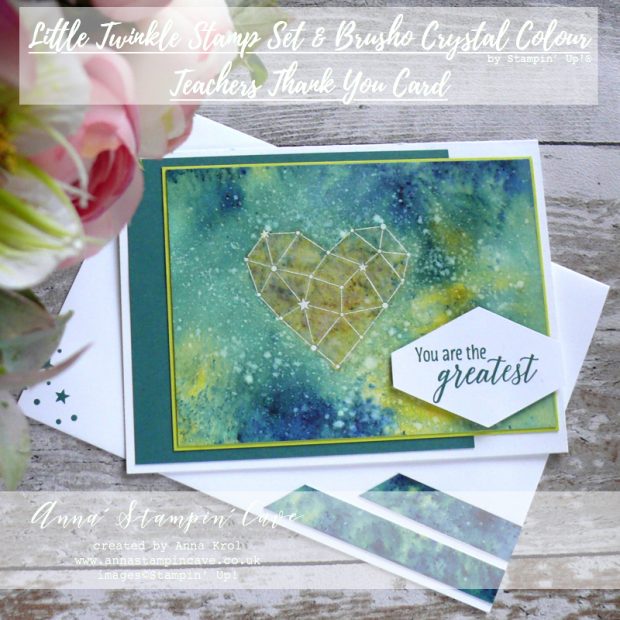
Anna' Stampin' Cave - Teachers Thank You Card with Watercolour Wash using Brusho Crystal Colour, Little Twinkle Stamp Set & Tropical Chic Stamp Set from Stampin' Up!

Card dimensions:

  • Whisper White Thick cardstock: 11-6/8″ x 4-1/8″ scored in half at 5-7/8″ (29.7 x 10.5 cm scored in half at 14.8 cm)
  • Tranquil Tide cardstock panel: 3-7/8″ x 4-1/4″ (9.8 cm x 10.6 cm)
  • Lemon Lime Twist cardstock panel: 3-5/8″ x 5-13/16″ (9.2 cm x 12.2 cm)
  • Watercolour Paper panel: 3-1/2″ x 5-3/4″ (9 cm x 12 cm)
  • Whisper White cardstock for sentiment

My thought behind this card was to create one that could be suitable either for a female or male teacher.

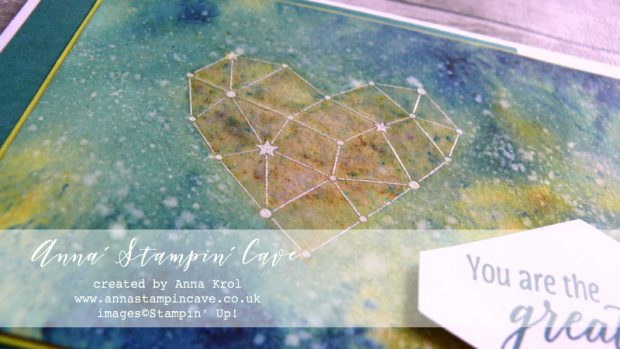
I prepared my watercolour panel – it was bit larger than what I needed – with embossing buddy and stamped the ‘heart constellation’ using Versamark ink. I sprinkled it with a White Emboss Powder and heat set it with my Heat Tool.

When heat embossing on Watercolor Paper, because it’s a quite porous surface, you need to make sure all the image has transferred very well. It can take a little bit longer for the embossing powder to melt, so be patient.

Anna' Stampin' Cave - Teachers Thank You Card with Watercolour Wash using Brusho Crystal Colour, Little Twinkle Stamp Set & Tropical Chic Stamp Set from Stampin' Up!

Brusho Crystal Colour

They are high quality and highly pigmented paint powders. They are water-based and most of all completely non-toxic. For my card, I chose two colours to work with: Prussian Blue and Moss Green.

I added my water to the embossed heart, sprinkled it with Moss Green and using the aqua painter I moved the water around.

Before adding Prussian Blue I wet the panel under a running water. I wasn’t too concerned and didn’t worry too much that the Mossy Green will run. Once my panel was really wet I sprinkled it richly with Prussian Blue.

I moved the colour tilting the panel in each direction dabbing off any colour that got into the heart – I wanted to keep it green. Once my panel was dry I spritz it with water (very selectively avoiding the heart) and added more Prussian Blue with a few Moss Green areas for the contrast and moved it around with aqua painter again. Once happy with results, and when the panel was still slightly damp, I sprinkled some more of Prussian Blue and let it dry without moving the paper. I love the effect it left on the panel.
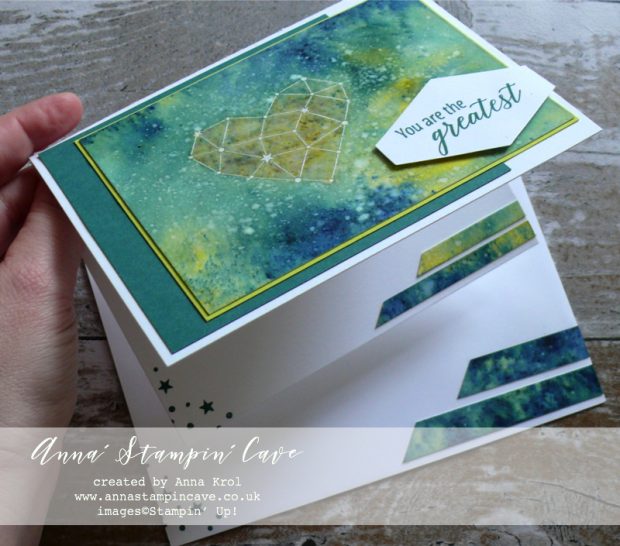
Anna' Stampin' Cave - Teachers Thank You Card with Watercolour Wash using Brusho Crystal Colour, Little Twinkle Stamp Set & Tropical Chic Stamp Set from Stampin' Up!

Assembling the card

For the final touch, I took a Whisper White Craft Ink Refill and with a help of clear block and aqua painter, I splashed white all over the panel.

Once my panel was dry I cut it to the size but I saved my colourful off cuts to use them later for some accents.

I adhered Tranquil Tide panel to the card base with liquid glue. Next, I mounted watercolour piece onto a Lemon Lime Twist panel and adhered them both to the base.

The sentiment comes from Tropical Chic Stamp Set. I stamped it in Tranquil Tide ink and punched out with Tailored Tag Punch. I have added it to my card with few dimensionals.

Final touches

For some interest, I stamped a cluster of stars inside of my card, in a bottom left corner. Besides that, I also took one of the watercolour strips that left, cut it at an angle and add it to the inside as well. I think it looks pretty cool.
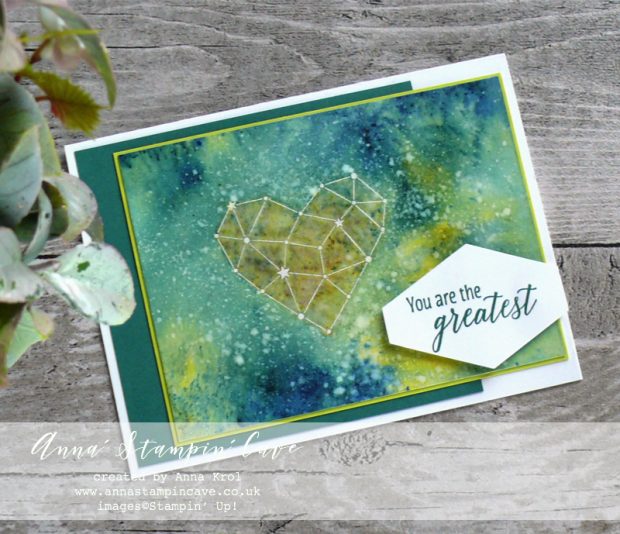
Anna' Stampin' Cave - Teachers Thank You Card with Watercolour Wash using Brusho Crystal Colour, Little Twinkle Stamp Set & Tropical Chic Stamp Set from Stampin' Up!

I also decided to decorate the envelope with the same elements as the inside of my card: clusters of stars and another watercolour strip cut at an angle.

And that’s it from me for today. I hope you’ve enjoyed visiting my blog. Do you like the card I created? I would love to hear your thoughts.

Below is the list of all the winners, so be sure to hop along. Your next stop is lovely and very talented Janneke de Jong from the Netherlands  go and see her beautiful project.

As always, if you wish to purchase any of the products I have used, simply click the images below to go directly to my online store.

I add this card to:

HOST CODE for the month of AUGUST is U6KK4ACY. Orders of £50+ (excl. p&p) will receive a pack of Stampin’ Up! Pearlised Doilies!

Product List

Bone Folder

£6.25

Aqua Painters

£15.50

Pin me

Summary of the project which gives all the views of the card in one photo. I’d love if you pinned and called by on Pinterest xx
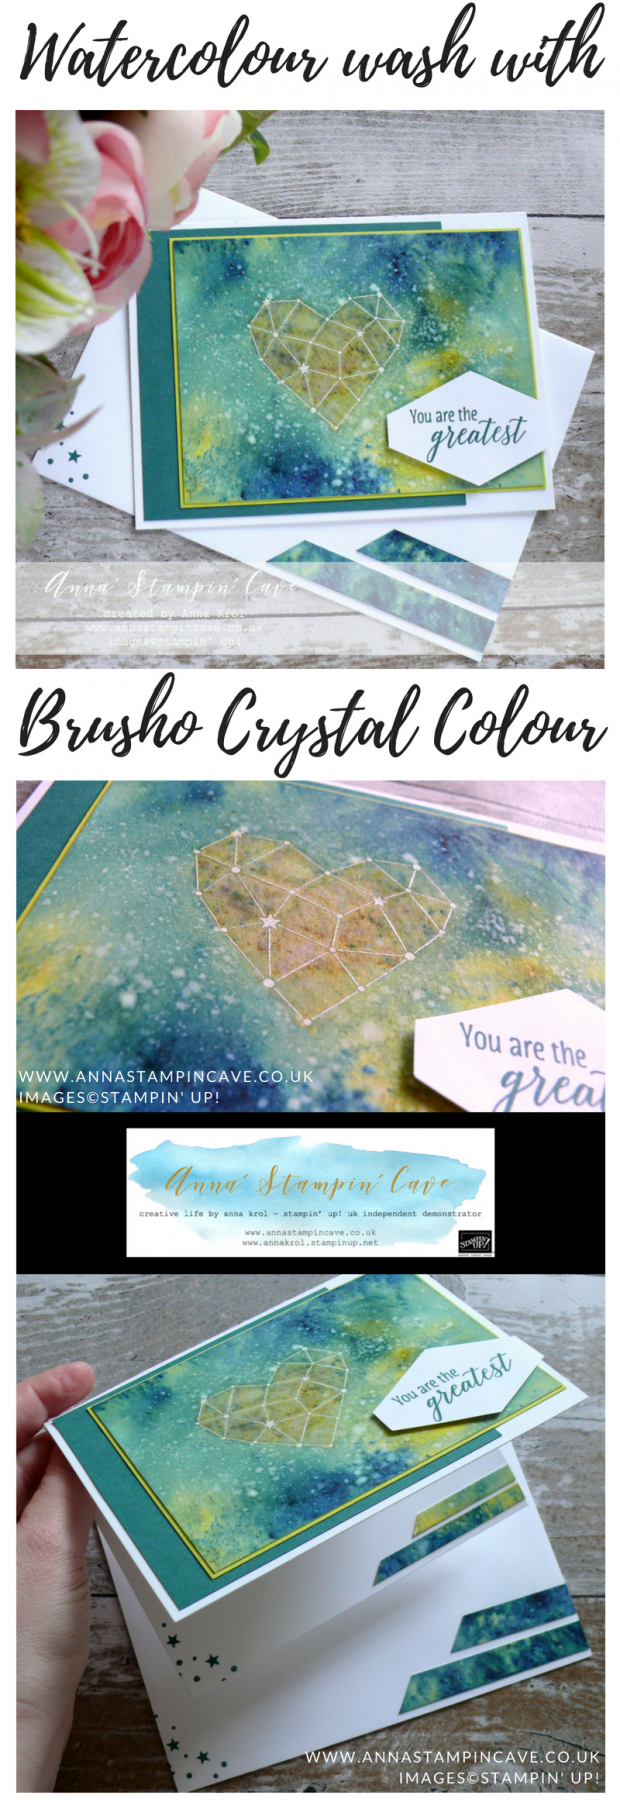
Anna' Stampin' Cave - Teachers Thank You Card with Watercolour Wash using Brusho Crystal Colour, Little Twinkle Stamp Set & Tropical Chic Stamp Set from Stampin' Up!


Don’t forget to check:

My exclusive special offer this month only: FREE Stampin’ Up! Pearlised Doilies

How it works…

  • Place a product order of £50 or more (excl. shipping) in my online store in the month of August. 
  • Add Host Code U6KK4ACY. To claim your reward you must include this code in your ordering process.
  • This August Special Offer will be applied to all qualifying orders placed through my shop using Host Code U6KK4ACY between 1 August – 31 August.
  • If your order is £150 or more do not use Host Code. You will earn your own Host Rewards to spend.
  • IMPORTANT:  My FREE Special Host Gift giveaways are mailed separately from any order and will arrive mid-September.

    Request Autumn/Winter Catalogue

    Stampin' Up! Autumn Winter 2018 Catalogue


    Earn in August – redeem in September –> click here for more details


    All-new, limited-time Colour Your Season products – Products available while supplies last or until 31 August 2018 – order yours today –> click here

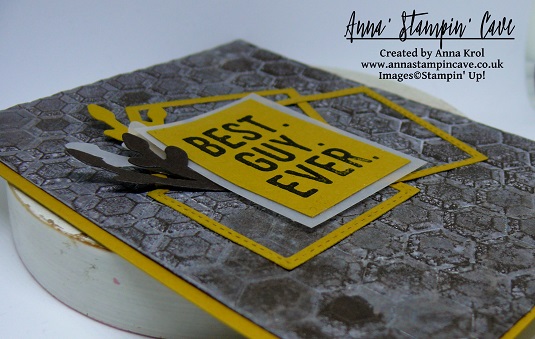
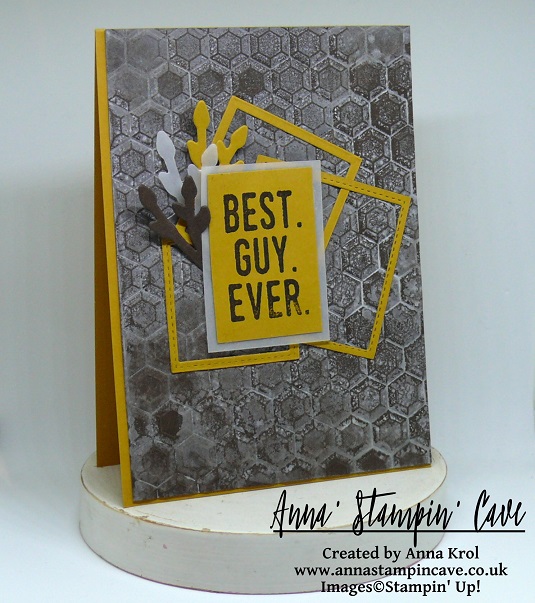
Best Guy Ever Clean & Simple Masculine Card

Anna’ Stampin’ Cave – Best Guy Ever Clean & Simple Masculine Card

International-Highlights-header-vote-fav

Thanks for coming to my blog today! We are being highlighted internationally by Kylie Bertucci and you are able to VOTE for my project. The top ten winners will get to be part of an international blog hop so please vote for my project. You can do it here or use a button at the end of my post.
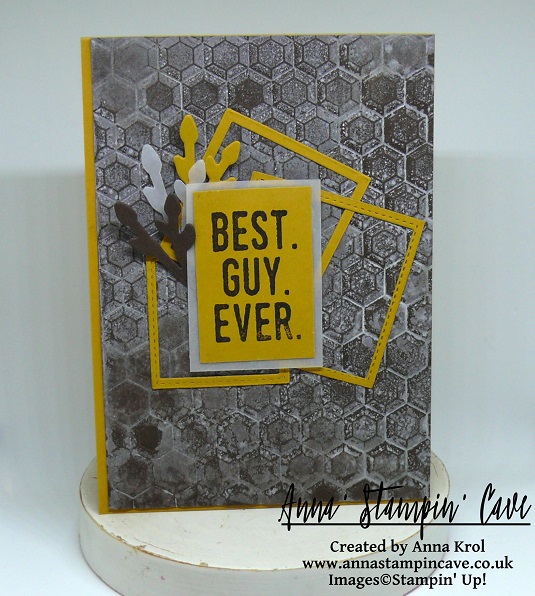
This month we have a theme that, I think, most of cardmakers struggling with – MASCULINE.

I know that for some it’s hard if you can’t use pink, glitter or rhinestones on the card. Not to mention flowers. I even heard that masculine cards are boring! What?! Today I will show you that masculine cards can be fun and not boring at all.

Best Guy Ever card dimensions:

  • Delightful Dijon cardstock: 11-6/8″ x 4-1/8″ scored in half at 5-7/8″ (29.7 x 10.5 cm scored in half at 14.8 cm)
  • Early Espresso cardstock: 5-6/8″ x 4″ (14.6 cm x 10.2 cm)
  • Delightful Dijon cardstock for sentiment: 1-3/8″ x 2″
  • White Vellum cardstock mat: 1-5/8″ x 2-2/8″
  • Early Espresso, Delightful Dijon and White Vellum scraps for die cutting

To achieve this fun texture on my Early Espresso panel I spritzed it with water to soften the fibre. Next, I dabbed Hexagons Dynamic Embossing folder with Whisper White Craft Ink, put Early Espresso cardstock inside, run it through the Big Shot and let it dry. When it dried I adhered it to the card base.

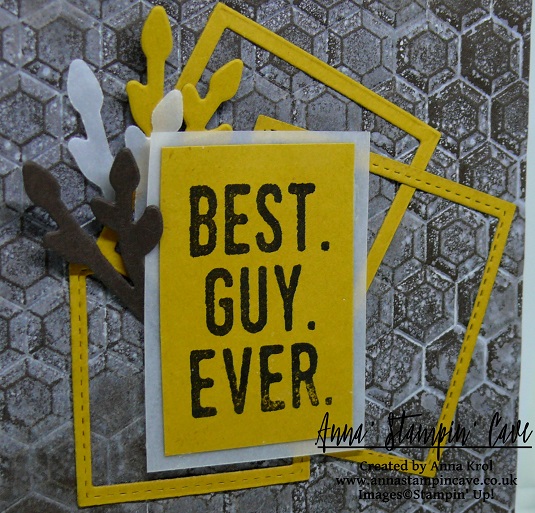
Next, I die cut various size frames from Delightful Dijon cardstock using squares from Stitched Shapes Framelits Dies and Layering Squares Framelits Dies. You can mix and match these as you wish. Glued them to my card with liquid adhesive.

I also die cut three ‘branches’ using one of the dies from Everyday Jars Framelits Dies: one from vellum, one from Delightful Dijon and one from Early Espresso cardstock.

The sentiment I chose for my card is brilliant and can be used for any occasion really. And I love the bold font. I stamped it on a piece of Delightful Dijon in Early Espresso and matted it with a piece of vellum.

I adhered my sentiment to the card with a couple of dimensionals. For a final touch, I added my ‘branches’ to the card. I glued their ends under the sentiment panel. And this is my card done. I hope I inspired you today.

Thanks for visiting my blog today and make sure you head over to Kylie’s blog to check all lovely projects and vote for your favourites. Hope you like my project enough to give it some love ?

Vote for me Kylie's Highlights Badge

Thank you for stopping by and have a blessed day,

One Wild Ride For GDP078

Anna’ Stampin’ Cave – One Wild Ride for GDP078

GDP078

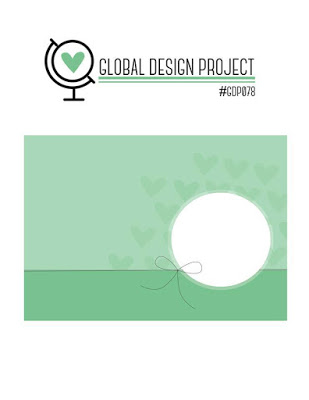
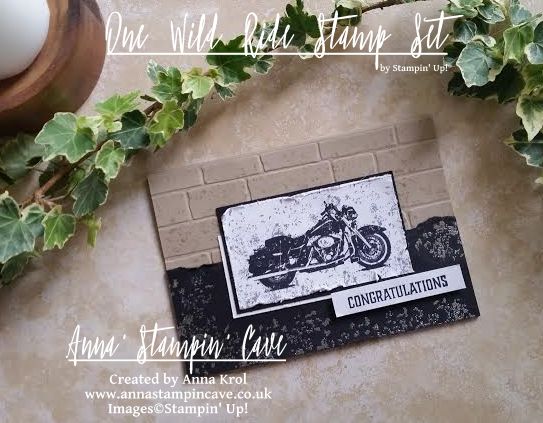
Hello, everyone! Today I’m playing along with Global Design Project’s Sketch Challenge. And oh how cool this sketch is – endless possibilities, honestly. It looks so soft and feminine to me yet I decided to go on the ‘dark side’ as there are always shortages in masculine cards.

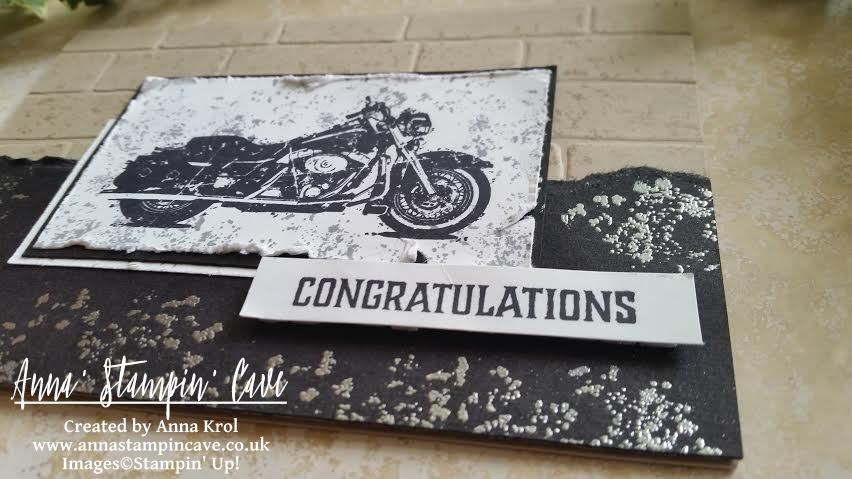
Anna' Stampin' Cave - Stampin' Up! One Wild Ride - masculine congratulations card for GDP078

One Wild Ride card dimensions:

  • Crumb Cake cardstock: 8-1/4″ x 5-7/8″ scored in half at 4-1/8″ (21cm x 14.8 cm scored in half at 10.5 cm)
  • Basic Black cardstock: 2-1/4″ x 5-7/8 and 3-6/8 x 2-1/8″ (5.7 cm x 14.8 cm and 9.5 cm x 5.4 cm)
  • Whisper White cardstock: 2″ x 3-5/8″ and 1-1/2″ x 2-1/2″ (5 cm x 9.2 cm and 3.8 cm x 6.3 cm) + a strip for a sentiment

Anna' Stampin' Cave - Stampin' Up! One Wild Ride - masculine congratulations card for GDP sketch challenge

I started with stamping card front with this gravel-splatter kinda stamp from One Wild Ride stamp set, in Crumb Cake for soft, tone on tone effect. Next, I embossed it with Brick Wall Textured Impressions Embossing Folder.

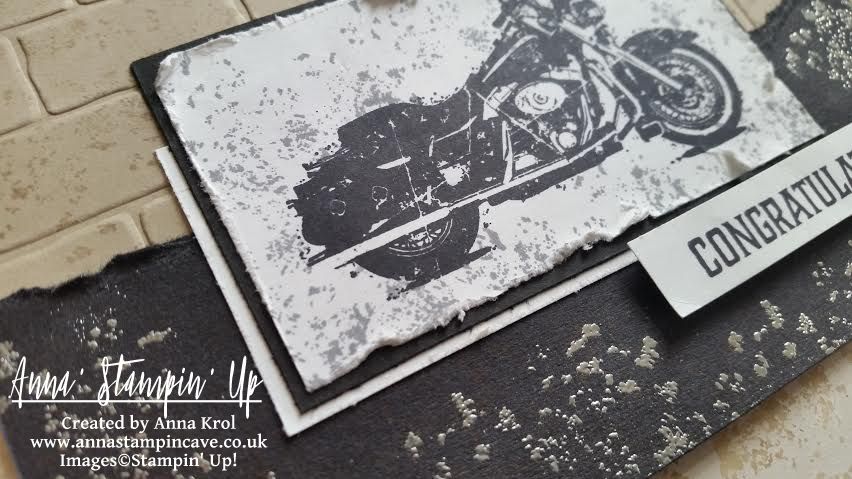
I took 2-1/4″ x 5-7/8 piece of Basic Black cardstock and distressed it by tearing the edge of the panel. Using the same ‘gravel’ stamp I stamped the whole panel in Versamark, heat embossed it in silver and adhered it to the card base.

Anna' Stampin' Cave - Stampin' Up! One Wild Ride - masculine congratulations card for GDP

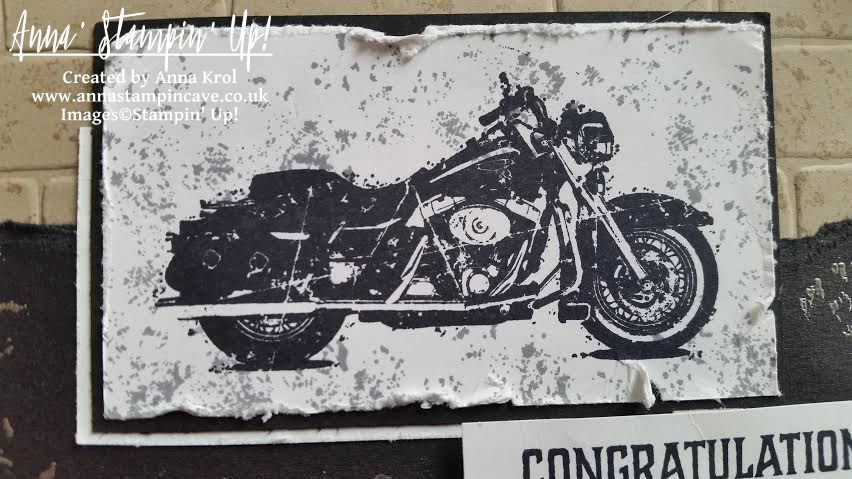
Next, I stamped motorcycle in Basic Black on a piece of Whisper White cardstock. It looked too ‘clean’ so once again I’ve used the gravel stamp. This time I stamped it in Basic Grey. I also distressed the edges of the panel using scissors.

I matted my Harley image with Basic Black cardstock and a smaller piece of Whisper White and adhered it flat to the base.

Anna' Stampin' Cave - Stampin' Up! One Wild Ride - masculine congratulations card for GDP#078

I kept sentiment simple, just Basic Black ‘congratulations’ on a strip of Whisper White popped out with dimensionals.

I hope you like my card and that maybe, just maybe, it inspired you and gave you some ideas for a surprisingly tough subject called ‘masculine cards’.

As always, I really want to encourage you to visit the Global Design Project challenge blog to see other beautiful projects from all around the world. Just click on their logo below to visit the website

Thank you for stopping by and have a blessed day,

The Creative Flow Blog Hop – No Red Romance With Large Letters Framelits Dies

Anna’ Stampin’ Cave – The Creative Flow Blog Hop – No Red Romance With Large Letters Framelits Dies

the-creative-flow-header

Thank you for joining us on our Creative Flow Blog Hop. Each month we are set a challenge to creatively stretch our imaginations. The products we have used are all available in the current Annual and/or seasonal Stampin’ Up!® catalogues. To hop along, please use the buttons at the bottom of the post to keep hopping.

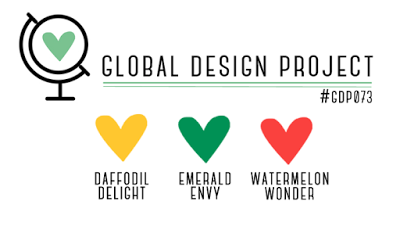
Today’s challenge was to create no-red Valentines Day card, and for some time I wasn’t sure what colour scheme to use. But Global Design Project came to the rescue with their #073 Colour Challenge. I really love this unusual, bright and oh-so-not-valentine’s colour mash-up, so I decided to combine these two together 🙂

gdp_colour_challenge73_png

I know it supposed to be no-red, but Watermelon Wonder is rather orangy red right lol And here’s what I came up with: a perfect card to give to my hubby on that special day.

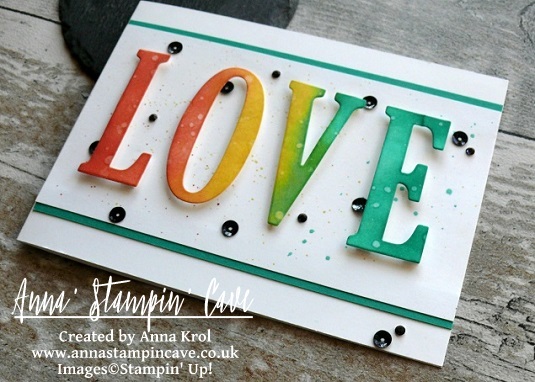
anna-stampin-cave-stampin-up-large-letters-framelits-dies-no-red-valentines-day-card

No-Red Romance card dimensions:

  • Whisper White cardstock: 11-6/8″ x 4-1/8″ scored in half at 5-7/8″ (29.7 x 10.5 cm scored in half at 14.8 cm)
  • Whisper White panel: 5-7/8″x 3″
  • Emerald Envy cardstock: 2 strips 5-7/8 long and briefly 2/8″wide
  • a piece of Whisper White for die-cutting

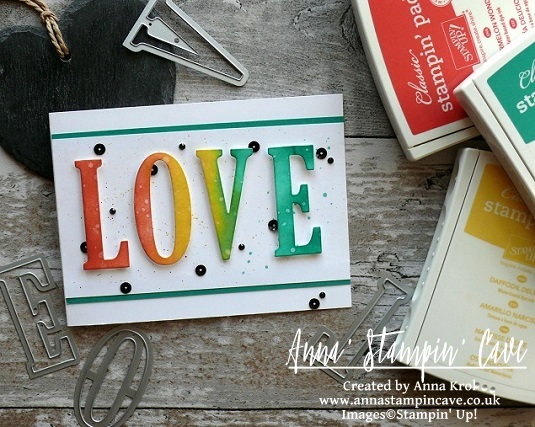
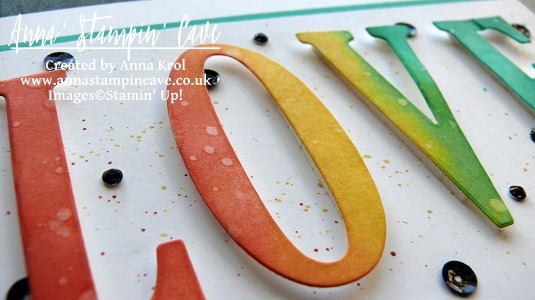
The first step was to die-cut word ‘LOVE’ using Large Letters Framelits Dies. I’ve used regular Whisper White cardstock for this. I’ve sponged the letters with my inks as follows: Watermelon Wonder first, Daffodil Delight next, and Emerald Envy as the last one creating ‘rainbow’ effect. I’ve paid special attention there’s smooth transition from one colour to another.

anna-stampin-cave-stampin-up-large-letters-framelits-dies-no-red-valentines-day-distressed-card

When I was done and happy with blending, I took a small paintbrush and flicked some water droplets all over the letters. I love how the water reactivates the ink. Such a simple step but add so much interest and texture to the (otherwise) flat surface.

Next, I took Whisper White panel and using the same small brush and my ink pads as a palette, I speckled some inks over the whole panel. I tried to keep my speckles somehow under control colour-wise, so the speckles match the letters that go over them.

Remember: The smaller is the brush, the smaller are the speckles.

When speckles dried, I adhered two strips of Emerald Envy cardstock underneath, one on top and one on the bottom of the panel.

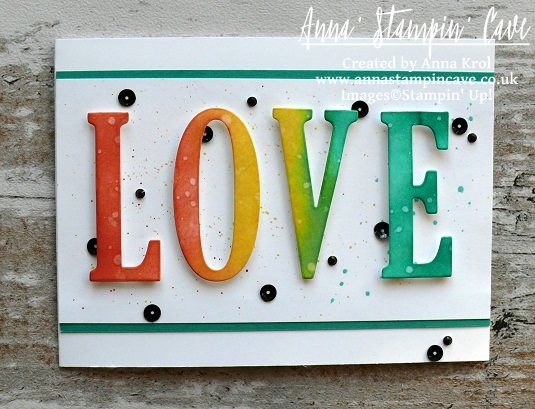
anna-stampin-cave-stampin-up-large-letters-framelits-dies-no-red-valentines-card

Now to assemble the card. I adhered the panel to the card base using Fast Fuse adhesive. And I have to say I’m happy to say it seems I finally made friends with this adhesive haha.

I wanted to pop-out my letters so I’ve used Foam Adhesive Strips to adhere them to the panel. You could use any regular foam adhesive, but these strips are perfect for adhering die-cuts that are quite narrow in shape. They are long but you can easily cut them to the length you want/need.

I was really happy how nicely this card was coming together, but I was desperate to add some embellishments to it. Yes I know, a card for a hubby and embellishments?! I must have lost my mind, haha. But why not?

anna-stampin-cave-stampin-up-large-letters-framelits-dies-no-red-valentines-day-card

So I scattered black sequins from Metallics Sequin Assortment pack all over my card and tried to figure out the placing and how many I will use. Once I was happy I adhered them with Fine-Tip Glue Pen. For the final touch, I coloured some rhinestones with black Sharpie and added them to the card too.

That’s it from me for today. I really hope you enjoyed my step by step directions.

For those of you who asked about stretching your stitched dies using partial die-cutting – I will have a short how-to post for you soon. So watch this space.

Now be sure to hop along our tiny blog hop to see more inspiring projects. Your next stop is lovely and talented Helen.

Thank you for stopping by and have a blessed day,

the-creative-flow-previous-button the-creative-flow-next-button

Large Letters Framelits Dies

Large Letters Framelits Dies
[141712]
£89.00

Whisper White A4 Card Stock

Whisper White A4 Card Stock
[106549]
£8.25

Emerald Envy A4 Cardstock

Emerald Envy A4 Cardstock
[141420]
£7.25

Watermelon Wonder Classic Stampin' Pad

Watermelon Wonder Classic Stampin’ Pad
[138323]
£6.00

Daffodil Delight Classic Stampin' Pad

Daffodil Delight Classic Stampin’ Pad
[126944]
£6.00

Emerald Envy Classic Stampin' Pad

Emerald Envy Classic Stampin’ Pad
[141396]
£6.00

Stamping Sponges

Stamping Sponges
[141337]
£3.25

Metallics Sequin Assortment

Metallics Sequin Assortment
[138390]
£4.50

Rhinestone Basic Jewels Embellishments

Rhinestone Basic Jewels Embellishments
[119246]
£4.50

Fast Fuse Adhesive

Fast Fuse Adhesive
[129026]
£9.00

Foam Adhesive Strips

Foam Adhesive Strips
[141825]
£7.25

Fine-Tip Glue Pen

Fine-Tip Glue Pen
[138309]
£6.25

Stampin' Trimmer

Stampin’ Trimmer
[129722]
£27.00

Big Shot

Big Shot
[143263]
£99.00

Pootlers Annual Catalogue Blog Hop – One Wild Ride

pootler's blog hop

Thank you for joining us on another Pootlers Blog Hop! We’re showcasing lots of gorgeous projects using products from the new Stampin’ Up!® Annual Catalogue. Simply use the buttons at the end of each post to keep hopping!

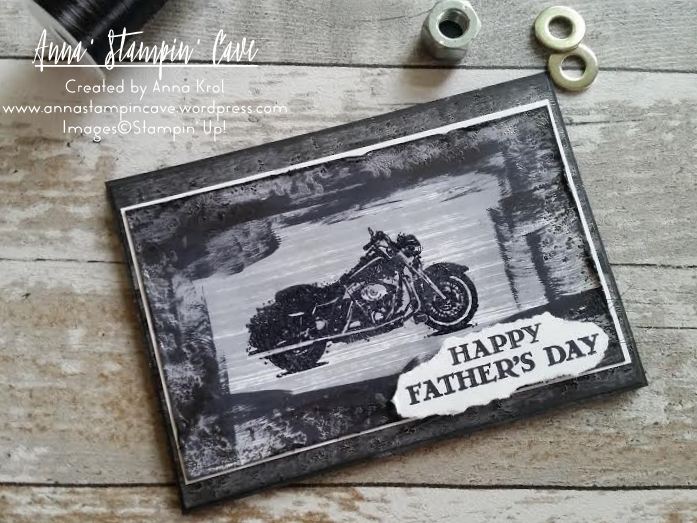
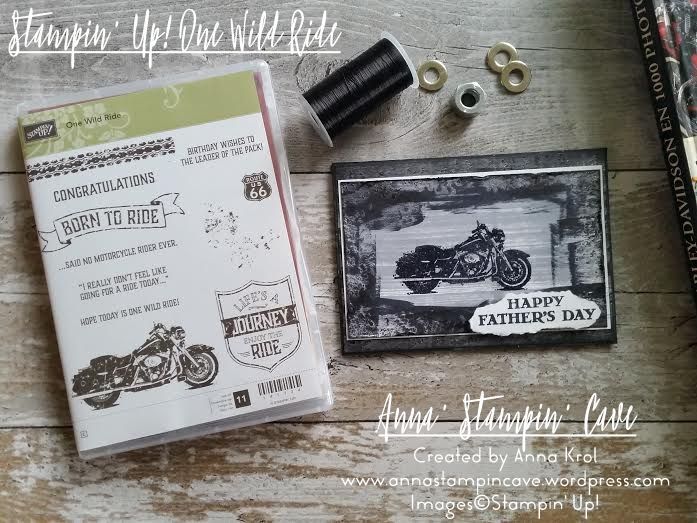
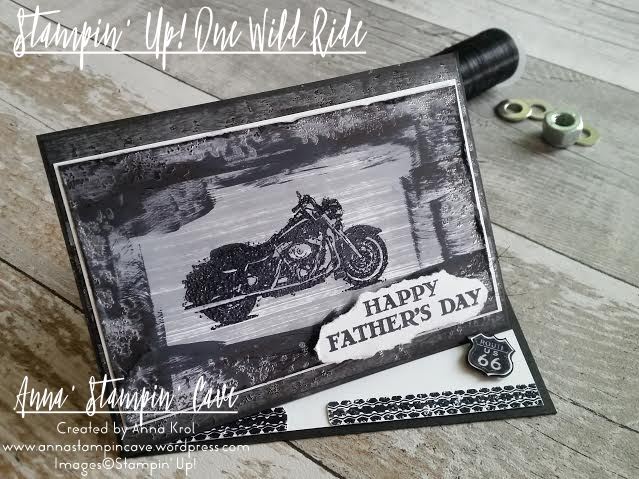
I hope you had a chance to look through our Annual Catalogue and you’ve got your favourites already. For today’s project, I’ve used One Wild Ride Stamp Set from page 115, to create a Father’s Day card for my hubby.

Why did I choose this set? As a teenager I was a rebel girl: I was listening to Gun’s N’ Roses, Aerosmith and other rock stars, wearing skinny jeans, long hair and combat boots, I always dreamed of having my own Harley-Davidson. Silly, I know, but who wasn’t those days 😉 No surprise then, this set was in my first order. And what can I say, hubby has a soft spot for Good Ol’ Harry too.

One Wild Ride Stamp Set

To really show off this stamp set I decided to create a twisted easel card, which sounds more complicated than it sounds. I have to admit I wanted this card to look really rough and distressed, so you could nearly feel motorcycle’s grease j/k 😉 (Chris loves distressed cards with lots of layers).

The base of my card is standard top folded A6 in Basic Black. And the “front” of the card is scored in half diagonally to create an easel. For the proper card front I’ve used a piece of Basic Black again, a slightly smaller piece of Basic Black and Whisper White for stamping.

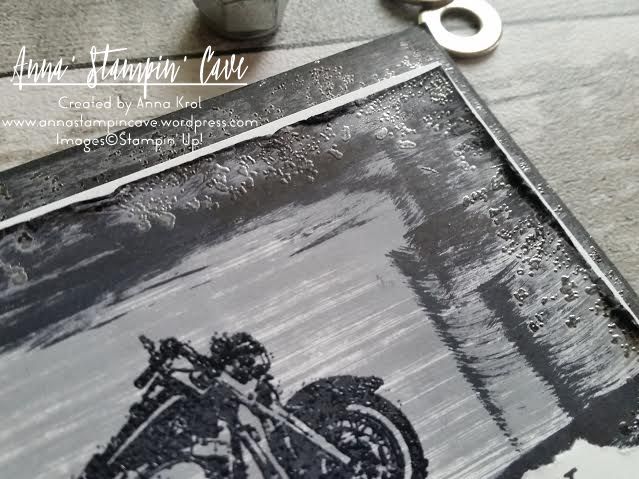
Basic Black panel I left intact. On Basic Grey, I stamped with this gravel-splatter -kinda stamp from the set, with Versamark, and heat embossed it in silver. Next, I took Basic Black Archival Ink and smooshed it across the panel, where the embossing was. It makes it look a little bit dull, but you can still see the Basic Grey card.

To add some shine and dimension to the motorcycle, I dabbed my stamp in Versamark first. Next, without stamping, I dabbed it in Basic Black Archival Ink, so once it’s stamped, Versamark was on top and I heat embossed the image using clear embossing powder. Again I’ve used gravel stamp and stamped it all around the edge of my WW panel. heat embossed it in silver and smooshed Basic Black across the panel where the embossing was. Next, I took a cloth and “took off” some of that ink which created that dull metal look. Because there was a too big contrast between Whisper White and all that black, I smooshed Basic Grey across the centre of the panel. To finish it off I added some distressing to the edges using scissors.

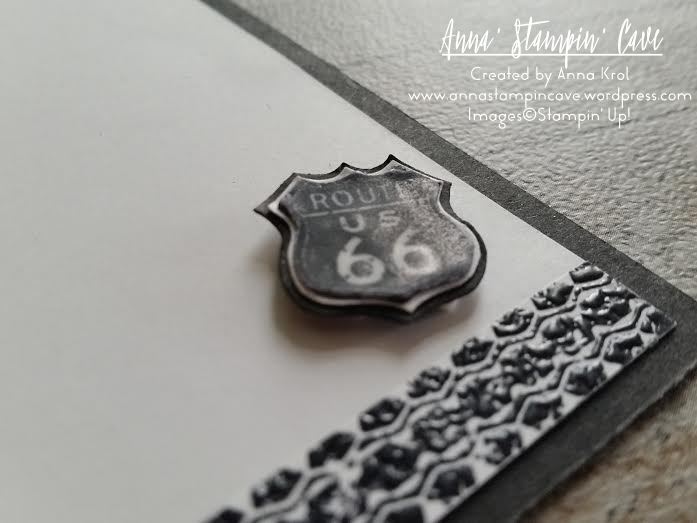
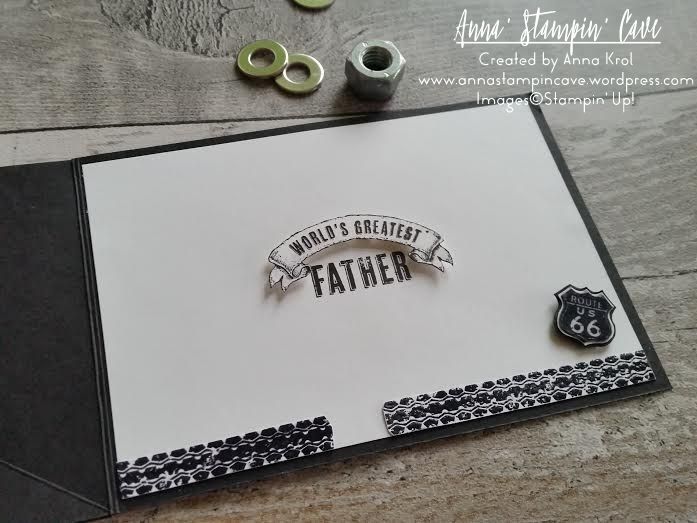
For the inside of the card, I’ve used banner and sentiment from Guy Greetings Stamp Set. I hand-cut the banner and add it to the card using dimensionals. I also stamped tire trail stamp on a scrap piece of paper, cut it out and adhere it to the bottom of the inside panel. To create a stopper for the easel I stamped Route 66 stamp on a piece of whisper white, cut it out with scissors and heat embossed it with clear embossing powder. I next used it as a guide, to create two slightly bigger layers to go underneath the original image. One in Whisper White and one in Basic Black. Glued them together and adhered it in the corner of the inside panel. I could now assemble the whole card.

One Wild Ride Father's Day Card Twisted Easel Card

The sentiment for the front comes, again, from Guy Greetings Stamp Set. I stamp it on a scrap of Whisper White and just simply tore it out. It’s hard to see on the picture, but I added few strings of new Basic Black Metallic Thread underneath the sentiment before adhered it with dimensionals.

I’m really happy with this card(it’s got our daughter approval too haha). I know Chris will love it too.

How about you? Do you like my card? Let me know in the comments below.

Now, be sure to hop along and see more inspiring projects. Your next stop is lovely Kathleen from Lilypopcrafts  go and see what she has made using the new products.

next pootler blog

previous pootler blog

Thank you for stopping by and have a blessed day