Stampin’ Dreams August Blog Hop

Anna' Stampin' Cave - Country Home Stamp Set with Country Lane DSP & Tin Tile Dynamic Textured Embossing Folder from Stampin' Up!

Anna’ Stampin’ Cave – Stampin’ Dreams August Blog Hop
Welcome to our monthly blog hop! And today we have a real treat for you: a sneak peek of products from Stampin’ Up!®Autumn Winter Catalogue (also called a Holiday Catalog in other parts of the world). You are currently visiting Anna (me) and my Stampin’ Cave, up here in the UK. I hope you’ll enjoy coming to my blog today.
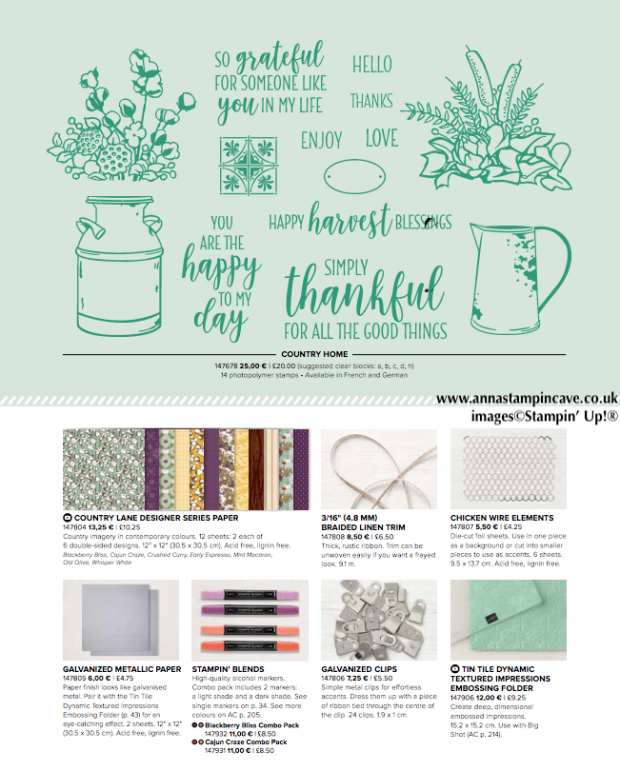
For today’s blog hop I decided to use products from one of my favourite suites from the catalogue, called Country Lane. Isn’t this bundle amazing!?

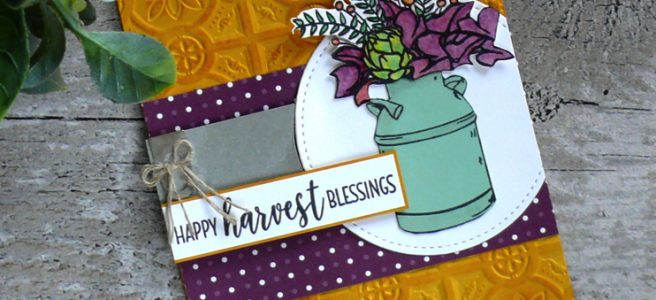
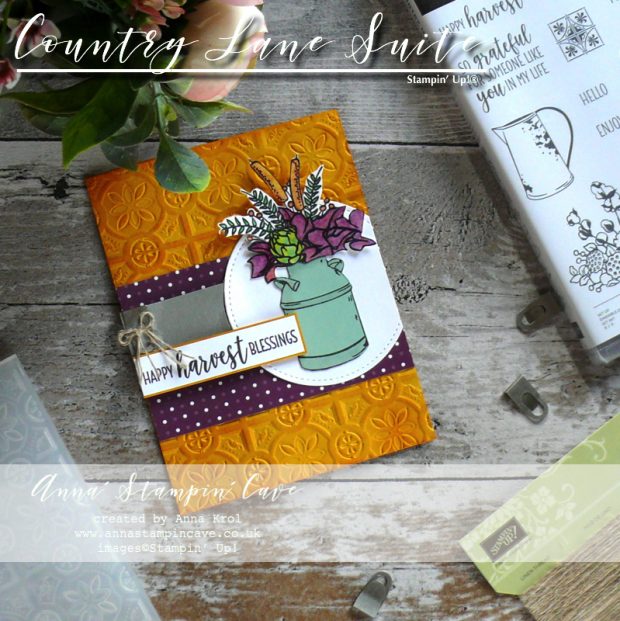
And here’s my card.

I’ve used Crushed Curry for the base.
Anna' Stampin' Cave - Country Home Stamp Set with Country Lane DSP & Tin Tile Dynamic Textured Embossing Folder from Stampin' Up!

To create this card, first, I run card front through the Big Shot with brand new Tin Tile Dynamic Textured Impressions Embossing Folder. To bring out the beautiful detail of this folder, I used one of  Stamping Sponges and a Crushed Curry ink pad and sponged the surface to add more dimension.

Watercolour Pencils Assortment 2

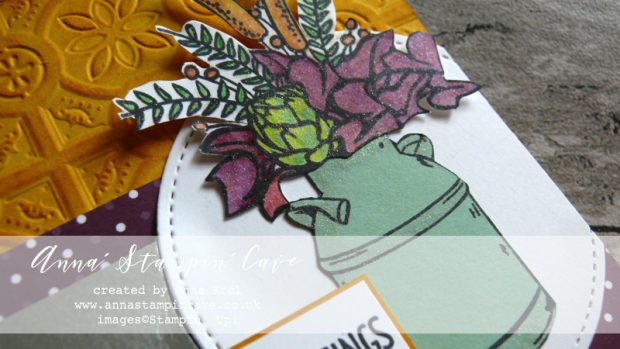
Next, I stamped my images: the milk can on a scrap of Mint Macaron cardstock, and flowers on a piece of Whisper White.

To colour in the flowers I’ve brand new Watercolour Pencils Assortment 2 and also added some shimmer to them with Clear Wink of Stella.

These pencils are available for purchase this month only as a part of Colour Your Seasons promotion (but we’ve heard they may come back in a future catalogue).
Anna' Stampin' Cave - Country Home Stamp Set with Country Lane DSP & Tin Tile Dynamic Textured Embossing Folder from Stampin' Up!

Fussy cutting

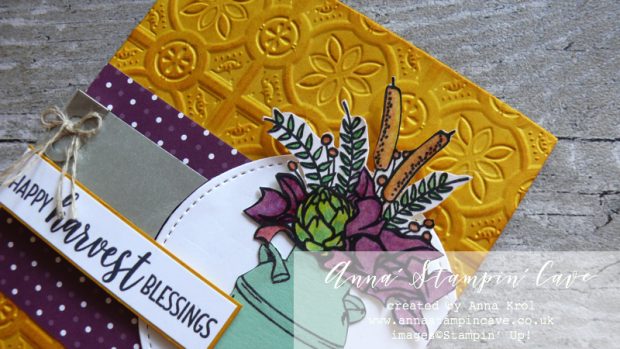
For the focal composition, I fussy cut the flowers and milk can. Next, I cut a piece of Country Lane DSP (with Blackberry Bliss polka dot design) and mount it flat on my card base.

I die-cut the biggest of four circles from Stitched Frames Framelits Dies from a Whisper White cardstock, cut off a slice and adhered it to patterned paper with a straight edge to the right.

Galvanized

There was one product or I should rather say a family of products that I was especially happy about – new ‘galvanized line. Galvanized Clips and Galvanized Buttons will soon join our embellishment assortment. But we will also have a new paper in our speciality papers assortment – Galvanised Metallic Paper. It’s just gorgeous in a real life and most importantly it’s double-sided!! Yay! I just had to use it

So I took a 1″ strip of Galvanised Metallic Paper, lay it flat over the card front, marked where the circle begins and using paper snips I cut out the concave shape. I slide in one of the Galvanised Clips to the edge of my strip. A tiny bow created using Linen Thread adds to the rustic theme of the card. I adhered it, to the left from the stitched circle, using dimensionals.
Anna' Stampin' Cave - Country Home Stamp Set with Country Lane DSP & Tin Tile Dynamic Textured Embossing Folder from Stampin' Up!

To finish assembling the card, I mounted my fussy-cut elements in the middle of a Whisper White circle. I’ve used liquid glue for the can and dimensionals for the flowers.

I stamped ‘Happy Harvest Blessings’ on a piece of Whisper White cardstock, cut it to the thin strip backed it with a piece of Crushed Curry and adhered it to the card just below the galvanized clip.
Anna' Stampin' Cave - Country Home Stamp Set with Country Lane DSP & Tin Tile Dynamic Textured Embossing Folder from Stampin' Up!

The inside

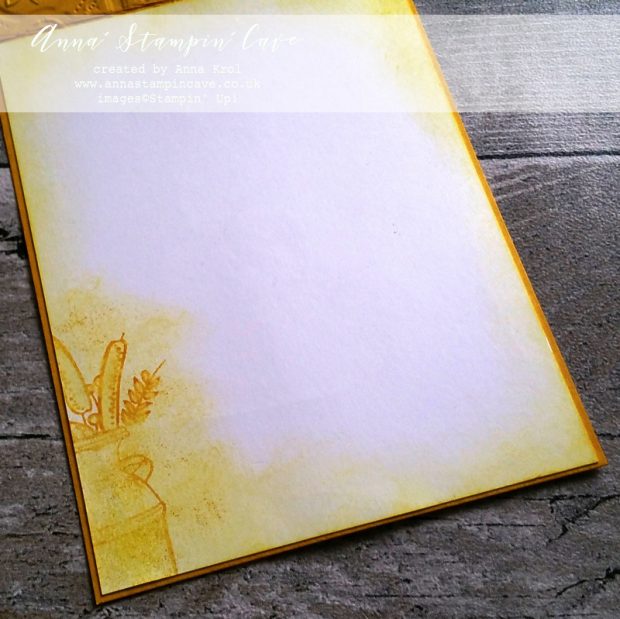
For the inside of the card, I decided to stamp the milk can and part of the bouquet. I stamped them off first with Crushed Curry ink pad. Using aqua painter I slightly washed out my images and once dry I sponged the inside of the card around all edges.

I really hope you enjoyed visiting my blog today and I would love to encourage you to hop along with us and see the rest of beautiful projects designed by amazing artists. Please be sure to continue to hop using the list below. You don’t want to miss any!

Blog Hop List:

As always, if you wish to purchase any of the products I have used, simply click the images below to go directly to my online store.

HOST CODE for the month of AUGUST is U6KK4ACY. Orders of £50+ (excl. p&p) will receive a pack of Stampin’ Up! Pearlised Doilies!

Shopping List

Linen Thread

£4.75

Big Shot

£102.00


Pin me

Summary of the project which gives all the views of the card in one photo. I’d love if you pinned and called by on Pinterest xx

Anna' Stampin' Cave - Country Home Stamp Set with Country Lane DSP & Tin Tile Dynamic Textured Embossing Folder from Stampin' Up!


Don’t forget to check:

My exclusive special offer this month only: FREE Stampin’ Up! Pearlised Doilies

How it works…

  • Place a product order of £50 or more (excl. shipping) in my online store in the month of August. 
  • Add Host Code U6KK4ACY. To claim your reward you must include this code in your ordering process.
  • This August Special Offer will be applied to all qualifying orders placed through my shop using Host Code U6KK4ACY between 1 August – 31 August.
  • If your order is £150 or more do not use Host Code. You will earn your own Host Rewards to spend.
  • IMPORTANT:  My FREE Special Host Gift giveaways are mailed separately from any order and will arrive mid-September.

    Request Autumn/Winter Catalogue

    Stampin' Up! Autumn Winter 2018 Catalogue

    Earn in August – redeem in September –> click here for more details

    All-new, limited-time Colour Your Season products – Products available while supplies last or until 31 August 2018 – order yours today –> click here

Clean & Simple New Home Card For #GDP123

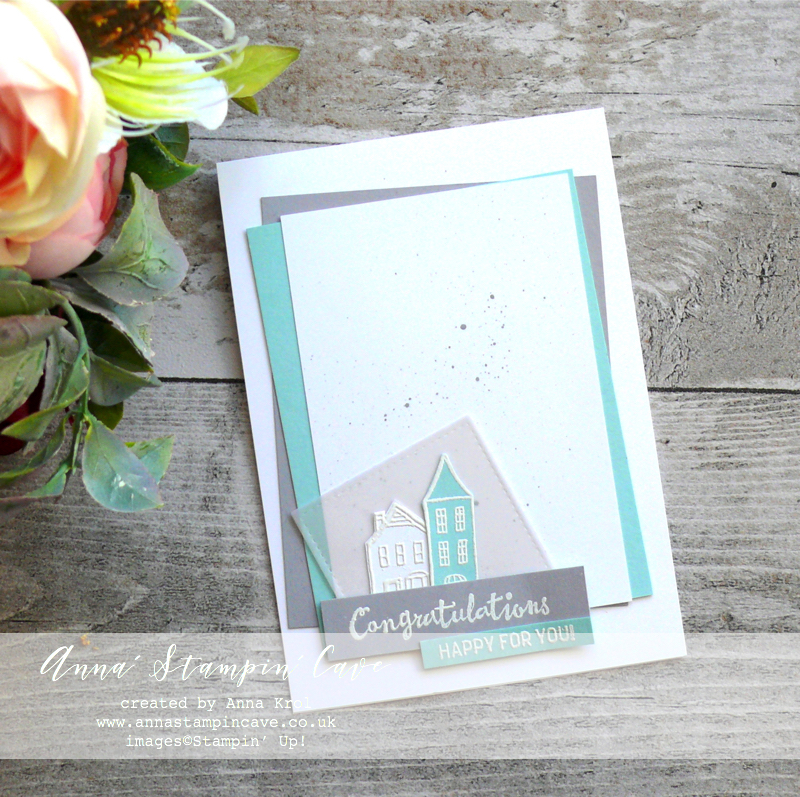
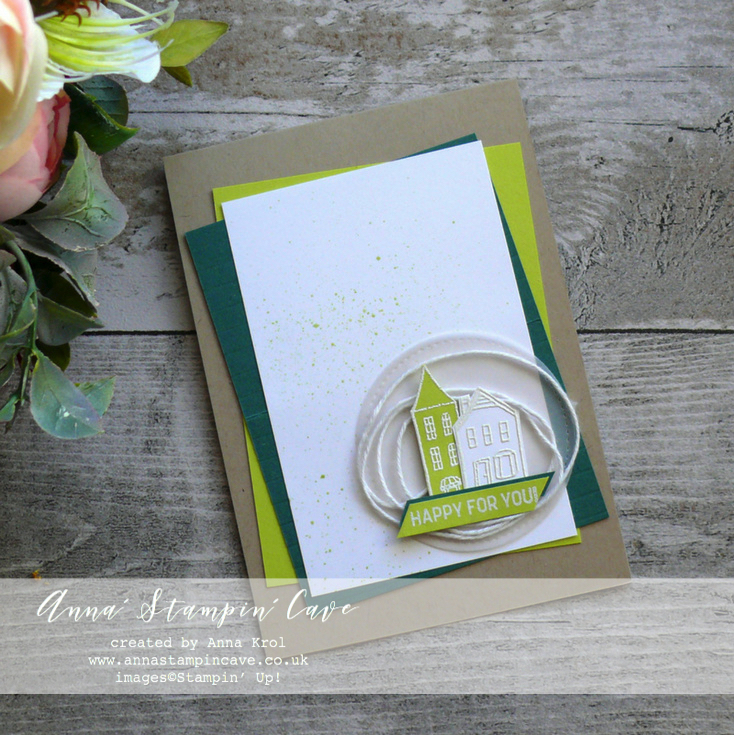
Anna’ Stampin’ Cave – Clean & Simple New Home card featuring ‘In The City’ Stamp Set from Stampin’ Up!

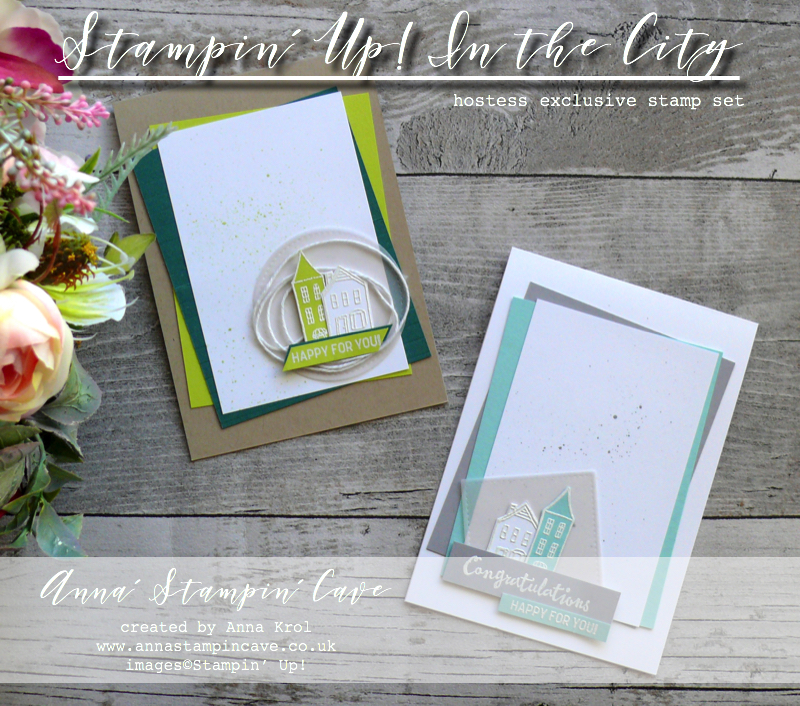
Hello and welcome! I’m so happy you popped in to visit my stampin’ cave. Today I’ve got for you beautiful, clean & simple cards using ‘In the City’ Stamp Set from Stampin’ Up!

My hubby’s younger sister & her husband are in the middle of buying their first house, hence the theme of my cards. There are still few weeks, maybe even a month until the completion date, but we are so, SO happy for them!

Dimensions for both cards:

  • card base: 11-6/8″ x 4-1/8″ scored in half at 5-7/8″ (29.7 x 10.5 cm scored in half at 14.8 cm) – Whisper White Thick & Crumb Cake cardstock
  • colour cardstock panels: 4-1/2″ x 3-1/2″ (11.4 cm x 8.9 cm) – Smoky Slate, Pool Party, Lemon Lime Twist & Tranquil Tide
  • Whisper White panels: 4-1/2″ x 3″ (11.4 cm x 7.6 cm)
  • scraps of cardstock & vellum for die-cutting and stamping
  • Whisper White Baker’s Twine: 20″ (approx)

For this first card, I decided to use soft colours. Smoky Slate and Pool Party accompanied by Whisper White make such an elegant combination.

First, I adhered all panels to the card base with snail adhesive. To add some interest to the layout, I assembled them at wonky angles.

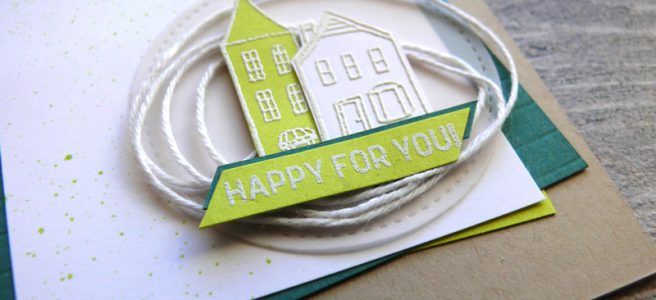
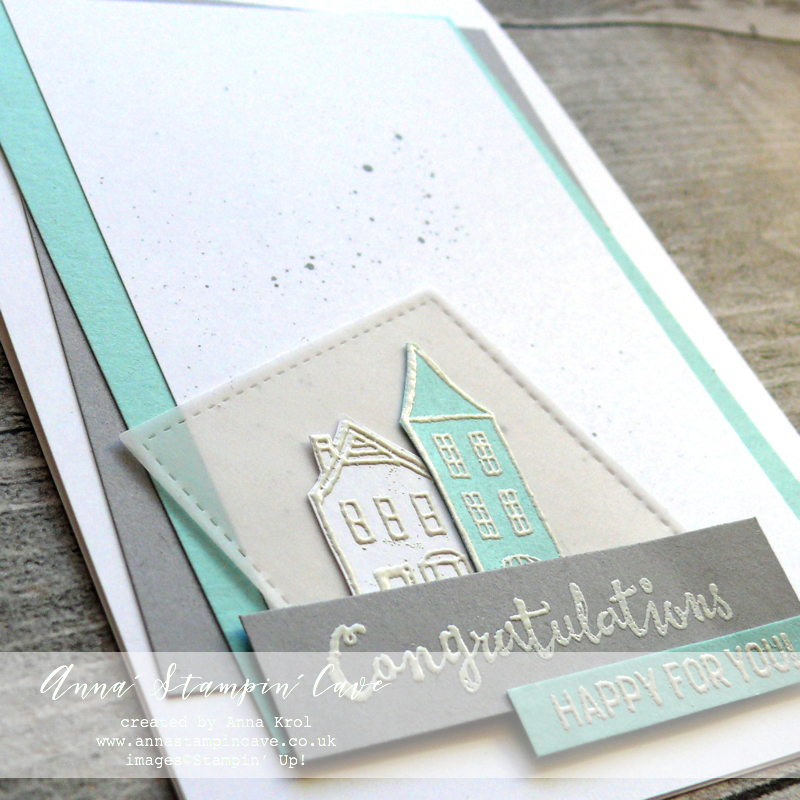
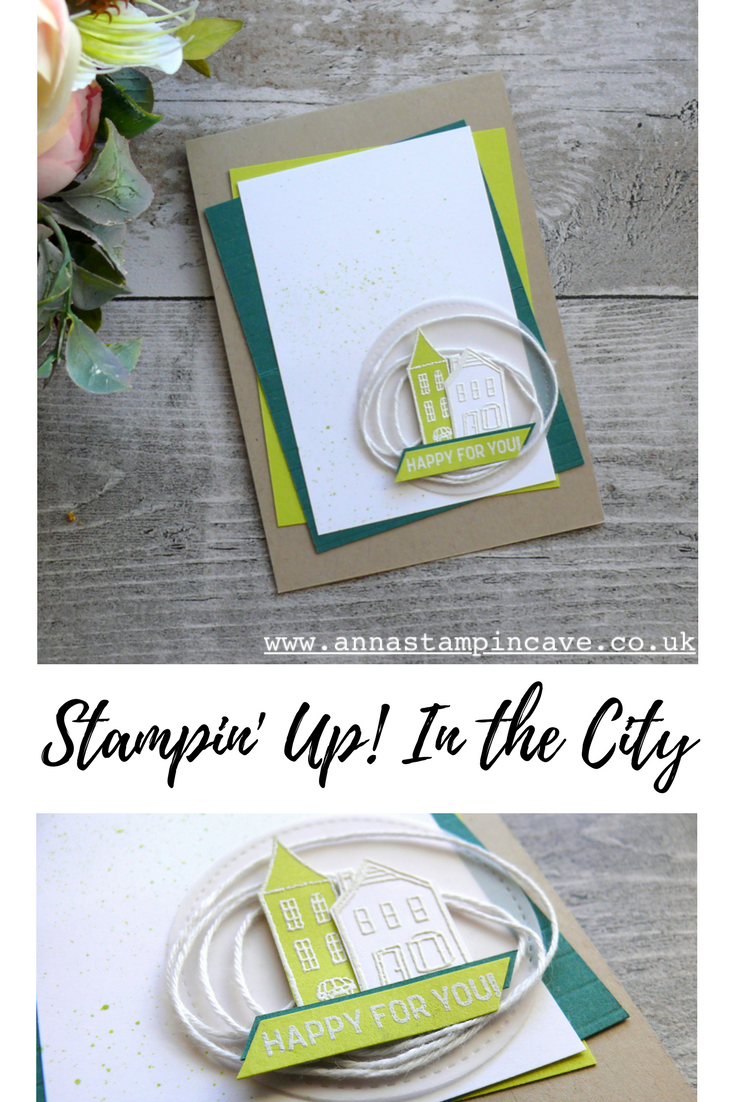
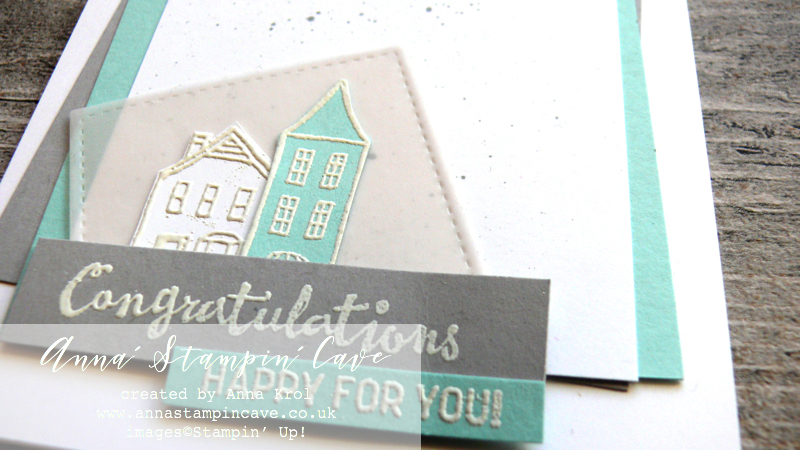
I stamped two tiny houses from In The City Stamp Set in Versamark ink; taller on a scrap of Pool Party cardstock, and lower one on Whisper White; and heat embossed them in white. This set stamp set doesn’t come with coordinating dies, but images are so easy to fussy-cut I did it in no time.

Sentiments are stamped in Versamark on two separate pieces of cardstock: I stamped ‘congratulations’ from Petal Palette Stamp Set on a strip of Smoky Slate cardstock, and ‘happy for you’ from In The City Stamp Set on a smaller strip of Pool Party and heat embossed both in white.

I die-cut a square of vellum using 2nd largest square die from Stitched Shapes Thinlits Dies. While playing with placement, I thought it would look cool if the square was kinda wonky too (to echo panels) so once happy, I adhered my tiny houses briefly in the middle of that’ wonky’ square. Next, I adhered them to the card and added sentiments using dimensionals.

I know this card supposed to be CAS (clean & simple) but too much white hurts my eyes, honest haha. So before I finished assembling it, I took Smoky Slate ink pad and transferred some ink onto an acrylic block. Next, using aqua painter I flicked few tiny ‘splatters’ of ink into the top Whisper White panel.

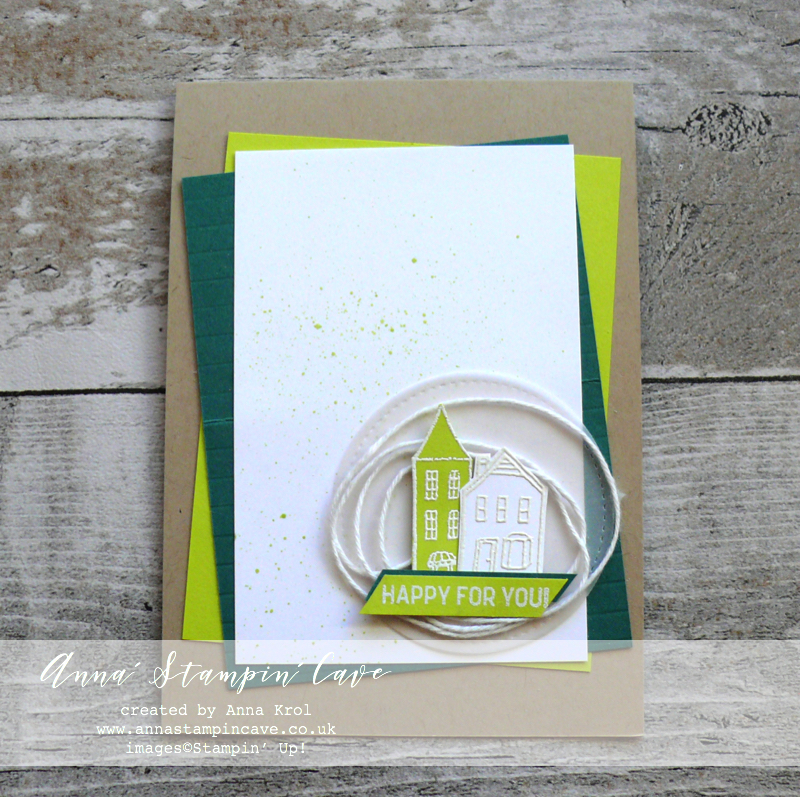
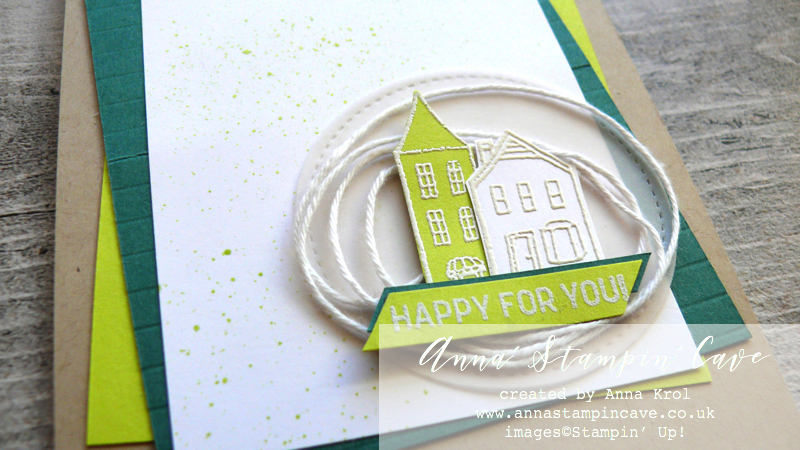
For this second card, I decided to use brighter colours. I chose Tranquil Tide and Lemon Lime Twist for some fun pop of colour. The base is Crumb Cake.

I wanted to add some extra texture and interest to this card. I really like the Simply Stripes Textured Embossing Folder from Spring Summer catalogue. But because I don’t have it yet I decided to imitate the look. I took my Tranquil Tide panel and with a help of Stampin’ Trimmer, I scored it every 1/4″. I love how it looks.

I also added Lemon Lime Twist splatters to Whisper White panel and adhered all the layers to the card base.

To soften up wonky angles I die-cut a circle from vellum using the 2nd largest circle from Stitched Shapes Framelits Dies. I wrapped some Whisper White Baker’s Twine around my fingers to create ‘wreath-like’ shape, and add it in the centre of the vellum circle with a dab of glue (snail adhesive).

I took tiny buildings and simple sentiment strip, put dimensionals to the back and mounted them onto my circle. Dimensionals not just keep all elements together, but they also secure twine from slipping off. I adhered my circle to the card with snail adhesive.

I love how these cards turned out. And to be honest, with a little tweak, they could easily fit any occasion really.

As always, I really want to encourage you to visit the Global Design Project challenge blog to see other beautiful projects from all around the world. Just click on their logo below to visit the website

I’m also adding my cards to Simon Says Stamp – Anything Goes Challenge

If you wish to purchase any of products I have used, simply click the images below to go directly to my online store and don’t forget to enter the hostess code RRMR76JH to receive a gift from me. Just a reminder that In The City Stamp Set is an exclusive Hostess Set, which means you can’t buy it, you can only earn it (choose) free when you spend £150 or more in my online store.

Thank you for stopping by and have a blessed day

Hostess Code for February: RRMR76JH – Use this code in the month of February and receive a gift from me.

Special Notes:1) Make sure you select Anna Krol as your demonstrator;
2) If you select “No Contact” box I do not have access to your name and can’t send you a gift;
3) If your order is £150 or more do not use the code and grab your own Stampin’ Rewards + gift from me

Product List

Aqua Painters

£15.50

Big Shot

£99.00

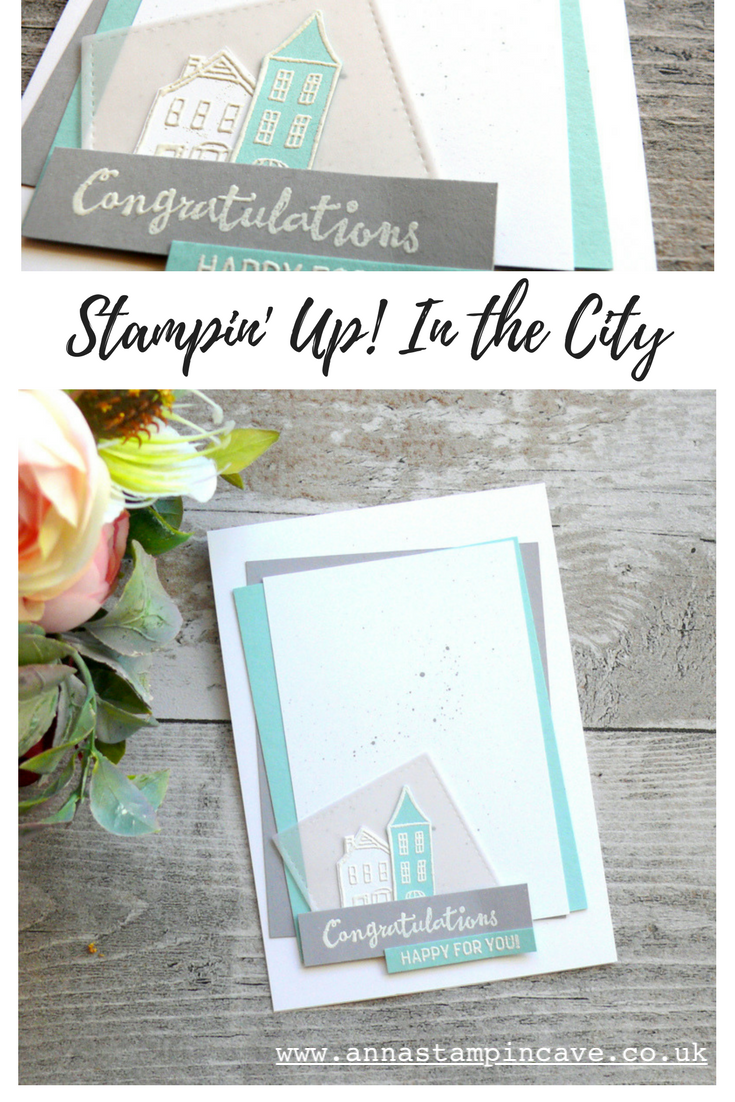
Pin me

Summary of the project which gives all the views of the card in one photo. I’d love if you pinned and called by on Pinterest xx

Don’t forget to check:
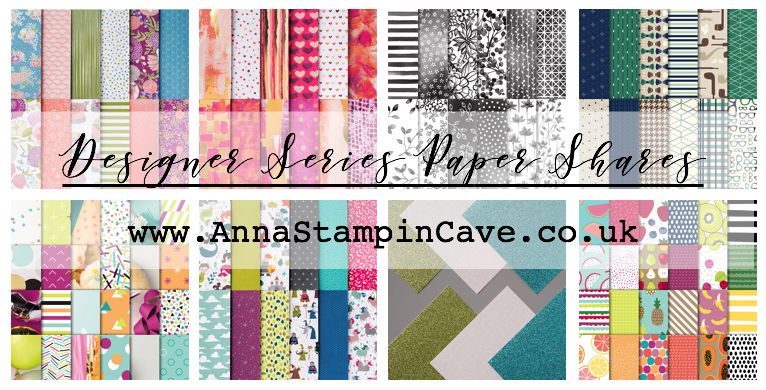
Spring Summer Catalogue Paper & Ribbon Shares. Shares are open to Austria, France, Germany, Netherlands & United Kingdom. 102 sheets of DSP & 2 yards of each type of ribbon from Spring/Summer Catalogue. Click here for more details —>
The New Stampin’ Up! Spring/Summer 2017 Catalogue and Sale-A-Bration are LIVE and it’s AMAZING! For every 60 €/£45, you spend either from Spring Summer Catalogue or Annual Catalogue, you will get to choose one FREE  level 1 product from SAB brochure! If you spend 120 €/£90, you get one FREE level 2 product, OR, you can choose two level 1 items. If you spend 180 €/£135, you have the option to choose three level 1 items or one level 1 item and one level 2 item. Click here for more details —>
Ever wondered what it’s like to join Stampin’ Up!’s community? I may have few answers for you. Click here for more details –>
One Wild Ride For GDP078

Anna’ Stampin’ Cave – One Wild Ride for GDP078

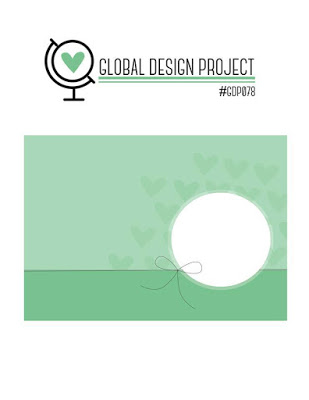
GDP078

Hello, everyone! Today I’m playing along with Global Design Project’s Sketch Challenge. And oh how cool this sketch is – endless possibilities, honestly. It looks so soft and feminine to me yet I decided to go on the ‘dark side’ as there are always shortages in masculine cards.

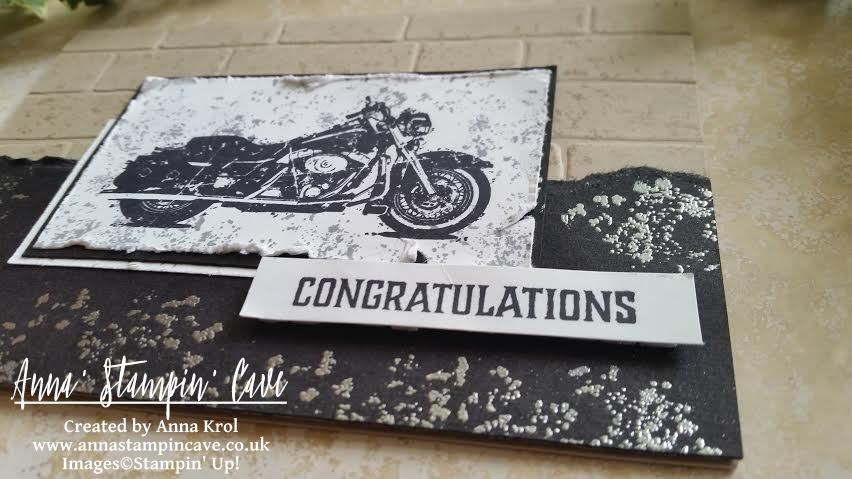
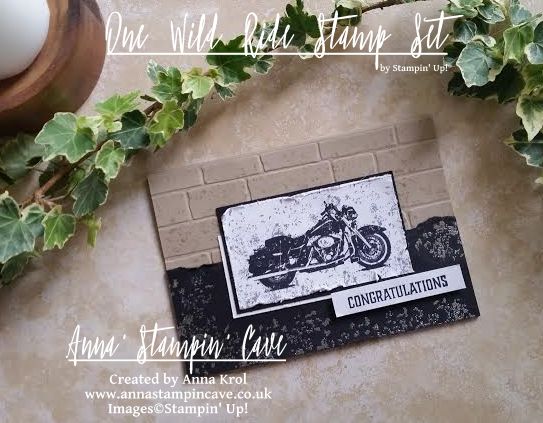
Anna' Stampin' Cave - Stampin' Up! One Wild Ride - masculine congratulations card for GDP078

One Wild Ride card dimensions:

  • Crumb Cake cardstock: 8-1/4″ x 5-7/8″ scored in half at 4-1/8″ (21cm x 14.8 cm scored in half at 10.5 cm)
  • Basic Black cardstock: 2-1/4″ x 5-7/8 and 3-6/8 x 2-1/8″ (5.7 cm x 14.8 cm and 9.5 cm x 5.4 cm)
  • Whisper White cardstock: 2″ x 3-5/8″ and 1-1/2″ x 2-1/2″ (5 cm x 9.2 cm and 3.8 cm x 6.3 cm) + a strip for a sentiment

Anna' Stampin' Cave - Stampin' Up! One Wild Ride - masculine congratulations card for GDP sketch challenge

I started with stamping card front with this gravel-splatter kinda stamp from One Wild Ride stamp set, in Crumb Cake for soft, tone on tone effect. Next, I embossed it with Brick Wall Textured Impressions Embossing Folder.

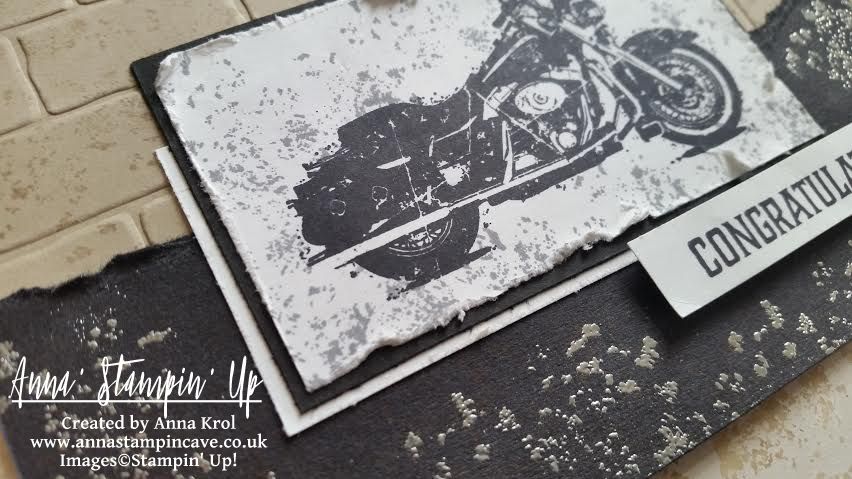
I took 2-1/4″ x 5-7/8 piece of Basic Black cardstock and distressed it by tearing the edge of the panel. Using the same ‘gravel’ stamp I stamped the whole panel in Versamark, heat embossed it in silver and adhered it to the card base.

Anna' Stampin' Cave - Stampin' Up! One Wild Ride - masculine congratulations card for GDP

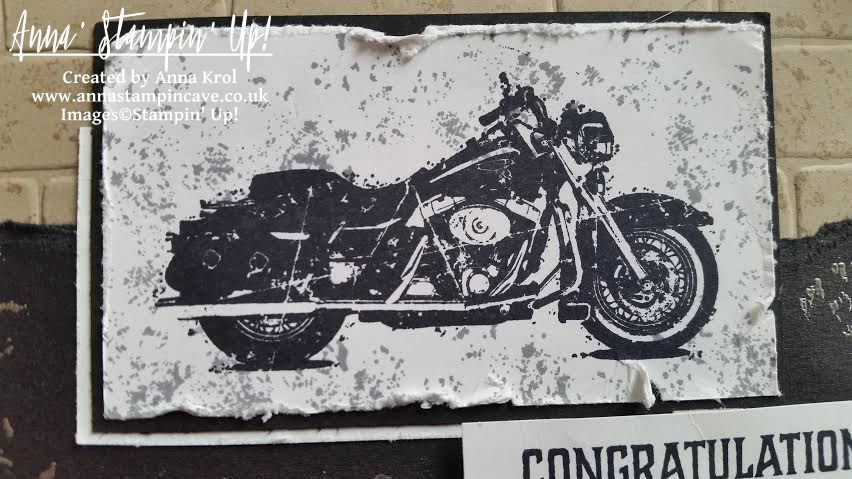
Next, I stamped motorcycle in Basic Black on a piece of Whisper White cardstock. It looked too ‘clean’ so once again I’ve used the gravel stamp. This time I stamped it in Basic Grey. I also distressed the edges of the panel using scissors.

I matted my Harley image with Basic Black cardstock and a smaller piece of Whisper White and adhered it flat to the base.

Anna' Stampin' Cave - Stampin' Up! One Wild Ride - masculine congratulations card for GDP#078

I kept sentiment simple, just Basic Black ‘congratulations’ on a strip of Whisper White popped out with dimensionals.

I hope you like my card and that maybe, just maybe, it inspired you and gave you some ideas for a surprisingly tough subject called ‘masculine cards’.

As always, I really want to encourage you to visit the Global Design Project challenge blog to see other beautiful projects from all around the world. Just click on their logo below to visit the website

Thank you for stopping by and have a blessed day,

Simply Sketched Saturday Challenge #15 – Follow Your Dreams

Anna’ Stampin’ Cave – Simply Sketched Saturday Challenge #15 – Follow Your Dreams

SSSC Header

Thank you for joining us for another Simply Sketched Saturday Challenge!  We are so excited to be sharing this hop with you. The products used are all available in the current Annual, or seasonal, Stampin’ Up!®  Catalogues*. Simply use the buttons at the bottom of the post to keep hopping!

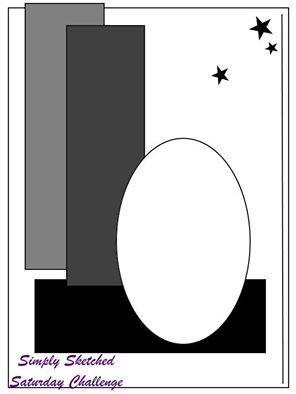
Welcome to our 15th sketch challenge blog hop! This month it was me who had a pleasure to create a sketch we are gonna work with. Here it is:
sssc-15

When creating this sketch, I won’t be lying, I had our new Stitched Shapes Framelits Dies in mind. And however I don’t have these dies yet myself, I hope to see them used a lot through this blog hop.

I know that in the ‘age’ of everything ‘clean and simple‘ and ‘less is more‘ in crafting world, layered, ‘busy’ and distressed cards are kinda faux pas. But I can’t help I love them the most! I love all the organic, (sometimes messy) creative process of designing a card.

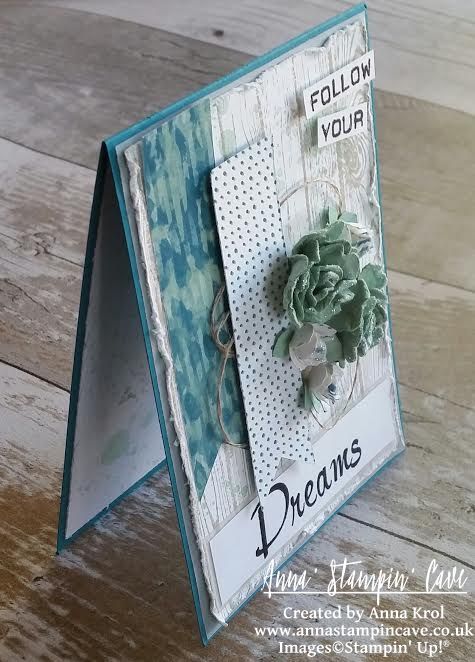
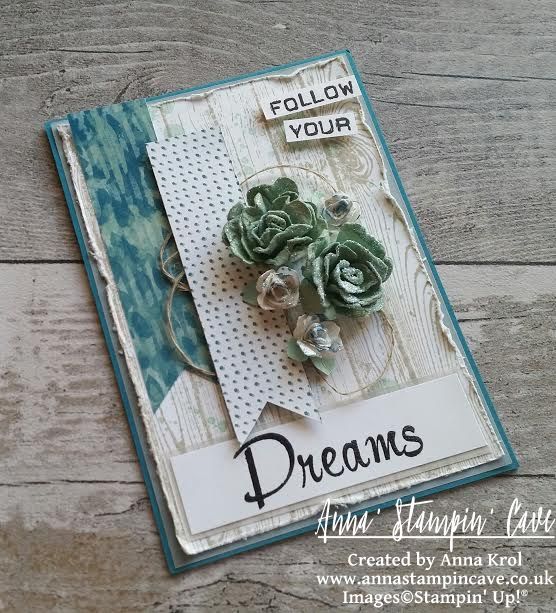
stampin-up-follow-your-dreams

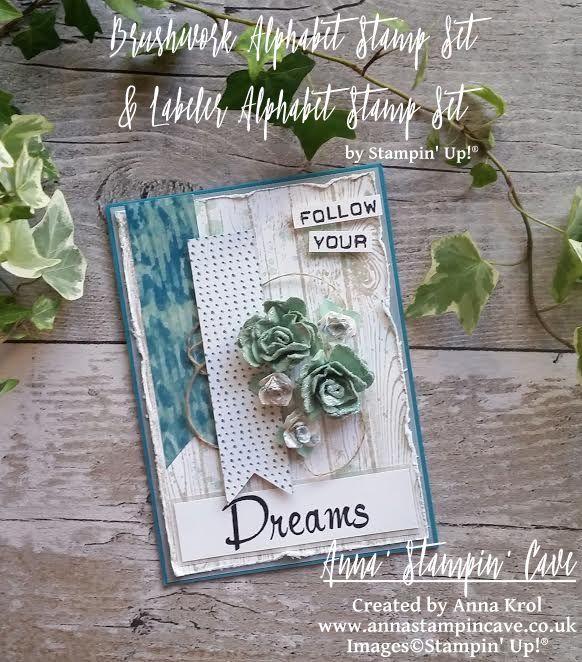
For my card base, I’ve used Island Indigo cardstock (standard top folding A6 size). The first layer is Vellum that measures 4”x 5-5/8” and next one is Whisper White 3-7/8”x 5-1/2” panel which I stamped using Hardwood background stamp in Sahara Sand. But because it felt rather ‘boring’ I also added few ‘splotches’ from Gorgeous Grunge stamp set in Mint Macaron, stamping them off a couple of times. I distressed the edges of my panel using regular scissors.

I also created a similar panel for the inside of the card, but this time I also stamped off the Hardwood image few times, so it wasn’t as crisp as the one on the card front.

follow-your-dreams

I took two pieces of Blooms & Bliss DSP, which measure 4”x 1” each, and cut them into banners. One of the banners I adhered flat down using a fast fuse and a second one I pop with dimensionals with few lengths of Linen Thread underneath.

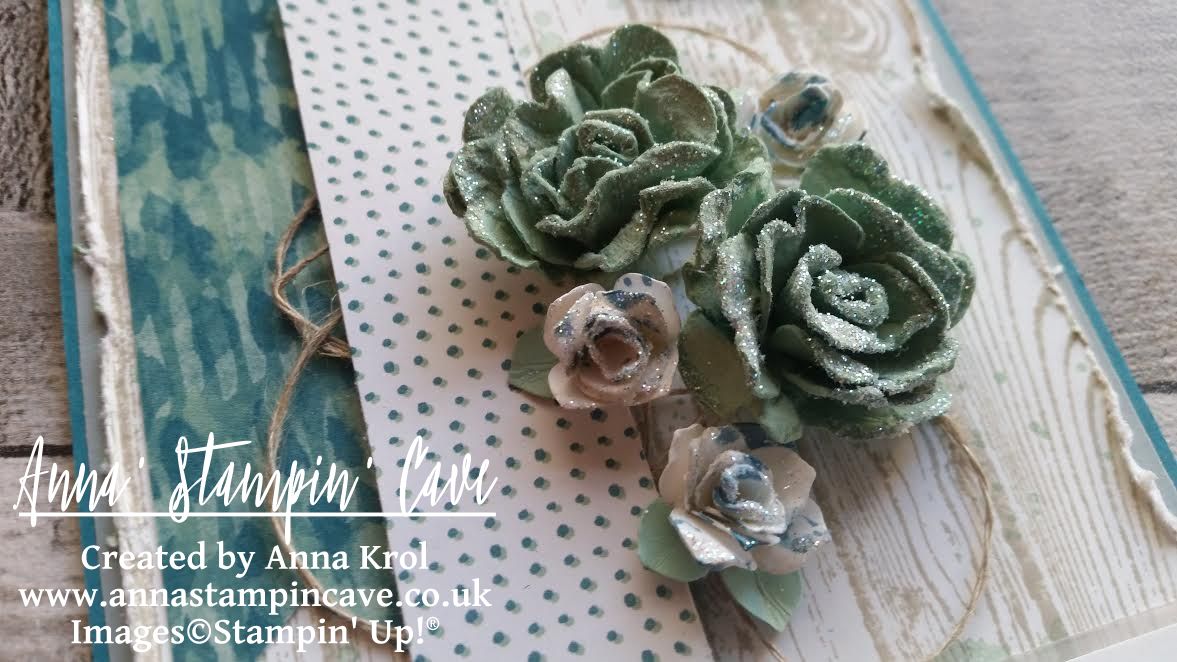
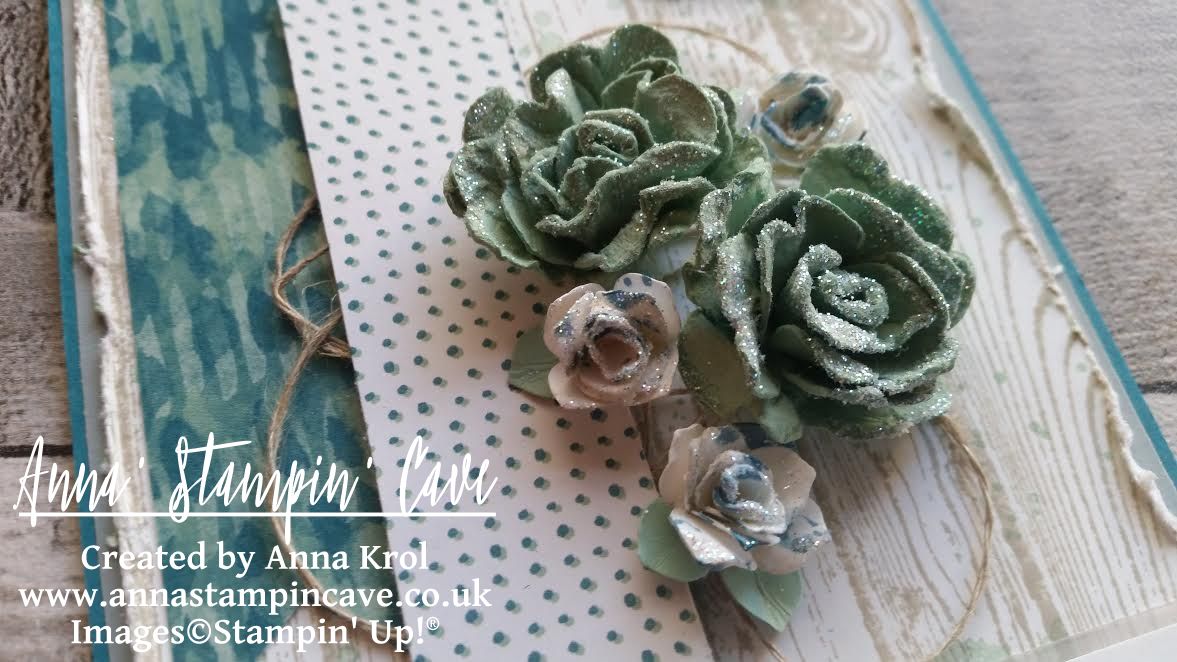
To create large roses I punched six flowers using Pansy punch from Mint Macaron cardstock (three flowers create one rose). For white tiny roses, I punched nine flowers using Petite Petals punch (again three flowers create one rose). I also punched one petite petals flower from Mint Macaron cardstock to create tiny leaves: I cut the shape apart so I end up with two double ‘leaves’ and one single ‘leaf’. White roses appeared bit ‘blunt’ so I decided to add some interest to them: using Island Indigo ink and a small paint brush I added some ‘speckles’ to them.

I also decided to add some sparkle to my flowers. I dipped the edges of petals first in watered-down Multipurpose Liquid Glue and next in Dazzling Diamonds glitter, and let it dry. Once they were ready I adhered them to the card with glue dots.

stampin-up-follow-your-dreams-handmade-roses

For the sentiment, I decided to use this awesome quote you probably have seen many times on the net: “Follow your dreams”. We might don’t have a stamp set with this sentiment, but this is where our amazing various alphabet sets come in handy.

Using Labeler Alphabet stamp set and Basic Black Archival ink pad, I stamped “follow your” on a 2/8” wide strip of Whisper White cardstock and cut it apart. Next, using Brushwork Alphabet stamp set and Basic Black Archival ink pad again, I stamped “Dreams” on a Whisper White panel that measures 7/8”x 3-1/2”, and heat embossed it with clear embossing powder for extra oomph. I pop ‘narrow’ part of the sentiment with dimensionals. For a wider piece, I created a vellum mat that measures 3-5/8”x 1”, and adhered them to the card front with a fast fuse.

anna-stampn-cave-stampin-up-follow-your-dreams

Do you like my project?! If so, please leave me a comment. I would love to hear from you!

Now, be sure to hop along and see more inspiring projects. Your next stop is Jillian’s blog  go and see what she has made for you.

Thank you for stopping by and have a blessed day,

SSSC Previous   SSSC Next Blog

Lotus Blossom Gorgeous Grunge And Gold Fancy Foil Vellum All About Kindness + Bonus Free Gift

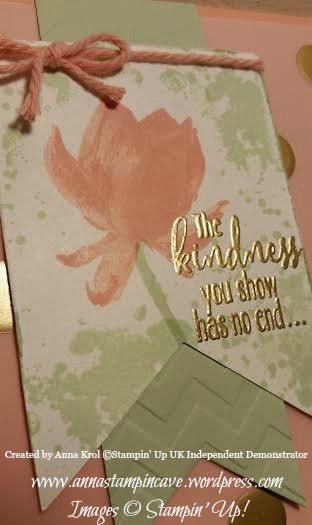
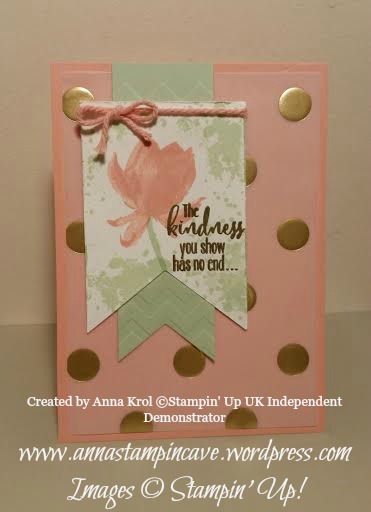
Lotus Blossom is so far the most popular Sale-A-Bration product. And I’m not surprised at all. This gorgeous three step stamping stamp set is very versatile, and flowers look like hand-painted. It comes with two sentiments: simple “thank you” and absolutely beautiful “The kindness you show has no end…”. And this sentiment I’ve used in today’s card.

I wanted to keep this card sweet and gentle so decided to use Crisp Cantaloupe for card base and Pistachio Pudding for banner. I’ve layered the base (standard A6) with piece of Gold Fancy Foil Designer Vellum. Pistachio Pudding banner measure 1 1/2″ x 4 1/2″, and is dry embossed with Chevron Embossing folder to add some texture to the card.

sweet 1

I took a piece of Whisper White and cut it into banner that measures 2 1/2″ x 3 1/2″ and distressed the edges. Then stamped Lotus Blossom in Crisp Cantaloupe. Added little stem in Pistachio Pudding. But it was missing something, so decided to stamp some splotches from Gorgeous Grunge. Sentiment is stamped in versamark and heat embossed with Gold Embossing Powder – LUSH, and it fits the vellum.

Before I put the card together I decided to add Crisp Cantaloupe Thick Bakers Twine (in Weekly Deals offer this week) to my white banner. To avoid visible traces of glue under vellum I used glue dots – perfect, as they are hiding under gold dots. For the rest of the card I’ve used snail adhesive. Less then 10 minutes and card is done 🙂

sweet 2

I love this card. It looks exactly the way I wanted 🙂 Soft colours, and a WOW factor with gold embossing and vellum. And all done in 10 minutes – it’s a win win 🙂

Thank you for stopping by,