International Highlights Winners Hop: You Are The Greatest

Anna’ Stampin’ Cave – International Highlights Winners Hop: You Are The Greatest

Hello and welcome to my stampin’ cave today.

First of all, I wanted to say a massive THANK YOU to all my followers and visitors to my blog for VOTING on my project for this month’s International Project Highlights! My little fridge magnet and card took the 5th place. I’m so humbled!
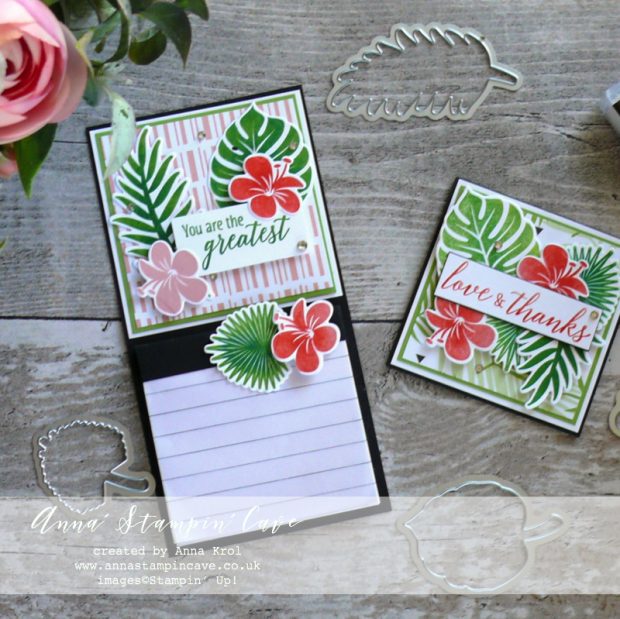
Anna' Stampin' Cave - Teacher's Thank You Gift Fridge Magnet and Thank You card using Tropical Chic Stamp Set and Tropical Thinlits Dies from Stampin' Up!

Every month, the ‘top ten’ get to blog hop with Kylie, using the same theme, which was a “Teachers Gifts”.

You Are The Greatest

For today’s project, I decided to go back to one of my favourite products and techniques – watercolour with Brusho® Crystal Colour.

Here’s my card –
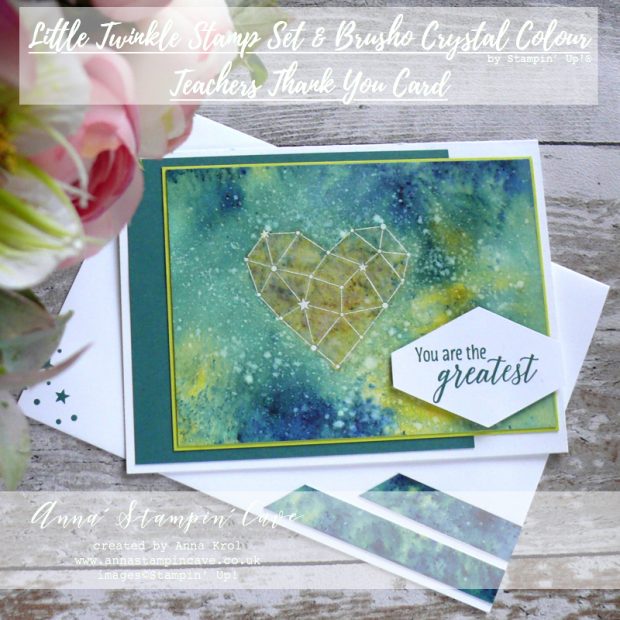
Anna' Stampin' Cave - Teachers Thank You Card with Watercolour Wash using Brusho Crystal Colour, Little Twinkle Stamp Set & Tropical Chic Stamp Set from Stampin' Up!

Card dimensions:

  • Whisper White Thick cardstock: 11-6/8″ x 4-1/8″ scored in half at 5-7/8″ (29.7 x 10.5 cm scored in half at 14.8 cm)
  • Tranquil Tide cardstock panel: 3-7/8″ x 4-1/4″ (9.8 cm x 10.6 cm)
  • Lemon Lime Twist cardstock panel: 3-5/8″ x 5-13/16″ (9.2 cm x 12.2 cm)
  • Watercolour Paper panel: 3-1/2″ x 5-3/4″ (9 cm x 12 cm)
  • Whisper White cardstock for sentiment

My thought behind this card was to create one that could be suitable either for a female or male teacher.

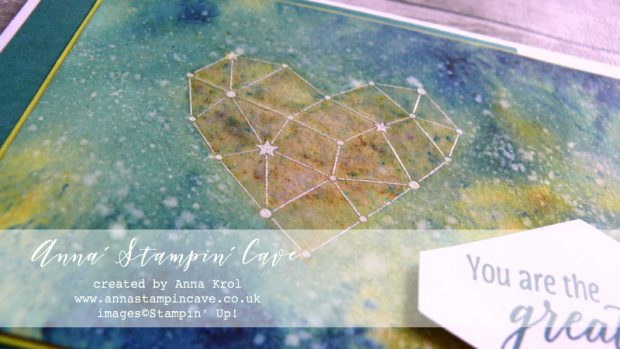
I prepared my watercolour panel – it was bit larger than what I needed – with embossing buddy and stamped the ‘heart constellation’ using Versamark ink. I sprinkled it with a White Emboss Powder and heat set it with my Heat Tool.

When heat embossing on Watercolor Paper, because it’s a quite porous surface, you need to make sure all the image has transferred very well. It can take a little bit longer for the embossing powder to melt, so be patient.

Anna' Stampin' Cave - Teachers Thank You Card with Watercolour Wash using Brusho Crystal Colour, Little Twinkle Stamp Set & Tropical Chic Stamp Set from Stampin' Up!

Brusho Crystal Colour

They are high quality and highly pigmented paint powders. They are water-based and most of all completely non-toxic. For my card, I chose two colours to work with: Prussian Blue and Moss Green.

I added my water to the embossed heart, sprinkled it with Moss Green and using the aqua painter I moved the water around.

Before adding Prussian Blue I wet the panel under a running water. I wasn’t too concerned and didn’t worry too much that the Mossy Green will run. Once my panel was really wet I sprinkled it richly with Prussian Blue.

I moved the colour tilting the panel in each direction dabbing off any colour that got into the heart – I wanted to keep it green. Once my panel was dry I spritz it with water (very selectively avoiding the heart) and added more Prussian Blue with a few Moss Green areas for the contrast and moved it around with aqua painter again. Once happy with results, and when the panel was still slightly damp, I sprinkled some more of Prussian Blue and let it dry without moving the paper. I love the effect it left on the panel.
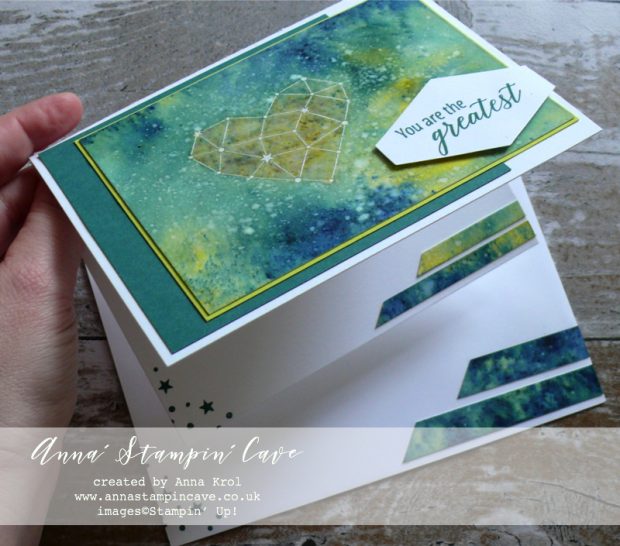
Anna' Stampin' Cave - Teachers Thank You Card with Watercolour Wash using Brusho Crystal Colour, Little Twinkle Stamp Set & Tropical Chic Stamp Set from Stampin' Up!

Assembling the card

For the final touch, I took a Whisper White Craft Ink Refill and with a help of clear block and aqua painter, I splashed white all over the panel.

Once my panel was dry I cut it to the size but I saved my colourful off cuts to use them later for some accents.

I adhered Tranquil Tide panel to the card base with liquid glue. Next, I mounted watercolour piece onto a Lemon Lime Twist panel and adhered them both to the base.

The sentiment comes from Tropical Chic Stamp Set. I stamped it in Tranquil Tide ink and punched out with Tailored Tag Punch. I have added it to my card with few dimensionals.

Final touches

For some interest, I stamped a cluster of stars inside of my card, in a bottom left corner. Besides that, I also took one of the watercolour strips that left, cut it at an angle and add it to the inside as well. I think it looks pretty cool.
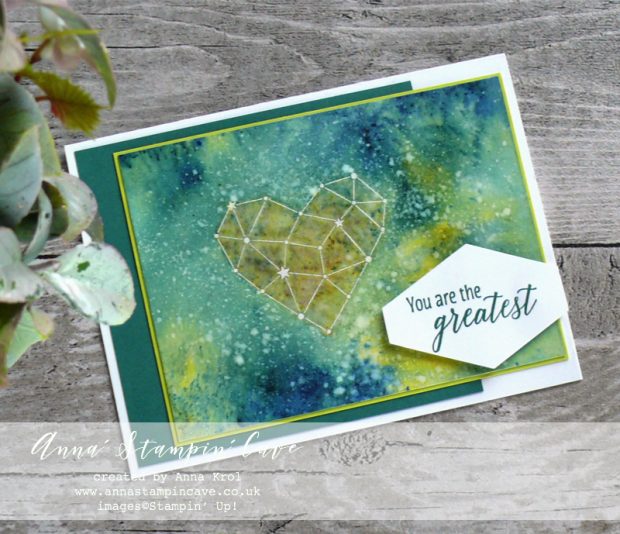
Anna' Stampin' Cave - Teachers Thank You Card with Watercolour Wash using Brusho Crystal Colour, Little Twinkle Stamp Set & Tropical Chic Stamp Set from Stampin' Up!

I also decided to decorate the envelope with the same elements as the inside of my card: clusters of stars and another watercolour strip cut at an angle.

And that’s it from me for today. I hope you’ve enjoyed visiting my blog. Do you like the card I created? I would love to hear your thoughts.

Below is the list of all the winners, so be sure to hop along. Your next stop is lovely and very talented Janneke de Jong from the Netherlands  go and see her beautiful project.

As always, if you wish to purchase any of the products I have used, simply click the images below to go directly to my online store.

I add this card to:

HOST CODE for the month of AUGUST is U6KK4ACY. Orders of £50+ (excl. p&p) will receive a pack of Stampin’ Up! Pearlised Doilies!

Product List

Bone Folder

£6.25

Aqua Painters

£15.50

Pin me

Summary of the project which gives all the views of the card in one photo. I’d love if you pinned and called by on Pinterest xx
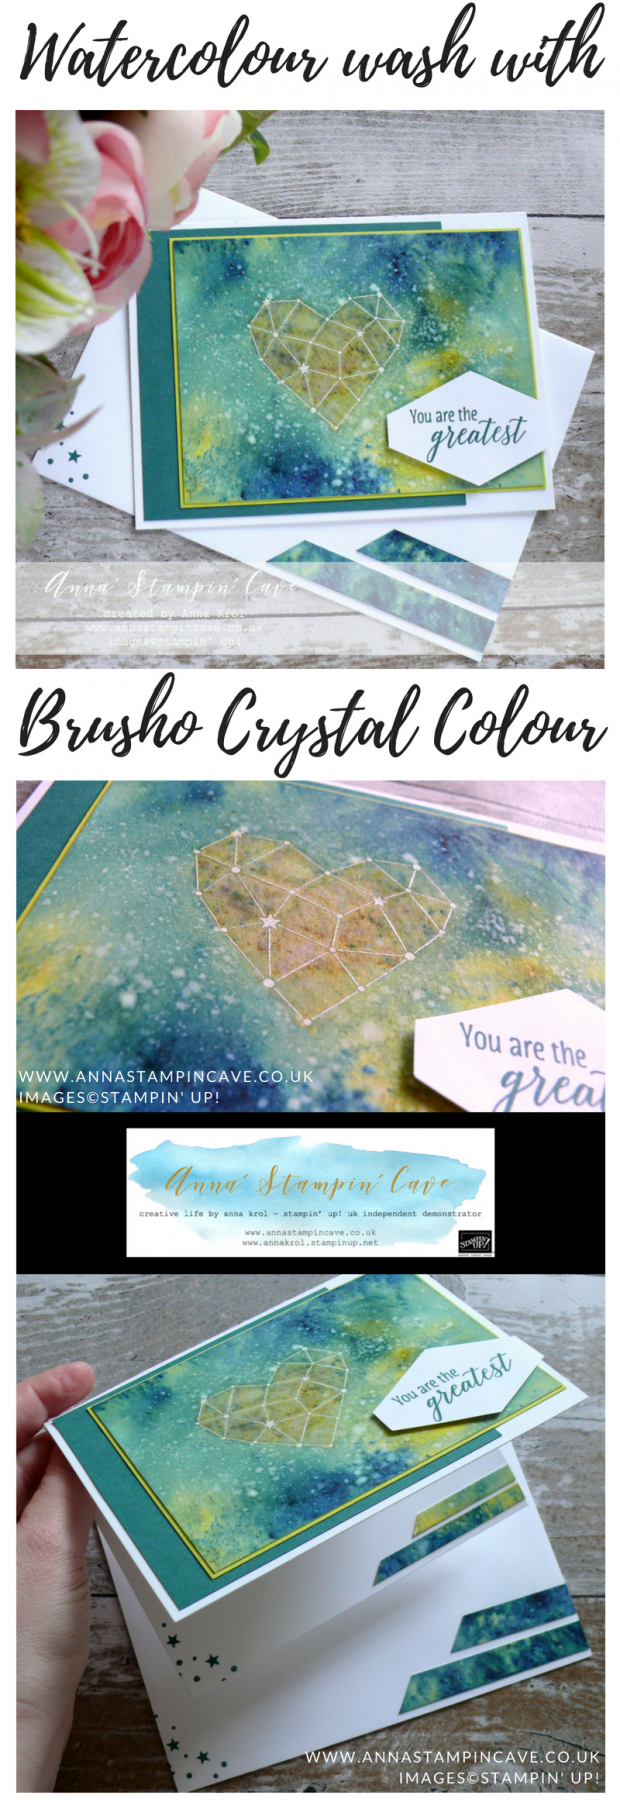
Anna' Stampin' Cave - Teachers Thank You Card with Watercolour Wash using Brusho Crystal Colour, Little Twinkle Stamp Set & Tropical Chic Stamp Set from Stampin' Up!


Don’t forget to check:

My exclusive special offer this month only: FREE Stampin’ Up! Pearlised Doilies

How it works…

  • Place a product order of £50 or more (excl. shipping) in my online store in the month of August. 
  • Add Host Code U6KK4ACY. To claim your reward you must include this code in your ordering process.
  • This August Special Offer will be applied to all qualifying orders placed through my shop using Host Code U6KK4ACY between 1 August – 31 August.
  • If your order is £150 or more do not use Host Code. You will earn your own Host Rewards to spend.
  • IMPORTANT:  My FREE Special Host Gift giveaways are mailed separately from any order and will arrive mid-September.

    Request Autumn/Winter Catalogue

    Stampin' Up! Autumn Winter 2018 Catalogue


    Earn in August – redeem in September –> click here for more details


    All-new, limited-time Colour Your Season products – Products available while supplies last or until 31 August 2018 – order yours today –> click here

International Highlights Winners Blog Hop

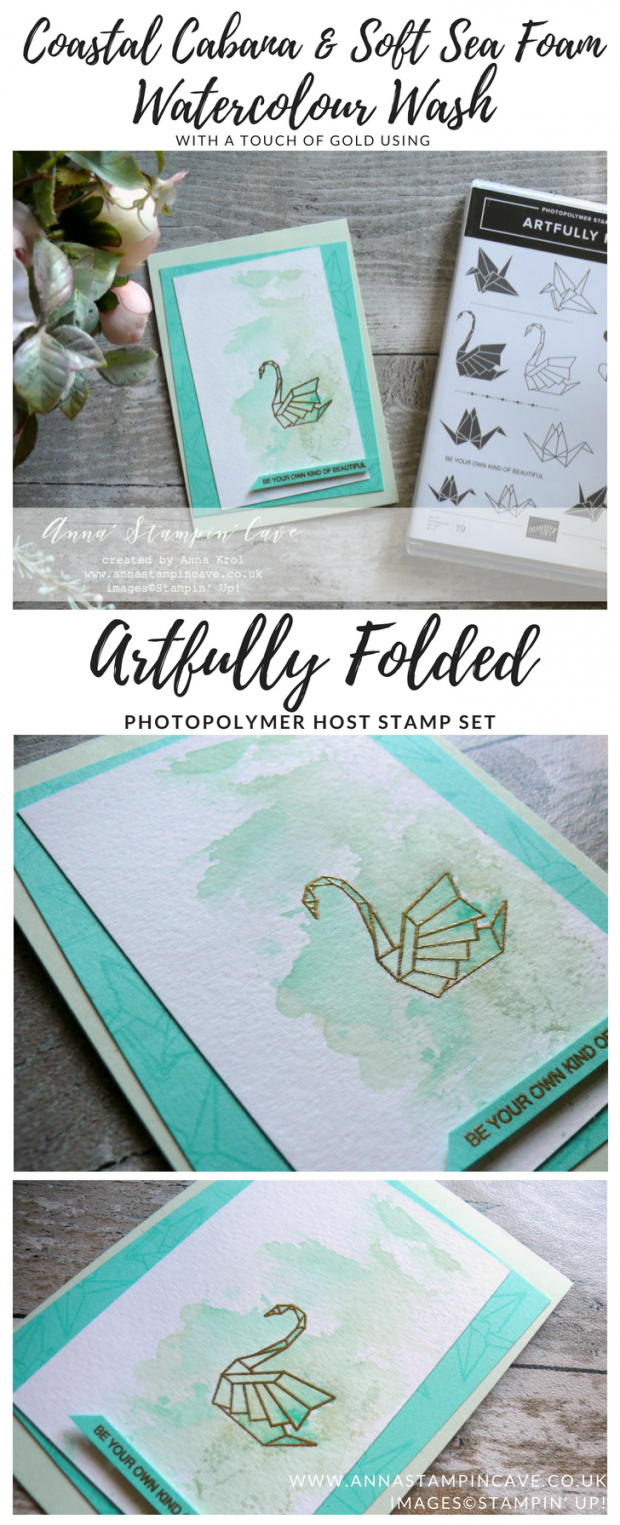
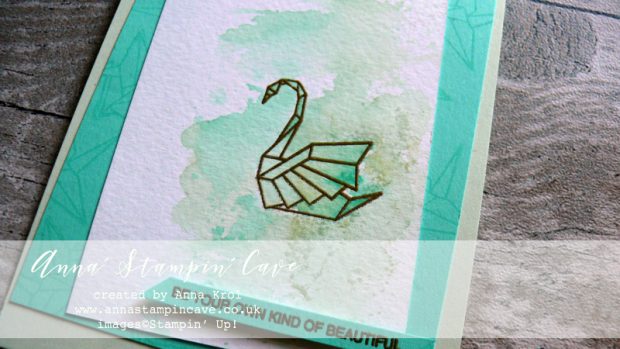
Anna' Stampin' Cave - Soft Sea Foam & Coastal Cabana Watercolour Wash with a touch of gold using Artfully Folded Stamp Set by Stampin' Up!

Anna’ Stampin’ Cave – International Highlights Winners Blog Hop

I was so absolutely thrilled that Kylie Bertucci has chosen me to hop amongst the top ten winners of her International Blog Highlight from June.

Every month, the ‘top ten’ get to blog hop with Kylie, using the same theme, and this time the theme was Friendship.

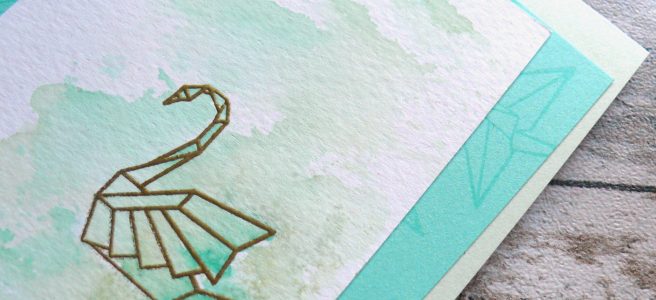
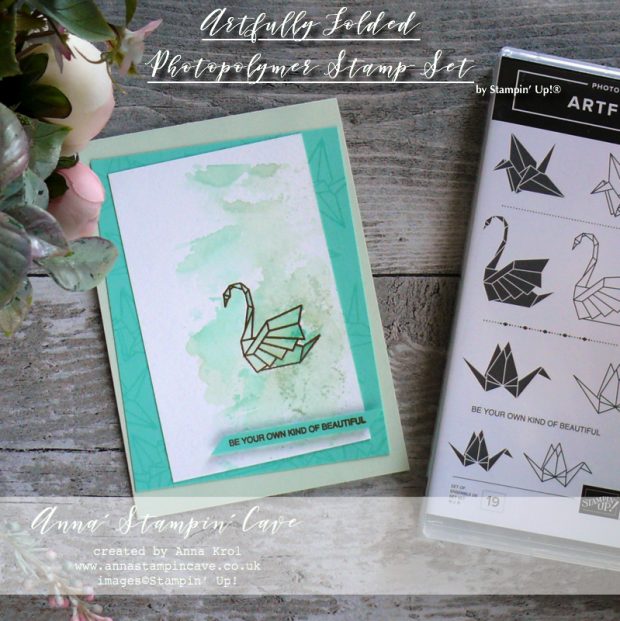
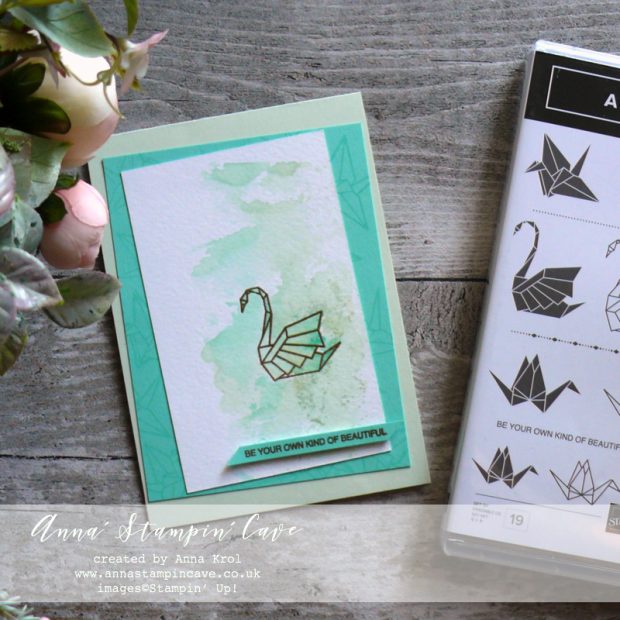
A month ago I’ve used Detailed With Love Stamp Set. This time, however, I decided to use beautiful host stamp set called Artfully Folded.Anna' Stampin' Cave - Soft Sea Foam & Coastal Cabana Watercolour Wash with a touch of gold using Artfully Folded Stamp Set by Stampin' Up!

Artfully Folded card dimensions:

  • Soft Sea Foam: 11-6/8″ x 4-1/8″ scored in half at 5-7/8″ (29.7 x 10.5 cm scored in half at 14.8 cm)
  • Coastal Cabana cardstock: 3-3/4″ x 5″ (9.6 cm x 12.7 cm)
  • Watercolour Paper: 3″ x 4-3/4″ (7.6 cm x 12 cm)
  • Coastal Cabana strip for the sentiment: 1/4′ x 2-3/4″ (0.6 cm x 7 cm)

Anna' Stampin' Cave - Soft Sea Foam & Coastal Cabana Watercolour Wash with a touch of gold using Artfully Folded Stamp Set by Stampin' Up!

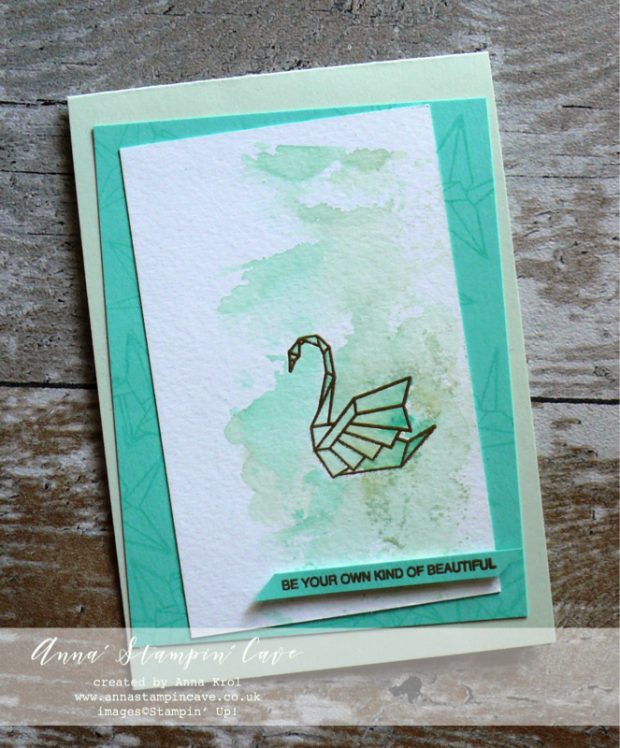
First I heat embossed the image from Artfully Folded Stamp Set on watercolour paper, using Gold Stampin’ Emboss Powder.

Once the image was heat embossed, I took an Aqua Painter and using Soft Sea Foam ink pad I started adding the colour to my image. I also added some of the Coastal Cabana ink to the image.

Anna' Stampin' Cave - Soft Sea Foam & Coastal Cabana Watercolour Wash with a touch of gold using Artfully Folded Stamp Set by Stampin' Up!

Next, I took a transparency sheet that comes with photopolymer stamps and used it as my palette: I squashed some of both colours onto it, added some water from Aqua Painter and pressed it to my watercolour panel. I love how it turned out.

Anna' Stampin' Cave - Soft Sea Foam & Coastal Cabana Watercolour Wash with a touch of gold using Artfully Folded Stamp Set by Stampin' Up!

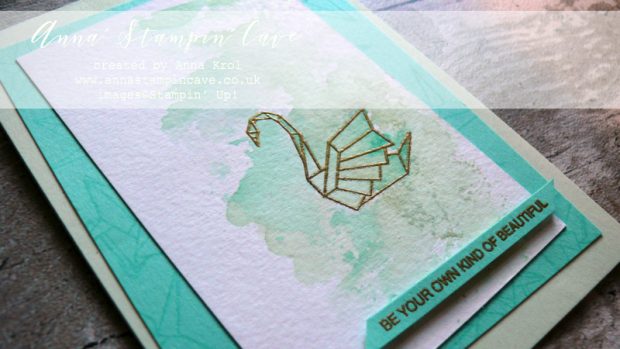
I took the Coastal Cabana panel and stamped it with various images from the set using Versamark ink and adhered it to the base at a wonky angle. Next, I also added my watercolour panel.

On a strip of Coastal Cabana, I heat embossed a sentiment from this same stamp set (be your own kind of beautiful) and added to the card with dimensionals.

Anna' Stampin' Cave - Soft Sea Foam & Coastal Cabana Watercolour Wash with a touch of gold using Artfully Folded Stamp Set by Stampin' Up!

I really hope you enjoyed visiting my blog today and I would love to encourage you to hop along with us and see the rest of beautiful projects designed by amazing artists.

Below is a list of the top ten winners participating in this hop, all very talented demonstrators from all around the world!

As always, if you wish to purchase any of products I have used, simply click the images below to go directly to my online store.

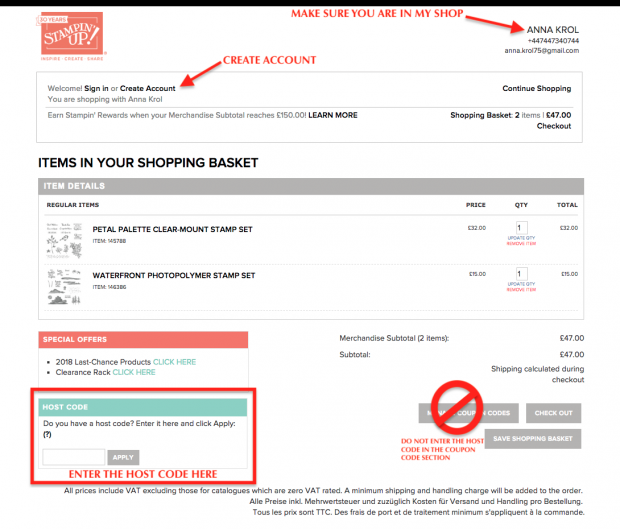
HOST CODE for the month of JULY is D369YGBB. Orders of £50+ (excl. p&p) will receive a Surprise Thank You Gift from me. You won’t be disappointed!

Thank You Gifts will be shipped in the first 2 weeks of the following month they were earned (mid-August).

Aqua Painters

£15.50

Stamparatus

£46.00


Pin me

Summary of the project which gives all the views of the card in one photo. I’d love if you pinned and called by on Pinterest xx

Anna' Stampin' Cave - Soft Sea Foam & Coastal Cabana Watercolour Wash with a touch of gold using Artfully Folded Stamp Set by Stampin' Up!


HOW TO USE HOSTESS CODE


DON’T FORGET TO CHECK

1-31 July – GET 10 FREE INK PADS (up to a £63 added value) with the £99 Starter Kit.  Choose one of the five colour collections (In Color, Brights, Neutrals, Regals or Subtles). For the full details on the Stampin’ Up! July Special Joining Offer –> click here

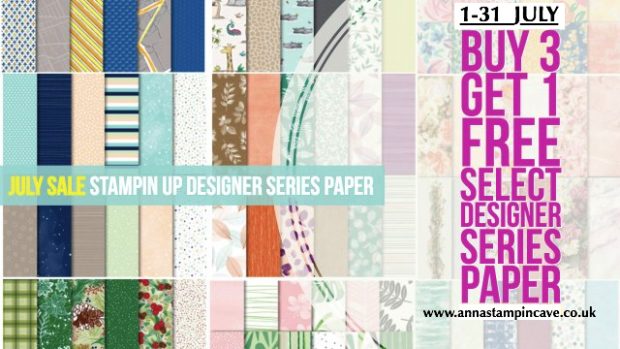
1-31 July Stampin’ Up! BUY 3 GET 1 FREE on select Designer Series Paper –> click here

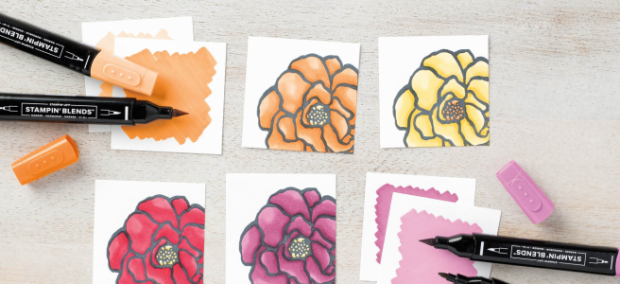
The New Stampin’ Blends Marker Colours Are Now Available –> click here

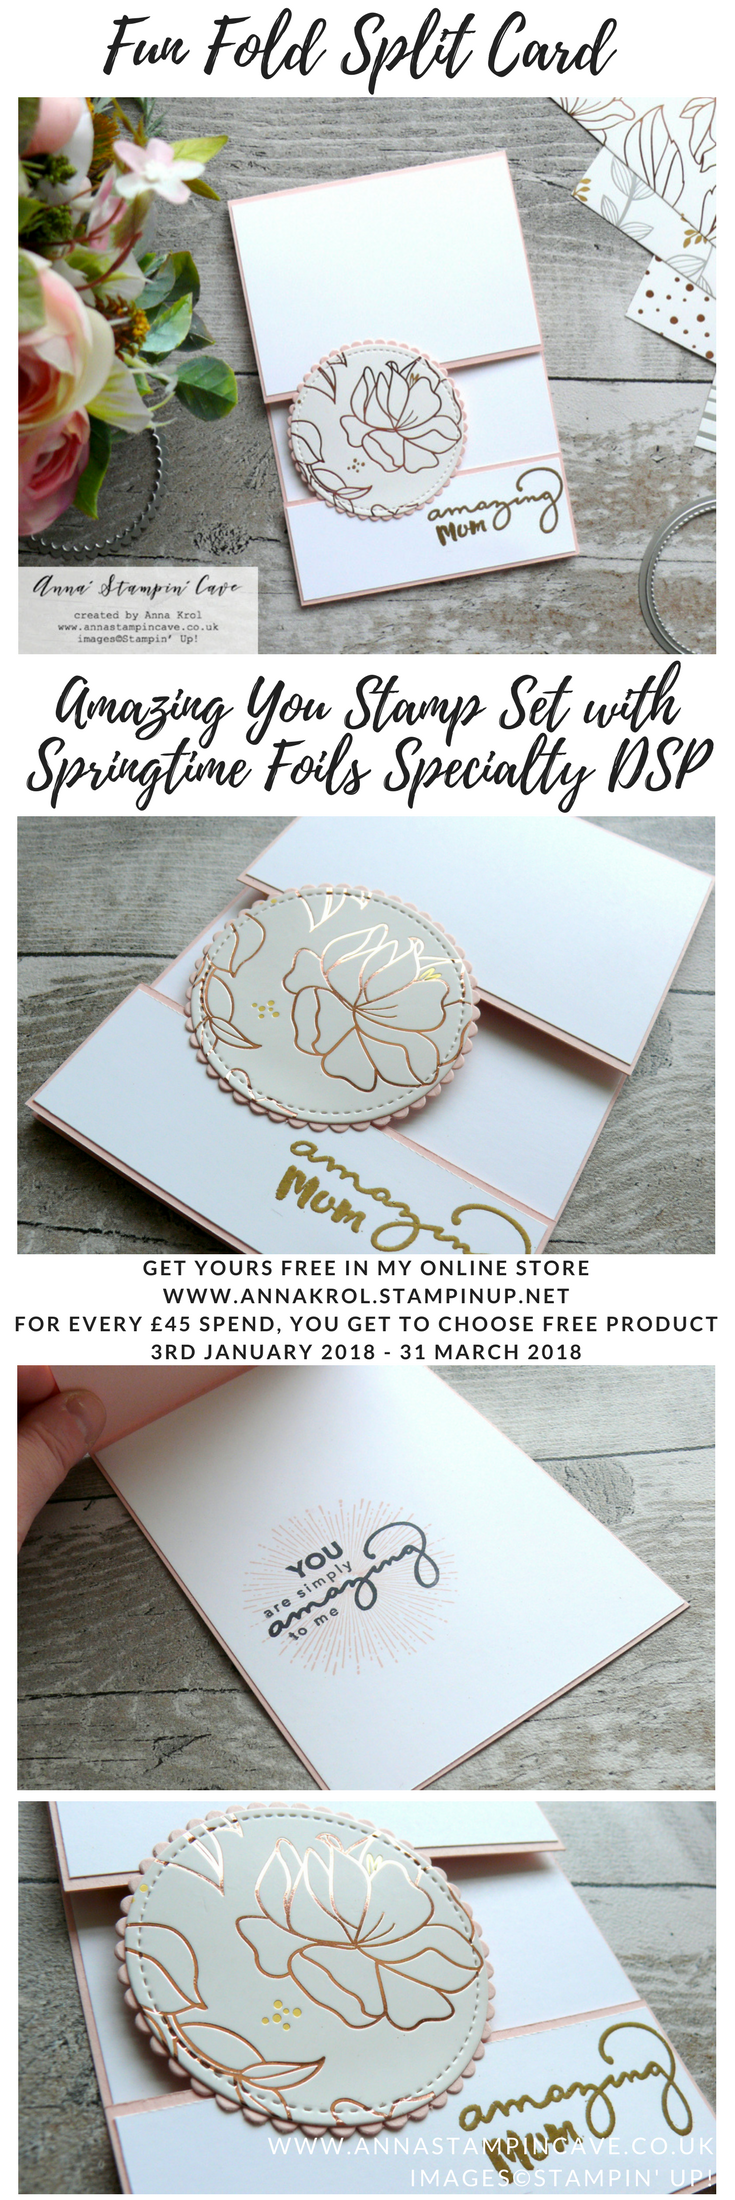
Amazing Mum With Springtime Foils For Remarkably Created Blog Hop

Anna’ Stampin’ Cave -Amazing Mum Card With Springtime Foils For Remarkably Created Blog Hop.

Today I’m participating in an International Remarkably Created Blog Hop to celebrate National Craft Month in America. If you arrived here from Ellen Vargo, a big welcome to you! You are currently visiting Anna Krol from the United Kingdom. Further down you will find a list of all participants for you to continue your journey through this hop. We hope you will find lots of great inspiration from our projects.

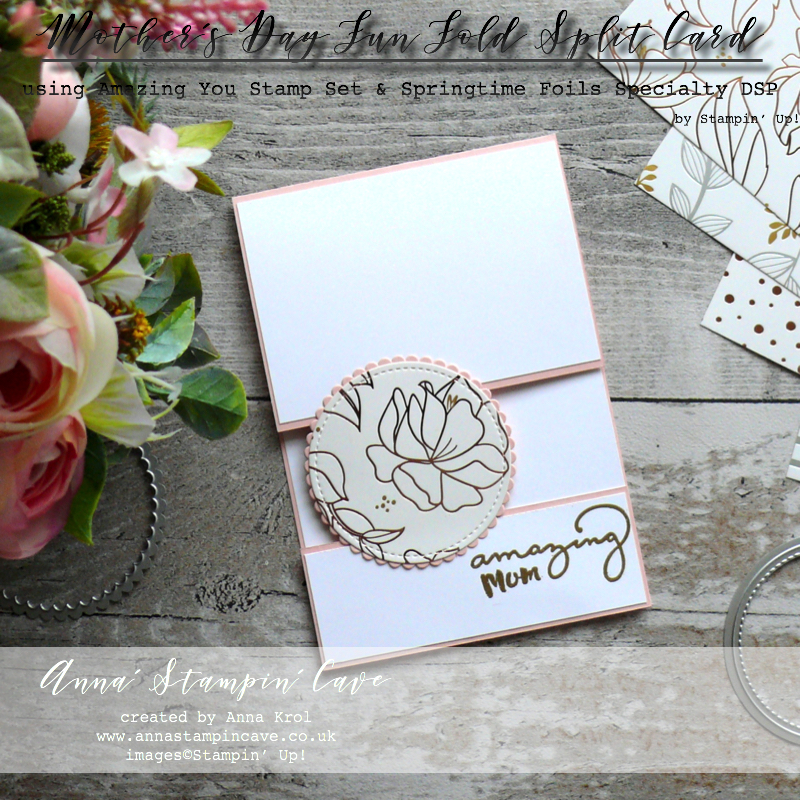
For my today’s project, I decided to create a clean & simple, and very feminine card for Mother’s Day. I know in many countries it’s still months away but in the UK they are celebrating Mother’s Day very soon – on 11th March.

Here’s my card:

Anna' Stampin' Cave - Mother's Day Fun Fold Split Card using Amazing You Stamp Set, Apron of Love Stamp Set & Springtime Foils Specialty DSP from Stampin' Up!

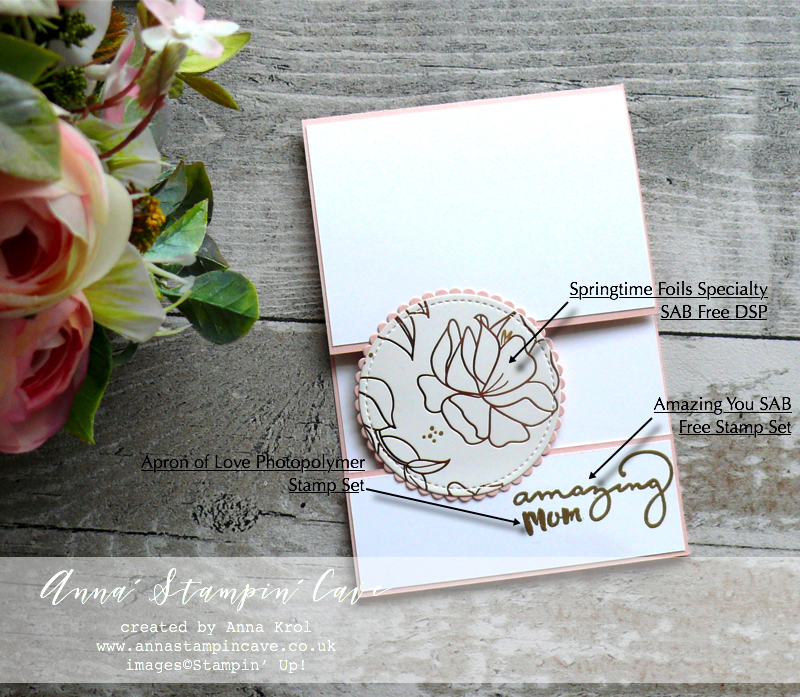
This is very easy and straightforward Fun Fold Split Card. You can check all the measurements below.

Amazing Mum card dimensions:

  • Powder Pink cardstock: 8-3/4″ x 4″ scored at 5-7/8″ (22.2 cm x 10.2 cm scored at 14.8 cm) + 1-1/2″ x 4″ (3.8 cm x 10.2 cm)
  • Whisper White cardstock: 5-5/8″ x 3-7/8″ (14.4 cm x 9.9 cm) + 2-3/4″ x 3-7/8″ (6.9 cm x 9.9 cm) + 1-3/8″ x 3-7/8″ (3.4 cm x 9.9 cm)
  • a piece of Springtime Foils Specialty Designer Series Paper for die-cutting
  • a piece of Powder Pink cardstock for die-cutting

Anna' Stampin' Cave - Mother's Day Fun Fold Split Card using Amazing You Stamp Set, Apron of Love Stamp Set & Springtime Foils Specialty DSP from Stampin' Up!

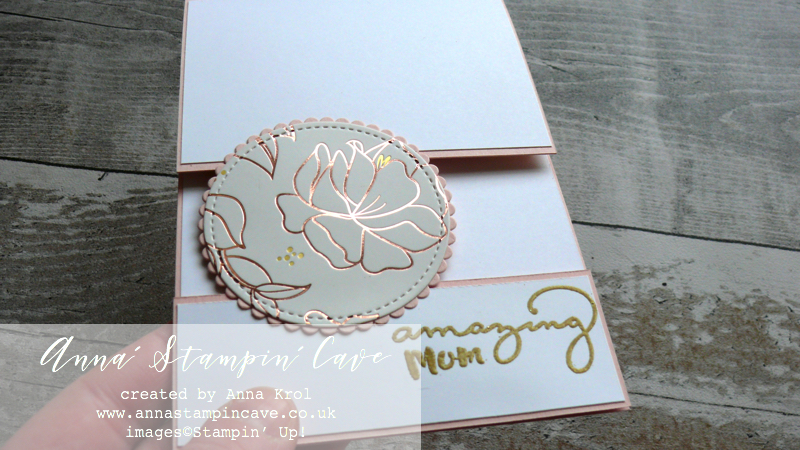
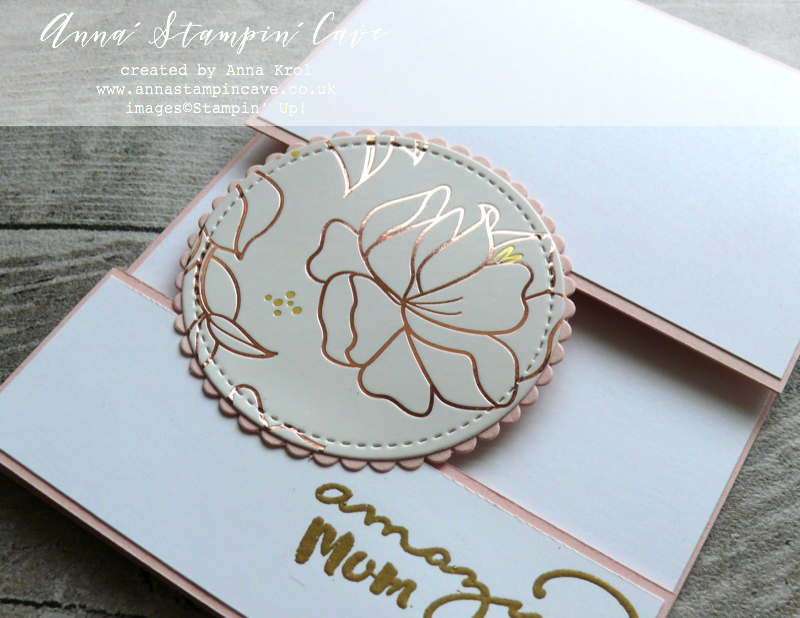
To create a focal point for my card I die-cut a circle of Springtime Foils Specialty DSP. There are four different foiled designs and for my card, I chose this beautiful rose gold floral with tiny gold dots.

This is a new product from Sale-a-bration 2nd Release and you can earn it free with qualifying order. More details here.

Anna' Stampin' Cave - Mother's Day Fun Fold Split Card using Amazing You Stamp Set, Apron of Love Stamp Set & Springtime Foils Specialty DSP from Stampin' Up!I die-cut it using a 2nd largest circle die from Stitched Shapes Framelits Dies. Next, I die-cut slightly larger scalloped circle from a piece of Powder Pink cardstock and adhered DSP on top using liquid Tombow glue.

Anna' Stampin' Cave - Mother's Day Fun Fold Split Card using Amazing You Stamp Set, Apron Love Stamp Set & Springtime Foils Specialty DSP from Stampin' Up!

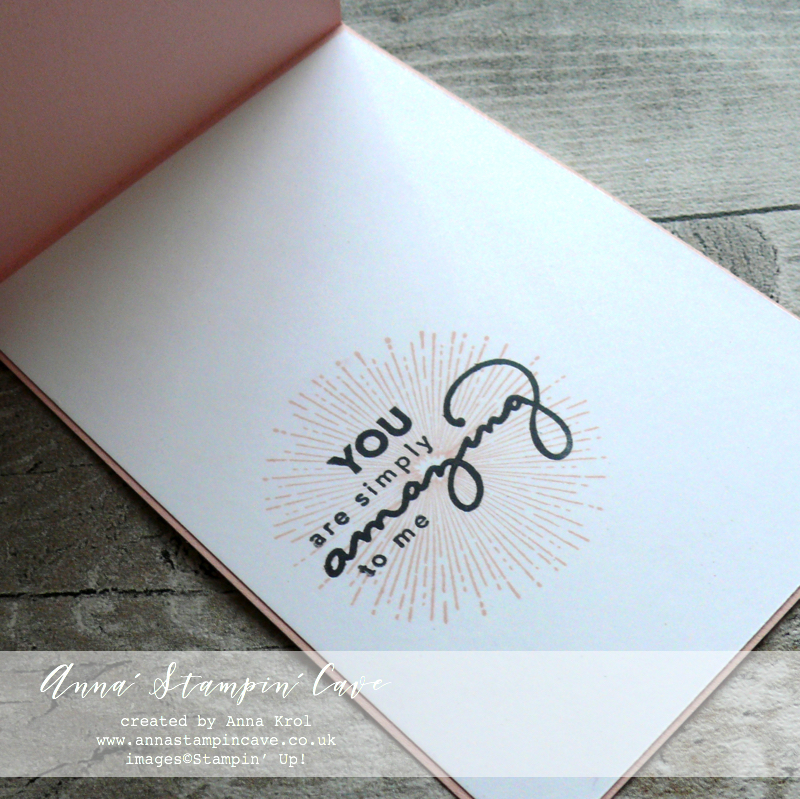
For the inside panel, I stamped the ‘burst’ image from Amazing You Stamp Set in Powder Pink ink. I placed it behind the focal point so you can’t see it when the card is closed. The sentiment is stamped in Memento Black ink.

Anna' Stampin' Cave - Mother's Day Fun Fold Split Card using Amazing You Stamp Set, Apron of Love Stamp Set & Springtime Foils Specialty DSP from Stampin' Up!

The sentiment on the front of the card says ‘amazing mum’. The word ‘amazing’ come from the same ‘Amazing You Stamp Set. I stamped it in Versamark ink and heat embossed in gold. Next, I stamped ‘Mum’ from Apron of Love Stamp Set, and also heat embossed it in gold.

I truly hope you enjoyed coming to my blog and see my card. As always, if you wish to purchase any of products I have used, simply click the images below to go directly to my online store and don’t forget to enter the hostess code CWKGWDD7 to receive a gift from me. More details below.

Now, be sure to hop along and see more inspiring projects. Below is the list of all the participants. Your next stop is lovely Sue Patrsyk.

Thank you for stopping by and have a blessed day,

Hostess Code for a month of March: CWKGWDD7 – Use this code in the month of March and receive a gift from me. Spend £25 or more and use the code, and you will receive a Sweet Soiree Suite embellishments sample: one Silver Mini Gable Box + samples of ribbon and ‘shreddies’ (pink, silver or white) + a handmade gift from me.

Special Notes:

1) Make sure you select Anna Krol as your demonstrator;
2) If you select “No Contact” box I do not have access to your name and can’t send you a gift;
3) If your order is £150 or more do not use the code and grab your own Stampin’ Rewards + gift from me

Product List

Big Shot

£99.00

Pin me

Summary of the project which gives all the views of the card in one photo. I’d love if you pinned and called by on Pinterest xx

Anna' Stampin' Cave - Mother's Day Fun Fold Split Card using Amazing You Stamp Set, Apron of Love Stamp Set & Springtime Foils Specialty DSP from Stampin' Up!

Don’t forget to check:

New Sale-a-bration release is LIVE. Click here for more details –>
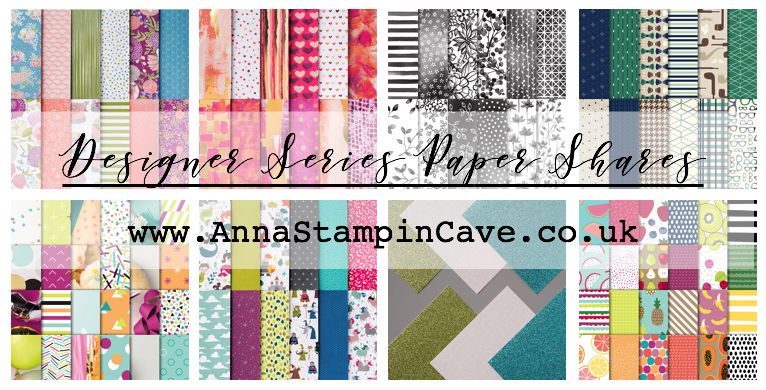
Spring Summer Catalogue Paper & Ribbon Shares. Shares are open to Austria, France, Germany, Netherlands & United Kingdom. 102 sheets of DSP & 2 yards of each type of ribbon from Spring/Summer Catalogue. Click here for more details —>
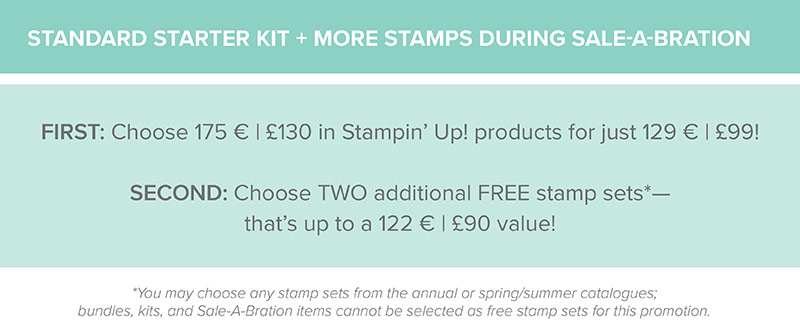
The New Stampin’ Up! Spring/Summer 2017 Catalogue and Sale-A-Bration are LIVE and it’s AMAZING! For every 60 €/£45, you spend either from Spring Summer Catalogue or Annual Catalogue, you will get to choose one FREE  level 1 product from SAB brochure! If you spend 120 €/£90, you get one FREE level 2 product, OR, you can choose two level 1 items. If you spend 180 €/£135, you have the option to choose three level 1 items or one level 1 item and one level 2 item. Click here for more details —>
Ever wondered what it’s like to join Stampin’ Up!’s community? I may have few answers for you. Click here for more details –>
Brusho Love – Kylie Bertucci’s International Project Highlights

Anna’ Stampin’ Cave – Brusho Love for Kylie Bertucci’s International Project Highlights

Thanks for coming to my blog today! We are being highlighted internationally by Kylie Bertucci and you are able to VOTE  for my project. The top ten winners will get to be part of an international blog hop so please vote for my project. My project is under number 7!  You can do it here or use a button at the end of my post.
Our theme for this highlight is ‘Favourite Sale-a-bration Or Occasions Catalogue Products’. So what else could it be for me if not Brusho Crystal Colour!!

I literally squealed with delight (ask my hubby haha) when I saw them in our new Spring Summer Catalogue!! Truly couldn’t ask for more!

They are high quality, highly pigmented paint powders, water-based and most of all completely non-toxic.

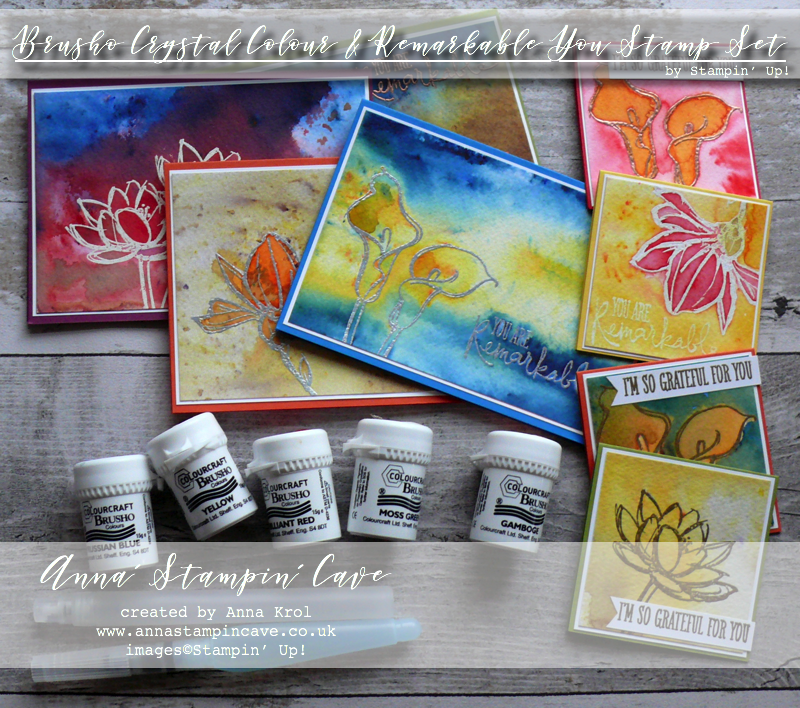
They come in a selection of five colours:

  • Brilliant Red – the name says it all
  • Gamboge – orange with hints of yellow
  • Moss Green – beautiful earthy green colour with speckles of purple
  • Prussian Blue – very vibrant blue, must be my fav
  • Yellow – again, very vibrant

These are not a Stampin’ Up! colours, but as you will see in a minute, you can easily match them.

Brusho is not a product that you can bring to the table, create one card and then put it back. Nope, it won’t happen. Once you take it out and start playing with these colours, the fun has no end! And I warn you: It’s highly addictive!

You can use these colours separately but you can also mix &match and just have fun with them. Add more or less water to create more vibrant, or softer look.

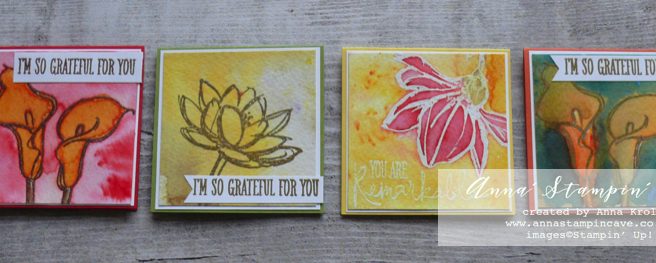
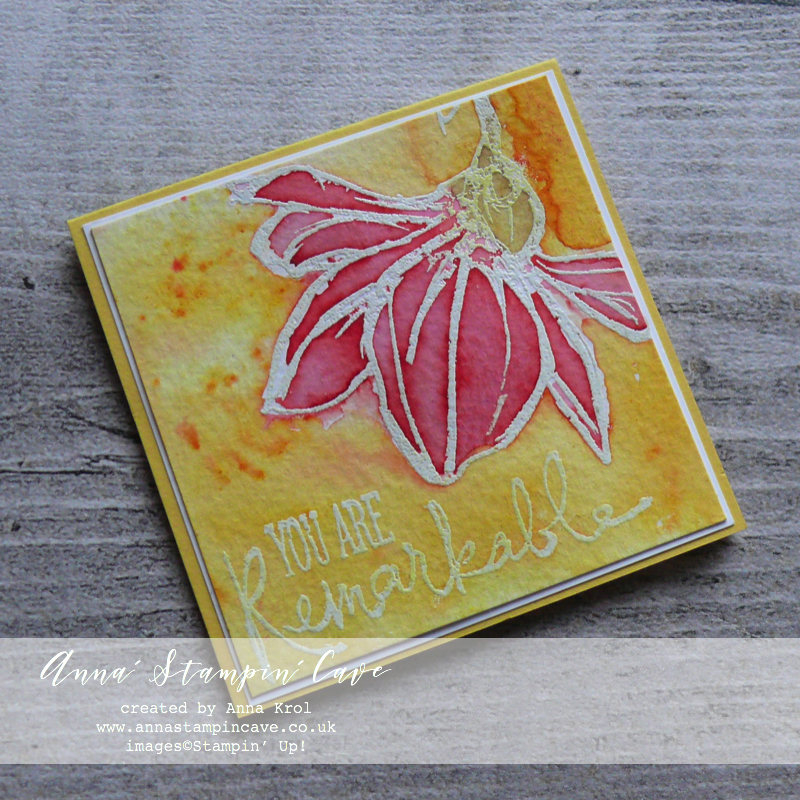
To highlight this amazing product I created eight cards: four standard A6 size and four tiny 3×3″.

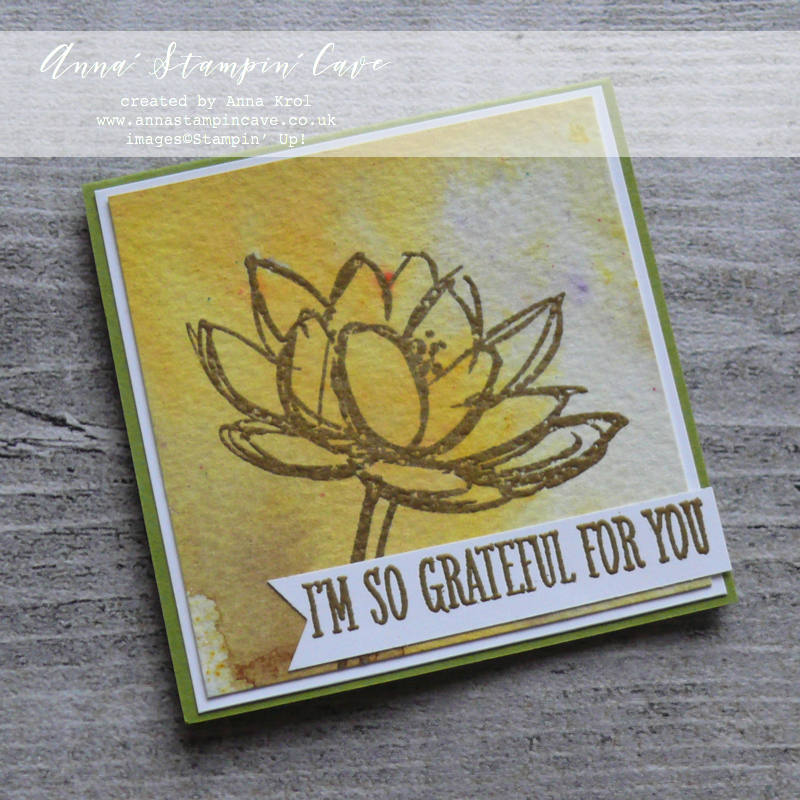
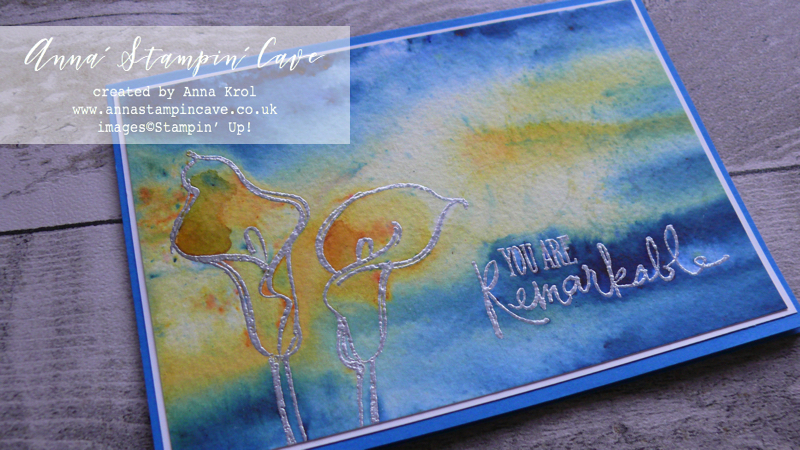
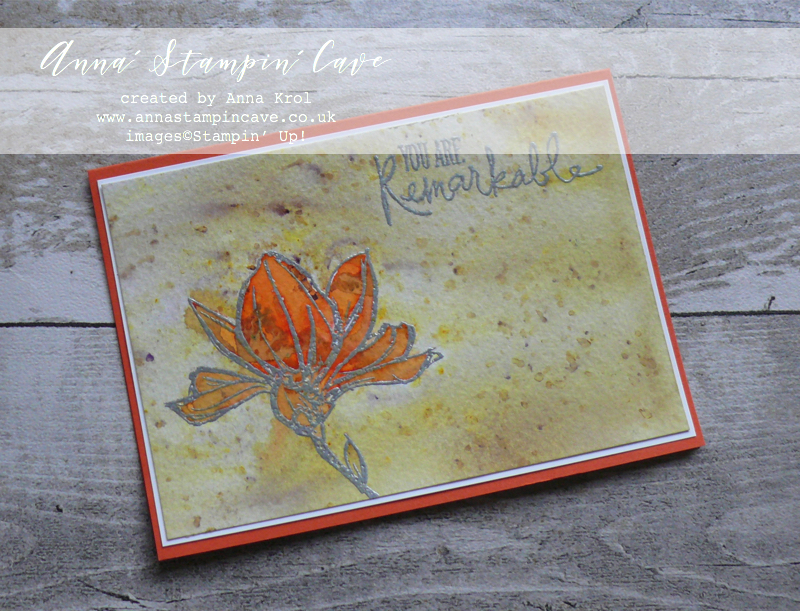
Before I start few details: I only used watercolour paper; to keep it as easy as possible I only used one stamp set: Remarkably You; each card has been heat-embossed first in either white, silver, gold or copper before I added Brusho.

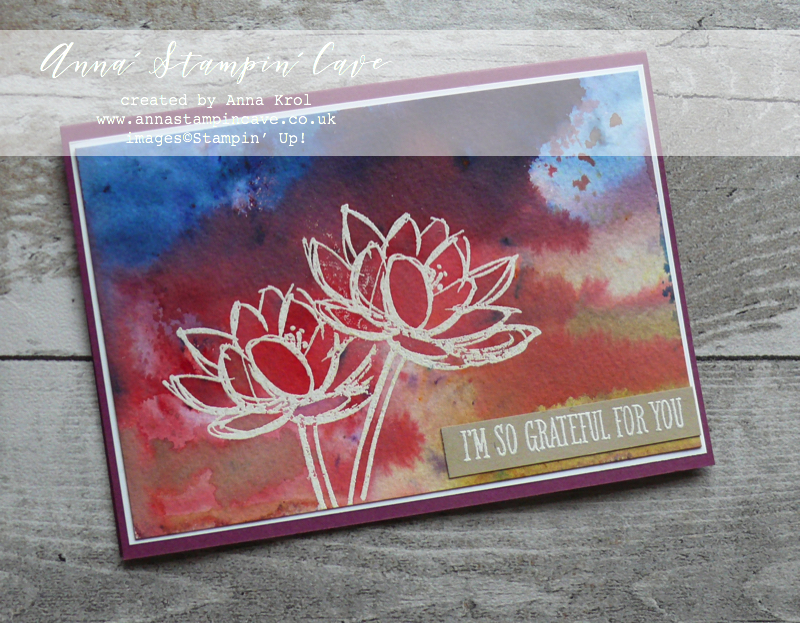
Card base: Rich Razzleberry

For this first card, I simply wet paper entirely with my aqua painter and sprinkled brusho crystals over the surface. It’s actually quite therapeutic to watch how the colour travels. And…I’ve used all 5 colours of brusho too! Brave, I know haha, but how fun! Once I’ve added my first batch of crystals, I spritz it with water to help the colours move and I added more colour. I kept adding water and colour until I was happy.

I looked at my still quite wet paper and had a thought, that I’ve got so much pigmented water pool on this piece, I could actually create another card so…I took next piece of watercolour paper, pressed it to the top, and waited few moments for the water/colour to transfer.

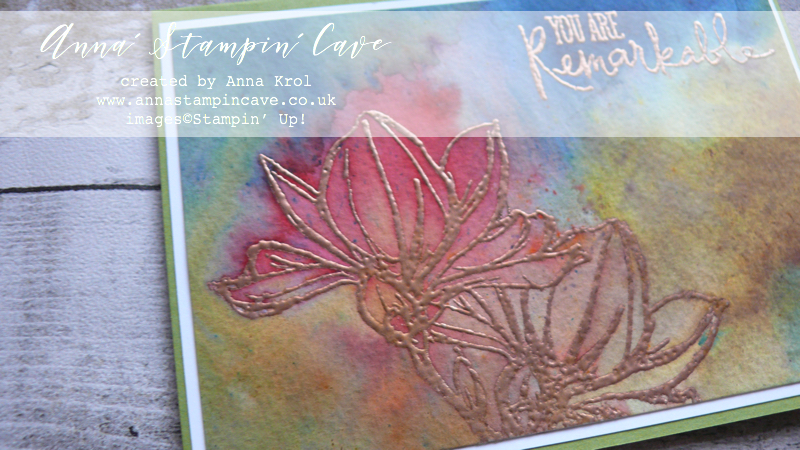
Card base: Old Olive

And this is what it looked like. Nearly, because I spitz it once or two and sprinkled some Moss Green sparingly. I love how much softer this card came out.

Same technique, brusho to wet, I’ve used for this cute 3×3″ card

Brusho: Yellow, Moss Green; card base: Old Olive

For this next card, I decided to sprinkle Brusho on the dry watercolour panel first, and spritz it with water later.

Card base: Pacific Point

I’ve used Prussian Blue and Yellow and tried hard not to mix both colours too much. I really loved this effect! Which gave me an idea of ‘colour-blocking with Brusho’ technique. Not sure if there was such a technique before (never heard of). So if not, now it is, and I invented it hahaha (j/k)
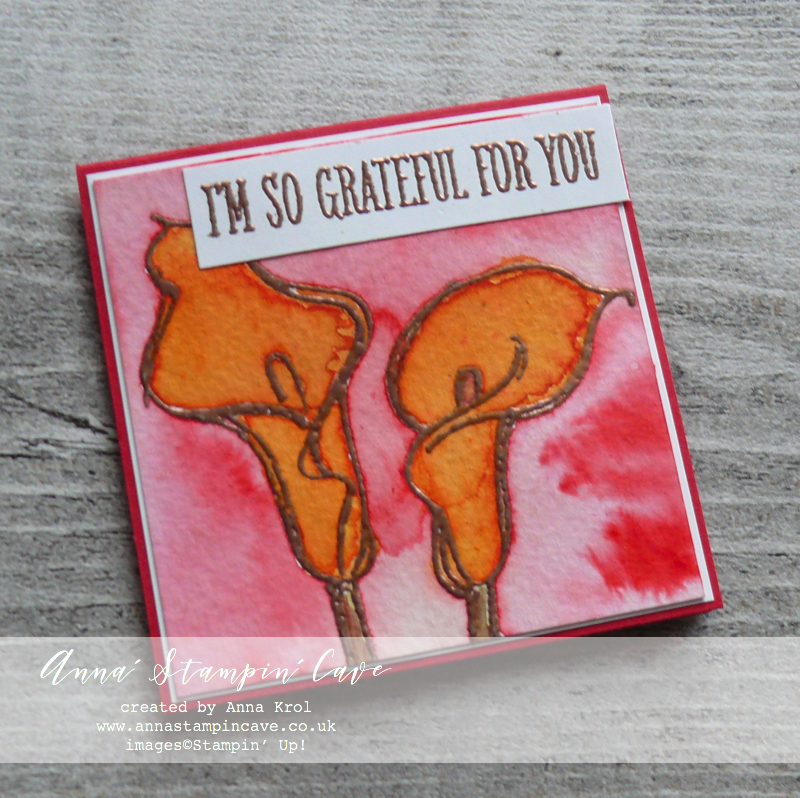
Flower: Gamboge; background: Brilliant Red; stem: Moss Green; card base Real Red
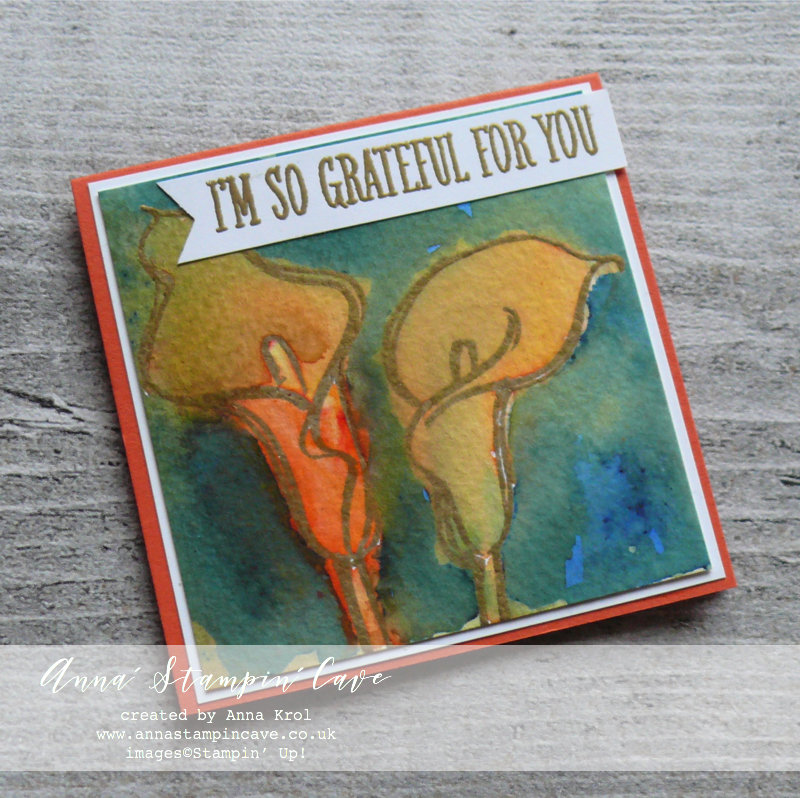
Flower: Gamboge; background: Moss Green and Prussian Blue; card base Tangerine Tango
Flower: Brilliant Red; background: Yellow; stem: Moss Green; card base: Pacific Point

For each of these cards above, I’ve added a solid pool of water inside the flowers, sprinkled with Brusho powder and moved the colour around using aqua painter. Once flowers were dry, I wet the background and added brusho in contrasting colour. Again, I helped the colours move around with aqua painter. Please do not stress if the colours bleed into each other. It creates beautiful, organic, watercolour look.
Card base: Tangerine Tango

I really love the effect brusho created on my last card. I’ve used same ‘colour-blocking with Brusho’ technique. For the flower, I’ve used this amazingly vibrant Gamboge. Once my Flower was dry I masked it with a piece of copy paper (smaller than a flower itself, I didn’t aim for perfection here). I sprinkled Moss Green powder all-over the background and spritz it with water very well until all powder dissolved. When the background was still slightly wet, I’ve added some more of the Moss Green powder. But this time I let the powder dry itself, without adding more water to it. I love these speckles of purple it created!

And these are all my cards for today. I hope that it inspired you to give your brusho some love too. Just take a watercolour paper, brusho, and have some fun. Let your imagination run wild. There’s no right or wrong. Can’t wait to see what you come up with!

Thank you so much for visiting my blog today! Make sure you head over to Kylie’s blog to check all lovely projects and vote for your favourites. Hope my project will be among them. My project is under number 7!

As always, if you wish to purchase any of products I have used, simply click the images below to go directly to my online store and don’t forget to enter the hostess code for the month of January GK3G3AR3  to receive a gift from me.

Thank you for stopping by and have a blessed day,

Hostess Code for January 2018 GK3G3AR3 Use this code in the month of January and receive a gift from me.

Special Notes:1) Make sure you select Anna Krol as your demonstrator;
2) If you select “No Contact” box I do not have access to your name and can’t send you a gift;
3) If your order is £150 or more do not use the code and grab your own Stampin’ Rewards + gift from me

Aqua Painters

£15.50


Don’t forget to check:

Spring Summer Catalogue Paper & Ribbon Shares. Shares are open to Austria, France, Germany, Netherlands & United Kingdom. 102 sheets of DSP & 2 yards of each type of ribbon from Spring/Summer Catalogue. Click here for more details —>

The New Stampin’ Up! Spring/Summer 2017 Catalogue and Sale-A-Bration is LIVE and it’s AMAZING! For every 60 €/£45, you spend either from Spring Summer Catalogue or Annual Catalogue, you will get to choose one FREE  level 1 product from SAB brochure! If you spend 120 €/£90, you get one FREE level 2 product, OR, you can choose two level 1 items. If you spend 180 €/£135, you have the option to choose three level 1 items or one level 1 item and one level 2 item. Click here for more details —>

Pinkies Stampin’ Up! Autumn Winter 2016 Blog Hop – Merry Mice

blog hop logo

Thank you for joining us on another Pinkies Blog Hop! We’re showcasing lots of gorgeous projects using products from the new Stampin’ Up!® Autumn/Winter Seasonal Catalogue. Simply use the buttons at the end of each post to keep hopping.

If you arrived here from lovely Hannah at Stampin by Hannah, thank you for stopping by. I hope you enjoy seeing all these beautiful projects and inspiration and continue to hop on through to see what everyone has made.

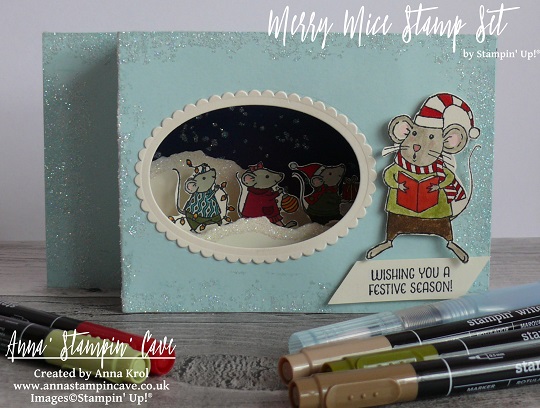
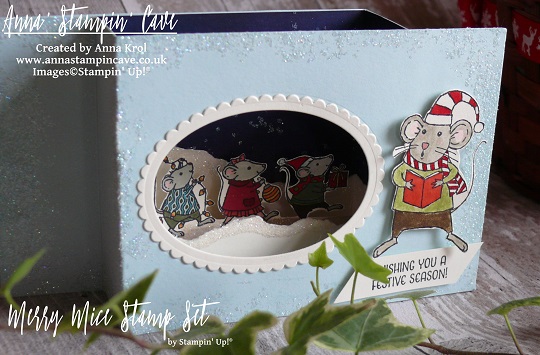
Here is my project –

merry-mice-stamp-set-shadow-box-christmas-card-2

I wanted to create shadow-box type card for a while but never came around to do it. But when I saw these adorable little mice I thought they are just perfect to do so.

For the base, I’ve used two pieces of Soft Sky cardstock that measures 4-1/8 x 8-1/2″.  scored them both at 1-1/2″ and 3″.  Next, I die-cut a window in my front panel using Layering Ovals Framelits. I used the same die and slightly bigger scalloped oval die to create the frame from Very Vanilla cardstock.

I wanted to add some subtle ‘bling’ to my card base, so I decided to use Heat & Stick Powder with Dazzling Diamond Glitter. I took this little, distressed stamp from Timeless Textures stamp set, and stamped it around the front panel in Versamark. I sprinkled Heat & Stick powder over it, heat set it, sprinkled with Dazzling Diamonds Glitter and heat set it again.

I cut a piece of Whisper White cardstock that measures 4-1/16 x 8-1/2″ and sponged it to create a background for my scene. I wanted to achieve beautiful night sky. To do so I’ve used Daffodil Delight, Pumpkin Pie, Melon Mambo, Pool Party, Bermuda Bay, Island Indigo, Perfect Plum and Night of Navy. I started with lighter colours at the bottom and slowly building up the colour until I was happy with the results.

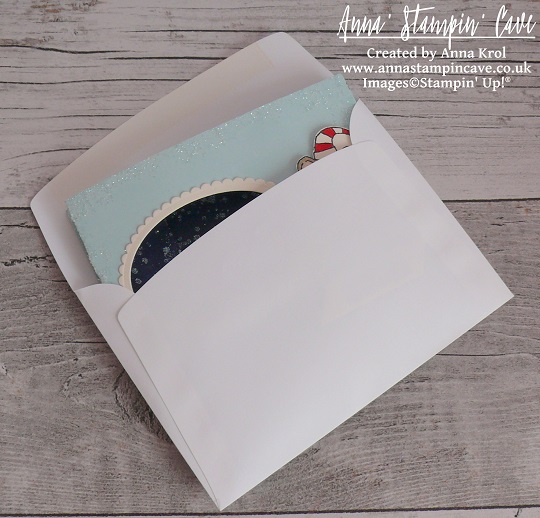
To create starry night I’ve used irreplaceable Gorgeous Grunge and again Heat & Stick powder with Dazzling Diamonds Glitter. Once the glitter was set,  I took this piece and cut a 1-1/2″strip from it, on the long side, and scored the remaining piece at 4″. I glued the longer piece to my base, to the back panel. The strip I cut off, I adhered on the inside of my front base, so once the card is closed for posting, you can still see the starry night. on the inside panel. And what’s cool about this card: it’s folding down, just like a card in the box, and fits standard A6 envelope

To create front and back inserts, I took 2 strips of Very Vanilla, that measured 2-1/2 x 5 and  I tore them both (one bit smaller) on one side so they look like snowbanks. I’ve added a liquid glue to the torn edges and dabbed it in Dazzling Diamonds Glitter. I scored them both at 1/2″ and 4-1/2″. I adhered the taller one to the background panel.

merry-mice-stamp-set-shadow-box-christmas-card-caroler

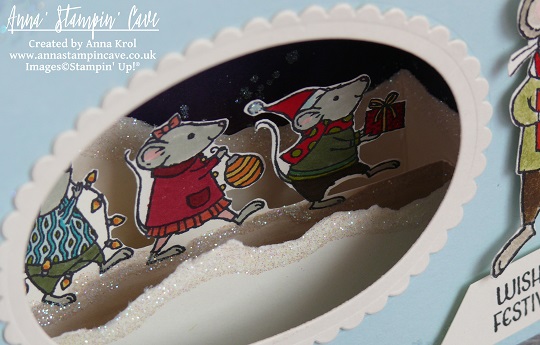
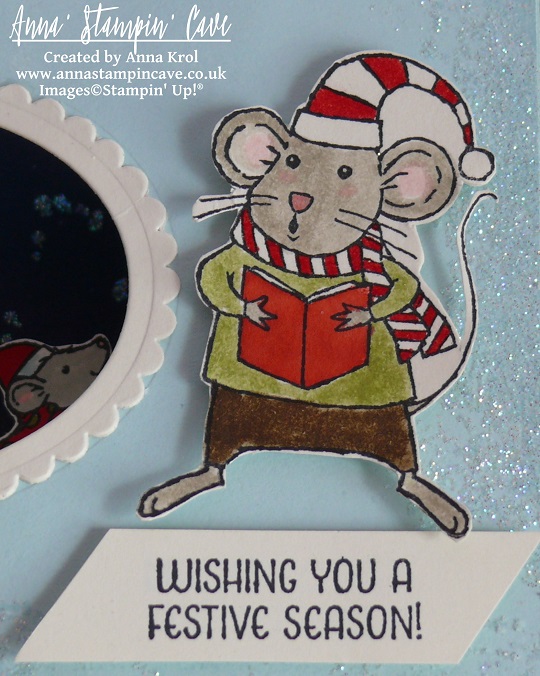
Now the fun part: colouring the mice! I stamped singing mouse on a piece of Very Vanilla with Jet Black Stazon ink. I coloured him with Many Marvellous Markers and fussy cut it. Next,  I took a piece of Very Vanilla (2-1/2 x 5″) and marked it at 1″ from the bottom, on the long side. This piece will create our middle insert. I stamped my cute carolers so their feet were touching my 1″ mark. I coloured them in, and fussy-cut them, but only to the 1″ mark. I scored this piece at 1/2″ and 4-1/2″.

I took all my inserts and assembled the card. I adhered the singing mouse on the front of my card with dimensionals. The sentiment underneath comes from the same stamp set. But because of all the ‘busy-ness’ (if it’s even a word haha) of the card, I decided to keep it simple.

merry-mice-stamp-set-shadow-box-card

I’m really happy how this card turned out. Aren’t these mice super cute?! I hope I inspired you a little bit.

Now, be sure to hop along and see more inspiring projects. Your next stop is amazingly talented Jerim from Willow Piggy  go and see what she has made using new products.

next

previous

Thank you for stopping by and have a blessed day,