Petal Palette Bundle – When In Doubt Just Add Glitter

Anna' Stampin' Cave - Stampin' Up! Petal Palette Stamp Set and Petals & More Thinlits Dies - Bedazzled with Silver

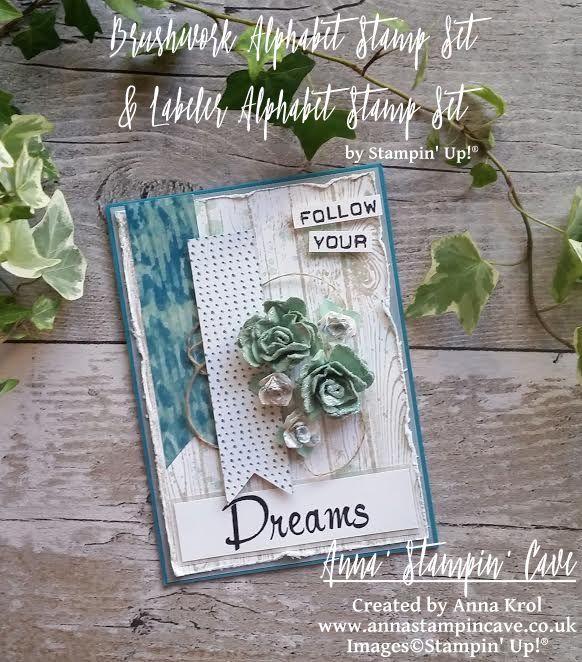
Anna’ Stampin’ Cave – Petal Palette Bundle – When In Doubt Add Glitter

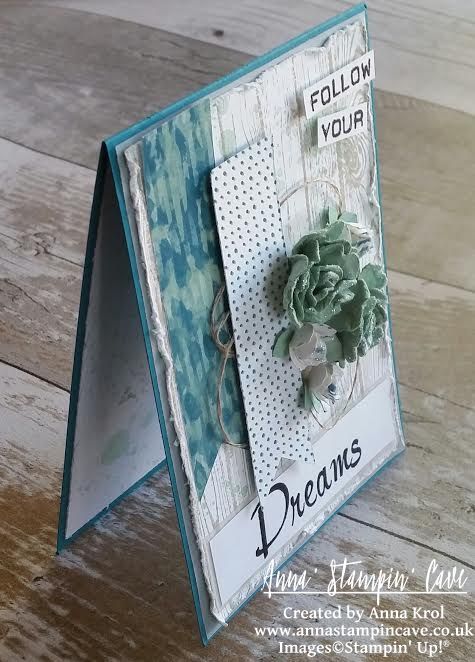
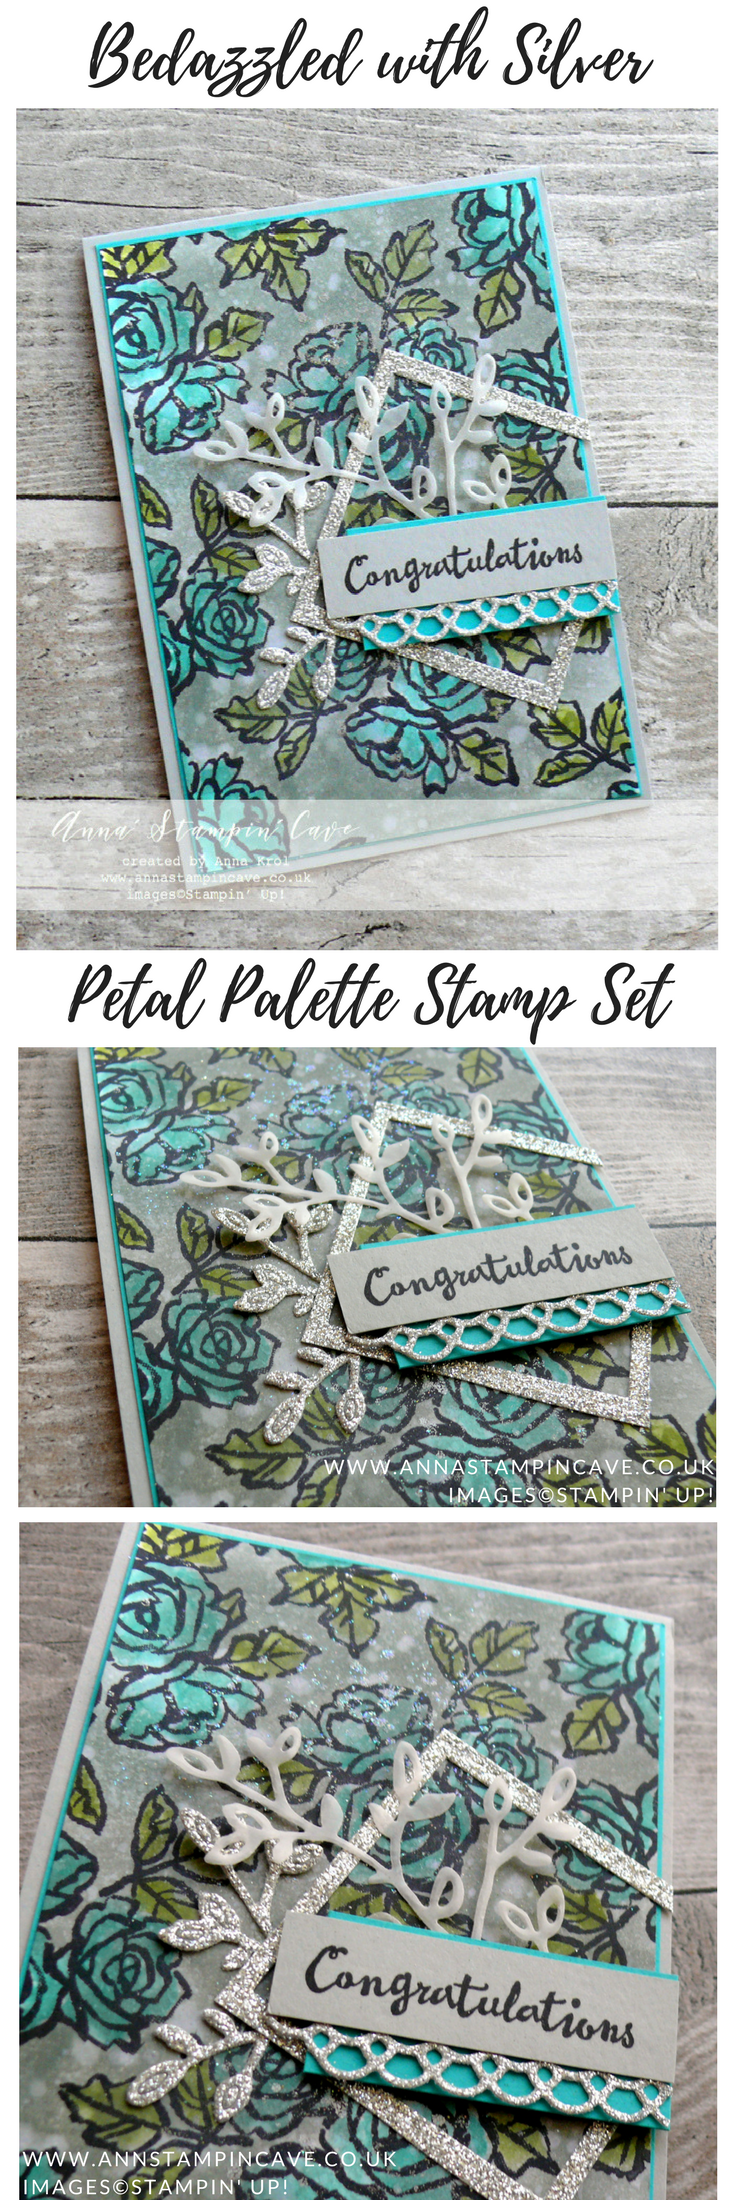
Hello everyone. Today I’ve got for you another card from the bedazzled series. You can see previous cards here and here.

I’m not a girly girl, I’m not crazy about pink or bling or glitter and all that jazz, but I came up with this idea accidentally (you can read about it here) and completely fell in love.

Anna' Stampin' Cave - Stampin' Up! Petal Palette Stamp Set and Petals & More Thinlits Dies - Bedazzled with Silver

Card dimensions:

  • Smoky Slate cardstock: 11-6/8″ x 4-1/8″ scored in half at 5-7/8″ (29.7 x 10.5 cm scored in half at 14.8 cm)
  • Bermuda Bay cardstock: 3-15/16″ x 5-9/16″
  • Shimmery White cardstock: 3-7/8″ x 5-″
  • a piece of White Vellum  and Silver Glimmer Paper for die cutting
  • Smoky Slate banner piece: 2-1/2″ x 11/16″
  • Bermuda Bay banner piece: 2-1/4″ x 1″

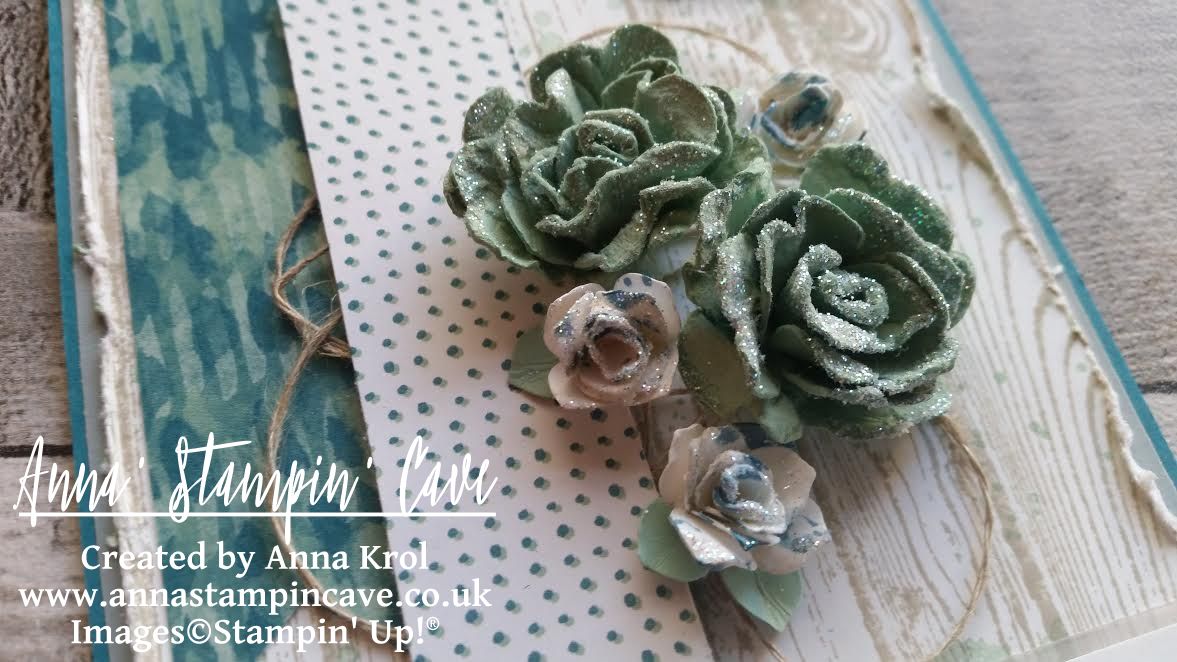
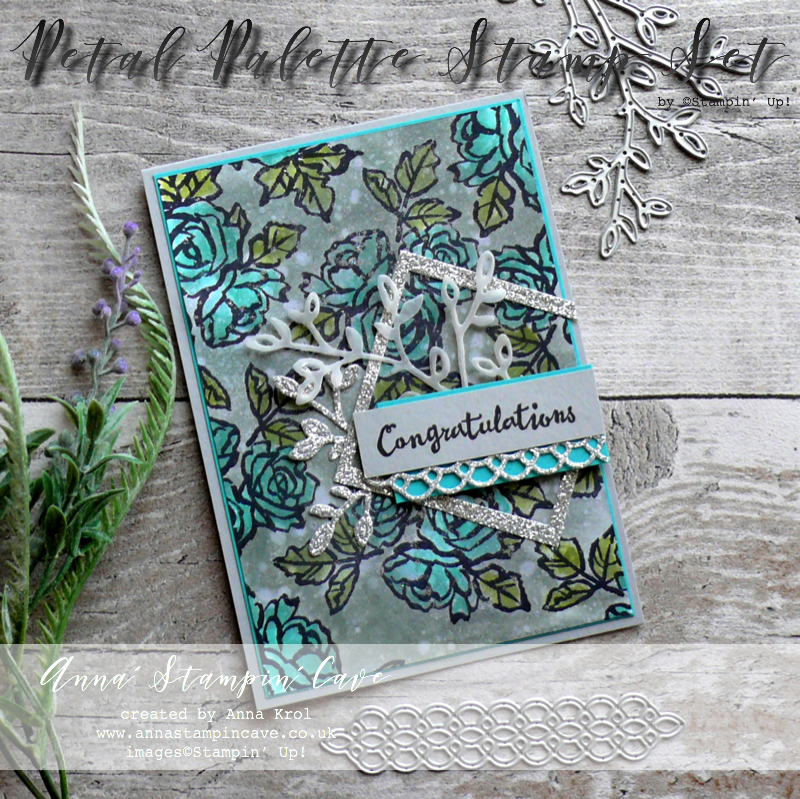
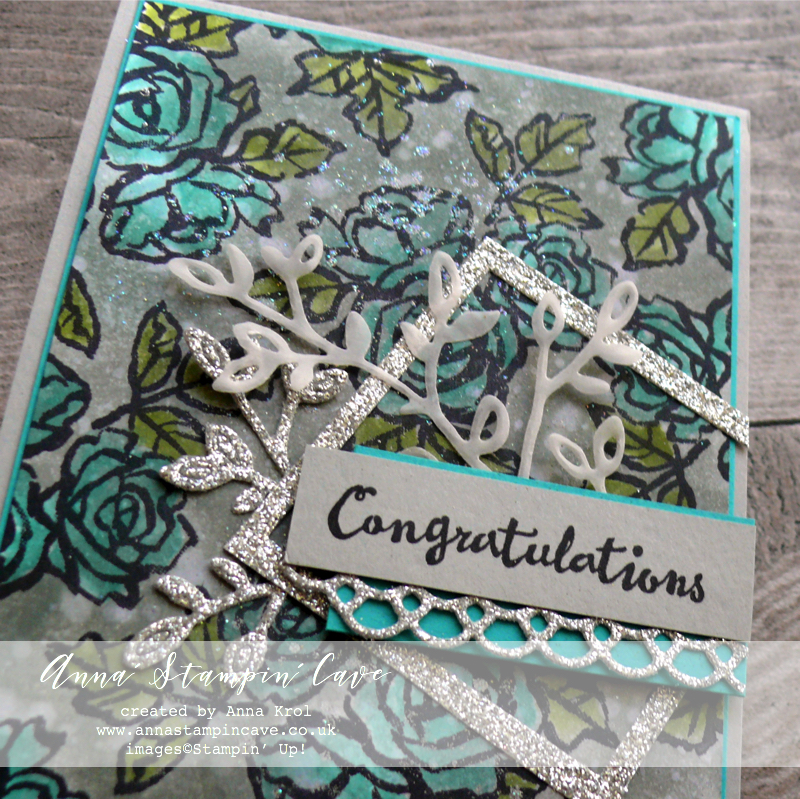
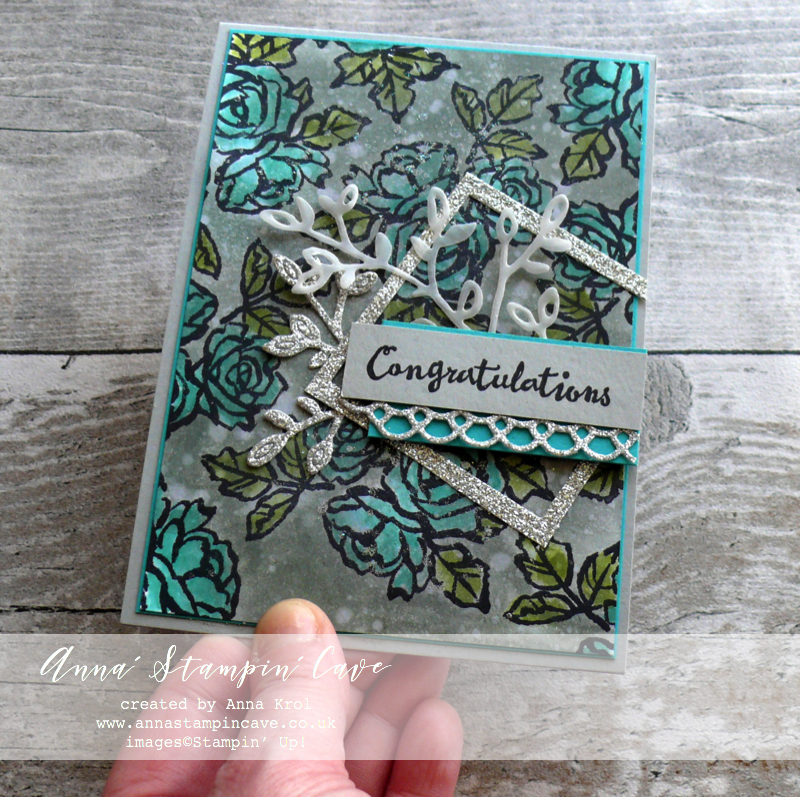
First, I created my watercolour background. I stamped roses from Petal Palette Stamp Set in Basic Black Archival ink, which is perfect to work with watercolours. I’ve used Bermuda Bay Ink Pad to colour in all my flowers. For leaves, I’ve used Old Olive with a hint of Lemon Lime Twist Ink Pad. Next, I sponged the whole panel using Smoky Slate Ink Pad and Stamping Sponge.

Anna' Stampin' Cave - Stampin' Up! Petal Palette Stamp Set and Petals & More Thinlits Dies - Bedazzled with Silver

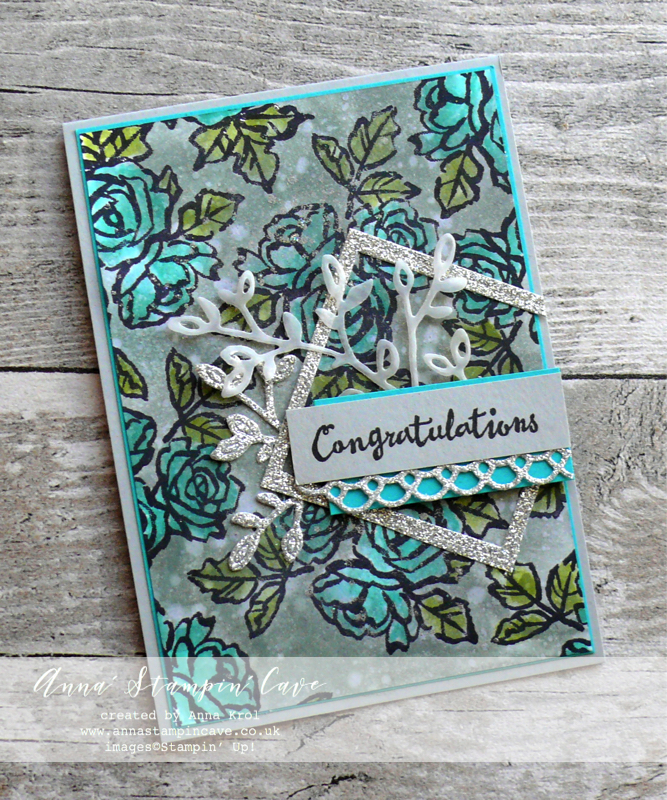
My favourite technique with a sponged background is to flick water all over it and let ink to react with water to create a distressed look.

I’ve used Embossing Buddy, antistatic pouch, to remove the static or any oil from the panel, flicked some more water on the background, sprinkled with Silver Emboss Powder and heat set it. Added more sprinkles/embossing until happy.

I reheat my embossing on the panel, cover it with Dazzling Diamonds Glitter, tap off the excess and heat set it again. Don’t you just love these ‘dazzling’ speckles?!

Anna' Stampin' Cave - Stampin' Up! Petal Palette Stamp Set and Petals & More Thinlits Dies - Bedazzled with Silver

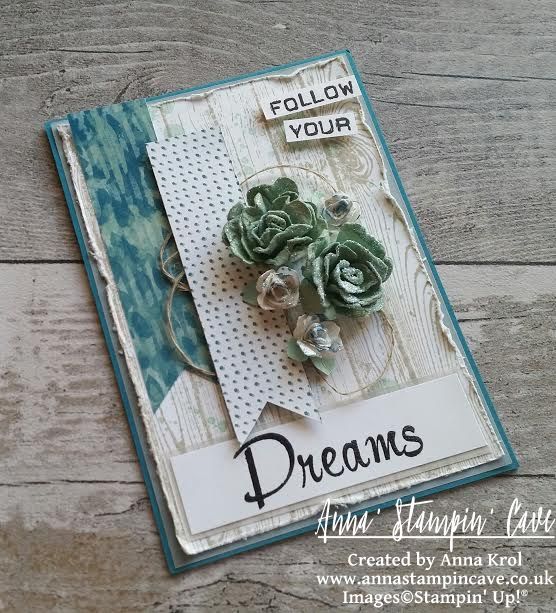
I adhered my background panel to Bermuda Bay mat and next to Smoky Slate card base. Now to jazz it up a little.

I’ve used Petals & More Thinlits Dies to die cut few elements for my card. I die cut two branches: one from vellum and one from Silver Glimmer Paper. I also die cut a filigree banner from Silver Glimmer Paper.

Anna' Stampin' Cave - Stampin' Up! Petal Palette Stamp Set and Petals & More Thinlits Dies - Bedazzled with Silver

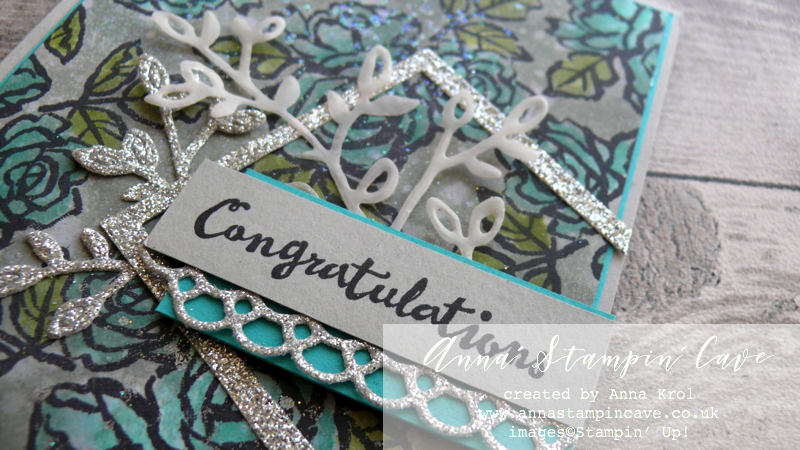
This square frame was actually a leftover from a different project (lying around) and it was just perfect fit.

I played a bit with a placing of all my elements, and once I was happy I adhered them to the card.

Anna' Stampin' Cave - Stampin' Up! Petal Palette Stamp Set and Petals & More Thinlits Dies - Bedazzled with Silver

I am really chuffed how this card turned out. Such a shame it’s so hard to photograph and to show all the sparkle in the photo. But below you can see a ‘boomerang’ from my Instagram from when I created the background piece. The shimmer is just mesmerising!!

https://www.instagram.com/p/Bf0SoEfBzWc/

So? Do like my card? I hope you do. Please let me know in the comments below.

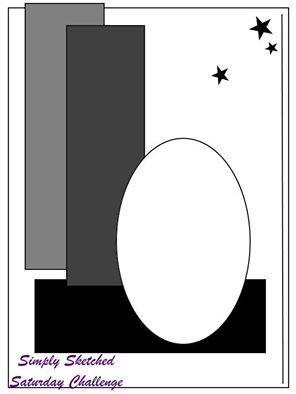
I’m adding my card to CAS(E) this Sketch #261 Challenge

If you wish to purchase any of products I have used, simply click the images below to go directly to my online store and don’t forget to enter the hostess code CWKGWDD7 to receive a gift from me.

Thank you for stopping by and have a blessed day

Hostess Code for a month of March: CWKGWDD7 – Use this code in the month of March and receive a gift from me. Spend £25 or more and use the code, and you will receive a Sweet Soiree Suite embellishments sample: one Silver Mini Gable Box + samples of ribbon and ‘shreddies’ (pink, silver or white) + a handmade gift from me.

Special Notes:

1) Make sure you select Anna Krol as your demonstrator;
2) If you select “No Contact” box I do not have access to your name and can’t send you a gift;
3) If your order is £150 or more do not use the code and grab your own Stampin’ Rewards + gift from me

Product List

Aqua Painters

£15.50

Big Shot

£99.00

Pin me

Summary of the project which gives all the views of the card in one photo. I’d love if you pinned and called by on Pinterest xx

Anna' Stampin' Cave - Stampin' Up! Petal Palette Stamp Set and Petals & More Thinlits Dies - Bedazzled with Silver

Don’t forget to check:

New Sale-a-bration release is LIVE. Click here for more details –>

Spring Summer Catalogue Paper & Ribbon Shares. Shares are open to Austria, France, Germany, Netherlands & United Kingdom. 102 sheets of DSP & 2 yards of each type of ribbon from Spring/Summer Catalogue. Click here for more details —>

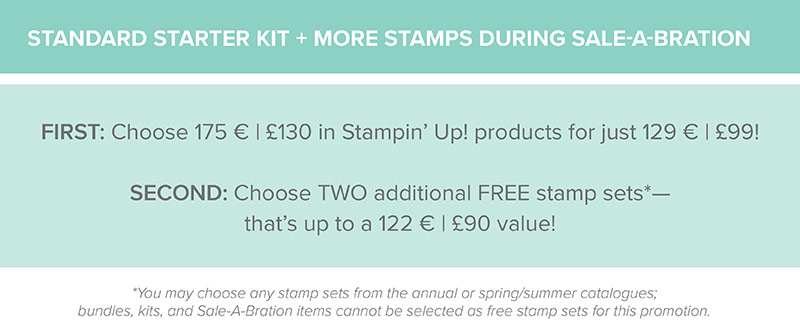
The New Stampin’ Up! Spring/Summer 2017 Catalogue and Sale-A-Bration are LIVE and it’s AMAZING! For every 60 €/£45, you spend either from Spring Summer Catalogue or Annual Catalogue, you will get to choose one FREE  level 1 product from SAB brochure! If you spend 120 €/£90, you get one FREE level 2 product, OR, you can choose two level 1 items. If you spend 180 €/£135, you have the option to choose three level 1 items or one level 1 item and one level 2 item. Click here for more details —>

Ever wondered what it’s like to join Stampin’ Up!’s community? I may have few answers for you. Click here for more details –>

Rustic Best Birds For Global Design Project #084 Challenge

Anna’ Stampin’ Cave – Rustic Best Birds For Global Design Project #084 Challenge

Hello and welcome everyone! Today I’m back with my entry for Global Design Project. This week is Case The Designer Challenge over at GDP and we’re casing wonderful Michelle Last. I have to admit I absolutely love Michelle’s style. She’s an incredible artist and amazing person too (I had the privilege to meet her in person a few years back).

It’s a beautiful card to CASE: clean & simple with lots of yummy texture. But I didn’t really want to follow the colour combination or the layout of Michelle’s card (but as you will see I failed miserably as I ‘accidentally’ cased the layout anyway haha ). For my card, I decided to focus on a couple of products she used instead: Best Birds Stamp Set and coordinating Birds & Blooms Thinlits Dies.

Rustic Best Birds card dimensions:

  • Crumb Cake cardstock: 8-1/4″ x 5-7/8″ scored in half at 4-1/8″ (21cm x 14.8 cm scored in half at 10.5 cm)
  • Crumb Cake cardstock: 4-1/8″ x 5-6/8″ (10.2 cm x 14.6 cm)
  • Whisper White cardstock for stamping & die cutting
  • Pool Party cardstock: 3/8″ x 4-3/8″
  • Burlap Ribbon: approx 5-6/8″ (14.6 cm)

I don’t know about you, but when I first saw this stamp set it has called countryside to me. I only bought this bundle a few weeks ago and was really eager to have a play. So this week’s challenge was perfect for inking up my stamp for the first time.

First, I created the background for my ‘idyllic’ scene. I took Crumb Cake panel and stamped it with Hardwood background stamp in Soft Suede. I also sponged the edges of the panel with Soft Suede ink to add to the ‘rustic feel’.

Next, I stamped and die cut all the elements of my scene. The bird is stamped using Crumb Cake ink. Flowers – Pool Party. For little berries/fruits, I’ve used Pear Pizzazz. Branch is stamped in Soft Suede ink and coloured in with markers: Crumb Cake for the branch and Pear Pizzazz for leaves.

I love this sentiment “It’s a good day” from Best Birds Stamp Set. I stamped it in Soft Suede on a piece of Whisper White cardstock and die cut using an oval die from Stitched Shapes Framelits Dies. I think stitched edge suit rustic ‘feel’ of this card just perfectly.

Before I assembled my card I played a little with a placement of all the elements. To add some ‘natural’ texture I decided to use Burlap Ribbon as a banner. I also cut a thin strip of Pool Party cardstock to ‘break’ all the browns. When I was happy with the placement, I took a photo and started the assembly.

Tip: If you have a layout, either a card or a scrapbook page, that consist of lots of small elements, play with the placement first, before glueing things down. Once you’re happy, take a photo of your test layout with your phone ( we all have it on hand, don’t we?). Next, assemble your card/scrapbook page piece by piece by piece with a help of your reference photo. No more guessing ‘where was this or that element supposed to go.

I truly hope you like my little, rustic card. It reminds me of my childhood in Poland and summer holidays we spent in the countryside with our great-grandmother. Wonderful memories.

As always, I really want to encourage you to visit the Global Design Project challenge blog to see other beautiful projects from all around the world. Just click on their logo below to visit the website

Thank you for stopping by and have a blessed day,

Roses & Dragonfly No°2 – Inlaid & Partial Die-cutting Birthday Card

Anna’ Stampin’ Cave – Roses & Dragonfly No°2 – Inlaid & Partial Die-cutting Birthday Card

And here I am again with Rose Wonder and Detailed Dragonfly Thinlits Dies!

My little sister (well not that little, she’s nearly 22 y.o. But hey! she will always be my little sister) came to last week and said she and her friends wanted me to make a birthday card for their girlfriend.

They really liked this card I’ve made a few weeks back…

anna-stampin-cave-stampin-up-dragonfly-dreams-bundle-and-rose-garden-thinlits-dies-inlaid-partial-die-cutting-technique

…and wanted something similar hence No°2 in the title 🙂

The base colour they wanted was orange with silver details, as these are the colours their friend loves. So fun and challenging as I don’t create much in orange! But I love challenges. I love to sit down and design, create something unusual; not just grab a card, two or three colours one stamp and bah! – five minutes later the card is done! I do clean & simple sometimes but that’s not my concept of creativity 🙂 I am an artist at heart. It have to be a process, it have to be messy and a little bit crazy too; so when I’m done my soul sings…

…and this is exactly how this card came to life

Anna' Stampin' Cave - Roses And Dragonfly Birthday Card using Inlaid Partial Die Cutting_Stampin' Up! Rose Garden Thinlits Dies_Detailed Dragonfly Thinlits Dies

Roses & Dragonfly No°2 card dimensions:

  • Calypso Coral cardstock card base: 11-6/8″ x 4-1/8″ scored in half at 5-7/8″ (29.7 x 10.5 cm scored in half at 14.8 cm)
  • Whisper White cardstock: 5-6/8″ x 4″ (14.6 cm x 10.2 cm)
  • Whisper White cardstock: 2 panels 5-5/8″ x 3-7/8″ each (14.3 cm x 9.8 cm); one for blending and one for die-cutting
  • strips of Calypso Coral and Whisper White cardstock for sentiment

First I adhered panel of Whisper White cardstock to the card base using snail adhesive. Next, I took one of the smaller panels and using ink pads and sponges I created a backing panel for the die-cut piece.

Anna' Stampin' Cave - Roses And Dragonfly Birthday Card using Inlaid Partial Die Cutting_Stampin' Up! Rose Garden Thinlits Dies_Detailed Dragonfly Thinlits Dies 4

As first, I blended in my darkest colour, Calypso Coral, followed by Pumpkin Pie and Peekaboo Peach. But you can start with the lightest shade first, it doesn’t really matter. I continued adding more colour until I was happy with the depth. To add more interest I flicked few droplets of water to my panel.

Water react with ink creating this beautiful, distressed look. Bear in mind that for the best results you have to do it when the ink is freshly blended.

I took the second Whisper White panel and arranged the dies how I wanted them to go. Next, I die-cut all elements, one at a time and put them away on a flat surface so I don’t lose any of the small pieces. Once everything been die-cut I adhered what’s left of the panel to the orange background. I’ve added some splatters of ink all over it and inlaid all my die-cut pieces back in. More detailed explanation can be found here ->

I added this panel to the card base with Foam Adhesive Strips for extra dimension.

Anna' Stampin' Cave - Roses And Dragonfly Birthday Card using Inlaid Partial Die Cutting_Stampin' Up! Rose Garden Thinlits Dies_Detailed Dragonfly Thinlits Dies 3

The sentiment I’ve used comes from Rose Wonder Stamp Set. I stamped it on Whisper White cardstock with Versamark ink. I heat embossed it in silver, mounted on a slightly wider piece of Calypso Coral cardstock and add it to the card.

To make the card looks even more pretty, I scattered rhinestones all over the panel. To wrap it up, I stamped dragonfly image inside the card and on the envelope. It’s hard to see but I’ve used all three colours of ink on this little creature.

The card has been given already and I know the girl loved it to bits. That is my biggest reward 🙂 But I hope you like it too. Would love to hear your opinion it the comments below.

If you wish to purchase any of products I have used, simply click the images below to go directly to my online store and don’t forget to enter the hostess code for the month of April XMAJ4CYX to receive a gift from me.

Thank you for stopping by and have a blessed day,

Just a note: the Dragonfly Dreams as a Bundle at 10% discount is available only until 31 May. After that date, you will be able to purchase Dragonfly Dreams Stamp Set and Detailed Dragonfly Thinlits Dies only separately, not as a bundle.

Don’t forget to check:

Stampin’ Up! Spring Summer & Annual Catalogue 2016 2017 Retiring List

Anna' Stampin' Cave Stampin' Up! Retiring Products 2017

It’s that time of the year again, when Stampin’ Up! is getting ready to retire stamps and accessories from both the Annual and Spring Summer catalogues. As sad as it is to see these products go, there’s still time for you to get them before they’re gone. Retiring products will only be available until 31 May, or while supplies last. So if there’s something from retiring products on your wishlist, don’t wait until last day – once they’re gone, they’re gone. And they are selling fast! Click here for more details ->

The Creative Flow Blog Hop – No Red Romance With Large Letters Framelits Dies

Anna’ Stampin’ Cave – The Creative Flow Blog Hop – No Red Romance With Large Letters Framelits Dies

the-creative-flow-header

Thank you for joining us on our Creative Flow Blog Hop. Each month we are set a challenge to creatively stretch our imaginations. The products we have used are all available in the current Annual and/or seasonal Stampin’ Up!® catalogues. To hop along, please use the buttons at the bottom of the post to keep hopping.

Today’s challenge was to create no-red Valentines Day card, and for some time I wasn’t sure what colour scheme to use. But Global Design Project came to the rescue with their #073 Colour Challenge. I really love this unusual, bright and oh-so-not-valentine’s colour mash-up, so I decided to combine these two together 🙂

gdp_colour_challenge73_png

I know it supposed to be no-red, but Watermelon Wonder is rather orangy red right lol And here’s what I came up with: a perfect card to give to my hubby on that special day.

anna-stampin-cave-stampin-up-large-letters-framelits-dies-no-red-valentines-day-card

No-Red Romance card dimensions:

  • Whisper White cardstock: 11-6/8″ x 4-1/8″ scored in half at 5-7/8″ (29.7 x 10.5 cm scored in half at 14.8 cm)
  • Whisper White panel: 5-7/8″x 3″
  • Emerald Envy cardstock: 2 strips 5-7/8 long and briefly 2/8″wide
  • a piece of Whisper White for die-cutting

The first step was to die-cut word ‘LOVE’ using Large Letters Framelits Dies. I’ve used regular Whisper White cardstock for this. I’ve sponged the letters with my inks as follows: Watermelon Wonder first, Daffodil Delight next, and Emerald Envy as the last one creating ‘rainbow’ effect. I’ve paid special attention there’s smooth transition from one colour to another.

anna-stampin-cave-stampin-up-large-letters-framelits-dies-no-red-valentines-day-distressed-card

When I was done and happy with blending, I took a small paintbrush and flicked some water droplets all over the letters. I love how the water reactivates the ink. Such a simple step but add so much interest and texture to the (otherwise) flat surface.

Next, I took Whisper White panel and using the same small brush and my ink pads as a palette, I speckled some inks over the whole panel. I tried to keep my speckles somehow under control colour-wise, so the speckles match the letters that go over them.

Remember: The smaller is the brush, the smaller are the speckles.

When speckles dried, I adhered two strips of Emerald Envy cardstock underneath, one on top and one on the bottom of the panel.

anna-stampin-cave-stampin-up-large-letters-framelits-dies-no-red-valentines-card

Now to assemble the card. I adhered the panel to the card base using Fast Fuse adhesive. And I have to say I’m happy to say it seems I finally made friends with this adhesive haha.

I wanted to pop-out my letters so I’ve used Foam Adhesive Strips to adhere them to the panel. You could use any regular foam adhesive, but these strips are perfect for adhering die-cuts that are quite narrow in shape. They are long but you can easily cut them to the length you want/need.

I was really happy how nicely this card was coming together, but I was desperate to add some embellishments to it. Yes I know, a card for a hubby and embellishments?! I must have lost my mind, haha. But why not?

anna-stampin-cave-stampin-up-large-letters-framelits-dies-no-red-valentines-day-card

So I scattered black sequins from Metallics Sequin Assortment pack all over my card and tried to figure out the placing and how many I will use. Once I was happy I adhered them with Fine-Tip Glue Pen. For the final touch, I coloured some rhinestones with black Sharpie and added them to the card too.

That’s it from me for today. I really hope you enjoyed my step by step directions.

For those of you who asked about stretching your stitched dies using partial die-cutting – I will have a short how-to post for you soon. So watch this space.

Now be sure to hop along our tiny blog hop to see more inspiring projects. Your next stop is lovely and talented Helen.

Thank you for stopping by and have a blessed day,

the-creative-flow-previous-button the-creative-flow-next-button

Large Letters Framelits Dies

Large Letters Framelits Dies
[141712]
£89.00

Whisper White A4 Card Stock

Whisper White A4 Card Stock
[106549]
£8.25

Emerald Envy A4 Cardstock

Emerald Envy A4 Cardstock
[141420]
£7.25

Watermelon Wonder Classic Stampin' Pad

Watermelon Wonder Classic Stampin’ Pad
[138323]
£6.00

Daffodil Delight Classic Stampin' Pad

Daffodil Delight Classic Stampin’ Pad
[126944]
£6.00

Emerald Envy Classic Stampin' Pad

Emerald Envy Classic Stampin’ Pad
[141396]
£6.00

Stamping Sponges

Stamping Sponges
[141337]
£3.25

Metallics Sequin Assortment

Metallics Sequin Assortment
[138390]
£4.50

Rhinestone Basic Jewels Embellishments

Rhinestone Basic Jewels Embellishments
[119246]
£4.50

Fast Fuse Adhesive

Fast Fuse Adhesive
[129026]
£9.00

Foam Adhesive Strips

Foam Adhesive Strips
[141825]
£7.25

Fine-Tip Glue Pen

Fine-Tip Glue Pen
[138309]
£6.25

Stampin' Trimmer

Stampin’ Trimmer
[129722]
£27.00

Big Shot

Big Shot
[143263]
£99.00

Simply Sketched Saturday Challenge #15 – Follow Your Dreams

Anna’ Stampin’ Cave – Simply Sketched Saturday Challenge #15 – Follow Your Dreams

SSSC Header

Thank you for joining us for another Simply Sketched Saturday Challenge!  We are so excited to be sharing this hop with you. The products used are all available in the current Annual, or seasonal, Stampin’ Up!®  Catalogues*. Simply use the buttons at the bottom of the post to keep hopping!

Welcome to our 15th sketch challenge blog hop! This month it was me who had a pleasure to create a sketch we are gonna work with. Here it is:

sssc-15

When creating this sketch, I won’t be lying, I had our new Stitched Shapes Framelits Dies in mind. And however I don’t have these dies yet myself, I hope to see them used a lot through this blog hop.

I know that in the ‘age’ of everything ‘clean and simple‘ and ‘less is more‘ in crafting world, layered, ‘busy’ and distressed cards are kinda faux pas. But I can’t help I love them the most! I love all the organic, (sometimes messy) creative process of designing a card.

stampin-up-follow-your-dreams

For my card base, I’ve used Island Indigo cardstock (standard top folding A6 size). The first layer is Vellum that measures 4”x 5-5/8” and next one is Whisper White 3-7/8”x 5-1/2” panel which I stamped using Hardwood background stamp in Sahara Sand. But because it felt rather ‘boring’ I also added few ‘splotches’ from Gorgeous Grunge stamp set in Mint Macaron, stamping them off a couple of times. I distressed the edges of my panel using regular scissors.

I also created a similar panel for the inside of the card, but this time I also stamped off the Hardwood image few times, so it wasn’t as crisp as the one on the card front.

follow-your-dreams

I took two pieces of Blooms & Bliss DSP, which measure 4”x 1” each, and cut them into banners. One of the banners I adhered flat down using a fast fuse and a second one I pop with dimensionals with few lengths of Linen Thread underneath.

To create large roses I punched six flowers using Pansy punch from Mint Macaron cardstock (three flowers create one rose). For white tiny roses, I punched nine flowers using Petite Petals punch (again three flowers create one rose). I also punched one petite petals flower from Mint Macaron cardstock to create tiny leaves: I cut the shape apart so I end up with two double ‘leaves’ and one single ‘leaf’. White roses appeared bit ‘blunt’ so I decided to add some interest to them: using Island Indigo ink and a small paint brush I added some ‘speckles’ to them.

I also decided to add some sparkle to my flowers. I dipped the edges of petals first in watered-down Multipurpose Liquid Glue and next in Dazzling Diamonds glitter, and let it dry. Once they were ready I adhered them to the card with glue dots.

stampin-up-follow-your-dreams-handmade-roses

For the sentiment, I decided to use this awesome quote you probably have seen many times on the net: “Follow your dreams”. We might don’t have a stamp set with this sentiment, but this is where our amazing various alphabet sets come in handy.

Using Labeler Alphabet stamp set and Basic Black Archival ink pad, I stamped “follow your” on a 2/8” wide strip of Whisper White cardstock and cut it apart. Next, using Brushwork Alphabet stamp set and Basic Black Archival ink pad again, I stamped “Dreams” on a Whisper White panel that measures 7/8”x 3-1/2”, and heat embossed it with clear embossing powder for extra oomph. I pop ‘narrow’ part of the sentiment with dimensionals. For a wider piece, I created a vellum mat that measures 3-5/8”x 1”, and adhered them to the card front with a fast fuse.

anna-stampn-cave-stampin-up-follow-your-dreams

Do you like my project?! If so, please leave me a comment. I would love to hear from you!

Now, be sure to hop along and see more inspiring projects. Your next stop is Jillian’s blog  go and see what she has made for you.

Thank you for stopping by and have a blessed day,

SSSC Previous   SSSC Next Blog