Roses and Dragonfly Thank You For A Smile Card for GDP#075

Anna’ Stampin’ Cave – Roses and Dragonfly Thank You For A Smile Card for GDP#075

gdp075

Hello and welcome everyone! Today I’ve got for you a card I created for this week’s Global Design Project theme challenge: Winged Creatures. I’m bit late to the party but thankfully not too late.

I’m a big fan of detailed die-cutting and had this idea bouncing around in my head for a while now, just never had enough time to try it.

In this card, I’ve incorporated two die-cutting techniques – inlaid die-cutting and partial die-cutting – using a couple of detailed die sets: Rose Garden Thinlits Dies and Detailed Dragonfly Thinlits Dies.
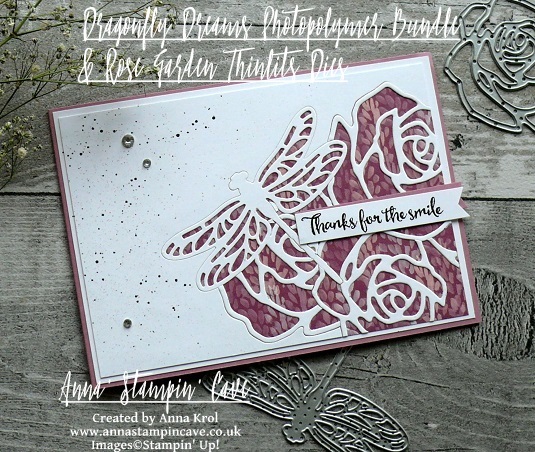
anna-stampin-cave-stampin-up-dragonfly-dreams-bundle-and-rose-garden-thinlits-dies-inlaid-partial-die-cutting-technique

Roses and Dragonfly Thank You For A Smile Card dimensions:

  • Sweet Sugarplum cardstock: 11-6/8″ x 4-1/8″ scored in half at 5-7/8″ (29.7 x 10.5 cm scored in half at 14.8 cm)
  • Whisper White cardstock cut into two panels: bottom one measure 5-6/8″ x 4″ (14,5 x 10,2 cm) and top one 5-1/2″ x 3-7/8″ (14 cm x 9,8 cm)
  • Blooms & Bliss Designer Series Paper: 5-1/2″ x 3-7/8″ (14 cm x 9,8 cm)
anna-stampin-cave-stampin-up-dragonfly-dreams-bundle-rose-garden-thinlits-dies-inlaid-partial-die-cutting-technique

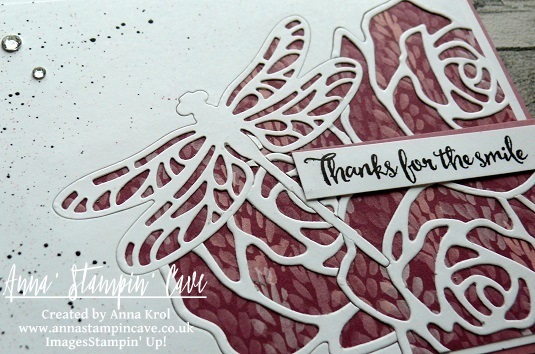
To create my card I started with die-cutting.

I wanted this small dragonfly to be in the foreground of my die-cut panel so  I run it through my Big Shot first.

For this technique, you first want to die-cut the image you want to have in the foreground of your card and you work your way backwards. Everything you die-cut later will appear to be ‘behind’ this first image.

Once it has been die-cut, I removed the dragonfly die and die-cut and I placed the rose die on the panel. I placed it the way that some parts of the die overlapped the negative space where dragonfly was die-cut previously from.
anna-stampin-cave-stampin-up-dragonfly-dreams-bundle-and-rose-garden-thinlits-dies

Again, I run it through the Big Shot and very carefully removed my rose die-cut from the die, being careful not to lose all the separate pieces as I will need them all to inlaid them back to my panel. I die-cut two more partial roses (one at a time) from the same panel, every time making sure they overlap the space of a previously die-cut image and saving all the little die-cut pieces. I arranged all my die-cut on the desk, so I knew

Once all the images were die-cut, I adhered what was left of the panel to the Blooms & Bliss DSP piece. And now the fun began: I had to inlay all the die-cut outlines where they came from.
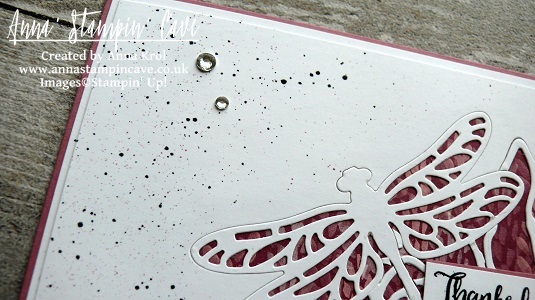
anna-stampin-cave-stampin-up-dragonfly-dreams-bundle-and-rose-garden-thinlits-dies-inlaid-partial-die-cutting-technique

The easiest part was to inlay the dragonfly outline. From there, I worked my way through the roses in the same order I die-cut them. Once I was done, I matted my detailed panel with slightly bigger Whisper White piece and next mounted it onto my Sweet Sugarplum card base.

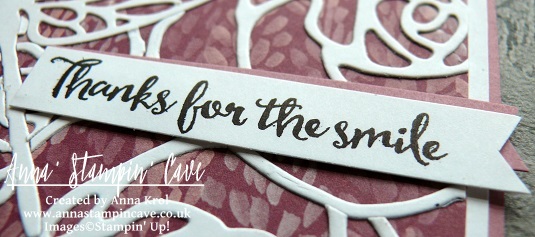
I masked bottom part of the sentiment ‘Thanks for the smile and everything else’, stamped it on a strip of Whisper White cardstock in Basic Black Archival Ink and cut it into a banner. I also cut a banner from Sweet Sugarplum cardstock and adhered them both to my card, offsetting slightly.
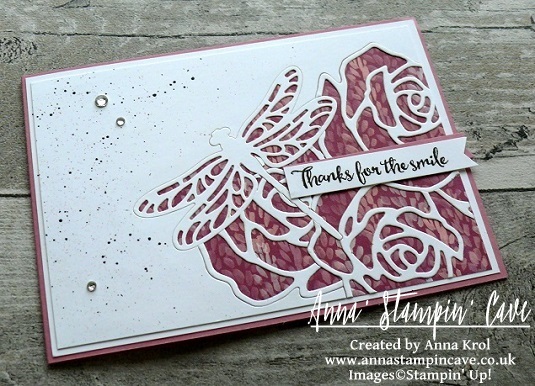
anna-stampin-cave-stampin-up-dragonfly-dreams-bundle-and-rose-garden-thinlits-dies-inlaid-partial-die-cutting-technique

I was pretty happy with the outcome but I had a feeling that something was missing. So I masked the detailed part and all the edges of my card, and I added some tiny speckles in Basic Black and Sweet Sugarplum. Few rhinestones wrap up my card.

I hope you feel inspired and that you give this technique a go. Thank you for stopping by and have a blessed day,

Dragonfly Dreams Clean & Simple For GDP#069 Colour Challenge

Anna’ Stampin’ Cave – Dragonfly Dreams Clean & Simple For GDP#069 Colour Challenge

gdp069

Hello and welcome everyone! Something new from me today as it’s the first time when I bite the bullet and decided to take a part in Colour Challenge over at Global Design Project.

I’ve been following this blog for some time now, just never felt confident enough to join in the fun. But hey! It’s just for fun, right?! And when I saw Delightful Dijon (I really, really love this colour) amongst other colours in this week’s challenge, I just knew: now or never. It’s a great colour combination and as my free choice, I simply used Whisper White.

I didn’t craft much lately due to health issues, but I was eager to use a new stamp set from Stampin’ Up! Spring Summer 2017 Catalogue, called Dragonfly Dreams. It comes with coordinating Detailed Dragonfly Thinlits Dies, as a bundle, and is just beautiful. It seemed perfect for the idea I had in my head.

Just forgive me poor photos. I don’t have any fancy equipment and take my photos in the daylight. But the weather is so miserable since few days down here in Midlands, UK, that it was just impossible to take any decent picture.

anna-stampin-cave-stampin-up-dragonfly-dreams-stamp-set-and-dies-bundle-clean-and-simple-card

‘Nearly Inlay’ Dragonfly Dreams card dimensions:

  • Delightful Dijon cardstock: 11-6/8″ x 4-1/8″ scored in half at 5-7/8″ (29.7 x 10.5 cm scored in half at 14.8 cm)
  • Whisper White cardstock: 2 panels 4″x 5-5/8″(10,2 x 14,3 cm)

First, I stamped the card base with the polka dot (kinda) background stamp from Dragonfly Dreams Stamp Set until it was all covered. I’ve used Delightful Dijon ink for a tone on tone effect.

anna-stampin-cave-stampin-up-dragonfly-dreams-bundle-clean-and-simple-card

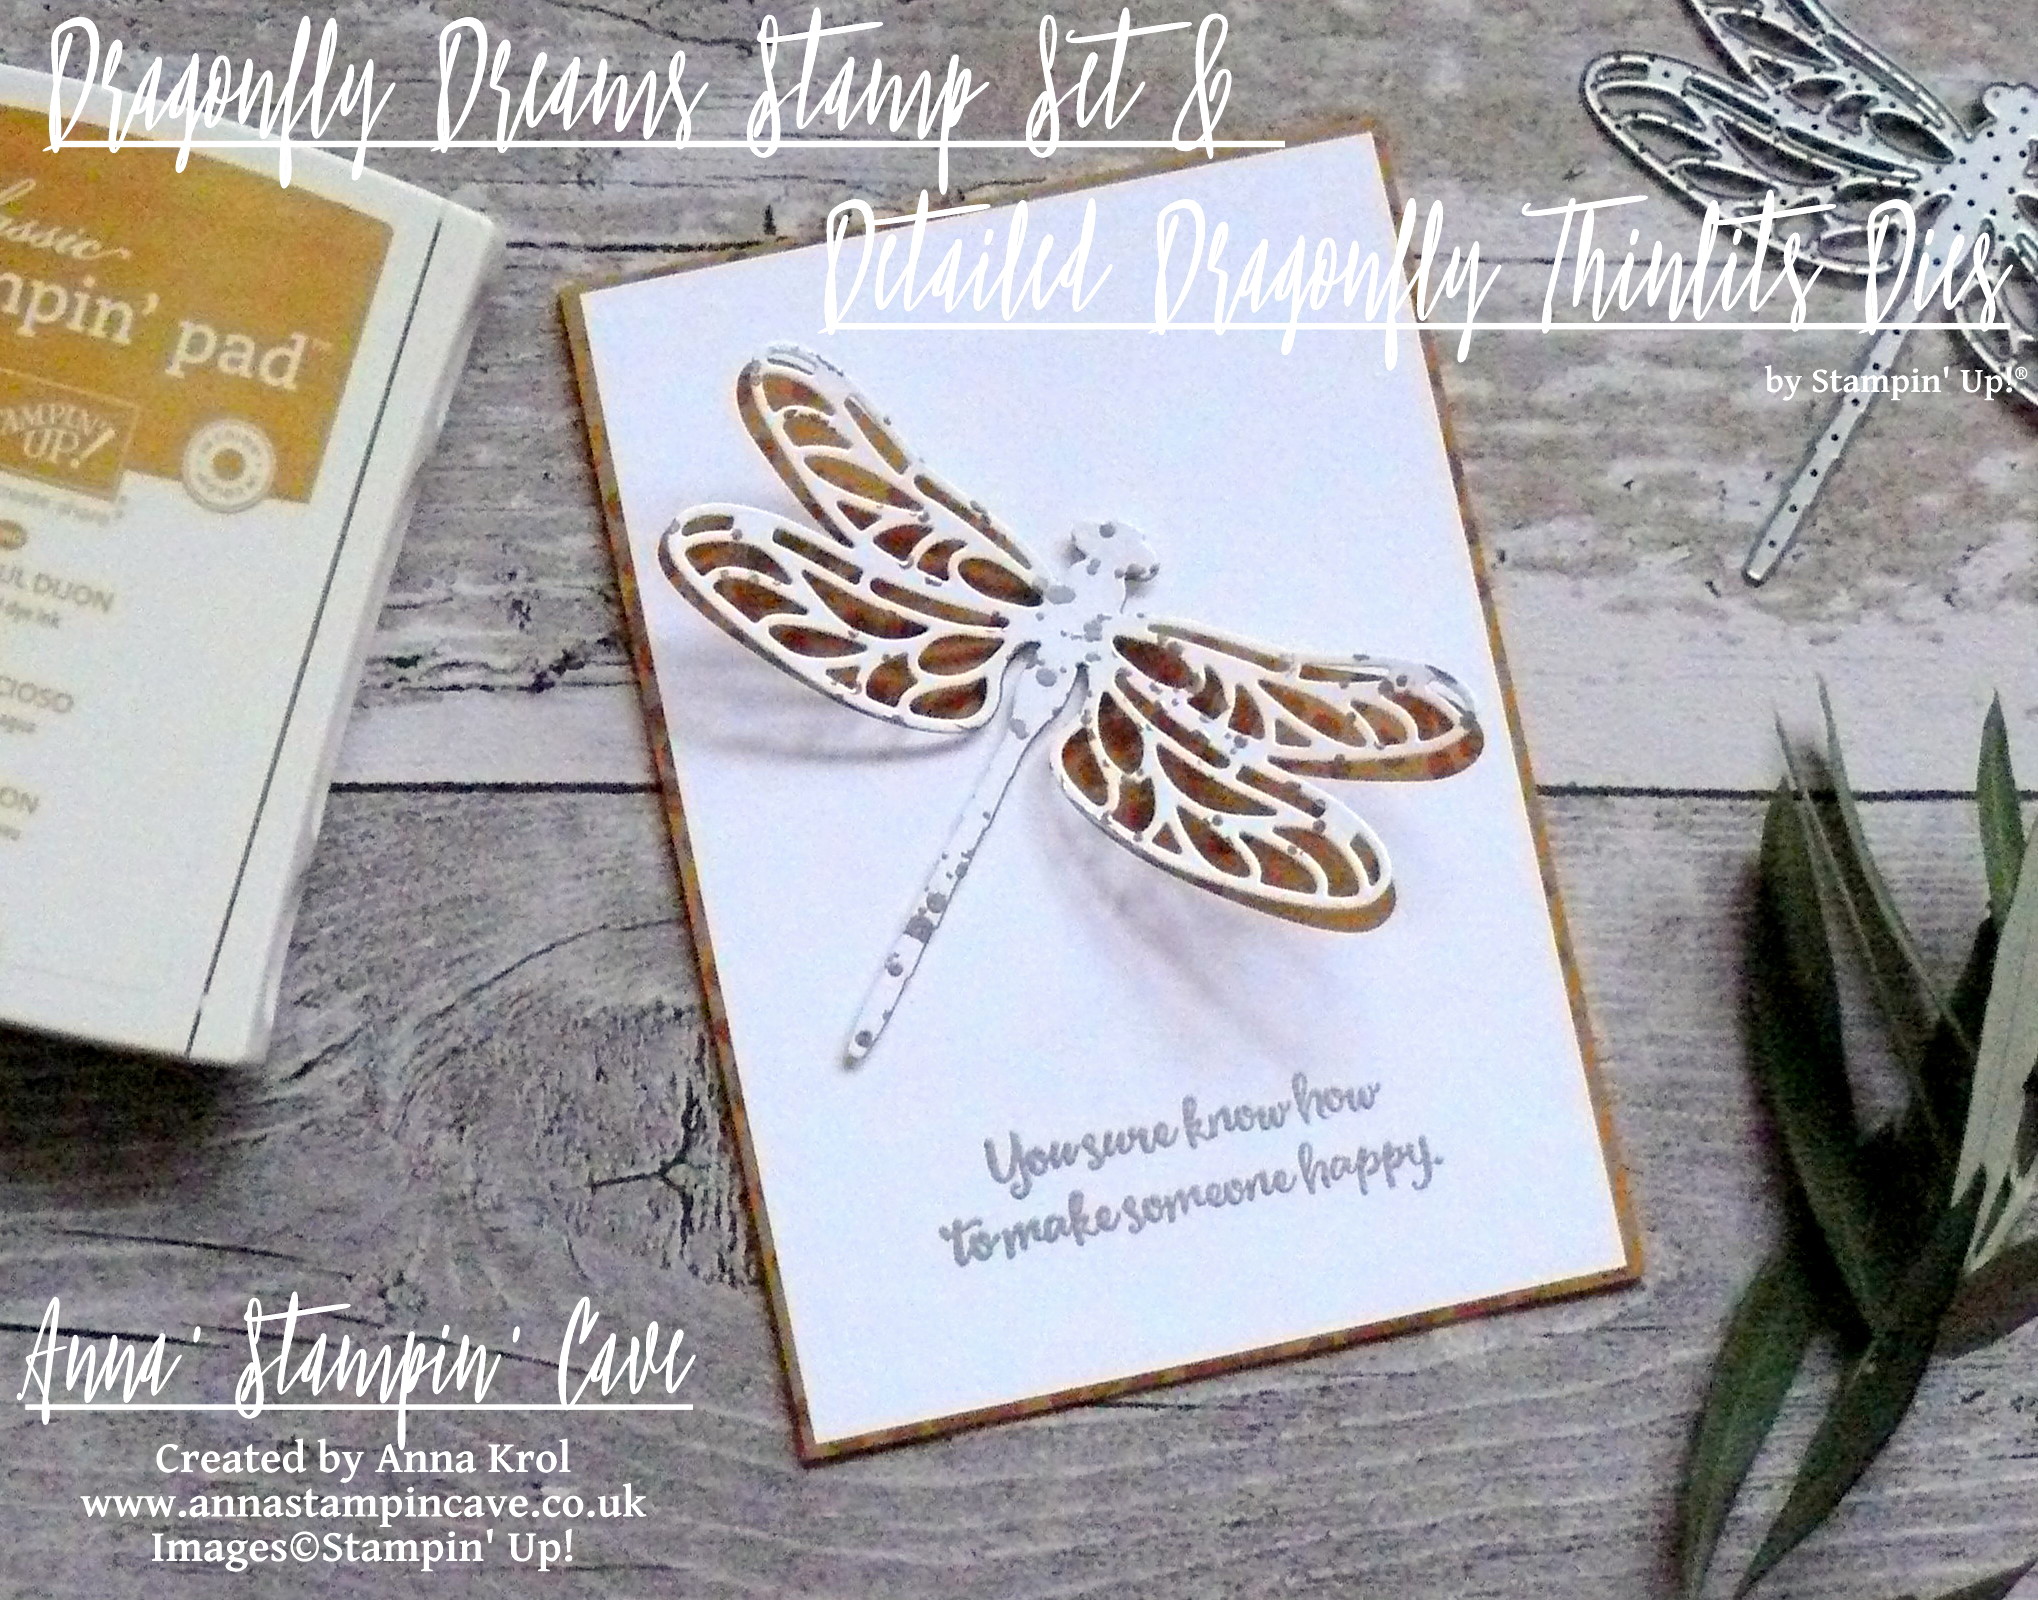
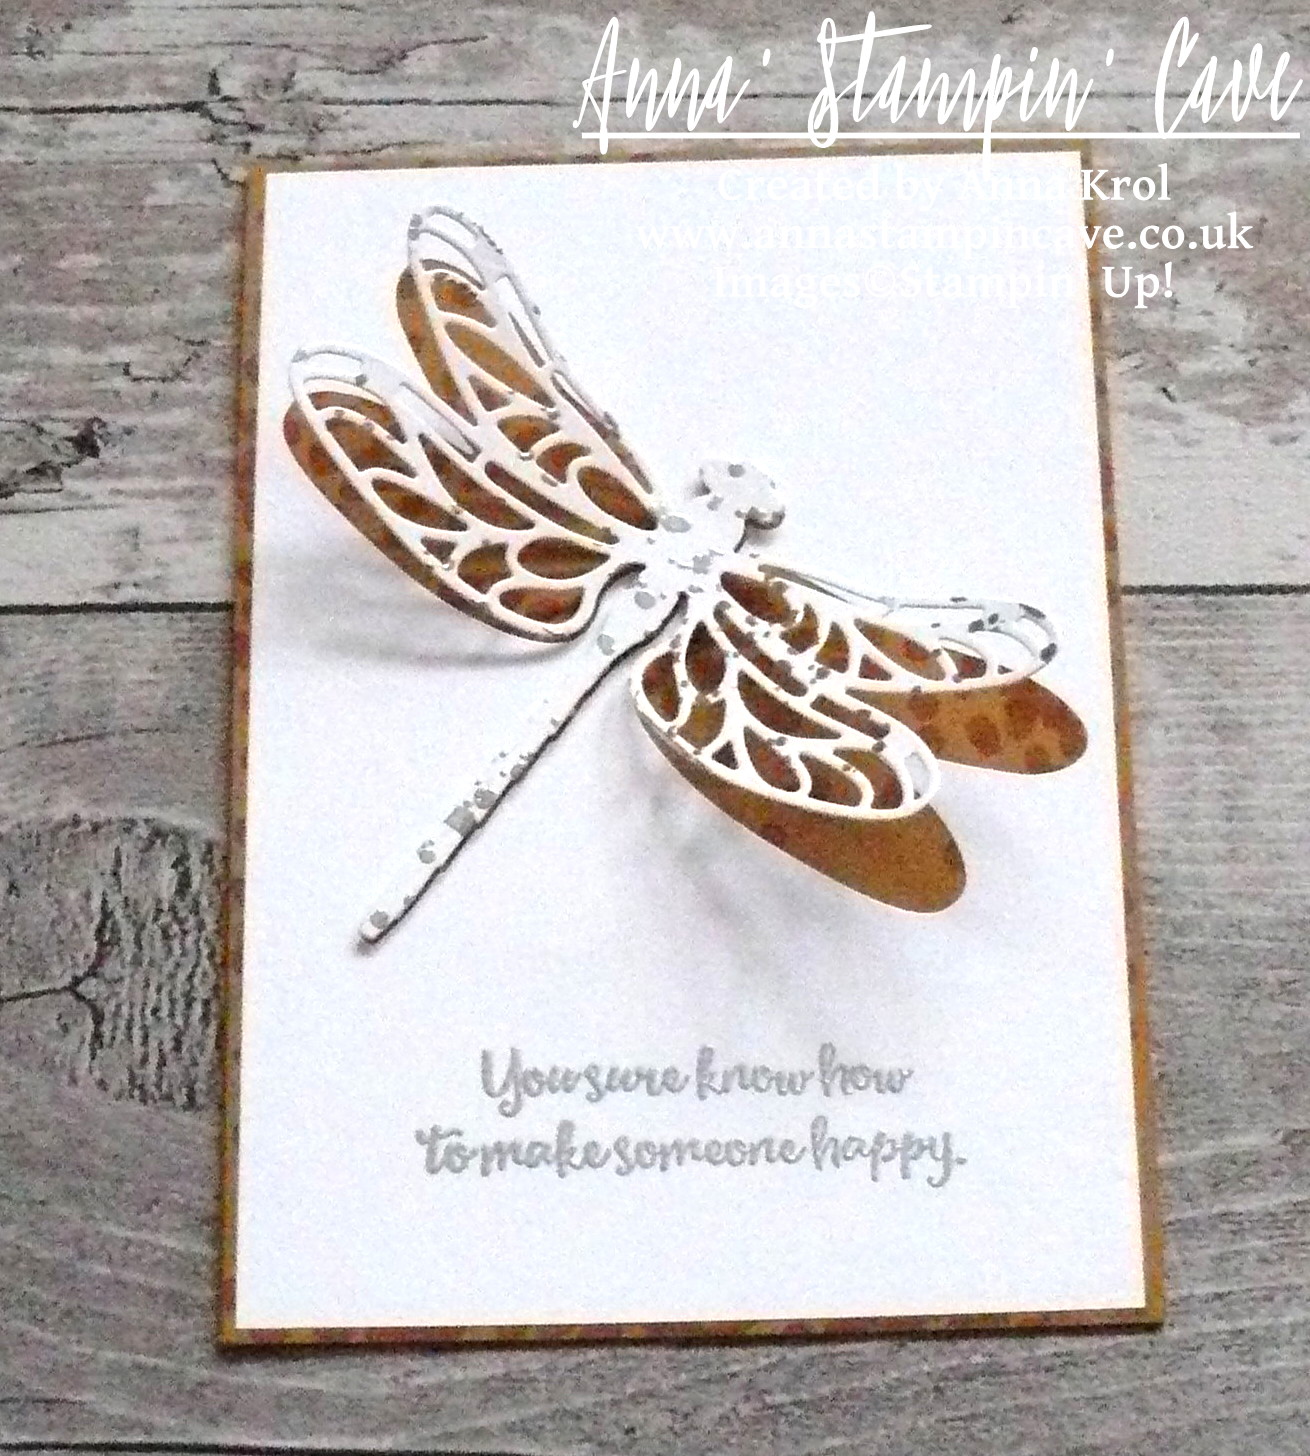
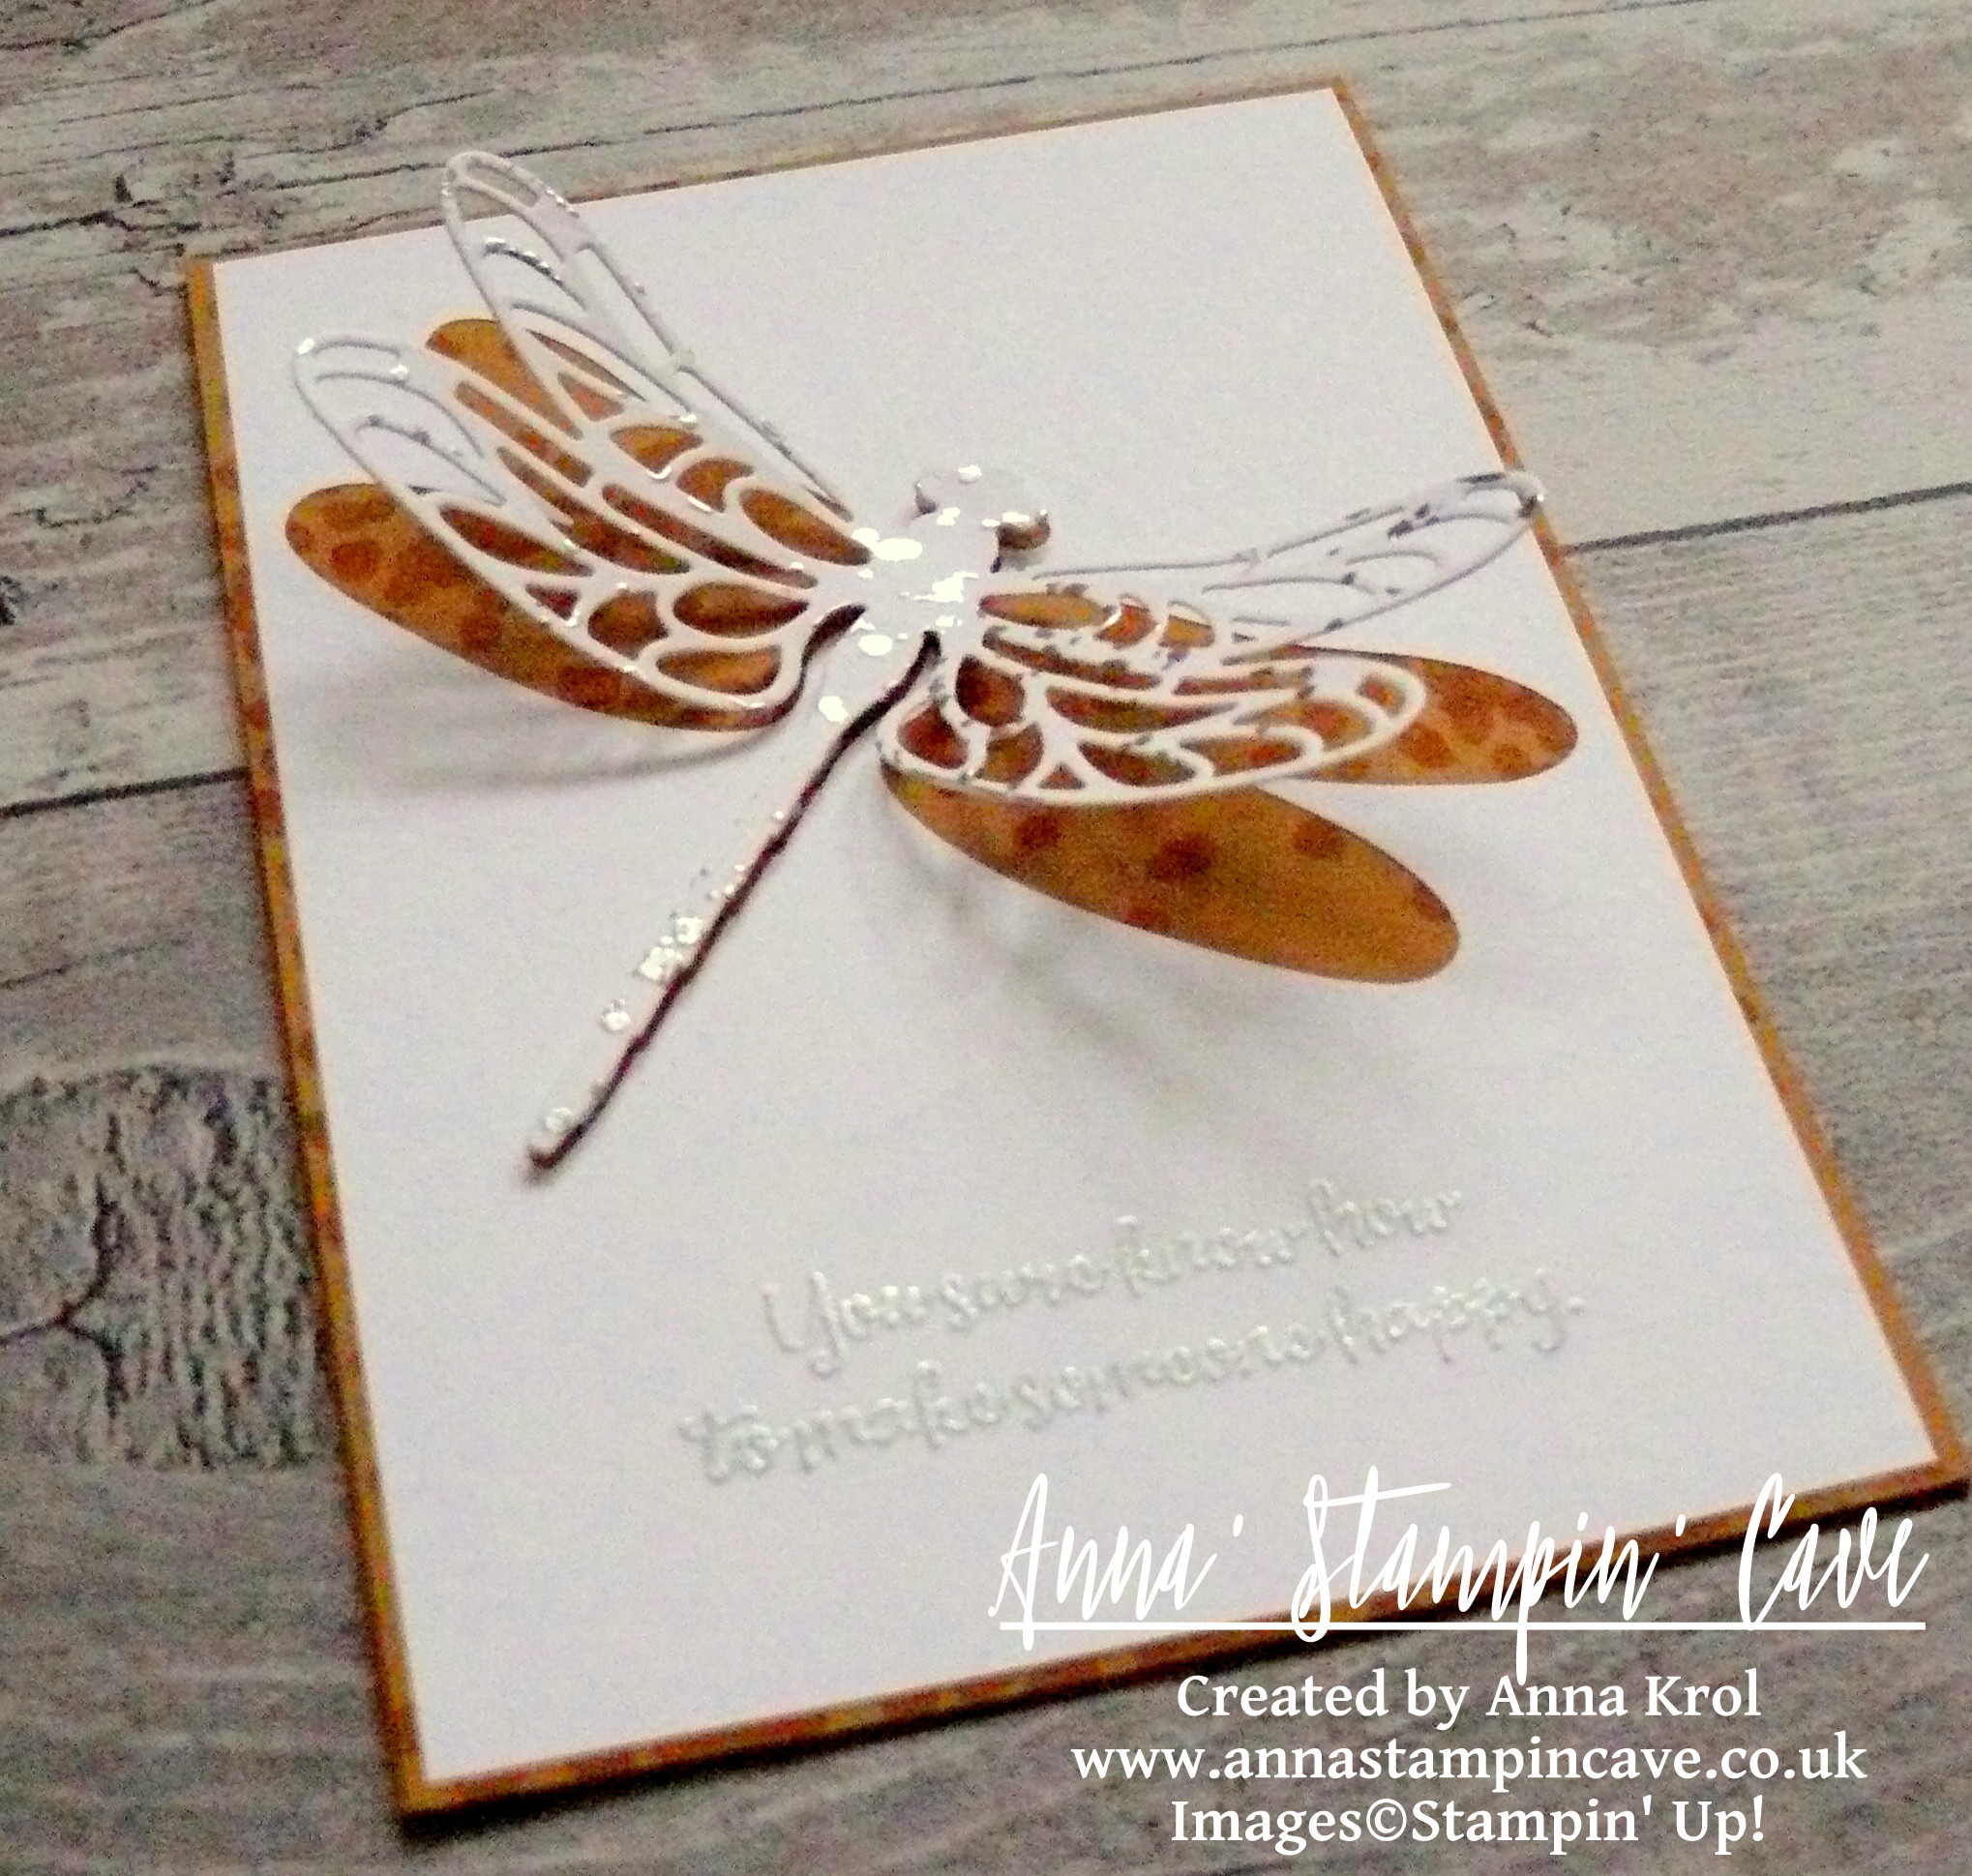
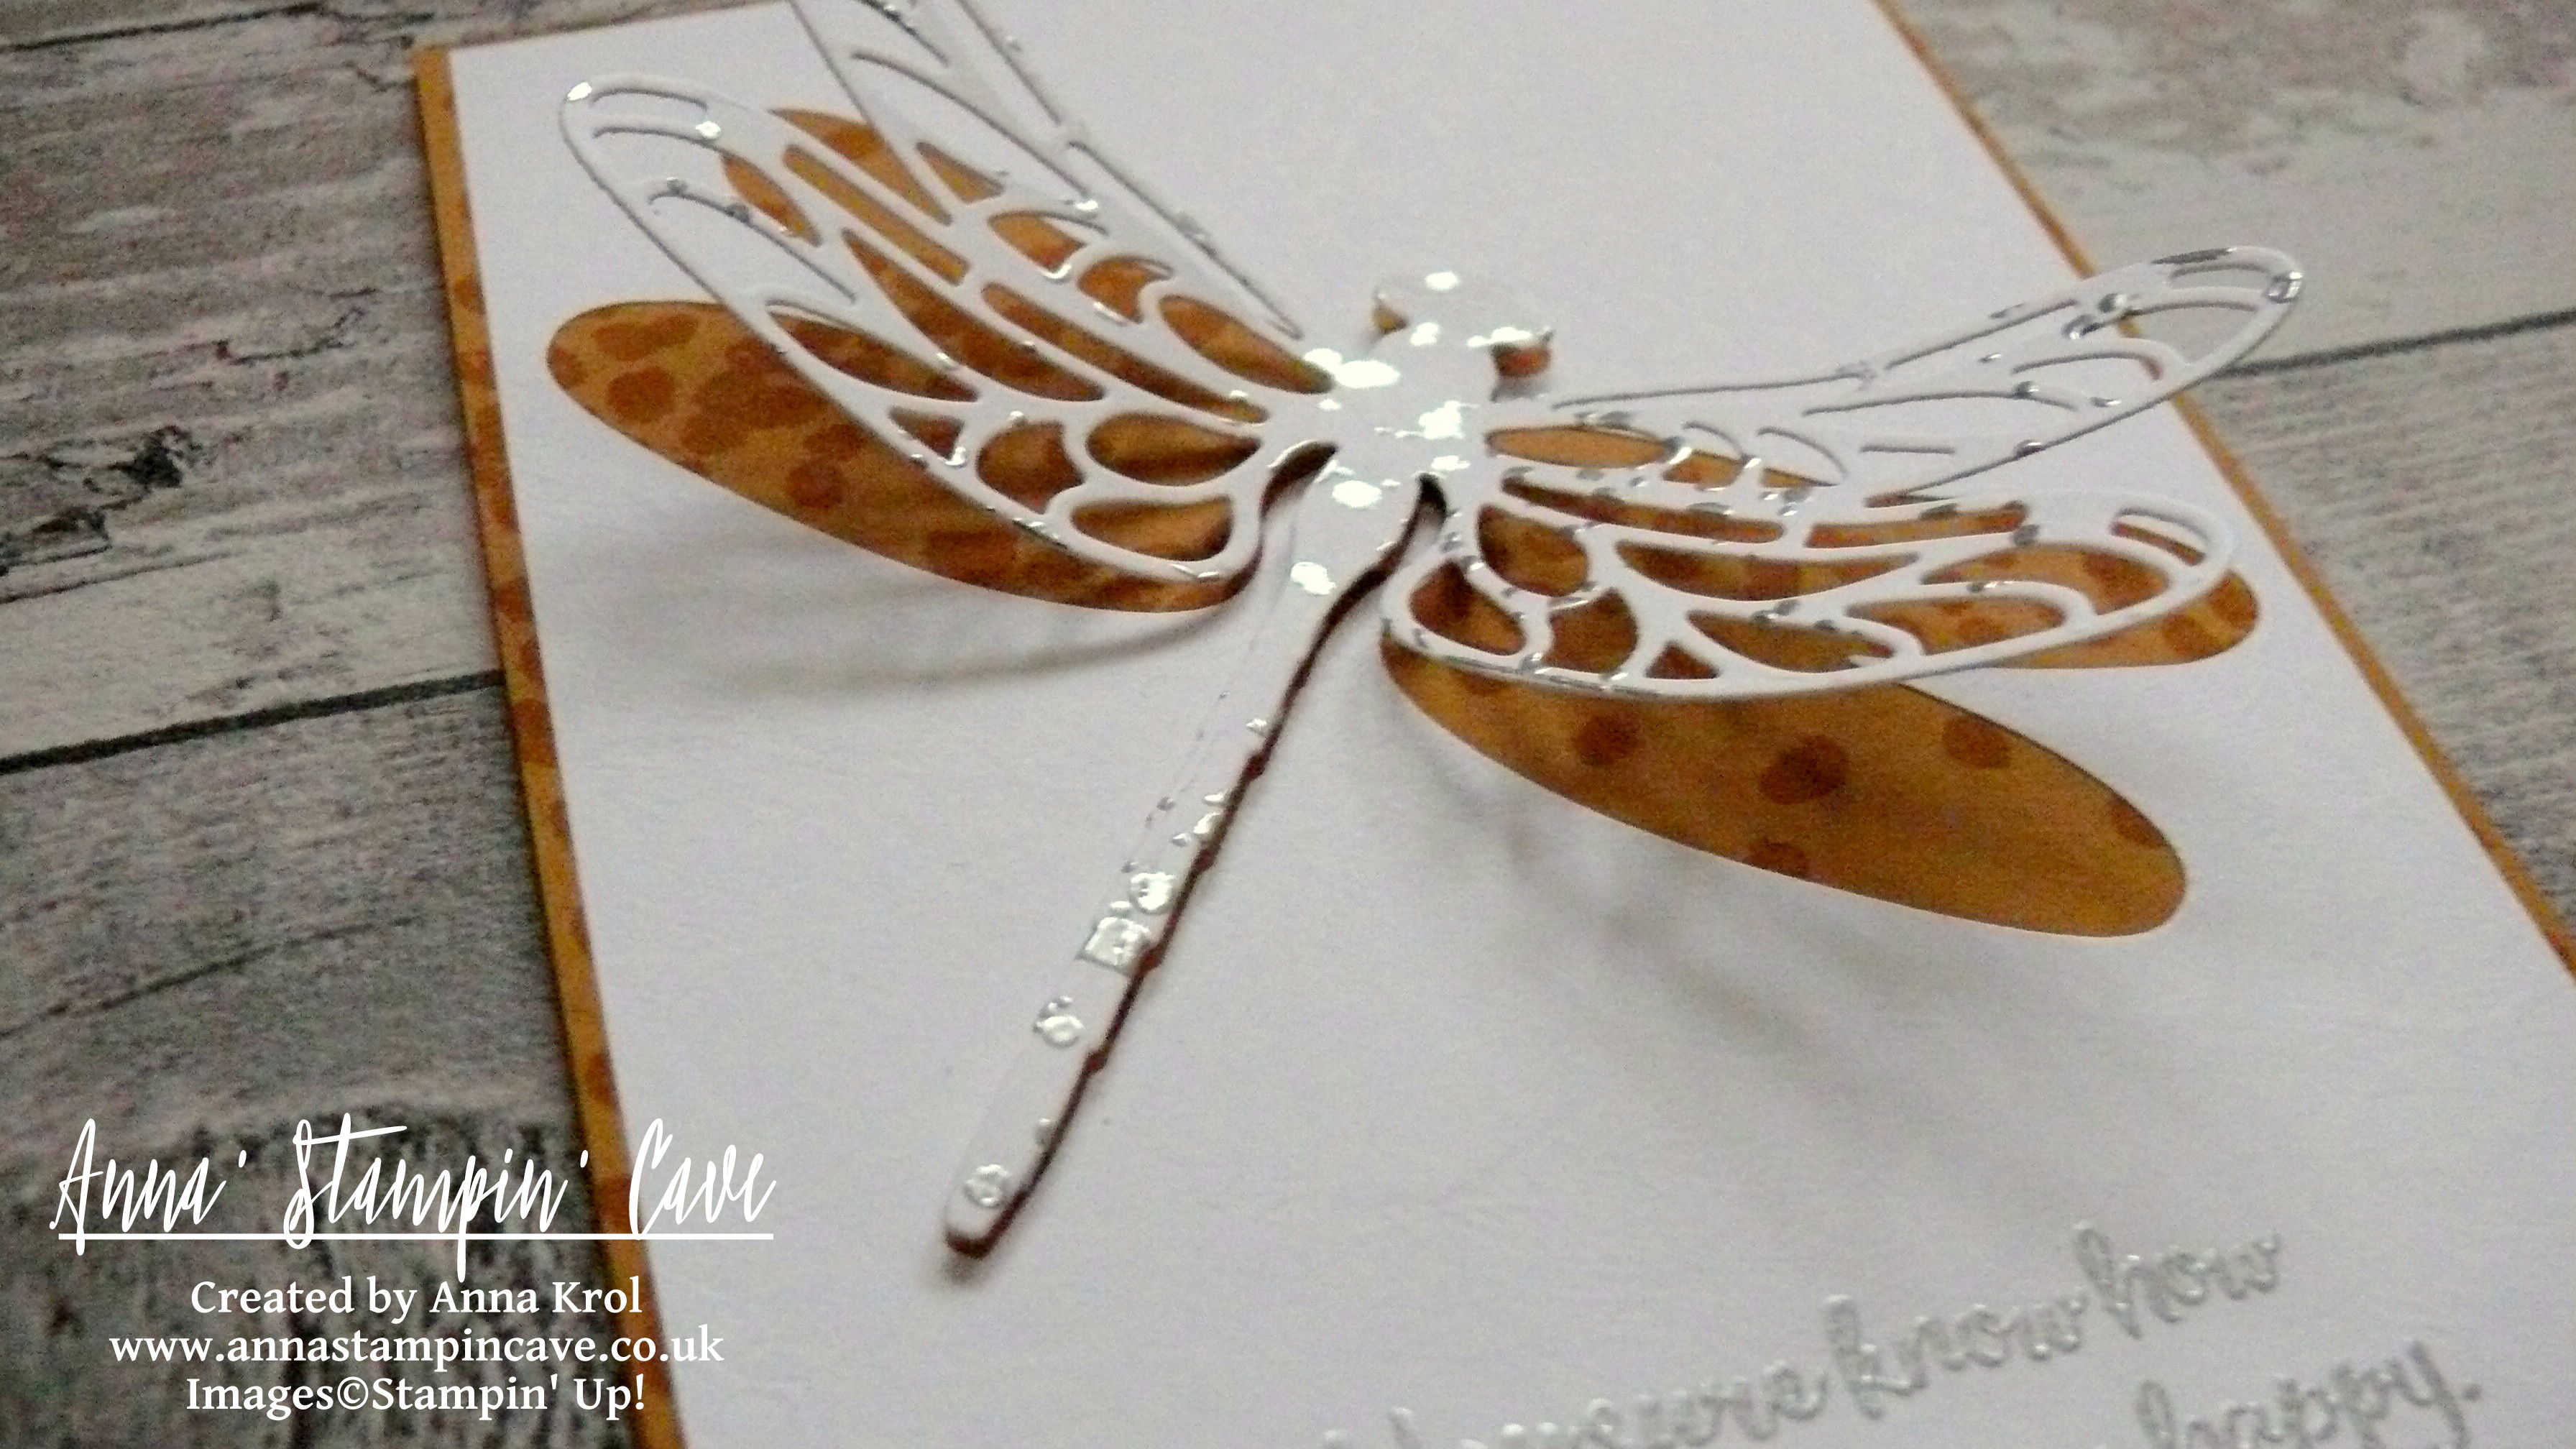
Next, I die-cut the largest detailed dragonfly, using Detailed Dragonfly Thinlits Dies, from one of the  Whisper White panels and adhered that panel (without dragonfly) to the card base. Of course, I forgot to stamp my sentiment before adhering the panel to the card front.  Typical, right?! LOL But nothing was lost yet. I picked the beautiful ‘You sure know how to make someone happy’ sentiment from Dragonfly Dreams Stamp Set (I love sentiments and the fonts in in this set) and heat embossed it on my card base with silver embossing powder. Seemed easy, but while heat embossing it, the base ‘curled up’ a bit. So I run it through my Big Shot to straighten it up. Bear in mind if you’ve got worn out plates they will leave an impression on your cardstock – ask how do I know.

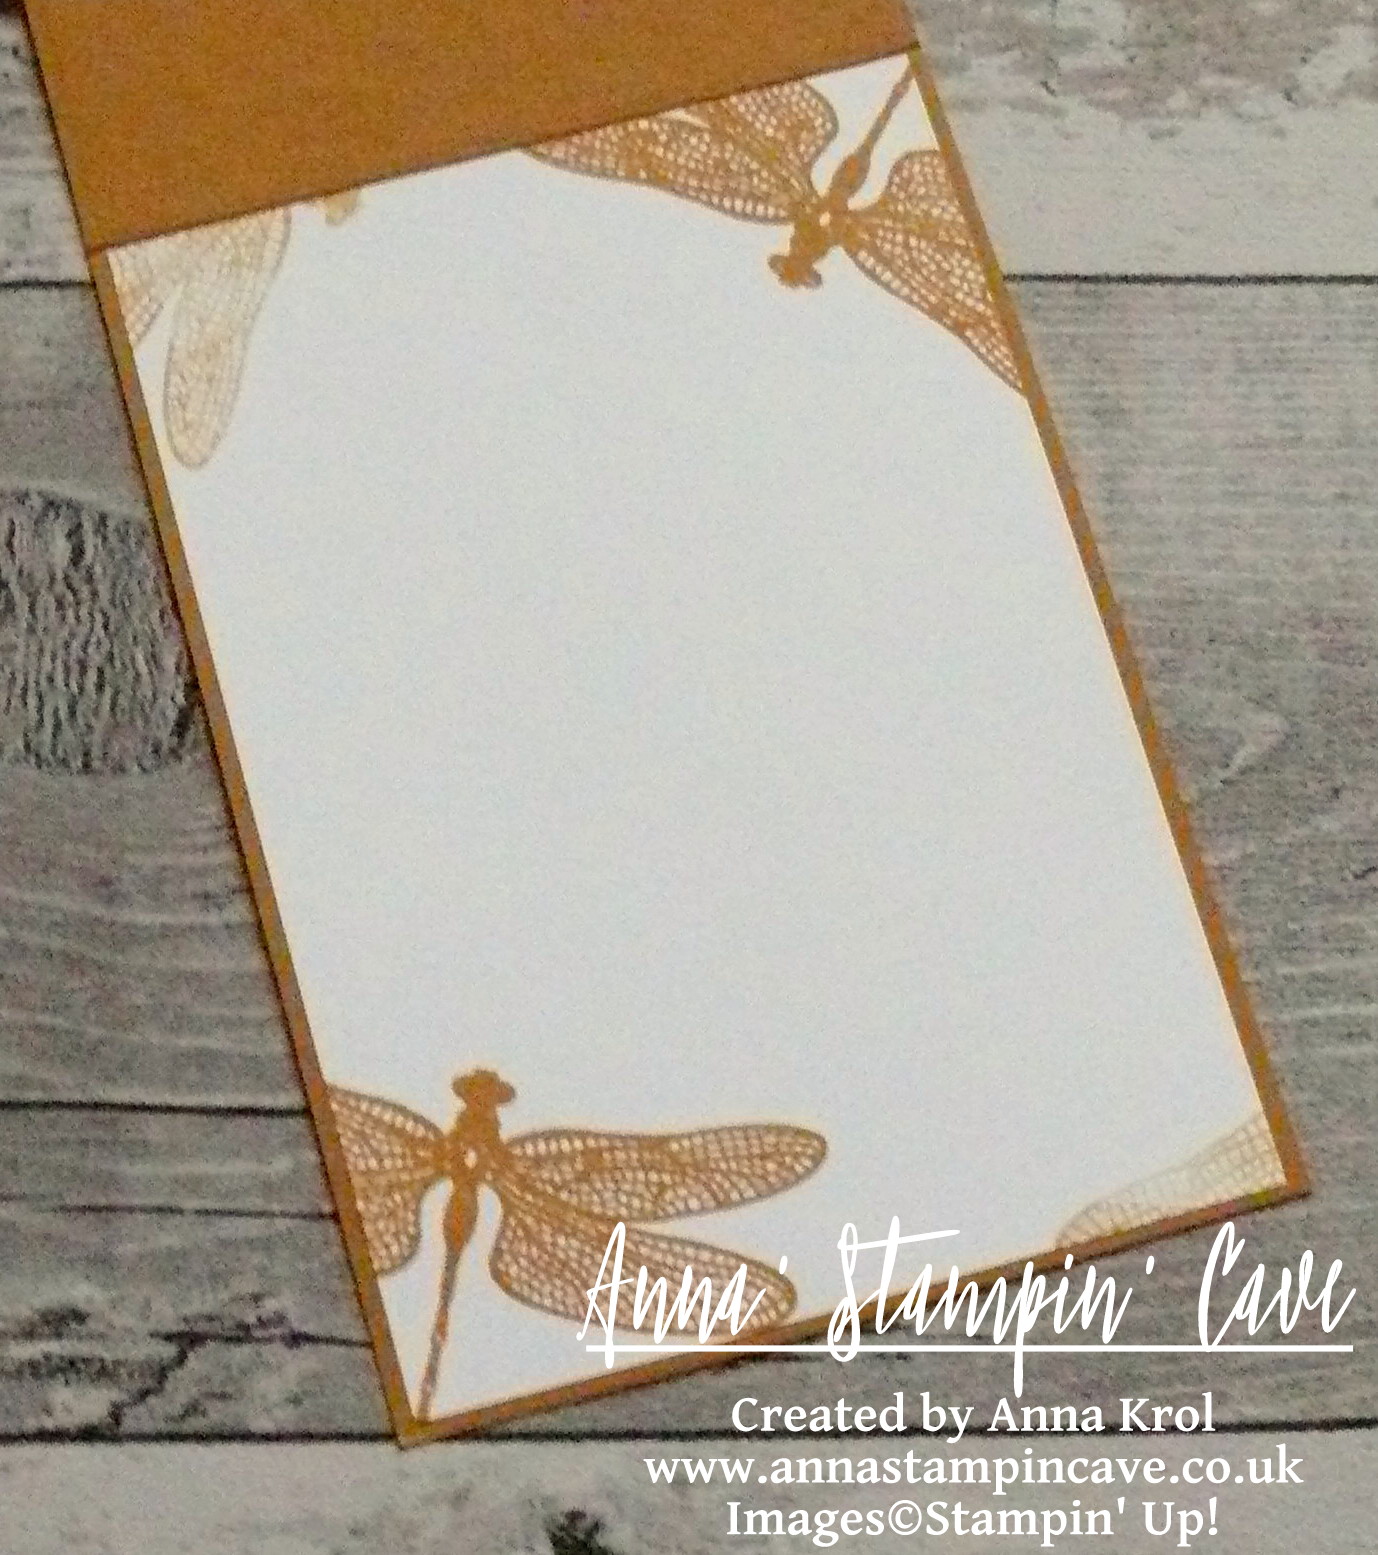
For the inside panel, I stamped few dragonflies in Delightful Dijon in the corners before adhered it with liquid adhesive.

anna-stampin-cave-stampin-up-dragonfly-dreams-bundle-clean-and-simple-card-inside

I wanted for my dragonfly to carry some silver detail too, so I stamped tiny splotches/dots from Gorgeous Grunge Stamp Set all over the die-cut, using Versamark ink, and heat embossed it with silver embossing powder.

Anna' Stampin' Cave Dragonfly Dreams Bundle Clean and Simple Card.JPG

My original idea was to inlay the dragonfly die-cut back to the negative on the card base. But I’ve changed my mind along the way as the stamped detail on the card base wouldn’t be really visible through the die cut. So I decided to adhere my dragonfly only on the body length but it didn’t look good either. At the end, I’ve used tiny pieces of dimensionals to pop the dragonfly up.

anna-stampin-cave-stampin-up-dragonfly-dreams-bundle-cas

I’m really pleased how this card turned out and I hope you like it too.

I really want to encourage you to check the Global Design Project challenge blog. They have a new challenge every week with various themes and extremely talented Design Team – they will simply blow your mind with their creativity! Just click on their logo below to visit the website

gdp_blog_header

As always, if you wish to purchase any of the products I have used, simply click the images below to go directly to my online shop.

Thank you for stopping by and have a blessed day

Dragonfly Dreams Photopolymer Bundle

Dragonfly Dreams Photopolymer Bundle
[144728]
£42.25

Detailed Dragonfly Thinlits Dies

Detailed Dragonfly Thinlits Dies
[142749]
£28.00

Dragonfly Dreams Photopolymer Stamp Set

Dragonfly Dreams Photopolymer Stamp Set
[142924]
£19.00

Gorgeous Grunge Clear Stamp Set

Gorgeous Grunge Clear Stamp Set
[130517]
£18.00

Delightful Dijon A4 Cardstock

Delightful Dijon A4 Cardstock
[138345]
£7.25

Whisper White A4 Card Stock

Whisper White A4 Card Stock
[106549]
£8.25

Delightful Dijon Classic Stampin' Pad

Delightful Dijon Classic Stampin’ Pad
[138327]
£6.00

Embossing Buddy

Embossing Buddy
[103083]
£5.50

Versamark Pad

Versamark Pad
[102283]
£7.75

Silver Stampin' Emboss Powder

Silver Stampin’ Emboss Powder
[109131]
£4.50

Stampin' Dimensionals

Stampin’ Dimensionals
[104430]
£3.75

Liquid Multipurpose Glue

Liquid Multipurpose Glue
[110755]
£3.75

Stampin' Trimmer

Stampin’ Trimmer
[129722]
£27.00

Big Shot

Big Shot
[143263]
£99.00

Simply Sketched Saturday Challenge #16 – I’m Here For You

Anna’ Stampin’ Cave – Simply Sketched Saturday Challenge #16 – I’m Here For You

SSSC Header

Thank you for joining us for another Simply Sketched Saturday Challenge!  We are so excited to be sharing this hop with you. The products used are all available in the current Annual, or seasonal, Stampin’ Up!®  Catalogues*. Simply use the buttons at the bottom of the post to keep hopping!

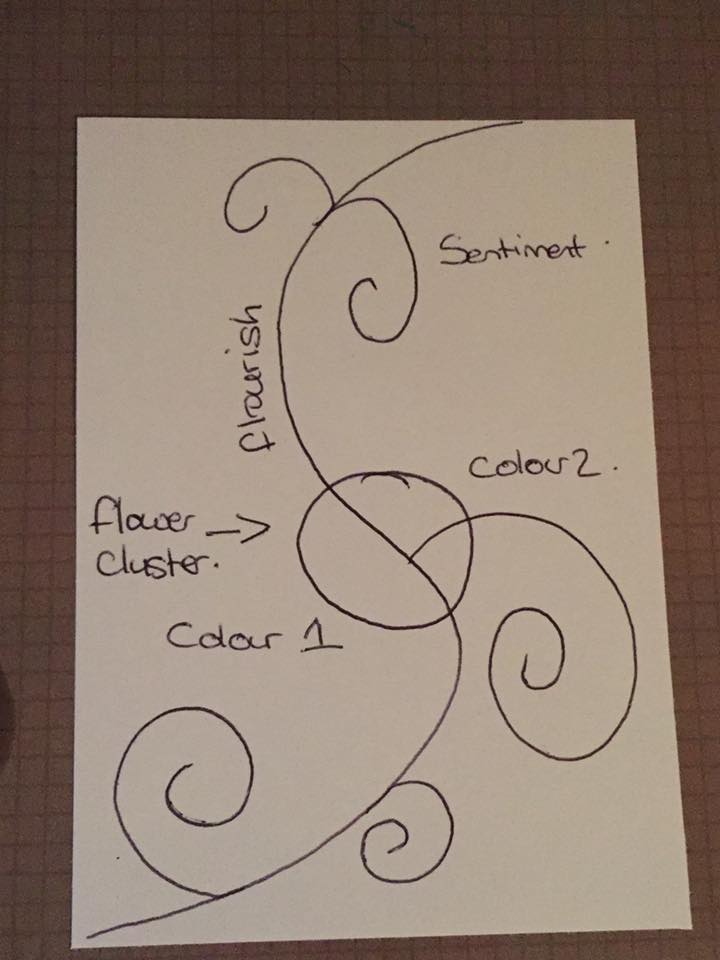
Welcome to our 16th sketch challenge blog hop! Today’s sketch has been designed by Amanda Charlesworth.

sssc16

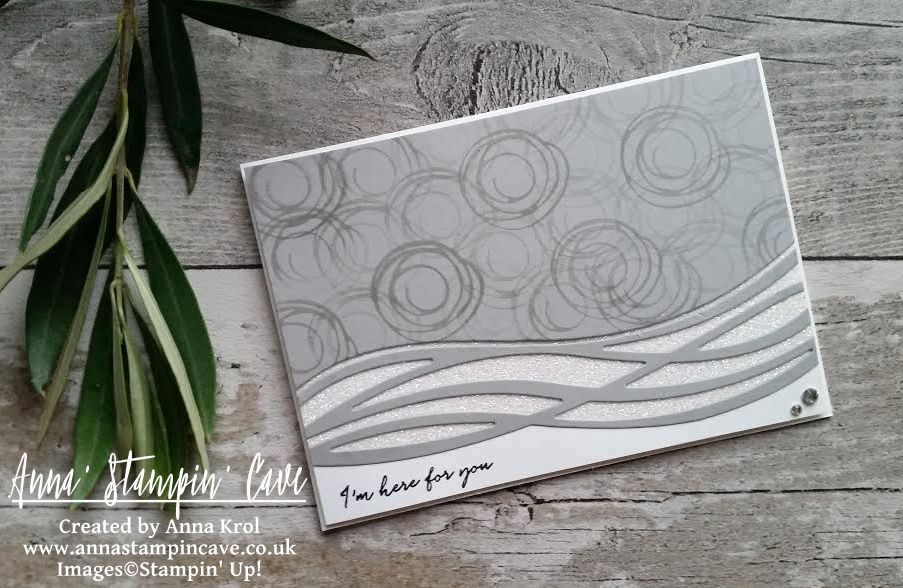
For a long time, I couldn’t decide if I wanted to create a 3D project or a card for this sketch. But because I definitely feel more confident as a card maker, I saved myself some stress and decided to make a card.

stampin-up-swirly-bird-photopolymer-bundle-monochromatic-im-here-for-you-card

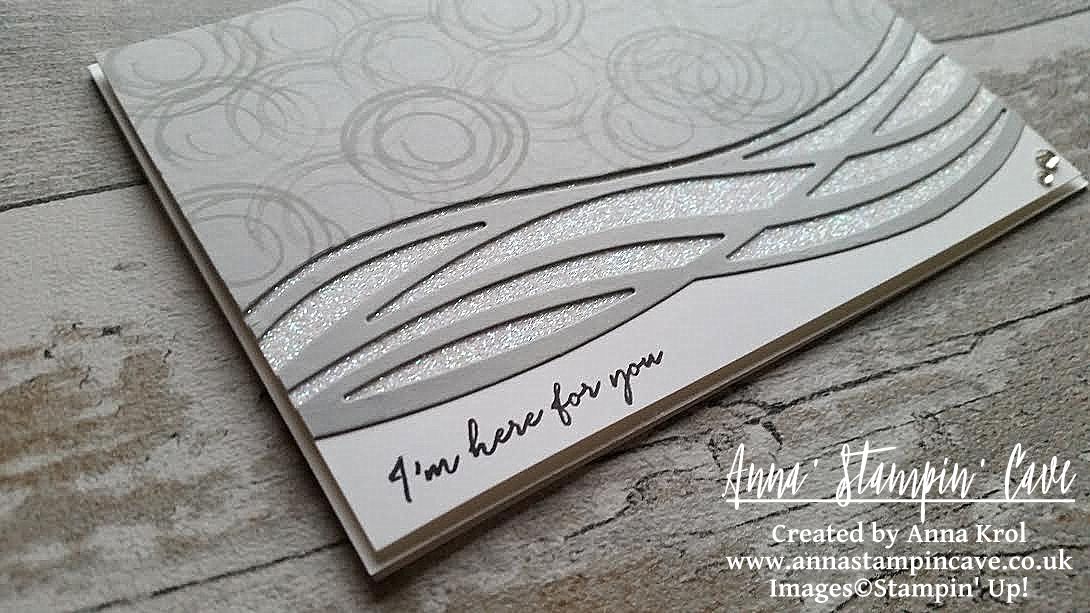
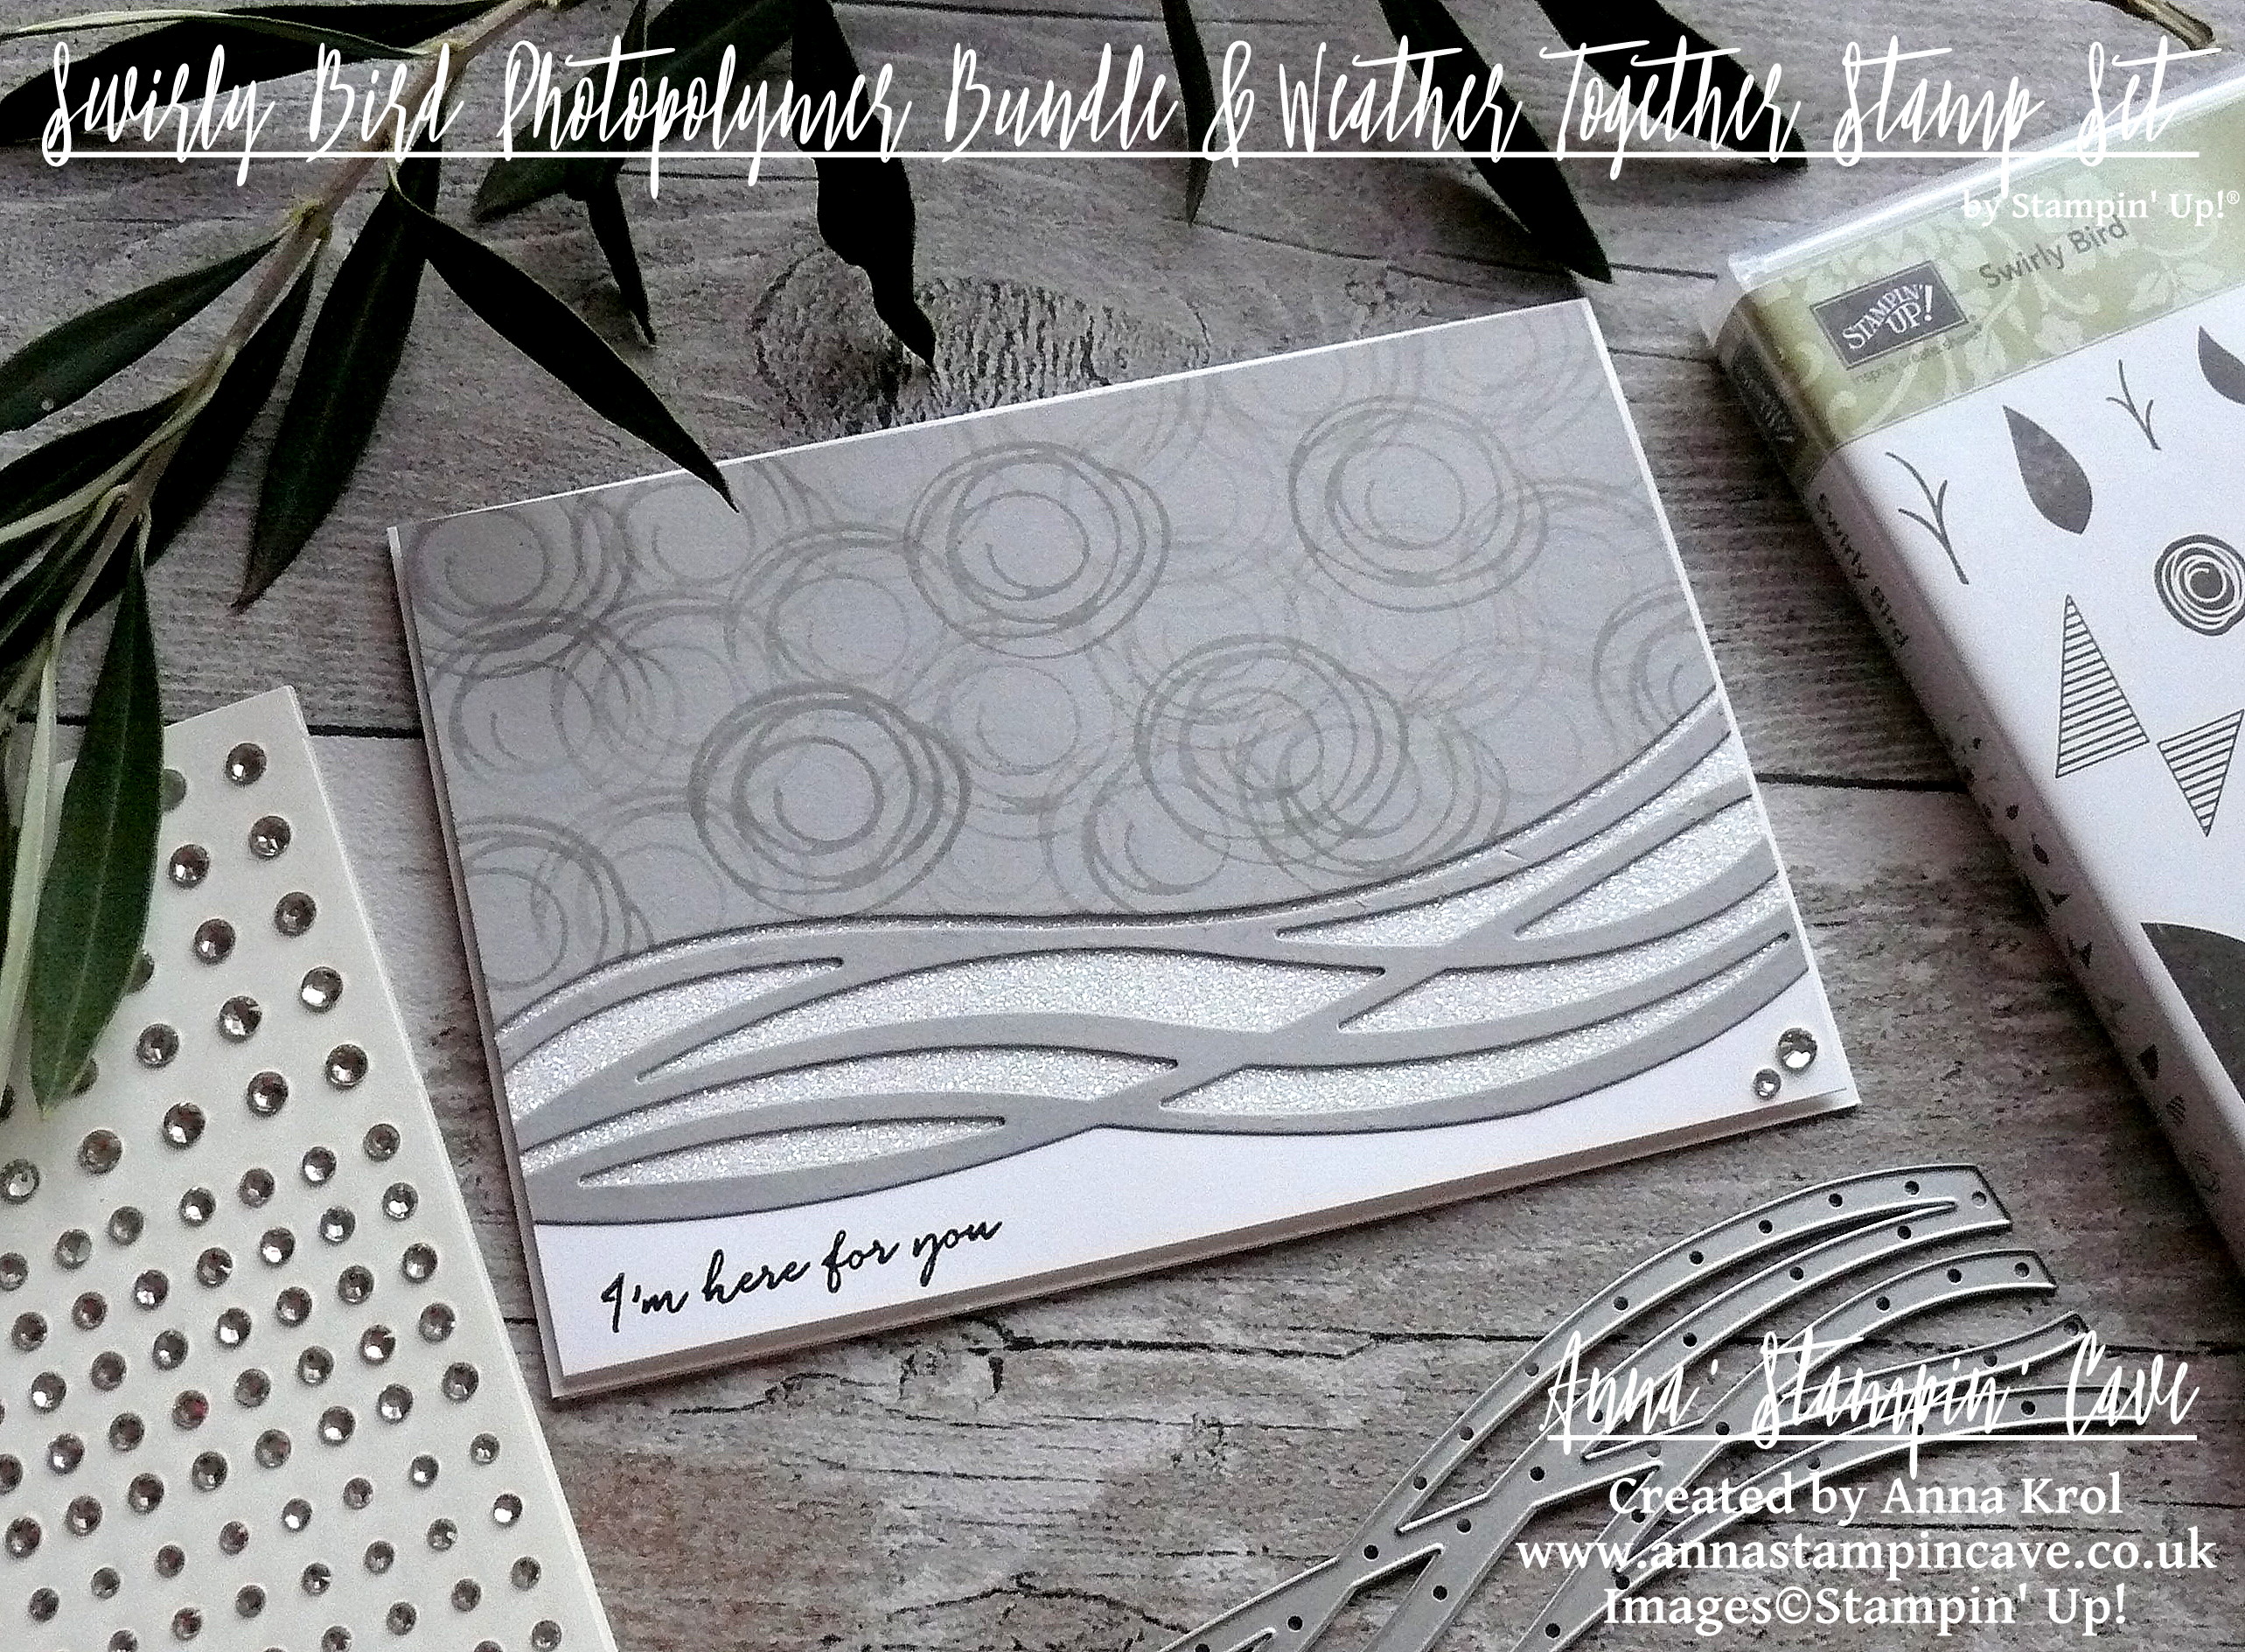
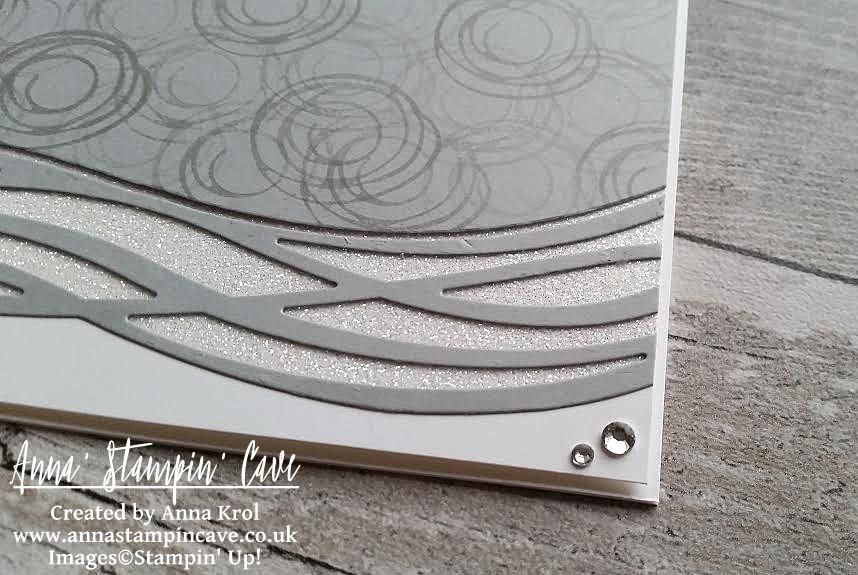
I altered the sketch a little bit and added my own twist to it. The base of my card is Whisper White Thick A4 cardstock that measures 8-1/4″x 5-7/8″, and folded in half at 4-1/8″. Next, I cut two panels: one from regular Whisper White and one Smoky Slate. Both measured 4″x 5-6/8″. I took the Smoky Slate panel and using a multi-wave die from Swirly Scribbles Thinlits Dies, I die cut one piece of ‘waves’.

Savvy Tip: Save the bottom scrap piece for some masking later on.

I took scribble circle stamp from Swirly Bird Stamp Set and stamp it repeatedly in Smoky Slate over the Smoky Slate panel, overlapping and stamping off until the whole piece was covered.

stampin-up-swirly-bird-photopolymer-bundle-monochromatic-card

Now I took Whisper White panel and that Smoky Slate scrap piece I saved earlier to create glimmer bottom layer for my wavy die-cut. I lined up the straight edge of my scrap with a bottom edge of Whisper White and squished Versamark pad over the bottom piece of that Whisper White panel. I didn’t want to cover entire panel, only the part that will be peaking through the ‘wavy’ piece. I sprinkled Heat & Stick Powder over it and heat embossed until melted. Next, I added Dazzling Diamond Glitter over it and heat embossed again to secure glitter in place. But why I used that leftover scrap of Smoky Slate, you may wonder? I’ve used it to make sure the very bottom of my WW panel won’t be covered in glitter, so I had a nice spot for my sentiment.

stampin-up-swirly-bird-photopolymer-bundle-monochromatic-card

I adhered Smoky Slate panel and ‘waves’ to the Whisper White panel. To finish off my card, I took a beautiful ‘I’m here for you’ sentiment from Weather Together Stamp Set and stamped it in Basic Black at the bottom left corner of my panel. I also added a couple of rhinestones at bottom right corner for a good measure. I’ve mounted the whole piece to the card base using dimensionals.

stampin-up-swirly-bird-photopolymer-bundle-monochromatic-card

I really like how this card turned out. Clean and simple. I hope you like my take on the sketch too.

As always, if you wish to purchase any of the products I have used, simply click the images below to go directly to my online shop.

Now, be sure to hop along and see more inspiring projects. Your next stop is lovely Jillian.

Thank you for stopping by and have a blessed day,

SSSC Previous   SSSC Next Blog

Swirly Bird Photopolymer Bundle

Swirly Bird Photopolymer Bundle
[142353]
£42.25

Swirly Scribbles Thinlits Dies

Swirly Scribbles Thinlits Dies
[141497]
£24.00

Swirly Bird Photopolymer Stamp Set

Swirly Bird Photopolymer Stamp Set
[141749]
£23.00

Weather Together Photopolymer Stamp Set

Weather Together Photopolymer Stamp Set
[141543]
£19.00

Whisper White A4 Thick Cardstock

Whisper White A4 Thick Cardstock
[140490]
£6.50

Whisper White A4 Card Stock

Whisper White A4 Card Stock
[106549]
£8.25

Card Stock A4 Smoky Slate

Card Stock A4 Smoky Slate
[131291]
£7.25

Smoky Slate Classic Stampin' Pad

Smoky Slate Classic Stampin’ Pad
[131179]
£6.00

Basic Black Archival Stampin’ Pad

Basic Black Archival Stampin’ Pad
[140931]
£6.50

Versamark Pad

Versamark Pad
[102283]
£7.75

Heat & Stick Powder

Heat & Stick Powder
[100625]
£4.00

Dazzling Diamonds Stampin' Glitter

Dazzling Diamonds Stampin’ Glitter
[133751]
£4.50

Rhinestone Basic Jewels Embellishments

Rhinestone Basic Jewels Embellishments
[119246]
£4.50

Liquid Multipurpose Glue

Liquid Multipurpose Glue
[110755]
£3.75

Stampin' Dimensionals

Stampin’ Dimensionals
[104430]
£3.75

Heat Tool - Uk Plug

Heat Tool – Uk Plug
[129054]
£27.00

Big Shot

Big Shot
[143263]
£99.00


Elegant Monochromatic With Pop Of Colour

Anna’ Stampin’ Cave – Elegant Monochromatic With Pop Of Colour

Wow! It’s hard to believe, but today is last day with My Hero Stamp Set from Stampin’ Up! Yep, 5 weeks have passed!

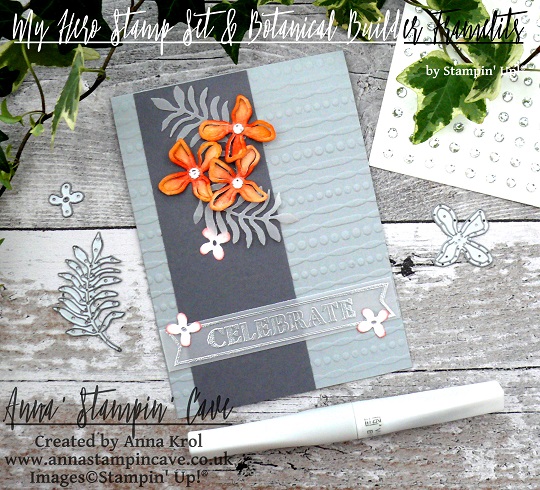
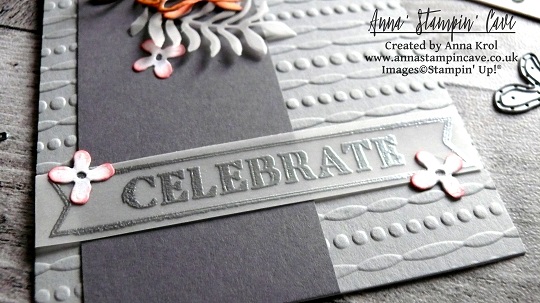
For my final project, I’ve created this striking yet elegant, almost monochromatic card, in shades of grey but with a pop of colour in form of dainty orange flowers.

stampin-up-botanical-builder-framelits-my-hero-stamp-set

For the base of my card I took an A4 sheet of Smoky Slate cardstock, cut it in half at 4-1/8″ and folded in half at 5-7/8″. I run the front of the base through Big Shot with Festive Embossing Folder. The panel is a piece of Basic Grey cardstock that measures 2″ x 5-7/8″. I adhere it to the base with Multipurpose Liquid Adhesive.

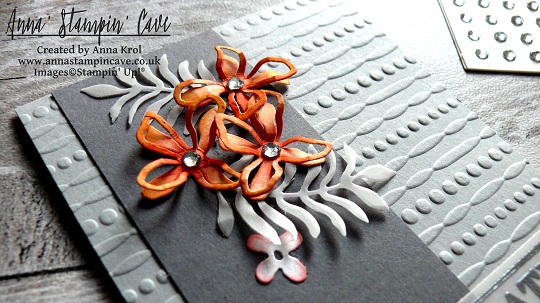
Next, I created my floral composition using Botanical Builder Framelits Dies. I die cut a couple of leaves from vellum and six flowers: three tiny flowers and three small 3D flowers from a scrap of Whisper White cardstock.

Savvy Tip: Don’t know what to do with random off cuts that are to small to use on cards or to punch anything out of them? Don’t throw them away! I save all my off cuts and use them up when need to die cut small elements, flowers, etc using framelits dies

To add a little bit of colour to my flowers I sponged the edges of the tiny flowers with Watermelon Wonder. For 3D flowers, I decided for more ‘dramatic’ look I sponged entire flowers using Pumpkin Pie ink pad and a dab of Watermelon Wonder to the centres. I also added a large rhinestone to each centre. You can’t really tell from the photos (blame the awful English weather) but I’ve added a touch of shimmer using Clear Wink Of Stella Glitter Brush to each flower (tiny ones too).

stampin-up-botanical-builder-framelits-my-hero-stamp-set

Next, I took a strip of vellum ( 1/2″ x 4-1/8″) and stamped a ‘Celebrate’ from My Hero Stamp Set in Versamark. Of course, I’ve used an Embossing Buddy prior to stamping. I heat embossed the sentiment with Silver Stampin’ Emboss Powder.

Tip: For best results with heat embossing always treat your cardstock, dsp, vellum, etc with embossing buddy. I takes off the statick from the surface of your paper, and makes the powder stick only to the areas you stamped.
Tip 2: If you don’t have an embossing buddy or any other antistatic tool you can use cornflour instead. Just sprinkle a little amount of flour over the surface of your cardstock, spread it with fingers or paint brush, and shake off the excess. Now you can stamp and heat emboss.

I assembled my composition using Glue Dots and liquid adhesive. Two tiny flowers on the vellum banner are hiding adhesive that I’ve used to adhere the banner to the card base.

stampin-up-botanical-builder-framelits-my-hero-stamp-set

I really like how this card turned out. I love the monochromatic, cold look of greys with a pop of bright orange. And what do you think about this colour combination? Do you like it? I would love to hear from you in comments below.

Thank you for stopping by and have a blessed day,
Simply Sketched Saturday Challenge Blog Hop #3 – Sweet & Mint

SSSC Header

Thank you for joining us for another Simply Sketched Saturday Challenge!  We’re so excited to be sharing this hop with you. The products used are all available in the current Annual, or seasonal, Stampin’ Up!®  Catalogues*. Simply use the buttons at the bottom of the post to keep hopping!

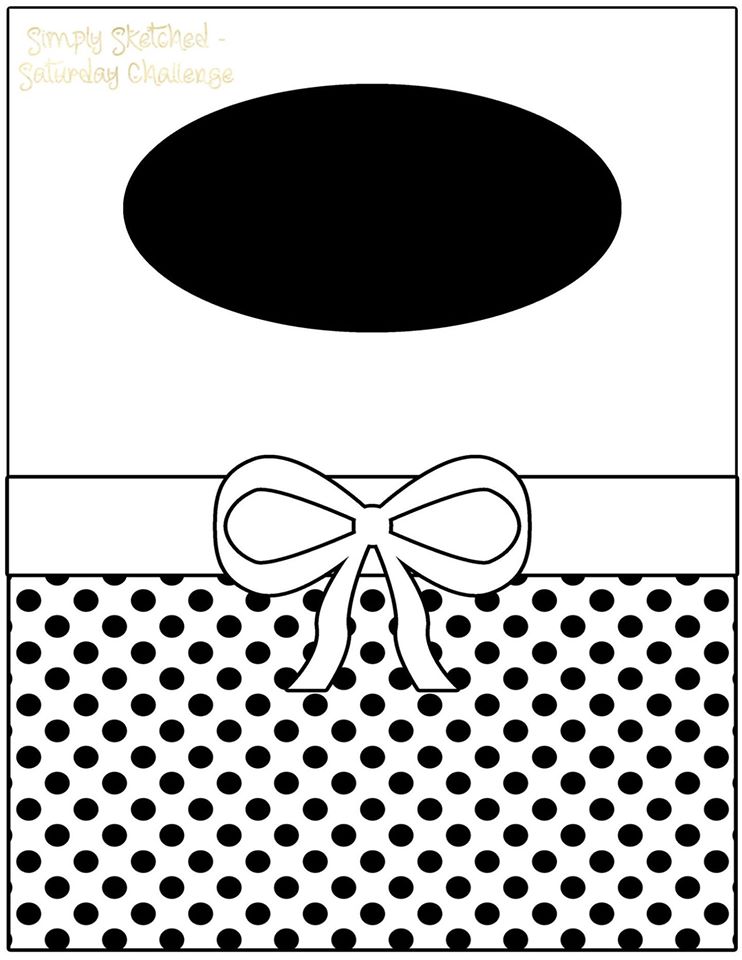
Today’s sketch was designed by very talented Angelina from Intatwyne Designs. I really like the simplicity of this design.

3

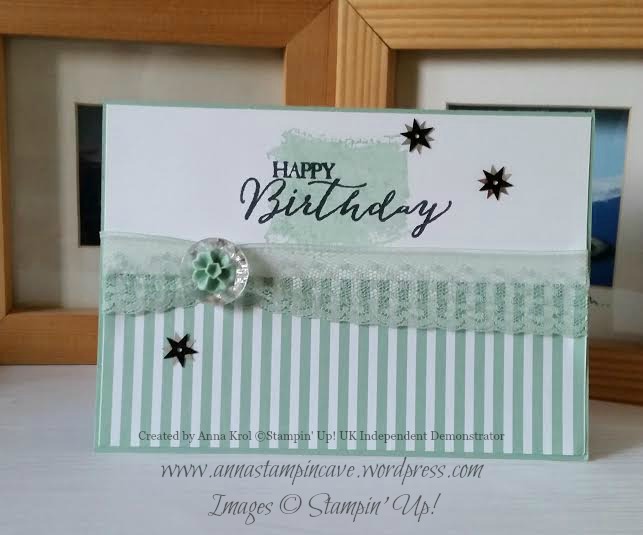
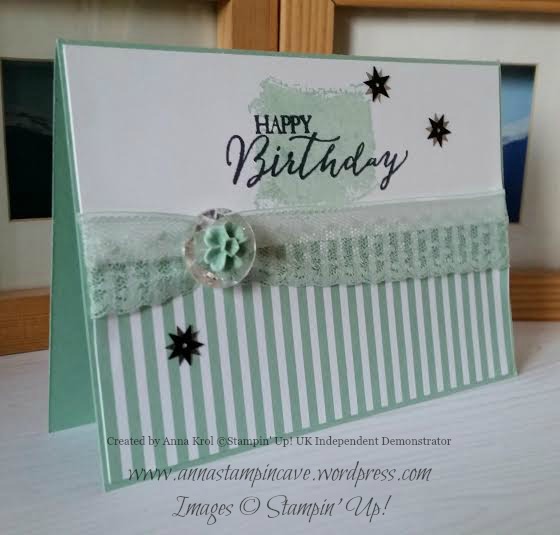
My first thought about this sketch was that it’s sweet. So is my today’s card: sweet & mint. I absolutely love 2015 – 2017 In Colors. But Mint Macaron is definitely my favourite one.

Sweet & Mint

The base of my card is Mint Macaron scored at 4-1/4″ and folded in half in landscape mode. Both panels measure 5-3/4 x 2″. The top panel is a piece of Whisper White. I stamped one of the “swooshes” from Work of Art in Mint Macaron (briefly in the middle of the panel). Then I stamped the sentiment in Memento Black. The bottom panel is a piece of 2015-2017 In Color Envelope Paper.

Sweet & Mint 2

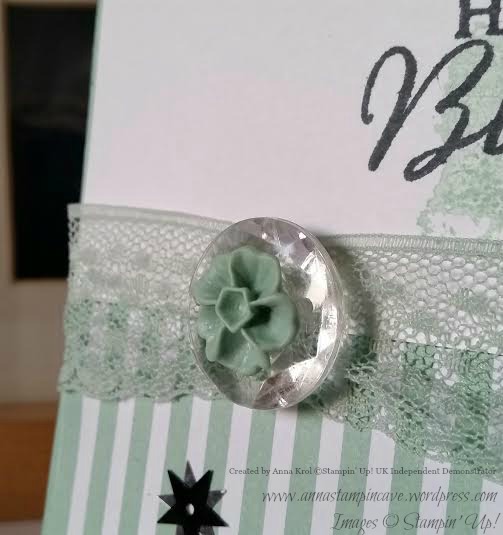
I adhered both panels to the base and added a ribbon in the middle ( I tucked the ends under the panels). Don’t you just love this Dotted Lace Trim Ribbon? I’ve used a glue dot to bunch up the ribbon and adhered button on top. I was planning to add bakers twine bow on top, but I didn’t like it. I added Blossom Accent instead.

Sweet & Mint 3

To finish my card off I added few star sequins. I didn’t plan that but needed to hide a boo-boo. I end up adding three just for a good measure 😉

Hope you like my sweet and simple card. It’s very versatile design and would work nicely with different sentiments. Plus it’s perfect for mass-producing: only took few minutes to put it together. So it’s a win-win.

Now, be sure to hop along and see more inspiring projects. Thank you for stopping by and have a blessed day!

SSSC Previous   SSSC Next Blog