Stampin’ Dreams Blog Hop – Party Pandas Valentine

Anna’ Stampin’ Cave Party Pandas Valentine For Stampin’ Dreams Blog Hop
Hello everyone! Welcome to the monthly Stampin’ Dreams Blog Hop. This month’s theme is Love. You are currently visiting Anna Krol from United Kingdom. I hope you enjoy my project. It’s my first time ‘hopping’ with Stampin’ Dreams crew. And I’ve got for you the most adorable love card EVER! Even if I do say so myself haha

Party Pandas card dimensions:

  • Basic Black cardstock: 11-6/8″ x 4-1/8″ scored in half at 5-7/8″ (29.7 x 10.5 cm scored in half at 14.8 cm)
  • Lemon Lime Twist cardstock: 3-1/2″ x 5-1/4″ (8.9 cm x 13.4 cm)
  • Whisper White cardstock: 2-1/2″ x 4″ (6.4 cm x 10.2 cm)
  • Watercolour Paper
  • Whisper White cardstock for the inside of the card: 3-1/2″ x 5-1/4″ (8.9 cm x 13.4 cm)

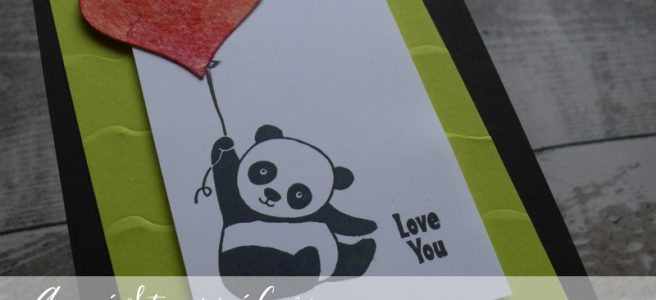
When I saw a theme of this month’s blog hop I instantly knew which stamp set I will use. Isn’t this panda adorable?! Especially with its slightly oversized heart balloon!
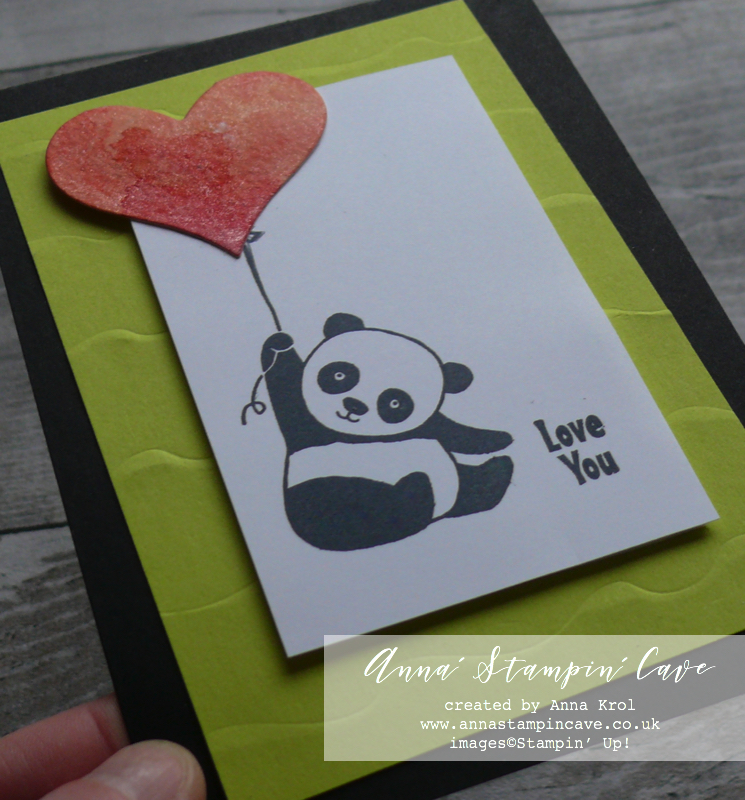
The base of my card is standard A6 size in Basic Black. For the first layer I took a piece of Lemon Lime Twist cardstock, spritz it with water to soften the fibres, and run it through the Big Shot with lovely Ruffled Dynamic Textured Impressions Embossing Folder. I adhered it to the card base with Fast Fuse

Next, I inked my panda (I didn’t ink the balloon part) with Black Memento ink and stamped it onto Whisper White. With help of Stamp-a-ma-jig I positioned and stamped the sentiment ‘love you’ from the same stamp set.
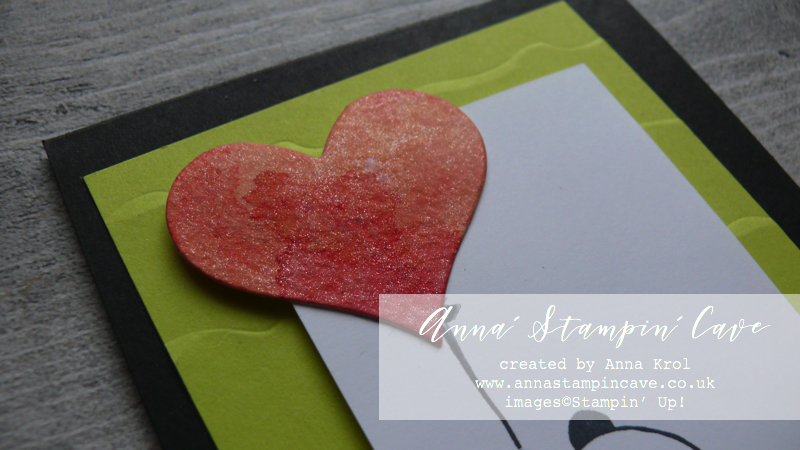
Using watercolour paper and Brusho Crystal Colour in Brilliant Red and Gamboge, I created a watercolour wash. Once it dried, I took the heart die from Mini Treat Bag Thinlits Dies, die-cut my balloon and added some shimmer with Clear Wink of Stella.

I glued my heart to the panda, where the balloon was and adhered the whole piece to the card base using dimensionals.
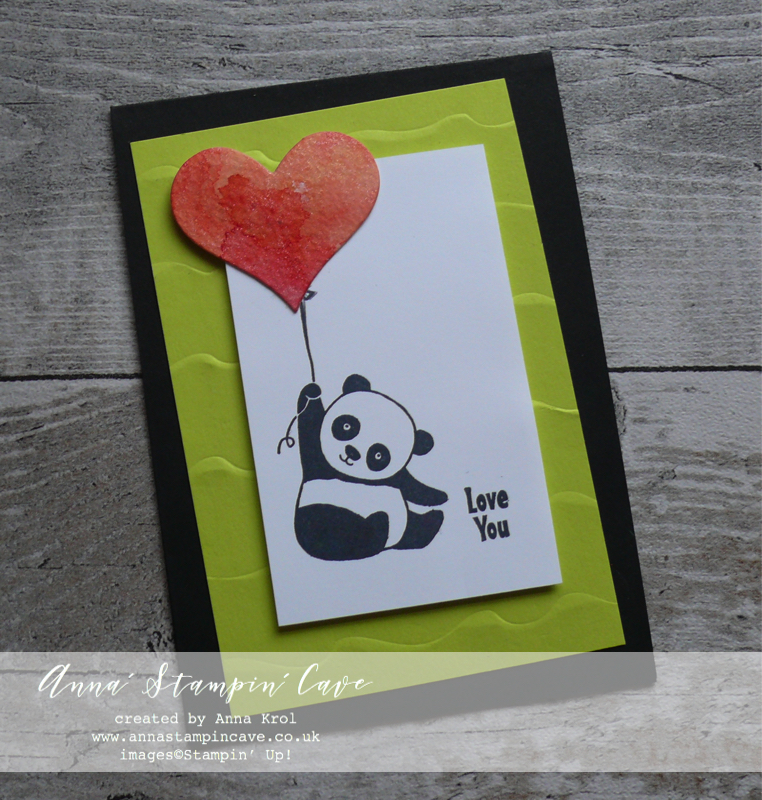
I’m really happy how this card turned out! Love the colours, dimension but most of all this adorable panda. And I hope that my card inspired you & brightened your day. I would love for you to see the list below & hop through all of the lovely artists on the list to see all our projects. You don’t want to miss any!

I’m also entering this card at

If you wish to purchase any of products I have used, simply click the images below to go directly to my online store and don’t forget to enter the hostess code for the month of January GK3G3AR3 to receive a gift from me.

Thank you for stopping by and have a blessed day


Hostess Code for January 2018 GK3G3AR3 Use this code in the month of January and receive a gift from me.

Special Notes:1) Make sure you select Anna Krol as your demonstrator;
2) If you select “No Contact” box I do not have access to your name and can’t send you a gift;
3) If your order is £150

Aqua Painters

£15.50

Big Shot

£99.00

Don’t forget to check:

Spring Summer Catalogue Paper & Ribbon Shares. Shares are open to Austria, France, Germany, Netherlands & United Kingdom. 102 sheets of DSP & 2 yards of each type of ribbon from Spring/Summer Catalogue. Click here for more details —>

The New Stampin’ Up! Spring/Summer 2017 Catalogue and Sale-A-Bration is LIVE and it’s AMAZING! For every 60 €/£45, you spend either from Spring Summer Catalogue or Annual Catalogue, you will get to choose one FREE  level 1 product from SAB brochure! If you spend 120 €/£90, you get one FREE level 2 product, OR, you can choose two level 1 items. If you spend 180 €/£135, you have the option to choose three level 1 items or one level 1 item and one level 2 item. Click here for more details —>

The Creative Flow Blog Hop – No Red Romance With Large Letters Framelits Dies

Anna’ Stampin’ Cave – The Creative Flow Blog Hop – No Red Romance With Large Letters Framelits Dies

the-creative-flow-header

Thank you for joining us on our Creative Flow Blog Hop. Each month we are set a challenge to creatively stretch our imaginations. The products we have used are all available in the current Annual and/or seasonal Stampin’ Up!® catalogues. To hop along, please use the buttons at the bottom of the post to keep hopping.

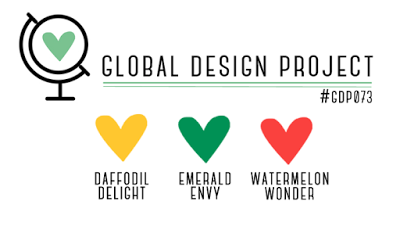
Today’s challenge was to create no-red Valentines Day card, and for some time I wasn’t sure what colour scheme to use. But Global Design Project came to the rescue with their #073 Colour Challenge. I really love this unusual, bright and oh-so-not-valentine’s colour mash-up, so I decided to combine these two together 🙂

gdp_colour_challenge73_png

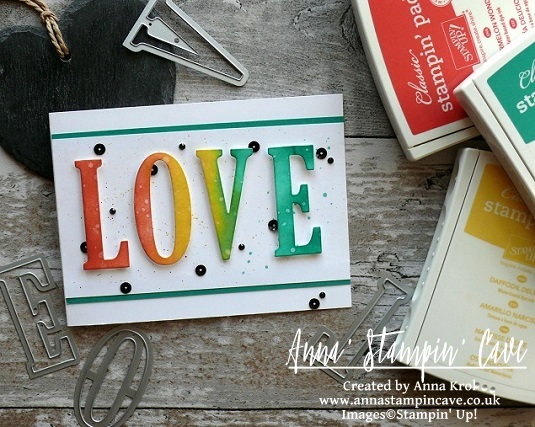
I know it supposed to be no-red, but Watermelon Wonder is rather orangy red right lol And here’s what I came up with: a perfect card to give to my hubby on that special day.

anna-stampin-cave-stampin-up-large-letters-framelits-dies-no-red-valentines-day-card

No-Red Romance card dimensions:

  • Whisper White cardstock: 11-6/8″ x 4-1/8″ scored in half at 5-7/8″ (29.7 x 10.5 cm scored in half at 14.8 cm)
  • Whisper White panel: 5-7/8″x 3″
  • Emerald Envy cardstock: 2 strips 5-7/8 long and briefly 2/8″wide
  • a piece of Whisper White for die-cutting

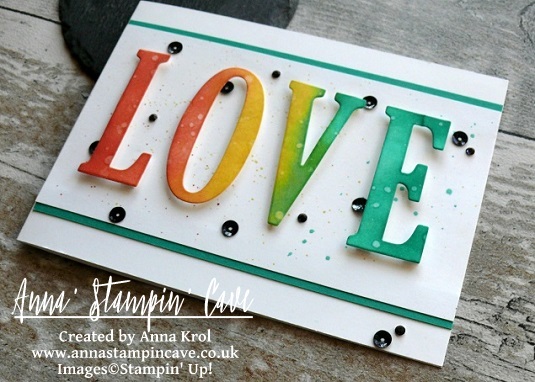
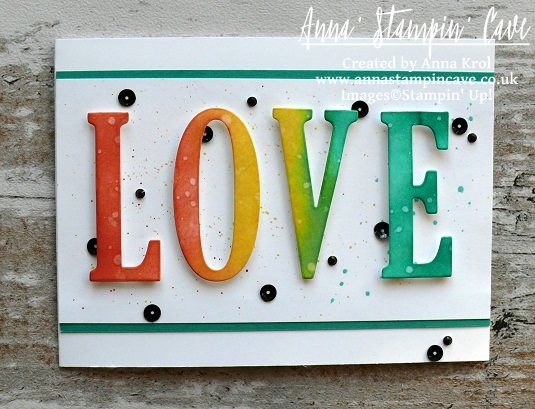
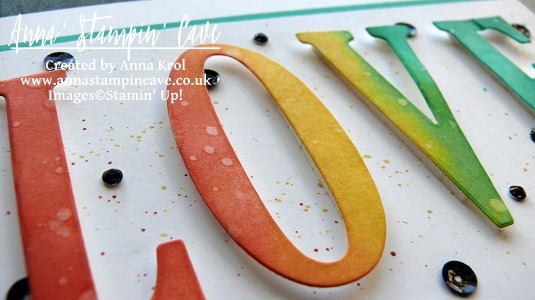
The first step was to die-cut word ‘LOVE’ using Large Letters Framelits Dies. I’ve used regular Whisper White cardstock for this. I’ve sponged the letters with my inks as follows: Watermelon Wonder first, Daffodil Delight next, and Emerald Envy as the last one creating ‘rainbow’ effect. I’ve paid special attention there’s smooth transition from one colour to another.

anna-stampin-cave-stampin-up-large-letters-framelits-dies-no-red-valentines-day-distressed-card

When I was done and happy with blending, I took a small paintbrush and flicked some water droplets all over the letters. I love how the water reactivates the ink. Such a simple step but add so much interest and texture to the (otherwise) flat surface.

Next, I took Whisper White panel and using the same small brush and my ink pads as a palette, I speckled some inks over the whole panel. I tried to keep my speckles somehow under control colour-wise, so the speckles match the letters that go over them.

Remember: The smaller is the brush, the smaller are the speckles.

When speckles dried, I adhered two strips of Emerald Envy cardstock underneath, one on top and one on the bottom of the panel.

anna-stampin-cave-stampin-up-large-letters-framelits-dies-no-red-valentines-card

Now to assemble the card. I adhered the panel to the card base using Fast Fuse adhesive. And I have to say I’m happy to say it seems I finally made friends with this adhesive haha.

I wanted to pop-out my letters so I’ve used Foam Adhesive Strips to adhere them to the panel. You could use any regular foam adhesive, but these strips are perfect for adhering die-cuts that are quite narrow in shape. They are long but you can easily cut them to the length you want/need.

I was really happy how nicely this card was coming together, but I was desperate to add some embellishments to it. Yes I know, a card for a hubby and embellishments?! I must have lost my mind, haha. But why not?

anna-stampin-cave-stampin-up-large-letters-framelits-dies-no-red-valentines-day-card

So I scattered black sequins from Metallics Sequin Assortment pack all over my card and tried to figure out the placing and how many I will use. Once I was happy I adhered them with Fine-Tip Glue Pen. For the final touch, I coloured some rhinestones with black Sharpie and added them to the card too.

That’s it from me for today. I really hope you enjoyed my step by step directions.

For those of you who asked about stretching your stitched dies using partial die-cutting – I will have a short how-to post for you soon. So watch this space.

Now be sure to hop along our tiny blog hop to see more inspiring projects. Your next stop is lovely and talented Helen.

Thank you for stopping by and have a blessed day,

the-creative-flow-previous-button the-creative-flow-next-button

Large Letters Framelits Dies

Large Letters Framelits Dies
[141712]
£89.00

Whisper White A4 Card Stock

Whisper White A4 Card Stock
[106549]
£8.25

Emerald Envy A4 Cardstock

Emerald Envy A4 Cardstock
[141420]
£7.25

Watermelon Wonder Classic Stampin' Pad

Watermelon Wonder Classic Stampin’ Pad
[138323]
£6.00

Daffodil Delight Classic Stampin' Pad

Daffodil Delight Classic Stampin’ Pad
[126944]
£6.00

Emerald Envy Classic Stampin' Pad

Emerald Envy Classic Stampin’ Pad
[141396]
£6.00

Stamping Sponges

Stamping Sponges
[141337]
£3.25

Metallics Sequin Assortment

Metallics Sequin Assortment
[138390]
£4.50

Rhinestone Basic Jewels Embellishments

Rhinestone Basic Jewels Embellishments
[119246]
£4.50

Fast Fuse Adhesive

Fast Fuse Adhesive
[129026]
£9.00

Foam Adhesive Strips

Foam Adhesive Strips
[141825]
£7.25

Fine-Tip Glue Pen

Fine-Tip Glue Pen
[138309]
£6.25

Stampin' Trimmer

Stampin’ Trimmer
[129722]
£27.00

Big Shot

Big Shot
[143263]
£99.00

Simply Sketched Saturday Challenge Blog Hop #6 – You Are My Person

SSSC Header

Thank you for joining us for another Simply Sketched Saturday Challenge!  We’re so excited to be sharing this hop with you. The products used are all available in the current Annual, or seasonal, Stampin’ Up!®  Catalogues*. Simply use the buttons at the bottom of the post to keep hopping!

Today’s sketch was designed by very talented Debbie who sadly couldn’t take a part in Hop today. But we’re all hoping she’ll be back with us soon. I also wanted to wish a very Happy Birthday to Sam from Sam’s Crafty Things as she’s celebrating today! Happy Birthday, Sam, have a good one!

But now let’s get back to the sketch.

#6

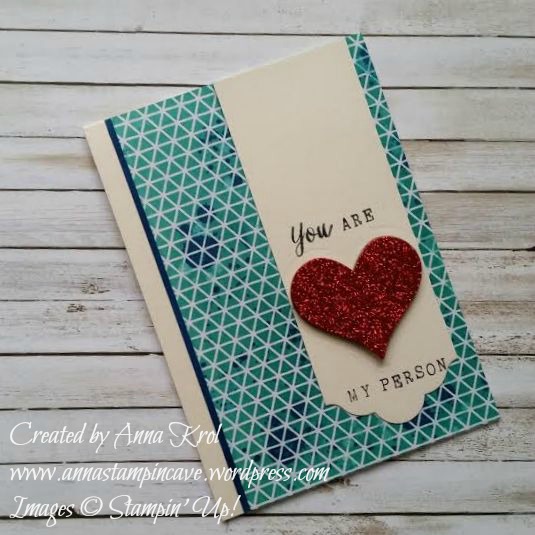
My card for today is pretty simple and created using few favourites from Annual Catalogue. As Valentine’s Day is just one day apart I wanted to create something in this theme. I’ve made this card purely with my husband in mind. He is my partner and best friend. He is my person. He is a true blessing in my life.

You Are My Person 5

The base of my card is standard A6 in Very Vanilla. For the background, I chose Colour Me Irresistible Specialty DSP. I love this paper! Each pack contains 6 white sheets and 6 other colours sheets (one of each colour). And each sheet has a subtle embossing in various designs. For my card, I decided to use a white sheet with the geometrical design.

You Are My Person 2

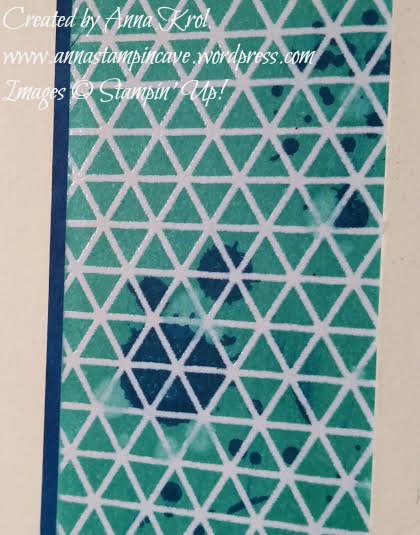
To add colour to my background I’ve used a brayer. I bought it recently (finally) and it was the perfect occasion to open it and have fun adding colour. It’s so easy! The ink I’ve used is Bermuda Bay. When I was happy with my background I decided to add some twist to it. First I sprinkled few water droplets on top to lift some of the colour. Next, I stamped few splotches from Gorgeous Grunge. For this. I’ve used Pacific Point. I trimmed my piece so once adhered to the base I would have nice, clean border. I also added a tiny strip of Pacific Point cardstock.

You Are My Person 4

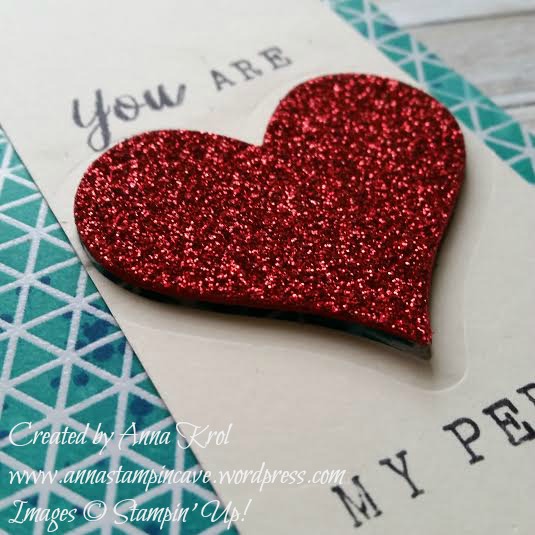
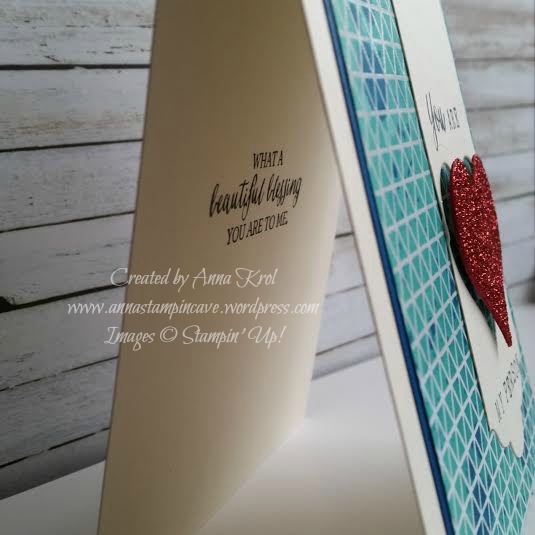
Next, I created the banner. I took a piece of Very Vanilla that measures 2 x 5-6/8″. To create this elegant edge I’ve used 3rd biggest of Lots Of Labels framelits dies. I die-cut a heart from Mini Treat Bag Thinlits Dies. And die-cut it twice: once from my banner and the second one from Red Glimmer Paper. I glued these two hearts together and traced the edge with Real Red Stampin’ Marker. Before I put my card together I stamped the sentiment. Word “you” comes from Rose Wonder stamp set. It’s actually “Thank You” sentiment, but it was very easy to ink just that one word. To create the rest of my sentiment I’ve used Alphabet Rotary Stamp. Oh, wish Stampin’ Up! had “You are my person” sentiment in their offering. It’s such a beautiful thing to say. Not only to your partner but also to a friend. I stamped inside of my card as well.

Now was the time to put the card together. I adhered the background and a strip of Pacific Point cardstock using Tombow glue to make sure it will hold the paper really well. I added the banner with snail adhesive and I popped my glittery heart with dimensionals.

And what do you think? Do you like my card? Please let me know in the comments below. I would love to hear from you.

Now, be sure to hop along and see more inspiring projects. Your next stop is lovely Karen  go and see what she has made using our cute sketch. It’s her first blog hop with us, so please show her some love.

Thank you for stopping by and have a blessed day!

SSSC Previous   SSSC Next Blog

Bloomin’ Love Valentine’s Day Gift Set

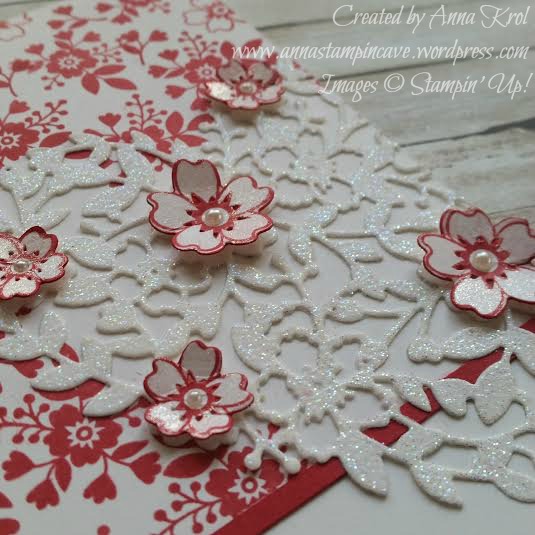
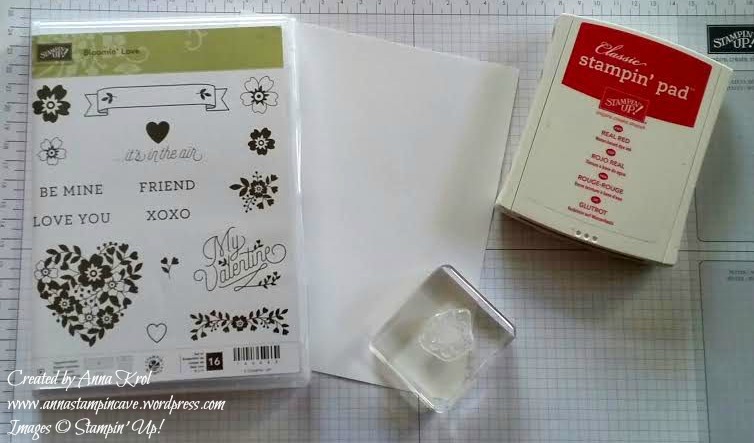
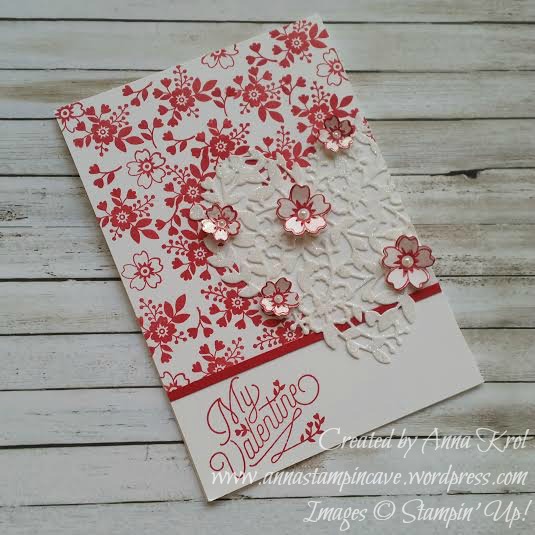
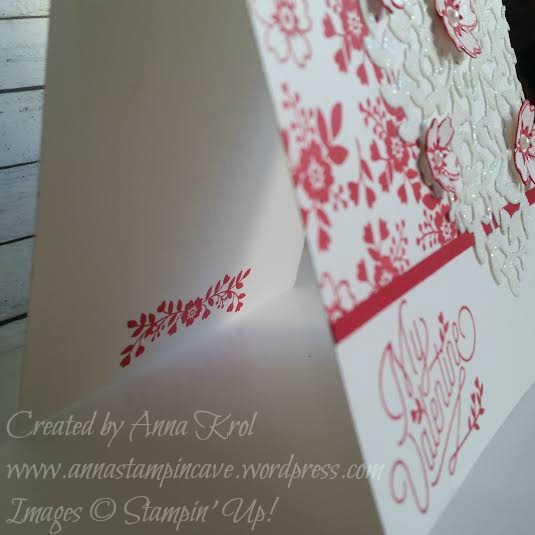
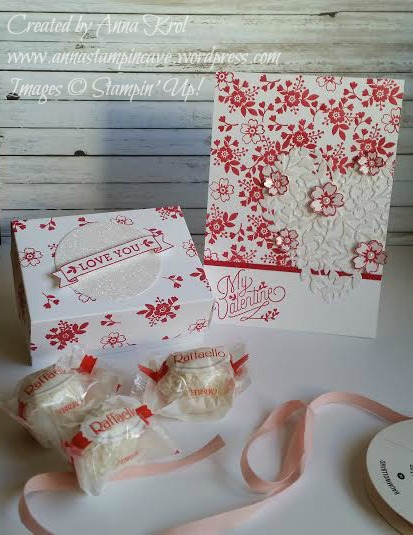
Today I’ve got for you beautiful Valentine’s Day card I’ve made to match cute Valentine’s Day gift box I posted two weeks ago. Again I’ve used Bloomin’ Love stamp set and Real Red Stampin’ Pad. This time I also used matching Bloomin’ Heart Thinlit Dies.

The card is a standard A6 top folded card. Because I didn’t want the stamping underneath the heart, I die-cut my heart first and used it as a stencil to lightly mark where the heart will be. I also masked around 1-1/2″ of the bottom of the card base using post-it notes. I wanted to keep it clean for the sentiment.

Valentines Day card 8

I stamped the base carefully around the marked line first, and then just filled in the rest of the space. Next, I stamped the sentiment. I cut a tiny strip of Real Red cardstock and adhered it just above the sentiment to hide where the stamping ends.

Valentines Day card 2

I also stamped the inside of the card using this cute floral stamp.

Valentines Day card 6

When I put my card together I decided to add some pop to it.

I stamped 3 small and 2 large flower outlines on the piece of Whisper White and die-cut them. I sponged their edges and attached them to the heart with glue dots. Just a little touch of Clear Wink of Stella glitter pen and few mini pearls and the card was ready.

Valentines Day card 3

I love how this card turned out and how it matches the box. Perfect little gift for Valentine’s Day.

Thank you for stopping by and have a blessed day,

You Send Me Soaring

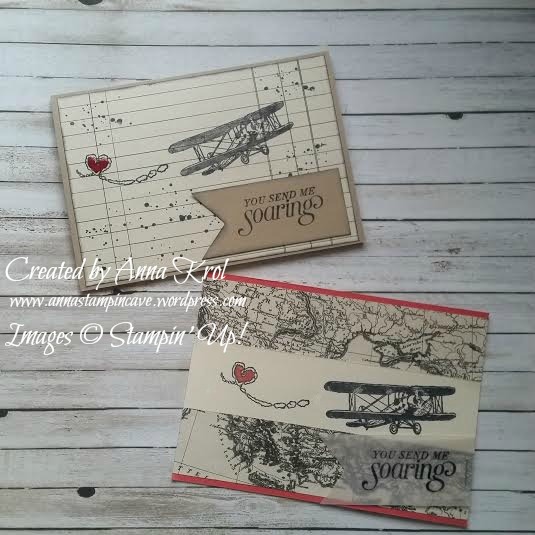
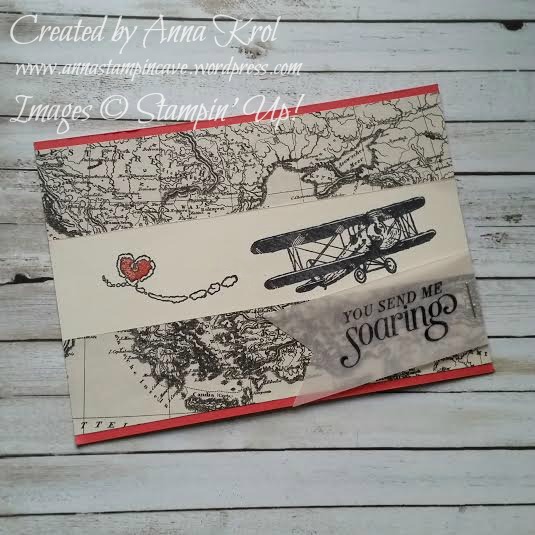
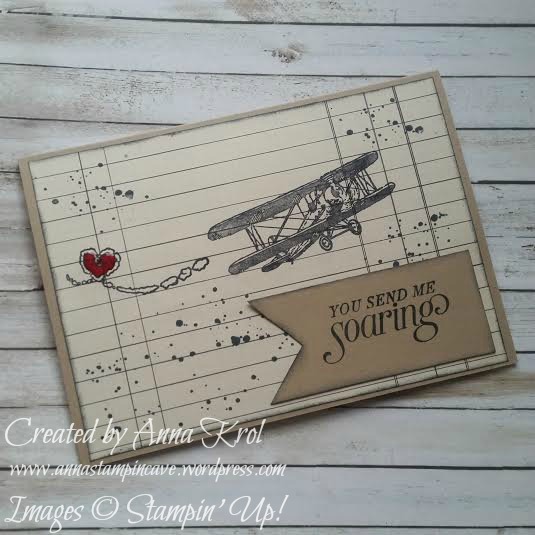
I love the vintage feel to Sky is the Limit stamp set from Stampin’ Up! and I’ve used it recently to create cute Valentine’s Day cards perfect for men in our lives.

sky is the limit 3

First card I’ve made for a card-swap in our group of demonstrators. As all stampers, we love to swap! Swapping lets you share your creativity, enjoy the creativity of other stampers, and gather and collect ideas.

sky is the limit 7

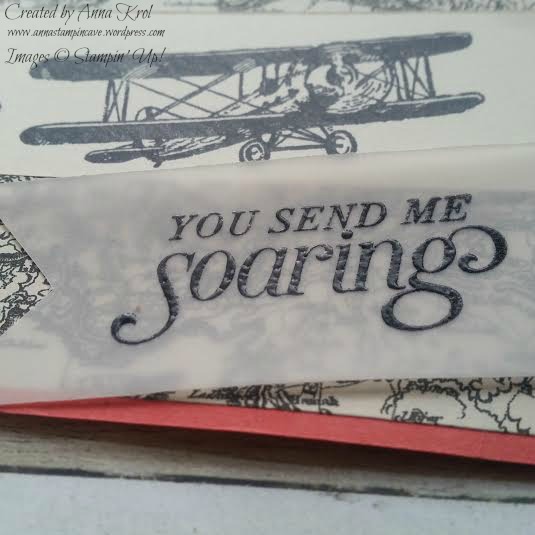
The base of my card is Watermelon Wonder cardstock. For the layer, I cut two pieces of Typeset Specialty DSP (each measure 5-7/8″ x 1-3/8″) and a strip of Very Vanilla cardstock that measure 5-7/8″ x 1-1/4″. Before I adhered them on my base I stamped my images on Very Vanilla using Basic Black Archival Stampin’ Pad, as I was planning to do a little colouring. Our archival ink pads are perfect for watercolouring as they do not bleed. I coloured heart using Watermelon Wonder ink pad and a blender pen and added a little shimmer with clear Wink of Stella Glitter Brush. Yeah, I know that most of the guys do not like a bling. But come on: he loves you, so you can sneak a little shimmer here and there, and he won’t say a word 😉 I stamped the sentiment on a piece of vellum and heat embossed in black. Cut it into a banner and attached to the card using a regular stapler.

For the second card base, I chose cardstock in my favourite neutral colour – Crumb Cake.

sky is the limit 6

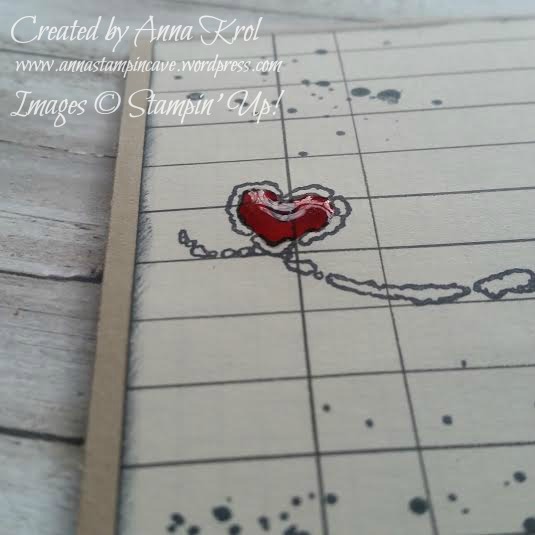
For the layer again I reached for Typeset DSP. But this time I stamped directly onto my designer paper. I also added some splotches from Gorgeous Grunge stamp set and sponged the edges to add to the vintage look. This time I stamped sentiment onto a piece of Crumb Cake instead of vellum. I attached everything to the base using snail adhesive. The plan for the heart was to leave it blank this time, but when the card was put together I’ve changed my mind. I colour the heart using a Real Red marker and then filled it with Crystal Effects. I have to say I love how a little of Crystal Effects makes the heart just POP! sky is the limit 4

It’s been ages since last time I’ve made masculine cards, so rather pleased how these turned out. I was wondering which of the finishes get more votes: Wink of Stella or Crystal Effects. So I’ve asked my fellow crafters (showing them just a hearts sneak peek) what they think. And I’m not surprised that Crystal Effects gets more votes. And which finish do you prefer? Let me know in the comments below.

Thank you for stopping by and have a great day,