International Highlights Winners Blog Hop

Anna' Stampin' Cave - Soft Sea Foam & Coastal Cabana Watercolour Wash with a touch of gold using Artfully Folded Stamp Set by Stampin' Up!

Anna’ Stampin’ Cave – International Highlights Winners Blog Hop

I was so absolutely thrilled that Kylie Bertucci has chosen me to hop amongst the top ten winners of her International Blog Highlight from June.

Every month, the ‘top ten’ get to blog hop with Kylie, using the same theme, and this time the theme was Friendship.

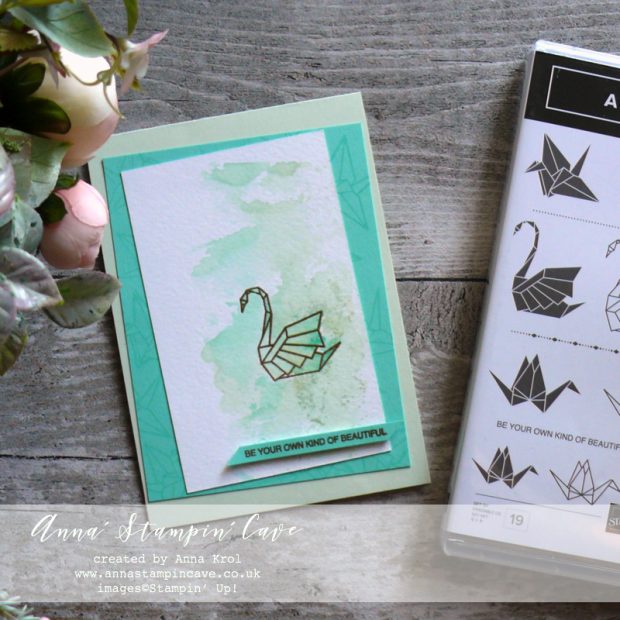
A month ago I’ve used Detailed With Love Stamp Set. This time, however, I decided to use beautiful host stamp set called Artfully Folded.Anna' Stampin' Cave - Soft Sea Foam & Coastal Cabana Watercolour Wash with a touch of gold using Artfully Folded Stamp Set by Stampin' Up!

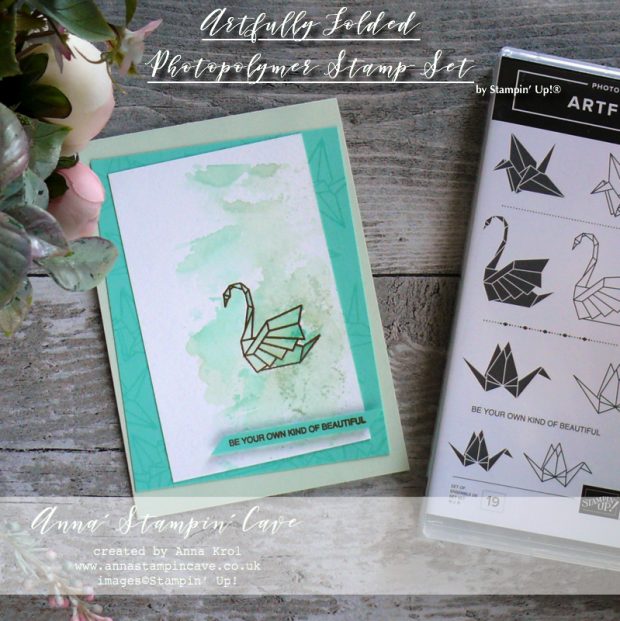
Artfully Folded card dimensions:

  • Soft Sea Foam: 11-6/8″ x 4-1/8″ scored in half at 5-7/8″ (29.7 x 10.5 cm scored in half at 14.8 cm)
  • Coastal Cabana cardstock: 3-3/4″ x 5″ (9.6 cm x 12.7 cm)
  • Watercolour Paper: 3″ x 4-3/4″ (7.6 cm x 12 cm)
  • Coastal Cabana strip for the sentiment: 1/4′ x 2-3/4″ (0.6 cm x 7 cm)

Anna' Stampin' Cave - Soft Sea Foam & Coastal Cabana Watercolour Wash with a touch of gold using Artfully Folded Stamp Set by Stampin' Up!

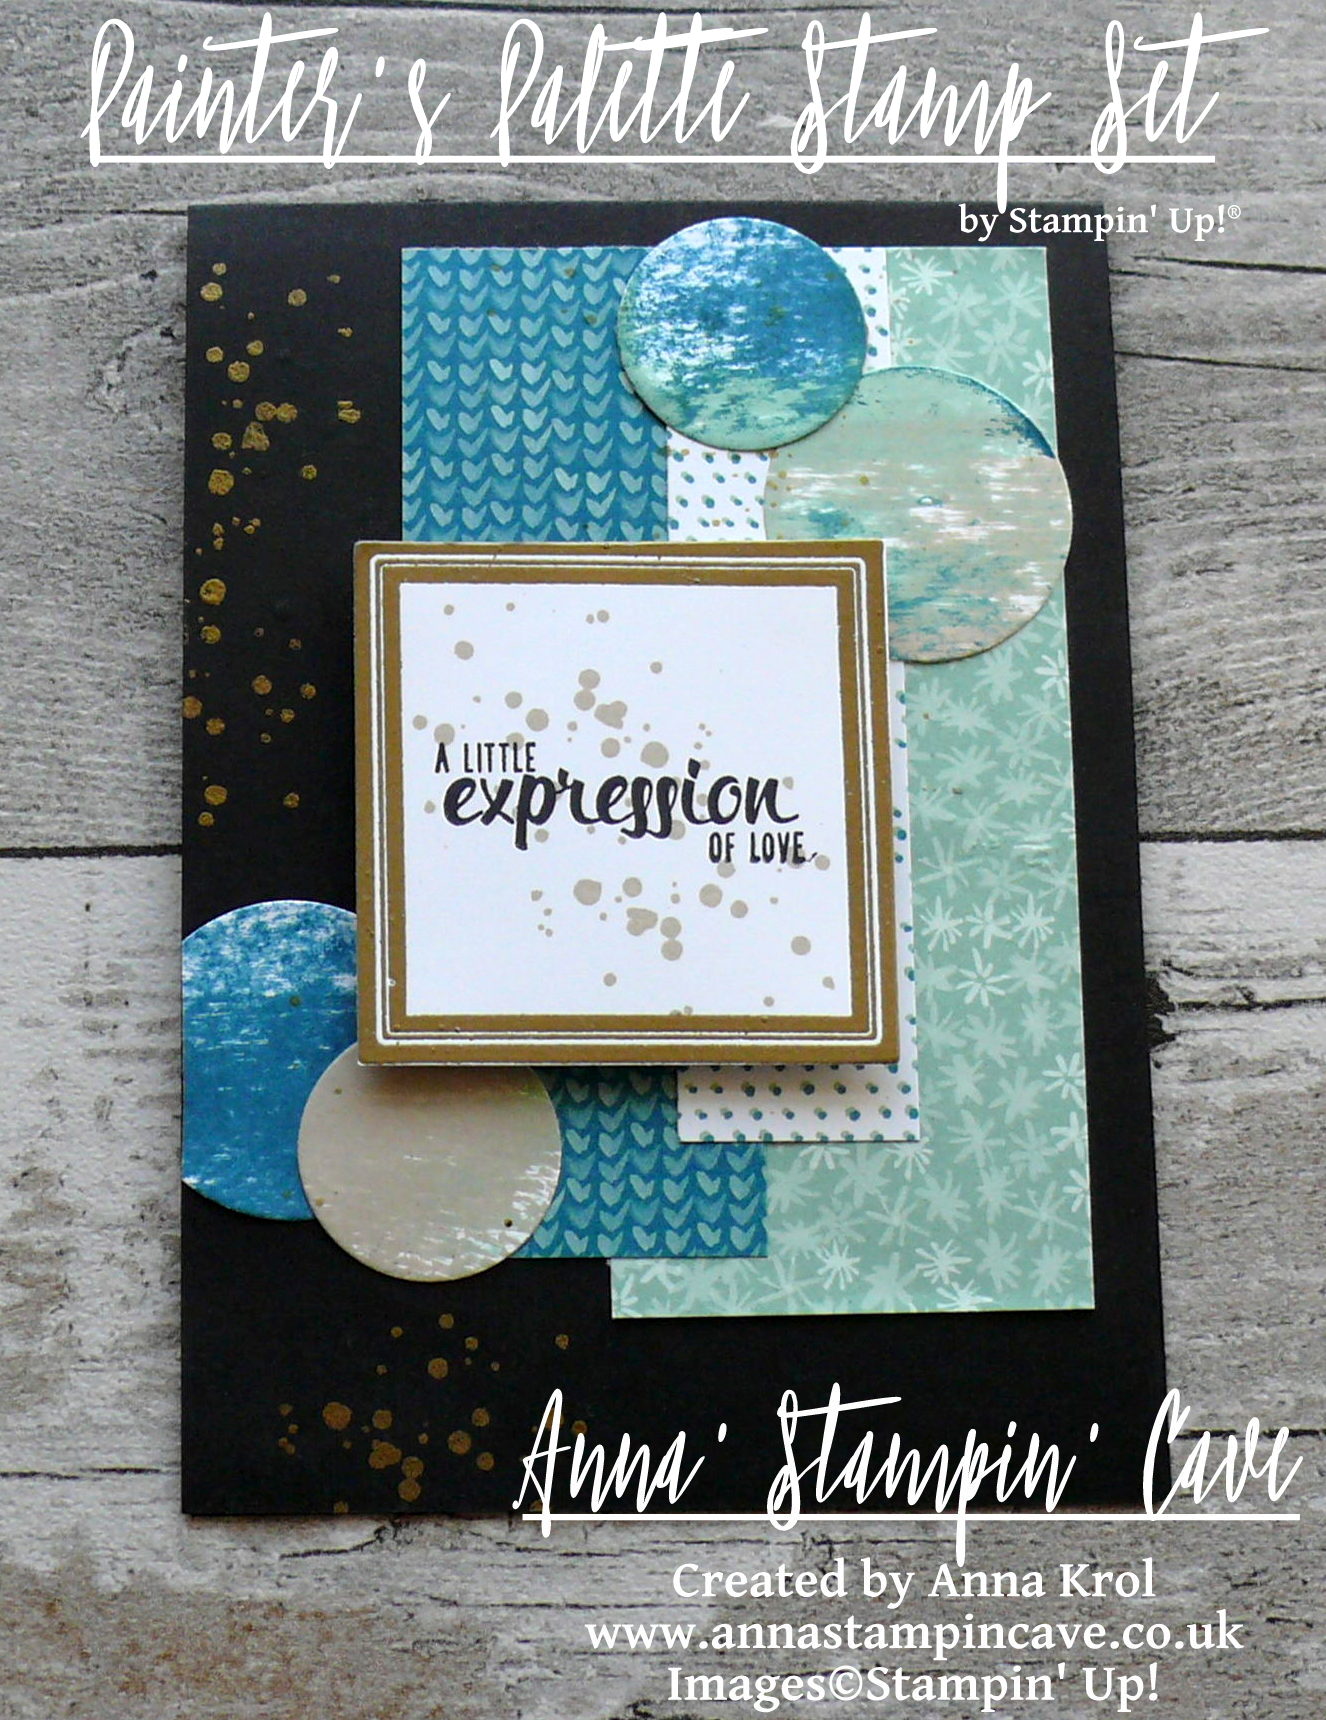
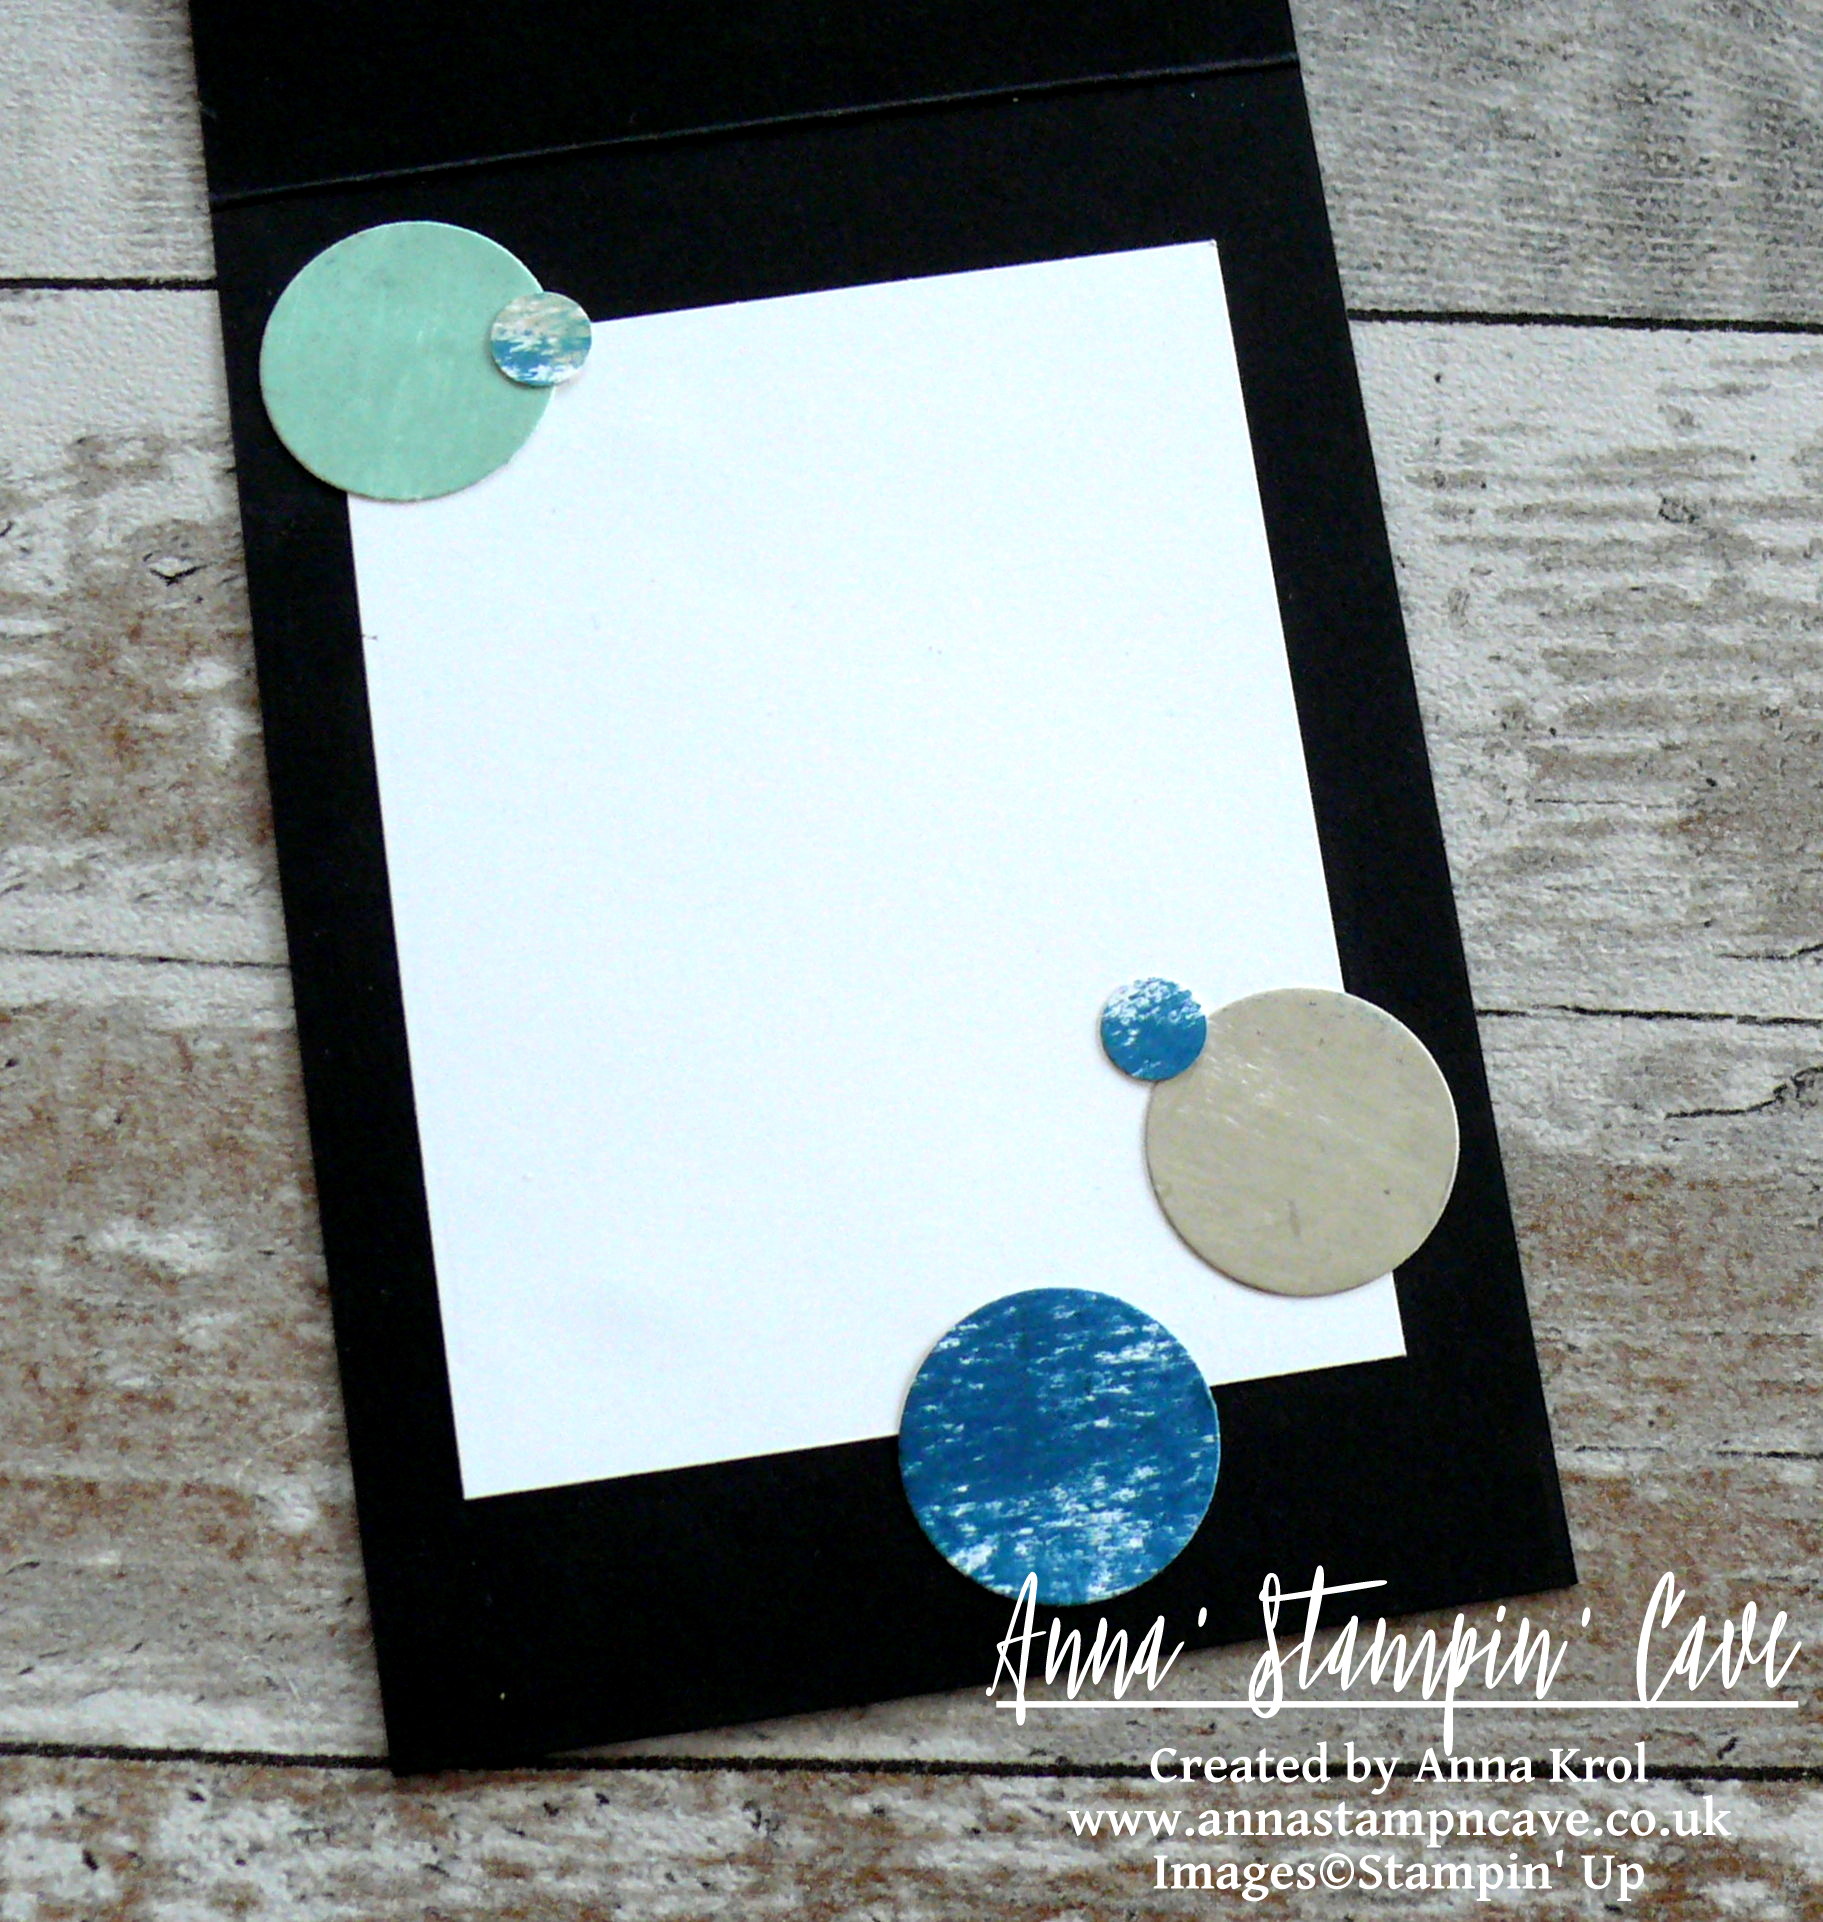
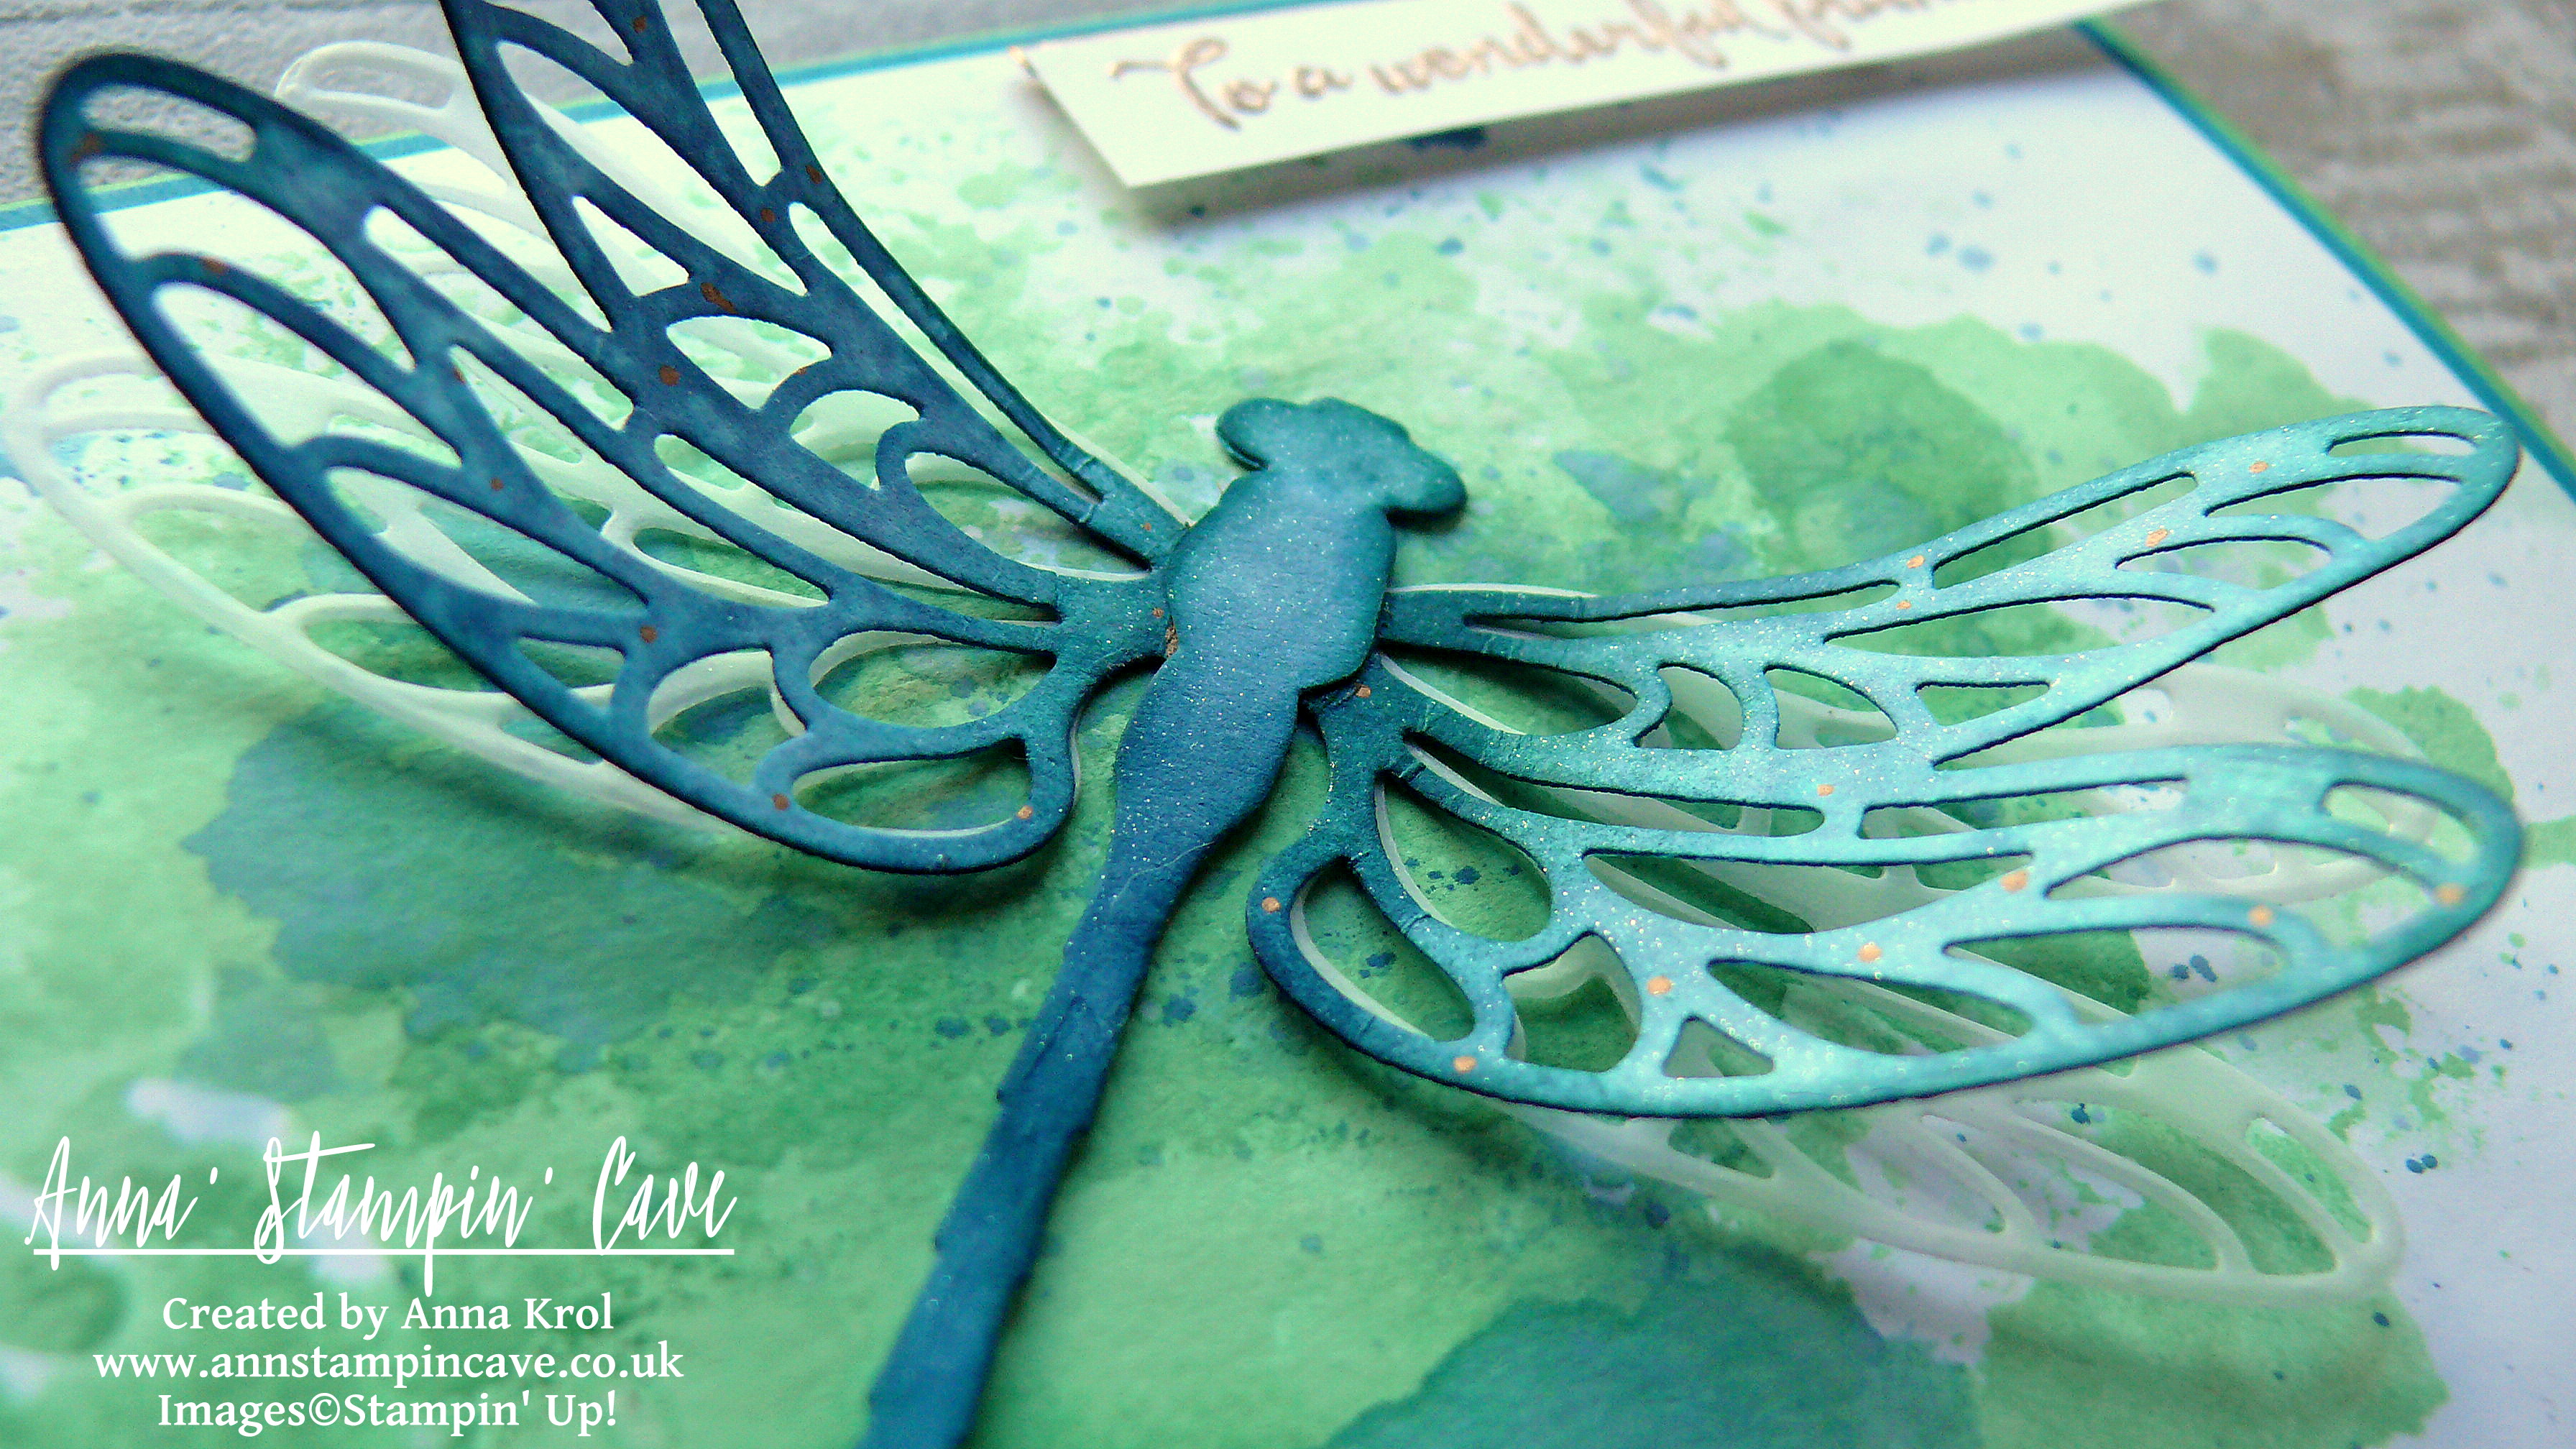
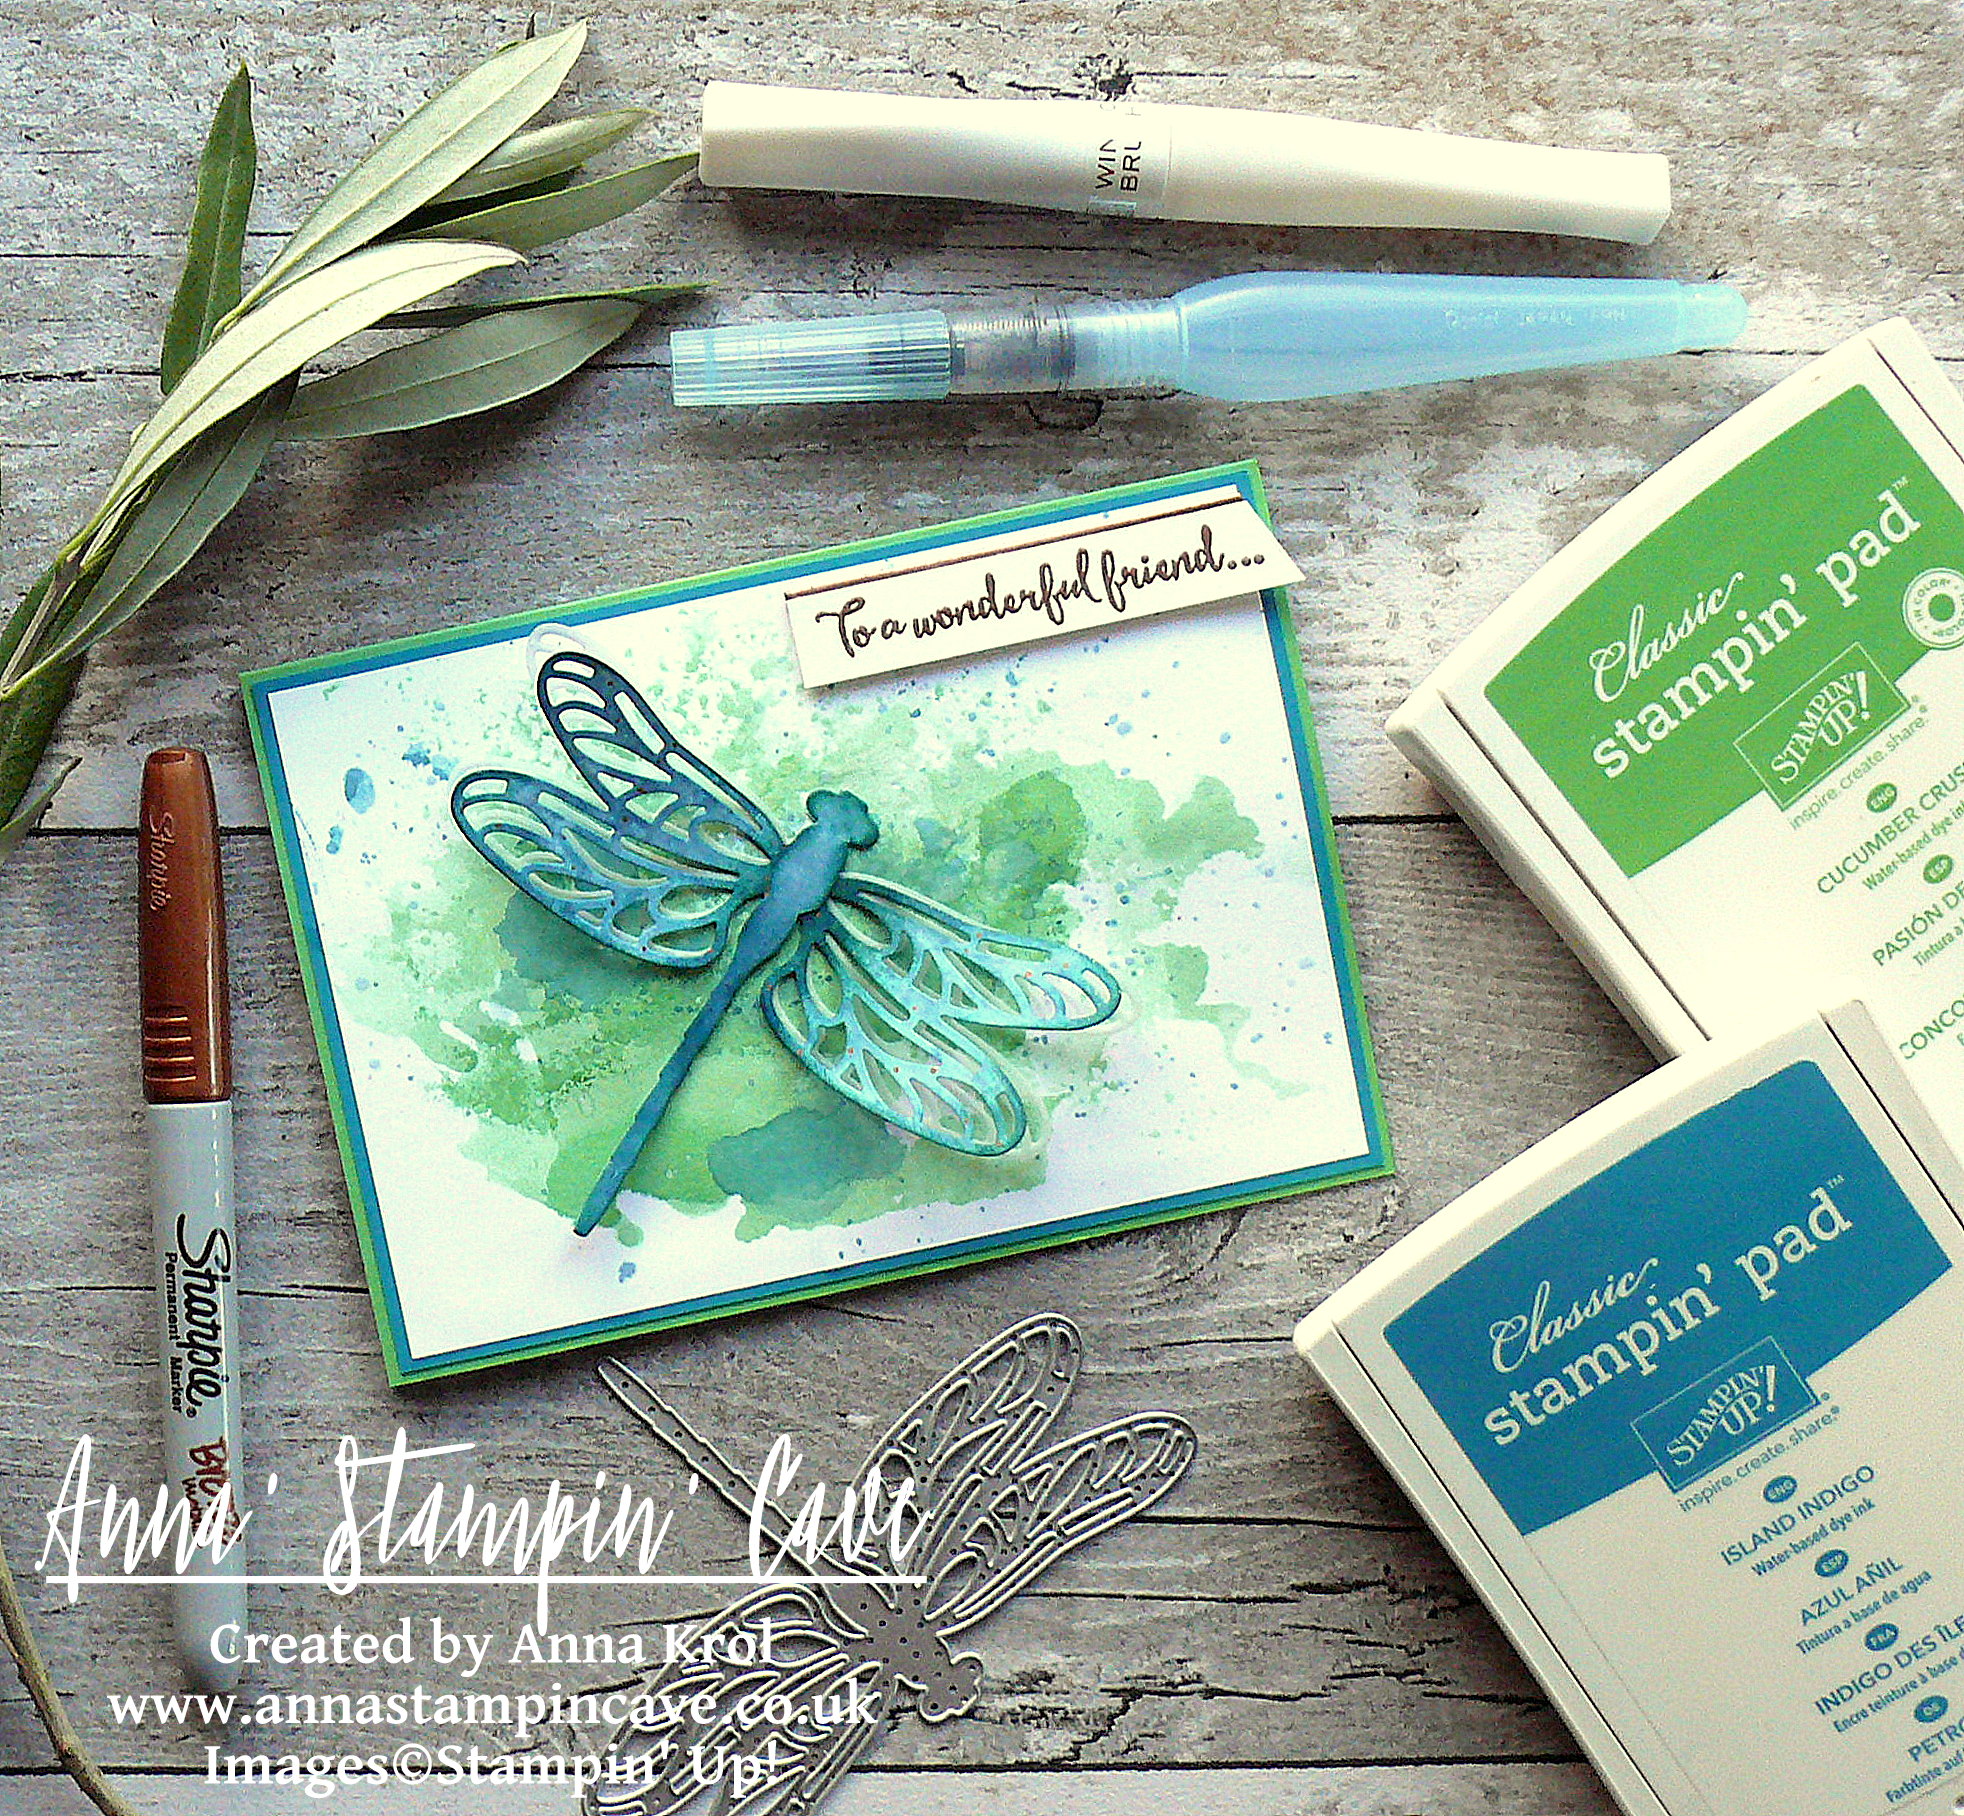
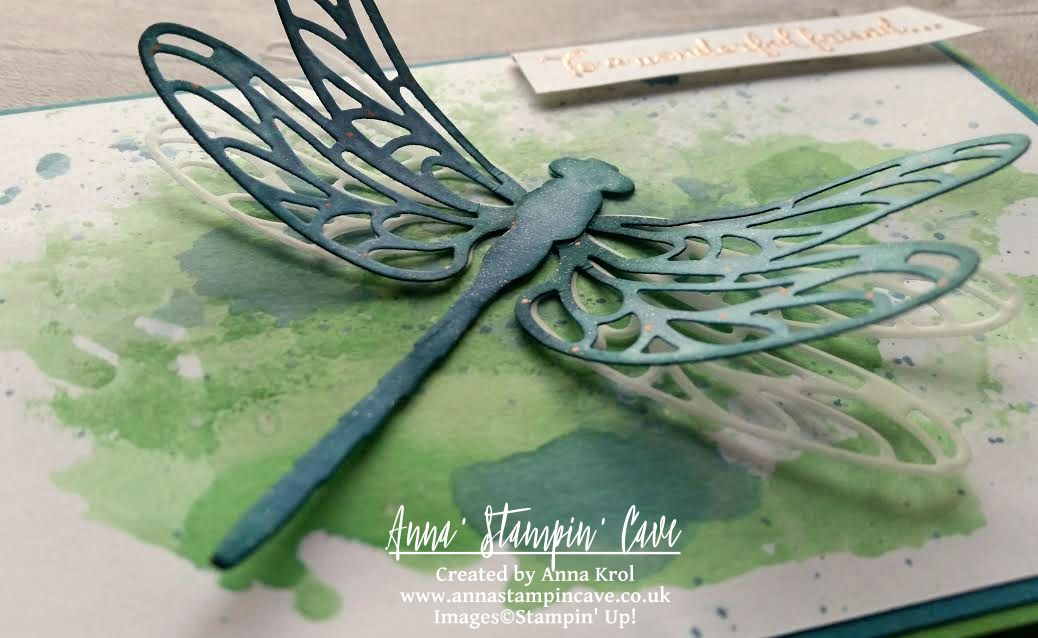
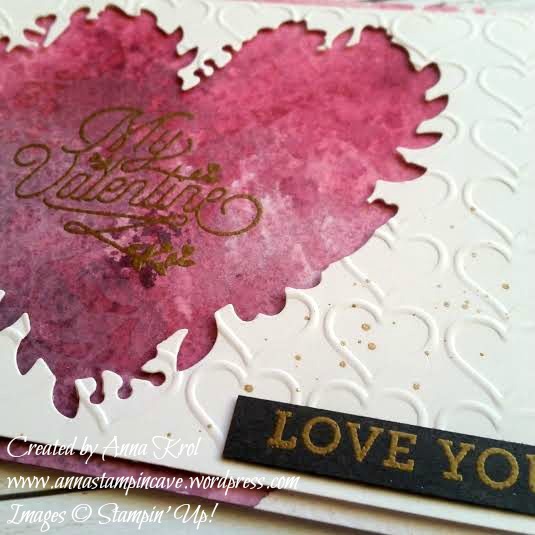
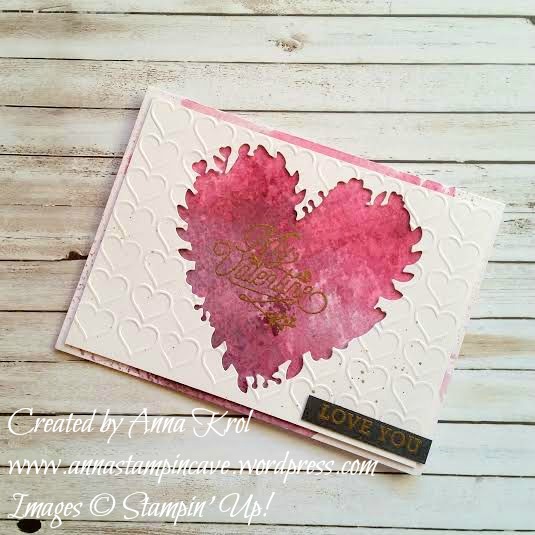
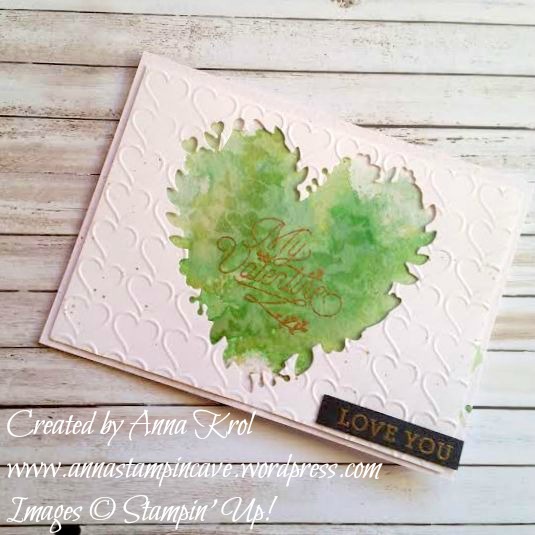
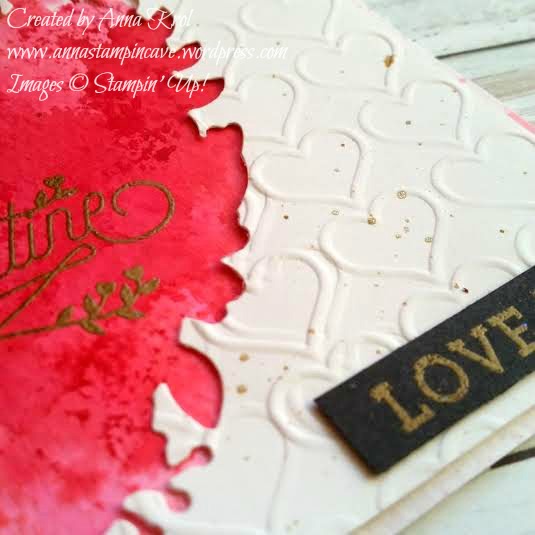
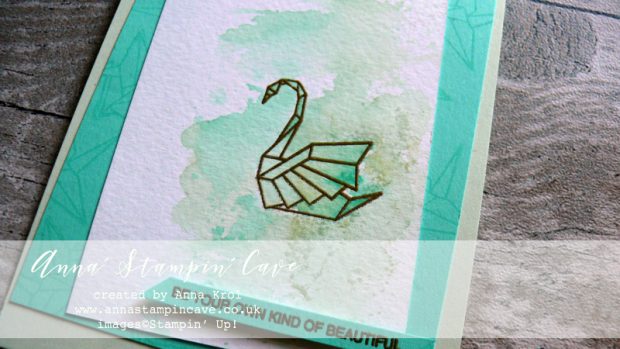
First I heat embossed the image from Artfully Folded Stamp Set on watercolour paper, using Gold Stampin’ Emboss Powder.

Once the image was heat embossed, I took an Aqua Painter and using Soft Sea Foam ink pad I started adding the colour to my image. I also added some of the Coastal Cabana ink to the image.

Anna' Stampin' Cave - Soft Sea Foam & Coastal Cabana Watercolour Wash with a touch of gold using Artfully Folded Stamp Set by Stampin' Up!

Next, I took a transparency sheet that comes with photopolymer stamps and used it as my palette: I squashed some of both colours onto it, added some water from Aqua Painter and pressed it to my watercolour panel. I love how it turned out.

Anna' Stampin' Cave - Soft Sea Foam & Coastal Cabana Watercolour Wash with a touch of gold using Artfully Folded Stamp Set by Stampin' Up!

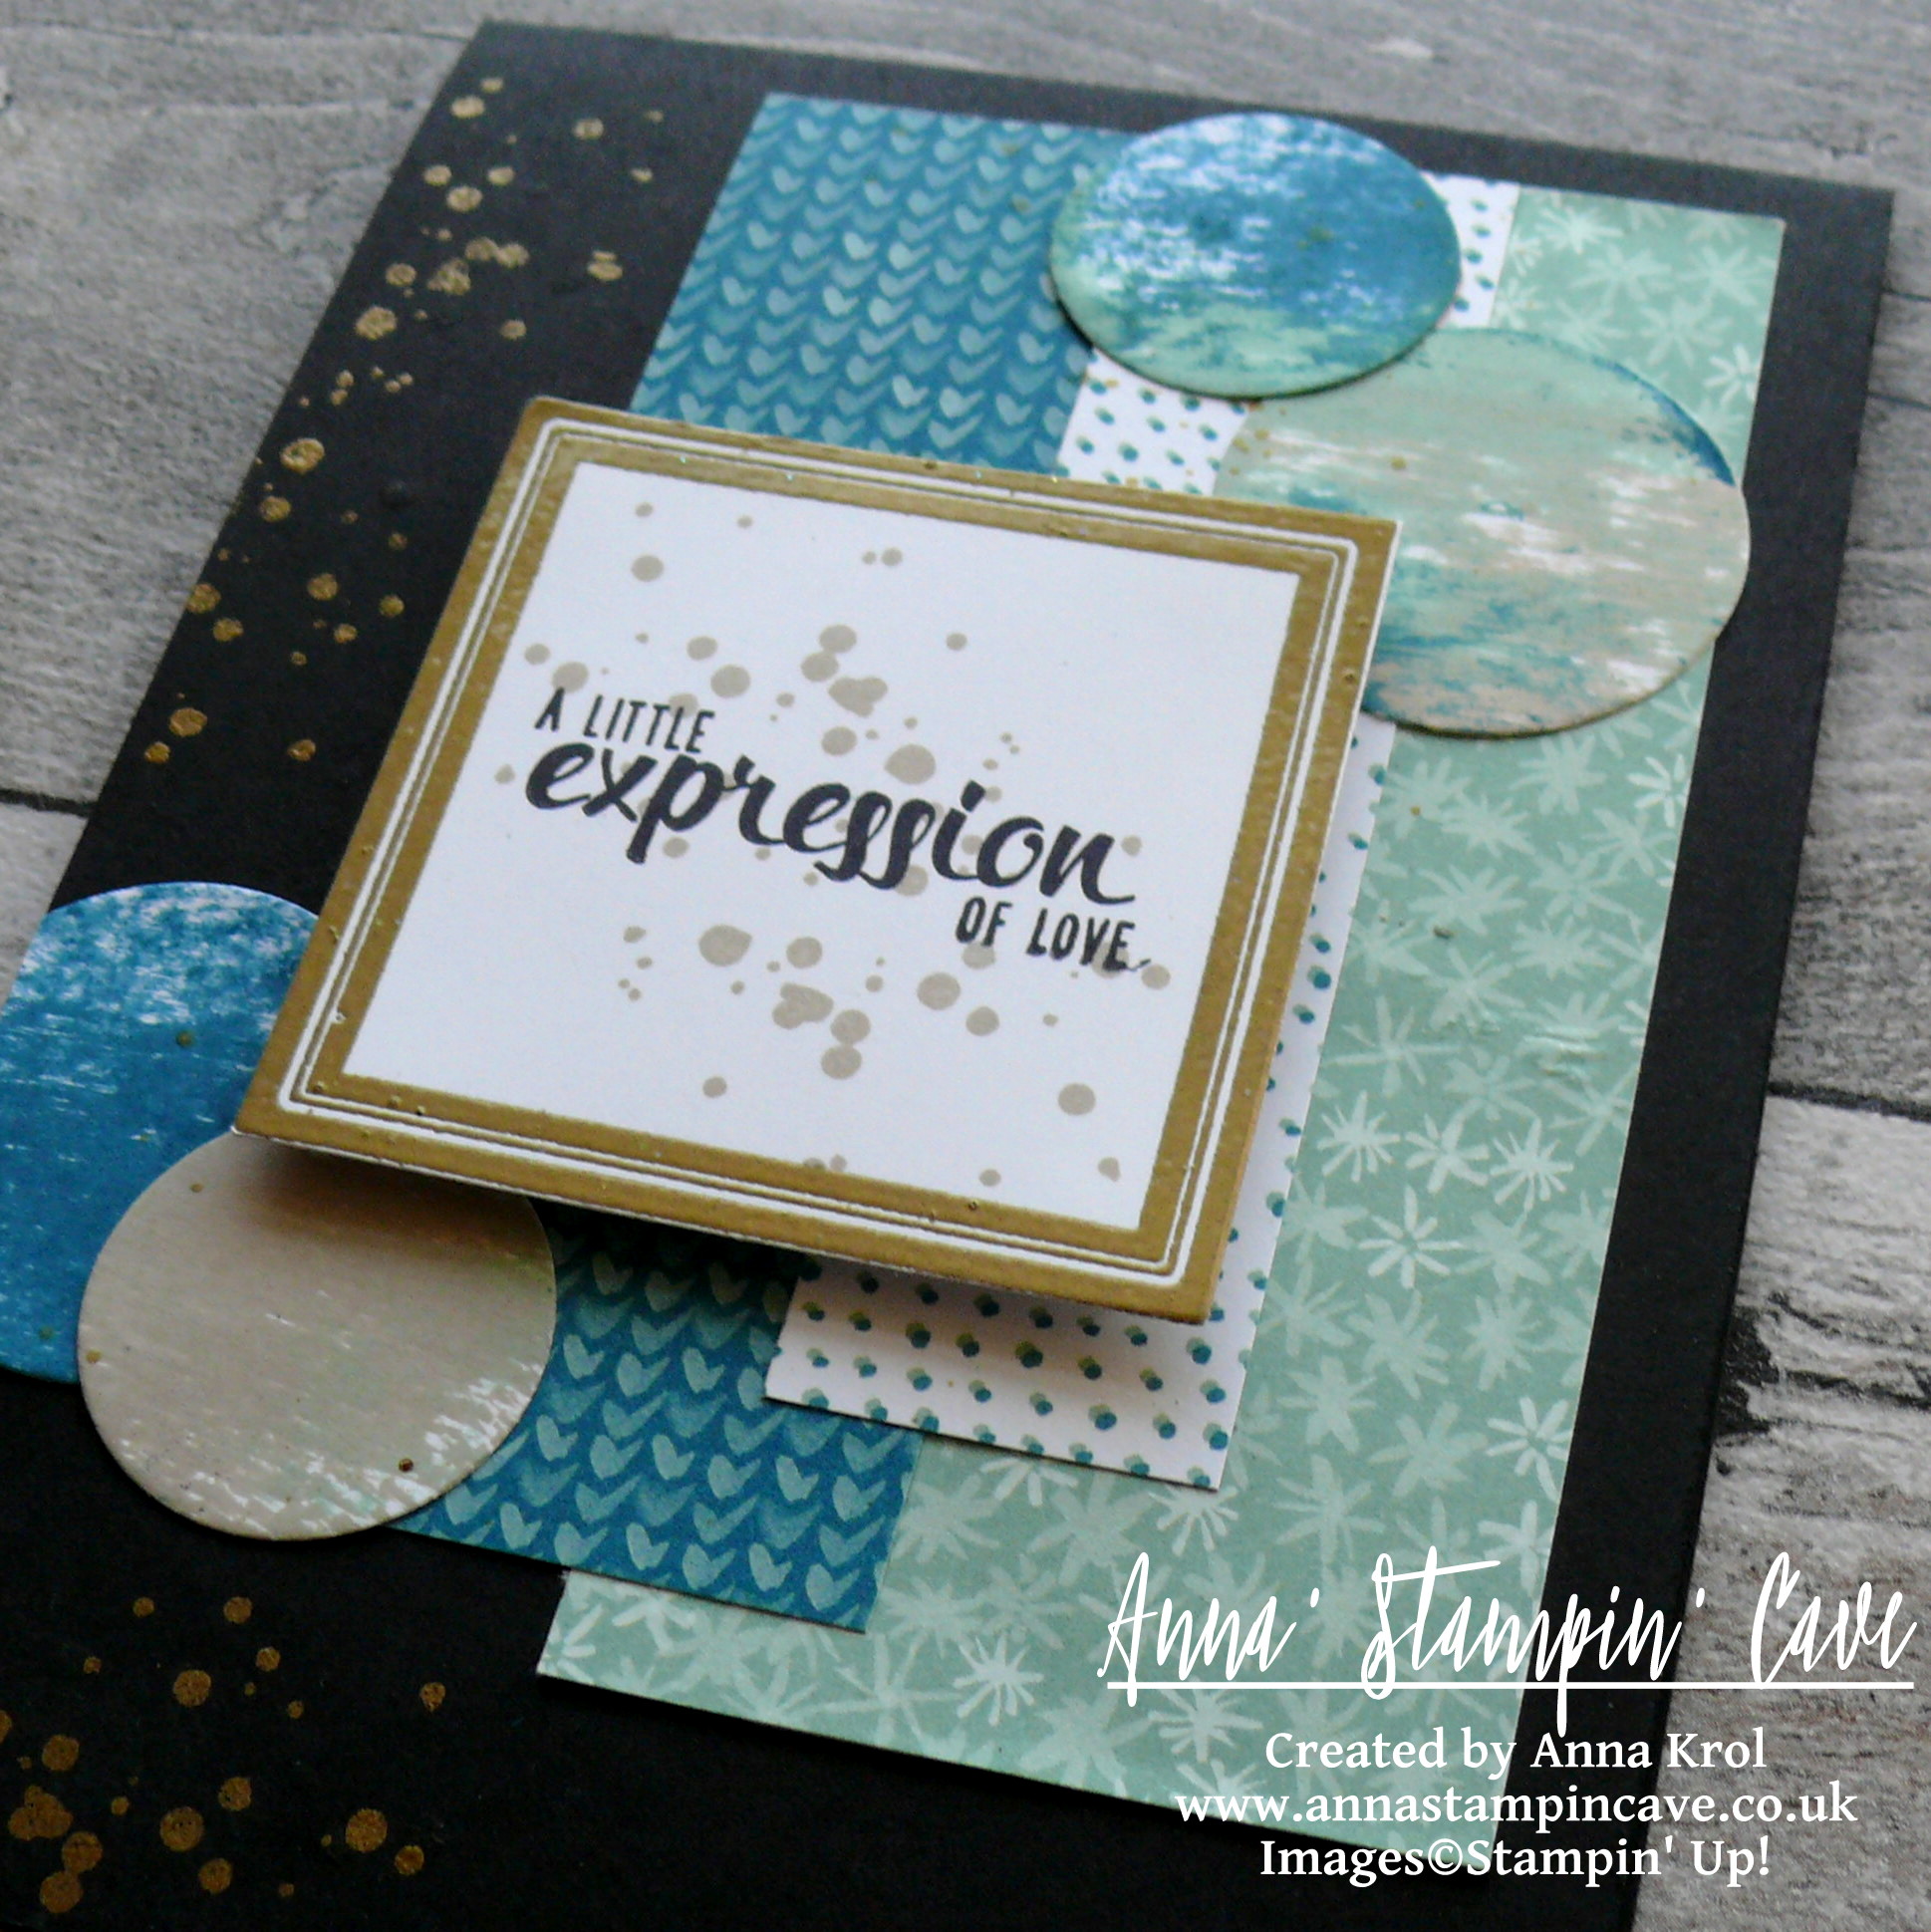
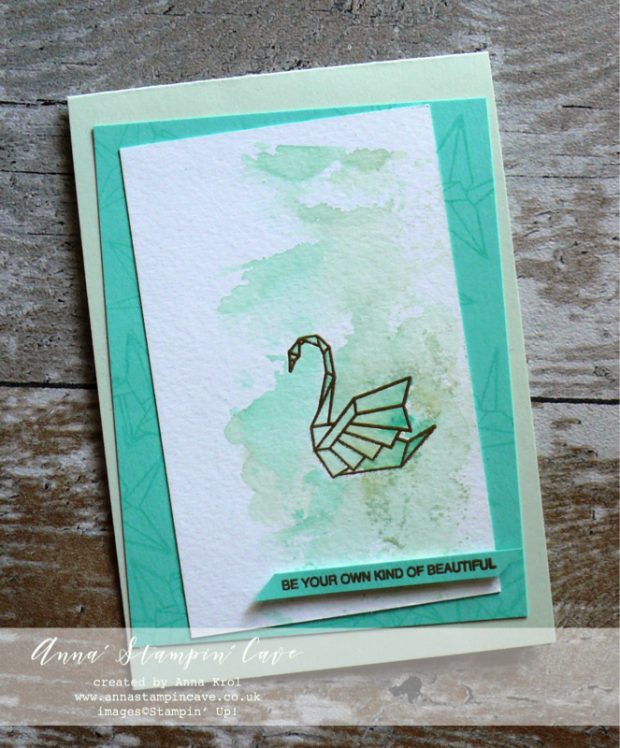
I took the Coastal Cabana panel and stamped it with various images from the set using Versamark ink and adhered it to the base at a wonky angle. Next, I also added my watercolour panel.

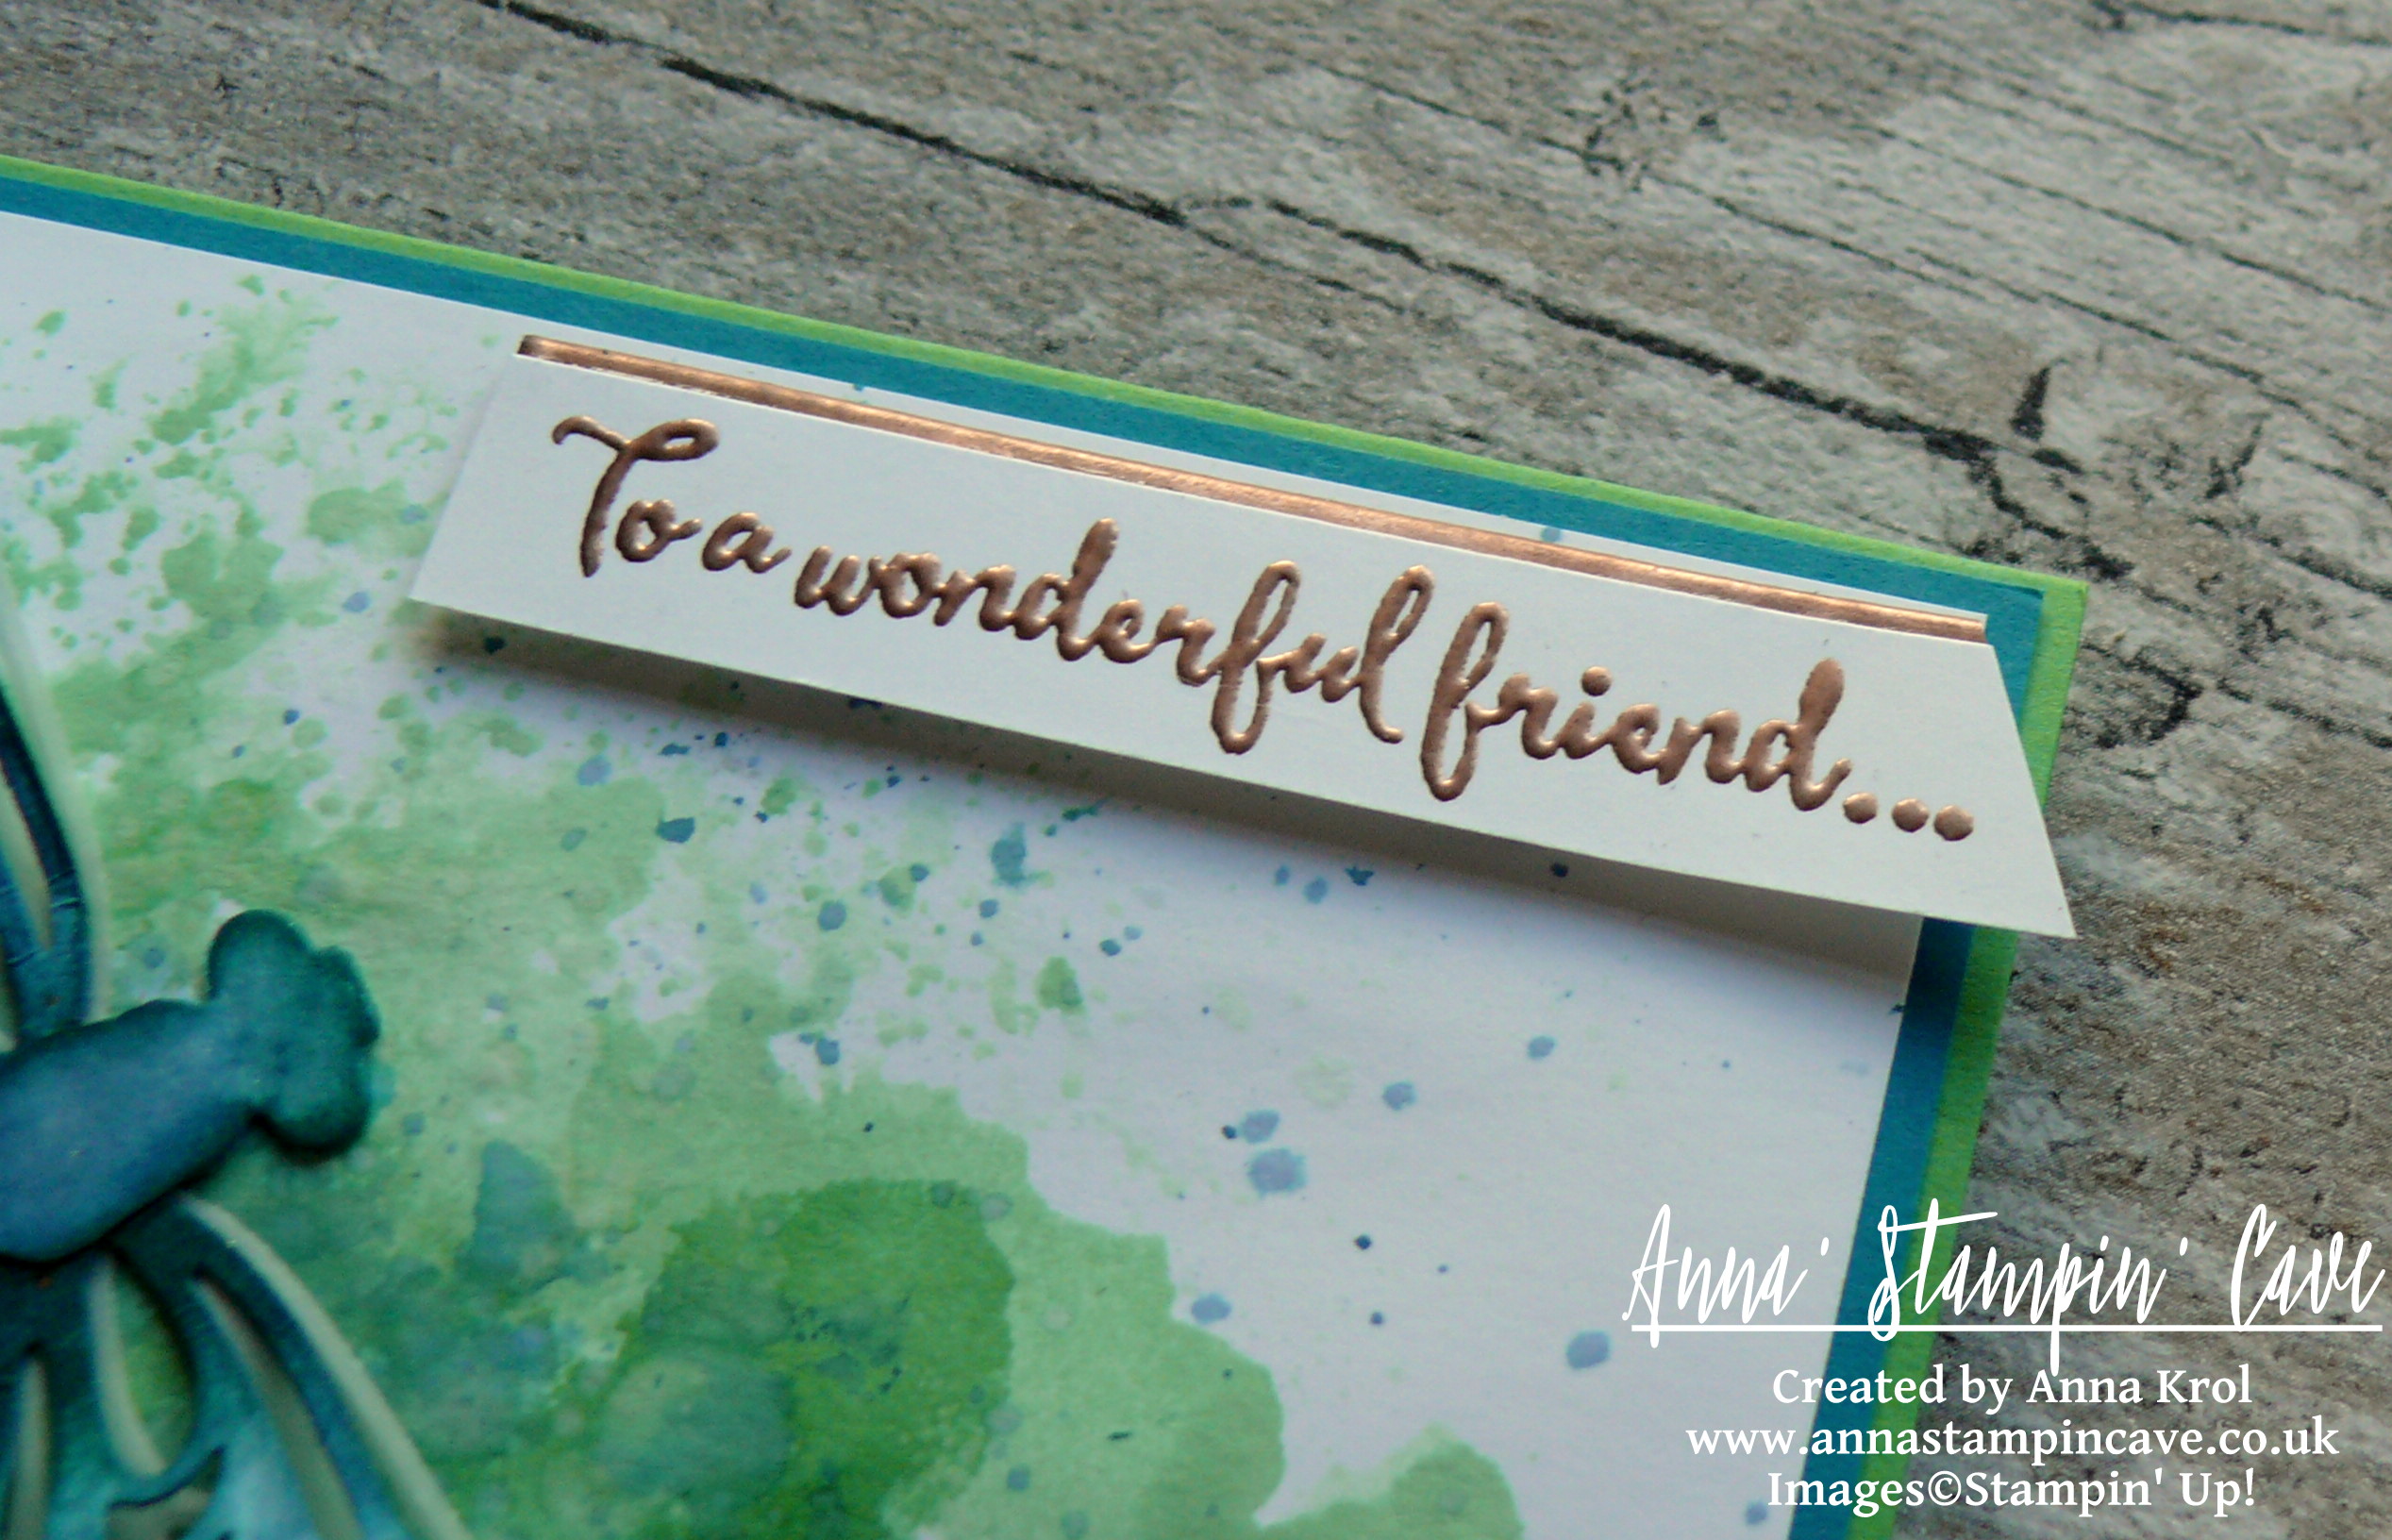
On a strip of Coastal Cabana, I heat embossed a sentiment from this same stamp set (be your own kind of beautiful) and added to the card with dimensionals.

Anna' Stampin' Cave - Soft Sea Foam & Coastal Cabana Watercolour Wash with a touch of gold using Artfully Folded Stamp Set by Stampin' Up!

I really hope you enjoyed visiting my blog today and I would love to encourage you to hop along with us and see the rest of beautiful projects designed by amazing artists.

Below is a list of the top ten winners participating in this hop, all very talented demonstrators from all around the world!

As always, if you wish to purchase any of products I have used, simply click the images below to go directly to my online store.

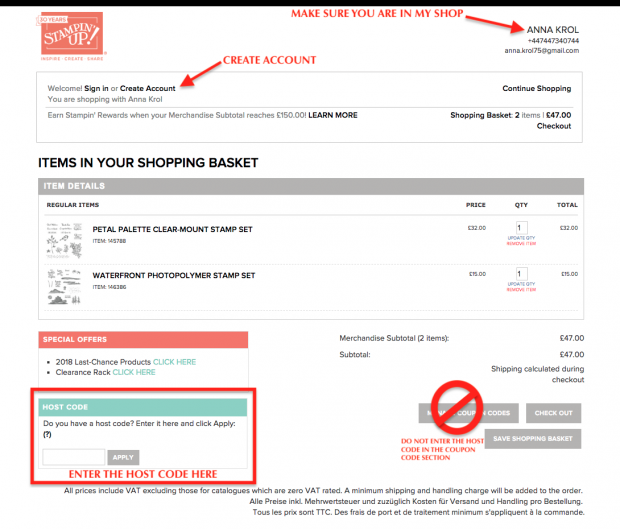
HOST CODE for the month of JULY is D369YGBB. Orders of £50+ (excl. p&p) will receive a Surprise Thank You Gift from me. You won’t be disappointed!

Thank You Gifts will be shipped in the first 2 weeks of the following month they were earned (mid-August).
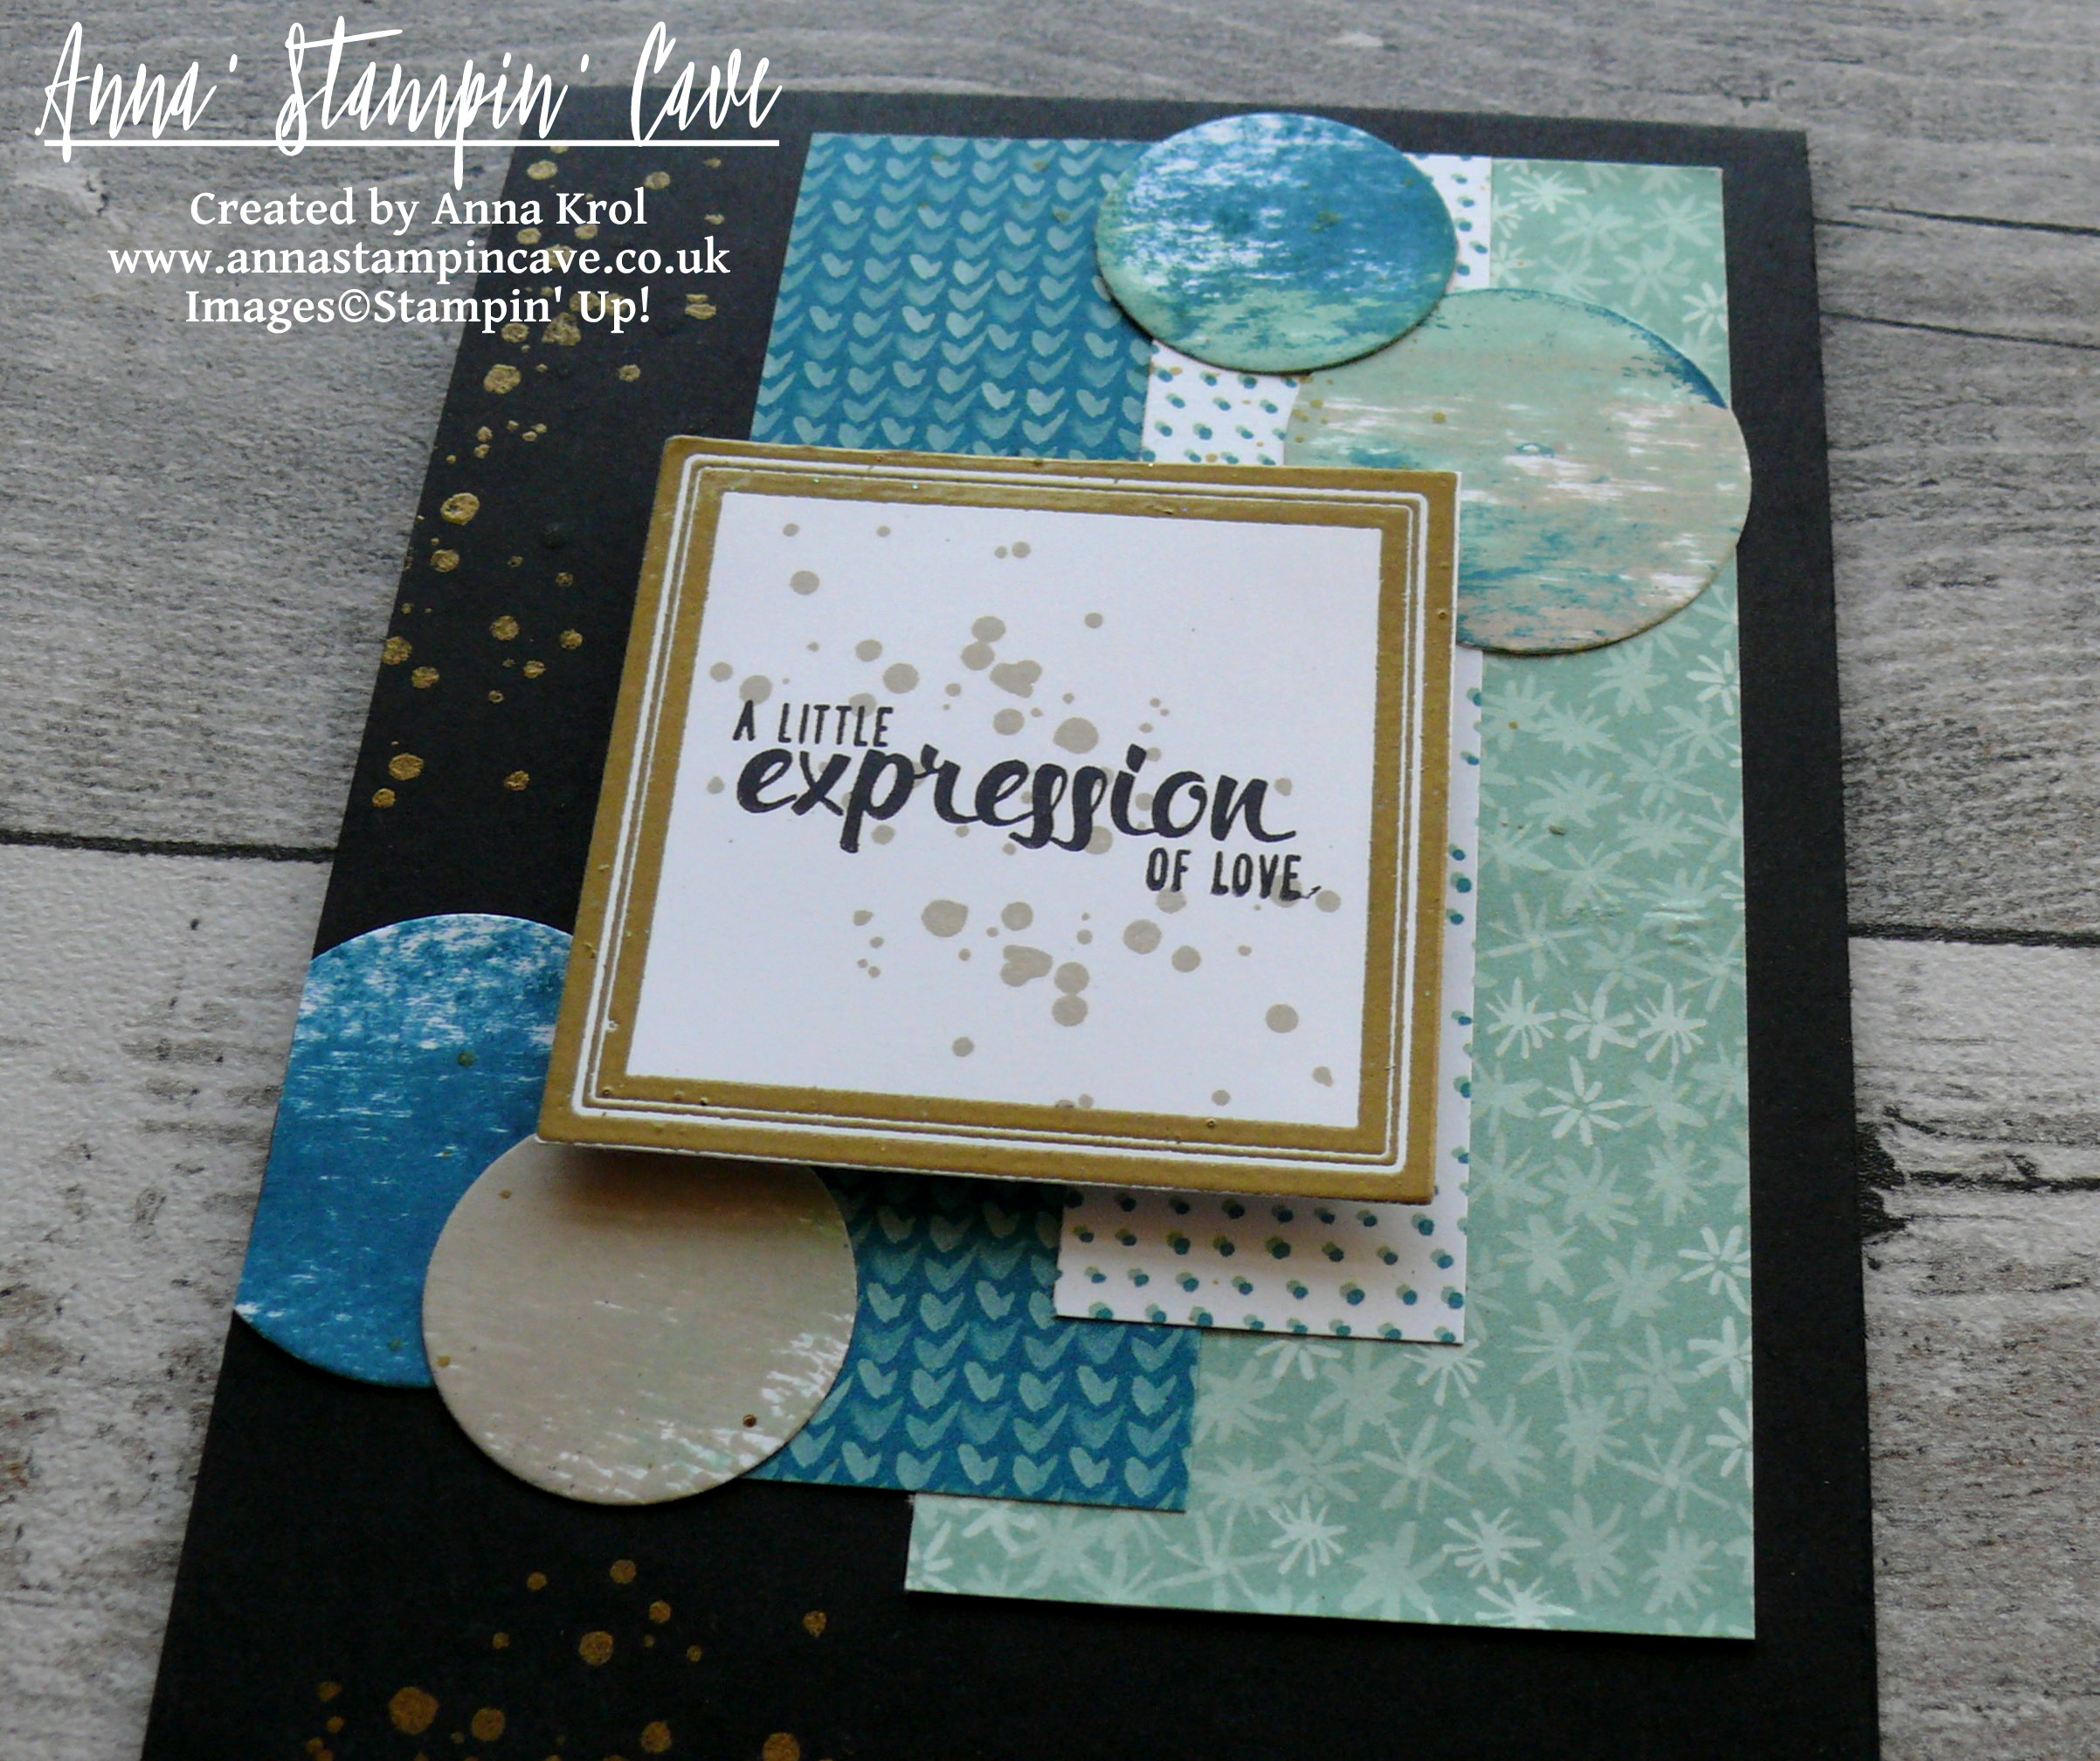
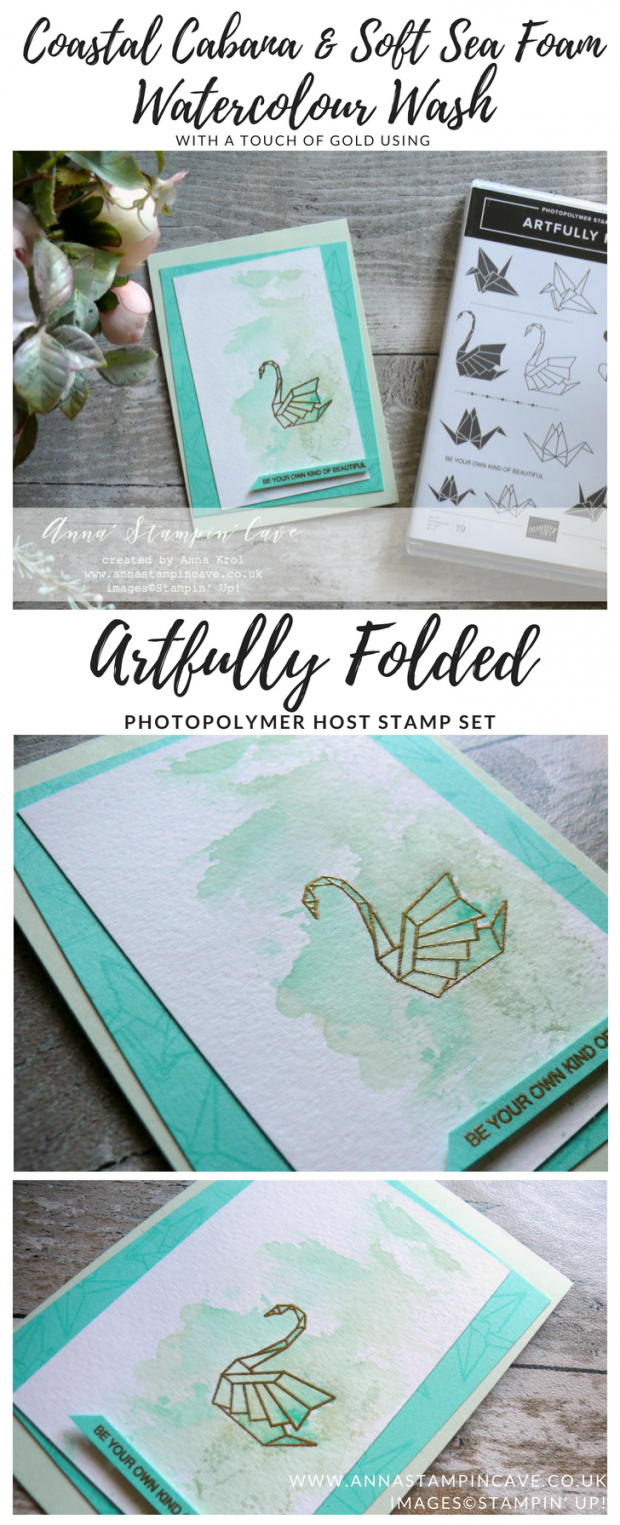
Aqua Painters

£15.50

Stamparatus

£46.00


Pin me

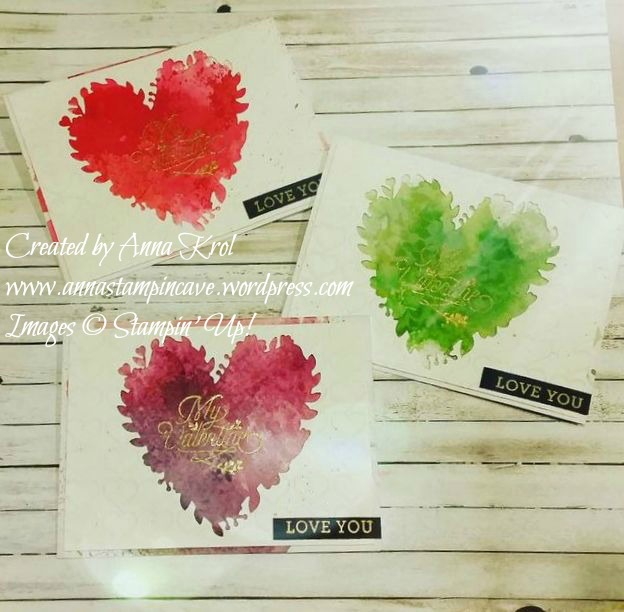
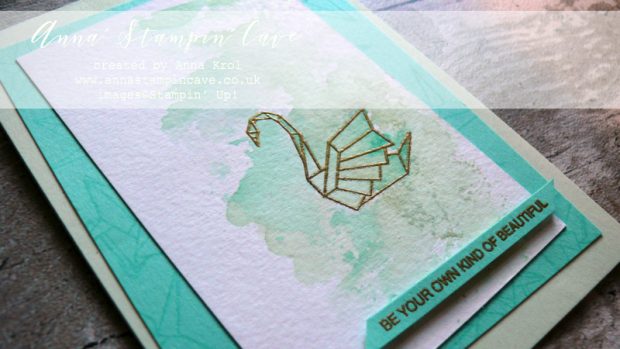
Summary of the project which gives all the views of the card in one photo. I’d love if you pinned and called by on Pinterest xx

Anna' Stampin' Cave - Soft Sea Foam & Coastal Cabana Watercolour Wash with a touch of gold using Artfully Folded Stamp Set by Stampin' Up!


HOW TO USE HOSTESS CODE


DON’T FORGET TO CHECK

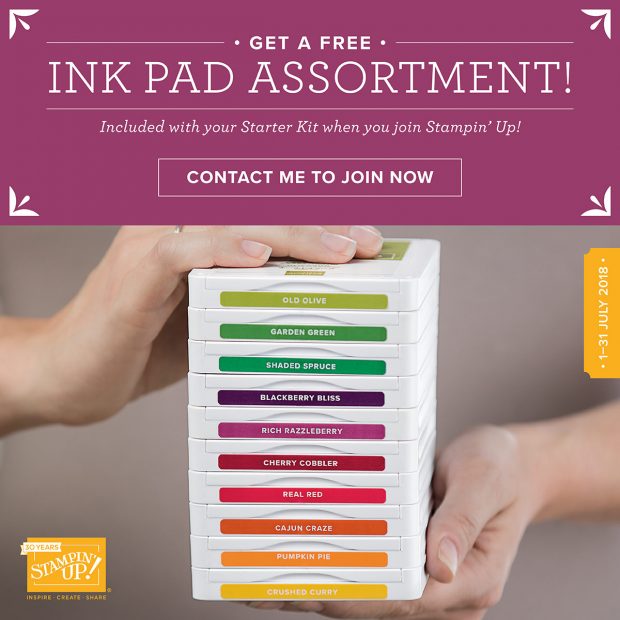
1-31 July – GET 10 FREE INK PADS (up to a £63 added value) with the £99 Starter Kit.  Choose one of the five colour collections (In Color, Brights, Neutrals, Regals or Subtles). For the full details on the Stampin’ Up! July Special Joining Offer –> click here

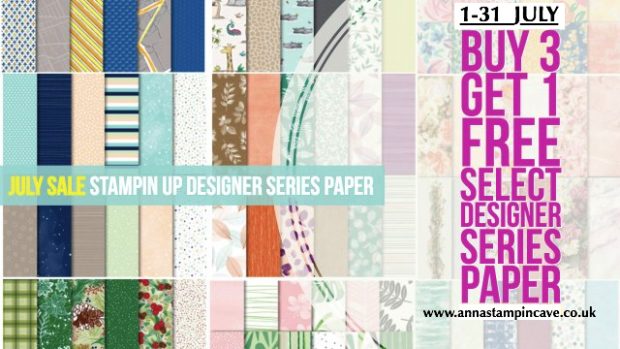
1-31 July Stampin’ Up! BUY 3 GET 1 FREE on select Designer Series Paper –> click here

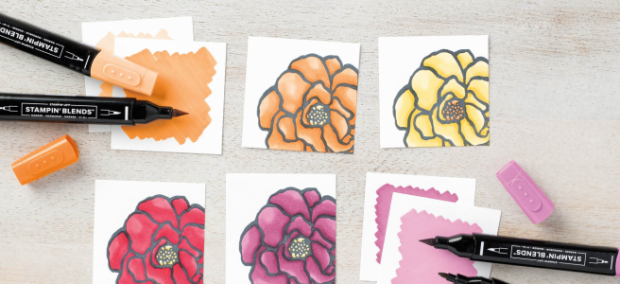
The New Stampin’ Blends Marker Colours Are Now Available –> click here

Simply Sketched Saturday Challenge – A Little Expression Of Love

Anna’ Stampin’ Cave – Simply Sketched Saturday Challenge – A Little Expression Of Love

Thank you for joining us for another Simply Sketched Saturday Challenge!  We are so excited to be sharing this hop with you. The products used are all available in the current Annual, or seasonal, Stampin’ Up!®  Catalogues*. Simply use the buttons at the bottom of the post to keep hopping!

Today’s sketch has been provided by lovely Sally Shaw from Sallystampers blog.

SSSC 18

WOW! this sketch really sat me down for a moment. In a good way of course – great creative exercise for my grey cells. And here’s what I came out with:

Anna' Stampin' Cave - Stampin' Up! Painter's Palette - A Little Expression Of Love Card

A Little Expression of Love card dimensions:

  • Basic Black cardstock: 11-6/8″ x 4-1/8″ scored in half at 5-7/8″ (29.7 x 10.5 cm scored in half at 14.8 cm)
  • Whisper White cardstock for the inside: 3-2/8″ x 4-2/8″ (8,4cm x 10,7cm)
  • 3 strips of Blooms & Bliss Designer Series Paper: 4-6/8″ x 2″, 4-1/2″ x 1-1/2″ & 4″ x 1″ (12cm x 5cm; 11,4cm x 3,9cm & 10,2cm x 2,5cm )
  • scraps of Whisper White for stamping and die-cutting.

First, I stamped the palette image from Painter’s Palette Stamp Set on Whisper White cardstock in Versamark, and heat embossed it in gold. In the middle, using Stamp-a-ma-jig, I stamped the sentiment in Basic Black. Because I didn’t want all that white space around the sentiment, I took a ‘dotty’ stamp from the same set and stamped it a couple of times in Sahara Sand. I die cut my piece using Layering Squares Framelits Dies.

Anna' Stampin' Cave - Stampin' Up! Painter's Palette - Blooms and Bliss DSP - A Little Expression Of Love Card

Next, I created my circles and I’ve used a really cool and easy technique to do so. I took a piece of Whisper White cardstock, clear stamping block H and three ink pads: Island Indigo, Mint Macaron, and Sahara Sand. First, I inked the clear block with Island Indigo ink and dragged it through the cardstock. I repeat it with other two ink pads, making sure some of the colours overlap, creating fun, distressed design. I die-cut various circles from my piece.

Card assembly. I adhered strips of DSP to the base using snail adhesive, followed by circles. The sentiment is popped up on dimensionals. For the inside, I added Whisper White panel and few leftover circles too.

Anna' Stampin' Cave - Stampin' Up! Painter's Palette and Blooms and Bliss DSP - A Little Expression Of Love Card - card inside

To wrap up my design together I wanted to add some extra golden accents to the card. I’ve used gold Wink of Stella to add some soft random splotches to the DSP and circles (I masked the sentiment for this step). Next, using same ‘dotty’ stamp as for the sentiment, I stamped it randomly on the card base in Versamark and heat embossed it in gold.

Anna' Stampin' Cave - Stampin' Up! Painter's Palette - A Little Expression Of Love Card

I have to tell you, I enjoyed the process of designing this card and watching how it comes together nicely. I hope you like it too.

Now be sure to hop along to see more inspiring projects. Your next stop is lovely and talented Jillian.

Thank you for stopping by and have a blessed day


Shake It In Teals – Birthday Card For Sweet 17

Hello and welcome! Today I want to share with you a card I’ve made for our daughter’s 17th birthday. I don’t know where the time has gone but I could swear she was just 7 not that long ago.

She’s not a girly-girl ( happy mamma here lol). She’s studying fine art in Sixth Form and she loves mixed media. So I had to come up with something little more ‘sophisticated’ than flowers and butterflies if you know what I mean 😉

This year I decided to make a shaker card in beautiful teal shades. [You can see her last year’s birthday card here]

P1130276

Shake It In Teals Card dimensions:

  • Thick Whisper White cardstock: 11-6/8″ x 4-1/8″ scored in half at 5-7/8″ (29.7 x 10.5 cm scored in half at 14.8 cm)
  • Watercolour Paper: 5-6/8″ x 3-7/8″ (14.5 cm x 9.7 cm)
  • Basic Black cardstock: 1/2″ x 5-6/8″ (14.5 cm x 1.2 cm)
  • for die-cutting word happy pieces of Basic Black, Island Indigo and Emerald Envy

It’s very simple, a straightforward card so I won’t include a whole step by step instructions, just some hints, and tips.

Frame: To create a teal-like shade for the watercolour panel I’ve mixed Island Indigo ink with Emerald Envy ink in a watercolour wash. When the panel was dry I die cut a rectangle from the middle of the panel, creating a frame.

P1130298

Numbers: I didn’t want the number to look flat and boring, so I took that watercoloured rectangle, stamped two paisley images in Versamark in the middle, heat embossed them in white and die cut numbers 1 and 7 from that piece.

‘Happy’: I die cut it three times: one from Basic Black cardstock, 2nd from Island Indigo and 3rd from Emerald Envy and adhered them together. To add shine to it I cover my word in Versamark and heat embossed in clear. I did the same with the Basic Black strip.

P1130289

Before I put my shaker card together I adhered few sequins to the base of my card so not all sequins fall down when the card is standing on the shelf. For the final touch, I added some random gold dots to the frame with my gold Sharpie.

There’re few things that didn’t come out as I hoped for, but with my numb hands, I think that overall the card looks nice. The most important is the fact that our girl loved it, so YAY!

If you wish to purchase any of products I have used, simply click the images below to go directly to my online store and don’t forget to enter the hostess code for the month of March G3JKVASG to receive a gift from me.

Thank you for stopping by and have a blessed day

Dragonfly Dreams Stamp Set & Coordinating Dies

Anna’ Stampin’ Cave – Dragonfly Dreams Stamp Set & coordinating dies

anna-stampin-cave-ink-smooshing-technique-with-dragonfly-dreams-stamp-set-coordinating-dies

For today’s project, I have used once again Dragonfly Dreams Stamp Set and Detailed Dragonfly Thinlits Dies. I love this bundle and either together or separate, I just can’t get enough of it. This time though I decided to revisit two of my favourite techniques: watercolour and ink smooching. Bright colours, Cucumber Crush and Island Indigo, seemed perfect combination for a dragonfly card.

anna-stampin-cave-ink-smooshing-technique-with-dragonfly-dreams-stamp-set-detailed-dragonfly-thinlits-dies

Watercolour Dragonfly card dimensions:

  • Cucumber Crush cardstock: 8-1/4″ x 5-7/8″ scored in half at 4-1/8″ (21 x 14.8 cm scored in half at 10.5 cm)
  • Island Indigo cardstock: 4″x 5-6/8″(10,2 x 14,5 cm)
  • Whisper White cardstock: 3-7/8″ x 5-5/8″ (9.8 x 14.2 cm) and 2-7/8″ x 1/2″(7.4 x 1.3 cm) for a sentiment
  • Scraps of Whisper White, Shimmery White and White Vellum cardstock for die-cutting

First thing first I had to prepare my watercolour panel. And to be honest I risked a bit using regular Whisper White cardstock here.

If you are not confident with water colouring and don’t want to risk, please always use watercolour paper with ink smooshing technique.

I pressed Cucumber Crush ink pad on a craft mat, spritz it with water (not too much) and took a piece of acetate to lift some of this puddle of colour. I smooshed it on my panel and dried it with a heat gun. I repeat this process couple of times, every time drying my panel in-between until I was happy with layers of colour. Next, I switched to Island Indigo but I only added one layer of colour. The last touch was to add few splotches of ink to my panel with help of aqua painter.

anna-stampin-cave-ink-smooshing-technique-with-dragonfly-dreams-stamp-set-detailed-dragonfly-dies

I die cut two dragonflies, one from Whisper White cardstock and one from vellum (without the head) for 3D effect. To colour in cardstock dragonfly I used a very similar technique as previously. I pressed some more of Island Indigo ink on the craft mat, spritz it with water and dabbed the dragonfly straight in the puddle, dried and repeat until I was happy with the colour.

I wanted to add more depth and ‘life’ to my dragonfly, so I sponged the edges of wings and the body with Island Indigo ink. I also added few speckles with bronze metallic Sharpie marker.

While sponging I’ve noticed that the dragonfly was bit ‘flimsy’ (note to myself: if you plan to dab your intricate die-cuts in the puddles of coloured water, use paper with the higher grammage, like watercolour perhaps(!?) lol. So I die-cut just the body of a dragonfly from Shimmery White cardstock, watercolour it, sponged the edges and adhered on top of the dragonfly with liquid adhesive. Next, I adhered the vellum dragonfly underneath, offsetting slightly.

anna-stampin-cave-ink-smooshing-technique-with-dragonfly-dreams-stamp-set-detailed-dragonfly-thinlits

The sentiment I chose comes from the same Dragonfly Dreams stamp set. I stamped it in Versamark on the strip of Whisper White, heat embossed it using Copper Embossing Powder and trimmed it diagonally. The sentiment alone seemed a bit dull so I took a very narrow strip of Whisper White (around 1/8″), dabbed it in Versamark and heat embossed in copper as well. Next, I trimmed it and adhered it to the sentiment, underneath the top edge, so it peeks out slightly.

anna-stampin-cave-ink-smooshing-technique-with-dragonfly-dreams-bundle

To assemble the card I’ve used my favourite Tombow liquid adhesive. I love it because it gives you some wiggle room before it sets. Also, it’s the best for those slightly warped watercolour panels. Next, I’ve added my sentiment in the top right corner using dimensionals. For dragonfly, I’ve used Tombow again. The last touch was to add some extra shimmer to the dragonfly with Clear Wink of Stella Glitter Brush. You can’t go wrong with this stuff right?!

I hope you’ve enjoyed my project and that it will give some extra ideas of how to use this beautiful Dragonfly Dreams Bundle. I would love to hear what you think in comments below. As always, if you wish to purchase any of products I have used, simply click the images below to go directly to my online shop.

Thank you for stopping by and have a blessed day

Dragonfly Dreams Photopolymer Bundle

Dragonfly Dreams Photopolymer Bundle
[144728]
£42.25

Detailed Dragonfly Thinlits Dies

Detailed Dragonfly Thinlits Dies
[142749]
£28.00

Dragonfly Dreams Photopolymer Stamp Set

Dragonfly Dreams Photopolymer Stamp Set
[142924]
£19.00

Cucumber Crush A4 Cardstock

Cucumber Crush A4 Cardstock
[138342]
£7.25

Island Indigo A4 Card Stock

Island Indigo A4 Card Stock
[124390]
£7.25

Whisper White A4 Card Stock

Whisper White A4 Card Stock
[106549]
£8.25

White Vellum A4 Card Stock

White Vellum A4 Card Stock
[106584]
£6.00

Shimmery White A4 Card Stock

Shimmery White A4 Card Stock
[121717]
£7.25

Cucumber Crush Classic Stampin' Pad

Cucumber Crush Classic Stampin’ Pad
[138324]
£6.00

Island Indigo Classic Stampin' Pad

Island Indigo Classic Stampin’ Pad
[126986]
£6.00

Versamark Pad

Versamark Pad
[102283]
£7.75

Embossing Buddy

Embossing Buddy
[103083]
£5.50

Copper Stampin' Emboss Powder

Copper Stampin’ Emboss Powder
[141636]
£4.50

Aqua Painters

Aqua Painters
[103954]
£15.50

Clear Wink Of Stella Glitter Brush

Clear Wink Of Stella Glitter Brush
[141897]
£7.25

Liquid Multipurpose Glue

Liquid Multipurpose Glue
[110755]
£3.75

Stampin' Dimensionals

Stampin’ Dimensionals
[104430]
£3.75

Paper Snips Scissors

Paper Snips Scissors
[103579]
£9.00

Stampin' Trimmer

Stampin’ Trimmer
[129722]
£27.00

Big Shot

Big Shot
[143263]
£99.00

Ink Smooshing With Bloomin’ Hearts Thinlits Dies – Using Die-cut Negatives

Hello guys! I’m back today with ink smooshing technique again. But this time I’ve used die-cut negatives I’ve saved from my previous project.

bloomin love

For these cards, I decided to choose different colours: shades of red, green and purple. The base of my cards is again a watercolour paper as it’s perfect for watercolour techniques. I explained ink smooshing technique in my post here.

To add some more detail to the die-cut pieces I run them through my big shot with Happy Heart Embossing Folder. I love how they stand out from busy backgrounds.

bloomin love green

To stamp main sentiments I have used my die-cut as a guide to make sure I stamp it exactly in the middle of my card. I stamped it in Versamark and heat embossed in gold. Before adhering the panels I’ve made few “splotches” using Gold Wink Of Stella Glitter Brush.

To finish off my cards I took a strip of black cardstock and heat embossed “love you” sentiment in gold. My husband’s friend came over at the weekend and “nicked” one card for his girlfriend straight away haha Hope she will like it.

If you like my project or got any questions please let me know in the comments below.

Thank you for stopping by. Have a blessed day,