Wildflower Fields Fridge Mini Calendars

Wildflower Fields Fridge Mini Calendars

Wildflower Fields Fridge Mini Calendars - Blackberry Bliss

Good evening everyone. A few days ago, on my facebook page,  I’ve posted some fridge mini calendars I’ve made as a thank you gifts for my customers. But they were such a hit that I thought I will make a blog post, to show how to make them. Just a warning, it’s gonna be picture heavy 😉

Wildflower Fields Fridge Mini Calendars - Blackberry Bliss 2

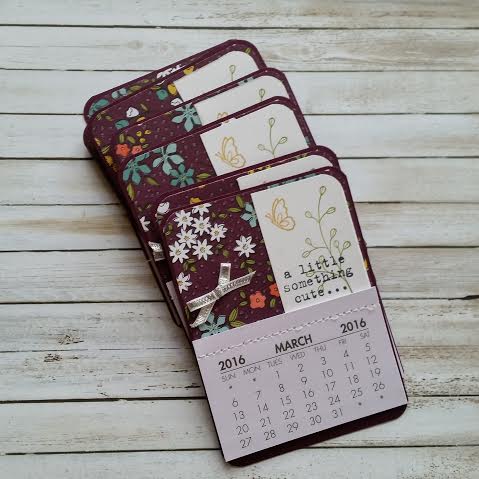
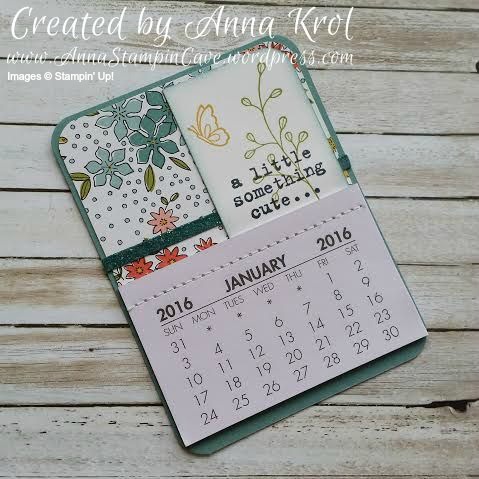
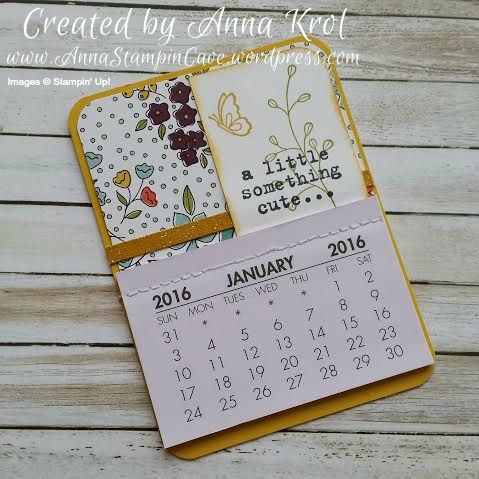
I’ve bought these mini calendars on eBay while ago, but due to chronic fatigue I just couldn’t push myself to sit down and craft – maybe except for the cards once in a while. But I was wondering about customers gifts the other day and had a lightbulb moment – why not make cute magnetic fridge calendars?! Each calendar measures approx 2-7/8″ x 1-7/8″, and on their size, I’ve based my design.

Wildflower Fields Fridge Mini Calendars - Instructions 1

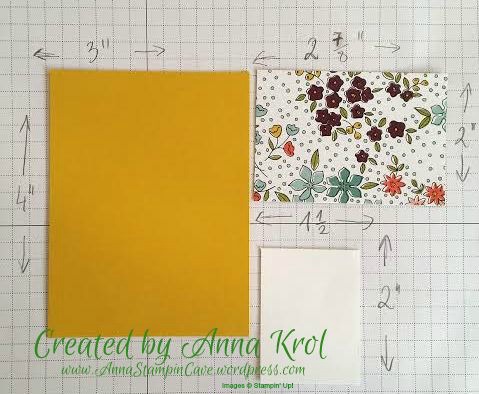
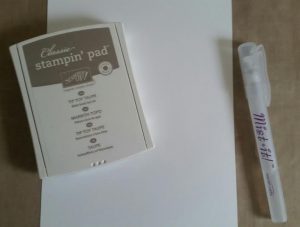
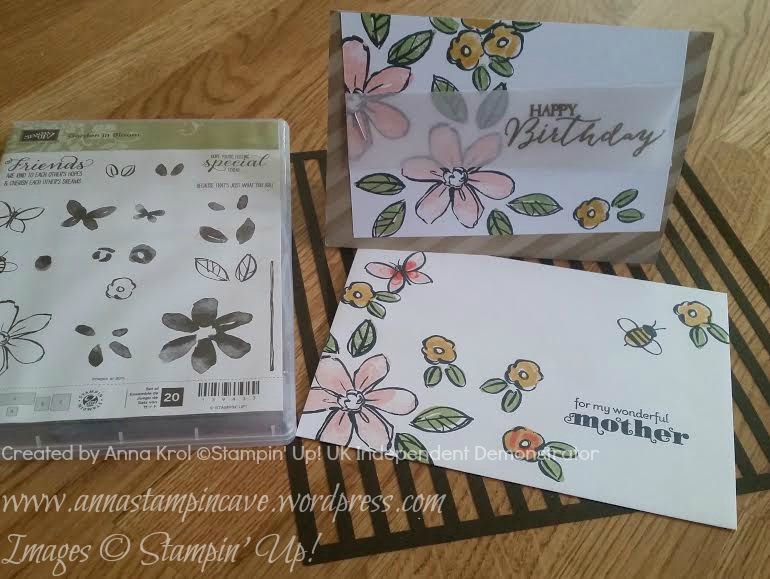
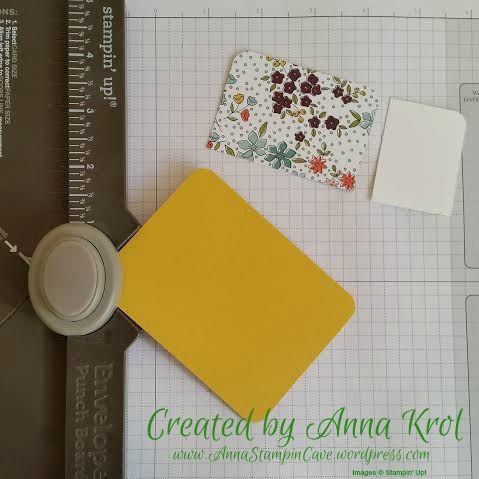
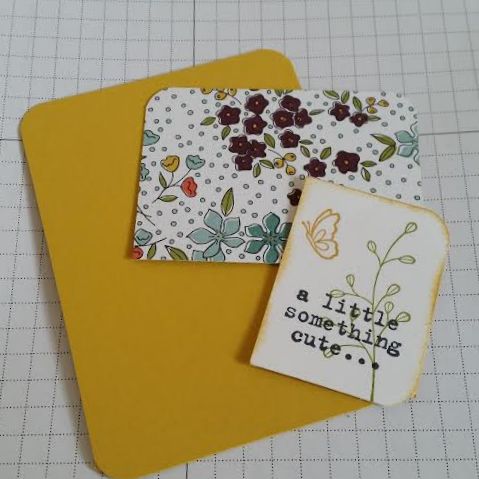
The base for my calendar measures 3″x 4″ – here I’ve used Hello Honey. Designer Series Paper measures 2-7/8″x 2″ and Whisper White piece for stamping measures 1-1/2″x 2″. I rounded all the edges of my base, top edges of DSP and right top corner of Whisper White. I’ve used my Envelope Punch Board to do so, but you could use the corner rounder punch if you have one.

Wildflower Fields Fridge Mini Calendars - Instructions 2 Wildflower Fields Fridge Mini Calendars - Instructions 3

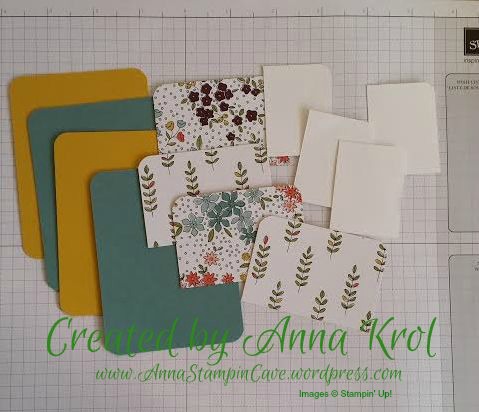
I stamped “a little something cute…” sentiment from Something To Say stamp set on my Whisper White pieces. Next, I stamped floral images from Flowering Fields stamp set. I just love this set! Don’t forget that this beautiful stamp set you can earn free with every £45 purchase during Sale-a-bration.

instrukcje

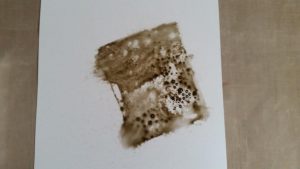
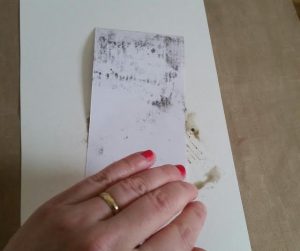
I’ve used Hello Honey for butterflies, Old Olive for stems and leaves, and Lost Lagoon and Calypso Coral for flowers. I’ve used ink pads as well as Stampin’ Markers to do my stamping. I have to say here, I love that all Stampin’ Up’s Designer Series Papers got all coordinating colours listed at the back of the paper pack. It makes creating so much easier if you don’t have to work out which colours to use. I also sponged stamped panels, so they stand out nicely from the background.

Wildflower Fields Fridge Mini Calendars - Hello Honey 2 Wildflower Fields Fridge Mini Calendars - Lost Lagoon

Wildflower Fields Fridge Mini Calendars - Lost Lagoon 2 Wildflower Fields Fridge Mini Calendars - Hello Honey

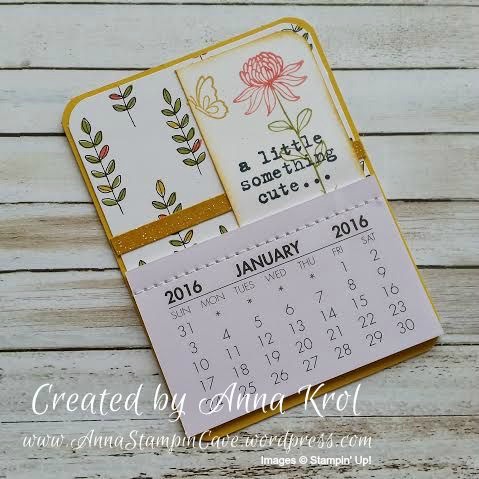
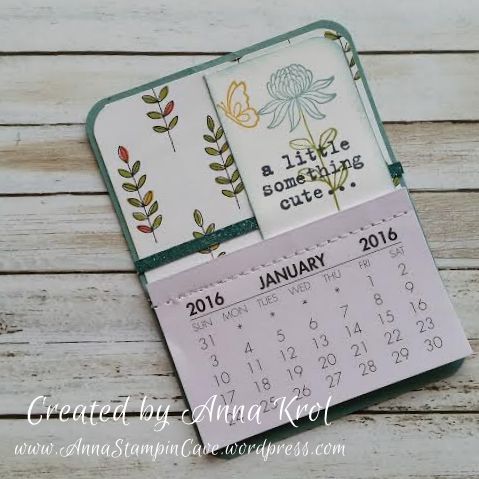
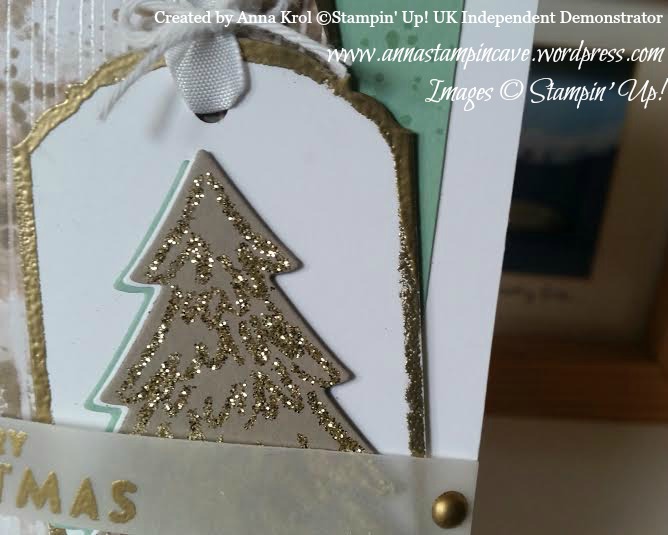
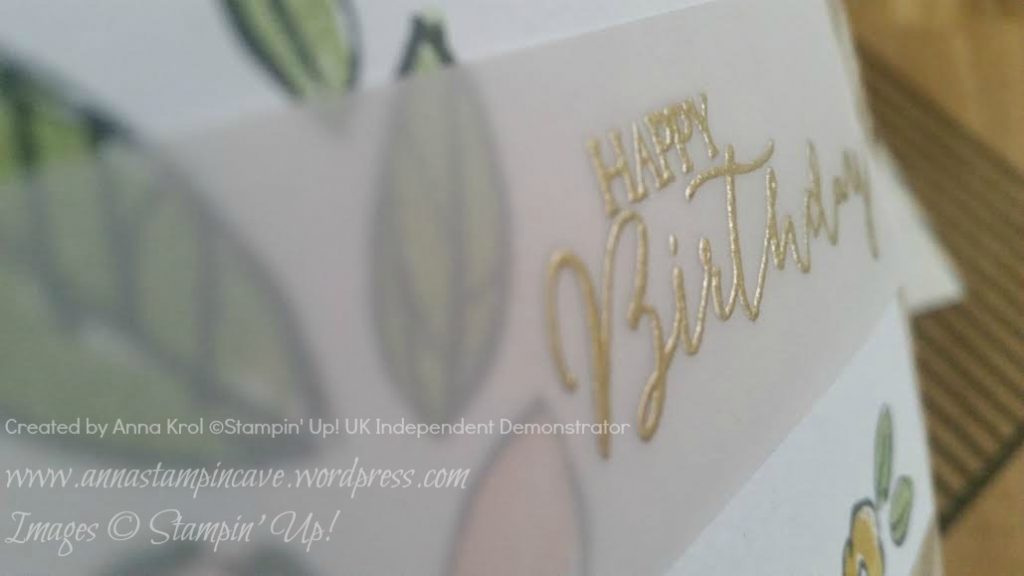
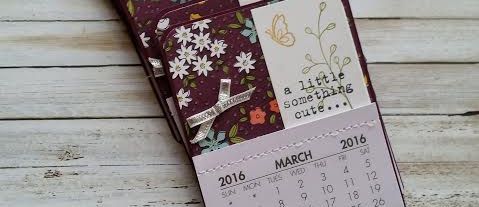
To embellish my Blackberry Bliss calendars I’ve used Silver 1/8″ Ribbon as it looked pretty neat on a dark background. But it didn’t work as good on the light one. So I cut “skinny” strips of cardstock in Lost Lagoon and Hello Honey, smooshed Versamark over them and heat embossed with Iridescent Ice Embossing Powder. I love this gentle shimmer.

Wildflower Fields Fridge Mini Calendars - Instructions 5

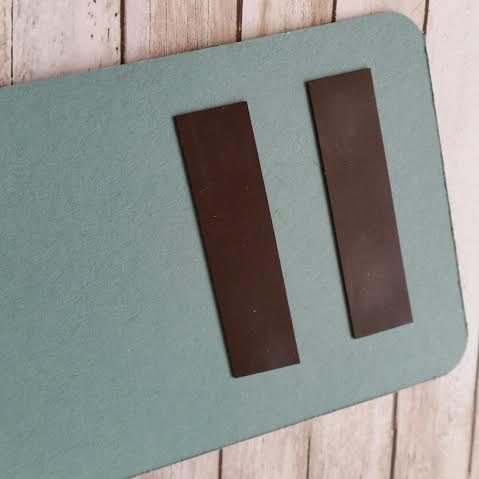
I assembled my calendars using Tombow glue. I also added two strips of a magnet at the back of each one.

Wildflower Fields Fridge Mini Calendars - Lost Lagoon & Hello Honey

I really hope you like my little project and that you give them a go. Or maybe you have different ideas to use these little calendars for? I would love to hear from you!

Have a blessed day,

Shadowhunters Fangirl Birthday Card using Stampin’ Up! Products

Sharing something a little different with you today. I’m so happy I finally had some spare time to post this awesome card (if I do say so myself).

My (not so little anymore) girl had her 16th birthday last Sunday. And because she’s a big fan of Cassandra Clare’s Shadowhunters book series, I really wanted to create something in that theme for her.

4

Obviously, I don’t own any matching stamp sets so I had to improvise. I’ve used pretty few current stamp sets to create my card. First I choose black & gold colour combo – I think it fits the theme perfectly. It’s a gate-fold card, with base in Basic Black. I “brushed” Versamark around the edges, added gold embossing powder and heat set it. I didn’t go for perfection – it was meant to be a bit edgy, rough. Next, I cut two panels to go on the front. Using Versamark again, I stamped flourishes from Everything Eleanor stamp set, and heat embossed it in gold. As before, I didn’t pay attention to detail on purpose – the edgier the better.

3

Inside of the card is pretty simple. I’ve found Angelic Rune symbol online, printed it on copy paper and then traced it on a piece of basic black. I hand-cut it and heat embossed it with Iridescent Ice embossing folder first. But I didn’t like how this turned out and decided to add more sparkle to it. I dabbed Versamark on top of my symbol and added  Heat & Stick powder. I melt the powder with Heat Tool, covered it with gold glitter and heat set my piece again. I love how this turned out. Sentiment comes from Rose Wonder stamp set.

1

To close my card I created a belly-band. Same as with a card front I added that rough gold edge. I stamped small butterfly from Butterfly Basics, heat embossed it in gold and die-cut it. I also die-cut the more intricate butterfly from gold glimmer paper. I adhered them together, added some gold Metallic Thread underneath and attached it to my belly-band.

2

And that’s it. That’s my Shadowhunters birthday card. Do you like it? I have to say that my daughter truly loved it. And the moment she opened the card and saw the Angelic Rune symbol – well, that was priceless to see how her eyes light up. Mission completed!

Thank you for stopping by and have a great day,

Simply Sketched Saturday Challenge Blog Hop #2 – Peaceful Pines

SSSC Header

Thank you for joining us for another Simply Sketched Saturday Challenge!  We’re so excited to be sharing this hop with you. The products used are all available in the current Annual, or seasonal, Stampin’ Up!®  Catalogues*. Simply use the buttons at the bottom of the post to keep hopping!

If you have arrived here from Mandy’s blog thank you for stopping by. If you just start here please keep “hopping” to see the inspiration from our little group. I’m sure you will enjoy what everyone prepared for you this time.

I was really excited about this week’s sketch designed by Amy from blog Engineering Home. Not that it’s an easy one. Oh, and it was her BIRTHDAY yesterday!!! Happy Birthday, Amy! ??????

SKETCH 2

This time I decided to go with Christmas theme. And yes I know there’s still a time for Christmas cards, but hey, you’ve got to start somewhere 🙂 So here’s my interpretation of this week’s brilliant sketch:

Peaceful Pines

I know that many cardmakers prefer ever-so-popular clean and simple style, but I’m a big fan of distressing. And in my card today I tried to incorporate both styles.

peaceful pines 3

The base of my card is Whisper White card stock. A slightly smaller panel of Mint Macaron measures 5″ x 3-3/8″. I knew this panel will be mostly covered but I wanted to add some interest to it. First I thought about dry embossing but it would be too busy for an idea I had in my head. Instead, I stamped some splotches with Gorgeous Grunge in Mint Macaron for a subtle tone-on-tone look.

A distressed panel is a piece of white woodgrain patterned paper from Color Me Irresistible Specialty DSP. This paper is amazing, as each sheet is clear embossed, ready for inking, sponging, spritzing – getting messy in short 🙂

peaceful pines 4.2

peaceful pines 4.1

I squeezed Tip Top Taupe ink pad on the sleek surface (you can use acetate or craft sheet), spritz it with water and swooshed my paper into this puddle of colour. I added ink and water until achieved the look I wanted. I love how embossing resists the colour. When the paper was dry I stamped few splotches from Gorgeous Grunge and distressed and sponged the edges. Just a warning, this technique will warp your paper so you have to be careful, or use watercolour paper.

Peaceful Pines 3

To create my tag I cut a piece of Whisper White card that measures 2″ x 4″ and punch it with Ornate Tag Topper punch. Then I dabbed the edges in Versamark and heat emboss it with gold embossing powder.

I stamped Christmas tree from Peaceful Pines stamp set in Versamark on a piece of Tip Top Taupe card stock. I heat embossed it with Heat & Stick powder and when it got sticky I sprinkled gold glitter over it (I must say that I’m in love with Gold Stampin’ Glitter). Then I die cut it using coordinating framelits. I also die cut half of the tree from Whisper White and Mint Macaron to layer them together. When the tree was ready I assemble my tag and finish it with a piece of ribbon and bakers twine. Finally, I could assemble my card. Now just sentiment left.

Peaceful Pines 2

The sentiment comes from Flurry of Wishes stamp set. I embossed it in gold on a strip of vellum and attached to my card with edges of dimensionals (folded in half). To finish it off I coloured two White Perfect Accents using gold Sharpie and added them where the adhesive was. Taa-daah!

Now, be sure to hop along and see more inspiring projects. Your next stop is Suzanne at Hullahbaloo. Thank you for stopping by and have a blessed day

SSSC Previous  SSSC Next Blog

For Our Mum – Birthday Cards Using Garden In Bloom Stamp Set By Stampin’ Up!

This term seems to be really busy: with our daughter having MOCK exams in a few weeks time = parents meetings at school;  my little sister temporarily moving with us ( only for weekdays; she just started Interior Design MDes course at Coventry University); and me trying to cope with MS as best as I can + infusions in hospital every 4 weeks…there are days I can’t do anything and idea of crafting don’t even cross my mind.

But last week there was our mum’s 63rd birthday. My sister said she really wanted to make a handmade card for our mum but she had no idea where to start. She has never done a card in her life. I took her to my “studio” so she could choose stamp sets & ink pads she liked. And she chose gorgeous Garden In Bloom stamp set + Blushing Bride, Calypso Coral, Hello Honey and Pear Pizzazz ink pads. Then I thought: oh well, while teaching her how to make a card I could make one for our mum too, right? So I grabbed all essentials: card, adhesives, masks, sponges etc. and we made our way to kitchen (my craft room is really tiny).

Do I have to say we had a blast?! It was so good to craft together…

annastampincave - collage

..and she did very well as for her first time stamping, don’t you think? The sentiment is a mix of two stamp sets: Crazy About You and retired Delightful Dozen.

paulina woźniak

For my card, I’ve used same design/layout. Just twisted it a bit with a piece of vellum. I also made a matching envelope. Isn’t it pretty? Vellum is attached with stapler

63 urodziny 2

Sentiment on a card comes from Butterfly Basics and is heat embossed in gold.

I’ve also decided to decorate flap of my envelope

annastampincave bday set

Love love love how these two turned out! Chuffed even more because mum loved cards we’ve made. And my sister is now hooked, so I’m pretty sure it wasn’t last time when we were crafting together.

Thank you for stopping by,

Easy Peasy Bokeh Technique And Tin Of Cards Stamp Set By Stampin’ Up!

Bokeh technique! Have you ever tried it?! I loved this technique “from aside” for a while but never get around to try it myself. Until now 🙂 And why oh! why I waited so long?! hahaha

This is such a cool and easy technique and you can achieve this effect in many different ways. But wait, what the bokeh effect is and means?! In photography bokeh (originally /ˈbkɛ/, /ˈbk/ boh-kay — also sometimes pronounced as /ˈbkə/ boh-kə is the aesthetic quality of the blur produced in the out-of-focus parts of an image produced by a lens. The term comes from the Japanese word boke (暈け or ボケ), which means “blur” or “haze”, or boke-aji (ボケ味), the “blur quality”. The Japanese term boke is also used in the sense of a mental haze or senility. The term bokashi (暈かし) is related, meaning intentional blurring or gradation.

pobrane

Cool, hey? 🙂

To achieve a similar effect on your card you can try the watercolour technique background which can be pretty amazing, and for the “blur” you simply add lighter “circles” with white pigment ink. And what’s cool about the pigment ink, you can make your circles as soft or as intense as you wish.

The first card I created is for my hubby’s 41st Birthday which happens to be today! HAPPY BIRTHDAY, BABY!!! I love you to the moon and back! You are such a blessing in my life xx

ja aaa

You must have noticed our ‘cheeky little thing’ photobomb the picture haha

And here’s the card –

Happy Birthday Card - Anna's Stampin' Cave

For the background, I’ve used three colours of ink: Pool Party, Bermuda Bay and Island Indigo. I’ve sponged the panel randomly, making sure all the colours are blended well. When I was happy with my background I started adding circles in various sizes with Whisper White Craft Ink and sponge.

Happy Birthday Card - Anna's Stampin' Cave

Sentiment and border come from Tin Of Cards stamp set that coordinates with Tin Of Cards Project Kit. But this set is so versatile with its bold images. Once you’ve created your beautiful kit you can use that stamp set over and over again on different occasions. I stamped the sentiment in Versamark and heat-embossed with black embossing powder. Stars are punched with Confetti Stars Punch. To add some WOW effect I added Crystal Effects to the sentiment and stars. I love how they “pop!” from the card.

But because I had all my supplies out, I’ve created three more cards using same technique and stamp set but different colours.

A Happy Hello Card - Anna's Stampin' Cave

For this one, I used Daffodil Delight, Watermelon Wonder and Melon Mambo. For a little twist, I stamped my sentiment onto vellum and added a circle full of punched out stars so the background is peeking from behind. I really love this effect. Larger star comes from Itty Bitty Accents punch pack and it holds vellum in place.

Thank You Card - Anna's Stampin' Cave

My third card is a Thank You card. And again same technique but different sentiment and colours: So Saffron, Pear Pizzazz and Old Olive. And again I used Crystal Effects on stars and sentiment.

For my last card today I used Wisteria Wonder, Perfect Plum and Rich Razzleberry.

Congrats To You - Anna's Stampin' Cave

But this time I decided to add a vellum “screen” to my layout. Such an easy way to intensify the blur effect.

Hope you like my today’s cards and that I’ve inspired you to try bokeh technique yourself. Honestly, I had lots of fun creating these cards and would love to hear what you think about them. Please let me know in the comments below.

Thank you so much for stopping by,