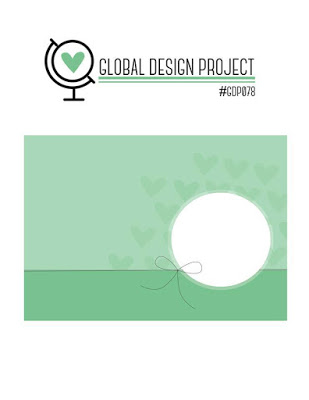
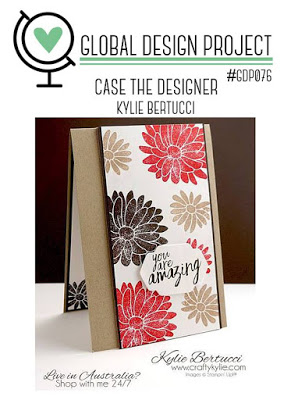
Hello, everyone! Today I’m playing along with Global Design Project’s Sketch Challenge. And oh how cool this sketch is – endless possibilities, honestly. It looks so soft and feminine to me yet I decided to go on the ‘dark side’ as there are always shortages in masculine cards.
One Wild Ride card dimensions:
Crumb Cake cardstock: 8-1/4″ x 5-7/8″ scored in half at 4-1/8″ (21cm x 14.8 cm scored in half at 10.5 cm)
Basic Black cardstock: 2-1/4″ x 5-7/8 and 3-6/8 x 2-1/8″ (5.7 cm x 14.8 cm and 9.5 cm x 5.4 cm)
Whisper White cardstock: 2″ x 3-5/8″ and 1-1/2″ x 2-1/2″ (5 cm x 9.2 cm and 3.8 cm x 6.3 cm) + a strip for a sentiment
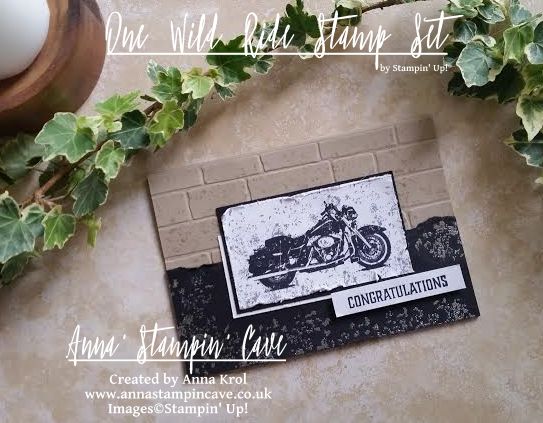
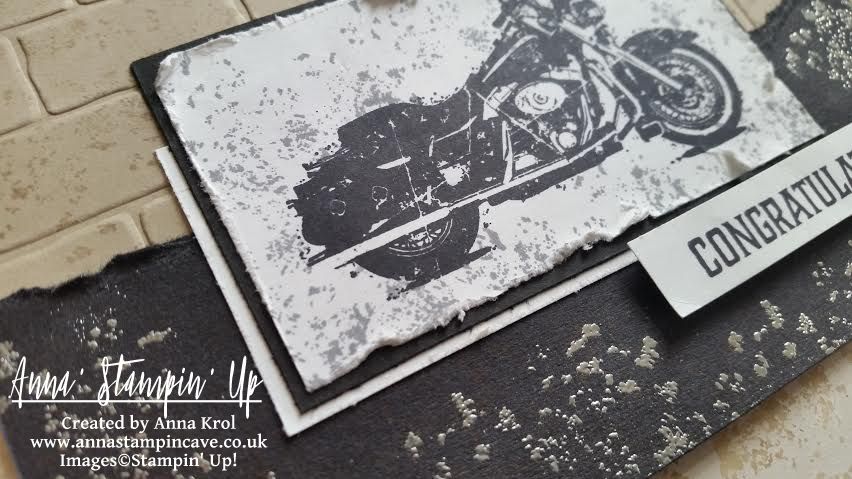
I started with stamping card front with this gravel-splatter kinda stamp from One Wild Ride stamp set, in Crumb Cake for soft, tone on tone effect. Next, I embossed it with Brick Wall Textured Impressions Embossing Folder.
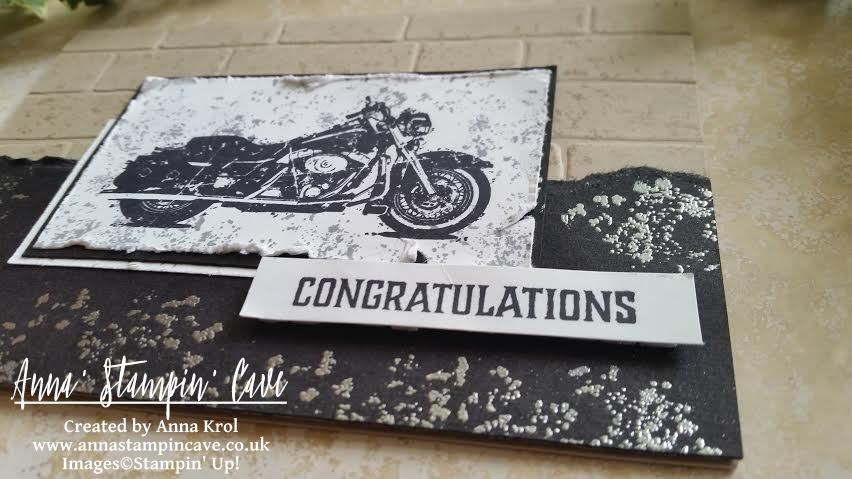
I took 2-1/4″ x 5-7/8 piece of Basic Black cardstock and distressed it by tearing the edge of the panel. Using the same ‘gravel’ stamp I stamped the whole panel in Versamark, heat embossed it in silver and adhered it to the card base.
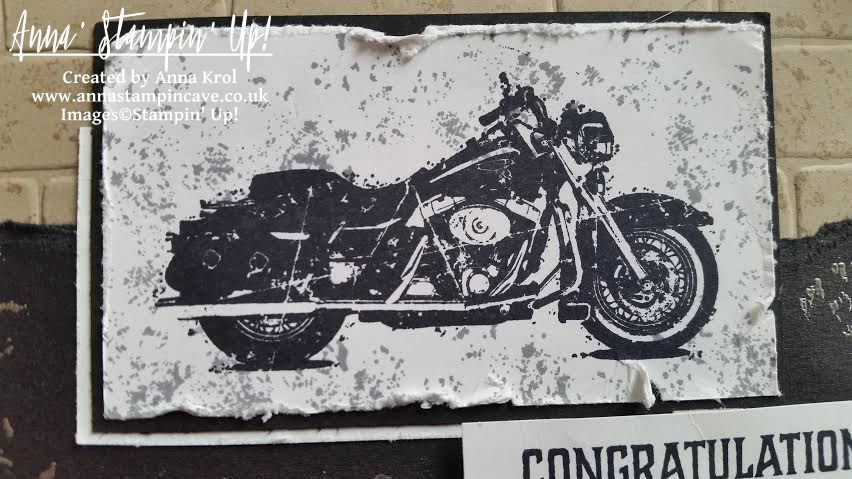
Next, I stamped motorcycle in Basic Black on a piece of Whisper White cardstock. It looked too ‘clean’ so once again I’ve used the gravel stamp. This time I stamped it in Basic Grey. I also distressed the edges of the panel using scissors.
I matted my Harley image with Basic Black cardstock and a smaller piece of Whisper White and adhered it flat to the base.
I kept sentiment simple, just Basic Black ‘congratulations’ on a strip of Whisper White popped out with dimensionals.
I hope you like my card and that maybe, just maybe, it inspired you and gave you some ideas for a surprisingly tough subject called ‘masculine cards’.
As always, I really want to encourage you to visit the Global Design Project challenge blog to see other beautiful projects from all around the world. Just click on their logo below to visit the website
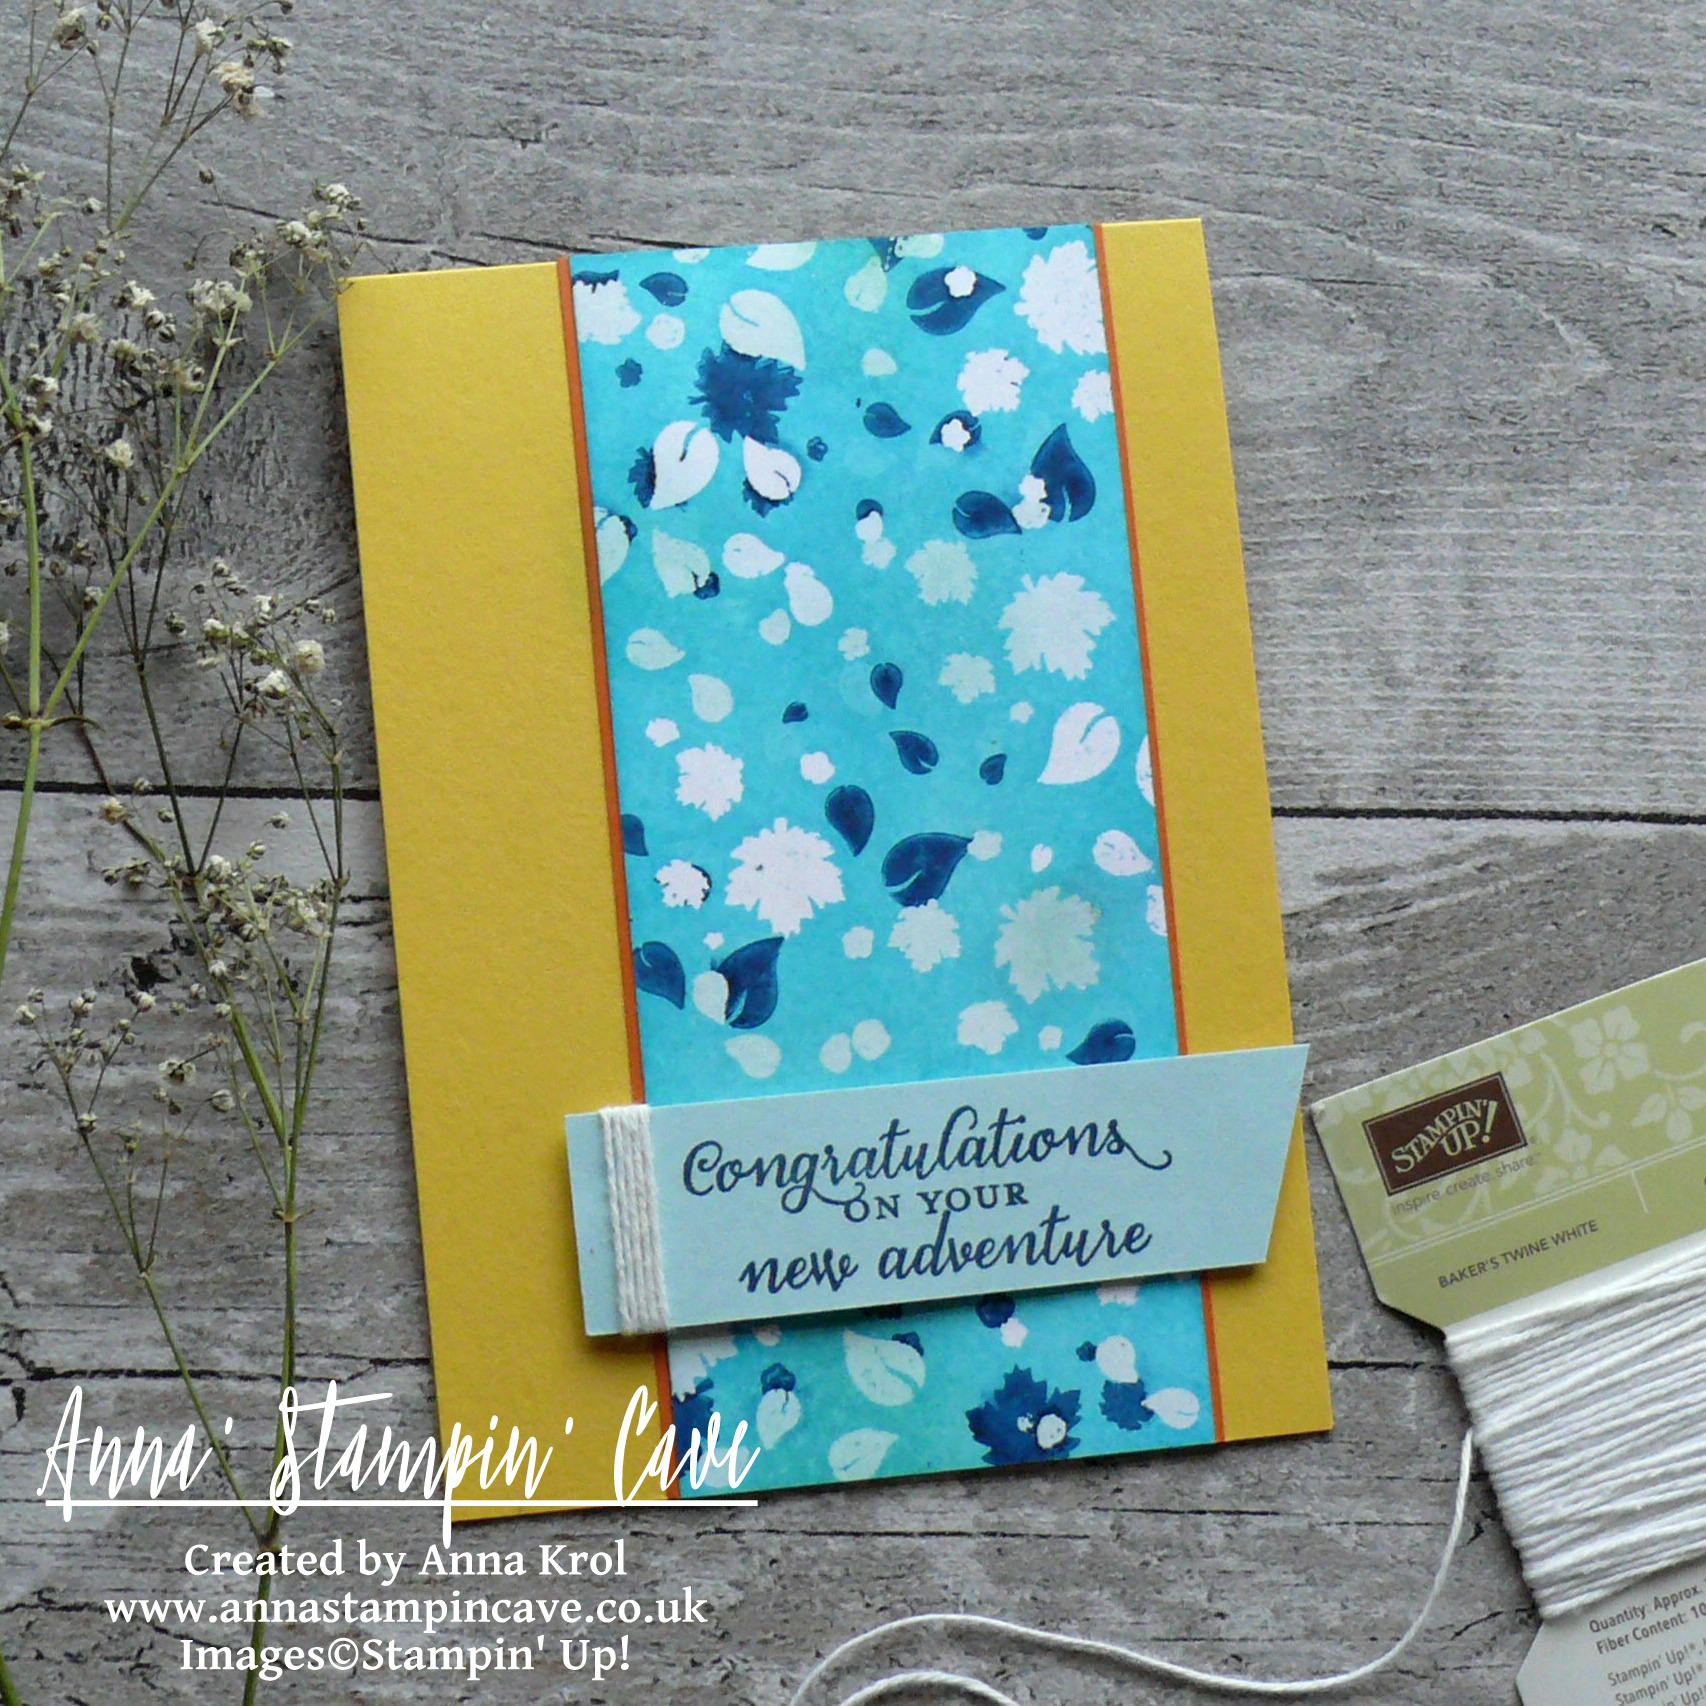
Anna’ Stampin’ Cave – New Adventure Card For GDP076 Case The Designer Challenge
Hello and welcome everyone! Today I’m back with my entry for Global Design Project. This week’s challenge is to CASE lovely and talented Kylie Bertucci. And oh, boy! What a brilliant card it is!
Phew, I did it! To be honest I really thought I won’t make it this week. Lately, I’m so exhausted it’s unbelievable. Living with MS alone isn’t easy, but working night shifts on top of that truly wreak a havoc in my body. And even though I only work two shifts per week, sometimes I am so drained I need to recover for a couple of days before I get back on track. Then I have to pick up on things at home that have to be done, spend some quality time with hubby and daughter…and by the time I’m ready to sit down and create, another week roll on…crazy vicious cycle isn’t it haha
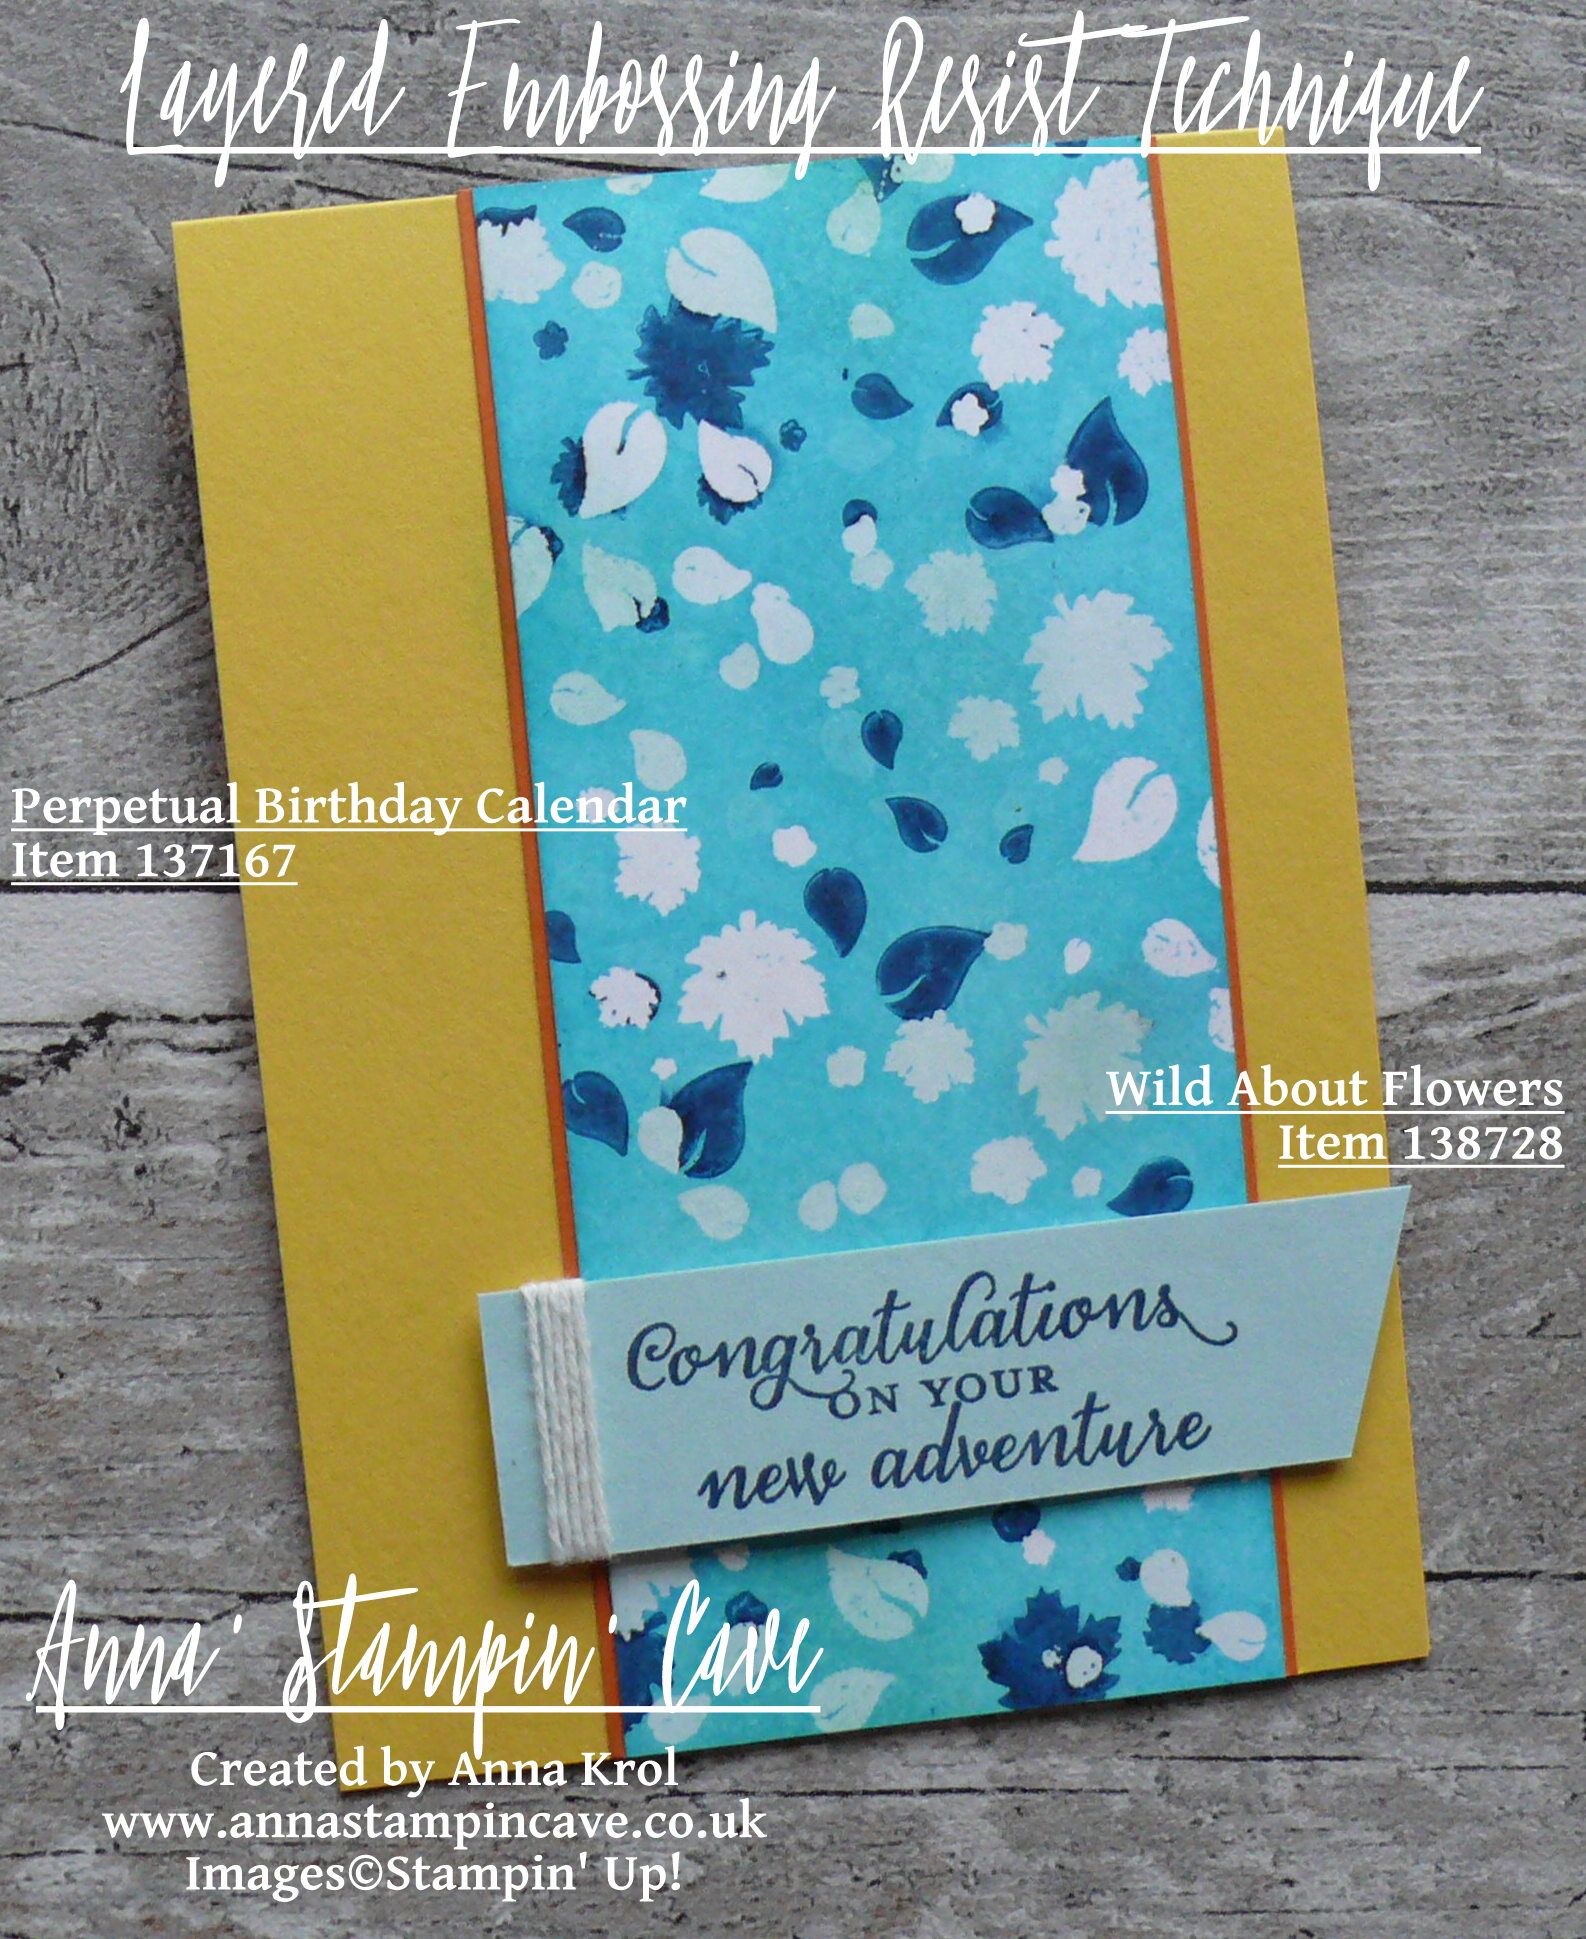
But today I woke up with ‘this idea’ that I just had to turn it into a card. So I jumped out of bed, brew myself a cup of chicory coffee, done my Bible reading and sneaked straight into my ‘cave’. I’ve used a really fun technique called ‘layered embossing resist’.
New Adventure Card dimensions:
Daffodil Delight cardstock: 11-6/8″ x 4-1/8″ scored in half at 5-7/8″ (29.7 x 10.5 cm scored in half at 14.8 cm)
Whisper White cardstock: 5-7/8″ x 2-1/2″ (14.8 cm x 6.4 cm)
Pumpkin Pie cardstock: 2 strips 5-7/8″ long and 1/2″ wide approx (14.8 cm x 1.3 cm)
Soft Sky cardstock: 3-1/2″ x 1″ (9 cm x 2.6 cm)
Whisper White Baker’s Twine: 6″
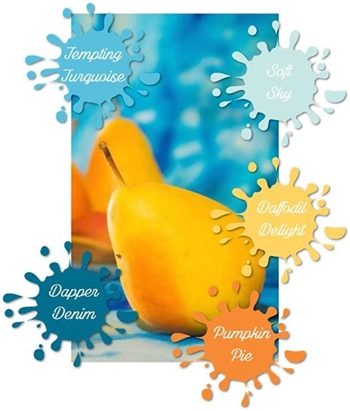
The bright colour combination I’ve used is inspired by this month’s Colour Your World Challenge.
To create this fun background (and a focal point of my card) I decided to use the clusters of leaves from Perpetual Birthday Calendar Stamp Set.
For the first layer, I randomly stamped few clusters of leaves using Versamark ink on Whisper White panel and heat embossed them in clear. Once it’s done, I inked the panel using Soft Sky Ink Pad.
To create the second layer I stamped and heat embossed my leaves in clear again and sponged my panel in Tempting Turquoise. For the last layer, I stamped my leaves in Dapper Denim. Next, I used iron and regular copy paper to remove embossing from the panel.
I added strips of Pumpkin Pie cardstock under my panel and adhered it all to the card base.
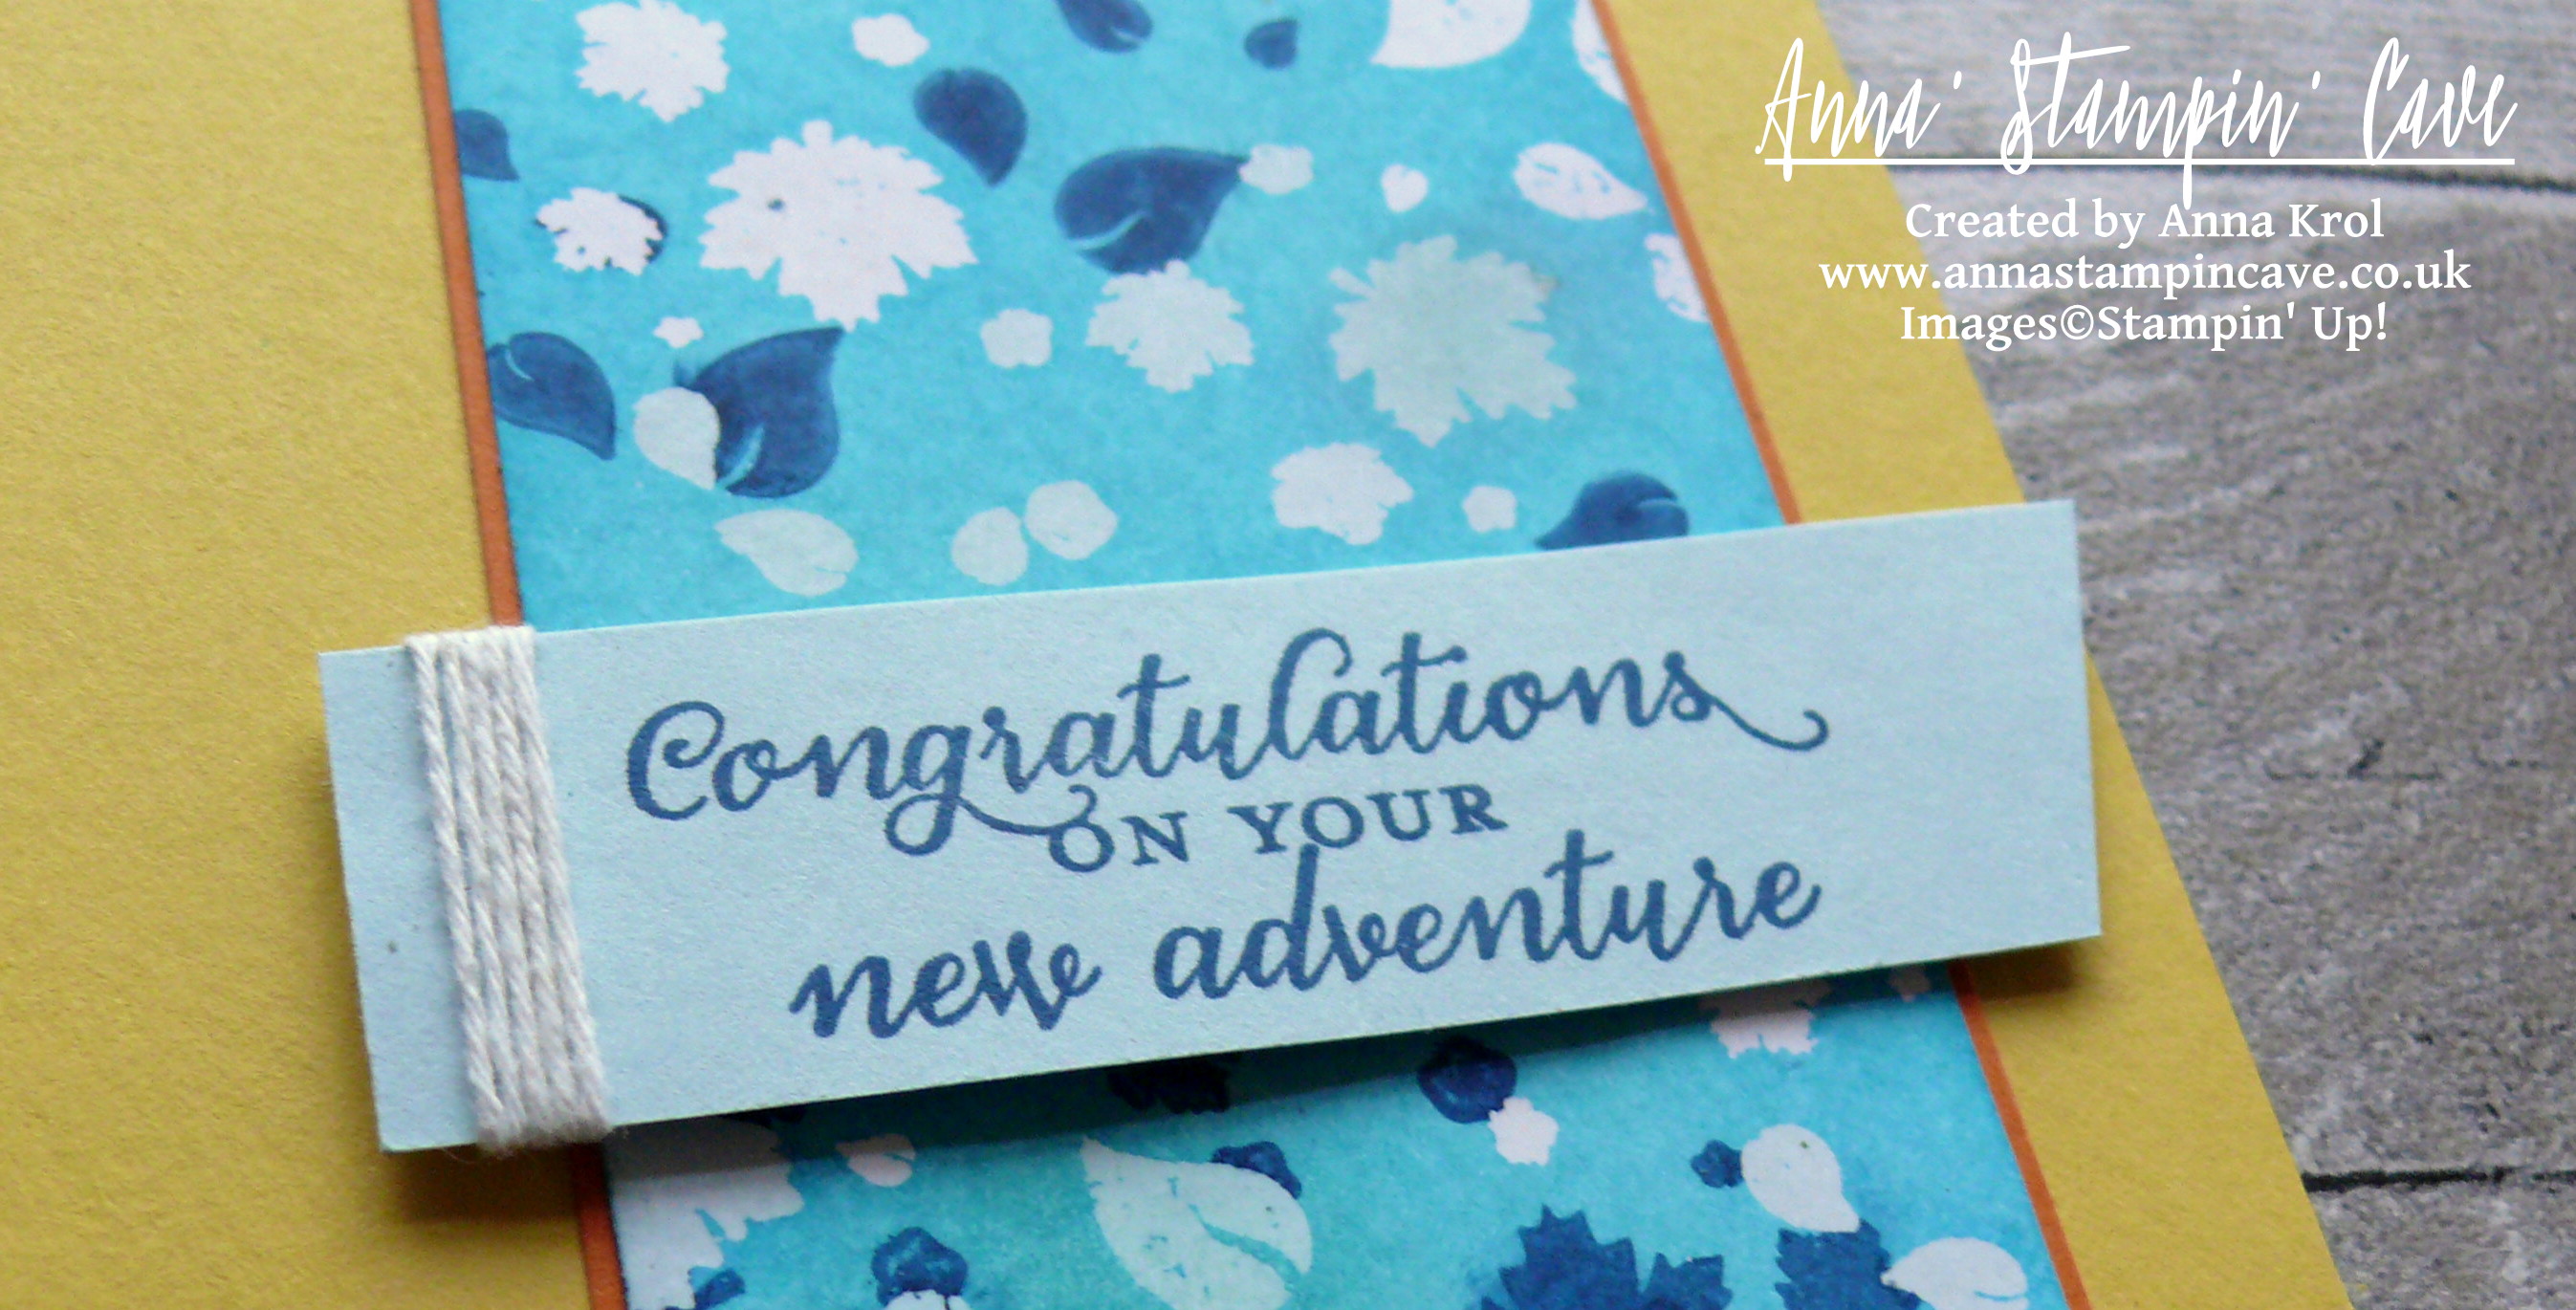
The sentiment is from Wild About Flowers Stamp Set. I stamped it in Dapper Denim on a piece of Soft Sky cardstock and cut one of the ends diagonally creating and wrapped white baker’s twine around the other end. I adhered it to the card base with dimensionals.
So this is it from me for today. Very simple card and so different from my usual style, but I quite like it. And I hope you like it too.
As always, I really want to encourage you to visit the Global Design Project challenge blog to see other beautiful projects from all around the world. Just click on their logo below to visit the website
Anna’ Stampin’ Cave – Faux Watercolour For GDP#072 Case The Designer Challenge
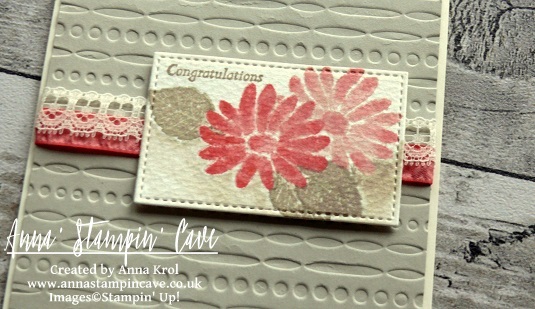
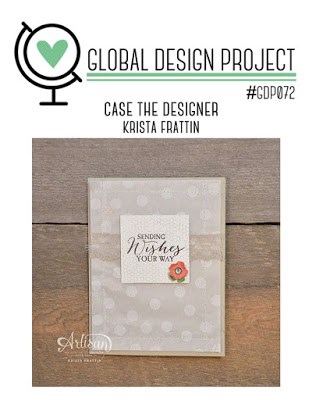
Hello and welcome everyone! Today I’m back with my entry for Global Design Project. This week’s challenge is ‘CASE the Designer’ – we are casing extremely talented Krista Frattin.
If you’re not sure what ‘CASE’ stands for, at least in crafty world, here are few decipherings: Copy And Selectively Edit or Copy And Share Everything. Generally speaking, it means that you take inspiration from someone else’s project, like colours, layout, stamp set used, etc, and add your own twist to it.
I really loved this simple layout and toned palette with a little pop of colour, so this is what I ‘borrowed’ from Krista’s card. But I’ve decided to use a new stamp set from Stampin’ Up! Spring Summer Catalogue called Special Reason.
Faux Watercolour Special Reason card dimensions:
Very Vanilla cardstock: 11-6/8″ x 4-1/8″ scored in half at 5-7/8″ (29.7 x 10.5 cm scored in half at 14.8 cm)
Sahara Sand cardstock: 4″x 5-6/8″(10,2 x 14,5 cm)
Water Colour Paper: 2″ x 3″ (briefly as it will be die-cut later)
Flirty Flaming Ruched Ribbon: length 6″ approx
Very Vanilla Lace Trim: length 6″ approx
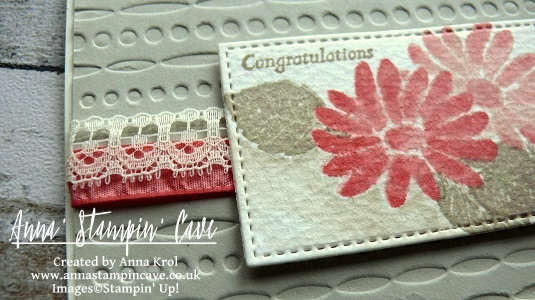
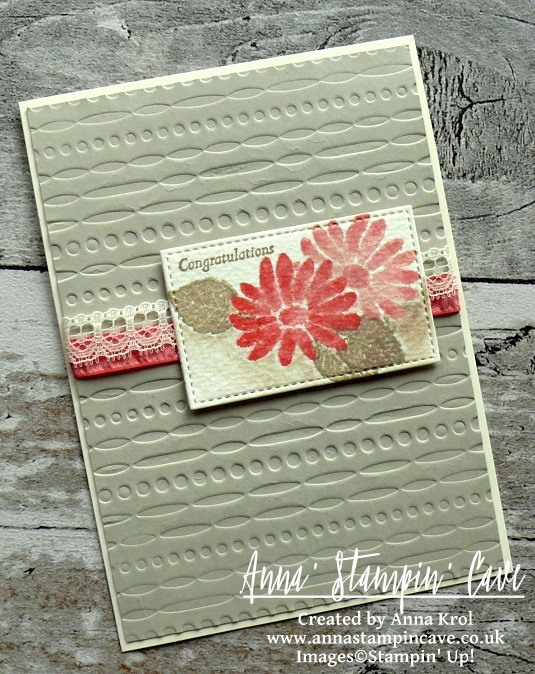
I began with dry embossing Sahara Sand panel with a Festive embossing folder. I love this design as it’s really versatile. For my card, I’ve used de-bossed side. I added Flirty Flamingo Ruched ribbon to the panel, briefly in the middle, and secure it at the back with snail adhesive. Next, I added Very Vanilla Lace Trim on top of it, slightly overlapping both ribbons so Flirty Flamingo was peeking from underneath the lace. I adhered my panel to the card base with liquid adhesive and red-lined tape where the ribbons were for extra security.
To create my focal point I’ve used few great techniques: watercolour, faux watercolour, rock’n’roll, masking and partial die-cutting.
I started with stamping my flower onto watercolour paper. I loaded my stamp with Blushing Bride Ink and then ‘rocking’ my stamp I added Flirty Flamingo only on the edges of the stamp – that’s rock’n’roll technique, super easy hey? Once I stamped the image, I took an aqua painter and started blending both colours on each petal creating a faux watercolour effect. I also added Flirty Flamingo ink to the centre of the flower. I build up the colour (but I let it dry completely between layers) by adding more Flirty Flamingo to the top of each petal and blending it down with an aqua painter.
Next, I created a mask. I stamped the same flower onto a post-it note and fussy cut it. I stuck it to my watercolour flower (first, make sure it’s dry) and using Stamp-a-ma-jig I stamped two leaves in Sahara Sand, one below, and one on the side of my flower. Using same faux watercolour technique I blended the ink on my leaves, being careful not to lose subtle veins detail. I also created a leaf mask and added another leaf at the bottom of the flower.
Not taking off the masks, and with help of Stamp-a-ma-jig again, I stamped another flower. This time I only used Blushing Bride ink for a softer shade. But still added a hint of Flirty Flamingo ink to the edges of petals while blending them with water.
Before die-cutting my piece, I decided to add a little bit of shading beneath my composition. Nothing fancy, just a subtle watercolour wash with Sahara Sand ink and aqua painter. I love how it added an extra dimension to my piece.
To die-cut my watercolour panel I’ve used a second smallest square (1-5/8″) from Stitched Shapes Thinlits Dies. But this is a rectangle, you say. Yes, I know, but I extended my die using partial die cutting technique (if you want to know how to do it, please leave me a comment below). The final piece measure 1-5/8″ x 2-5/8″ (4.2 x 6.7 cm).
I assembled my watercolour panel using Stampin’ Dimensionals.
I really like how this card turned out. No need for extra embellishments, it’s beautiful as it is. I hope you like it too, and that I inspired you to try some of the techniques I showed, especially mess-free, faux watercolour.
I really want to encourage you to check the Global Design Project challenge blog. They have a new challenge every week with various themes and extremely talented Design Team – they will simply blow your mind with their creativity! Just click on their logo below to visit the website
As always, if you wish to purchase any of the products I have used, simply click the images below to go directly to my online shop.
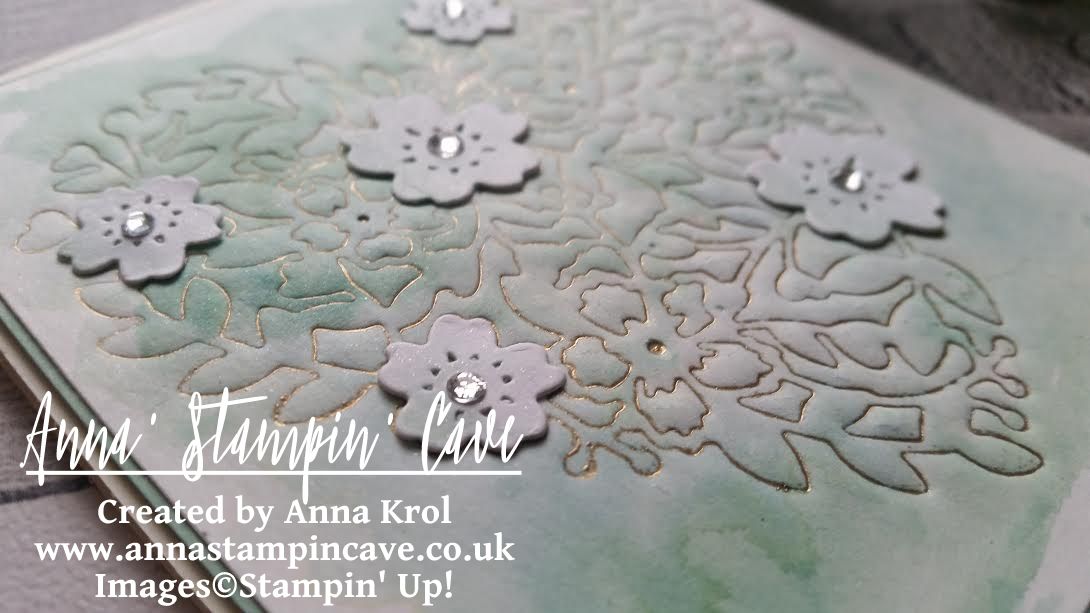
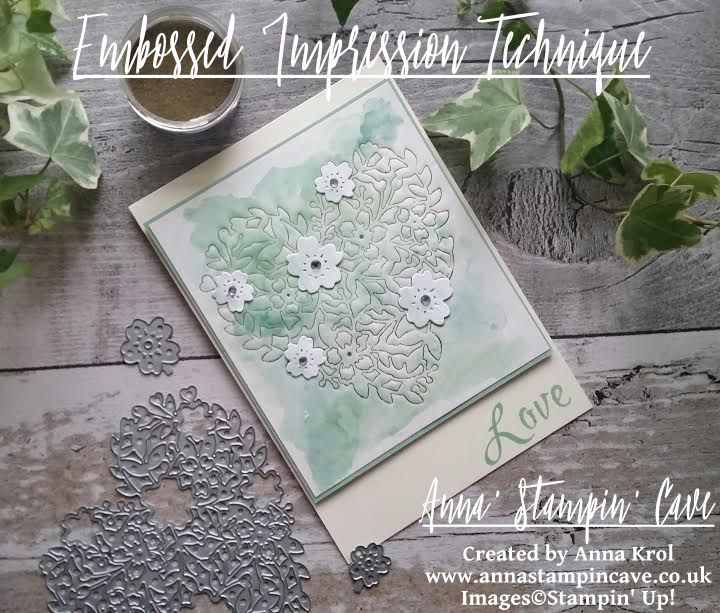
Today, I’ve got for you card using beautiful Bloomin’ Heart Thinlits Dies. I’ve made various cards using this die in the past, but this time I wanted to try something new: an Embossed Impression Technique. This is very easy, yet effective technique. And great way to stretch your dies too.
I’ve used Stampin’ Up! White Shimmery cardstock for this technique, as I planned to do a bit of water colouring later on. I prepared my Big Shot sandwich: Big Shot on Tab 1 -> Cutting Plate -> Silicon {embossing) mat -> cardstock (I swiped the cardstock with embossing buddy). Next, I tapped Versamark over the cutting edge of the die very gently, and placed the die, cutting edge down, on my cardstock. Remember, once it’s on the paper don’t move it or you will mess up your image. I then carefully placed the second cutting plate over the top and run it through the big shot.
Because I put Versamark Ink on the die, now I had that ink in all the ‘valleys’ of the impression I just made. So I sprinkled Gold Stampin’ Emboss Powder over it and heat embossed it.
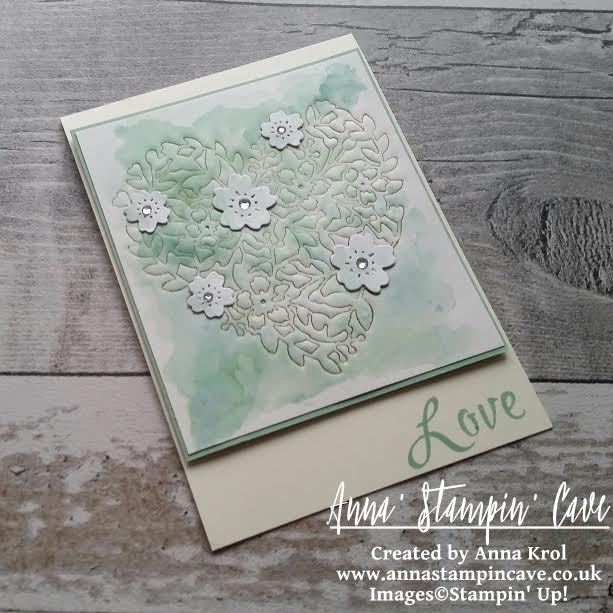
I love those tiny gold lines! Next, I made few watercolour washes over my piece, using Mint Macaron ink pad and Pool Party reinker. Once dry, I cut my panel to 3-7/8″x 4-3/8″.
I also die cut five flowers, two large and three small, from Whisper White cardstock (I probably should have used Shimmery White cardstock for them too), and adhered them to my piece with glue dots. I’ve added some soft Mint Macaron watercolour wash to the flowers to add some depth to them
My card base is Very Vanilla. I stamped ‘Love’ in Mint Macaron using Brushwork Alphabet stamp set. I adhered my embossed panel with liquid glue to a piece of Mint Macaron mat (4″x 4-1/2″), and add them both to the card base with dimensionals.
To finish off my card I’ve added some shimmer to the flowers with Clear Wink of Stella Glitter Brush and put a rhinestone in each flower centre.
I hope you like my card, and that you give this technique a try.
As always, if you wish to purchase any of the products I have used, simply click the images below to go directly to my online shop.
Anna’ Stampin’ Cave – Elegant Monochromatic With Pop Of Colour
Wow! It’s hard to believe, but today is last day with My Hero Stamp Set from Stampin’ Up! Yep, 5 weeks have passed!
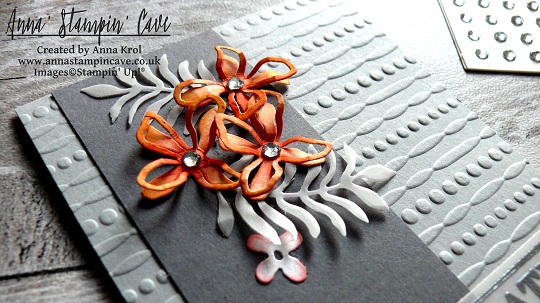
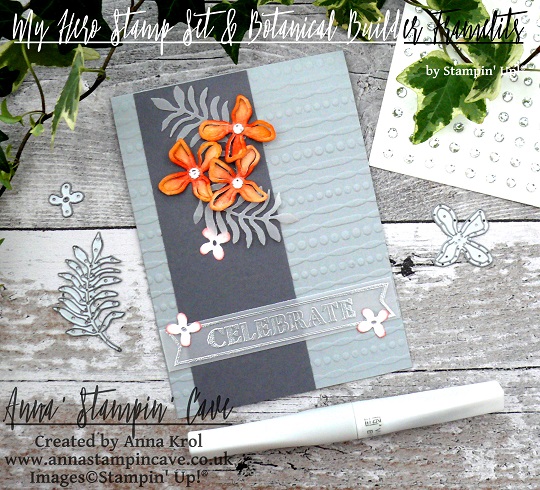
For my final project, I’ve created this striking yet elegant, almost monochromatic card, in shades of grey but with a pop of colour in form of dainty orange flowers.
For the base of my card I took an A4 sheet of Smoky Slate cardstock, cut it in half at 4-1/8″ and folded in half at 5-7/8″. I run the front of the base through Big Shot with Festive Embossing Folder. The panel is a piece of Basic Grey cardstock that measures 2″ x 5-7/8″. I adhere it to the base with Multipurpose Liquid Adhesive.
Next, I created my floral composition using Botanical Builder Framelits Dies. I die cut a couple of leaves from vellum and six flowers: three tiny flowers and three small 3D flowers from a scrap of Whisper White cardstock.
Savvy Tip: Don’t know what to do with random off cuts that are to small to use on cards or to punch anything out of them? Don’t throw them away! I save all my off cuts and use them up when need to die cut small elements, flowers, etc using framelits dies
To add a little bit of colour to my flowers I sponged the edges of the tiny flowers with Watermelon Wonder. For 3D flowers, I decided for more ‘dramatic’ look I sponged entire flowers using Pumpkin Pie ink pad and a dab of Watermelon Wonder to the centres. I also added a large rhinestone to each centre. You can’t really tell from the photos (blame the awful English weather) but I’ve added a touch of shimmer using Clear Wink Of Stella Glitter Brush to each flower (tiny ones too).
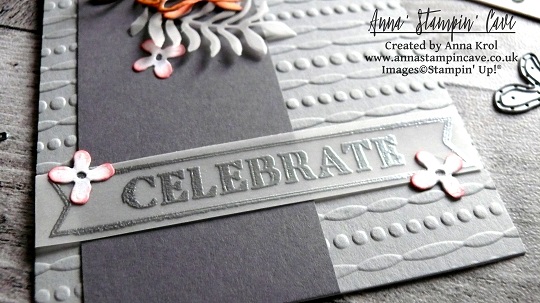
Next, I took a strip of vellum ( 1/2″ x 4-1/8″) and stamped a ‘Celebrate’ from My Hero Stamp Set in Versamark. Of course, I’ve used an Embossing Buddy prior to stamping. I heat embossed the sentiment with Silver Stampin’ Emboss Powder.
Tip: For best results with heat embossing always treat your cardstock, dsp, vellum, etc with embossing buddy. I takes off the statick from the surface of your paper, and makes the powder stick only to the areas you stamped.
Tip 2: If you don’t have an embossing buddy or any other antistatic tool you can use cornflour instead. Just sprinkle a little amount of flour over the surface of your cardstock, spread it with fingers or paint brush, and shake off the excess. Now you can stamp and heat emboss.
I assembled my composition using Glue Dots and liquid adhesive. Two tiny flowers on the vellum banner are hiding adhesive that I’ve used to adhere the banner to the card base.
I really like how this card turned out. I love the monochromatic, cold look of greys with a pop of bright orange. And what do you think about this colour combination? Do you like it? I would love to hear from you in comments below.


 Lace Trim")
 Ruched Ribbon")