The Creative Flow Blog Hop – No Red Romance With Large Letters Framelits Dies

Anna’ Stampin’ Cave – The Creative Flow Blog Hop – No Red Romance With Large Letters Framelits Dies

the-creative-flow-header

Thank you for joining us on our Creative Flow Blog Hop. Each month we are set a challenge to creatively stretch our imaginations. The products we have used are all available in the current Annual and/or seasonal Stampin’ Up!® catalogues. To hop along, please use the buttons at the bottom of the post to keep hopping.

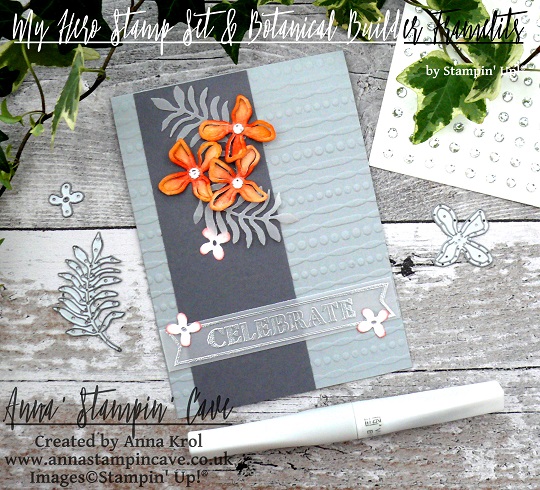
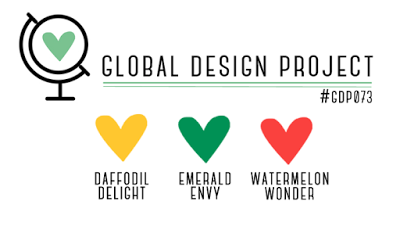
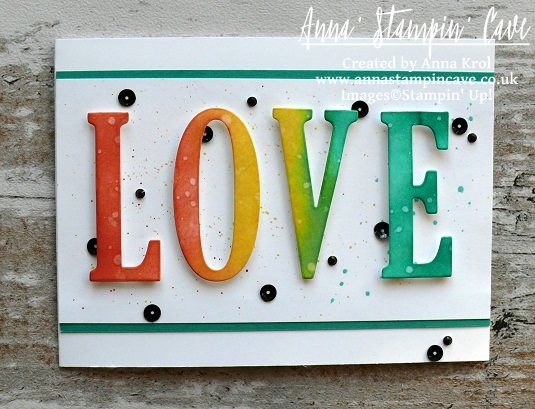
Today’s challenge was to create no-red Valentines Day card, and for some time I wasn’t sure what colour scheme to use. But Global Design Project came to the rescue with their #073 Colour Challenge. I really love this unusual, bright and oh-so-not-valentine’s colour mash-up, so I decided to combine these two together 🙂

gdp_colour_challenge73_png

I know it supposed to be no-red, but Watermelon Wonder is rather orangy red right lol And here’s what I came up with: a perfect card to give to my hubby on that special day.

anna-stampin-cave-stampin-up-large-letters-framelits-dies-no-red-valentines-day-card

No-Red Romance card dimensions:

  • Whisper White cardstock: 11-6/8″ x 4-1/8″ scored in half at 5-7/8″ (29.7 x 10.5 cm scored in half at 14.8 cm)
  • Whisper White panel: 5-7/8″x 3″
  • Emerald Envy cardstock: 2 strips 5-7/8 long and briefly 2/8″wide
  • a piece of Whisper White for die-cutting

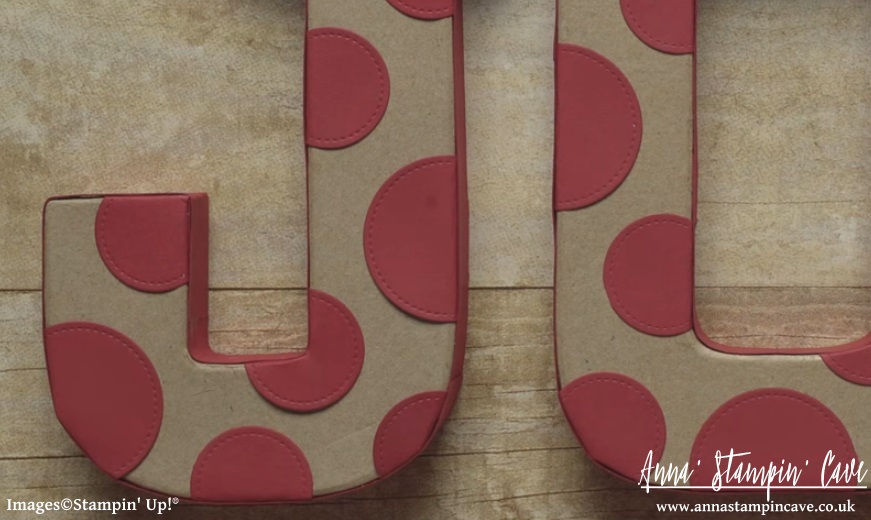
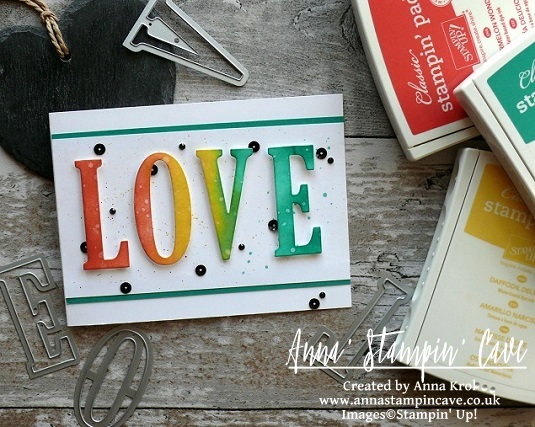
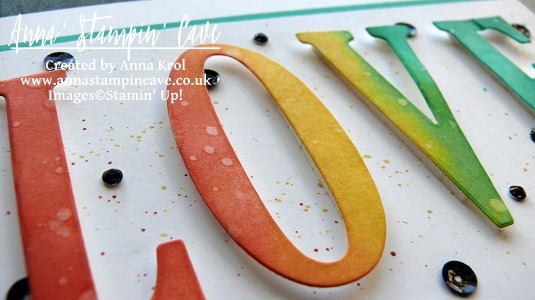
The first step was to die-cut word ‘LOVE’ using Large Letters Framelits Dies. I’ve used regular Whisper White cardstock for this. I’ve sponged the letters with my inks as follows: Watermelon Wonder first, Daffodil Delight next, and Emerald Envy as the last one creating ‘rainbow’ effect. I’ve paid special attention there’s smooth transition from one colour to another.

anna-stampin-cave-stampin-up-large-letters-framelits-dies-no-red-valentines-day-distressed-card

When I was done and happy with blending, I took a small paintbrush and flicked some water droplets all over the letters. I love how the water reactivates the ink. Such a simple step but add so much interest and texture to the (otherwise) flat surface.

Next, I took Whisper White panel and using the same small brush and my ink pads as a palette, I speckled some inks over the whole panel. I tried to keep my speckles somehow under control colour-wise, so the speckles match the letters that go over them.

Remember: The smaller is the brush, the smaller are the speckles.

When speckles dried, I adhered two strips of Emerald Envy cardstock underneath, one on top and one on the bottom of the panel.

anna-stampin-cave-stampin-up-large-letters-framelits-dies-no-red-valentines-card

Now to assemble the card. I adhered the panel to the card base using Fast Fuse adhesive. And I have to say I’m happy to say it seems I finally made friends with this adhesive haha.

I wanted to pop-out my letters so I’ve used Foam Adhesive Strips to adhere them to the panel. You could use any regular foam adhesive, but these strips are perfect for adhering die-cuts that are quite narrow in shape. They are long but you can easily cut them to the length you want/need.

I was really happy how nicely this card was coming together, but I was desperate to add some embellishments to it. Yes I know, a card for a hubby and embellishments?! I must have lost my mind, haha. But why not?

anna-stampin-cave-stampin-up-large-letters-framelits-dies-no-red-valentines-day-card

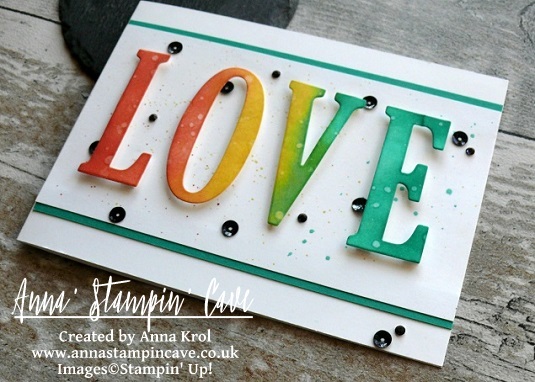
So I scattered black sequins from Metallics Sequin Assortment pack all over my card and tried to figure out the placing and how many I will use. Once I was happy I adhered them with Fine-Tip Glue Pen. For the final touch, I coloured some rhinestones with black Sharpie and added them to the card too.

That’s it from me for today. I really hope you enjoyed my step by step directions.

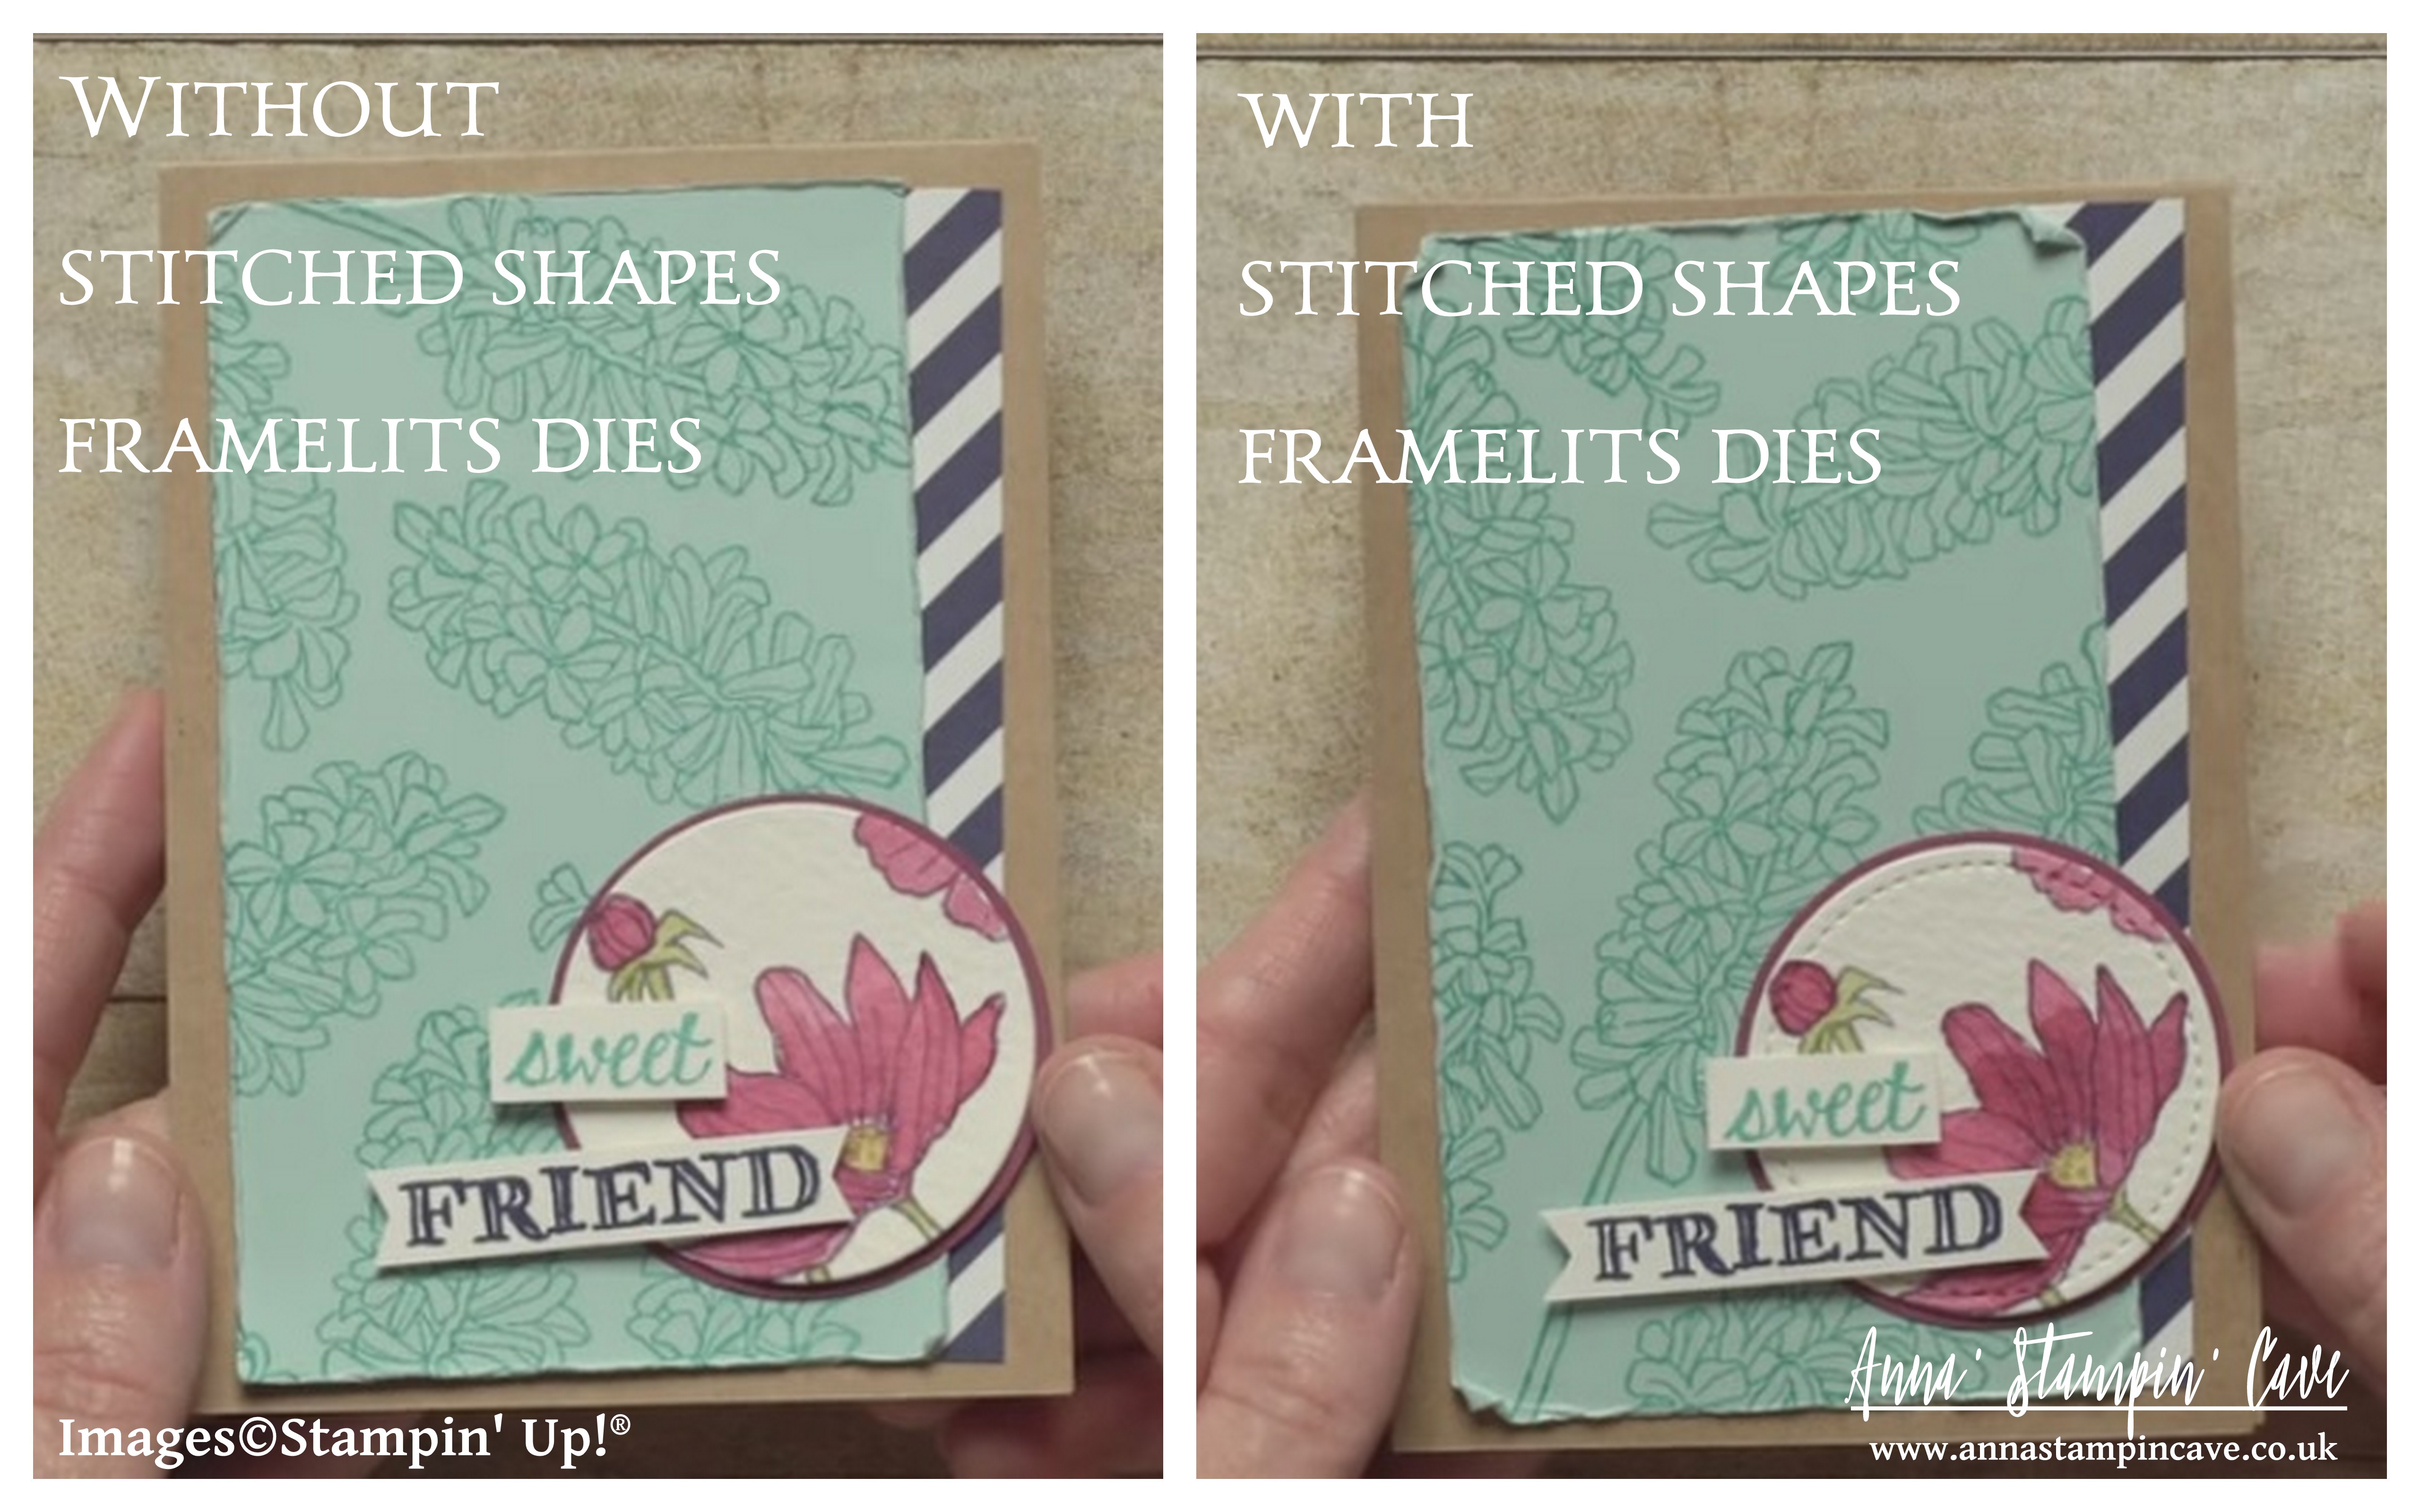
For those of you who asked about stretching your stitched dies using partial die-cutting – I will have a short how-to post for you soon. So watch this space.

Now be sure to hop along our tiny blog hop to see more inspiring projects. Your next stop is lovely and talented Helen.

Thank you for stopping by and have a blessed day,

the-creative-flow-previous-button the-creative-flow-next-button

Large Letters Framelits Dies

Large Letters Framelits Dies
[141712]
£89.00

Whisper White A4 Card Stock

Whisper White A4 Card Stock
[106549]
£8.25

Emerald Envy A4 Cardstock

Emerald Envy A4 Cardstock
[141420]
£7.25

Watermelon Wonder Classic Stampin' Pad

Watermelon Wonder Classic Stampin’ Pad
[138323]
£6.00

Daffodil Delight Classic Stampin' Pad

Daffodil Delight Classic Stampin’ Pad
[126944]
£6.00

Emerald Envy Classic Stampin' Pad

Emerald Envy Classic Stampin’ Pad
[141396]
£6.00

Stamping Sponges

Stamping Sponges
[141337]
£3.25

Metallics Sequin Assortment

Metallics Sequin Assortment
[138390]
£4.50

Rhinestone Basic Jewels Embellishments

Rhinestone Basic Jewels Embellishments
[119246]
£4.50

Fast Fuse Adhesive

Fast Fuse Adhesive
[129026]
£9.00

Foam Adhesive Strips

Foam Adhesive Strips
[141825]
£7.25

Fine-Tip Glue Pen

Fine-Tip Glue Pen
[138309]
£6.25

Stampin' Trimmer

Stampin’ Trimmer
[129722]
£27.00

Big Shot

Big Shot
[143263]
£99.00

The Creative Flow Blog Hop – Cookie Cutter Peek-A-Boo Baby Cards

Anna’ Stampin’ Cave – The Creative Flow Blog Hop – Cookie Cutter Peek-A-Boo Baby Cards

the-creative-flow-header

Thank you for joining us on our Creative Flow Blog Hop. Each month we are set a challenge to creatively stretch our imaginations. To hop along, please use the buttons at the bottom of the post to keep hopping.

For this month we’ve been set a challenge to use any carry-over holiday-themed stamps to create a non-Christmassy project.

stampin-up-carry-over-stamp-sets

I knew straight away I wanted to use Cookie Cutter Christmas Stamp Set to create some super cute baby cards.

anna-stampin-cave-cookie-cutter-peek-a-boo-baby-card

I chose rather traditional baby colours: pink and blue. For the pink, I’ve used beautiful dusty Blushing Bride, and Pool Party seemed just perfect for a baby boy card.

anna-stampin-cave-cookie-cutter-peek-a-boo-baby-card-baby-girl

Peek-A-Boo Baby Girl card dimensions:

  • Blushing Bride cardstock: 8-1/4″ x 5-7/8″ scored in half at 4-1/8″ (21 x 14.8 cm scored in half at 10.5 cm)
  • Whisper White cardstock: 4-3/8″ x 3-5/8″ (11.1 x 9.2 cm)
  • Blushing Bride Designer Series Paper from Subtles Designer Series Paper Stack: 4-2/8″ x 3-1/2″ (10.7 x 8.8 cm)
  • Scraps of Whisper White and White Vellum cardstock for die-cutting and sentiment
  • Whisper White Organza Ribbon: approx 6″

First, I stamped the little bear from Cookie Cutter Christmas Stamp Set, in Blushing Bride, onto a piece of Whisper White cardstock. For the little face, I’ve used Basic Black Archival Ink Pad. I die-cut the bear image using the second largest oval from Stitched Shapes Framelits Dies. I also die-cut the same size stitched oval shape from White Vellum. Next, I stamped ‘peek-a-boo’ sentiment from Suite Sayings Stamp Set, also in Blushing Bride, on a strip of Whisper White, and cut it into a banner. A baby card can’t go without a little bling so I added a tiny rhinestone to the sentiment banner.

To add some interest (and cuteness) to the card base, I pull out long forgotten Hearts & Stars Decorative Masks. For the girly card, I’ve used hearts stencil. First, I thought to add some sparkle through the stencil, but at the end, I decided for tone on tone effect and sponged hearts with Blushing Bride Ink.

anna-stampin-cave-cookie-cutter-peek-a-boo-baby-card-pool-party

Peek-A-Boo Baby Boy card dimensions:

  • Whisper White cardstock: 8-1/4″ x 5-7/8″ scored in half at 4-1/8″ (21 x 14.8 cm scored in half at 10.5 cm)
  • Pool Party cardstock: 4-3/8″ x 3-5/8″ (11.1 x 9.2 cm)
  • Pool Party Designer Series Paper from Subtles Designer Series Paper Stack: 4-2/8″ x 3-1/2″ (10.7 x 8.8 cm)
  • Scraps of Whisper White and White Vellum cardstock for die-cutting and sentiment
  • Whisper White Organza Ribbon: approx 6″

This card was made similarly to the baby girl one. The only significant change, except colour combo obviously,  was that I stamped the bear and his ears separately as I planned to punch the bear using Cookie Cutter Bilder Punch. 

It turned out that the bear has a slightly wider ‘body’ than the other images from this stamp set and you can’t punch it without losing a little bit of his chubby shape.

At the end, I had to fussy-cut the bear but it’s quite a straightforward process. I punched out his ears and using snail adhesive I glued his ears behind his head and next I glued the bear flat onto the stitched oval shape.

Assembling these cards was pretty easy. First I adhered DSP panels to the cardstock. I added the ribbon at the bottom of my panels. I secured it at the back of the panels using snail adhesive and glued it to the card base.

Next step was to assemble my little bears. I glued the ovals with bears to the vellum ovals, offsetting them slightly. I adhered them to the card with Stampin’ Dimensionals for some extra dimension. Sentiments are adhered using Stampin’ Dimensionals too.

anna-stampin-cave-cookie-cutter-peek-a-boo-baby-cards

I truly hope you like my cute ‘peek-a-boo’ baby cards. They are not only adorable but also very easy to recreate.

Now, be sure to hop along and see more inspiring projects. Your next stop is lovely and talented Heidi.

Thank you for stopping by and have a blessed day

the-creative-flow-previous-button the-creative-flow-next-button

Simply Sketched Saturday Challenge #16 – I’m Here For You

Anna’ Stampin’ Cave – Simply Sketched Saturday Challenge #16 – I’m Here For You

SSSC Header

Thank you for joining us for another Simply Sketched Saturday Challenge!  We are so excited to be sharing this hop with you. The products used are all available in the current Annual, or seasonal, Stampin’ Up!®  Catalogues*. Simply use the buttons at the bottom of the post to keep hopping!

Welcome to our 16th sketch challenge blog hop! Today’s sketch has been designed by Amanda Charlesworth.

sssc16

For a long time, I couldn’t decide if I wanted to create a 3D project or a card for this sketch. But because I definitely feel more confident as a card maker, I saved myself some stress and decided to make a card.

stampin-up-swirly-bird-photopolymer-bundle-monochromatic-im-here-for-you-card

I altered the sketch a little bit and added my own twist to it. The base of my card is Whisper White Thick A4 cardstock that measures 8-1/4″x 5-7/8″, and folded in half at 4-1/8″. Next, I cut two panels: one from regular Whisper White and one Smoky Slate. Both measured 4″x 5-6/8″. I took the Smoky Slate panel and using a multi-wave die from Swirly Scribbles Thinlits Dies, I die cut one piece of ‘waves’.

Savvy Tip: Save the bottom scrap piece for some masking later on.

I took scribble circle stamp from Swirly Bird Stamp Set and stamp it repeatedly in Smoky Slate over the Smoky Slate panel, overlapping and stamping off until the whole piece was covered.

stampin-up-swirly-bird-photopolymer-bundle-monochromatic-card

Now I took Whisper White panel and that Smoky Slate scrap piece I saved earlier to create glimmer bottom layer for my wavy die-cut. I lined up the straight edge of my scrap with a bottom edge of Whisper White and squished Versamark pad over the bottom piece of that Whisper White panel. I didn’t want to cover entire panel, only the part that will be peaking through the ‘wavy’ piece. I sprinkled Heat & Stick Powder over it and heat embossed until melted. Next, I added Dazzling Diamond Glitter over it and heat embossed again to secure glitter in place. But why I used that leftover scrap of Smoky Slate, you may wonder? I’ve used it to make sure the very bottom of my WW panel won’t be covered in glitter, so I had a nice spot for my sentiment.

stampin-up-swirly-bird-photopolymer-bundle-monochromatic-card

I adhered Smoky Slate panel and ‘waves’ to the Whisper White panel. To finish off my card, I took a beautiful ‘I’m here for you’ sentiment from Weather Together Stamp Set and stamped it in Basic Black at the bottom left corner of my panel. I also added a couple of rhinestones at bottom right corner for a good measure. I’ve mounted the whole piece to the card base using dimensionals.

stampin-up-swirly-bird-photopolymer-bundle-monochromatic-card

I really like how this card turned out. Clean and simple. I hope you like my take on the sketch too.

As always, if you wish to purchase any of the products I have used, simply click the images below to go directly to my online shop.

Now, be sure to hop along and see more inspiring projects. Your next stop is lovely Jillian.

Thank you for stopping by and have a blessed day,

SSSC Previous   SSSC Next Blog

Swirly Bird Photopolymer Bundle

Swirly Bird Photopolymer Bundle
[142353]
£42.25

Swirly Scribbles Thinlits Dies

Swirly Scribbles Thinlits Dies
[141497]
£24.00

Swirly Bird Photopolymer Stamp Set

Swirly Bird Photopolymer Stamp Set
[141749]
£23.00

Weather Together Photopolymer Stamp Set

Weather Together Photopolymer Stamp Set
[141543]
£19.00

Whisper White A4 Thick Cardstock

Whisper White A4 Thick Cardstock
[140490]
£6.50

Whisper White A4 Card Stock

Whisper White A4 Card Stock
[106549]
£8.25

Card Stock A4 Smoky Slate

Card Stock A4 Smoky Slate
[131291]
£7.25

Smoky Slate Classic Stampin' Pad

Smoky Slate Classic Stampin’ Pad
[131179]
£6.00

Basic Black Archival Stampin’ Pad

Basic Black Archival Stampin’ Pad
[140931]
£6.50

Versamark Pad

Versamark Pad
[102283]
£7.75

Heat & Stick Powder

Heat & Stick Powder
[100625]
£4.00

Dazzling Diamonds Stampin' Glitter

Dazzling Diamonds Stampin’ Glitter
[133751]
£4.50

Rhinestone Basic Jewels Embellishments

Rhinestone Basic Jewels Embellishments
[119246]
£4.50

Liquid Multipurpose Glue

Liquid Multipurpose Glue
[110755]
£3.75

Stampin' Dimensionals

Stampin’ Dimensionals
[104430]
£3.75

Heat Tool - Uk Plug

Heat Tool – Uk Plug
[129054]
£27.00

Big Shot

Big Shot
[143263]
£99.00


New Stitched Shapes Framelits Dies

Anna’ Stampin’ Cave – New Stitched Shapes Framelits Dies

anna-stampin-cave-stitched-shapes-framelits-dies-by-stampin-up

Not only stitches are a classic trend, they illustrate the quality, precision, and extra care is taken when creating a piece. Giving a stitched gift shows just how much you value that relationship.

Now you have the opportunity to purchase Stitched Shapes Framelits ahead of their official release in the 2017-2018 annual catalogue and get 25% off coordinating stamp sets.

With Stitched Shapes Framelits you can make paper stitches in seconds, turning any project into one that is stitched from the heart.

And there’s more great news…although the 25% off stamps sets ends 30 November, you will still be able to get the Stitched Shapes Framelits after that date.

anna-stampin-cave-stitched-shapes-framelits-dies-by-stampin-up
25% off stamps sets ends 30 November. I will post all the stamps sets with clickable images and links at the very end of this post

anna-stampin-cave-stitched-shapes-framelits-dies-by-stampin-up

There are 12 pieces all together in the Stitched Shapes Framelits Dies. You get 4 each of the squares, circles, and ovals.

stampin-up-stitched-shapes-framelits-dies-2

They are sized for the stamped images that you tend to use the most.

stampin-up-stitched-shapes-framelits-dies-3

The stitched shape sits approximately 1/6″ from the edge of the cutout, making the stamp-able dimensions roughly 1/8″ smaller than the cut-out.

Here are all the sizes:

Squares
1-3/16”
1-5/8”
2-1/8”
2-5/8”

Circles
1-3/8”
1-7/8”
2-3/8”
2-7/8”

Ovals
1-3/4” x 13/16”
2-1/4” x 1-5/16”
2-3/4” x 1-13/16”
3-1/4” x 2-5/16”

Here are few of the projects from Stampin’ Up! to showcase the versatility of Stitched Shapes Framelits Dies.

stitched-shapes-framelits-dies-by-stampin-up

stampin-up-stitched-shapes-framelits-dies

stampin-up-stitched-shapes-framelits-dies-4

Stampin' Up! Stitched Shapes Framelits Dies 7.jpg

Stitched Shapes Framelits Dies are not reserved for cardmaking only…

stampin-up-stitched-shapes-framelits-dies-5

…and here’s a close up

Stampin' Up! Stitched Shapes Framelits Dies 6.jpg

Elegant Monochromatic With Pop Of Colour

Anna’ Stampin’ Cave – Elegant Monochromatic With Pop Of Colour

Wow! It’s hard to believe, but today is last day with My Hero Stamp Set from Stampin’ Up! Yep, 5 weeks have passed!

For my final project, I’ve created this striking yet elegant, almost monochromatic card, in shades of grey but with a pop of colour in form of dainty orange flowers.

stampin-up-botanical-builder-framelits-my-hero-stamp-set

For the base of my card I took an A4 sheet of Smoky Slate cardstock, cut it in half at 4-1/8″ and folded in half at 5-7/8″. I run the front of the base through Big Shot with Festive Embossing Folder. The panel is a piece of Basic Grey cardstock that measures 2″ x 5-7/8″. I adhere it to the base with Multipurpose Liquid Adhesive.

Next, I created my floral composition using Botanical Builder Framelits Dies. I die cut a couple of leaves from vellum and six flowers: three tiny flowers and three small 3D flowers from a scrap of Whisper White cardstock.

Savvy Tip: Don’t know what to do with random off cuts that are to small to use on cards or to punch anything out of them? Don’t throw them away! I save all my off cuts and use them up when need to die cut small elements, flowers, etc using framelits dies

To add a little bit of colour to my flowers I sponged the edges of the tiny flowers with Watermelon Wonder. For 3D flowers, I decided for more ‘dramatic’ look I sponged entire flowers using Pumpkin Pie ink pad and a dab of Watermelon Wonder to the centres. I also added a large rhinestone to each centre. You can’t really tell from the photos (blame the awful English weather) but I’ve added a touch of shimmer using Clear Wink Of Stella Glitter Brush to each flower (tiny ones too).

stampin-up-botanical-builder-framelits-my-hero-stamp-set

Next, I took a strip of vellum ( 1/2″ x 4-1/8″) and stamped a ‘Celebrate’ from My Hero Stamp Set in Versamark. Of course, I’ve used an Embossing Buddy prior to stamping. I heat embossed the sentiment with Silver Stampin’ Emboss Powder.

Tip: For best results with heat embossing always treat your cardstock, dsp, vellum, etc with embossing buddy. I takes off the statick from the surface of your paper, and makes the powder stick only to the areas you stamped.
Tip 2: If you don’t have an embossing buddy or any other antistatic tool you can use cornflour instead. Just sprinkle a little amount of flour over the surface of your cardstock, spread it with fingers or paint brush, and shake off the excess. Now you can stamp and heat emboss.

I assembled my composition using Glue Dots and liquid adhesive. Two tiny flowers on the vellum banner are hiding adhesive that I’ve used to adhere the banner to the card base.

stampin-up-botanical-builder-framelits-my-hero-stamp-set

I really like how this card turned out. I love the monochromatic, cold look of greys with a pop of bright orange. And what do you think about this colour combination? Do you like it? I would love to hear from you in comments below.

Thank you for stopping by and have a blessed day,