Anna’ Stampin’ Cave – Teachers Thank You Gift Using Tropical Chic Bundle
Thanks for coming to my blog today! We are being highlighted internationally by Kylie Bertucci and you are able to vote for my project. The top ten winners will get to be part of an international blog hop so please vote for my project. My project is under the number 20. You can do it here or use a button at the end of my post.
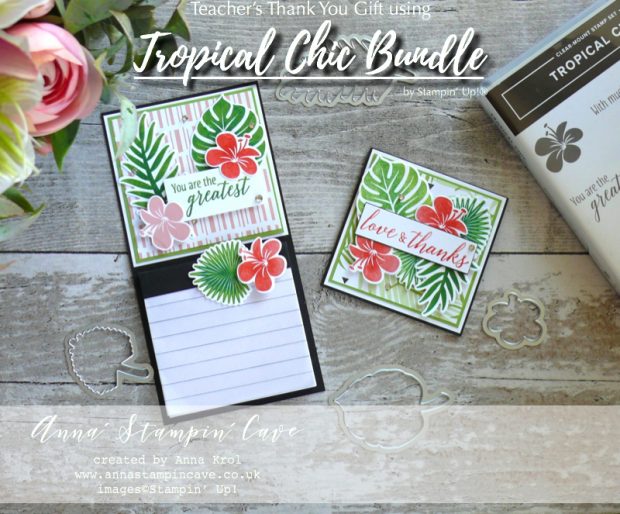
A theme for this month’s highlight is ‘Teachers Gifts’. And however, it’s been a long time since our daughter finished primary school (she starts Uni after summer break) I thought why not make a cute little set of a fancy fridge magnet and a mini 3×3″ Thank You card.
To make these I’ve used Stampin’ Up! Tropical Chic Stamp Set & Tropical Thinlits Dies. I also used coordinating Tropical Escape DSP.
Teachers Gift Fridge Magnet dimensions:
Basic Black cardstock for the base: 3-1/4″ x 6-1/2″
Basic Black cardstock for the notebook: 1-1/2″ x 3″
Whisper White cardstock: 3-1/8″ x 3-1/8″
Granny Apple Green cardstock: 3″ x 3″
Tropical Escape DSP: 2-7/8″ x 2-7/8″
Whisper White cardstock for stamping & die-cutting
Rhinestones
magnet sheet 3″ x 4″
Teachers Thank You Card dimensions:
Basic Black cardstock: 3″ x 6″
2x Whisper White cardstock: 2-7/8″ x 2-7/8″
Granny Apple Green cardstock: 2-6/8″ x 2-6/8″
Tropical Escape DSP: 2-5/8″ x 2-5/8″
Whisper White cardstock for stamping & die-cutting
Rhinestones
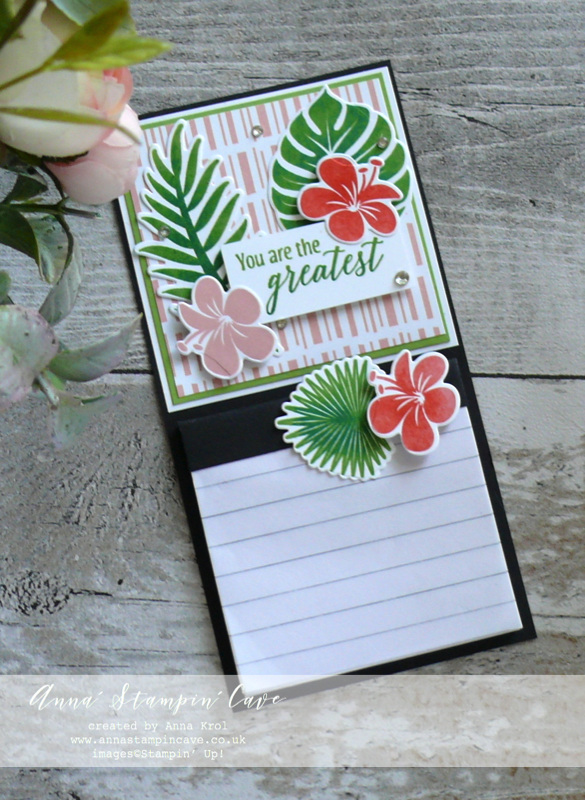
First, I created the base for my magnet: I cut Basic Black cardstock to 3-1/4″ x 6-1/2″ and using liquid glue I adhered the magnetic sheet at the back. Next, I created the notes area. I have found this little notebook in my drawer but it had a navy spine and was a little too long (3″ x 4″) and I needed a square one. So I removed the old spine and shortened notebook using the guillotine.
To create new spine I cut a 1-1/2″ x 3″ piece of Basic Black cardstock and scored it at 7/8″ and 1″. Adhered it to the notebook and adhered notebook to the base.
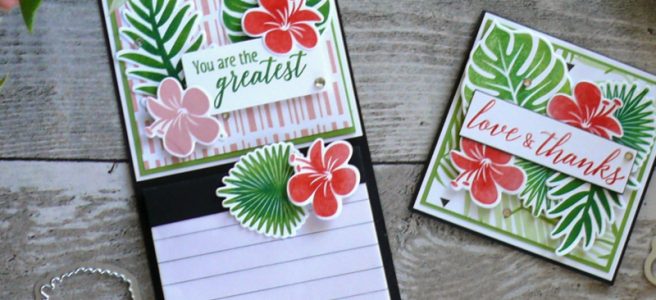
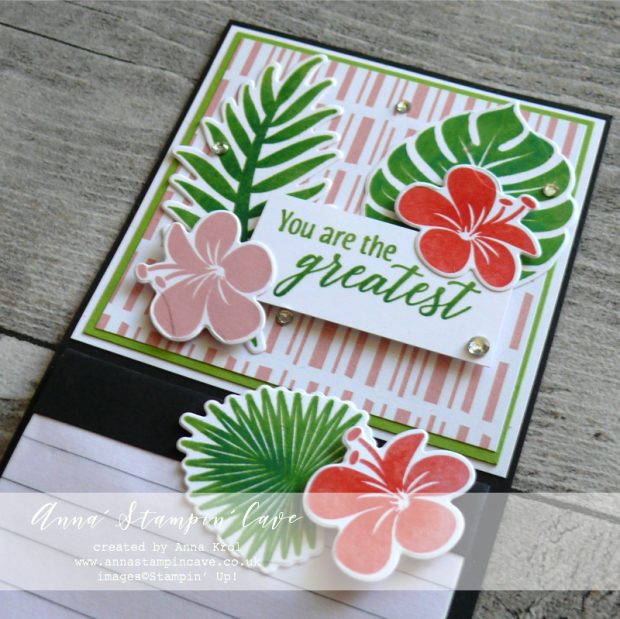
To finish off the top of my magnet, I took a Whisper White cardstock square, glued Granny Apple Green on top and layered a slightly smaller square of Tropical Escape DSP and adhered them all to the base.
For stamping the foliage I’ve used Stamparatus: I stamped each greenery image in Granny Apple Green ink, followed by Shaded Spruce but dabbed off some colour from the edges of the images.
I did the same with flowers but I used Blushing Bride with Poppy Parade. I decided to leave one flower just in Blushing Bride. I die cut all my images using coordinating dies, arranged and adhered them to the magnet using liquid glue and dimensionals.
For the sentiment, again, I’ve used Granny Apple Green with Shaded Spruce.
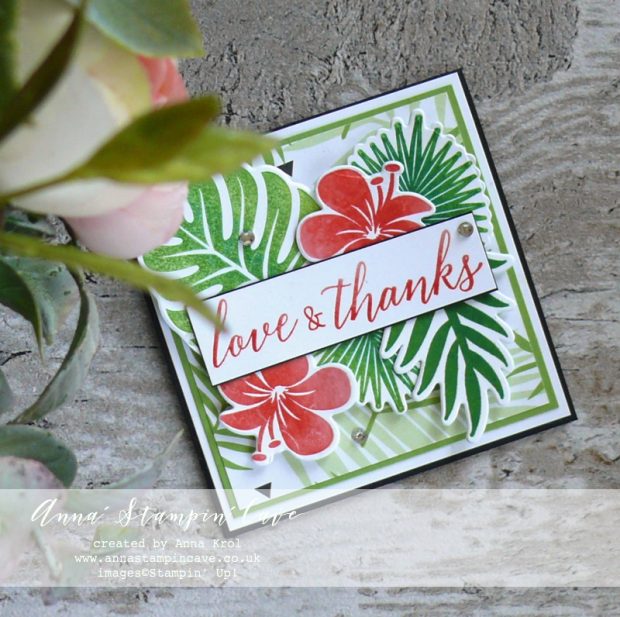
For the card, I’ve used a 3″ x 6″ piece of Basic Black, scored at 3″. Same as with a magnet piece, I layered Whisper White with Granny Apple Geen and Tropical Escape DSP on top and adhered them all to the card base.
Using Stamparatus, again, I stamped each of my images and die cut them using coordinating dies.
The sentiment comes from the same stamp set but I stamped only ‘Love & Thanks’ with Blushing Bride at full strength and Poppy Parade dabbed off for gradient look.
Few rhinestones finish off my little projects.
I truly hope you’ve enjoyed coming to my blog today.
Now, make sure you head over to Kylie’s blog to check all lovely projects and vote for your favourites. Hope my project will be among them. My project is under number 20!
As always, if you wish to purchase any of the products I have used, simply click the images below to go directly to my online store.
My exclusive special offer this month only: FREE Stampin’ Up! Pearlised Doilies
How it works…
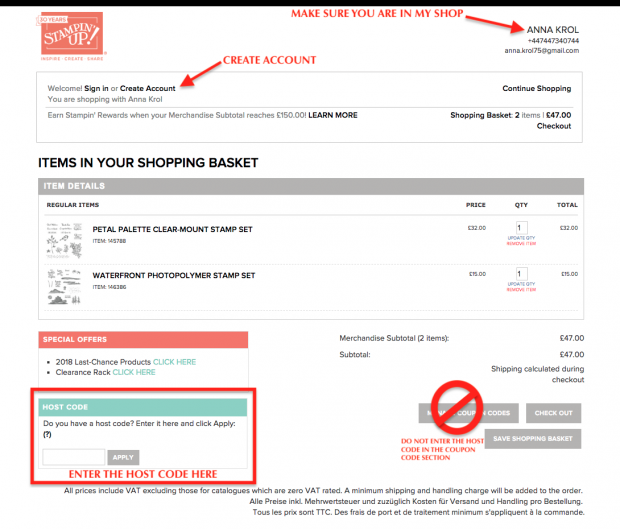
Place a product order of £50 or more (excl. shipping) in my online store in the month of August.
Add Host Code U6KK4ACY. To claim your reward you must include this code in your ordering process.
This August Special Offer will be applied to all qualifying orders placed through my shop using Host Code U6KK4ACY between 1 August – 31 August.
If your order is £150 or more do not use Host Code. You will earn your own Host Rewards to spend.
IMPORTANT: My FREE Special Host Gift giveaways are mailed separately from any order and will arrive mid-September.
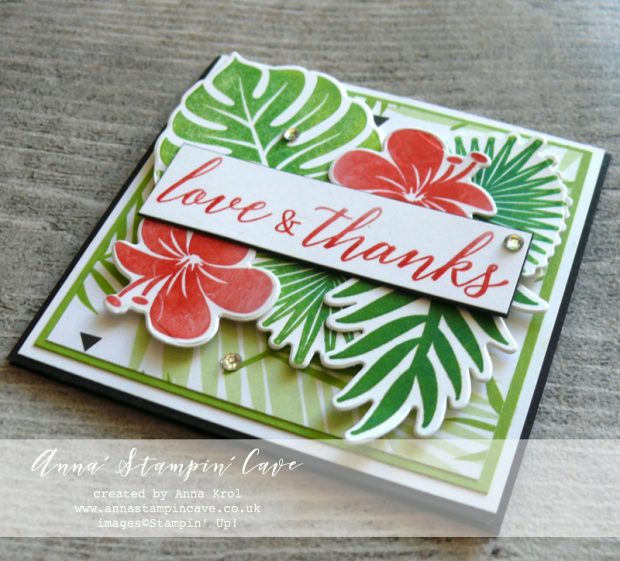
Summary of the project which gives all the views of the card in one photo. I’d love if you pinned and called by on Pinterest xx
DON’T FORGET TO CHECK
Request Autumn/Winter Catalogue below –
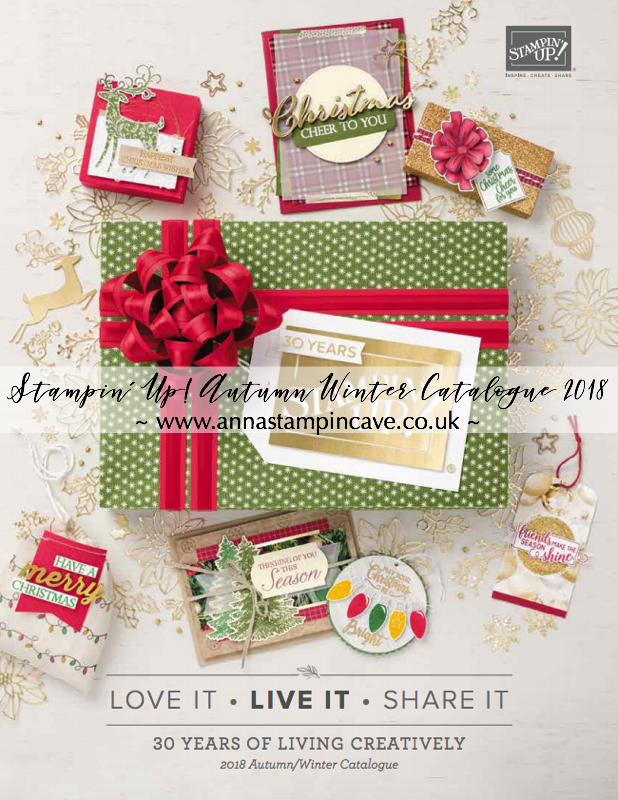
How can you get a FREE copy of the new Autumn/Winter 2018 Catalogue?
For those living in the UK and Northern Ireland, you may request a catalogue using the form below and I will add you to my mailing list for this catalogue.
You can also opt-in to receive my customer email newsletter, featuring tips, product shares, news of Stampin’ Up! specials and my personal promotions.
Do not forget to give your full address
It’s open to the United Kingdom and Northern Ireland only.
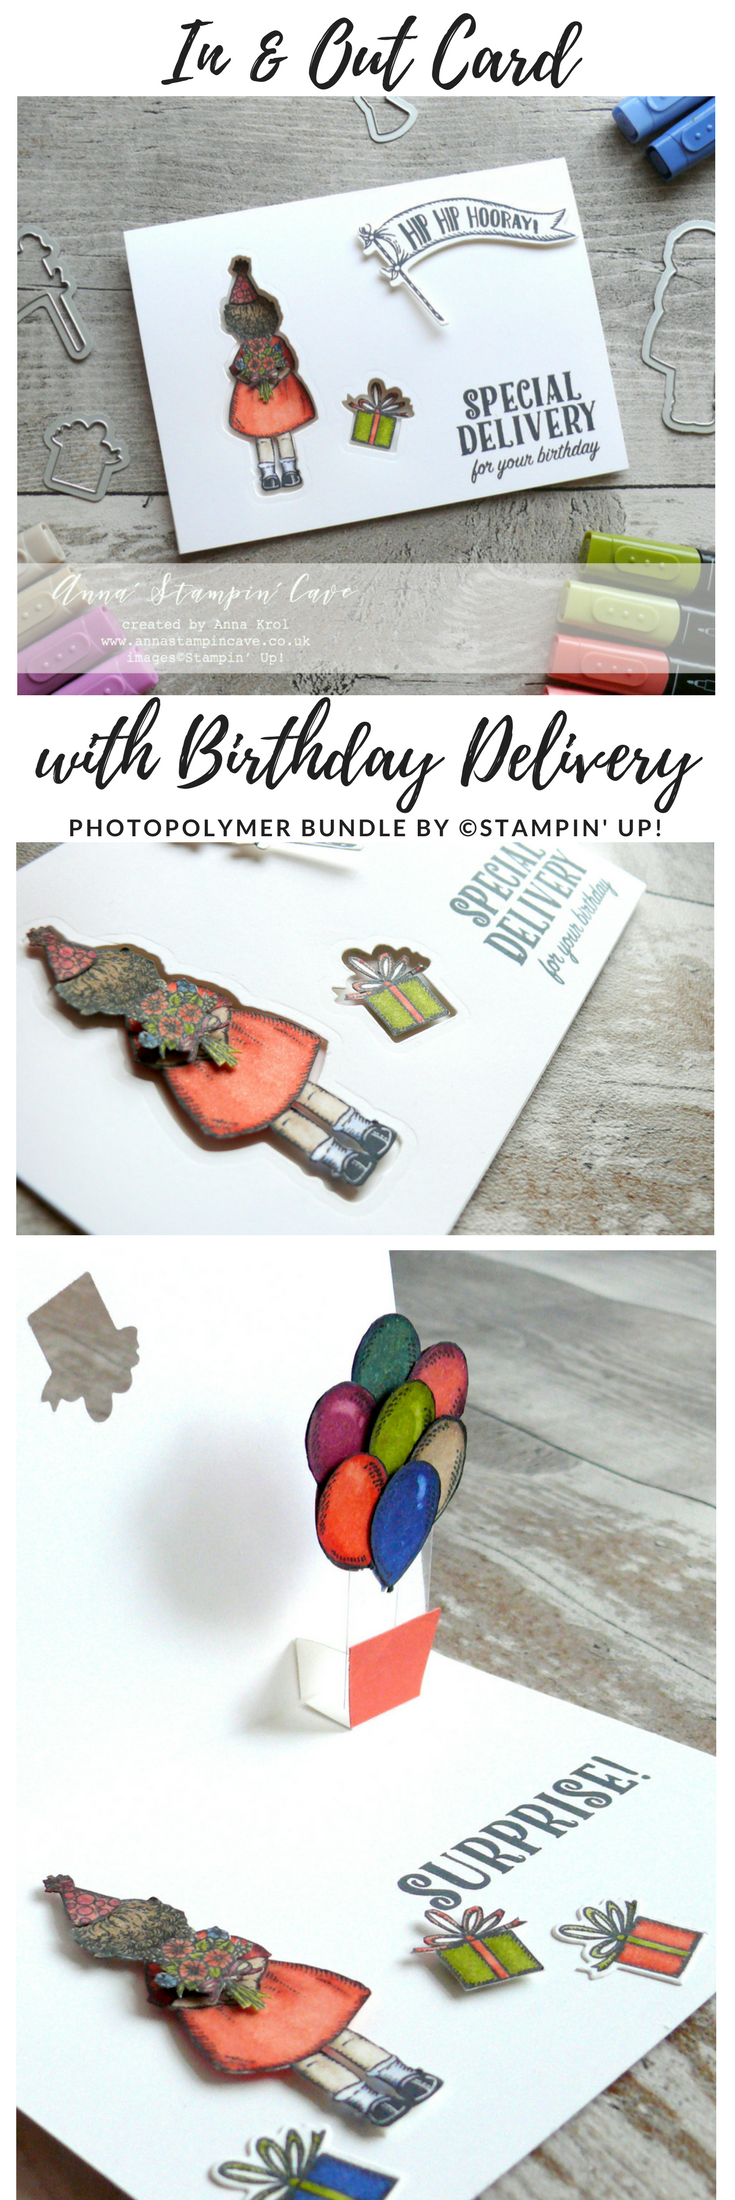
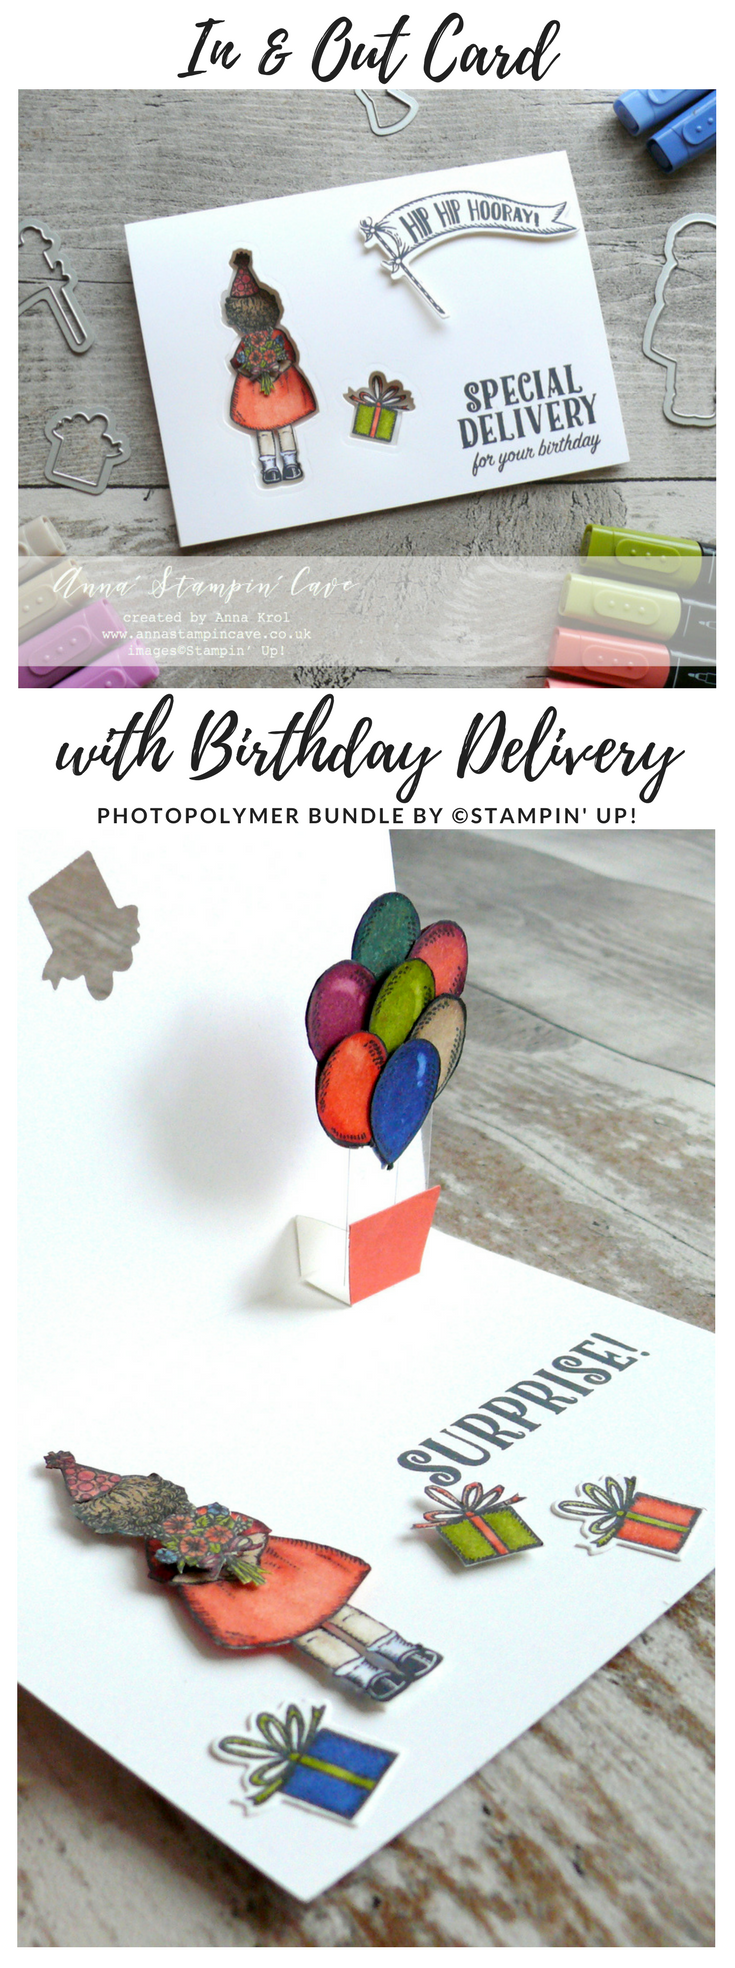
Anna’ Stampin’ Cave – Fun In and Out Birthday Card Using Birthday Delivery Bundle
Hello and thank you for stopping by.
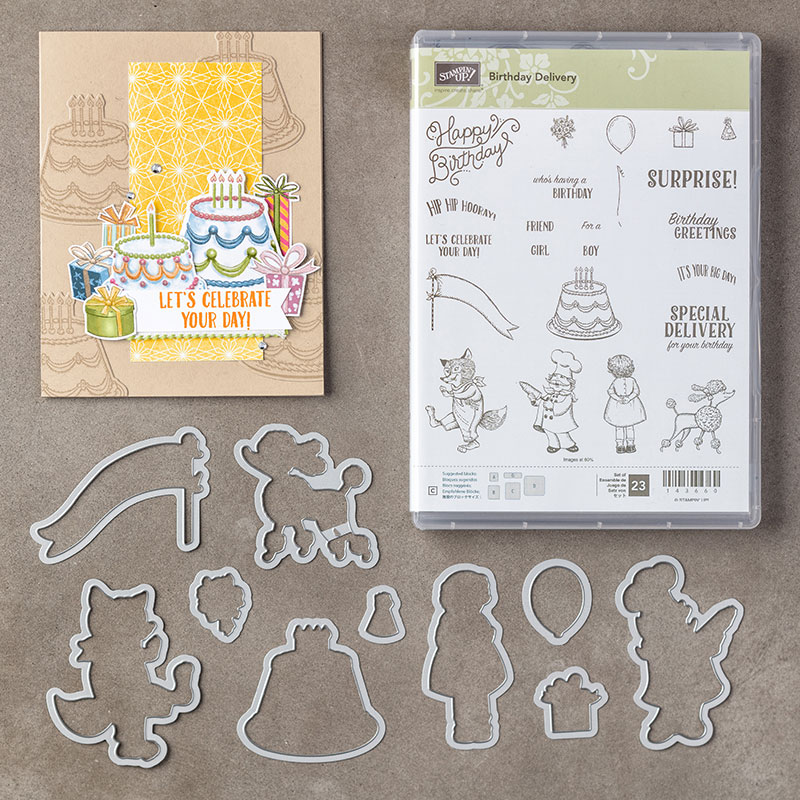
Today, I wanted to show you a fun card I created for my grand niece’s 6th birthday recently. I got an idea for this card from ever amazing Jennifer McGuire, and its called ‘In & Out Card’. For her technique, you need a stamp set that comes with coordinating dies. And Birthday Delivery Stamp Set with Birthday Friends Framelits Dies was just perfect!
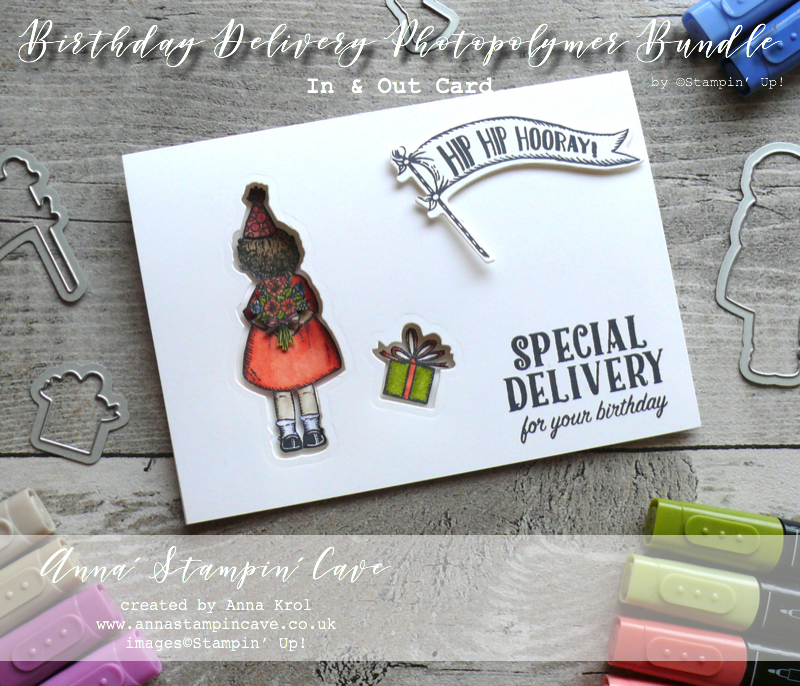
And here’s my card:
First, I stamped all the images I wanted to include in my card, on a scrap of Whisper White cardstock. I wanted to use my Stampin’ Blends to colour images in (bear in mind I only had five colours in the dark and light shade at that time) so I’ve used Black Memento Ink Pad for my stamping. I also stamped a sentiment in the bottom right corner of the card base.
Because I had the ink pad out already, I stamped ‘Hip, Hip, Hooray’ flag on a scrap of Whisper White cardstock, which I die-cut later.
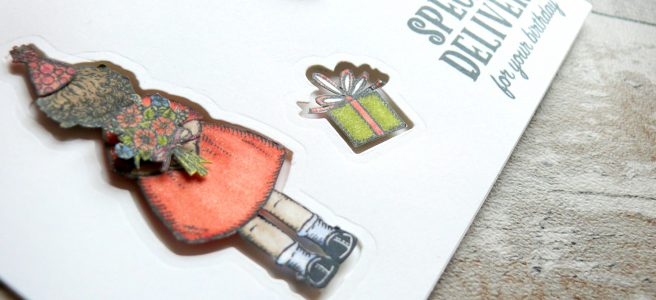
When finished my colouring, I fussy cut the images which I wanted to ‘peek’ through. I cut them out right up against the edge of the stamping. Next, I planned on their placing on the card and using coordinating dies, I die cut their shapes from the card base.
The party hat was bit tricky, but once I die cut the girl shape, I adhered my fussy cut party hat to girl’s head, place the image through the opening and using a piece of washi tape, I secured party hat die where it should go. Done!
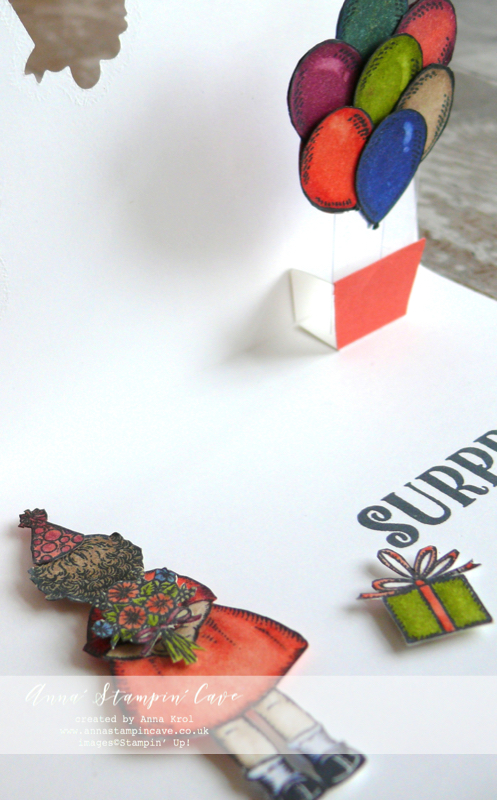
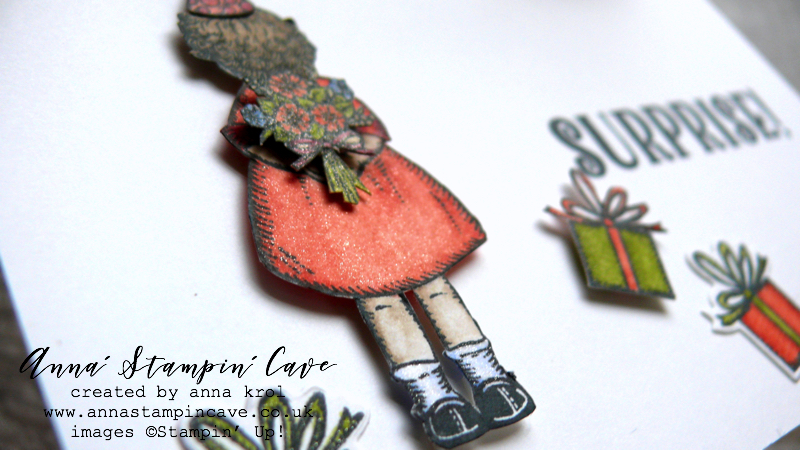
I adhered them through these openings, using dimensionals. Because these images are fussy cut, they fit snugly and don’t interfere with opening/closing the card. I also stamped, coloured and fussy cut the bouquet, And adhered it with dimensionals so it looks like my girl is carrying the flowers.
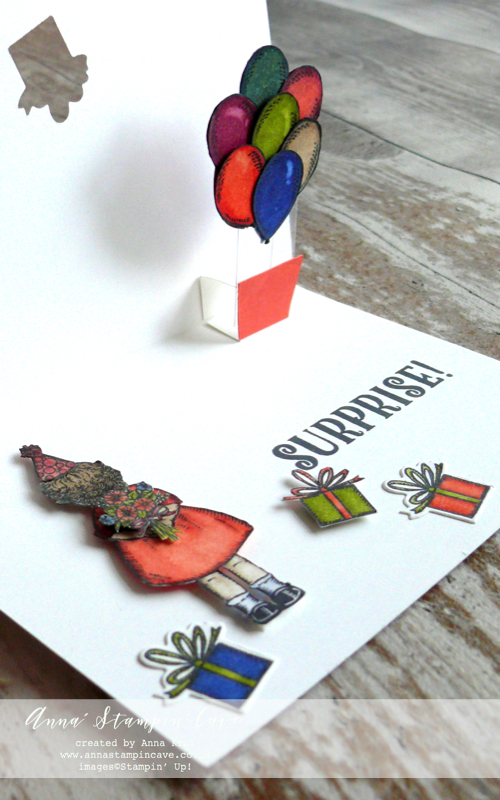
I stamped the second sentiment that says: ‘Surprise’ inside of the card. I also adhered two more pressie images inside of the card using snail adhesive.
I still wasn’t entirely happy with the card so I thought: Balloons!! I stamped 14 balloons from Birthday Delivery Stamp Set on a piece of Whisper White cardstock and coloured them in with Stampin’ Blends. Because I didn’t have many, I mixed some of the colours to create new shades. Also these I fussy cut.
I created a small pop up element on the inside of the card.
I’ve used few strips of acetate and adhered my balloons – back to back – on one end of these acetate strips. The second end I adhered to the pop-up element and I hide it with a piece of Calypso Coral cardstock.
Now to finish off my card.
Using dimensionals I popped up ‘Hip Hip Hooray’ flag on the front of my card. I also added Clear Wink of Stella to my images for a bit of shimmer.
I truly hope you like my card. I surely had fun putting it together for my grand niece. And if you would like to check Jennifer’s video just click HERE.
If you wish to purchase any of products I have used, simply click the images below to go directly to my online store and don’t forget to enter the hostess code RRMR76JH to receive a gift from me.
Thank you for stopping by and have a blessed day
Hostess Code for February: RRMR76JH – Use this code in the month of February and receive a gift from me.
Special Notes:1) Make sure you select Anna Krol as your demonstrator;
2) If you select “No Contact” box I do not have access to your name and can’t send you a gift;
3) If your order is £150 or more do not use the code and grab your own Stampin’ Rewards + gift from me Product List
Summary of the project which gives all the views of the card in one photo. I’d love if you pinned and called by on Pinterest xx
Don’t forget to check:
Spring Summer Catalogue Paper & Ribbon Shares. Shares are open to Austria, France, Germany, Netherlands & United Kingdom. 102 sheets of DSP & 2 yards of each type of ribbon from Spring/Summer Catalogue.Click here for more details —>
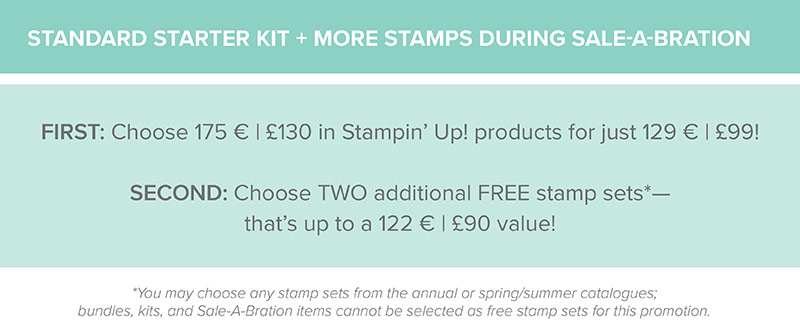
The New Stampin’ Up! Spring/Summer 2017 Catalogue and Sale-A-Bration are LIVE and it’s AMAZING! For every 60 €/£45, you spend either from Spring Summer Catalogue or Annual Catalogue, you will get to choose one FREE level 1 product from SAB brochure! If you spend 120 €/£90, you get one FREE level 2 product, OR, you can choose two level 1 items. If you spend 180 €/£135, you have the option to choose three level 1 items or one level 1 item and one level 2 item. Click here for more details —>
Ever wondered what it’s like to join Stampin’ Up!’s community? I may have few answers for you. Click here for more details –>
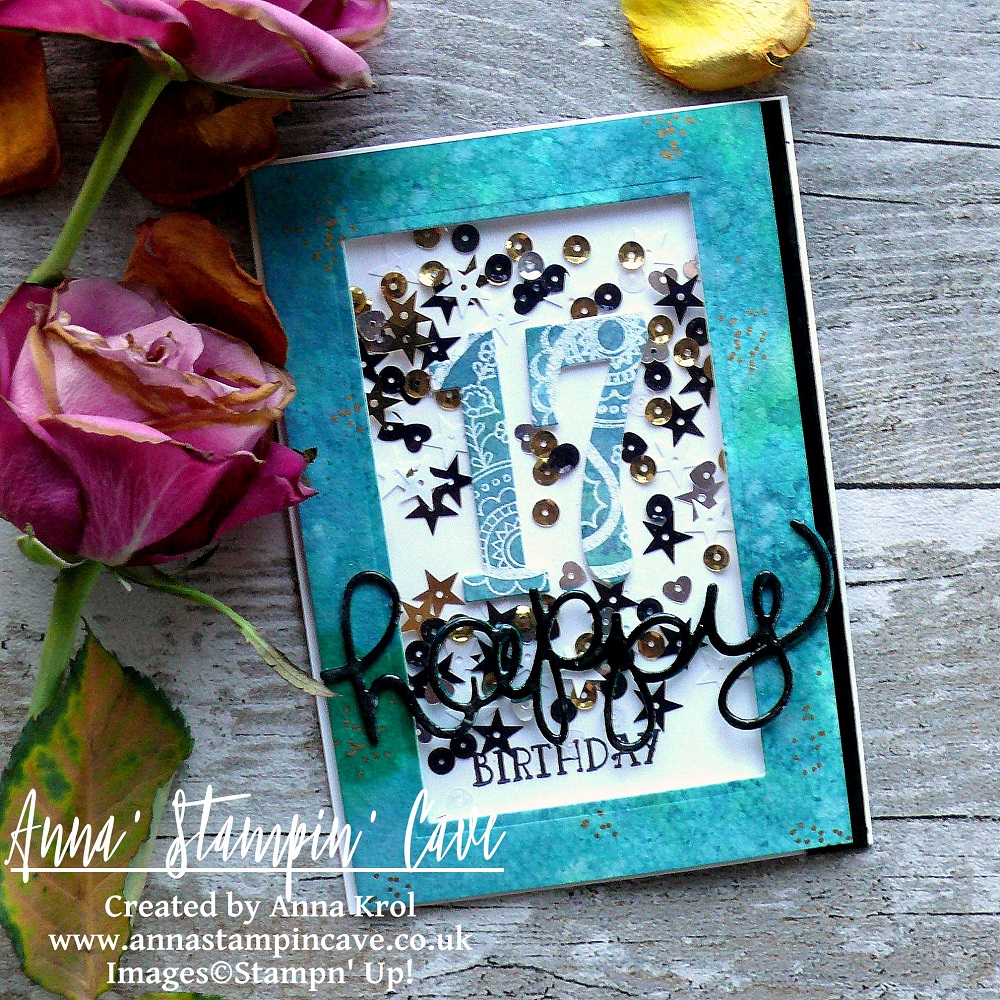
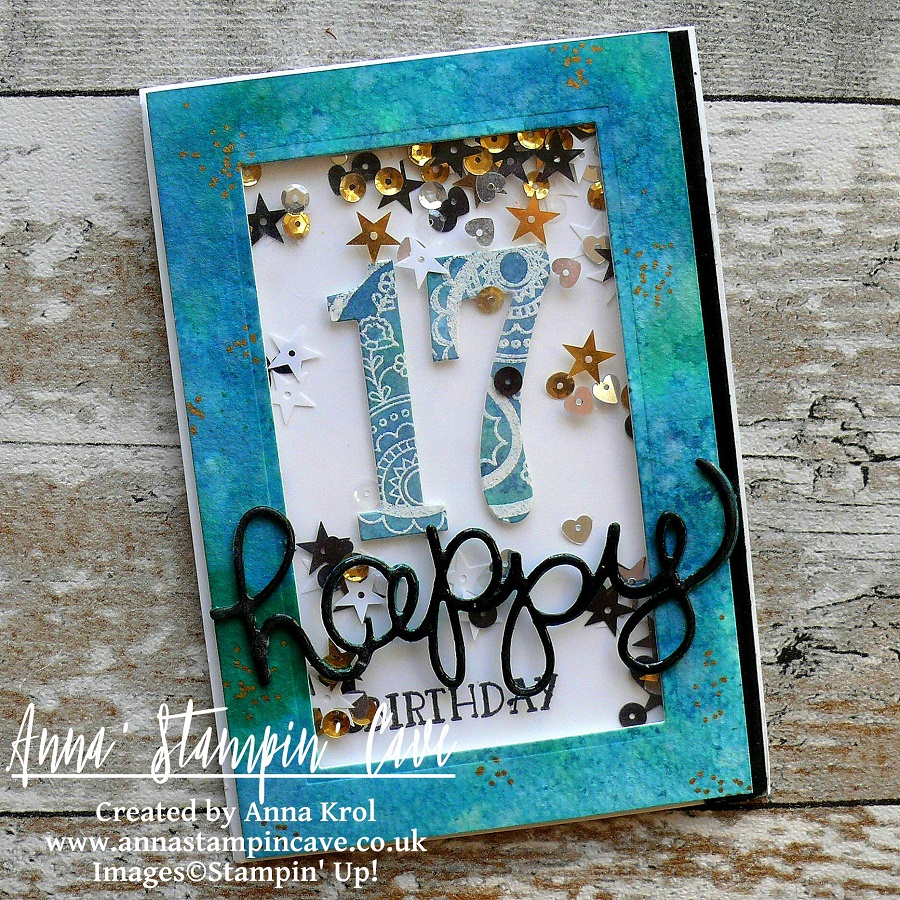
Hello and welcome! Today I want to share with you a card I’ve made for our daughter’s 17th birthday. I don’t know where the time has gone but I could swear she was just 7 not that long ago.
She’s not a girly-girl ( happy mamma here lol). She’s studying fine art in Sixth Form and she loves mixed media. So I had to come up with something little more ‘sophisticated’ than flowers and butterflies if you know what I mean 😉
This year I decided to make a shaker card in beautiful teal shades. [You can see her last year’s birthday card here]
Shake It In Teals Card dimensions:
Thick Whisper White cardstock: 11-6/8″ x 4-1/8″ scored in half at 5-7/8″ (29.7 x 10.5 cm scored in half at 14.8 cm)
Watercolour Paper: 5-6/8″ x 3-7/8″ (14.5 cm x 9.7 cm)
Basic Black cardstock: 1/2″ x 5-6/8″ (14.5 cm x 1.2 cm)
for die-cutting word happy pieces of Basic Black, Island Indigo and Emerald Envy
It’s very simple, a straightforward card so I won’t include a whole step by step instructions, just some hints, and tips.
Frame: To create a teal-like shade for the watercolour panel I’ve mixed Island Indigo ink with Emerald Envy ink in a watercolour wash. When the panel was dry I die cut a rectangle from the middle of the panel, creating a frame.
Numbers: I didn’t want the number to look flat and boring, so I took that watercoloured rectangle, stamped two paisley images in Versamark in the middle, heat embossed them in white and die cut numbers 1 and 7 from that piece.
‘Happy’: I die cut it three times: one from Basic Black cardstock, 2nd from Island Indigo and 3rd from Emerald Envy and adhered them together. To add shine to it I cover my word in Versamark and heat embossed in clear. I did the same with the Basic Black strip.
Before I put my shaker card together I adhered few sequins to the base of my card so not all sequins fall down when the card is standing on the shelf. For the final touch, I added some random gold dots to the frame with my gold Sharpie.
There’re few things that didn’t come out as I hoped for, but with my numb hands, I think that overall the card looks nice. The most important is the fact that our girl loved it, so YAY!
If you wish to purchase any of products I have used, simply click the images below to go directly to my online store and don’t forget to enter the hostess code for the month of March G3JKVASG to receive a gift from me.
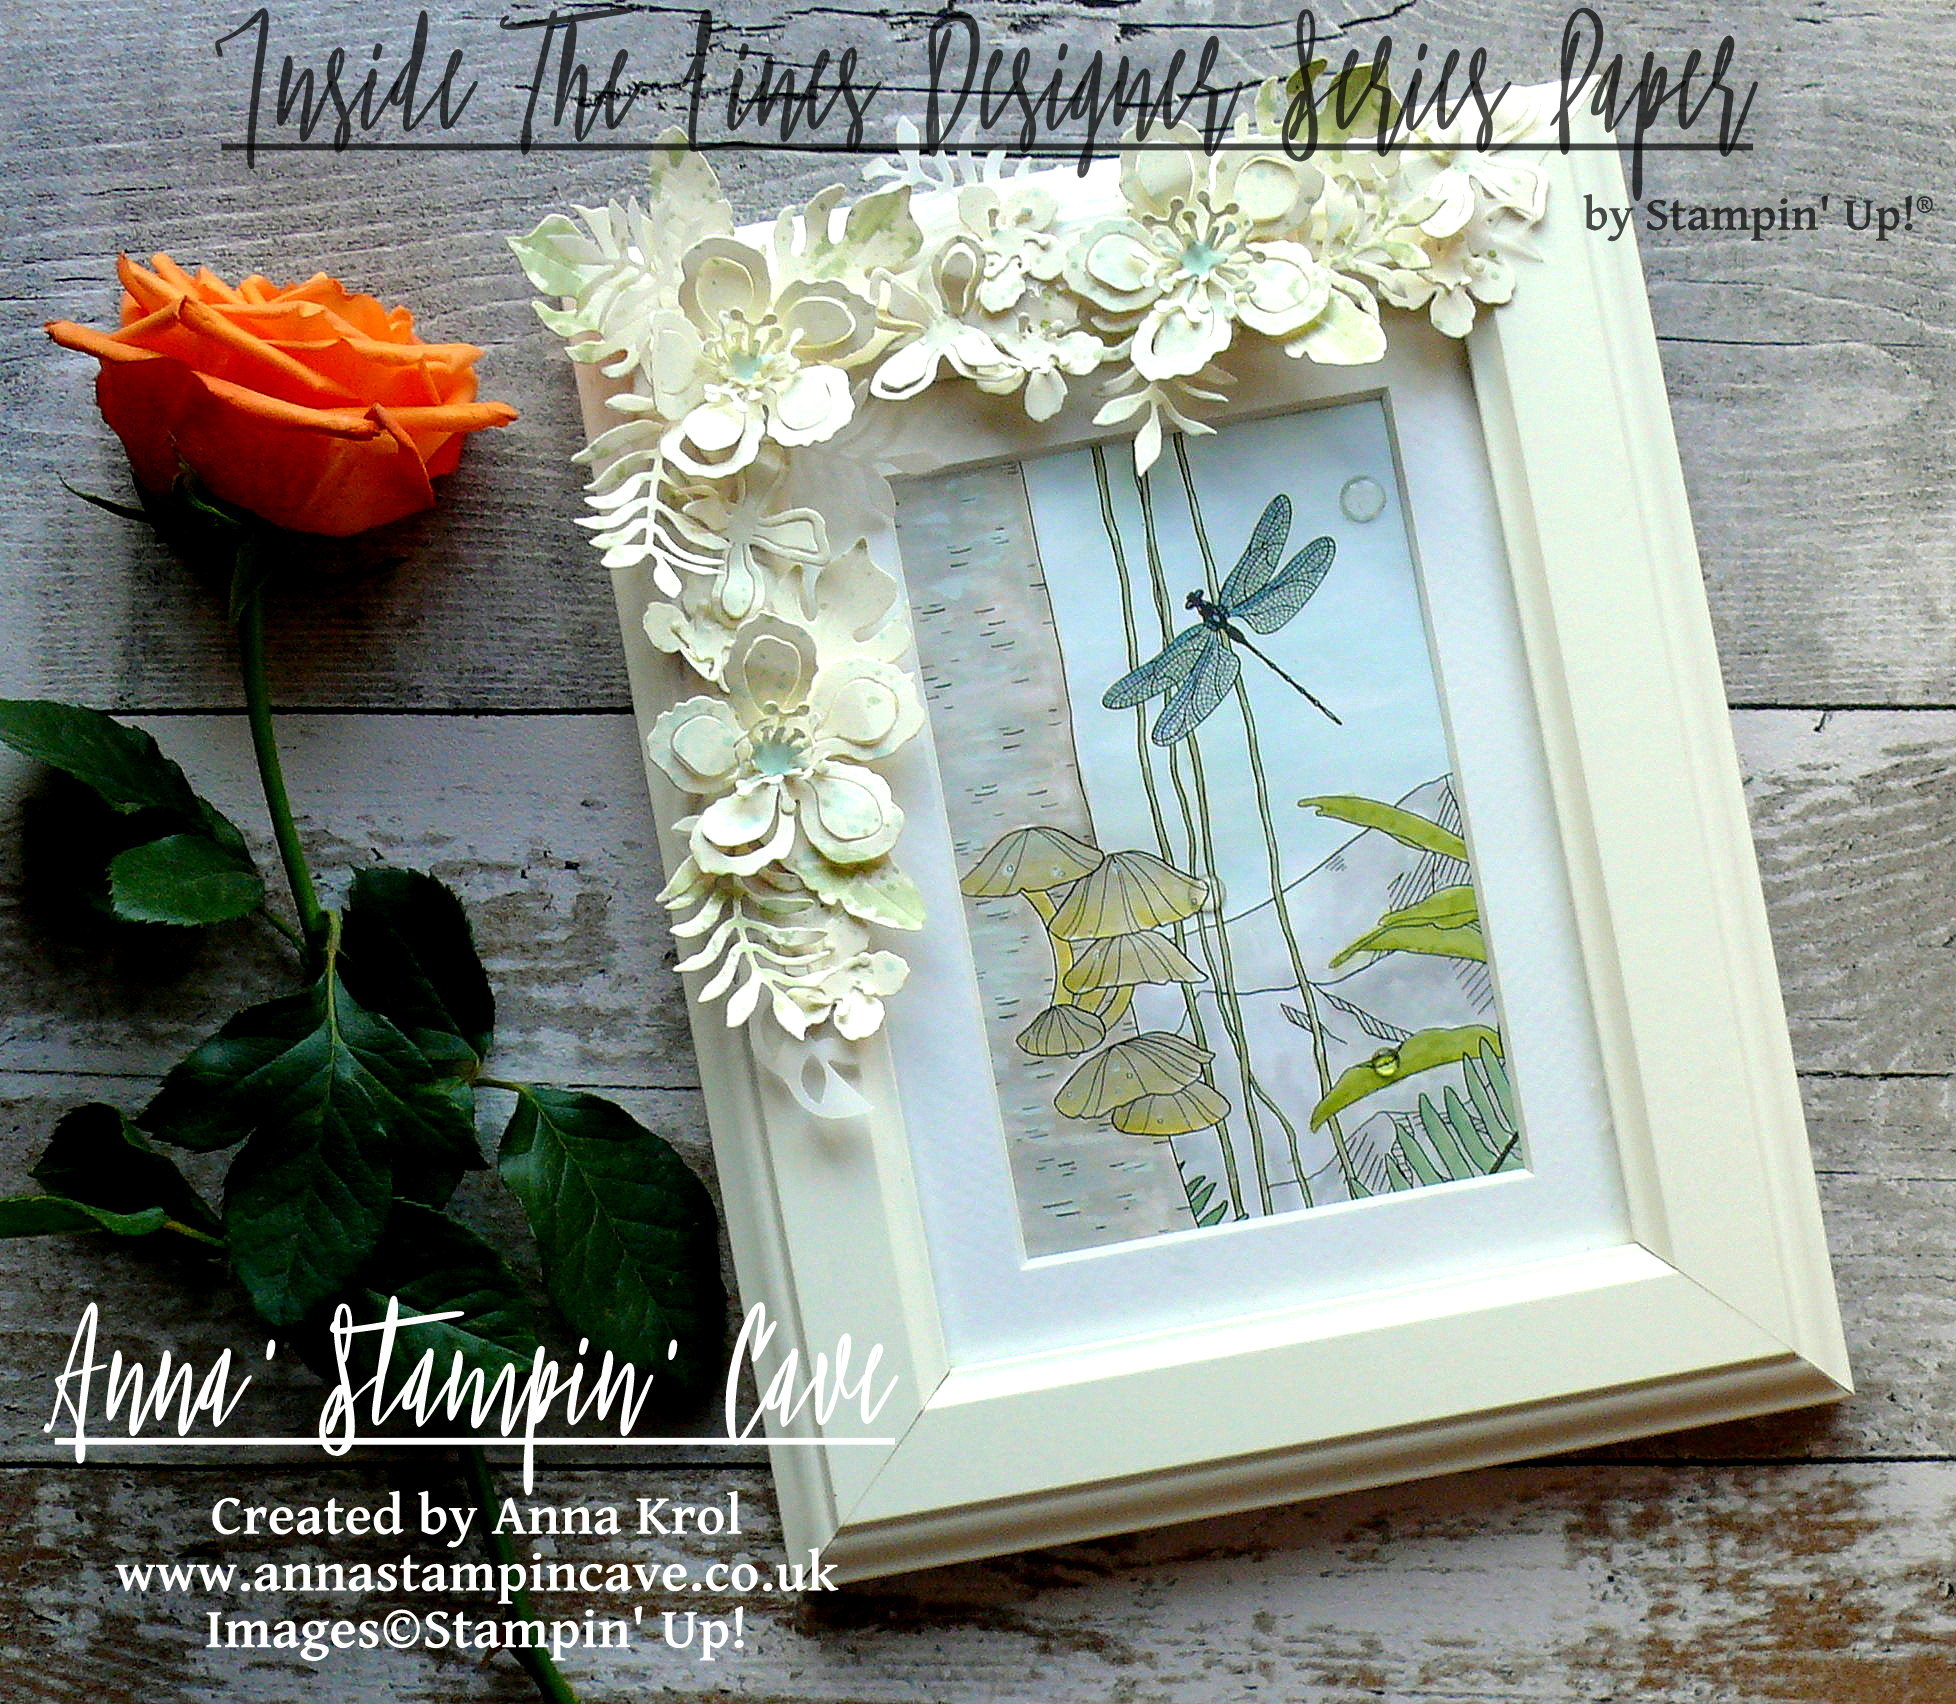
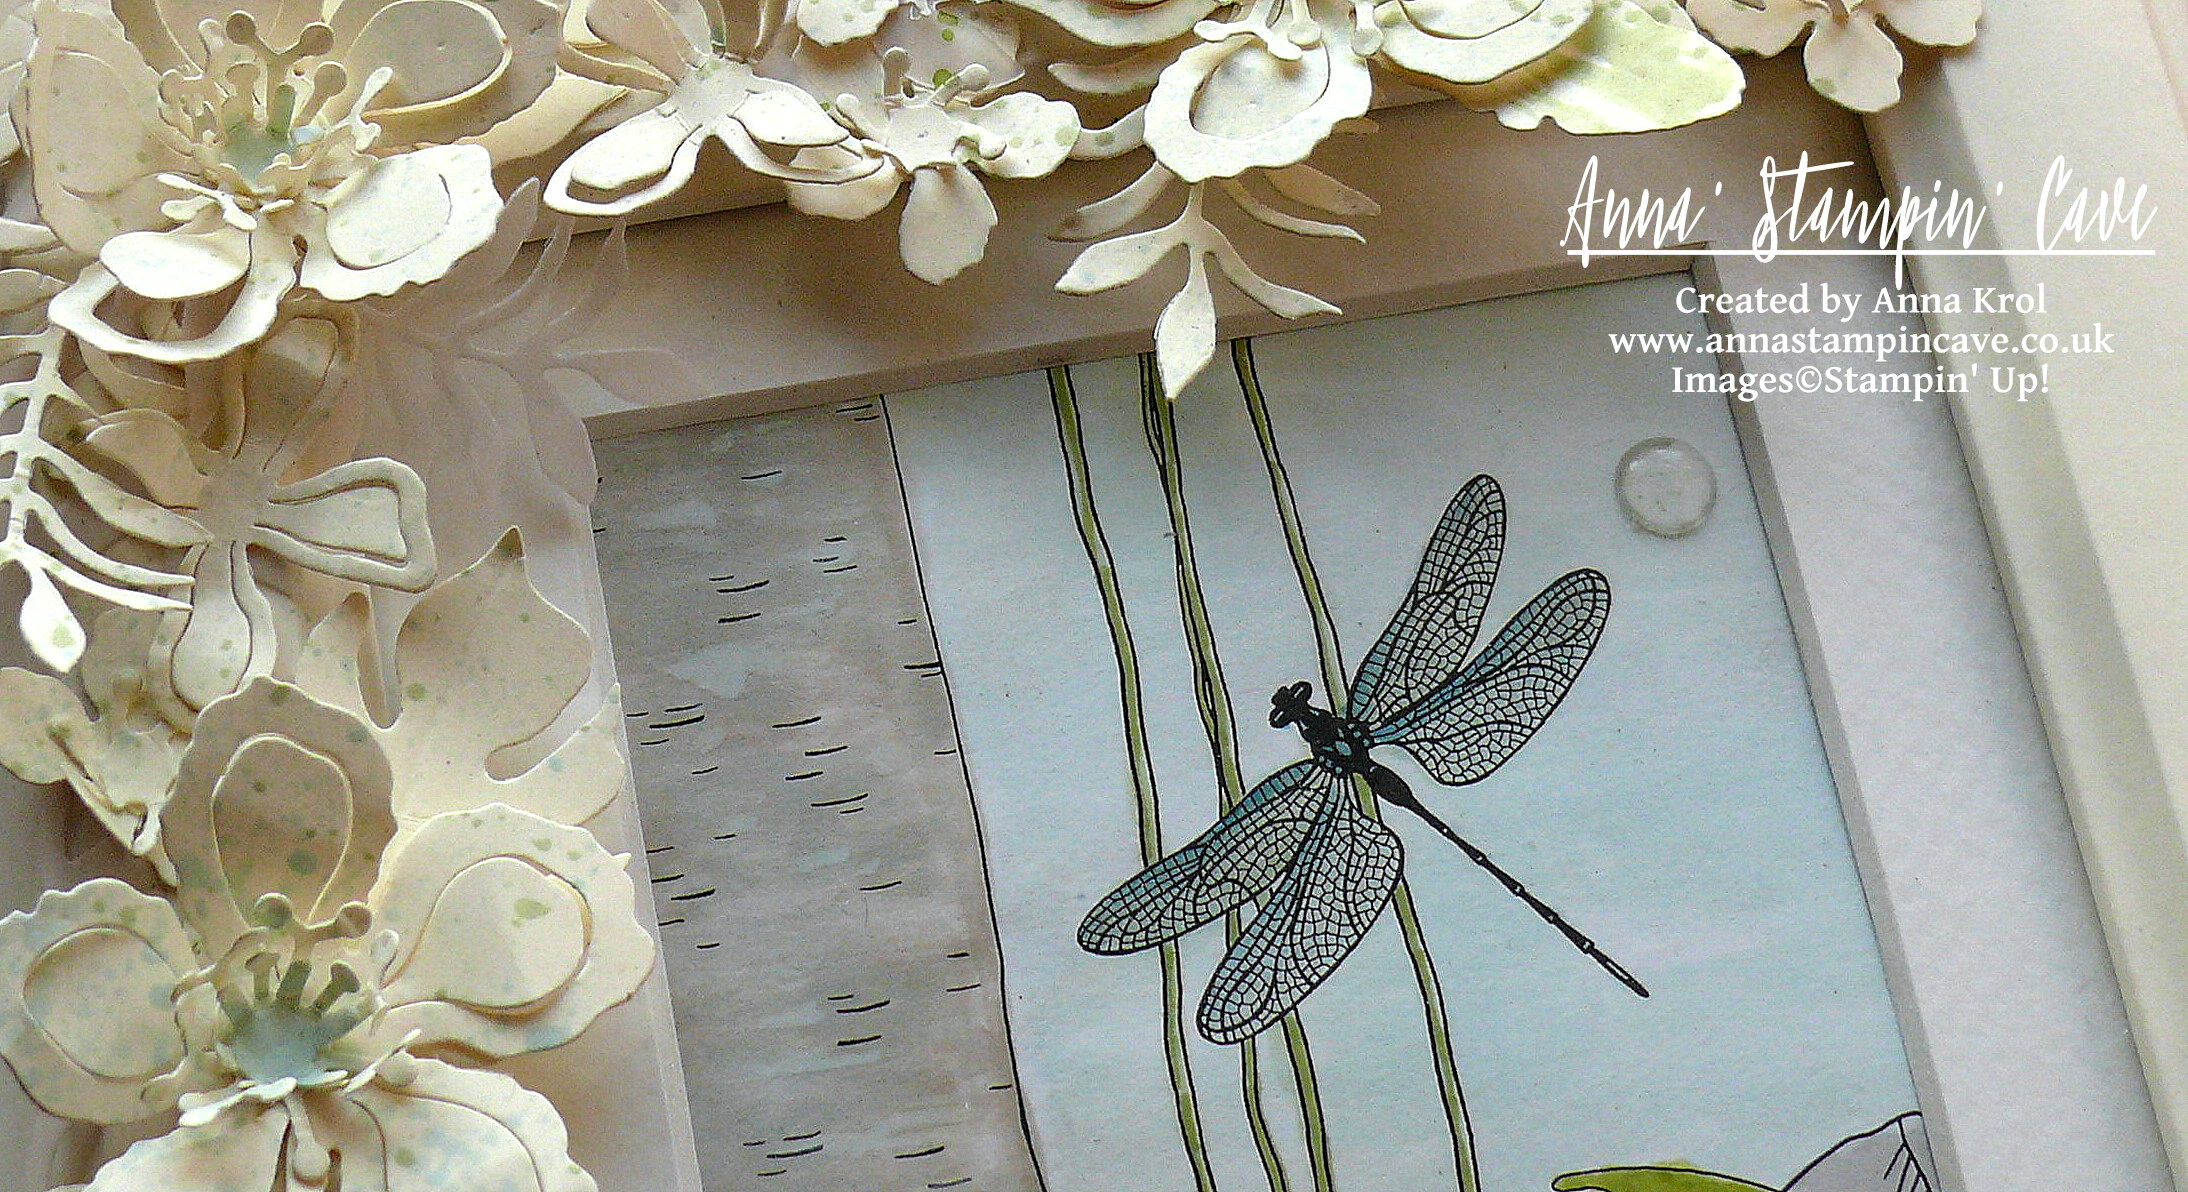
Anna’ Stampin’ Cave – Inside The Lines Altered Photo Frame
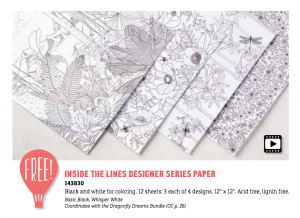
In my project today I decided to create altered photo frame with beautiful, Inside The Lines Designer Series Paper. With an ever-growing trend in adult colouring books, this paper is just spot on.
I don’t know about you, but I love these bold botanical designs. They coordinate with Dragonfly Dreams Stamp Set & Dies, but you can use them on their own too. Colour them in with markers, inks or watercolour pencils – it’s fun and very therapeutic…or leave them black&white. Whatever tickles your fancy.
The frame is from Ikea and is called Virserum. It measures 7-1/2 x 9-1/2″ (19 x 24 cm) and comes with inside mount, hence I only needed 4″x 6″ (10 x 15 cm) piece of DSP to fit inside.
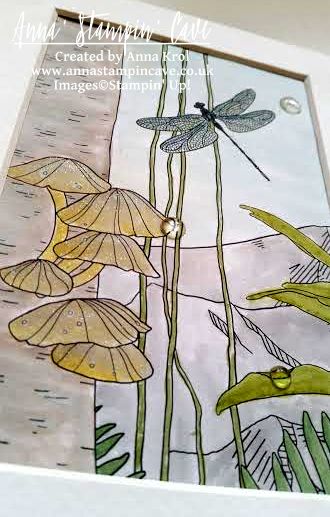
I’ve chosen this lovely, jungle-like design and cut it into 4″x 6″ rectangle. Because I was aiming for a subtle look I decided to watercolour my piece.
Bear in mind this is not watercolour paper so you can’t add too much water to it.
For the foliage, because it’s such a small area, I’ve used Stampin’ markers: Pear Pizzazz, Wild Wasabi, Old Olive, Garden Green and Always Artichoke. First, I scribbled my markers on a craft mat. I also spritz some water on my craft mat, next to the markers. I did it deliberately, to have more control of how much water I use. Next, I took dry aqua painter, picked up some water with its brush, next picked up some colour from the mat and started colouring my foliage. I was adding more colour and more water to the mat when needed. There are 4-5 layers of colour on leaves, each layer added when the first one was dry.
To colour in the rest of the image, I’ve used ink pads as my palettes.
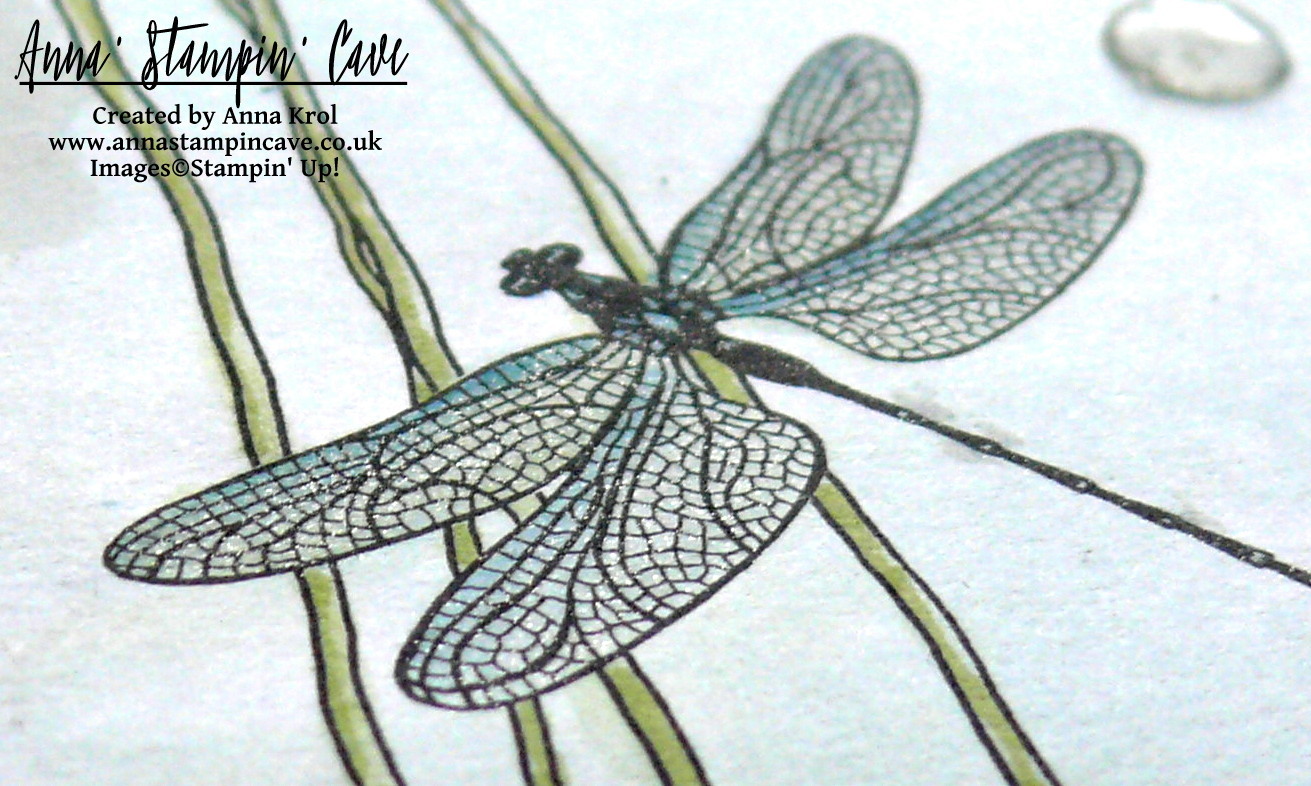
I’ve used Soft Sky for sky and dragonfly (with a little dab of Island Indigo marker). Mountains are coloured with Smoky Slate.
For the tree trunk, I’ve used Tip Top Taupe ink pad. To add some highlights I’ve used Whisper White Craft Ink (yes, I’ve used it with aqua painter too).
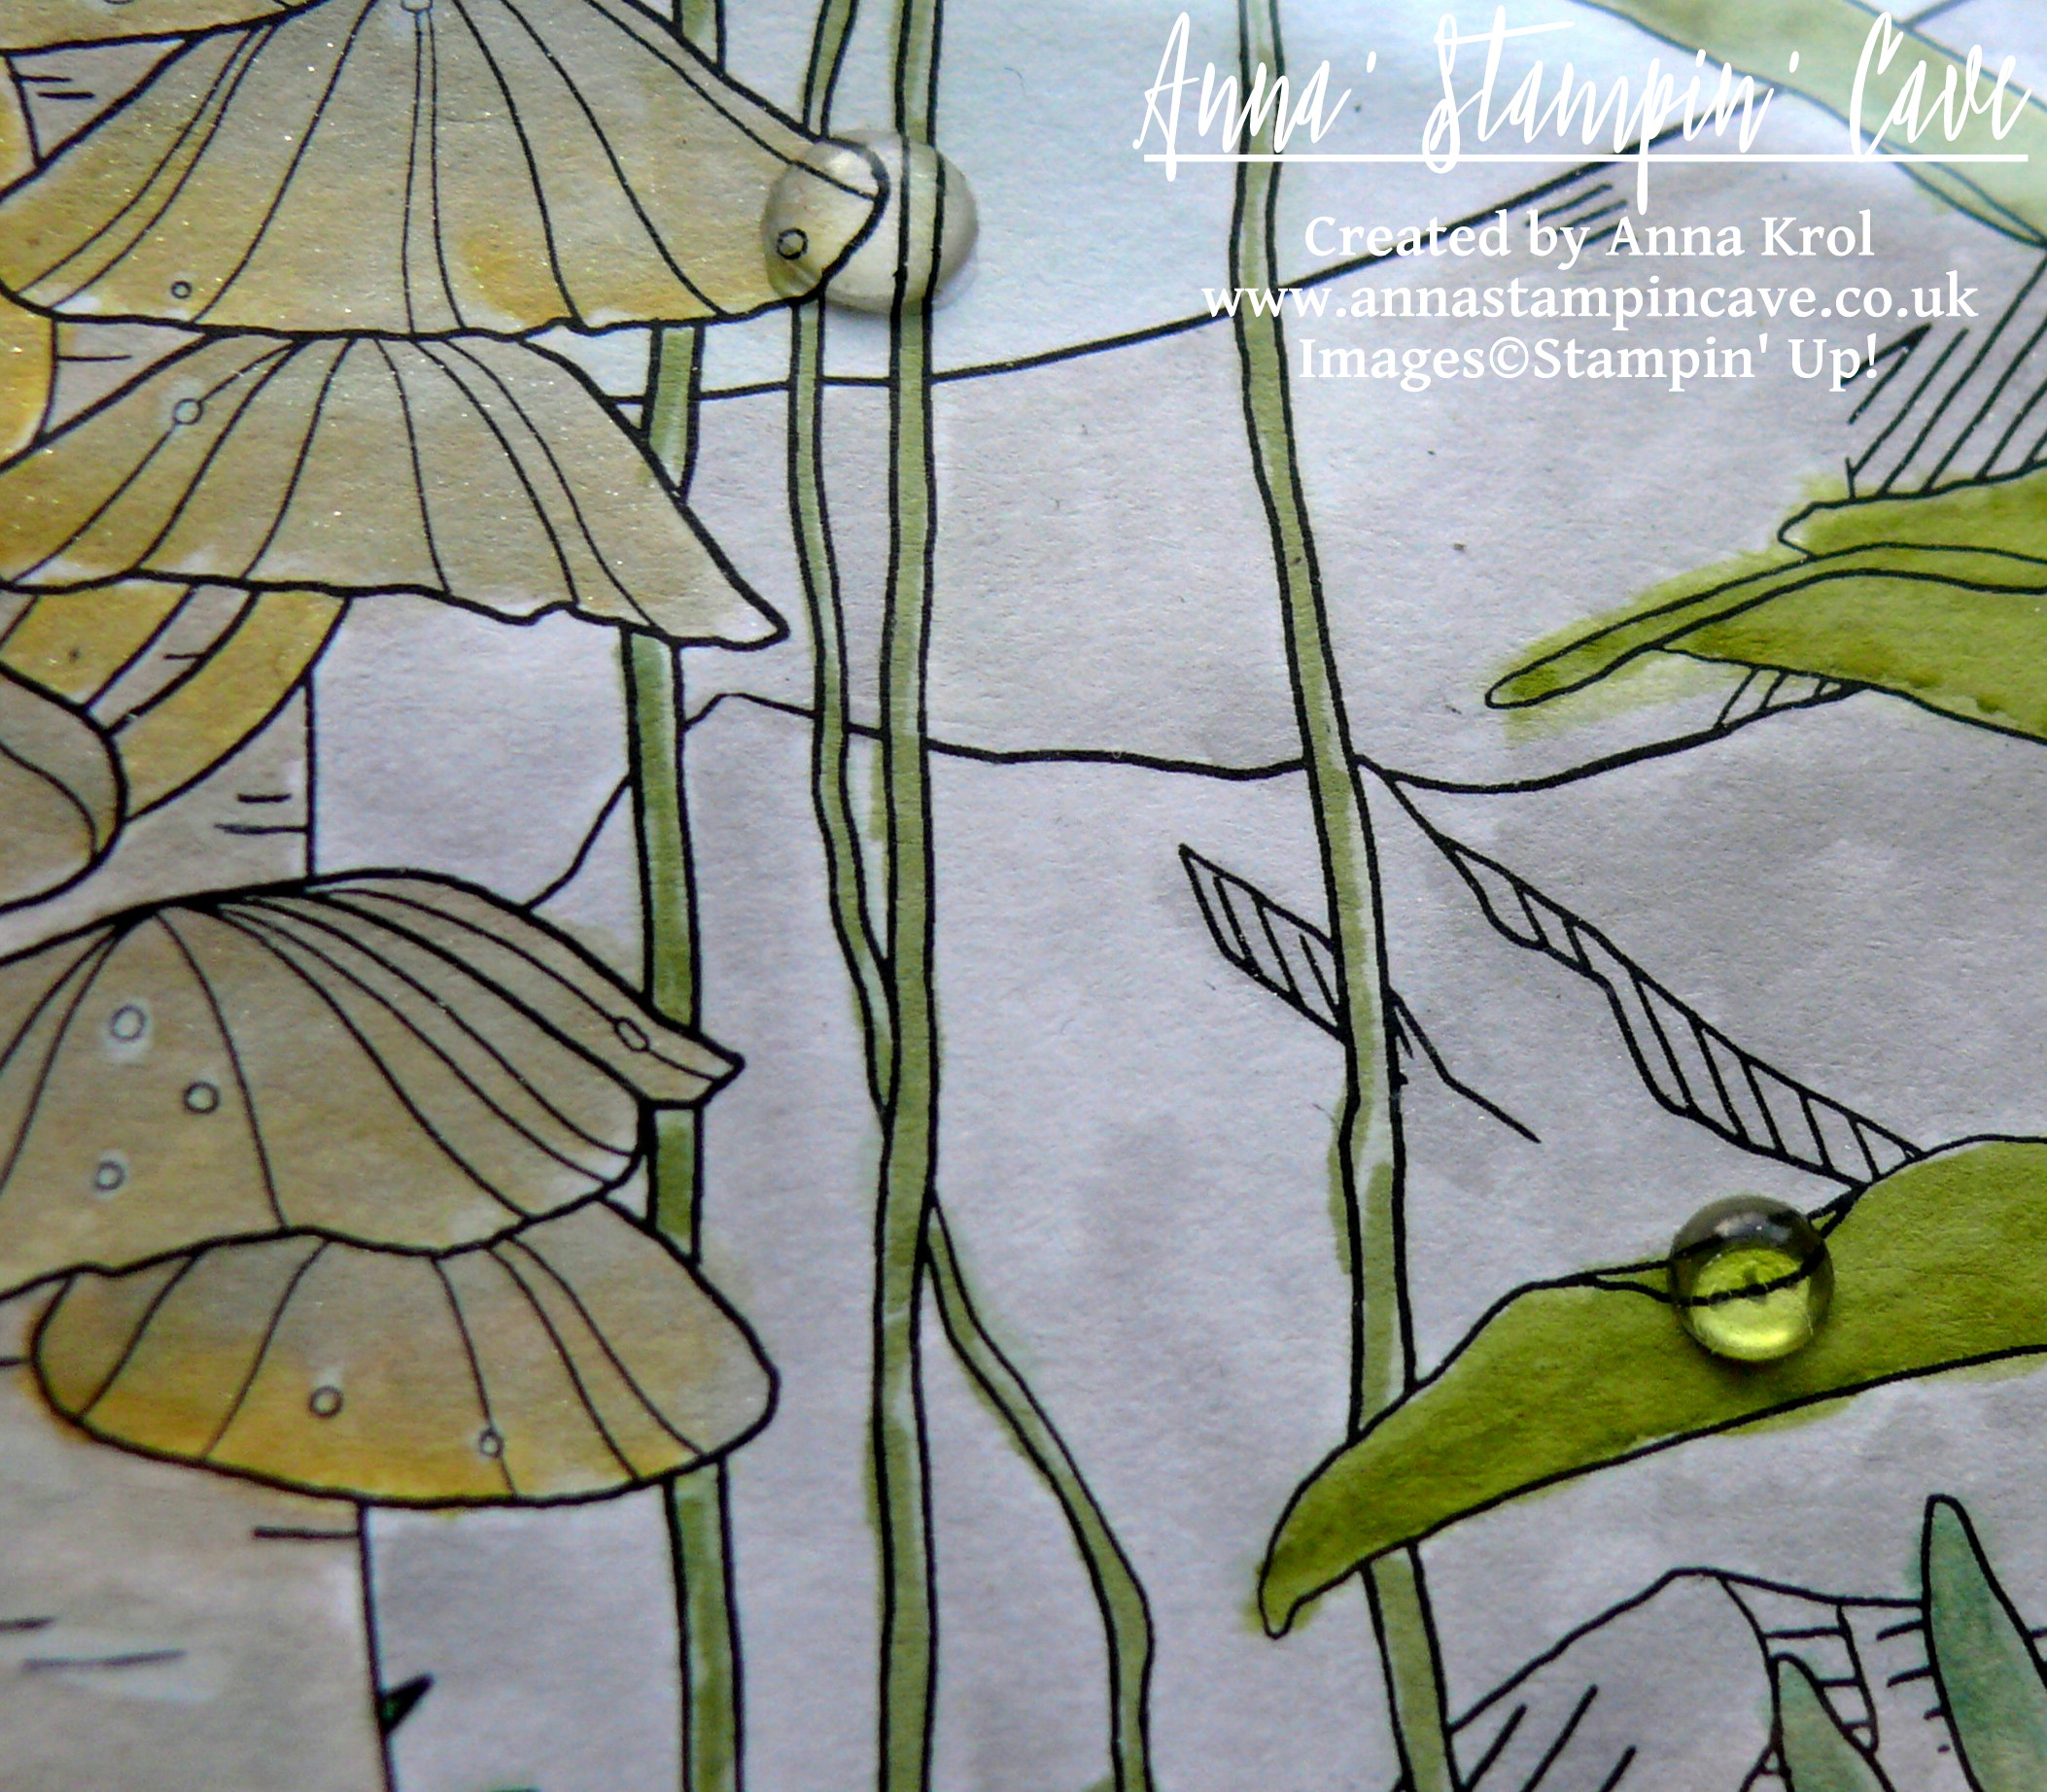
Polypores or conks (I’m not sure how they are called in the UK so forgive me if I’m wrong) are watercoloured with a mix of Sahara Sand, Crushed Curry and again some white craft ink for highlights.
For the final touch, I’ve added White Perfect Accents as dew drops (one on the sky is hiding a little boo-boo). And as a must, I had to add some shimmer with clear of Wink of Stella to the dragonfly, mountain tops, and polypores. Sadly it’s really hard to capture this lovely shimmer on photos. But now to the frame.
Believe it or not, this is my first ever altered photo frame. I knew I want flowers, but for a long time, I couldn’t decide on a colour. First, I wanted to go with quite a feminine look, so pinks and oranges. But once I had all my flowers ready I didn’t really like it. Typical haha. But no worries, I will use them to something else. And then I had this revelation: how about Very Vanilla?! Genius!
I die-cut oodles of flowers and leaves from Very Vanilla and Vellum cardstock. Arranged them around the frame and once I was happy with the placing, I adhered them with glue dots.
But as you may know me already, nothing can be too easy haha And when I looked at my frame something was missing, in my humble opinion. Oh right, it was too ‘clean’, too ‘white’. I needed some ‘controlled mess’.
I pressed Pear Pizzazz and Soft Sky ink pads next to each other on the craft mat and spritz it with water. I covered the glass with a piece of paper, and using a clean brush I added random and less random splatters to the flowers and leaves. And I have to say I love it now! And I hope you like my little project too.
I also want to add this project to the #071 Theme Challenge over at Global Design Project Challenge Blog. This weeks theme is ‘3D Or Off The Page’
As always, if you wish to purchase any of products I have used, simply click the images below to go directly to my online store.


 My exclusive special offer this month only:


 Designer Series Paper")


 Earn in August – redeem in September –>
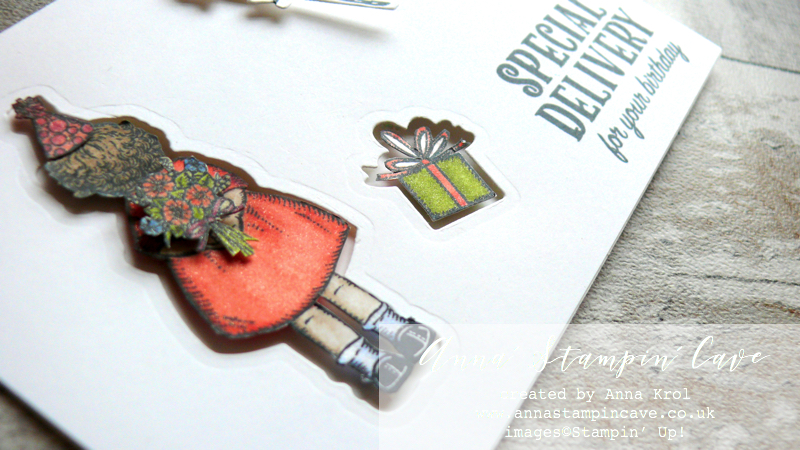
 I adhered them through these openings, using dimensionals. Because these images are fussy cut, they fit snugly and don’t interfere with opening/closing the card. I also stamped, coloured and fussy cut the bouquet, And adhered it with dimensionals so it looks like my girl is carrying the flowers.