Simply Sketched Saturday Challenge #15 – Follow Your Dreams

Anna’ Stampin’ Cave – Simply Sketched Saturday Challenge #15 – Follow Your Dreams

SSSC Header

Thank you for joining us for another Simply Sketched Saturday Challenge!  We are so excited to be sharing this hop with you. The products used are all available in the current Annual, or seasonal, Stampin’ Up!®  Catalogues*. Simply use the buttons at the bottom of the post to keep hopping!

Welcome to our 15th sketch challenge blog hop! This month it was me who had a pleasure to create a sketch we are gonna work with. Here it is:

sssc-15

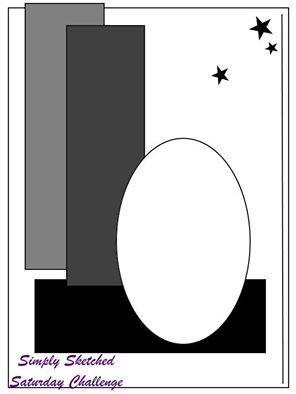
When creating this sketch, I won’t be lying, I had our new Stitched Shapes Framelits Dies in mind. And however I don’t have these dies yet myself, I hope to see them used a lot through this blog hop.

I know that in the ‘age’ of everything ‘clean and simple‘ and ‘less is more‘ in crafting world, layered, ‘busy’ and distressed cards are kinda faux pas. But I can’t help I love them the most! I love all the organic, (sometimes messy) creative process of designing a card.

stampin-up-follow-your-dreams

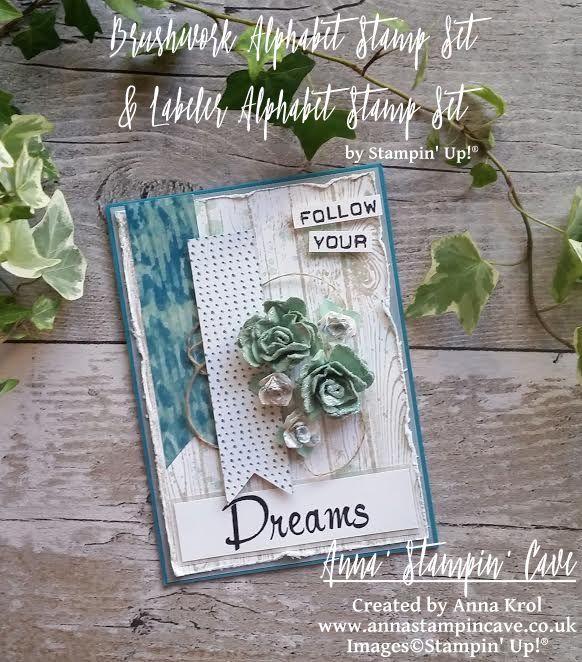
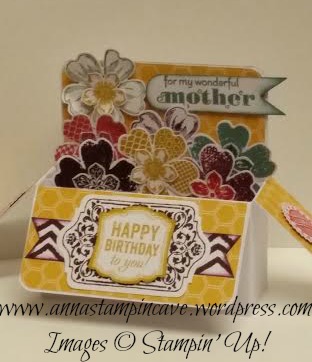
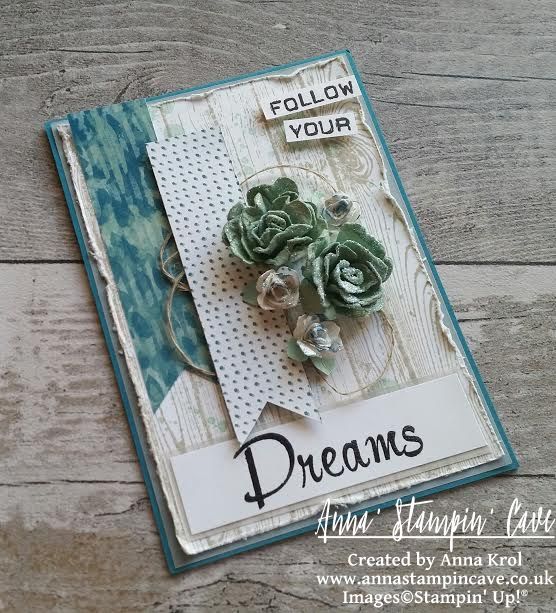
For my card base, I’ve used Island Indigo cardstock (standard top folding A6 size). The first layer is Vellum that measures 4”x 5-5/8” and next one is Whisper White 3-7/8”x 5-1/2” panel which I stamped using Hardwood background stamp in Sahara Sand. But because it felt rather ‘boring’ I also added few ‘splotches’ from Gorgeous Grunge stamp set in Mint Macaron, stamping them off a couple of times. I distressed the edges of my panel using regular scissors.

I also created a similar panel for the inside of the card, but this time I also stamped off the Hardwood image few times, so it wasn’t as crisp as the one on the card front.

follow-your-dreams

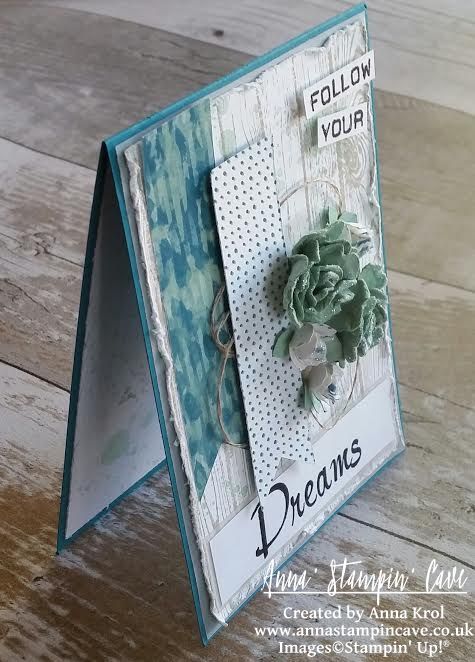
I took two pieces of Blooms & Bliss DSP, which measure 4”x 1” each, and cut them into banners. One of the banners I adhered flat down using a fast fuse and a second one I pop with dimensionals with few lengths of Linen Thread underneath.

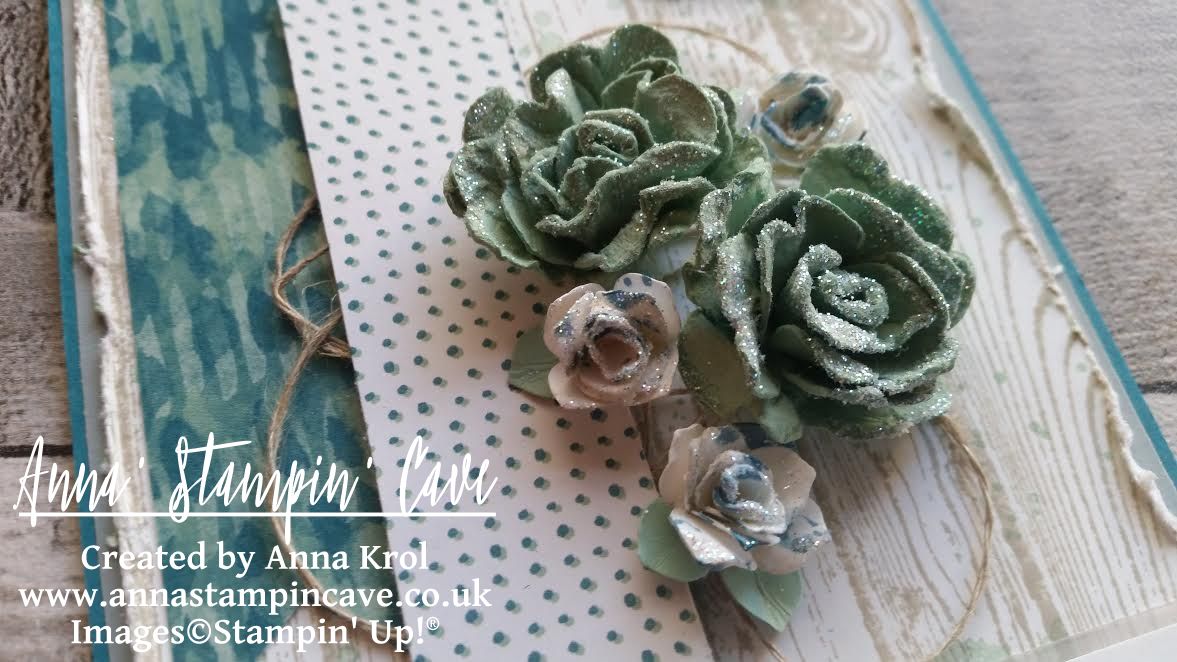
To create large roses I punched six flowers using Pansy punch from Mint Macaron cardstock (three flowers create one rose). For white tiny roses, I punched nine flowers using Petite Petals punch (again three flowers create one rose). I also punched one petite petals flower from Mint Macaron cardstock to create tiny leaves: I cut the shape apart so I end up with two double ‘leaves’ and one single ‘leaf’. White roses appeared bit ‘blunt’ so I decided to add some interest to them: using Island Indigo ink and a small paint brush I added some ‘speckles’ to them.

I also decided to add some sparkle to my flowers. I dipped the edges of petals first in watered-down Multipurpose Liquid Glue and next in Dazzling Diamonds glitter, and let it dry. Once they were ready I adhered them to the card with glue dots.

stampin-up-follow-your-dreams-handmade-roses

For the sentiment, I decided to use this awesome quote you probably have seen many times on the net: “Follow your dreams”. We might don’t have a stamp set with this sentiment, but this is where our amazing various alphabet sets come in handy.

Using Labeler Alphabet stamp set and Basic Black Archival ink pad, I stamped “follow your” on a 2/8” wide strip of Whisper White cardstock and cut it apart. Next, using Brushwork Alphabet stamp set and Basic Black Archival ink pad again, I stamped “Dreams” on a Whisper White panel that measures 7/8”x 3-1/2”, and heat embossed it with clear embossing powder for extra oomph. I pop ‘narrow’ part of the sentiment with dimensionals. For a wider piece, I created a vellum mat that measures 3-5/8”x 1”, and adhered them to the card front with a fast fuse.

anna-stampn-cave-stampin-up-follow-your-dreams

Do you like my project?! If so, please leave me a comment. I would love to hear from you!

Now, be sure to hop along and see more inspiring projects. Your next stop is Jillian’s blog  go and see what she has made for you.

Thank you for stopping by and have a blessed day,

SSSC Previous   SSSC Next Blog

Simply Sketched Saturday Challenge Blog Hop #5 – Valentine’s Day Gift Box

SSSC Header

Thank you for joining us for another Simply Sketched Saturday Challenge!  We’re so excited to be sharing this hop with you. The products used are all available in the current Annual, or seasonal, Stampin’ Up!®  Catalogues*. Simply use the buttons at the bottom of the post to keep hopping!

Wow! It’s been long since we’ve played with our challenge last time. Did you missed us?! But we’re back with a new sketch and lots of fabby projects to bring you endless ideas and inspirations. So welcome to our 5th sketch challenge! And today’s sketch has been created for us by lovely Cat.

January 16

I love this sketch! And the moment I saw it I had this idea popped into my head. It’s a little bit out of my comfort zone because I don’t do boxes usually. But I was just dying to make my idea into a project. So here it is:

Isn’t it cute?! This box measures 4 x 3″ and make perfect “home” for Raffaello chocolates

To create my box I took 2 pieces of whisper white that measured: for the lid 7 x 6″ (I trimmed it later slightly) and for the base 6-7/8 x 5-7/8″. I stamped the top piece randomly using a Real Red ink pad and flowery stamps from Bloomin’ Love stamp set. When it was done I scored both pieces at 1-1/2″ on each side. After I assembled the base I’ve decided I want my lid to be slightly shorter than the base so I trimmed it 1/2″ on each side.

stamping on tissue paper

I also stamped same design on a piece of white tissue paper, to put it inside of my box. As for the sentiment, I’ve stamped it in Real Red again and fussy cut it. But because it would disappear in a “busy” background I die cut a circle from Dazzling Diamonds Glimmer Paper. I attached it to my box with Tombow adhesive and added my sentiment on top using dimensionals.

Valentines Day favour box 2

Taa-daah! The box is done! And it’s perfect little box for delicious chocolates. Or maybe for a piece of jewellery? What do you think?

I hope you enjoyed my little project today. I would love hearing from you.

Now, be sure to hop along and see more inspiring projects. Your next stop is lovely Karen  go and see what she has made using our cute sketch. Thank you for stopping by and have a blessed day!

SSSC Previous   SSSC Next Blog

The Rectangle Card in the Box using Stampin’ Up! goodies!

Hello hello hello! Today I want to share with you really lovely card in the box. But this one is slightly different than those you’ve probably seen already as it’s in the shape of a rectangle.

dla neila 1

For the base, you need a piece of cardstock which measures 11-1/2 x 4-1/8 inches ( half of A4). I’ve used Whisper White. Score the base at 3-7/8, 5-1/2, 9-3/8 & 11″ on the long side. Then score at 2-1/8 on a short side. You will also need two extra pieces of cardstock for the inserts. Each piece should measure 4-7/8 x 3/4″ and need to be scored at 1/2″ on each side. If I find a time I will add a template to make it easier to follow.

dla neila 3

To decorate the box I’ve used beautiful paper from Moonlight DSP Paper Stack. It’s gorgeous design in new in-colour Hello Honey. For the flowers, I’ve used Petite Petals and Flower Shop stamp sets with coordinating punches. The colours I’ve chosen Blackberry Bliss, Hello Honey, Lost Lagoon and Strawberry Slush.

dla neila 2

The main sentiment is from Label Love – stamped in Hello Honey and punched with Artisan Label Punch. As the backing for the sentiment, I’ve used Chalk Talk stamp set and framelits, and banner stamped with chevron design from Work Of Art. Both stamped in Blackberry Bliss. On the sides, you can see tiny “celebrate” circles from Starburst Sayings in Strawberry Slush. The other sentiment: “for my wonderful mother” comes from one of our retired stamp sets: Delightful Dozen. Truly hope you like this project.

Thank you for stopping by,

Wise Owl Chocolate Wallet for Your Favourite Teacher

Have you ever wondering what to give to your child’s teachers, assistants, head teacher etc at the end of school year and don’t ruin your budget?! Here’s my idea: Super cute wallet/holder for chocolate bar. It’s a card and a treat all in one. Quite easy to make and perfect as a thank you gift: because chocolate bar don’t have to be boring! And because my project is a thank you gift for a teacher hence the Wise Owl 🙂

For the base I’ve used a piece of  cardstock that measures 7 1/8″ x 7 3/8″ and scored it ( on shorter side) at 3 3/8″ and 3 6/8″. Then I assembled the ribbon before decorate it with DSP.

wallet3

For the pocket which holds chocolate I’ve used a piece of cardstock that measures 4 5/8″ x 4 1/2″ and scored it (on wider side) at 3/8″, 6/8″, 3 7/8″ and 4 2/8″. Then turnon the shorter side and score it at 3/8″ and 6/8″. The sentiment on the pocket I’ve found and printed from internet. Loved this chalky handwriting 🙂

wallet5

The second pocket if flat and can hold gift cards, but I’ve used it as a tag holder. The base for this pocket measures 3 1/8″ x 4 3/8″. Tag measures 2″ x 6″ and you can either decorate it or write your message on.

wallet2

To add some detail to both pockets I’ve used Retired Scallop Trim Border Punch. But it’s still available in digital. I will post details in the list below. I’ve also punched a single flower in DSP to add some interest.

wallet6

I truly hope you enjoy this project, and that it will inspire your creativity 🙂

Thank you for stopping by