Roses and Dragonfly Thank You For A Smile Card for GDP#075

Anna’ Stampin’ Cave – Roses and Dragonfly Thank You For A Smile Card for GDP#075

gdp075

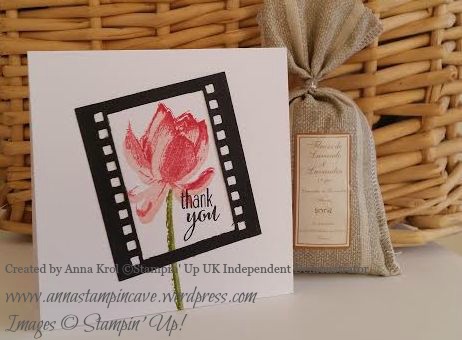
Hello and welcome everyone! Today I’ve got for you a card I created for this week’s Global Design Project theme challenge: Winged Creatures. I’m bit late to the party but thankfully not too late.

I’m a big fan of detailed die-cutting and had this idea bouncing around in my head for a while now, just never had enough time to try it.

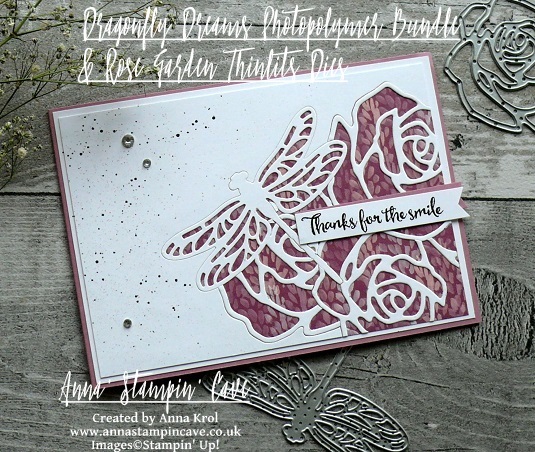
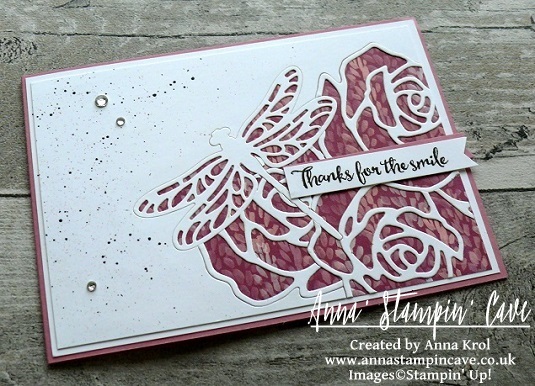
In this card, I’ve incorporated two die-cutting techniques – inlaid die-cutting and partial die-cutting – using a couple of detailed die sets: Rose Garden Thinlits Dies and Detailed Dragonfly Thinlits Dies.

anna-stampin-cave-stampin-up-dragonfly-dreams-bundle-and-rose-garden-thinlits-dies-inlaid-partial-die-cutting-technique

Roses and Dragonfly Thank You For A Smile Card dimensions:

  • Sweet Sugarplum cardstock: 11-6/8″ x 4-1/8″ scored in half at 5-7/8″ (29.7 x 10.5 cm scored in half at 14.8 cm)
  • Whisper White cardstock cut into two panels: bottom one measure 5-6/8″ x 4″ (14,5 x 10,2 cm) and top one 5-1/2″ x 3-7/8″ (14 cm x 9,8 cm)
  • Blooms & Bliss Designer Series Paper: 5-1/2″ x 3-7/8″ (14 cm x 9,8 cm)

anna-stampin-cave-stampin-up-dragonfly-dreams-bundle-rose-garden-thinlits-dies-inlaid-partial-die-cutting-technique

To create my card I started with die-cutting.

I wanted this small dragonfly to be in the foreground of my die-cut panel so  I run it through my Big Shot first.

For this technique, you first want to die-cut the image you want to have in the foreground of your card and you work your way backwards. Everything you die-cut later will appear to be ‘behind’ this first image.

Once it has been die-cut, I removed the dragonfly die and die-cut and I placed the rose die on the panel. I placed it the way that some parts of the die overlapped the negative space where dragonfly was die-cut previously from.

anna-stampin-cave-stampin-up-dragonfly-dreams-bundle-and-rose-garden-thinlits-dies

Again, I run it through the Big Shot and very carefully removed my rose die-cut from the die, being careful not to lose all the separate pieces as I will need them all to inlaid them back to my panel. I die-cut two more partial roses (one at a time) from the same panel, every time making sure they overlap the space of a previously die-cut image and saving all the little die-cut pieces. I arranged all my die-cut on the desk, so I knew

Once all the images were die-cut, I adhered what was left of the panel to the Blooms & Bliss DSP piece. And now the fun began: I had to inlay all the die-cut outlines where they came from.

anna-stampin-cave-stampin-up-dragonfly-dreams-bundle-and-rose-garden-thinlits-dies-inlaid-partial-die-cutting-technique

The easiest part was to inlay the dragonfly outline. From there, I worked my way through the roses in the same order I die-cut them. Once I was done, I matted my detailed panel with slightly bigger Whisper White piece and next mounted it onto my Sweet Sugarplum card base.

I masked bottom part of the sentiment ‘Thanks for the smile and everything else’, stamped it on a strip of Whisper White cardstock in Basic Black Archival Ink and cut it into a banner. I also cut a banner from Sweet Sugarplum cardstock and adhered them both to my card, offsetting slightly.

anna-stampin-cave-stampin-up-dragonfly-dreams-bundle-and-rose-garden-thinlits-dies-inlaid-partial-die-cutting-technique

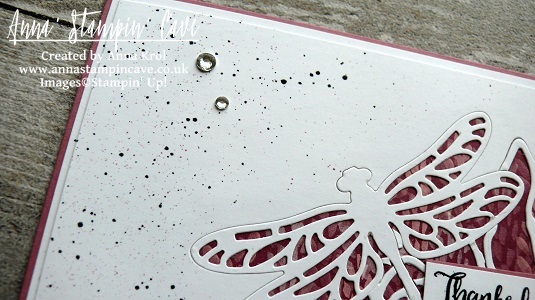
I was pretty happy with the outcome but I had a feeling that something was missing. So I masked the detailed part and all the edges of my card, and I added some tiny speckles in Basic Black and Sweet Sugarplum. Few rhinestones wrap up my card.

I hope you feel inspired and that you give this technique a go. Thank you for stopping by and have a blessed day,

Simply Sketched Saturday Challenge Blog Hop #7 – A World Of Thanks

SSSC Header

Thank you for joining us for another Simply Sketched Saturday Challenge!  We’re so excited to be sharing this hop with you. The products used are all available in the current Annual, or seasonal, Stampin’ Up!®  Catalogues*. Simply use the buttons at the bottom of the post to keep hopping!

Today’s sketch was designed by Hannah, and I have to admit that for me it was the hardest of all sketches I’ve worked with. Even though it’s the simplest one, that for sure.

Simply-Sketched-Saturday-Challenge  And here’s my take on the sketch:

A-World-of-Thanks-stampin-up

To create my card I’ve used Whisper White for the card base, Pear Pizzaz for the first layer and again Whisper White for stamping. The stamp I’ve used is called A World of Thanks and I love the grungy feel to it.

A-World-of-Thanks-stampin-up

I’ve used 3 different ink colours for my stamping: Daffodil Delight, Pear Pizzazz and Pool Party. I simply dabbed ink pads over the image, pressed the card on top and rubbed it well to make sure all ink was transferred. Next, I distressed the edges with scissors and attached my stamped image to Pear Pizzazz and next to card base.

A-World-of-Thanks-stampin-up

Now I would love to hear from you. Do you like my take on the sketch?

Now, be sure to hop along and see more inspiring projects. Your next stop is Karen’s blog  go and see what she has made for you.

Thank you for stopping by and have a blessed day!

SSSC Previous   SSSC Next Blog

CAS Thank You Card Using Work Of Art By Stampin’ Up!

I just love my today’s project. It’s clean and simple…and beautiful! There was a time (not that long ago) when I was wondering what the heck CAS card means…haha…and it means exactly that: clean and simple. Some people also use term KISS (keep it simple stamper!). No wonder I haven’t got an idea: I’ve got a tendency to “overthink” and “overload” my cards. But I quite like the idea of clean and simple layout. It’s just don’t come naturally for me.

So today I gave myself a challenge to create a CAS card. I decided to keep the card white with little splash of colour.

The base of the card is standard A6 and top panel is 1/4″ smaller. For my layout I used Work Of Art stamp set. I love this set for it’s simplycity: shapes, swatches, swooshes (or however you call them) that looks like painted with a brush – fab!

art of work 3

I overlapped two “swooshes”: one in Pool Party and other in Pistachio Pudding. I like how these colours complement each other. Now I needed some simple embellishment for my card. Buttons seemed too heavy. I needed something light, something like… a feather!

art of work

I took Four Feathers stamp set and choose smaller one with speckles. I took a piece of vellum, stamped the image in white craft ink and heat embossed it in clear. Then die-cut it with matching framelits and add it to the card with mini glue dots. Both, stamp set and dies, you can buy separately or save 15% and buy them in a bundle.

art of work 2

Sentiment is from Teeny Tiny Wishes and is stamped in Basic Grey. And that’s it. Card is done!

Do you like my project? Let me know in the comments below! Thank you so much for stopping by,

Thank You Cards with Sale-a-Bration Stamp Set Lotus Blossom

Today I’ve got some cool 4×4″ cards to share with you. These are Thank You cards I made for my customers and they showcasing Lotus Blossom – one of the stamp sets you can choose as your freebie during Sale-a-Bration.

lotus

Isn’t it gorgeous?! I’m in love with this set! It’s a 3 part stamp (3 step stamping) but all you really need for the flower is just ONE ink pad! Really! So all yesterday evening I’ve been playing with different colours to get different looks. I have to admit that lighter colours work best

lotus blossom 3 Wisteria Wonder

lotus blossom 5 Hello Honey

lotus blossom 6 Crisp Cantaloupe

But with stamping off technique you can use the richer colours too

lotus blossom 2 Lost Lagoon

lotus blossom 4 Coastal Cabana

Or even you can mix colours like in this one

lotus blossom

I stamped first and second part in Strawberry Slush ( second part I stamped off once) and third is stamped in Blushing Bride. All stems are stamped in Pear Pizzazz and Old Olive. To finish off the cards I stamped thank you (comes with set) with black Memento ink pad. Then I die cut film photo frames, attached them with liquid glue. Easy, and I really like how they turned out. Hope my customers will like them too 🙂

lotus blossom all

Thank you for stopping by