…And The Greatest Of These Is Love – Embossed Impression Technique

Hello and welcome!

Today, I’ve got for you card using beautiful Bloomin’ Heart Thinlits Dies. I’ve made various cards using this die in the past, but this time I wanted to try something new: an Embossed Impression Technique. This is very easy, yet effective technique. And great way to stretch your dies too.

stampin-up-embossing-stamping-with-bloomin-heart-thinlits-dies

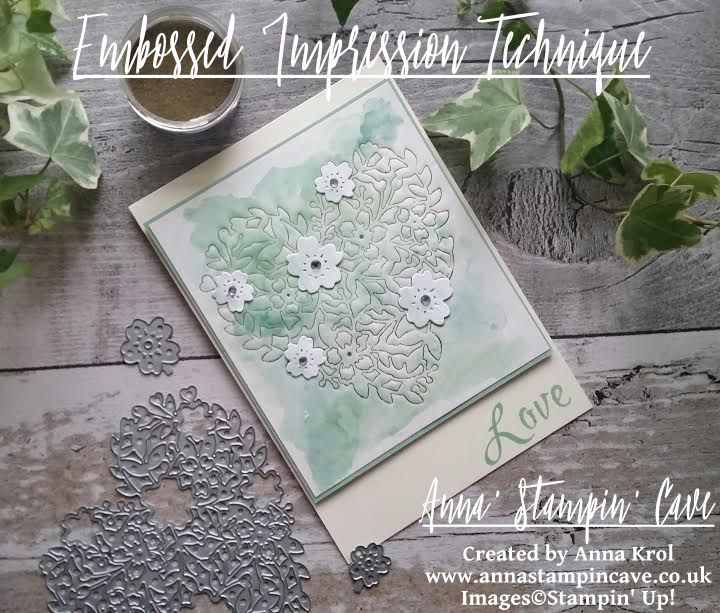
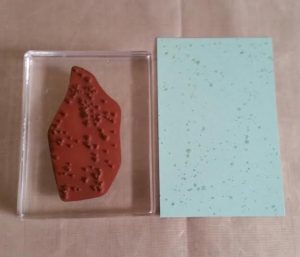
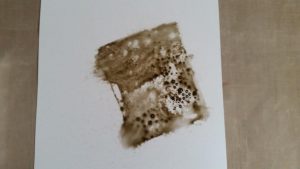
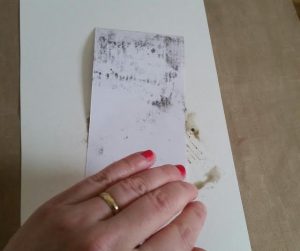
I’ve used Stampin’ Up! White Shimmery cardstock for this technique, as I planned to do a bit of water colouring later on. I prepared my Big Shot sandwich: Big Shot on Tab 1 -> Cutting Plate -> Silicon {embossing) mat -> cardstock (I swiped the cardstock with embossing buddy). Next, I tapped Versamark over the cutting edge of the die very gently, and placed the die, cutting edge down, on my cardstock. Remember, once it’s on the paper don’t move it or you will mess up your image. I then carefully placed the second cutting plate over the top and run it through the big shot.

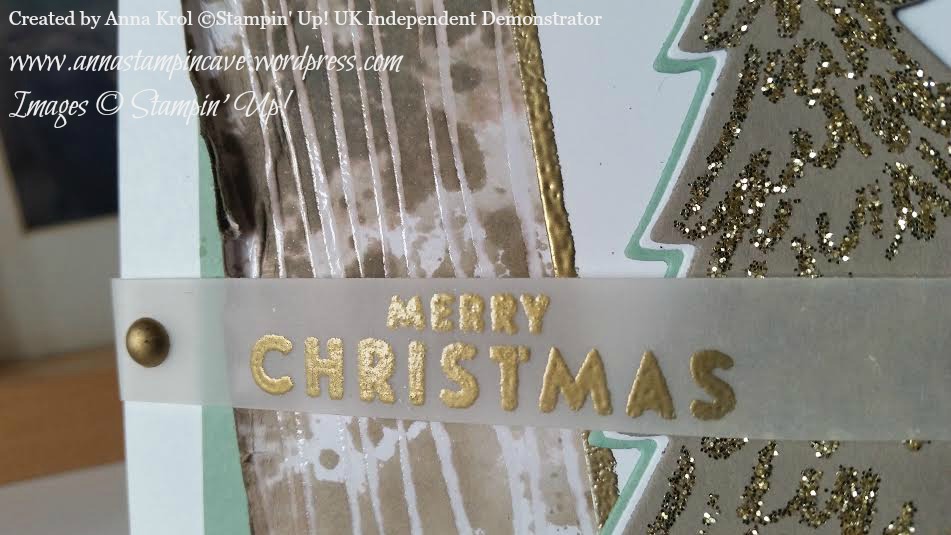
Because I put Versamark Ink on the die, now I had that ink in all the ‘valleys’ of the impression I just made. So I sprinkled Gold Stampin’ Emboss Powder over it and heat embossed it.

stampin-up-embossing-stamping-with-bloomin-heart-thinlits-dies

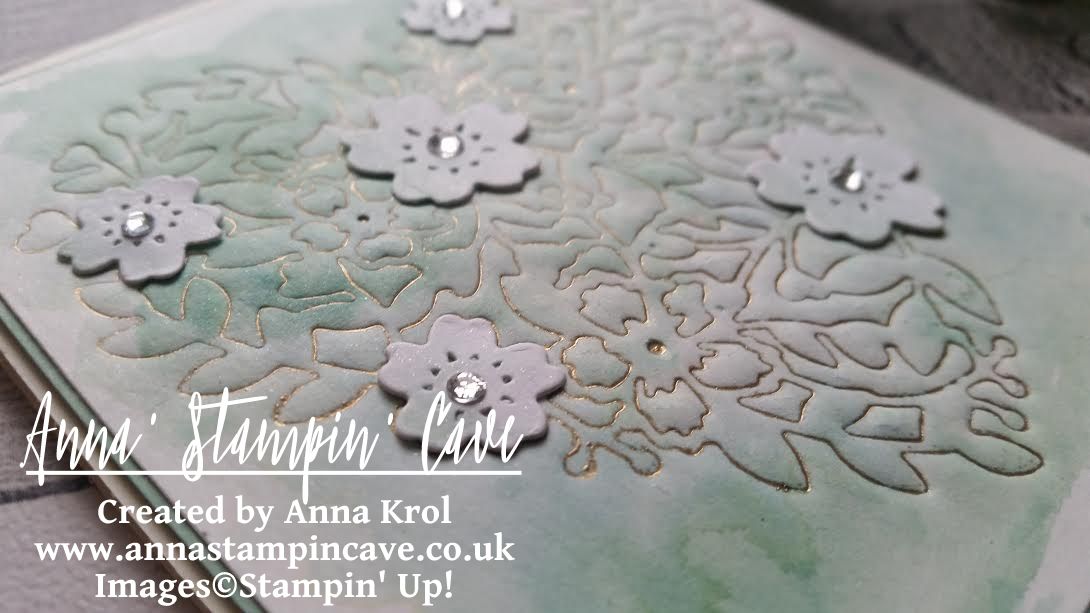
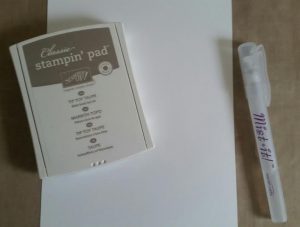
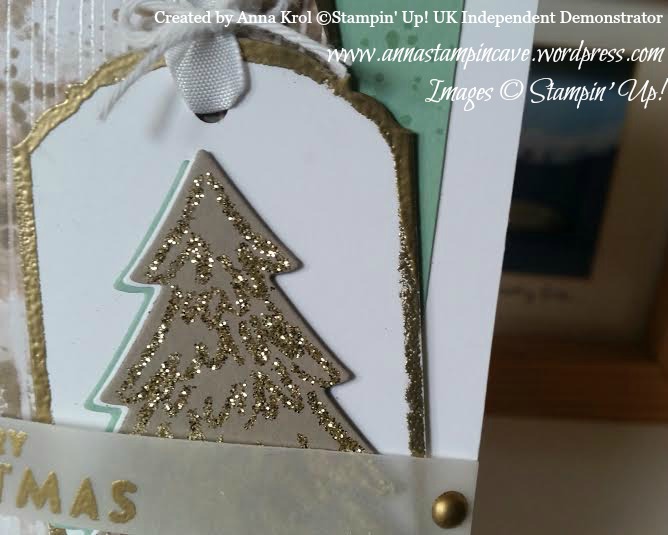
I love those tiny gold lines! Next, I made few watercolour washes over my piece, using Mint Macaron ink pad and Pool Party reinker. Once dry, I cut my panel to 3-7/8″x 4-3/8″.

I also die cut five flowers, two large and three small, from Whisper White cardstock (I probably should have used Shimmery White cardstock for them too), and adhered them to my piece with glue dots. I’ve added some soft Mint Macaron watercolour wash to the flowers to add some depth to them

stampin-up-embossing-stamping-with-bloomin-heart-thinlits-dies

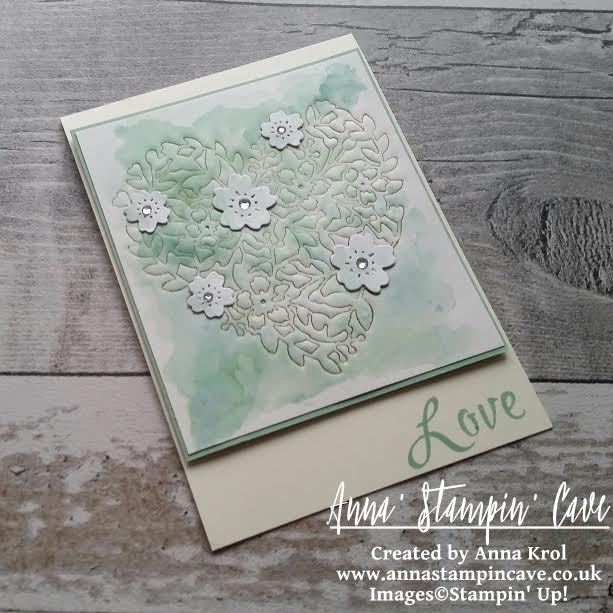
My card base is Very Vanilla. I stamped ‘Love’ in Mint Macaron using Brushwork Alphabet stamp set. I adhered my embossed panel with liquid glue to a piece of Mint Macaron mat (4″x 4-1/2″), and add them both to the card base with dimensionals.

To finish off my card I’ve added some shimmer to the flowers with Clear Wink of Stella Glitter Brush and put a rhinestone in each flower centre.

I hope you like my card, and that you give this technique a try.

As always, if you wish to purchase any of the products I have used, simply click the images below to go directly to my online shop.

Thank you for stopping by and have a blessed day

Brushwork Alphabet Photopolymer Stamp Set

Brushwork Alphabet Photopolymer Stamp Set
[141772]
£23.00

Bloomin' Heart Thinlits Dies

Bloomin’ Heart Thinlits Dies
[140621]
£22.00

Very Vanilla A4 Card Stock

Very Vanilla A4 Card Stock
[106550]
£8.25

Shimmery White A4 Card Stock

Shimmery White A4 Card Stock
[121717]
£7.25

Mint Macaron A4 Cardstock

Mint Macaron A4 Cardstock
[138344]
£7.25

Whisper White A4 Card Stock

Whisper White A4 Card Stock
[106549]
£8.25

Mint Macaron Classic Stampin' Pad

Mint Macaron Classic Stampin’ Pad
[138326]
£6.00

Pool Party Classic Stampin' Ink Refill

Pool Party Classic Stampin’ Ink Refill
[122933]
£3.00

Versamark Pad

Versamark Pad
[102283]
£7.75

Embossing Buddy

Embossing Buddy
[103083]
£5.50

Clear Wink Of Stella Glitter Brush

Clear Wink Of Stella Glitter Brush
[141897]
£7.25

Gold Stampin' Emboss Powder

Gold Stampin’ Emboss Powder
[109129]
£4.50

Rhinestone Basic Jewels Embellishments

Rhinestone Basic Jewels Embellishments
[119246]
£4.50

Aqua Painters

Aqua Painters
[103954]
£15.50

Stampin' Dimensionals

Stampin’ Dimensionals
[104430]
£3.75

Liquid Multipurpose Glue

Liquid Multipurpose Glue
[110755]
£3.75

Silicone Craft Sheet

Silicone Craft Sheet
[127853]
£5.50

Heat Tool - Uk Plug

Heat Tool – Uk Plug
[129054]
£27.00

Big Shot

Big Shot
[143263]
£99.00


Negative Die-Cutting

Anna’ Stampin’ Cave – Negative Die-Cutting


Hello everyone and welcome! Today I’ve got for you super cool & easy technique to try out: negative die-cutting. Just a reminder: each week we are using Ronald McDonald House stamp set ‘My Hero’.

anna-stampin-cave-my-hero-stamp-set-with-negative-die-cutting

For today’s project, I’ve decided to use this lovely umbrella image. To create my card I started with a Very Vanilla card base and a Very Vanilla panel, slightly smaller than my base. First, I arranged the layout of my card using the Umbrella Weather Framelits. When I was happy with the placing, I die cut the umbrella first and the handle next, from my panel. But instead of using the die-cut piece on the card (as we usually do, don’t we?), I’ve used the negative image. Savvy tip: Don’t throw your die cuts away. You can use them for your next project.

I took my panel, placed it on the card base without adhering it, and I stamped the umbrella and the handle through a die cut holes. Stamp-A-Ma-Jig ( I love this tool!!!) was a big help to position my stamps perfectly. To create an ombre effect on umbrella image, I coloured the stamp with Crushed Curry and Tangerine Tango Stampin’ Markers (Crushed Curry to the top and Tangerine Tango in the middle). And, because I don’t own the 2015-2017 In Colour Stampin’ Markers, I carefully dabbed Watermelon Wonder ink pad to the bottom of the stamp.

my-hero-stamp-set-with-negative-die-cutting-2

When I was done with the stamping, I trimmed my layer at slightly ‘wonky’ angles, and run it through the Big Shot with a Seaside embossing folder. This folder is intended to imitate the waves, but if you turn it aside, it looks like rain streaks on a window, which is totally cool 🙂

I took a piece of Watermelon Wonder DSP from 2015-2017 In Color Designer Paper Stack (there are four different designs to choose from, but I’ve gone for dots). It was slightly bigger than my top layer, but I  didn’t want to use it all on my card. I only wanted it to peek from underneath my top layer where the ‘wonky’ angles were. So I measured it up, trimmed the piece and adhered it to the base. next, using dimensionals, I’ve added the top layer.

my-hero-stamp-set-with-negative-die-cutting

I decided not to use any additional sentiment on my card, as I think the one on the umbrella says it all. To embellish the card I’ve used White Perfect Accents. But hey, you say, these are clear, right? But did you know that you can peel off the white, sticky backing from your  White Perfect Accents, and you get these super awesome clear, perfectly round embellishments?! It’s cool or what?! But, of course, once you peel the backing off, you need to use glue to adhere them.

pootlers-design-team-week-2

So, did you liked my project?! I hope I inspired you to give this technique a go. It’s really cool and you will be hooked in no time!

Thank you for stopping by and have a blessed day,

Simply Sketched Saturday Challenge Blog Hop #2 – Peaceful Pines

SSSC Header

Thank you for joining us for another Simply Sketched Saturday Challenge!  We’re so excited to be sharing this hop with you. The products used are all available in the current Annual, or seasonal, Stampin’ Up!®  Catalogues*. Simply use the buttons at the bottom of the post to keep hopping!

If you have arrived here from Mandy’s blog thank you for stopping by. If you just start here please keep “hopping” to see the inspiration from our little group. I’m sure you will enjoy what everyone prepared for you this time.

I was really excited about this week’s sketch designed by Amy from blog Engineering Home. Not that it’s an easy one. Oh, and it was her BIRTHDAY yesterday!!! Happy Birthday, Amy! ??????

SKETCH 2

This time I decided to go with Christmas theme. And yes I know there’s still a time for Christmas cards, but hey, you’ve got to start somewhere 🙂 So here’s my interpretation of this week’s brilliant sketch:

Peaceful Pines

I know that many cardmakers prefer ever-so-popular clean and simple style, but I’m a big fan of distressing. And in my card today I tried to incorporate both styles.

peaceful pines 3

The base of my card is Whisper White card stock. A slightly smaller panel of Mint Macaron measures 5″ x 3-3/8″. I knew this panel will be mostly covered but I wanted to add some interest to it. First I thought about dry embossing but it would be too busy for an idea I had in my head. Instead, I stamped some splotches with Gorgeous Grunge in Mint Macaron for a subtle tone-on-tone look.

A distressed panel is a piece of white woodgrain patterned paper from Color Me Irresistible Specialty DSP. This paper is amazing, as each sheet is clear embossed, ready for inking, sponging, spritzing – getting messy in short 🙂

peaceful pines 4.2

peaceful pines 4.1

I squeezed Tip Top Taupe ink pad on the sleek surface (you can use acetate or craft sheet), spritz it with water and swooshed my paper into this puddle of colour. I added ink and water until achieved the look I wanted. I love how embossing resists the colour. When the paper was dry I stamped few splotches from Gorgeous Grunge and distressed and sponged the edges. Just a warning, this technique will warp your paper so you have to be careful, or use watercolour paper.

Peaceful Pines 3

To create my tag I cut a piece of Whisper White card that measures 2″ x 4″ and punch it with Ornate Tag Topper punch. Then I dabbed the edges in Versamark and heat emboss it with gold embossing powder.

I stamped Christmas tree from Peaceful Pines stamp set in Versamark on a piece of Tip Top Taupe card stock. I heat embossed it with Heat & Stick powder and when it got sticky I sprinkled gold glitter over it (I must say that I’m in love with Gold Stampin’ Glitter). Then I die cut it using coordinating framelits. I also die cut half of the tree from Whisper White and Mint Macaron to layer them together. When the tree was ready I assemble my tag and finish it with a piece of ribbon and bakers twine. Finally, I could assemble my card. Now just sentiment left.

Peaceful Pines 2

The sentiment comes from Flurry of Wishes stamp set. I embossed it in gold on a strip of vellum and attached to my card with edges of dimensionals (folded in half). To finish it off I coloured two White Perfect Accents using gold Sharpie and added them where the adhesive was. Taa-daah!

Now, be sure to hop along and see more inspiring projects. Your next stop is Suzanne at Hullahbaloo. Thank you for stopping by and have a blessed day

SSSC Previous  SSSC Next Blog