So let’s dive in and see what this brochure is hiding on its pages.
Four Season Floral Cards
Flower stamps and floral card bases are some of the most versatile craft products. They’re great for all-occasion handmade cards and projects. The Four Season Floral Cards Collection features graceful flowers representing each of the four seasons, making it an excellent choice for all-year projects. No guesswork needed – we’ve done it for you! Mix and match the images and greetings from the stamp set with the pre-printed card bases to create projects for any occasion. The collection includes the supplies to make ten simple and elegant cards. Also available in French and German.
Combine juicy fruit and happy smiley faces for bright and fresh projects. The Cute Fruit Cards & Tags Collection includes enough supplies to create as many cards and tags as you can imagine. No guesswork needed – we’ve done it for you! Mix and match the images and greetings to create projects for any sweet friends. The Two-Step Stampin’ allows you to layer images in multiple colours. You’ll have so much fun combining the images to create a variety of fruit!
Kick up your heels with these sweet zebras! The Zany Zebras Cards Collection includes project supplies to create cards and learn how to use Watercolor Pencils. Watercolour Pencils are an easy way to add colour to your projects. Use alone or with water for a watercolour look. The fun images in the included Zany Zebras Stamp Set can be used all year long. There’s no limit to what you can do. Use the adhesive foam Stampin’ Dimensionals to add a pop of dimension to your projects.
Show off your creativity and create birthday cards for all your friends and family. The Hooray To You Cards & Envelopes Collection includes everything you need to make twenty simple and fun birthday cards. Learn the ‘markering’ technique with this Collection. Choose your favourite marker colour and use the brush end to colour the stamp. Once you’re done colouring, breathe on the stamp to remoisten the ink and stamp the image. You can colour the whole image or smaller sections to create different patterns. The ‘markering’ technique makes customising your stamp images a cinch!
Makes 15 cards, 3 each of 5 designs, using the included Simply Citrus Photopolymer Stamp Set.
Folded card size: 4-1/4″ x 5-1/2″ (10.8 x 14 cm). Includes 9-1/4″ x 9-1/4″ x 1-7/8″ (23.5 x 23.5 x 4.8 cm) printed cardboard box. Available in French & German.
Anna’ Stampin’ Cave – International Highlights Winners Hop: You Are The Greatest
Hello and welcome to my stampin’ cave today.
First of all, I wanted to say a massive THANK YOU to all my followers and visitors to my blog for VOTING on my project for this month’s International Project Highlights! My little fridge magnet and card took the 5th place. I’m so humbled!
Every month, the ‘top ten’ get to blog hop with Kylie, using the same theme, which was a “Teachers Gifts”.
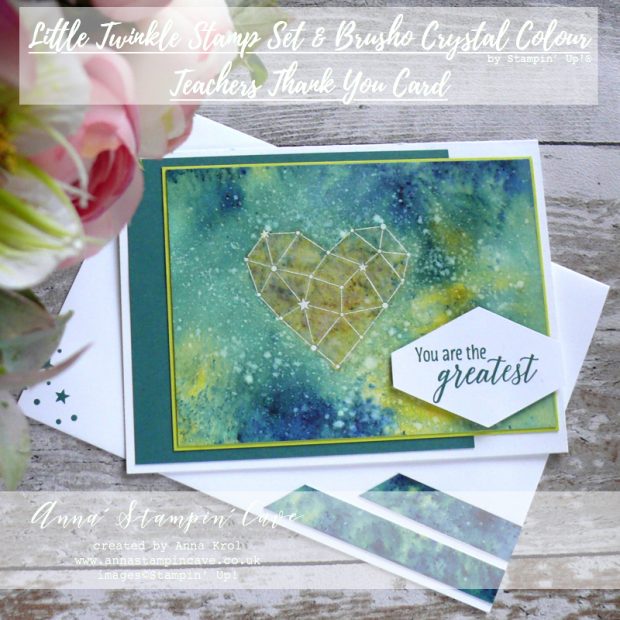
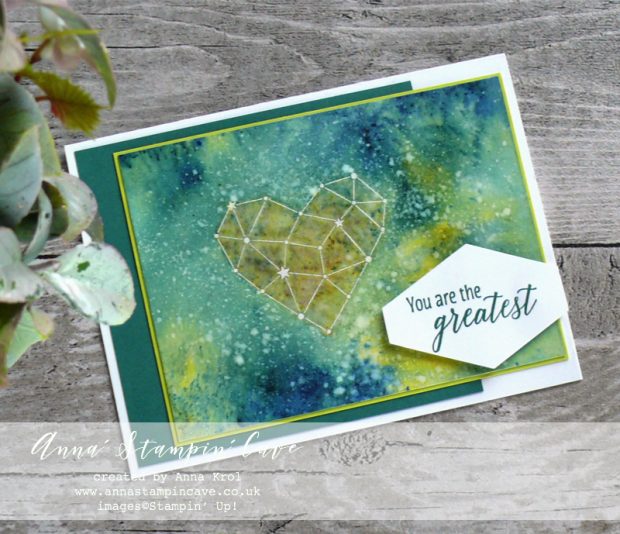
You Are The Greatest
For today’s project, I decided to go back to one of my favourite products and techniques – watercolour with Brusho® Crystal Colour.
Here’s my card –
Card dimensions:
Whisper White Thick cardstock: 11-6/8″ x 4-1/8″ scored in half at 5-7/8″ (29.7 x 10.5 cm scored in half at 14.8 cm)
Tranquil Tide cardstock panel: 3-7/8″ x 4-1/4″ (9.8 cm x 10.6 cm)
Lemon Lime Twist cardstock panel: 3-5/8″ x 5-13/16″ (9.2 cm x 12.2 cm)
Watercolour Paper panel: 3-1/2″ x 5-3/4″ (9 cm x 12 cm)
Whisper White cardstock for sentiment
My thought behind this card was to create one that could be suitable either for a female or male teacher.
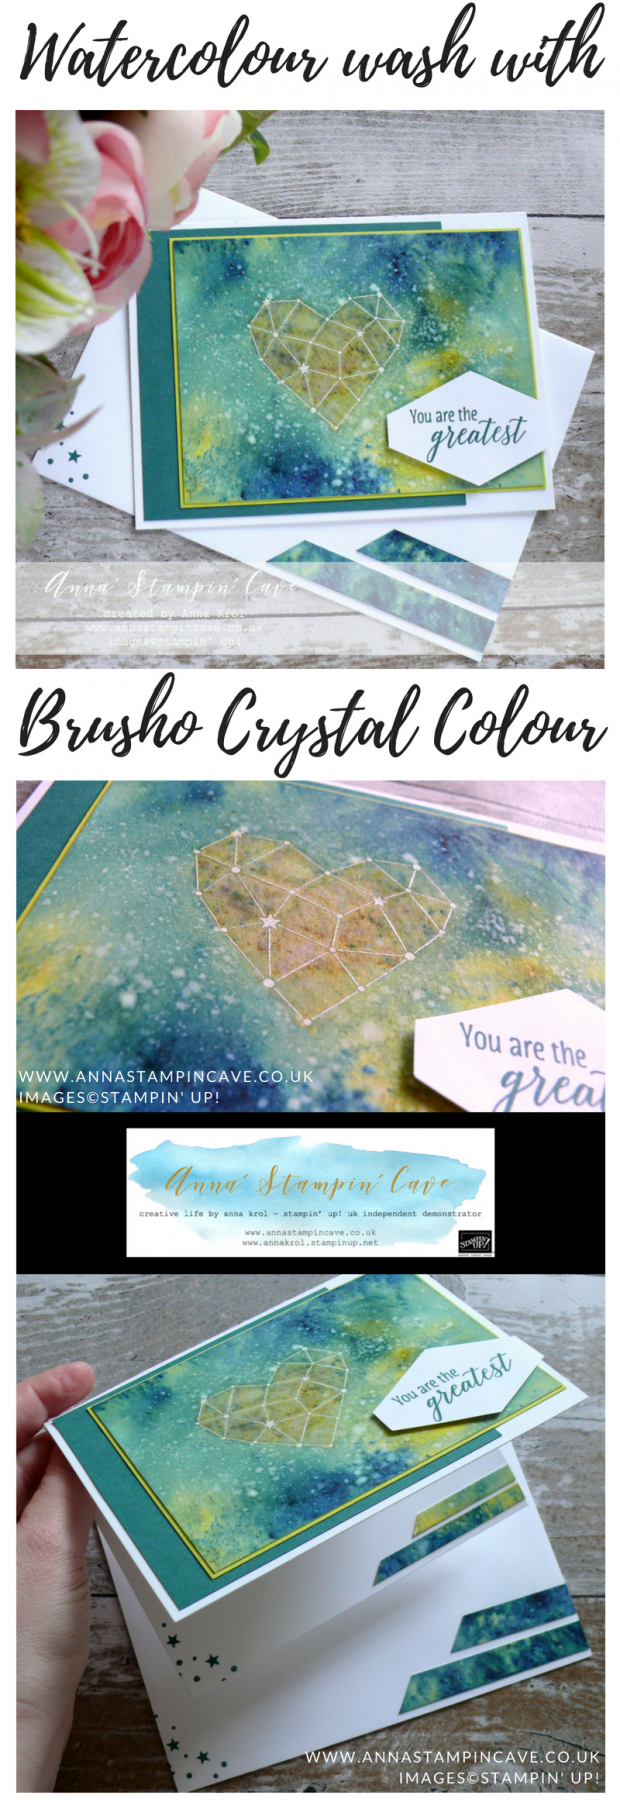
I prepared my watercolour panel – it was bit larger than what I needed – with embossing buddy and stamped the ‘heart constellation’ using Versamark ink. I sprinkled it with a White Emboss Powder and heat set it with my Heat Tool.
When heat embossing on Watercolor Paper, because it’s a quite porous surface, you need to make sure all the image has transferred very well. It can take a little bit longer for the embossing powder to melt, so be patient.
Brusho Crystal Colour
They are high quality and highly pigmented paint powders. They are water-based and most of all completely non-toxic. For my card, I chose two colours to work with: Prussian Blue and Moss Green.
I added my water to the embossed heart, sprinkled it with Moss Green and using the aqua painter I moved the water around.
Before adding Prussian Blue I wet the panel under a running water. I wasn’t too concerned and didn’t worry too much that the Mossy Green will run. Once my panel was really wet I sprinkled it richly with Prussian Blue.
I moved the colour tilting the panel in each direction dabbing off any colour that got into the heart – I wanted to keep it green. Once my panel was dry I spritz it with water (very selectively avoiding the heart) and added more Prussian Blue with a few Moss Green areas for the contrast and moved it around with aqua painter again. Once happy with results, and when the panel was still slightly damp, I sprinkled some more of Prussian Blue and let it dry without moving the paper. I love the effect it left on the panel.
Assembling the card
For the final touch, I took a Whisper White Craft Ink Refill and with a help of clear block and aqua painter, I splashed white all over the panel.
Once my panel was dry I cut it to the size but I saved my colourful off cuts to use them later for some accents.
I adhered Tranquil Tide panel to the card base with liquid glue. Next, I mounted watercolour piece onto a Lemon Lime Twist panel and adhered them both to the base.
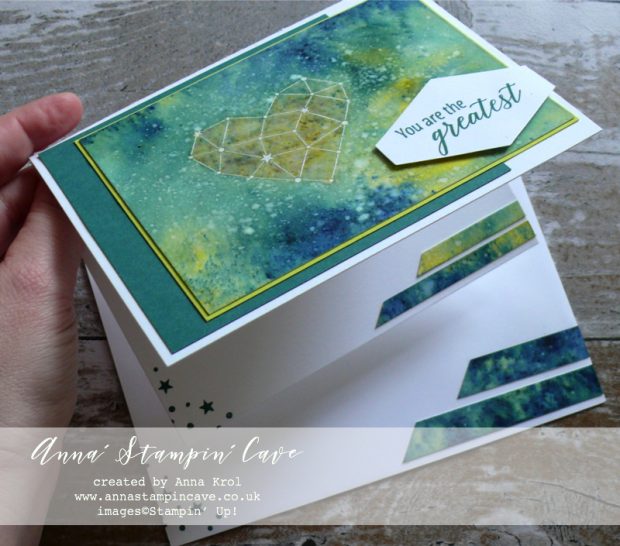
The sentiment comes from Tropical Chic Stamp Set. I stamped it in Tranquil Tide ink and punched out with Tailored Tag Punch. I have added it to my card with few dimensionals.
Final touches
For some interest, I stamped a cluster of stars inside of my card, in a bottom left corner. Besides that, I also took one of the watercolour strips that left, cut it at an angle and add it to the inside as well. I think it looks pretty cool.
I also decided to decorate the envelope with the same elements as the inside of my card: clusters of stars and another watercolour strip cut at an angle.
And that’s it from me for today. I hope you’ve enjoyed visiting my blog. Do you like the card I created? I would love to hear your thoughts.
Below is the list of all the winners, so be sure to hop along. Your next stop is lovely and very talented Janneke de Jong from the Netherlands – go and see her beautiful project.
As always, if you wish to purchase any of the products I have used, simply click the images below to go directly to my online store.
Anna’ Stampin’ Cave – Stampin’ Up! Watercolour Wings – Good Things Come In Threes
Hello, everyone! I hope you have an amazing Saturday so far. We have such a beautiful weather today down here in Midlands – it doesn’t feel like I live in the UK at all ? And I really hope this weather will stay for a little while. Even just to cheer me up. This past week was one of the toughest in last few months, as the pain is back and it ain’t go anywhere in near future. It laughs at painkillers too. So my days are filled with enormous pain that truly makes my brain freeze and I find it hard to concentrate, let alone create. But I had such a great idea for this week’s challenge over at Global Design Project that I just HAD TO make it happen! Do you have it sometimes? An idea that feels that if you won’t try it you will POP!? hahaha So a couple of nights back, I hid in my cave, despite the pain, and … five hours later I came out not with one but three cards! How that even happen?! As I was creating my initial card, more ideas popped into my head and obviously, I HAD TO TRY them all, haha So just a warning: this post is long and picture (glitter) heavy ?
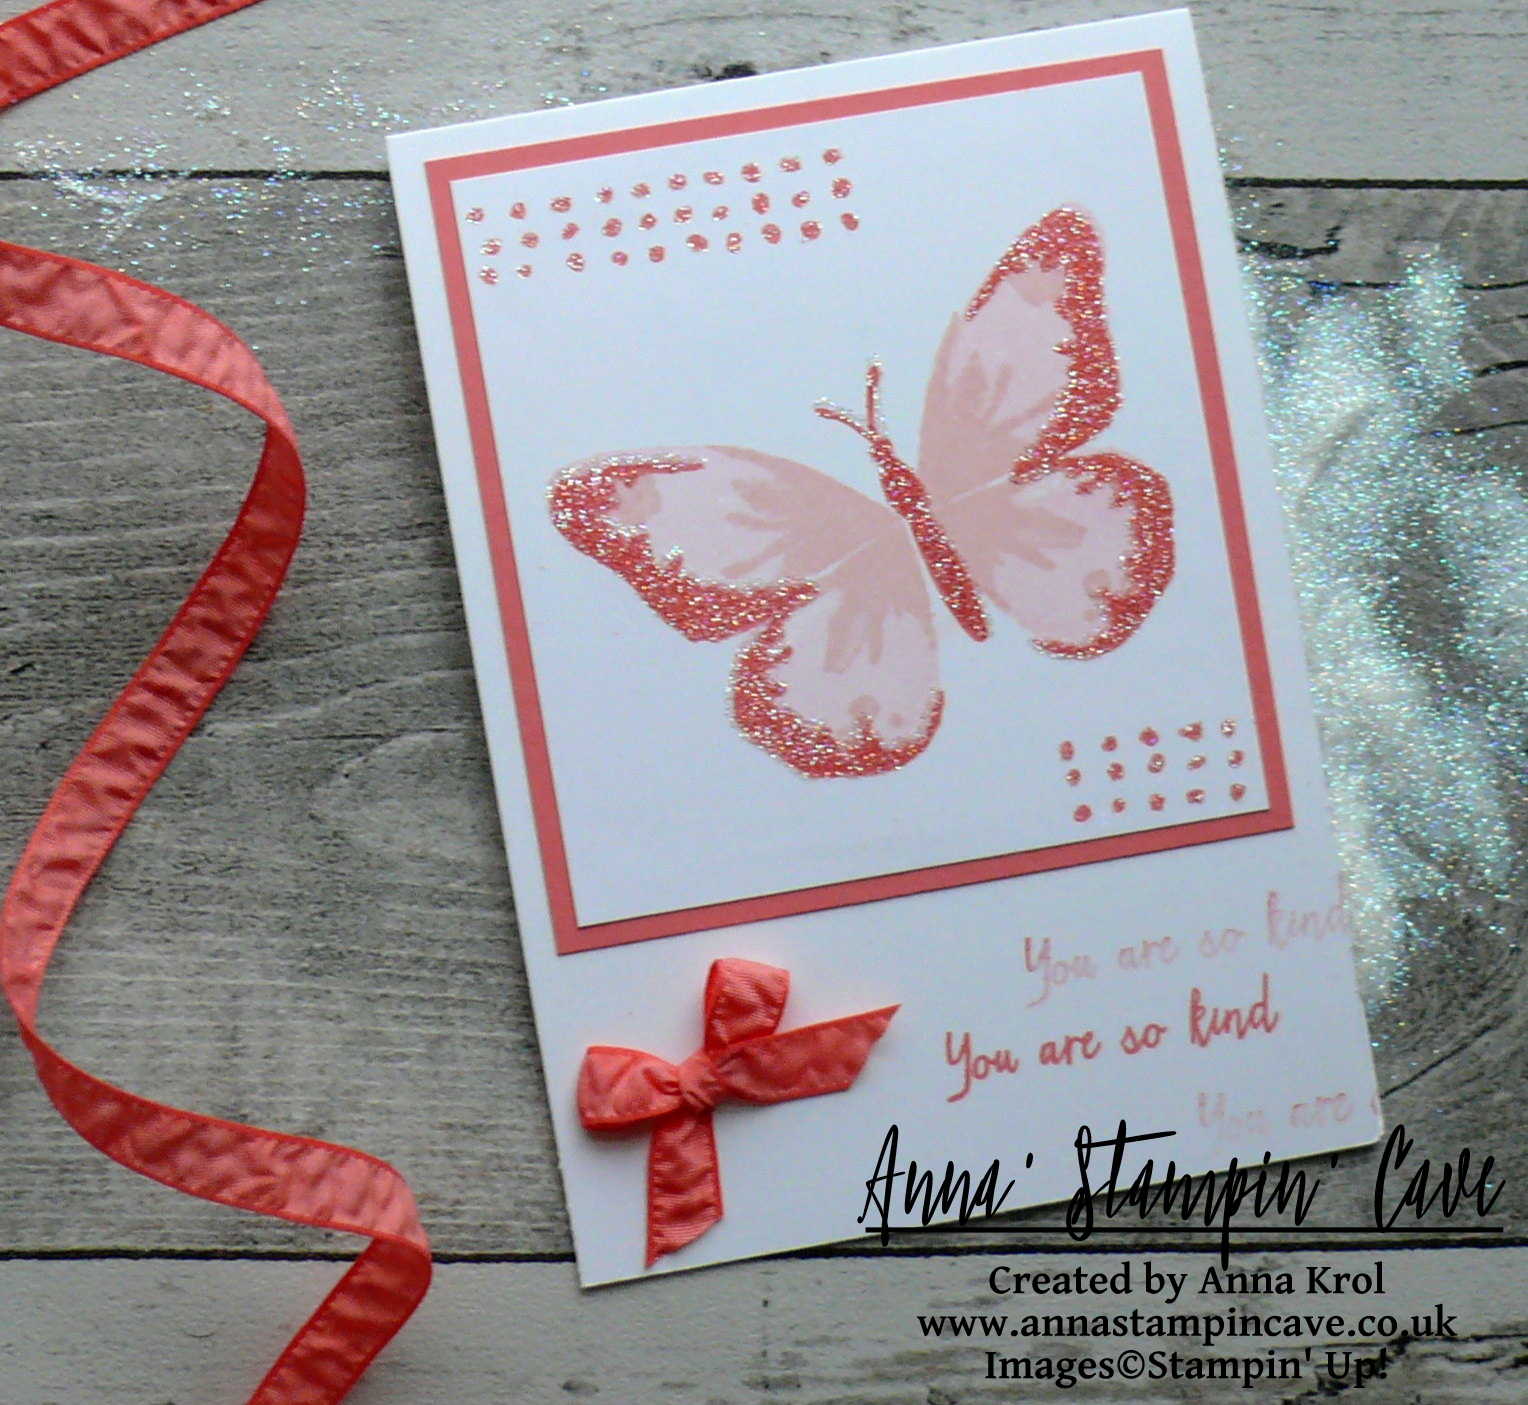
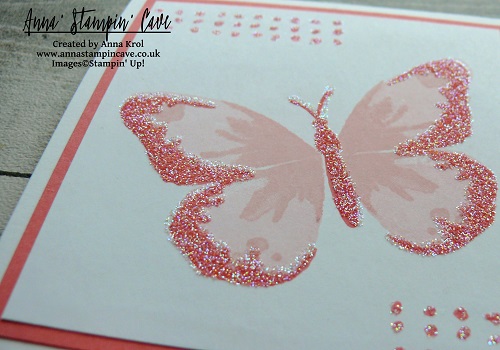
So I will start with my first card where it all started: lovely, clean & simple and … pink-ish. Not really something you’ve seen here often. But I actually like it:
Flirty Flamingo card dimensions:
Whisper White Thick cardstock card base: 11-6/8″ x 4-1/8″ scored in half at 5-7/8″ (29.7 x 10.5 cm scored in half at 14.8 cm)
Flirty Flamingo cardstock: 3-6/8″ x 4″ (9.6 cm x 10.2 cm)
Whisper White cardstock: 3-1/2″ x 3-6/8″ (9 cm x 9.6 cm)
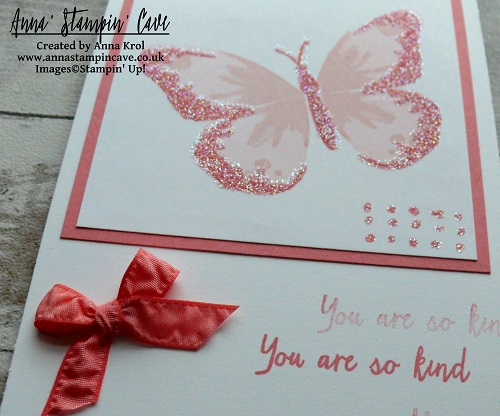
Flirty Flamingo Ruched Ribbon: 12″ approx, to tie a bow
This beautiful butterfly from Watercolour Wings Stamp Set is a three step stamping image as you have three stamps to create the look. I’ve used three different shades of pink: Pink Pirouette for the base, Blushing Bride for the details on the wings and Flirty Flamingo for wings’ edges and the body of the butterfly.
Savvy tip: if you’re just starting your papercraft adventure and don’t have many ink colours (been there, done that) you can use the same ink pad to stamp all the layers. If it’s a light colour ink, you can stamp each layer on top on previous one and it will get slightly darker each time. You can repeat more detailed layers couple of times to get the shade you are happy with. If you have dark colour ink, you can use stamping off technique (also called ghost stamping or second/third generation stamping). You simply stamp off your image couple of times before stamp it on your piece. The rule is: the larger the image like the base here, the lighter the shade.
I also stamped this polka-dot-kind-of image in two opposed corners of my panel. You are probably wondering: OK, but where all that glitter come from? And no, I didn’t use glue for that.
When the image was stamped, I prepared the card with embossing buddy and I stamped the edges of the wings of the butterfly, the body and polka dots once again, but this time using Versamark ink. I sprinkled it with Heat & Stick Powder, heat it till it melts, add Dazzling Diamonds glitter and heat set it again. Heat & Stick Powder once re-heated it melts again, making all that glitter to soak in, so when I send this card out the recipient can enjoy beautiful card and won’t be covered in glitter.
I adhered my panel to a Flirty Flaming mat and next to the card base. Firstly, I wanted to create the banner or a strip of cardstock for a sentiment, but it didn’t look good. So using Stamp-A-Ma-Jig I decided where I want my sentiment to go and stamped it in Flirty Flamingo. Next, to jazz it up a little I stamped it twice more, without re-inking my stamp. It’s called ghost stamping or stampin’ off. A little, dinky bow finish off my card.
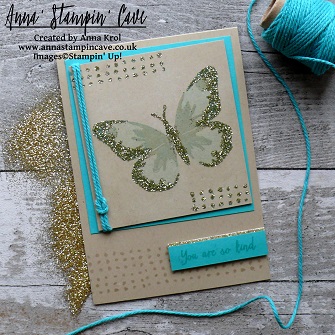
Card number 2 (Jazz it up babe ?)
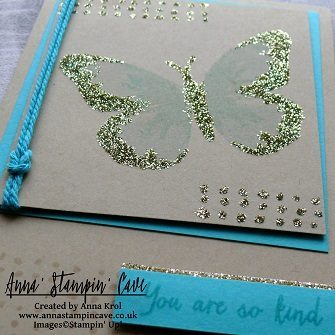
Bermuda Bay & Crumb Cake card dimensions:
Crumb Cake cardstock card base: 11-6/8″ x 4-1/8″ scored in half at 5-7/8″ (29.7 x 10.5 cm scored in half at 14.8 cm)
Bermuda Bay cardstock: 3-6/8″ x 4″ (9.6 cm x 10.2 cm)
Crumb Cake cardstock: 3-1/2″ x 3-6/8″ (9 cm x 9.6 cm)
Bermuda Bay cardstock strip for a sentiment
Bermuda Bay Thick Baker’s Twine two lengths: 16″ and 4″ (approx)
I this card for the butterfly I’ve used Soft Sky for the base, Pool Party for all the details on the wings and Bermuda Bay for the body and edges of its wings. And again I stamped polka dots in the corners. I’ve added gold glitter to my images same way as with my first card, using Heat & Stick Powder.
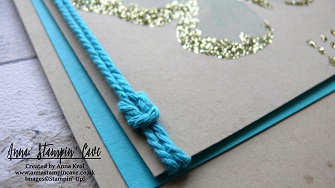
Using two lengths of Bermuda Bay Thick Baker’s Twine I created simple sailor knot. I added mini glue dot behind the knot and adhered it to the Crumb Cake panel. I secured the twine at the back using Fast Fuse. Next, I mounted my panel to the Bermuda Bay mat using thin (1 mm) foam adhesive tape and adhered them both to the card base.
The sentiment is stamped on a strip of Bermuda Bay cardstock and in Bermuda Bay ink for the subtle, tone on tone effect. I also added a strip of DIY gold glimmer paper behind it. I popped it up with dimensionals but before I adhered it to the card base I stamped few rows of polka dot piece on the card base in Versamark.
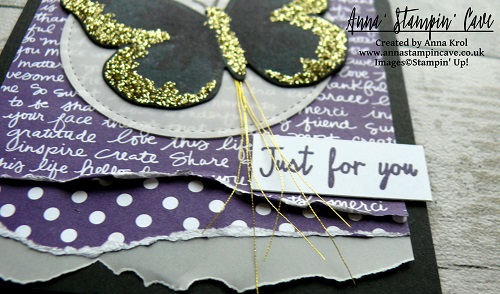
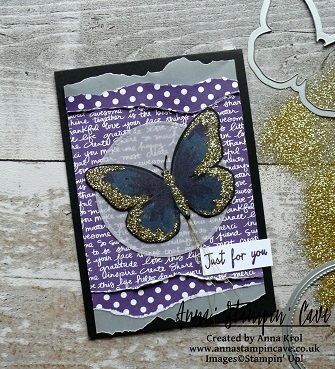
Card number 3 (the more the fancier ?)
Elegant Eggplant & Basic Black card dimensions:
Basic Black cardstock card base: 11-6/8″ x 4-1/8″ scored in half at 5-7/8″ (29.7 x 10.5 cm scored in half at 14.8 cm)
White Vellum cardstock: 3″ x 3-6/8″ (7.7 cm x 9.6 cm) + extra for die-cutting
Elegant Eggplant Paper From Regals Designer Series Paper Stack: 5-1/2″ x 3-6/8″ (14 cm x 9.6 cm)
Basic Black cardstock for butterfly
Whisper White cardstock for sentiment
Gold Metallic Thread
To be able to stamp the butterfly in various colours on black cardstock I stamped the base of my butterfly in Whisper White Craft Ink first. When it dried I stamped the base again, but this time in Perfect Plum. For the details on the centre of the wings, I’ve used Rich Razzleberry. The edges of the wings and body of the butterfly are stamped with Elegant Eggplant ink – I could totally skip this step as honestly, you can’t see that even in person, not only on photos. I added glitter as before and die-cut my butterfly using a coordinating die from Bold Butterfly Framelits Dies.
I took a piece of Elegant Eggplant DSP and I tore two strips of paper from the top and from the bottom. I didn’t measure it, just eyeball it, briefly about 1″. I also tore in half the strip of White Vellum cardstock. I adhered both strips of torn DSP behind the main piece, but showing the reverse design and so the torn edges were showing. I also
I adhered both strips of torn DSP behind the main piece with reverse design up and both strips of vellum behind it with jagged edges showing for extra dimension. I rolled up the edges of my DSP slightly and adhered the whole panel to the card base.
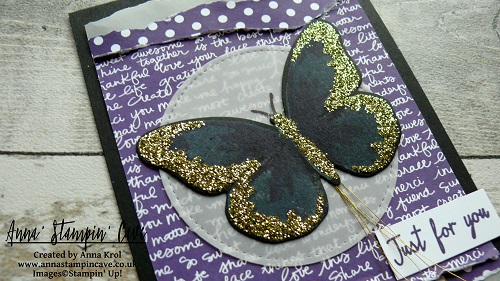
I die-cut a circle from White Vellum using the largest circle die from Stitched Shapes Framelits Dies. Before I added my butterfly on top I stamped the butterfly antenna in Basic Black on the vellum. I adhered few lengths of Gold Metallic Thread behind the butterfly, glued it to the vellum circle with Fast Fuse and next add it to the card base. The sentiment is stamped in Elegant Eggplant n piece of Whisper White cardstock and adhered to the base with glue dots.
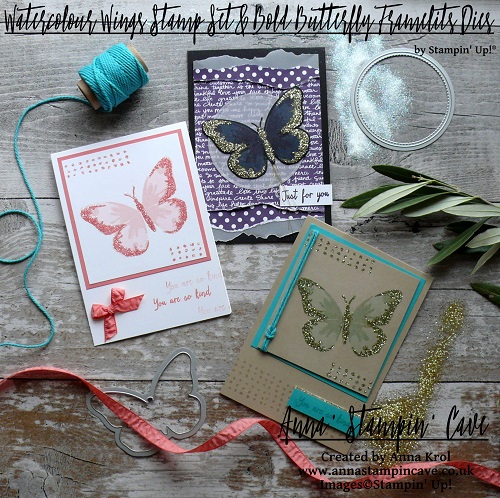
And here are all of the cards together:
I hope you like my cards and that I didn’t bore you with my mouthful-sort-of-directions, haha But this is me: love it or hate it ? Please let me know in comments below which one, which style is your favourite. I would love to hear from you!
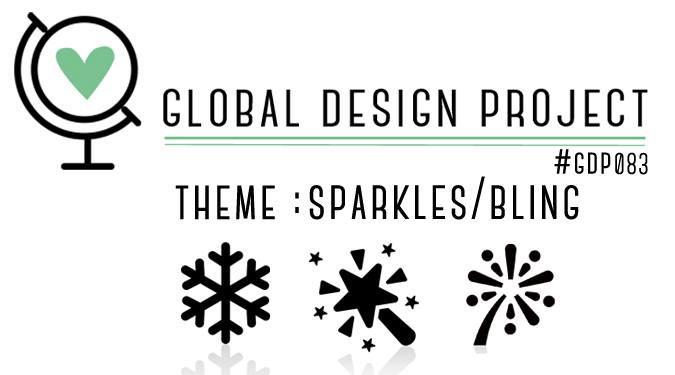
As always, I really want to encourage you to visit the Global Design Project challenge blog to see other beautiful projects from all around the world. Just click on their logo below to visit the website.
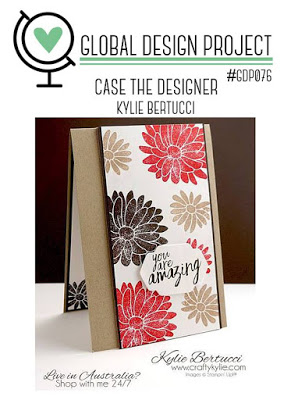
Anna’ Stampin’ Cave – New Adventure Card For GDP076 Case The Designer Challenge
Hello and welcome everyone! Today I’m back with my entry for Global Design Project. This week’s challenge is to CASE lovely and talented Kylie Bertucci. And oh, boy! What a brilliant card it is!
Phew, I did it! To be honest I really thought I won’t make it this week. Lately, I’m so exhausted it’s unbelievable. Living with MS alone isn’t easy, but working night shifts on top of that truly wreak a havoc in my body. And even though I only work two shifts per week, sometimes I am so drained I need to recover for a couple of days before I get back on track. Then I have to pick up on things at home that have to be done, spend some quality time with hubby and daughter…and by the time I’m ready to sit down and create, another week roll on…crazy vicious cycle isn’t it haha
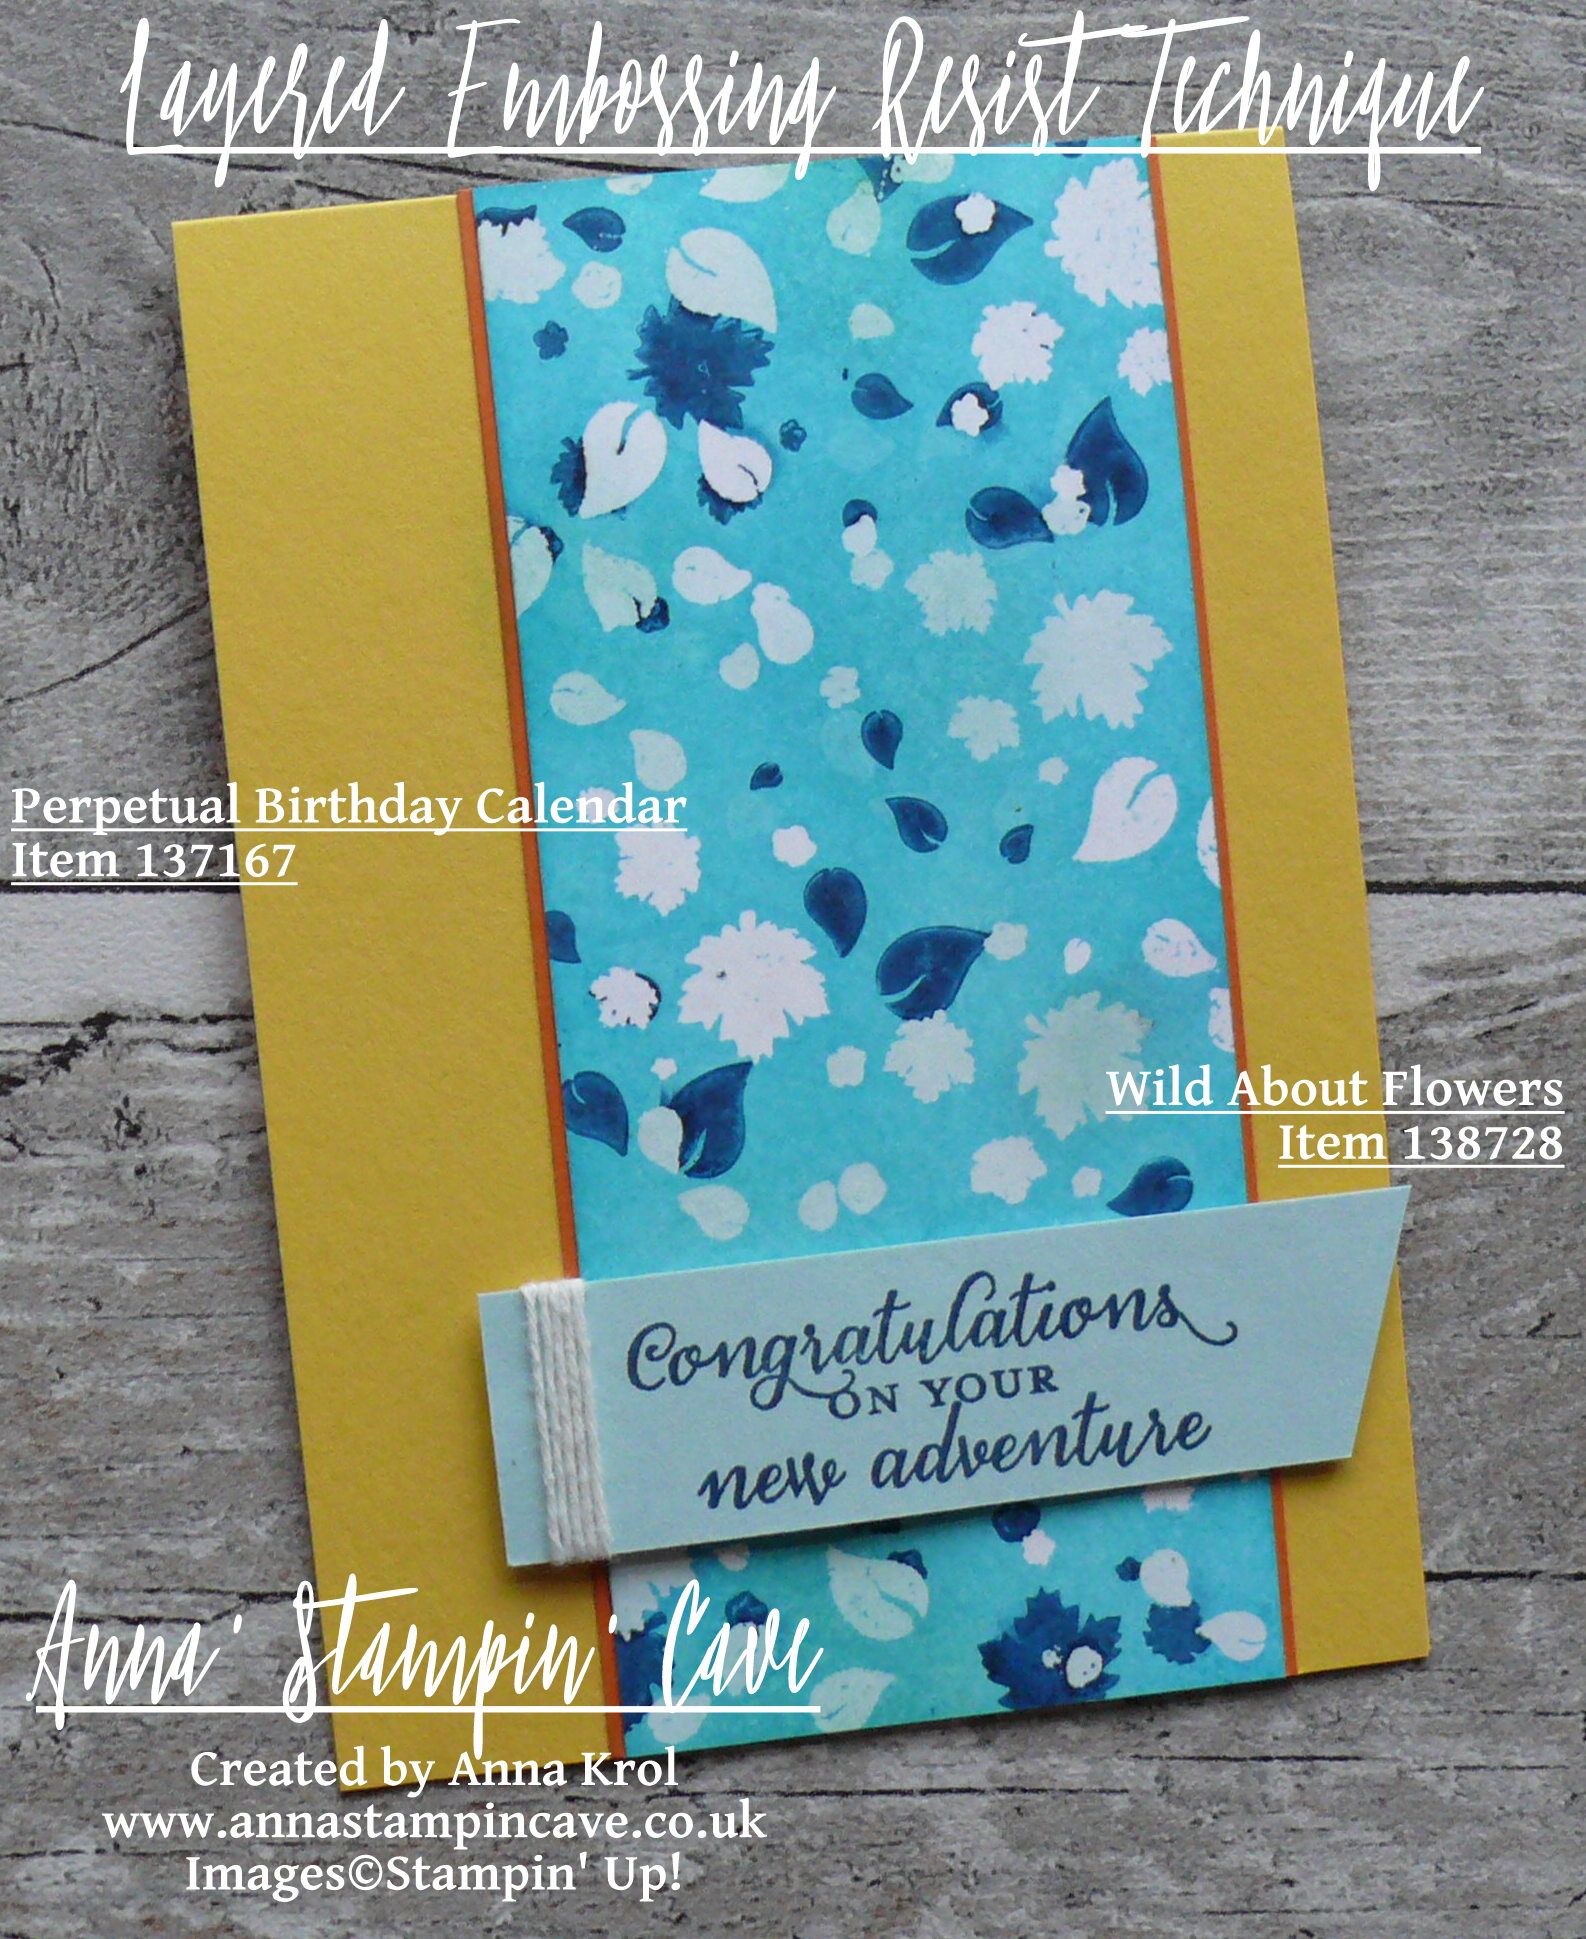
But today I woke up with ‘this idea’ that I just had to turn it into a card. So I jumped out of bed, brew myself a cup of chicory coffee, done my Bible reading and sneaked straight into my ‘cave’. I’ve used a really fun technique called ‘layered embossing resist’.
New Adventure Card dimensions:
Daffodil Delight cardstock: 11-6/8″ x 4-1/8″ scored in half at 5-7/8″ (29.7 x 10.5 cm scored in half at 14.8 cm)
Whisper White cardstock: 5-7/8″ x 2-1/2″ (14.8 cm x 6.4 cm)
Pumpkin Pie cardstock: 2 strips 5-7/8″ long and 1/2″ wide approx (14.8 cm x 1.3 cm)
Soft Sky cardstock: 3-1/2″ x 1″ (9 cm x 2.6 cm)
Whisper White Baker’s Twine: 6″
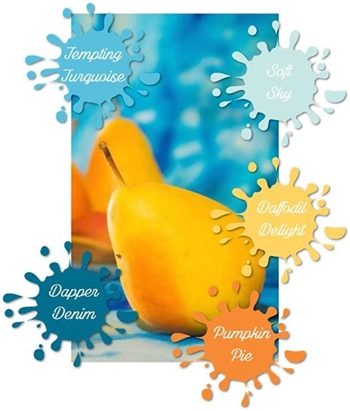
The bright colour combination I’ve used is inspired by this month’s Colour Your World Challenge.
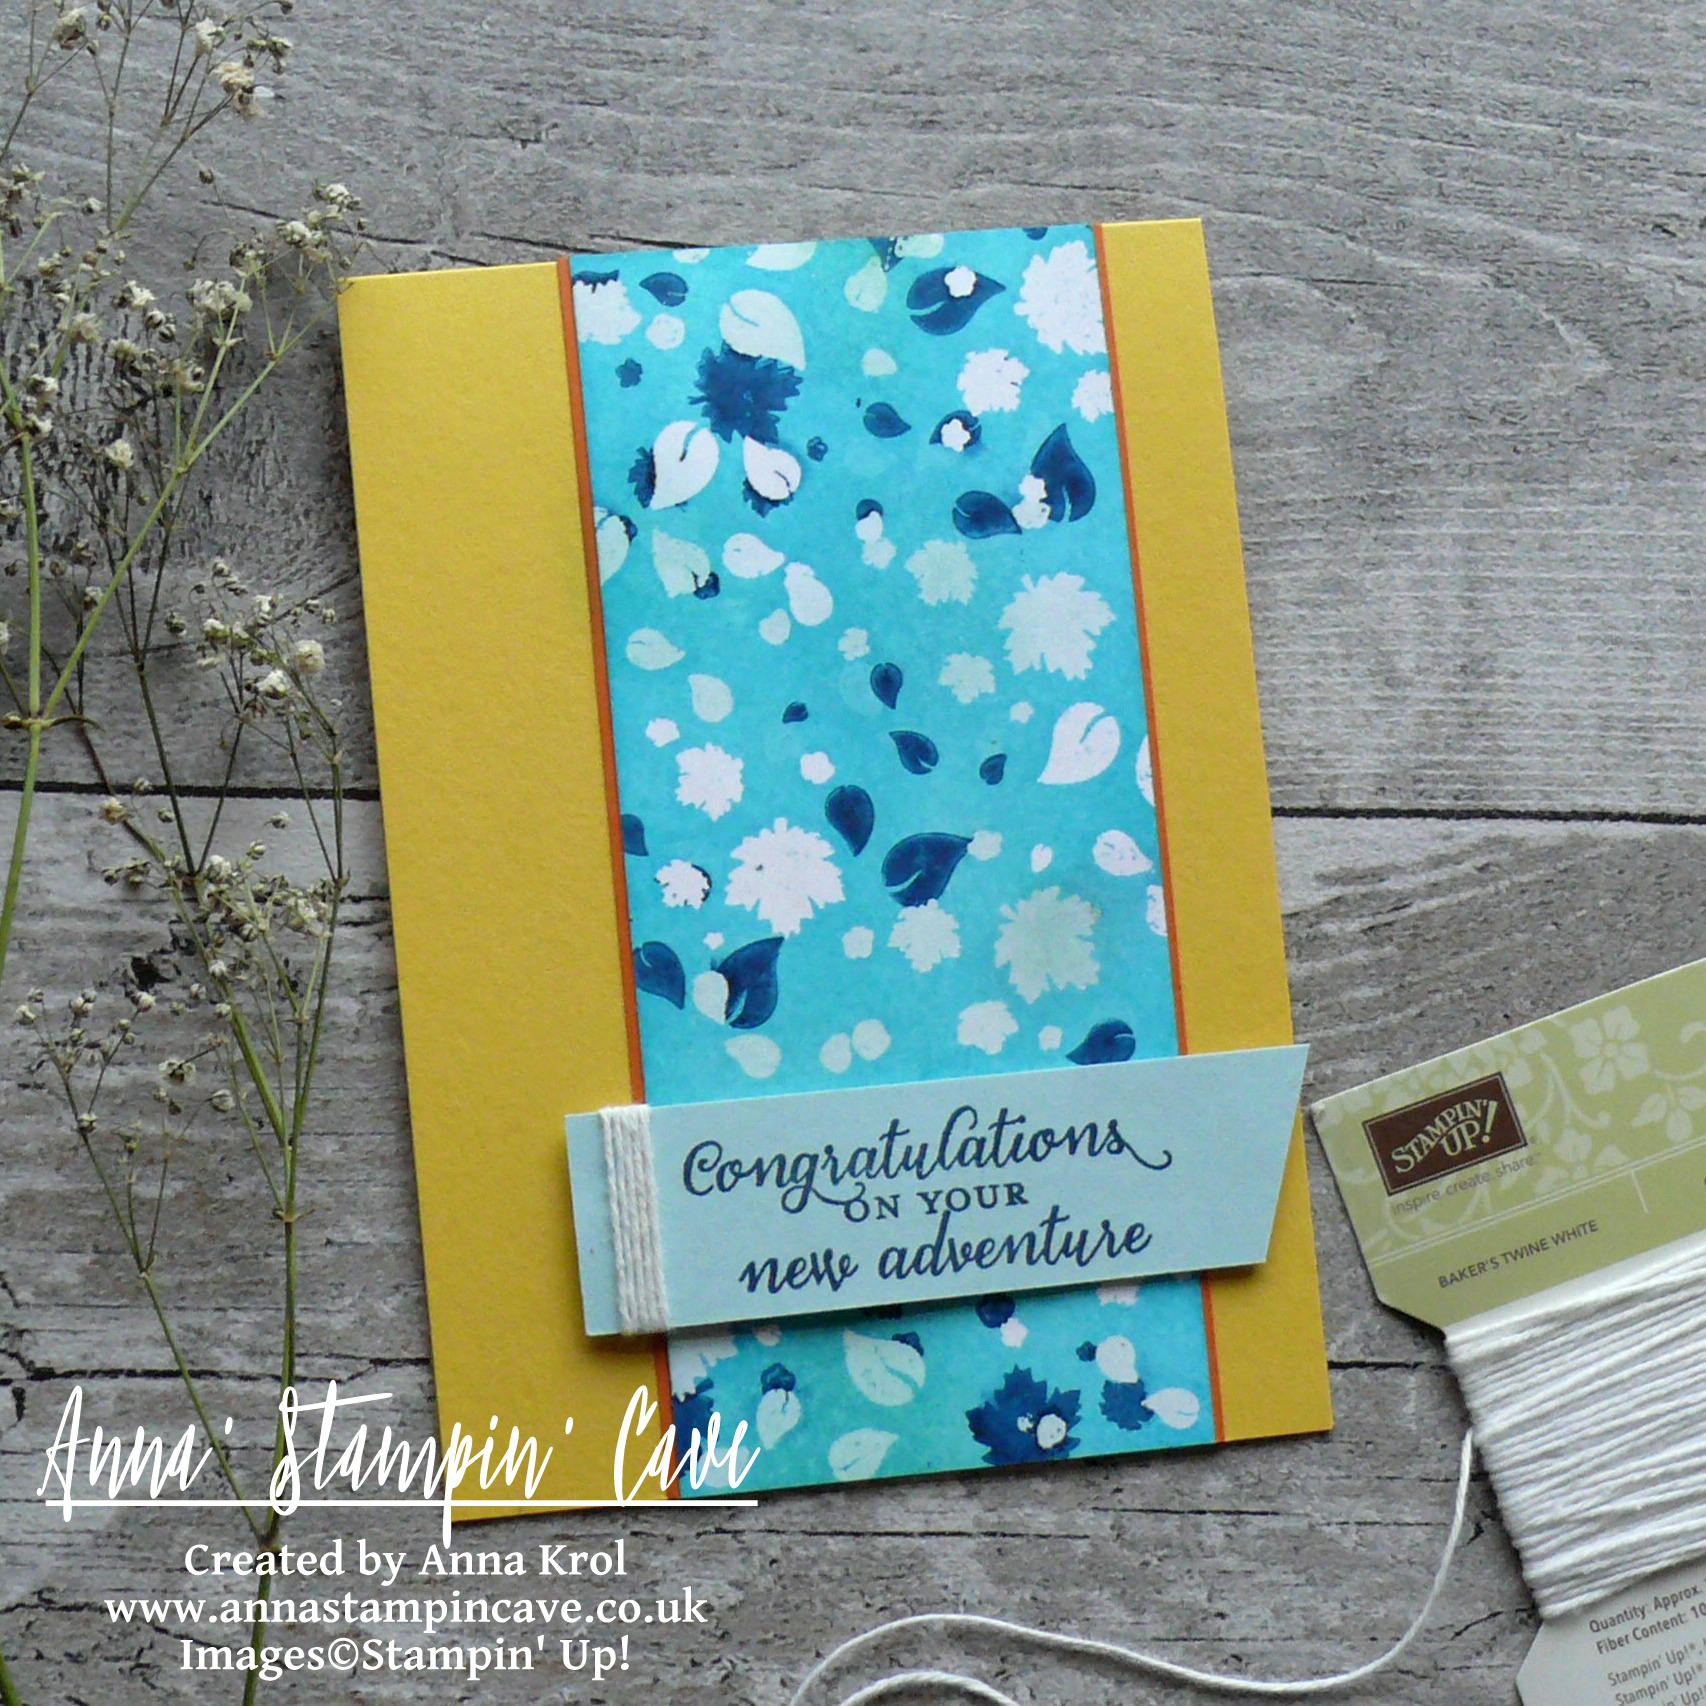
To create this fun background (and a focal point of my card) I decided to use the clusters of leaves from Perpetual Birthday Calendar Stamp Set.
For the first layer, I randomly stamped few clusters of leaves using Versamark ink on Whisper White panel and heat embossed them in clear. Once it’s done, I inked the panel using Soft Sky Ink Pad.
To create the second layer I stamped and heat embossed my leaves in clear again and sponged my panel in Tempting Turquoise. For the last layer, I stamped my leaves in Dapper Denim. Next, I used iron and regular copy paper to remove embossing from the panel.
I added strips of Pumpkin Pie cardstock under my panel and adhered it all to the card base.
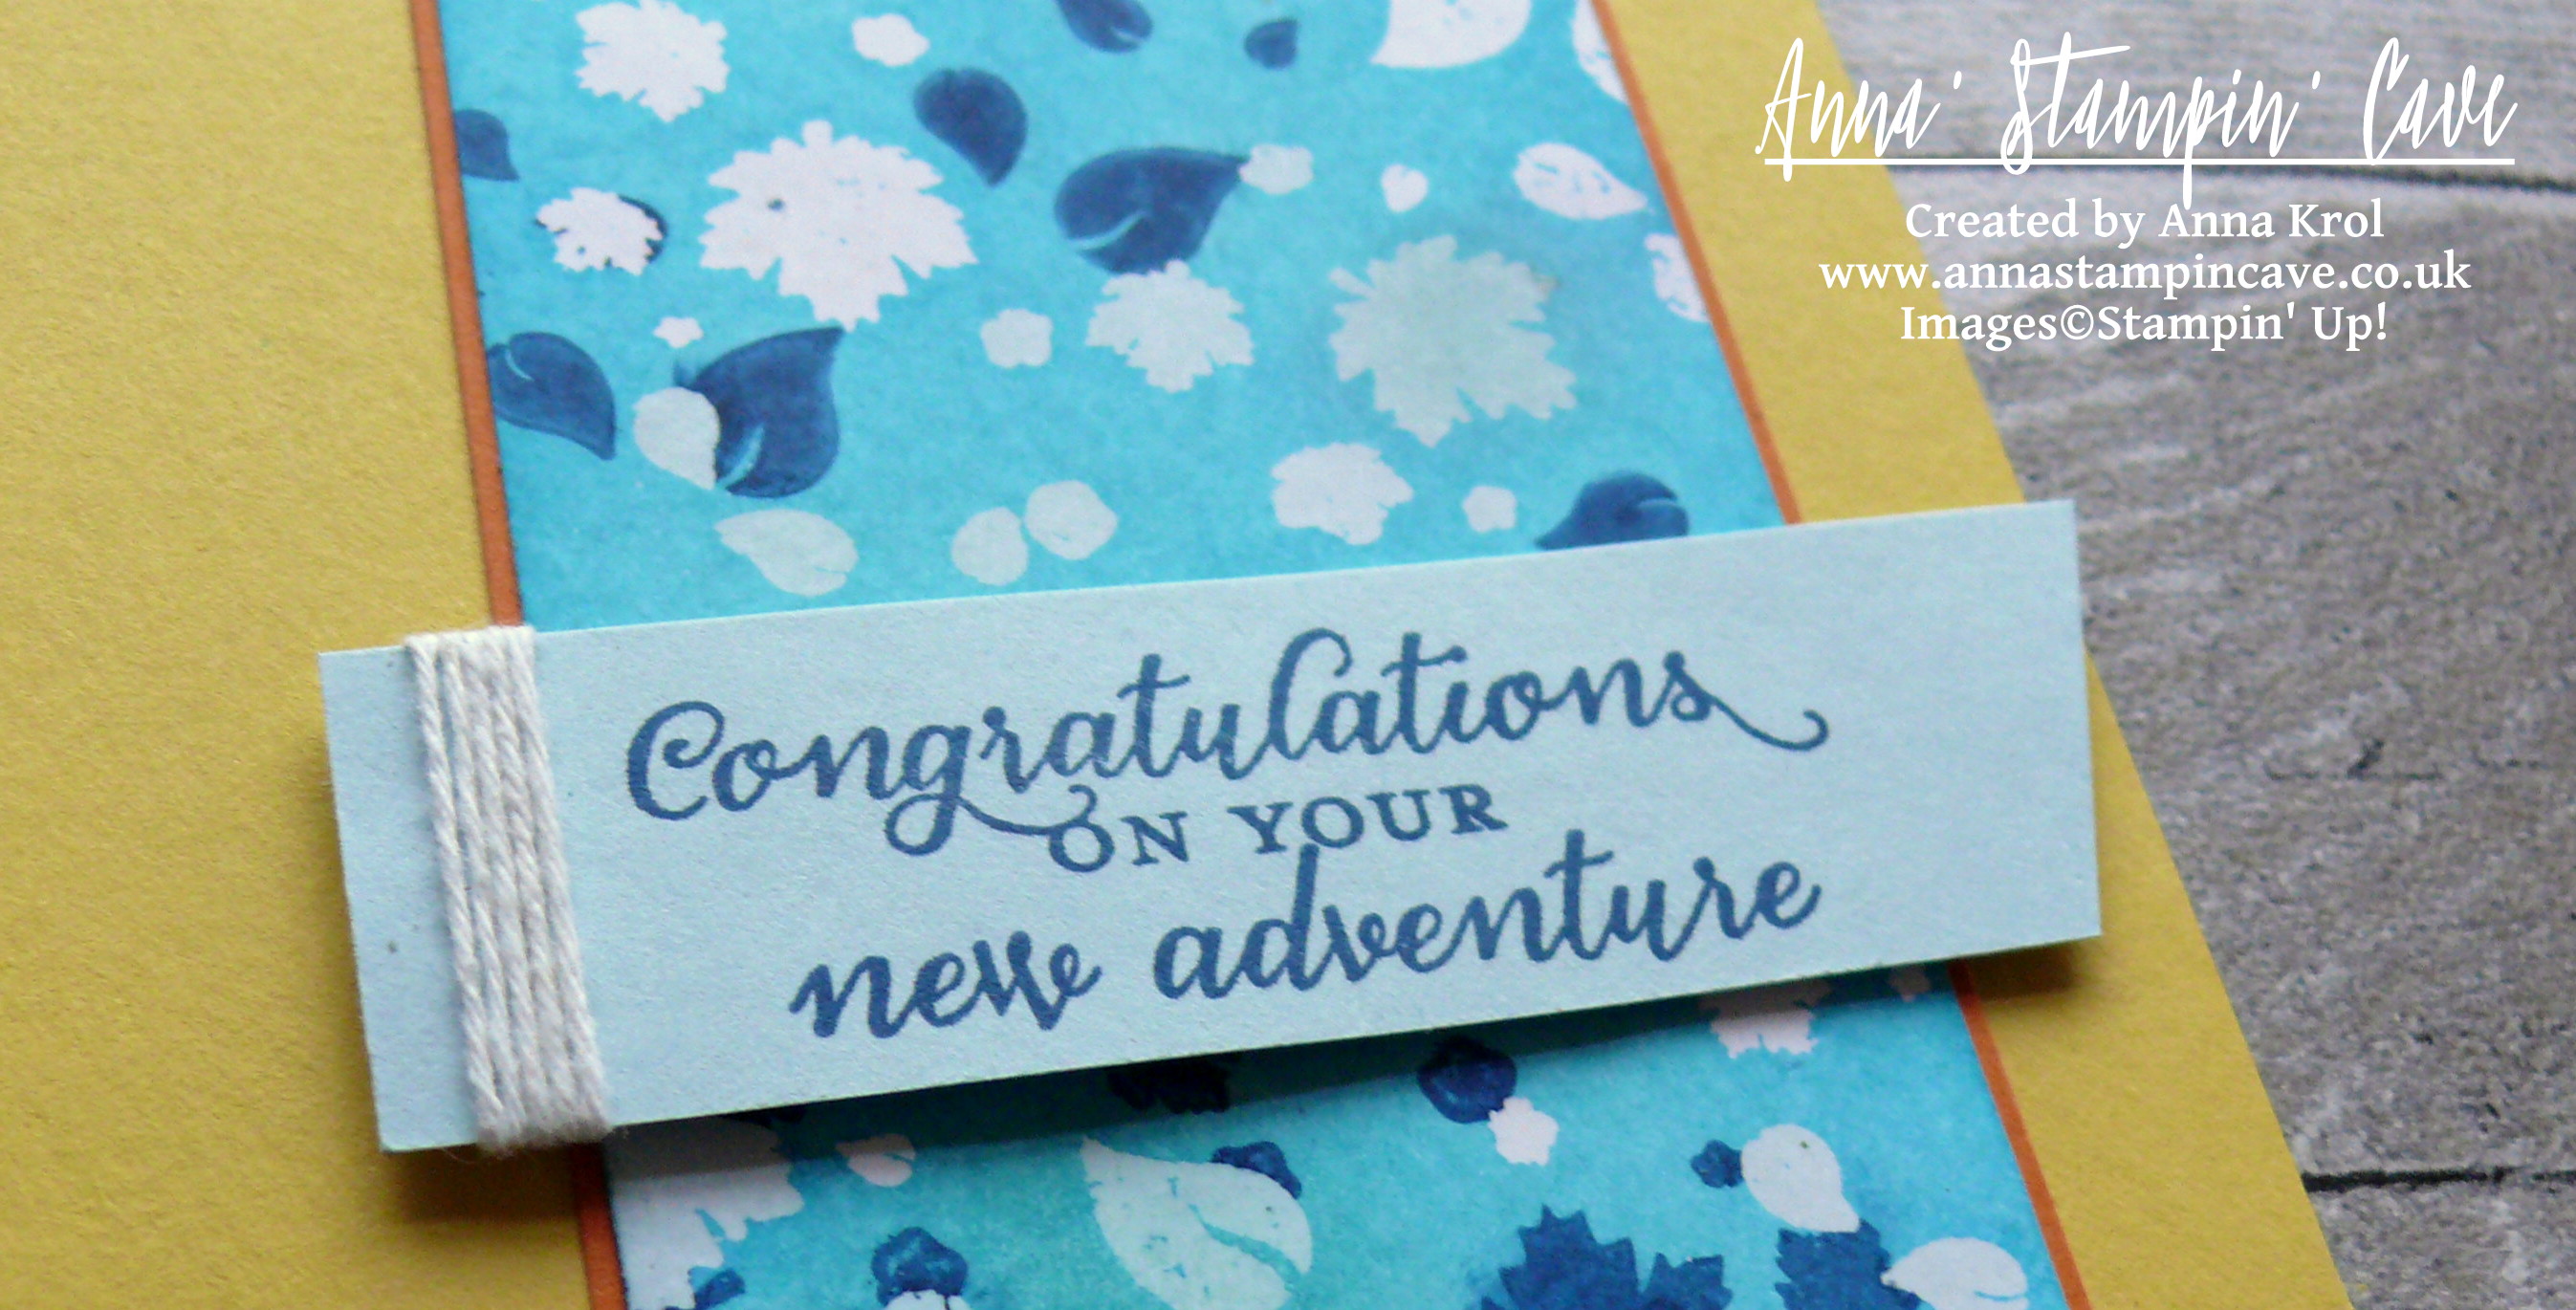
The sentiment is from Wild About Flowers Stamp Set. I stamped it in Dapper Denim on a piece of Soft Sky cardstock and cut one of the ends diagonally creating and wrapped white baker’s twine around the other end. I adhered it to the card base with dimensionals.
So this is it from me for today. Very simple card and so different from my usual style, but I quite like it. And I hope you like it too.
As always, I really want to encourage you to visit the Global Design Project challenge blog to see other beautiful projects from all around the world. Just click on their logo below to visit the website
Anna’ Stampin’ Cave – Simply Sketched Saturday Challenge #16 – I’m Here For You
Thank you for joining us for another Simply Sketched Saturday Challenge! We are so excited to be sharing this hop with you. The products used are all available in the current Annual, or seasonal, Stampin’ Up!® Catalogues*. Simply use the buttons at the bottom of the post to keep hopping!
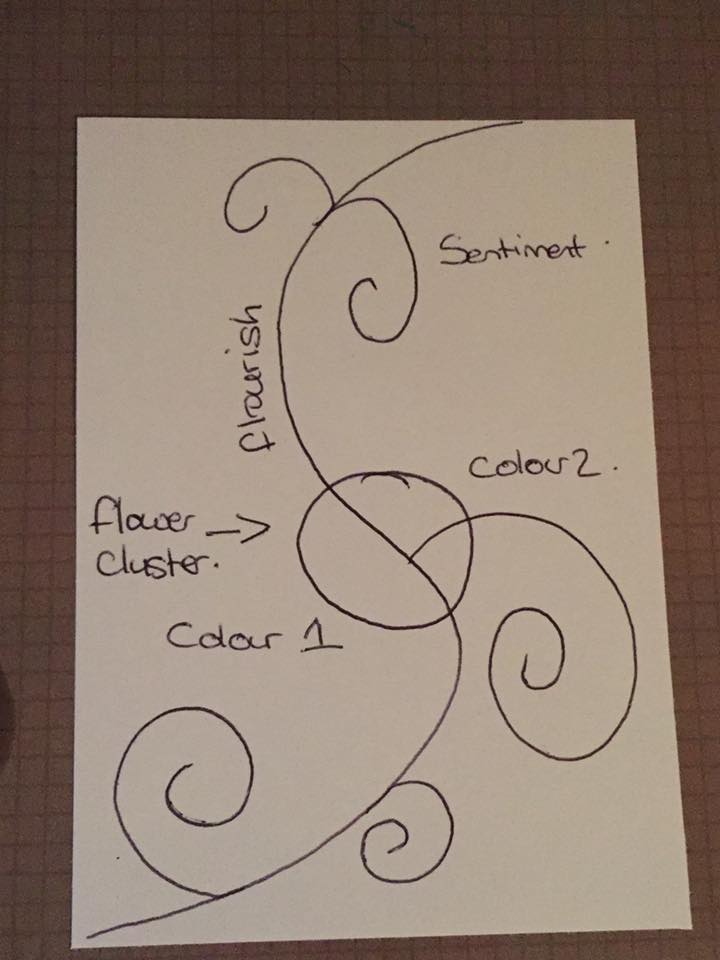
Welcome to our 16th sketch challenge blog hop! Today’s sketch has been designed by Amanda Charlesworth.
For a long time, I couldn’t decide if I wanted to create a 3D project or a card for this sketch. But because I definitely feel more confident as a card maker, I saved myself some stress and decided to make a card.
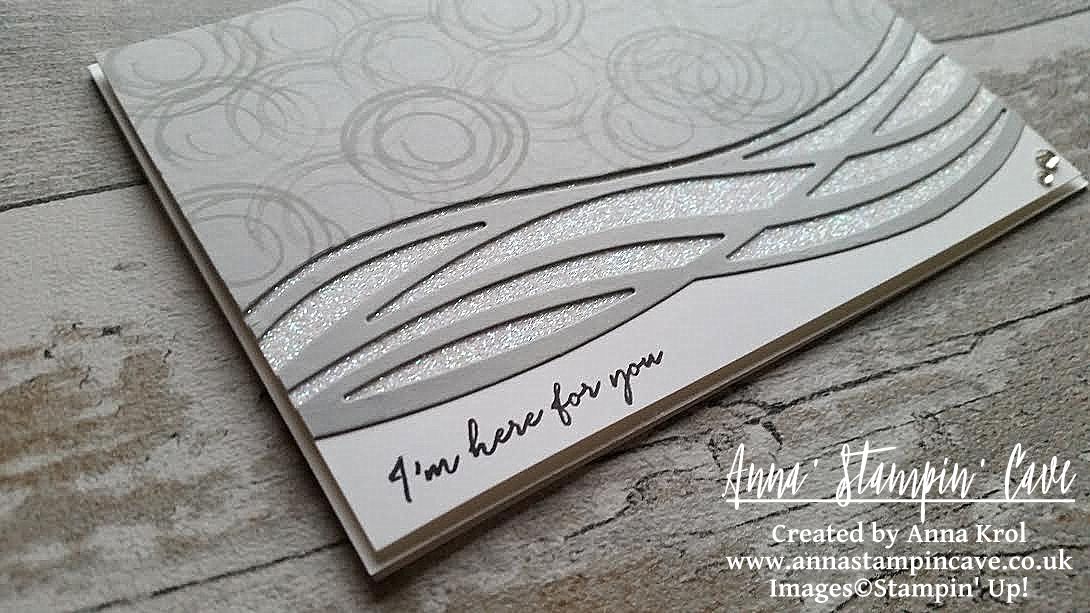
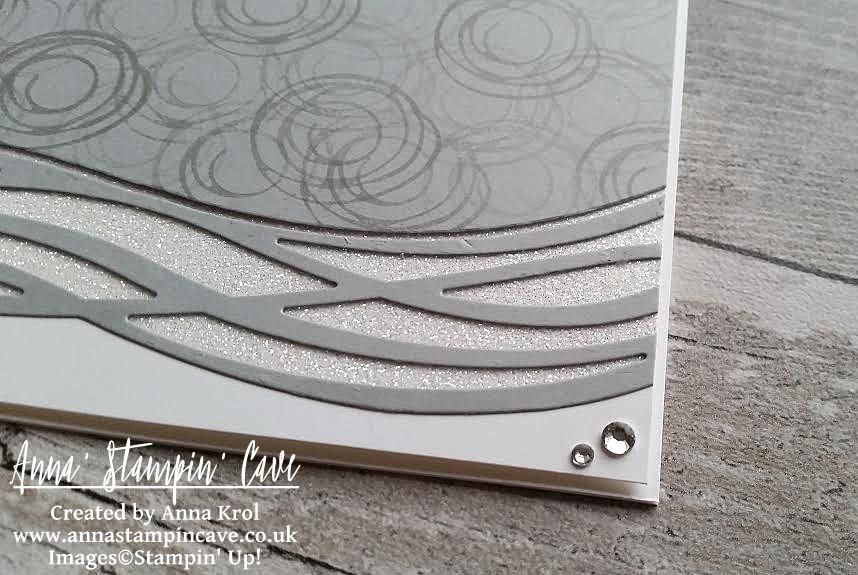
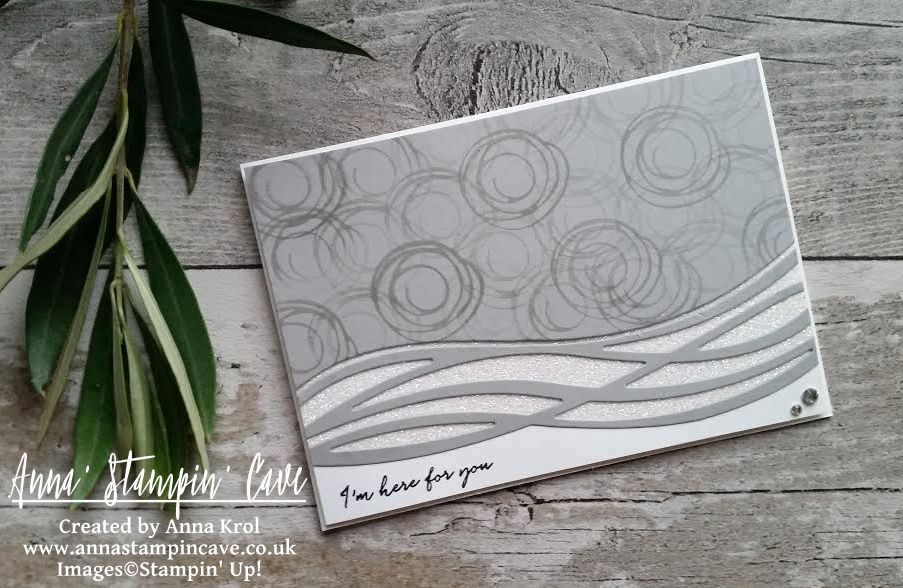
I altered the sketch a little bit and added my own twist to it. The base of my card is Whisper White Thick A4 cardstock that measures 8-1/4″x 5-7/8″, and folded in half at 4-1/8″. Next, I cut two panels: one from regular Whisper White and one Smoky Slate. Both measured 4″x 5-6/8″. I took the Smoky Slate panel and using a multi-wave die from Swirly Scribbles Thinlits Dies, I die cut one piece of ‘waves’.
Savvy Tip: Save the bottom scrap piece for some masking later on.
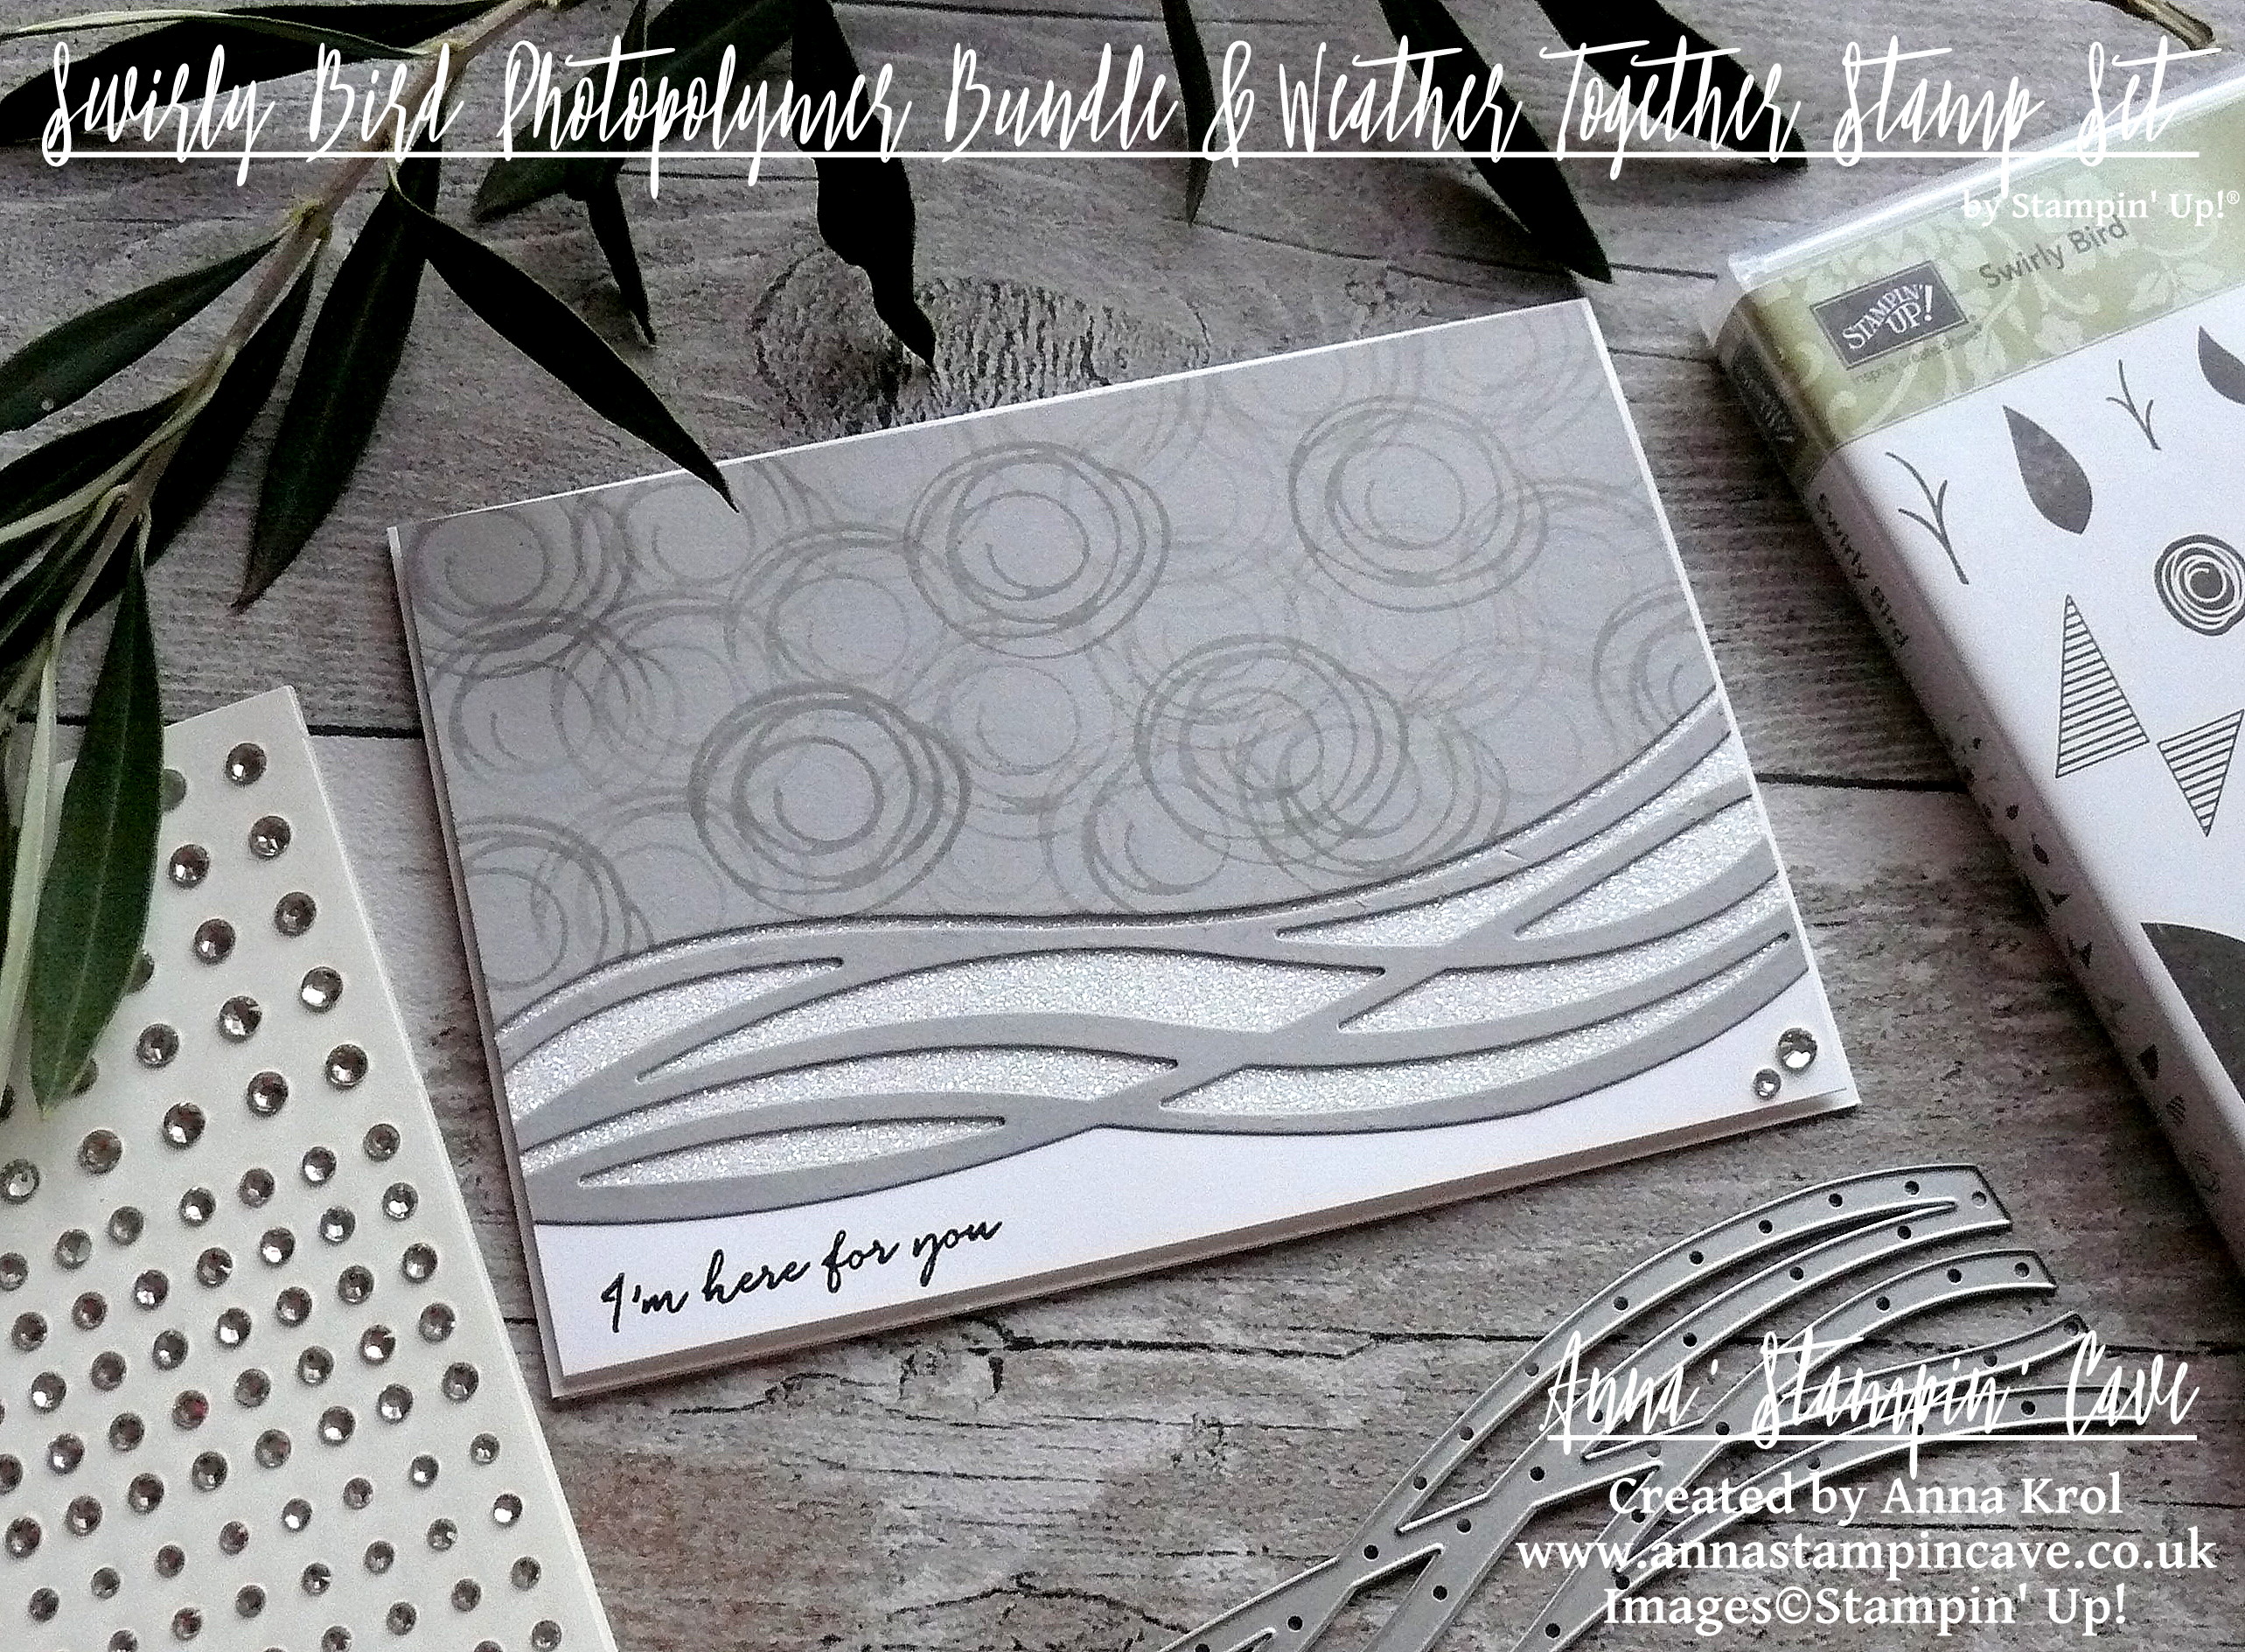
I took scribble circle stamp from Swirly Bird Stamp Set and stamp it repeatedly in Smoky Slate over the Smoky Slate panel, overlapping and stamping off until the whole piece was covered.
Now I took Whisper White panel and that Smoky Slate scrap piece I saved earlier to create glimmer bottom layer for my wavy die-cut. I lined up the straight edge of my scrap with a bottom edge of Whisper White and squished Versamark pad over the bottom piece of that Whisper White panel. I didn’t want to cover entire panel, only the part that will be peaking through the ‘wavy’ piece. I sprinkled Heat & Stick Powder over it and heat embossed until melted. Next, I added Dazzling Diamond Glitter over it and heat embossed again to secure glitter in place. But why I used that leftover scrap of Smoky Slate, you may wonder? I’ve used it to make sure the very bottom of my WW panel won’t be covered in glitter, so I had a nice spot for my sentiment.
I adhered Smoky Slate panel and ‘waves’ to the Whisper White panel. To finish off my card, I took a beautiful ‘I’m here for you’ sentiment from Weather Together Stamp Set and stamped it in Basic Black at the bottom left corner of my panel. I also added a couple of rhinestones at bottom right corner for a good measure. I’ve mounted the whole piece to the card base using dimensionals.
I really like how this card turned out. Clean and simple. I hope you like my take on the sketch too.
As always, if you wish to purchase any of the products I have used, simply click the images below to go directly to my online shop.
Now, be sure to hop along and see more inspiring projects. Your next stop is lovely Jillian.


")


")


")


")
")
")


 My exclusive special offer this month only: FREE Stampin’ Up! Pearlised Doilies
 Earn in August – redeem in September –>