Kylie Bertucci’s International Project Highlights

Anna’ Stampin’ Cave – Kylie Bertucci’s International Project Highlights

Thanks for coming to my blog today! We are being highlighted internationally by Kylie Bertucci and you are able to vote for my project. The top ten winners will get to be part of an international blog hop so please vote for my project. My project is under number  27!  You can do it here or use a button at the end of my post.

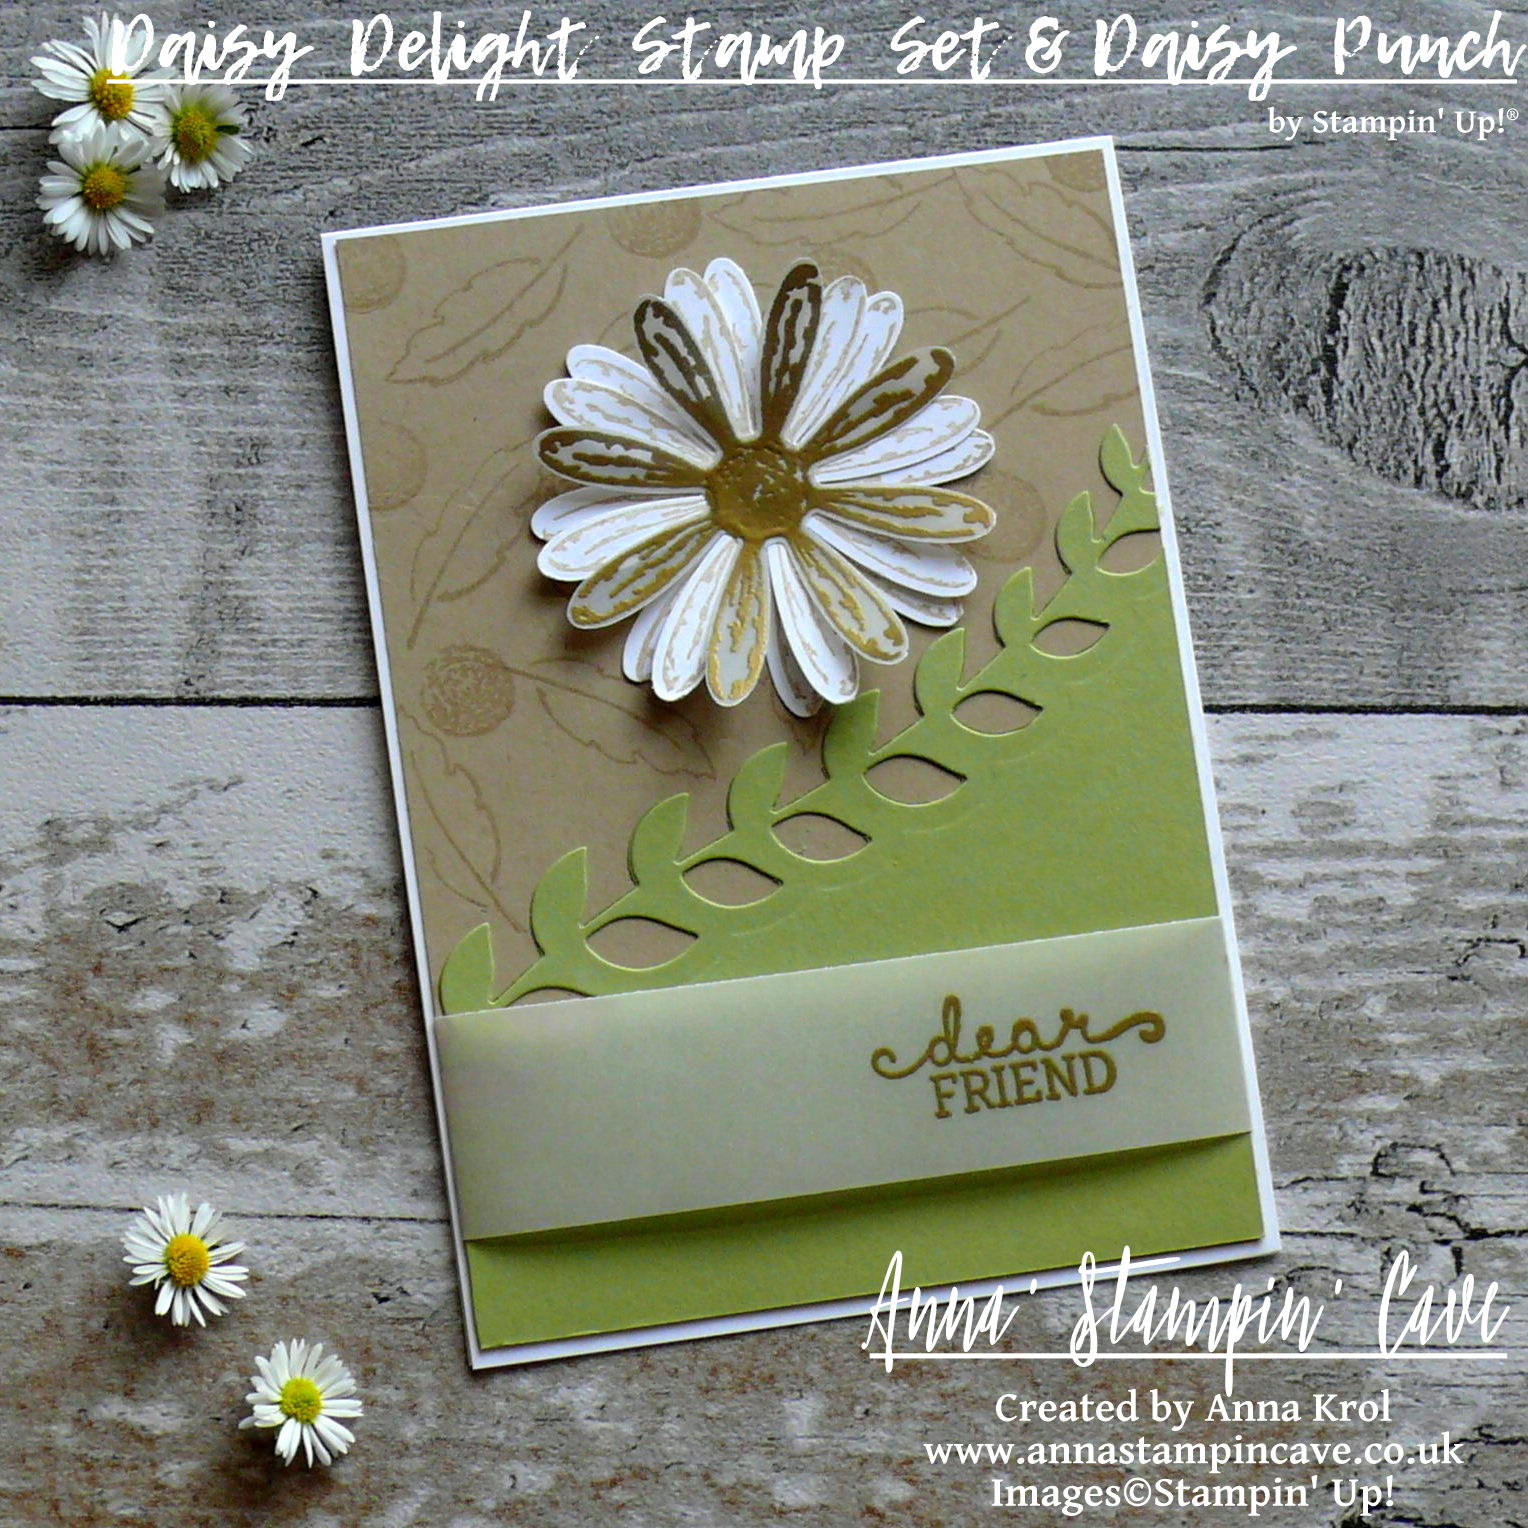
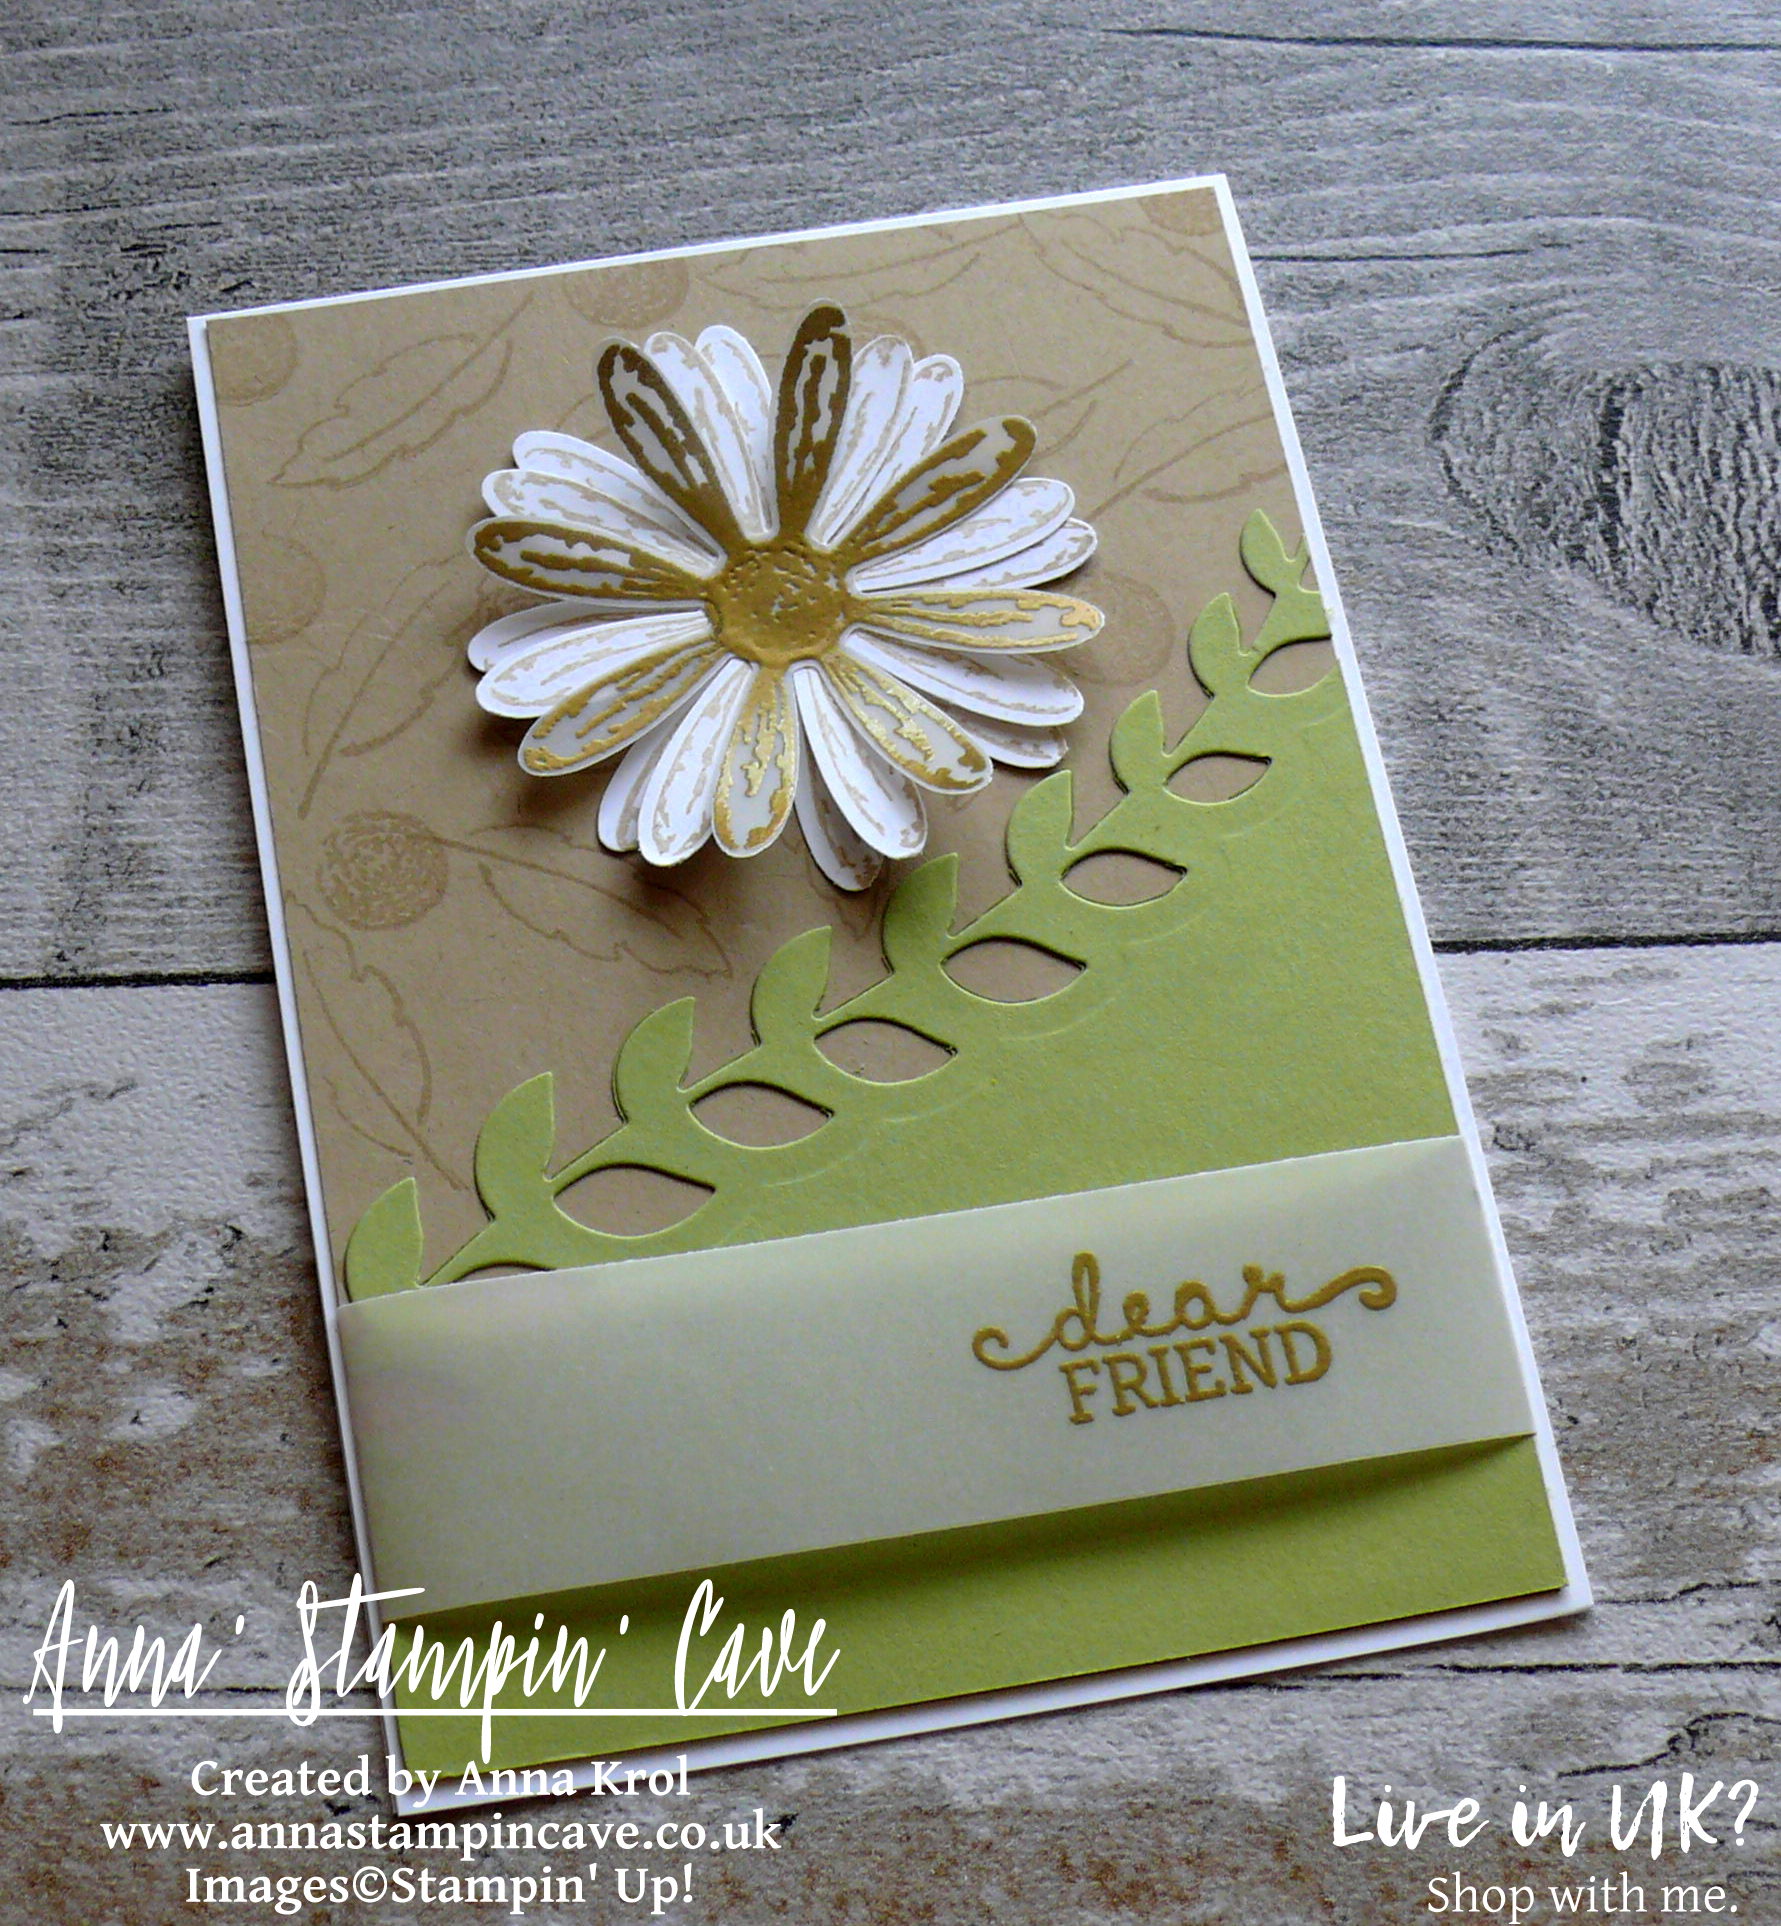
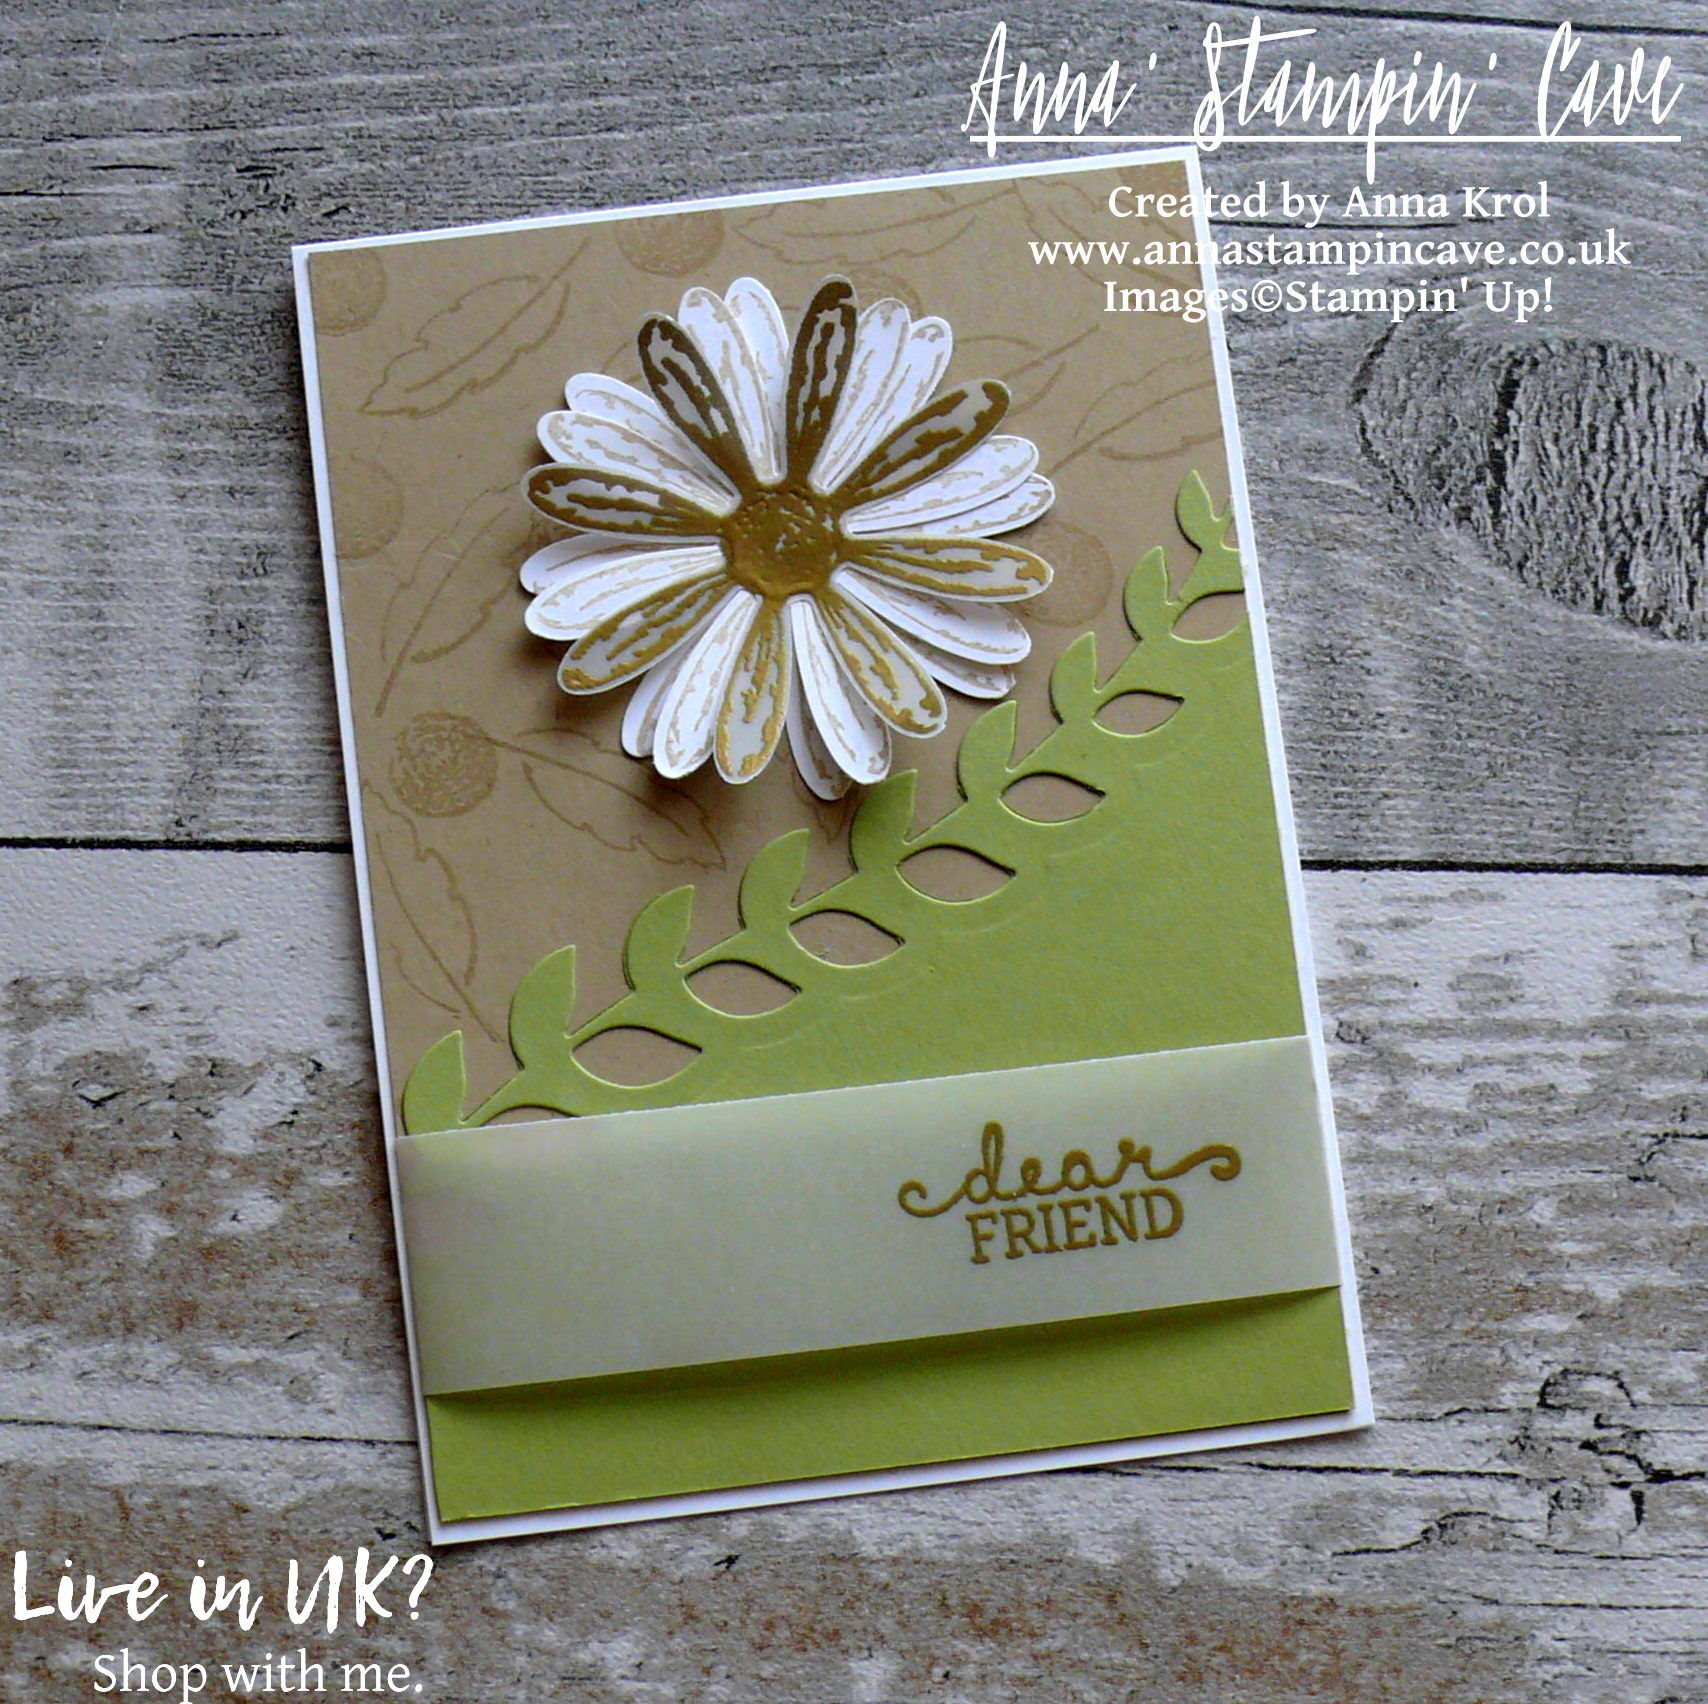
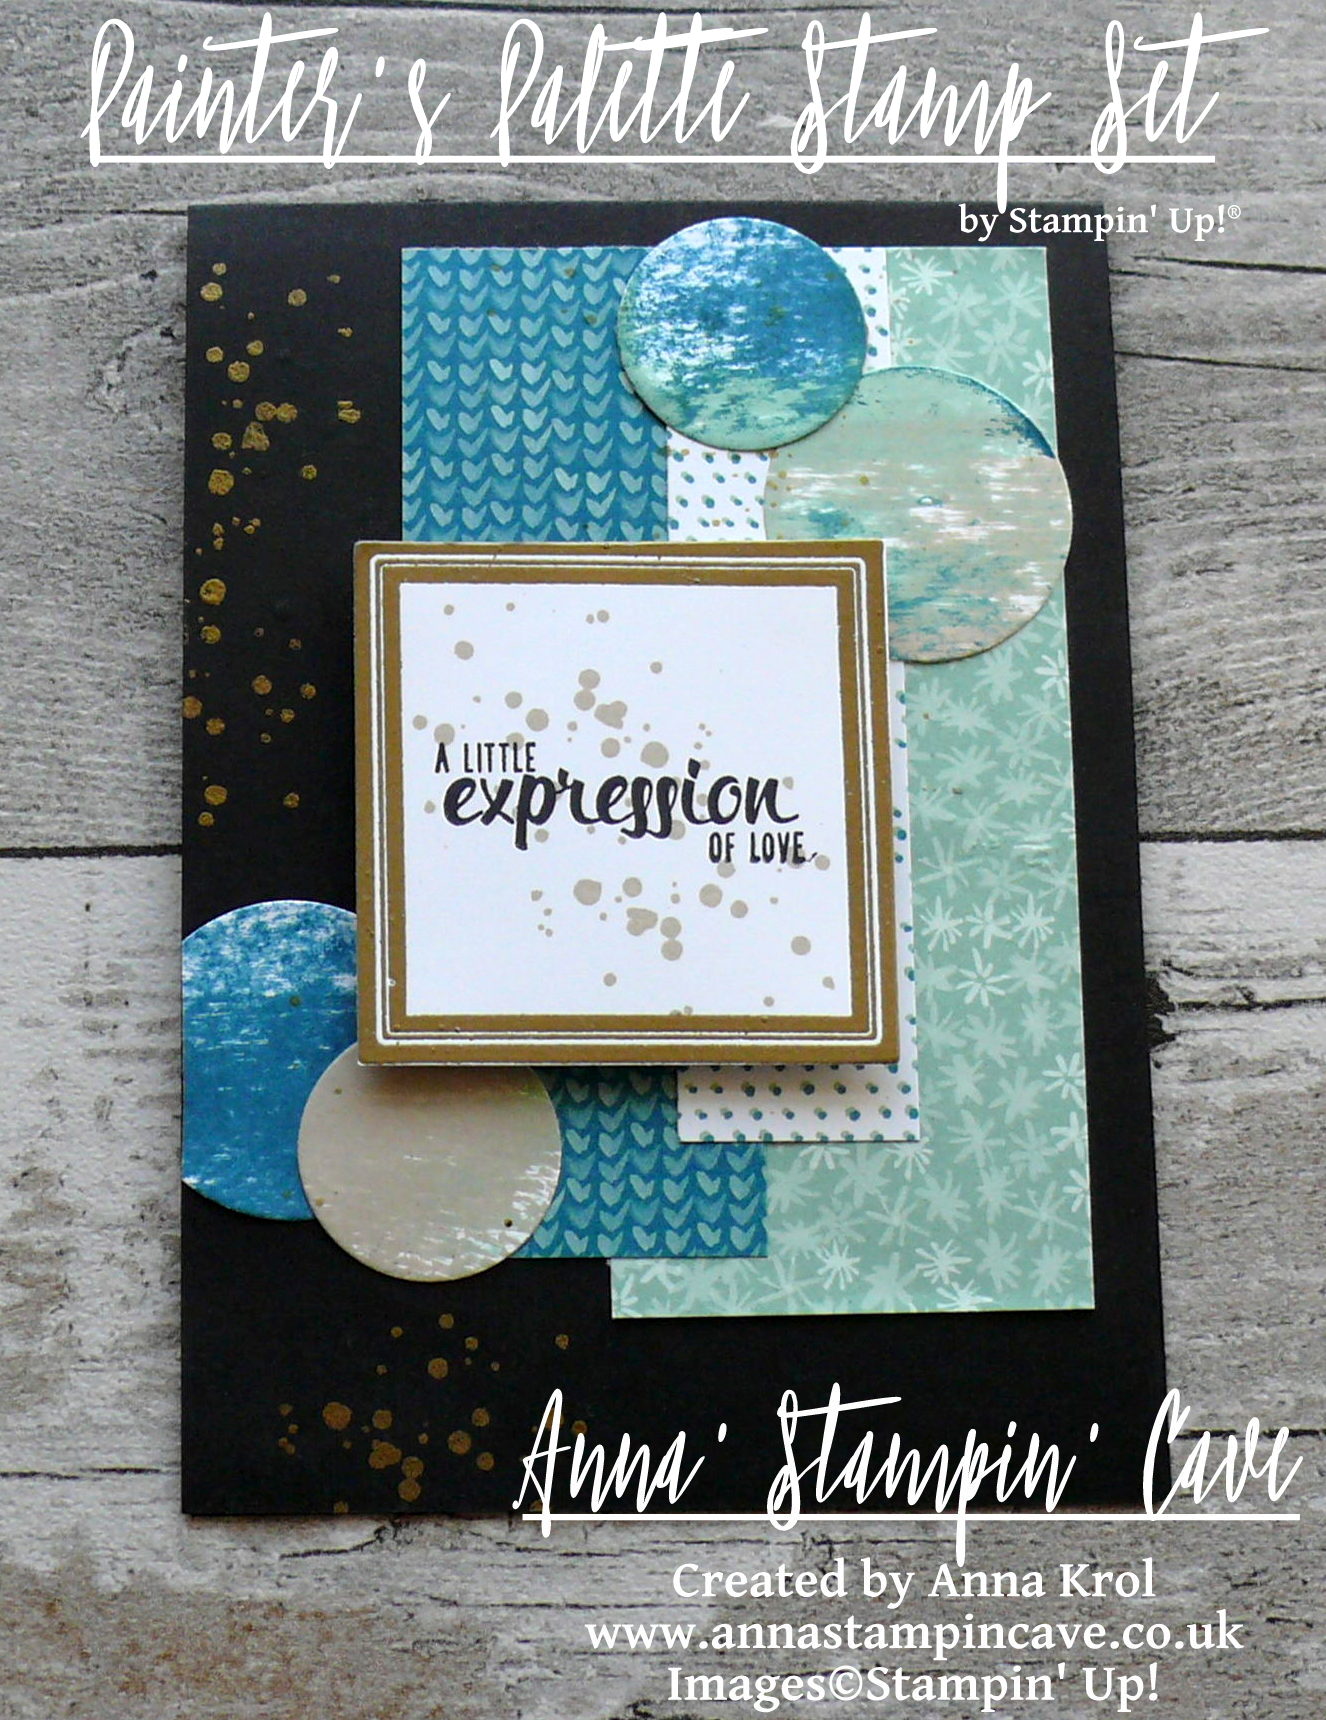
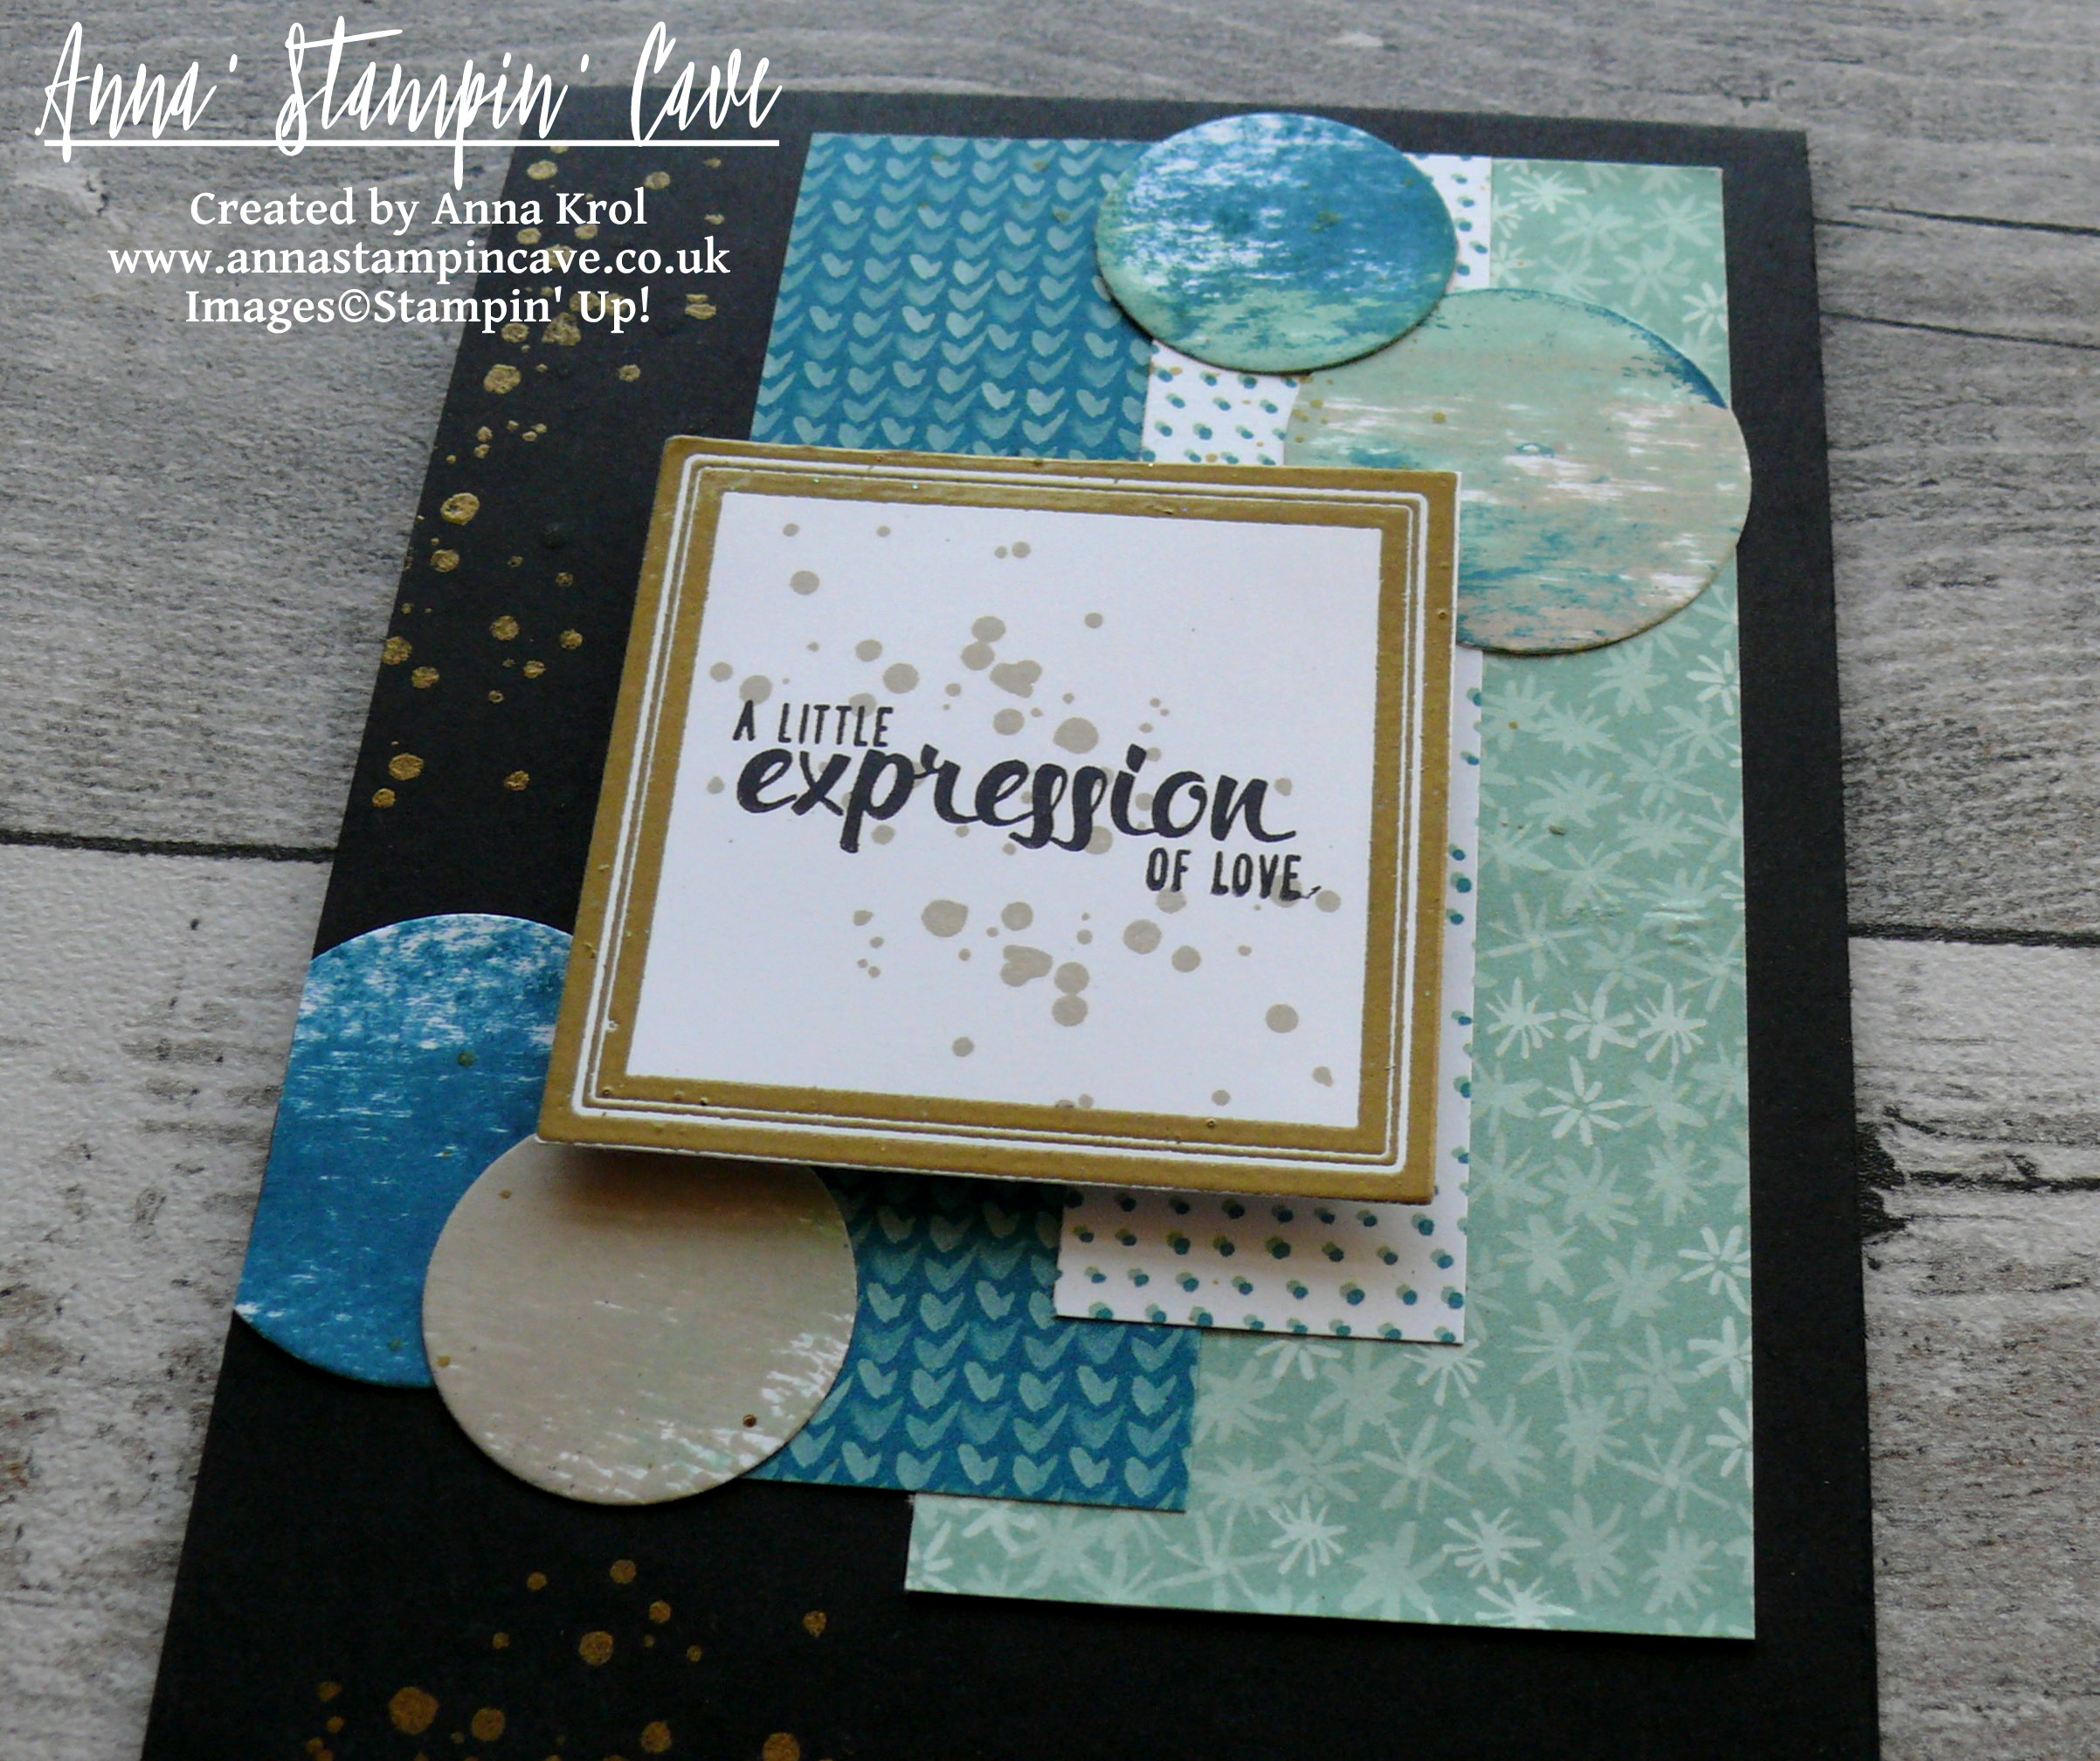
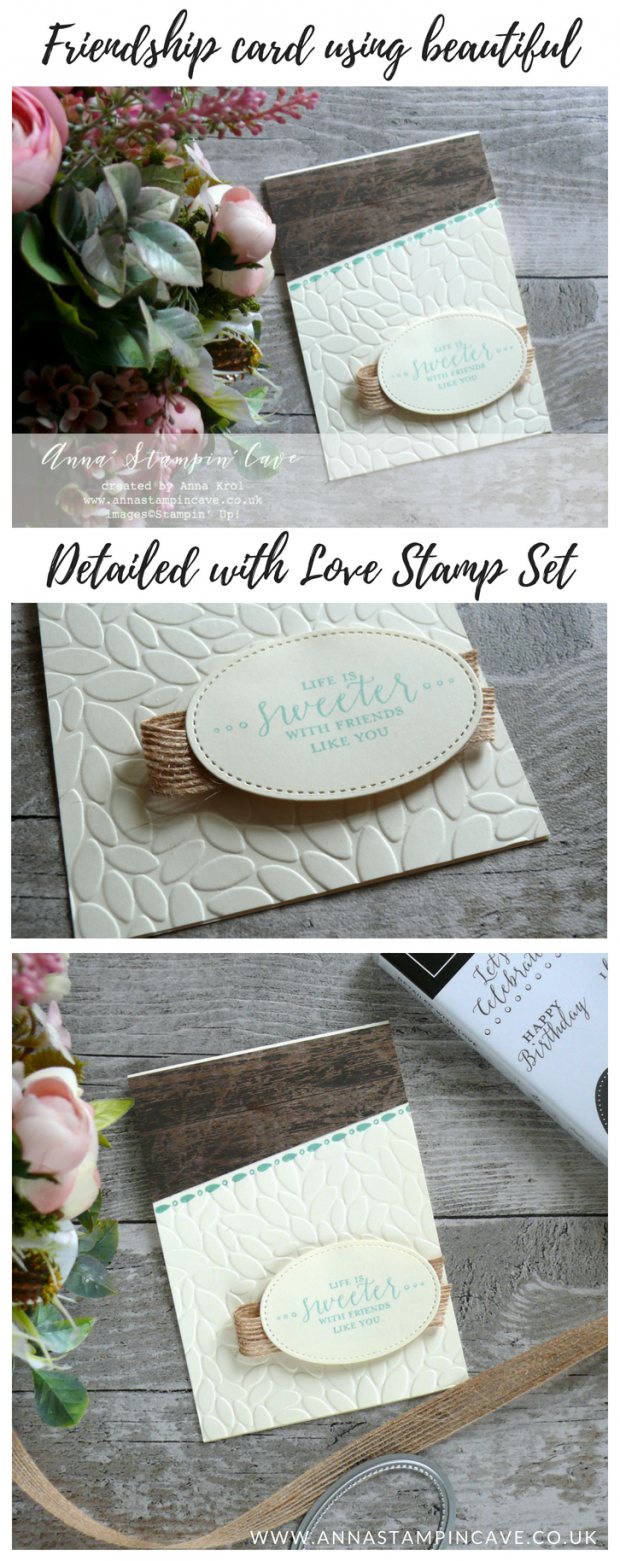
A theme for this highlight is ‘Friendship’. So I thought I will use some of the new products to create my card.

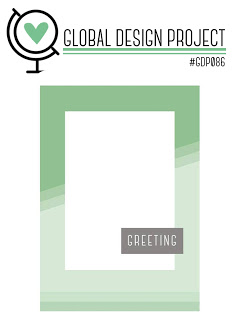
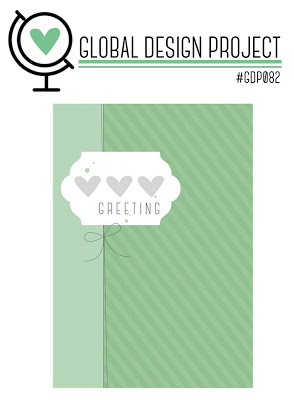
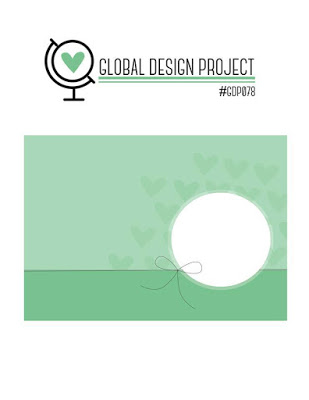
To create this card I used the sketch from the Global Design Project:

I slightly re-engineered it though (lol)
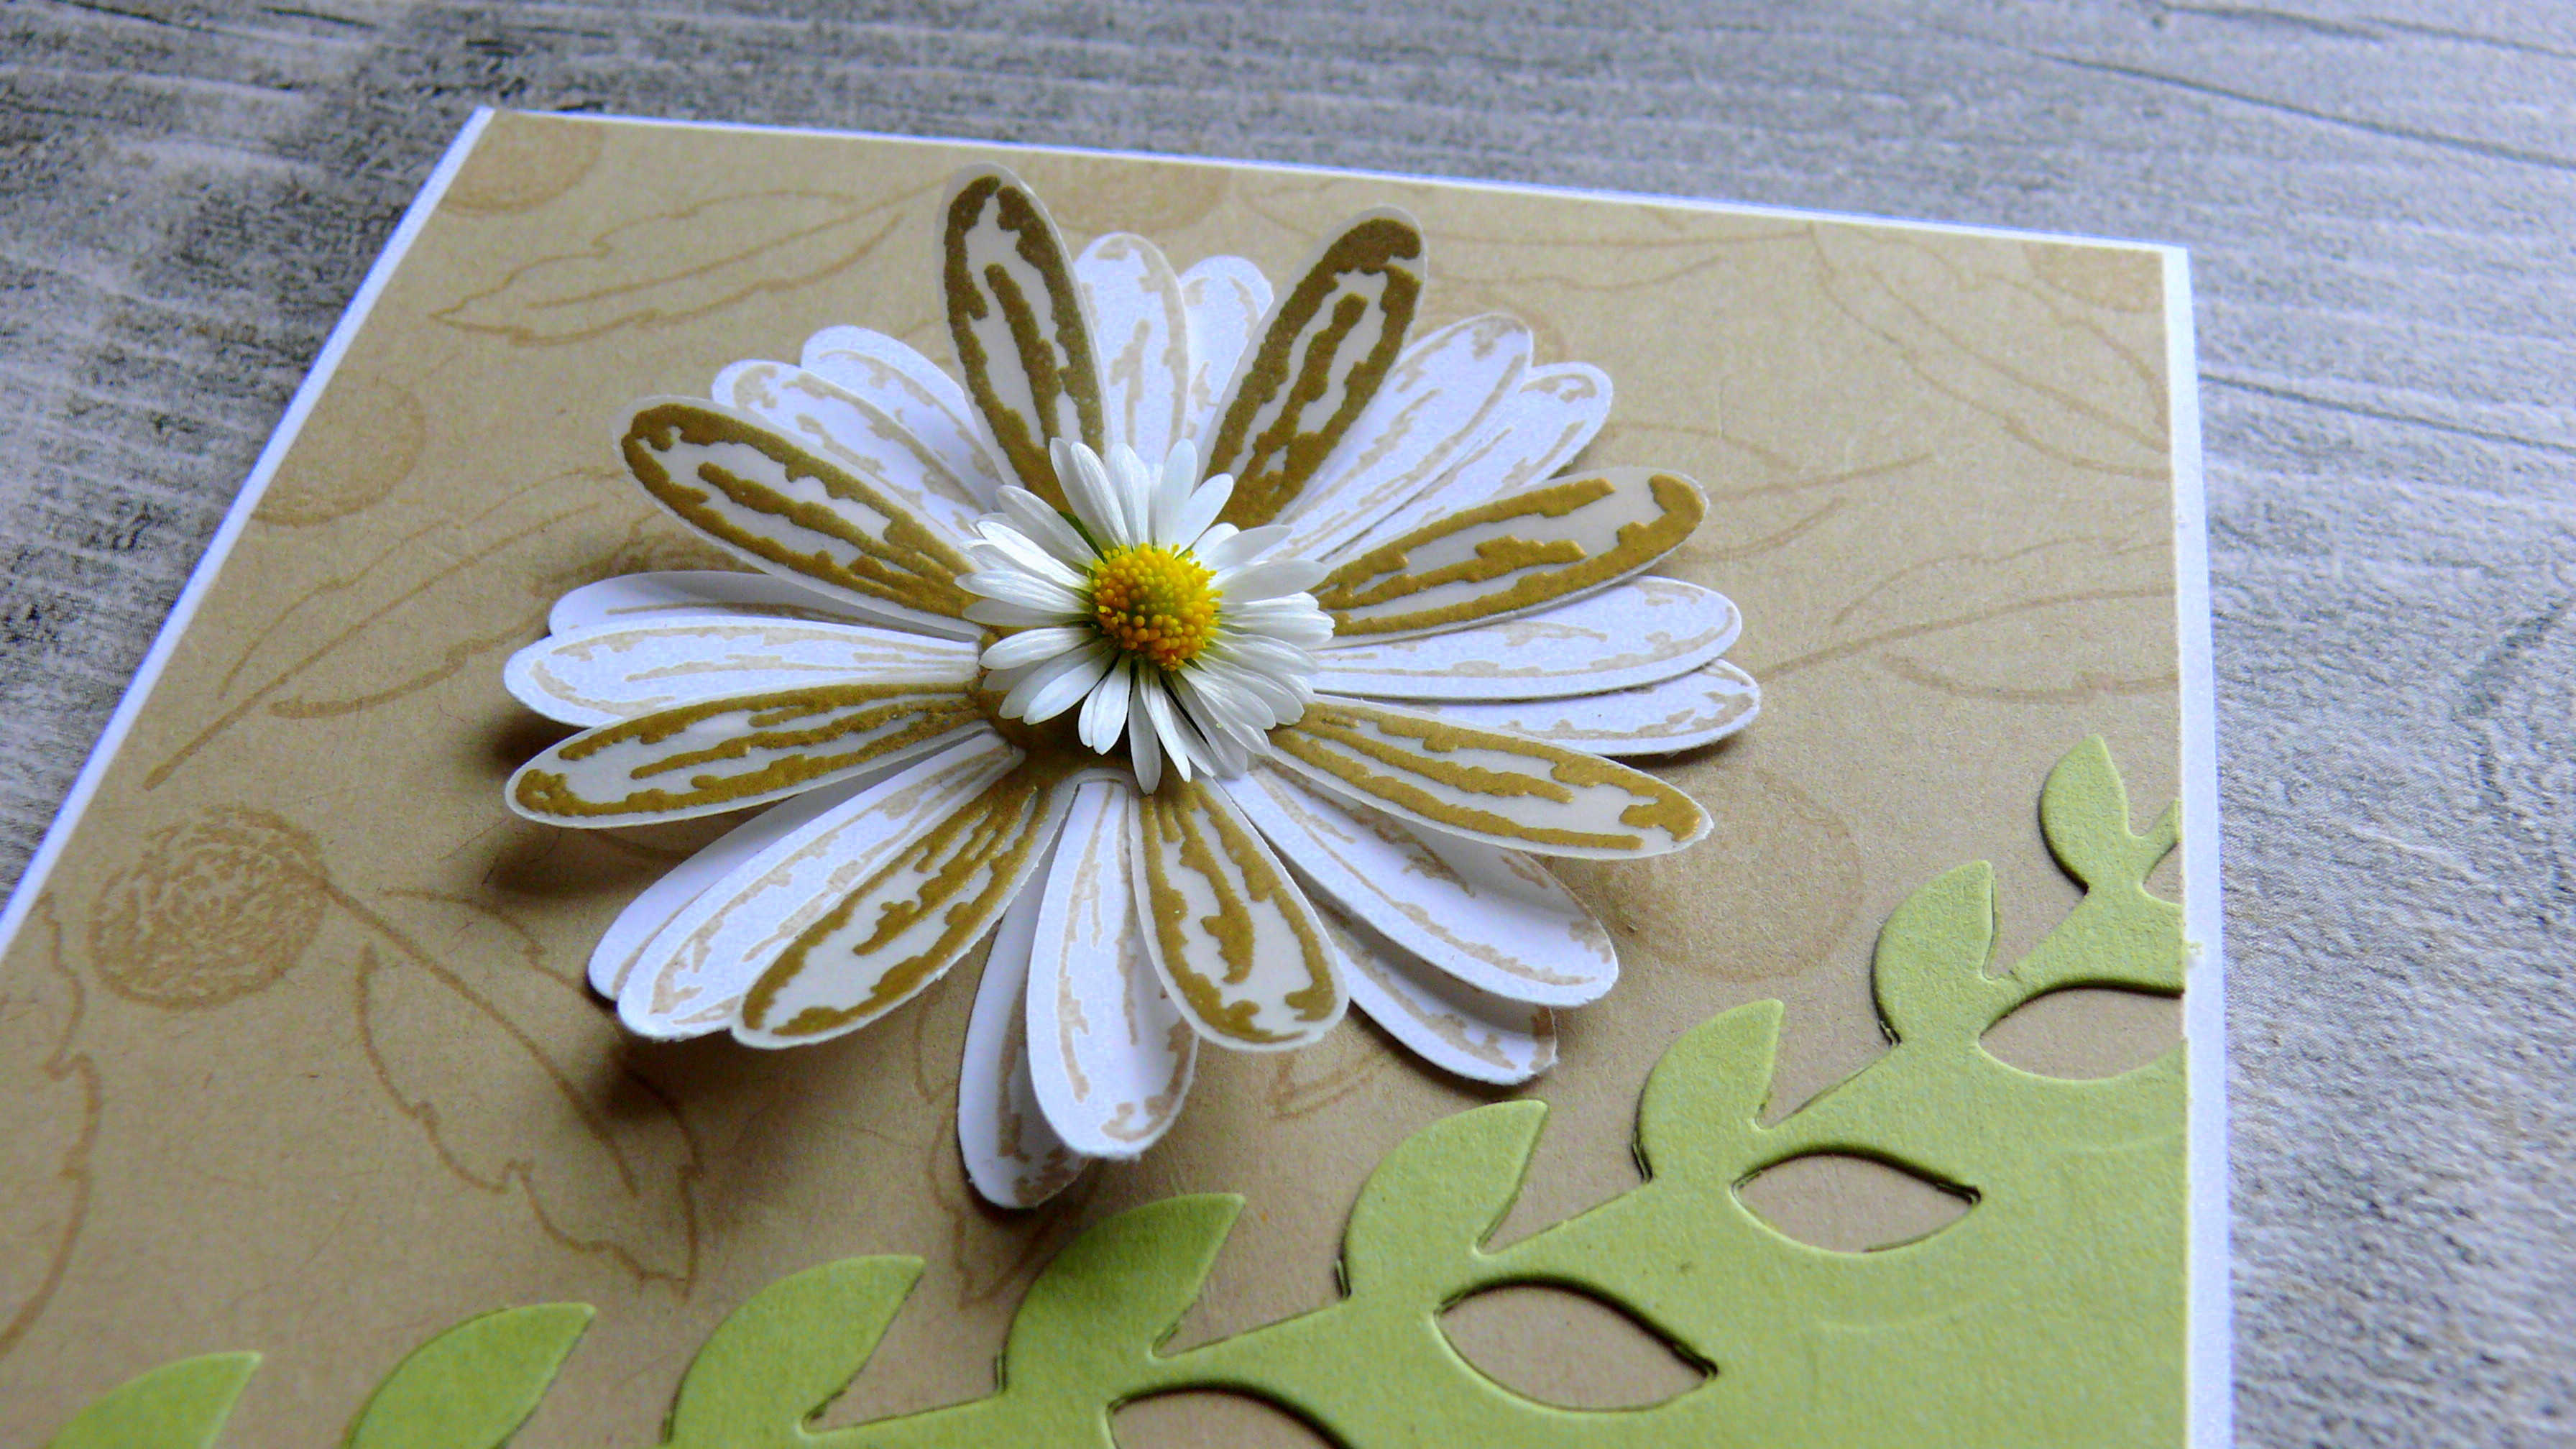
And here’s my card:

Anna' Stampin' Cave - friendship rustic card using Stampin' Up! Detailed with Love Stamp Set

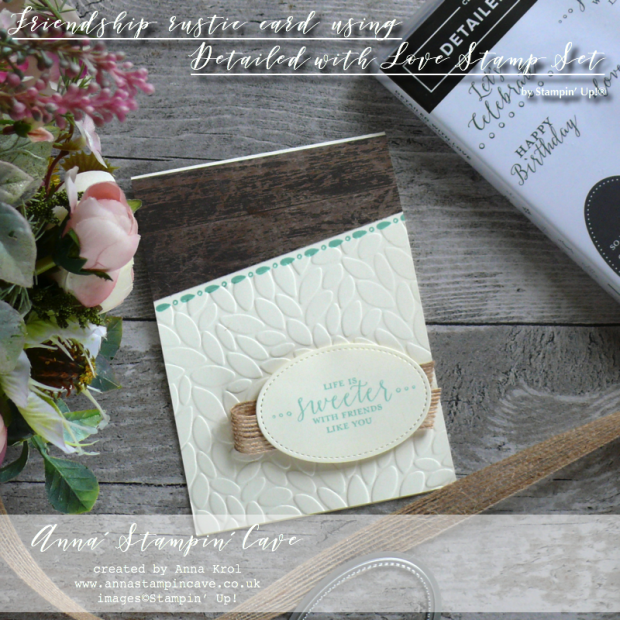
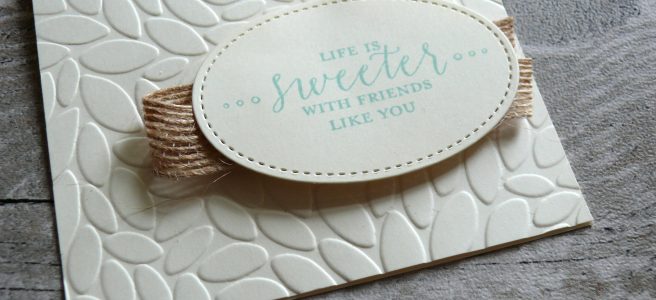
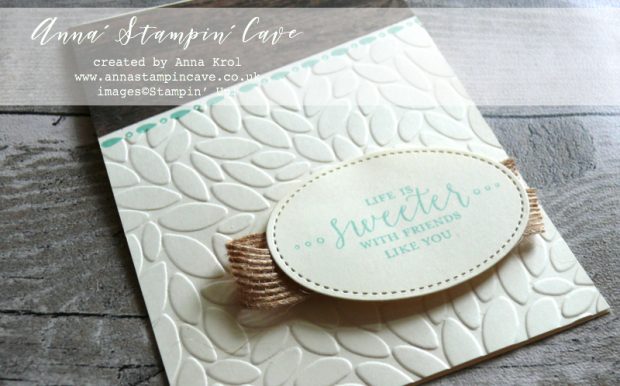
Friendship card dimensions:

  • Very Vanilla Thick Cardstock: 11-6/8″ x 4-1/8″ scored in half at 5-7/8″ (29.7 x 10.5 cm scored in half at 14.8 cm)
  • Very Vanilla regular cardstock for stamping
  • Wood Textures DSP Stack: 2″ x 4-1/8″ (5.08 cm x 10.5 cm)
  • 5/8″ Burlap Ribbon 7″ approx (17.8 cm)

First, I created the base. Next, I cut DSP at a slight angle – the narrower end measures 1-2/8″ (3.2 cm). I adhered it to the base using snail adhesive.

Anna' Stampin' Cave - friendship rustic card using Stampin' Up! Detailed with Love Stamp Set

Now the Stamparatus came in handy. I wanted to create a little border where DSP ended. I placed my card in the Stamparatus at an angle so the grid at the Samparatus base and the edge of DSP created ‘one line’.

I placed the border stamp where I wanted it to stamp, and using the plate I lift it up. I inked my stamp with a Pool Party Ink Pad and made my first impression. Now taking advantage of hinges, I moved the plate one spot in the right direction, inked and stamped again. Moved it, inked and stamped it one more time. Perfect alignment each time!

Next, I took the Petal Burst embossing folder and placed it on the bottom part of the card base, so it ended just by my stamped Pool Party border and run it through the Big Shot.

Anna' Stampin' Cave - friendship rustic card using Stampin' Up! Detailed with Love Stamp Set

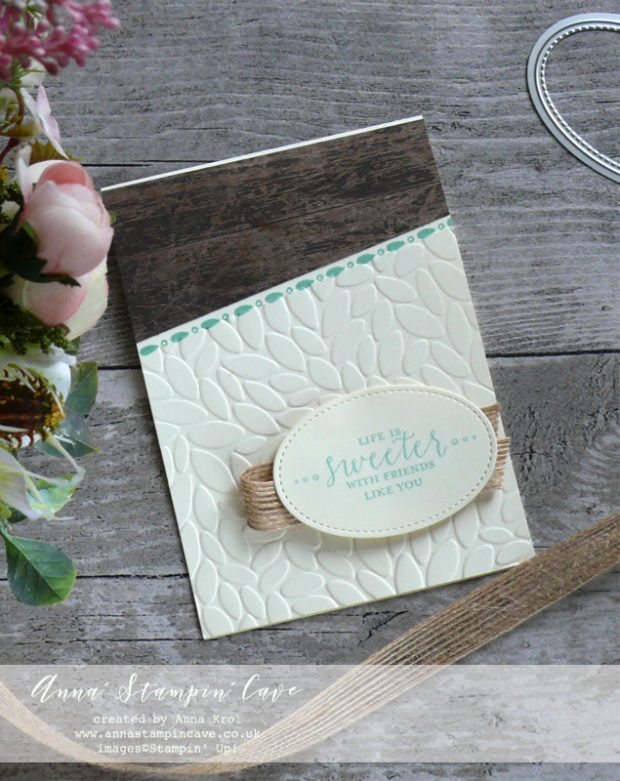
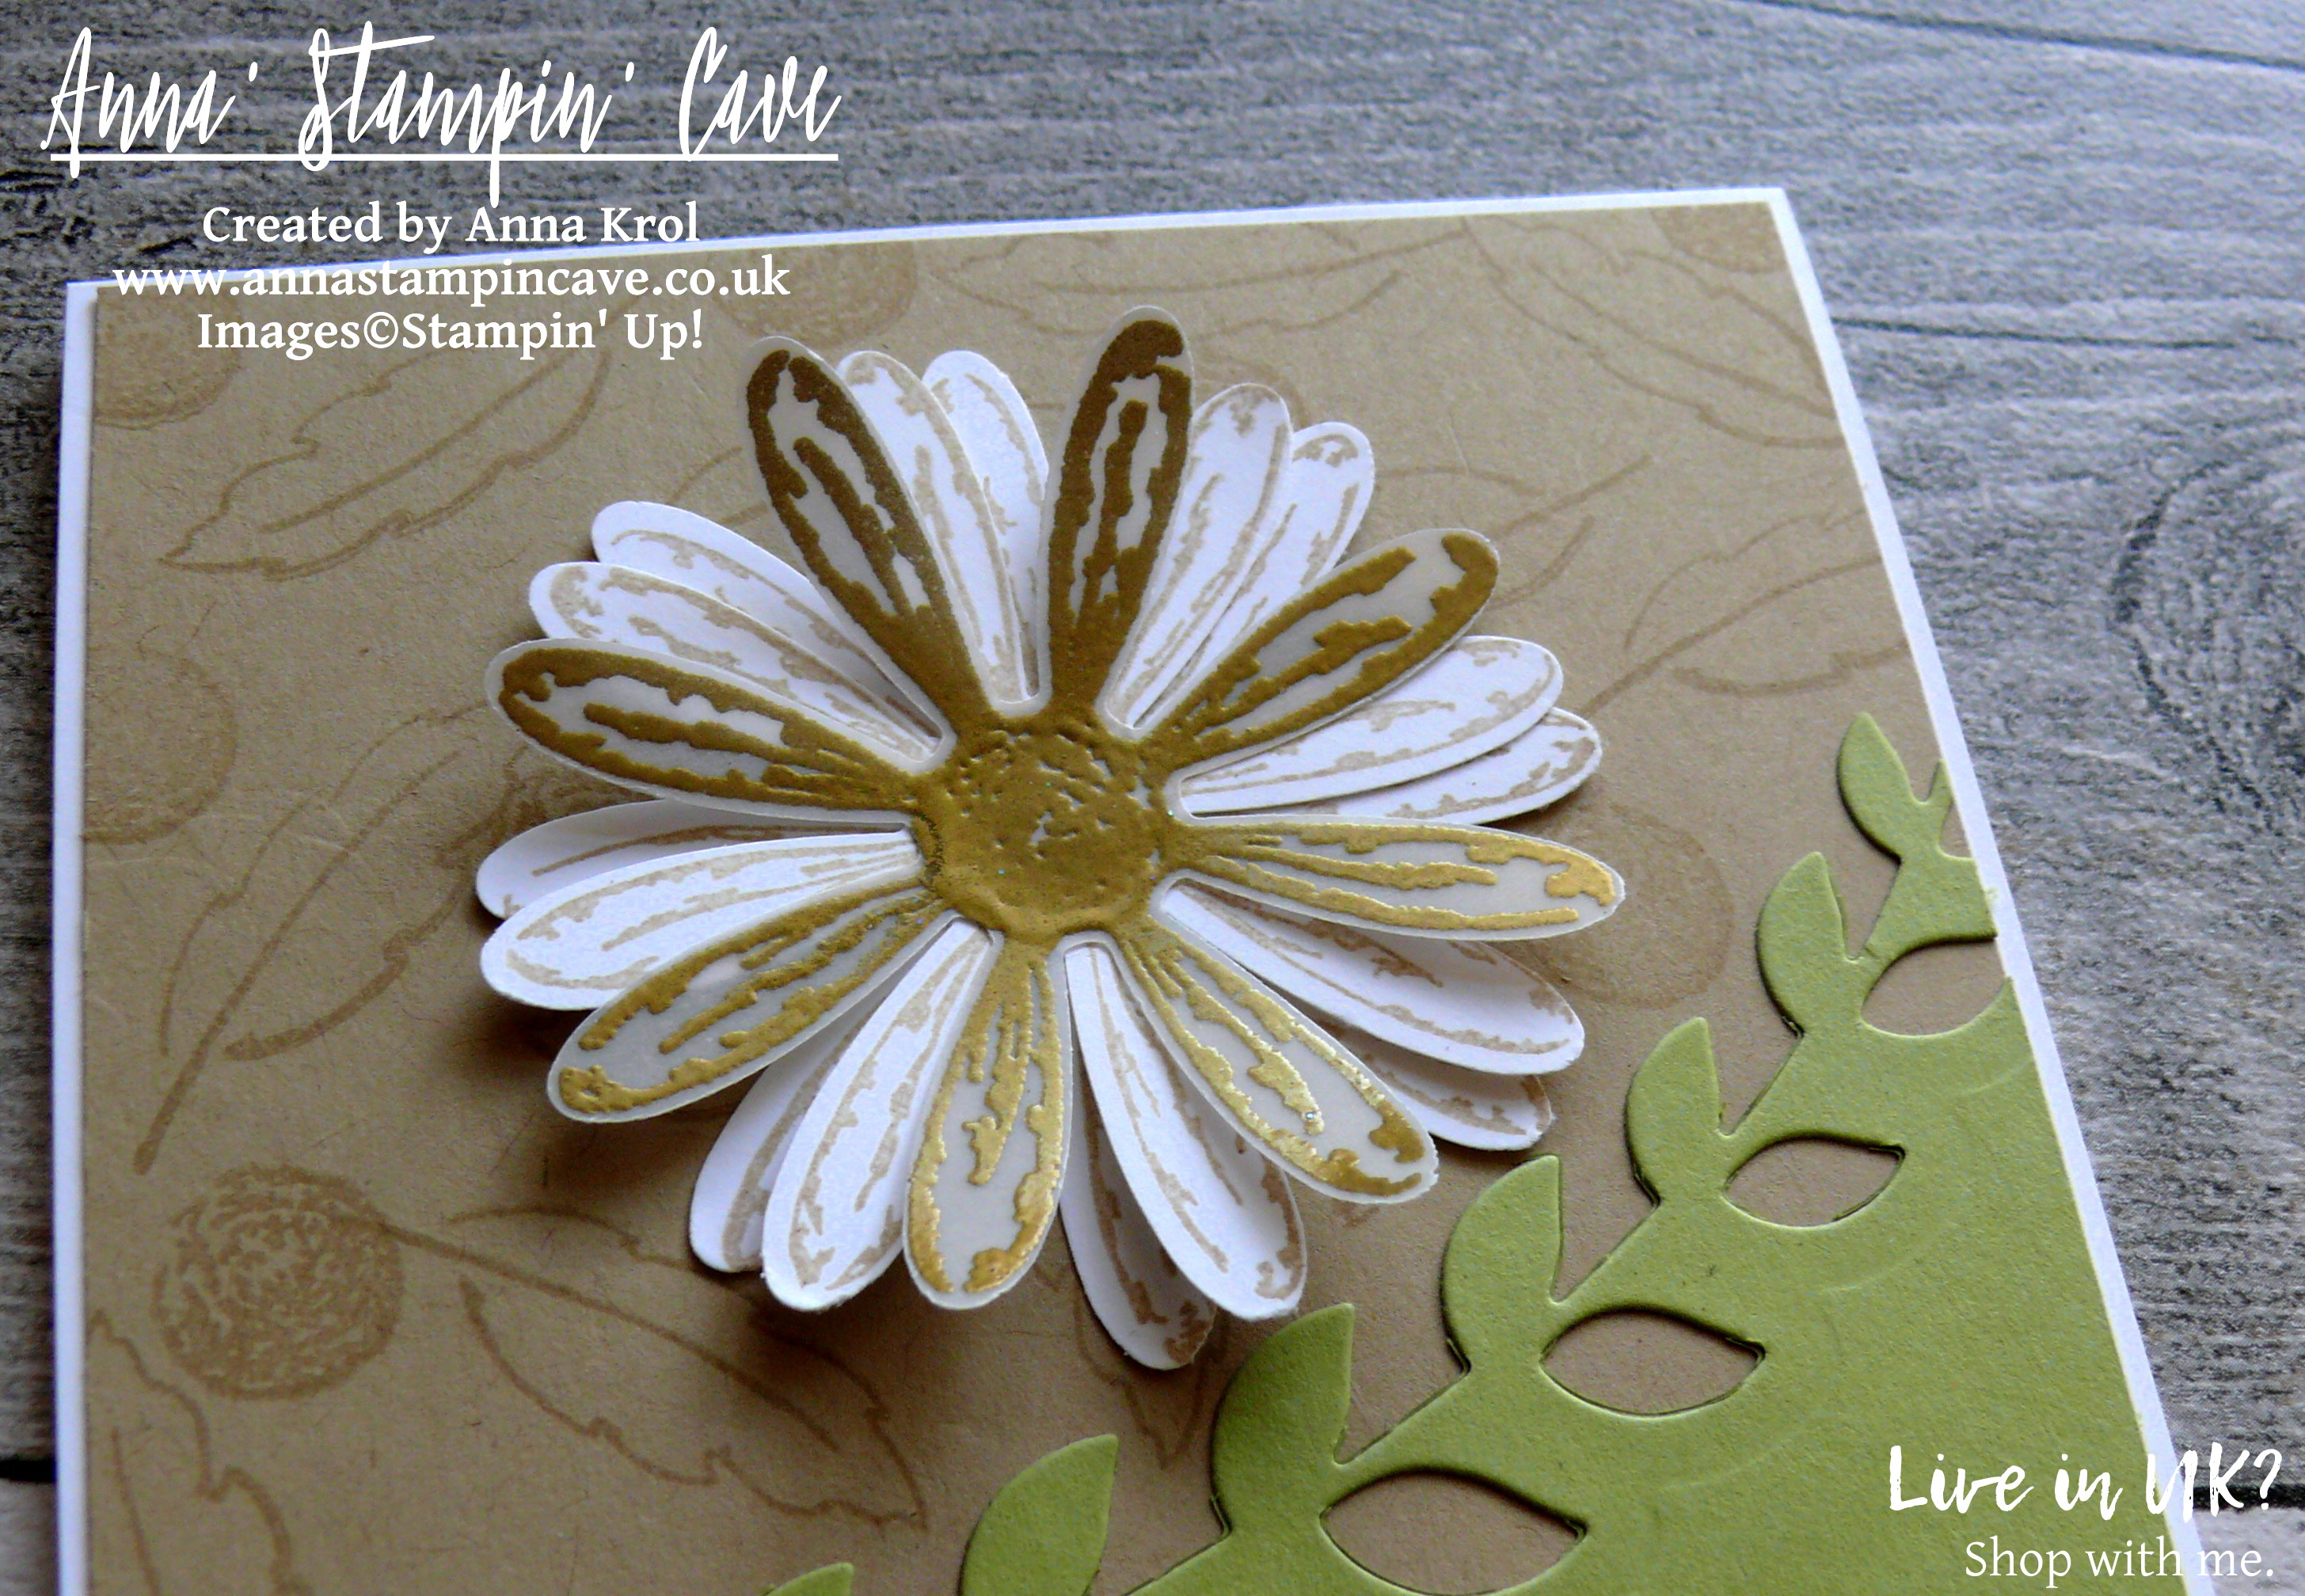
For the sentiment, I chose ‘Life is sweeter with friends like you’ also from Detailed With Love Stamp Set. I thought it would fit well. I stamped it in a Pool Party on a piece of regular Very Vanilla cardstock and next die cut it using the second largest oval die from Stitched Shapes Framelits Dies.

I took a piece of burlap ribbon, fold it in half and adhered under the oval. Next, using dimensionals I mounted it on my card.

I truly hope you’ve enjoyed coming to my blog today.

Now, make sure you head over to Kylie’s blog to check all lovely projects and vote for your favourites. Hope my project will be among them. My project is under number 27!

As always, if you wish to purchase any of products I have used, simply click the images below to go directly to my online store.

I also add this card to:


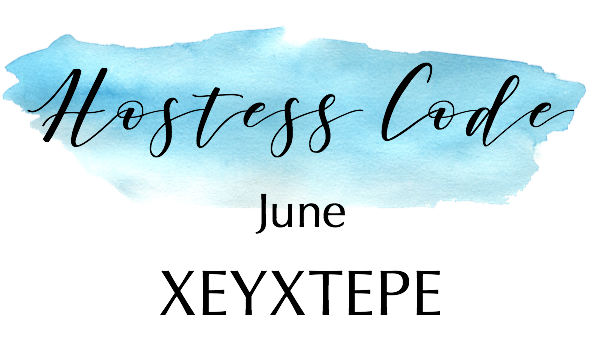
Host Code for the month of June is XEYXTEPE. Orders of £50+ (excl. p&p) will receive a Surprise Thank You Gift from me. You won’t be disappointed!

Thank You Gifts will be shipped in the first 2 weeks of the following month they were earned (mid-July).


Stamparatus

£46.00

Big Shot

£102.00

Anna' Stampin' Cave - friendship rustic card using Stampin' Up! Detailed with Love Stamp Set


HOW TO USE HOSTESS CODE


I would also love to invite you to join my team. I have a small team which is called Serendipity Crew. We are little but growing. And we are part of one of the biggest teams in the UK – a really wonderful group of women, of whom many have become dear friends of mine. We all support and inspire each other. So when you join my crew, you don’t get just me to help and support you, we all are a big friendly group! And we would love to welcome you.

Thank you for stopping by and have a blessed day,

Stampin’ Up! Daisy Delight Sneak Peek

Anna’ Stampin’ Cave – Stampin’ Up! Daisy Delight Sneak Peek

Hello, everyone! What a beautiful day we had today down here in Coventry, Warwickshire. Even though I can’t fully enjoy the weather (yet) I managed to spend few minutes in the garden. And oh, boy, what a wonderful feeling it was.

Today I’m back with a lovely card I created for this week’s sketch over at Global Design Project Challenge Blog. I truly enjoy their challenges as each week they have a new challenge based on either a colour combination, a sketch, theme and CASE-ing the Designer. Lot’s of fun!

For my card today I decided to use some old favourites, as well as a sneak peek of new, coming soon bundle: Daisy Delight Stamp Set and coordinating Daisy Punch.

Dear Friend card dimensions:

  • Whisper White cardstock: 11-6/8″ x 4-1/8″ scored in half at 5-7/8″ (29.7 x 10.5 cm scored in half at 14.8 cm)
  • Crumb Cake cardstock: 5-6/8″ x 4″ (14.6 cm x 10.2 cm)
  • Pear Pizzazz cardstock: 5″ x 4″ (12.6 cm x 10.2 cm)
  • White Vellum cardstock: 1-1/8″ x 5-1/2″ strip
  • White Vellum and Whisper White cardstock scraps to stamp and punch daisies

First, I created the bottom half of my panel using the border die from retiring Botanical Builder Framelits Dies. I die-cut it at a slight angle, so it creates a diagonal ‘line’, and adhered it to the Crumb Cake panel. I also randomly stamped a couple of images from Daisy Delight Stamp Set: centre of the flowers and outline of the leaves, on the Crumb Cake panel.

Next, I took a Crumb Cake ink pad and a scrap of Whisper White cardstock. I stamped two flowers from Daisy Delight Stamp Set and punched them out using coordinating Daisy Punch.

I also stamped one daisy and daisy centre onto vellum with Versamark ink, heat embossed it in gold and punched out as well. I layered all flowers together with vellum as a top layer, offsetting them slightly for extra dimension. I adhered them to my panel, just above Pear Pizzazz piece, using liquid adhesive.

The sentiment comes from Birthday Blooms Stamp Set and I heat embossed it in gold on a strip of White Vellum. Because my vellum strip was wider than the Crumb Cake piece I was able to adhere the ends to the back of my panel. This way I didn’t have to worry how to hide the adhesive. I mounted my panel to the card base.

And that’s my card for today. I hope you like it. I also hope you’ve enjoyed seeing a sneak peek of Daisy Delight Stamp Set and Daisy Punch. These both will be available in my shop on 1 June 2017. But if you don’t want to wait, and want to be able to order new products earlier, it’s as easy as 1…2…3… -> simply join the fun and order your Starter Kit. If you have more questions why don’t you drop me a message?

As always, I really want to encourage you to visit the Global Design Project challenge blog to see other beautiful projects from all around the world. Just click on their logo below to visit the website

If you wish to purchase any of products I have used, simply click the images below to go directly to my online store and don’t forget to enter the hostess code for the month of May SS3AK62K to receive a gift from me.

Just a reminder: Botanical Builder Framelits Dies are still available at a fraction of a price! But only until the end of May. After that date, you won’t be able to purchase them. So if you waited for a better moment to buy them – this moment is now.

Thank you for stopping by and have a blessed day,


Don’t forget to check:

Stampin’ Up! Spring Summer & Annual Catalogue 2016 2017 Retiring List

Anna' Stampin' Cave Stampin' Up! Retiring Products 2017

It’s that time of the year again, when Stampin’ Up! is getting ready to retire stamps and accessories from both the Annual and Spring Summer catalogues. As sad as it is to see these products go, there’s still time for you to get them before they’re gone. Retiring products will only be available until 31 May, or while supplies last. So if there’s something from retiring products on your wishlist, don’t wait until last day – once they’re gone, they’re gone. And they are selling fast! Click here for more details ->

Global Design Project #082 Sketch Challenge Beautiful Message

Anna’ Stampin’ Cave – Global Design Project #082 Sketch Challenge Beautiful Message

GDP82

Hello, everyone! Today I’m playing again with Global Design Project Sketch Challenge. But before I show you my take on the sketch I want to share with you some exciting news. My cards were among the winners at the last GDP Colour Challenge! Woo hoo! But that’s not all. I have also been chosen to be a Guest Designer in the next colour challenge! How cool and what a privilege?!

Guest_Designer_Winner_Anna

Totally unexpected; I’m still pinching myself 🙂 If you have not seen my winning cards, just click the button above.

But now let’s go back to today’s project.

Today I’ve got for you this beautiful, clean & simple card with an amazing message from the Bible.

Anna' Stampin' Cave_Stampin' Up! Easter Message Stamp Set_Mint Macaron_gold foil_gold heat embossing_clean and simple_Jesus is risen

Beautiful Message card dimensions:

  • Whisper White Thick cardstock: 11-6/8″ x 4-1/8″ scored in half at 5-7/8″ (29.7 x 10.5 cm scored in half at 14.8 cm)
  • Mint Macaron cardstock: 5-7/8″ x 4″ (14.8 cm x 10.2 cm)
  • Whisper White cardstock: 4-1/8″ x 2-2/8″ (10.4 cm x 5.7 cm)
  • Gold Foil: 5-7/8″ x 1″ (14.8 cm x 2.5 cm)

I was really eager to put my hands on this beautiful stamp set ‘Easter Message’ the moment I saw it. But I was able to order it only just recently.

Anna' Stampin' Cave_Stampin' Up! Easter Message Stamp Set_Mint Macaron_gold foil_gold heat embossing_Jesus is Risen

To create this beautiful card I first took Mint Macaron panel and randomly stamped palm tree all over it, using Versamark inkpad, and heat embossed it in gold.

To make sure none of the embossing powder sticks to the cardstock where unwanted, I rubbed my embossing buddy across the paper before application.

To slightly ‘dull’ golden embossing I rubbed my piece with a dry cloth. I think it creates unique, dramatic effect.

I adhered Mint Macaron panel to the card base, followed by a piece of gold foil.

Next, I took my piece of regular Whisper White cardstock and I stamped cross image in Mint Macaron on the top of my piece, so I still had a room for a sentiment below the cross.

For the sentiment I chose this beautiful, life-giving verse from a Bible: Matthew 28:6 ‘He is not here; He has risen’. I’m short for words to say how much this little verse mean for me.

Anna' Stampin' Cave_Stampin' Up! Easter Message Stamp Set_Jesus Is Risen_Mint Macaron_gold foil_gold heat embossing_clean and simple

I stamped my sentiment in Versamark and heat embossed using Gold Stampin’ Emboss Powder again. To stamp it and not ruin my panel, I’ve used good ole stamp-a-ma-jig, so it’s straight and exactly where it should be.

I mount my piece onto the card base using dimensionals.

I may not be an expert if it comes to clean & simple cards. I’m not good at using a minimal number of supplies either. But I’m working on it, and I have to say I’m really happy how this card came out. I hope you like it too. Gold and mint make such an amazing colour combination.

As always, I really want to encourage you to visit the Global Design Project challenge blog to see other beautiful projects from all around the world. Just click on their logo below to visit the website

If you wish to purchase any of products I have used, simply click the images below to go directly to my online store and don’t forget to enter the hostess code for the month of April XMAJ4CYX to receive a gift from me.

Thank you for stopping by and have a blessed day,

Don’t forget to check:

Stampin’ Up! Spring Summer & Annual Catalogue 2016 2017 Retiring List

Anna' Stampin' Cave Stampin' Up! Retiring Products 2017

It’s that time of the year again, when Stampin’ Up! is getting ready to retire stamps and accessories from both the Annual and Spring Summer catalogues. As sad as it is to see these products go, there’s still time for you to get them before they’re gone. Retiring products will only be available until 31 May, or while supplies last. So if there’s something from retiring products on your wishlist, don’t wait until last day – once they’re gone, they’re gone. And they are selling fast! Click here for more details ->

Simply Sketched Saturday Challenge – A Little Expression Of Love

Anna’ Stampin’ Cave – Simply Sketched Saturday Challenge – A Little Expression Of Love

Thank you for joining us for another Simply Sketched Saturday Challenge!  We are so excited to be sharing this hop with you. The products used are all available in the current Annual, or seasonal, Stampin’ Up!®  Catalogues*. Simply use the buttons at the bottom of the post to keep hopping!

Today’s sketch has been provided by lovely Sally Shaw from Sallystampers blog.

SSSC 18

WOW! this sketch really sat me down for a moment. In a good way of course – great creative exercise for my grey cells. And here’s what I came out with:

Anna' Stampin' Cave - Stampin' Up! Painter's Palette - A Little Expression Of Love Card

A Little Expression of Love card dimensions:

  • Basic Black cardstock: 11-6/8″ x 4-1/8″ scored in half at 5-7/8″ (29.7 x 10.5 cm scored in half at 14.8 cm)
  • Whisper White cardstock for the inside: 3-2/8″ x 4-2/8″ (8,4cm x 10,7cm)
  • 3 strips of Blooms & Bliss Designer Series Paper: 4-6/8″ x 2″, 4-1/2″ x 1-1/2″ & 4″ x 1″ (12cm x 5cm; 11,4cm x 3,9cm & 10,2cm x 2,5cm )
  • scraps of Whisper White for stamping and die-cutting.

First, I stamped the palette image from Painter’s Palette Stamp Set on Whisper White cardstock in Versamark, and heat embossed it in gold. In the middle, using Stamp-a-ma-jig, I stamped the sentiment in Basic Black. Because I didn’t want all that white space around the sentiment, I took a ‘dotty’ stamp from the same set and stamped it a couple of times in Sahara Sand. I die cut my piece using Layering Squares Framelits Dies.

Anna' Stampin' Cave - Stampin' Up! Painter's Palette - Blooms and Bliss DSP - A Little Expression Of Love Card

Next, I created my circles and I’ve used a really cool and easy technique to do so. I took a piece of Whisper White cardstock, clear stamping block H and three ink pads: Island Indigo, Mint Macaron, and Sahara Sand. First, I inked the clear block with Island Indigo ink and dragged it through the cardstock. I repeat it with other two ink pads, making sure some of the colours overlap, creating fun, distressed design. I die-cut various circles from my piece.

Card assembly. I adhered strips of DSP to the base using snail adhesive, followed by circles. The sentiment is popped up on dimensionals. For the inside, I added Whisper White panel and few leftover circles too.

Anna' Stampin' Cave - Stampin' Up! Painter's Palette and Blooms and Bliss DSP - A Little Expression Of Love Card - card inside

To wrap up my design together I wanted to add some extra golden accents to the card. I’ve used gold Wink of Stella to add some soft random splotches to the DSP and circles (I masked the sentiment for this step). Next, using same ‘dotty’ stamp as for the sentiment, I stamped it randomly on the card base in Versamark and heat embossed it in gold.

Anna' Stampin' Cave - Stampin' Up! Painter's Palette - A Little Expression Of Love Card

I have to tell you, I enjoyed the process of designing this card and watching how it comes together nicely. I hope you like it too.

Now be sure to hop along to see more inspiring projects. Your next stop is lovely and talented Jillian.

Thank you for stopping by and have a blessed day


One Wild Ride For GDP078

Anna’ Stampin’ Cave – One Wild Ride for GDP078

GDP078

Hello, everyone! Today I’m playing along with Global Design Project’s Sketch Challenge. And oh how cool this sketch is – endless possibilities, honestly. It looks so soft and feminine to me yet I decided to go on the ‘dark side’ as there are always shortages in masculine cards.

Anna' Stampin' Cave - Stampin' Up! One Wild Ride - masculine congratulations card for GDP078

One Wild Ride card dimensions:

  • Crumb Cake cardstock: 8-1/4″ x 5-7/8″ scored in half at 4-1/8″ (21cm x 14.8 cm scored in half at 10.5 cm)
  • Basic Black cardstock: 2-1/4″ x 5-7/8 and 3-6/8 x 2-1/8″ (5.7 cm x 14.8 cm and 9.5 cm x 5.4 cm)
  • Whisper White cardstock: 2″ x 3-5/8″ and 1-1/2″ x 2-1/2″ (5 cm x 9.2 cm and 3.8 cm x 6.3 cm) + a strip for a sentiment

Anna' Stampin' Cave - Stampin' Up! One Wild Ride - masculine congratulations card for GDP sketch challenge

I started with stamping card front with this gravel-splatter kinda stamp from One Wild Ride stamp set, in Crumb Cake for soft, tone on tone effect. Next, I embossed it with Brick Wall Textured Impressions Embossing Folder.

I took 2-1/4″ x 5-7/8 piece of Basic Black cardstock and distressed it by tearing the edge of the panel. Using the same ‘gravel’ stamp I stamped the whole panel in Versamark, heat embossed it in silver and adhered it to the card base.

Anna' Stampin' Cave - Stampin' Up! One Wild Ride - masculine congratulations card for GDP

Next, I stamped motorcycle in Basic Black on a piece of Whisper White cardstock. It looked too ‘clean’ so once again I’ve used the gravel stamp. This time I stamped it in Basic Grey. I also distressed the edges of the panel using scissors.

I matted my Harley image with Basic Black cardstock and a smaller piece of Whisper White and adhered it flat to the base.

Anna' Stampin' Cave - Stampin' Up! One Wild Ride - masculine congratulations card for GDP#078

I kept sentiment simple, just Basic Black ‘congratulations’ on a strip of Whisper White popped out with dimensionals.

I hope you like my card and that maybe, just maybe, it inspired you and gave you some ideas for a surprisingly tough subject called ‘masculine cards’.

As always, I really want to encourage you to visit the Global Design Project challenge blog to see other beautiful projects from all around the world. Just click on their logo below to visit the website

Thank you for stopping by and have a blessed day,