Amazing You Clean & Simple Card Using SAB Freebies

Anna' Stampin' Cave - Amazing You Card using Stampin' Up! Amazing You Stamp Set & Celebrate You Thinlits Dies - Bermuda Bay - Pool Party - Gold

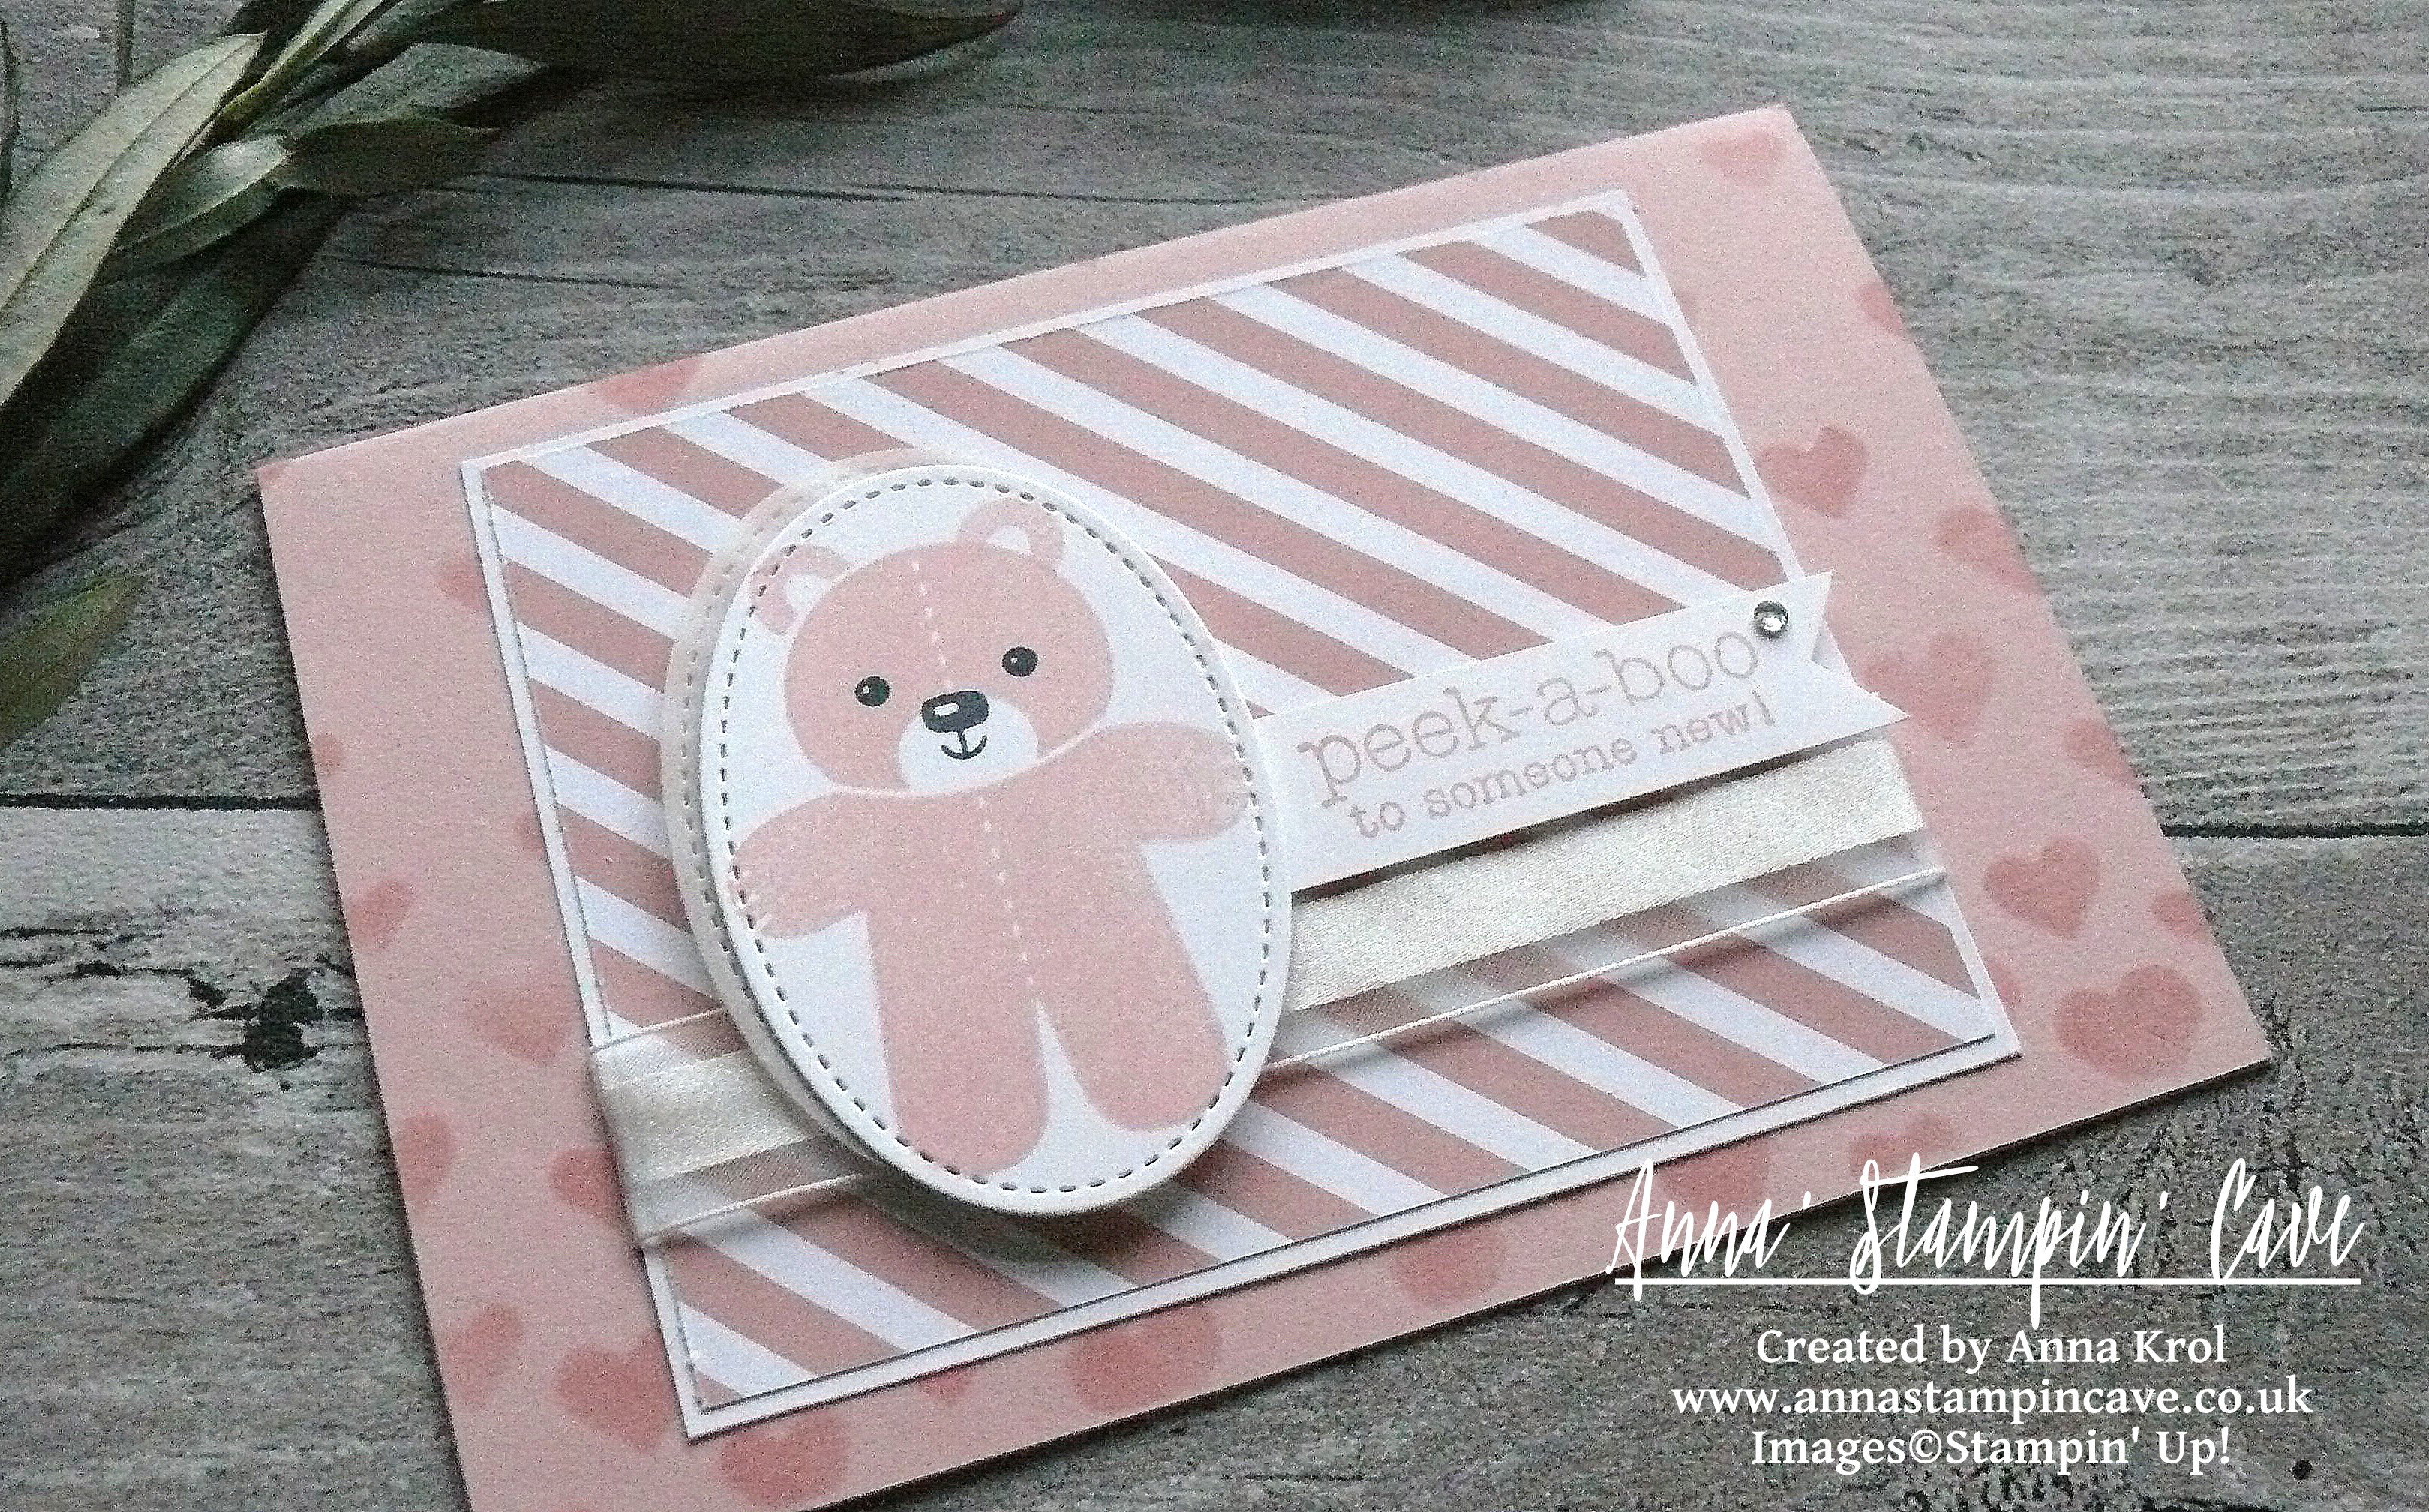
Anna’ Stampin’ Cave – Amazing You Clean & Simple Card Using SAB Freebies

Are you pink or blue person? Why my question you may be wondering?

Couple of days ago I shared with you lovely, CAS card using Amazing You Stamp Set and Celebrate You Thinlits Dies with flower in pink – you can check it here.

Today, however, I have a very similar card using the same products and layout, but in blue instead of pink.
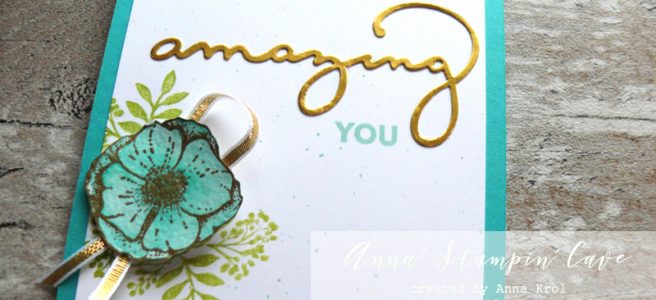
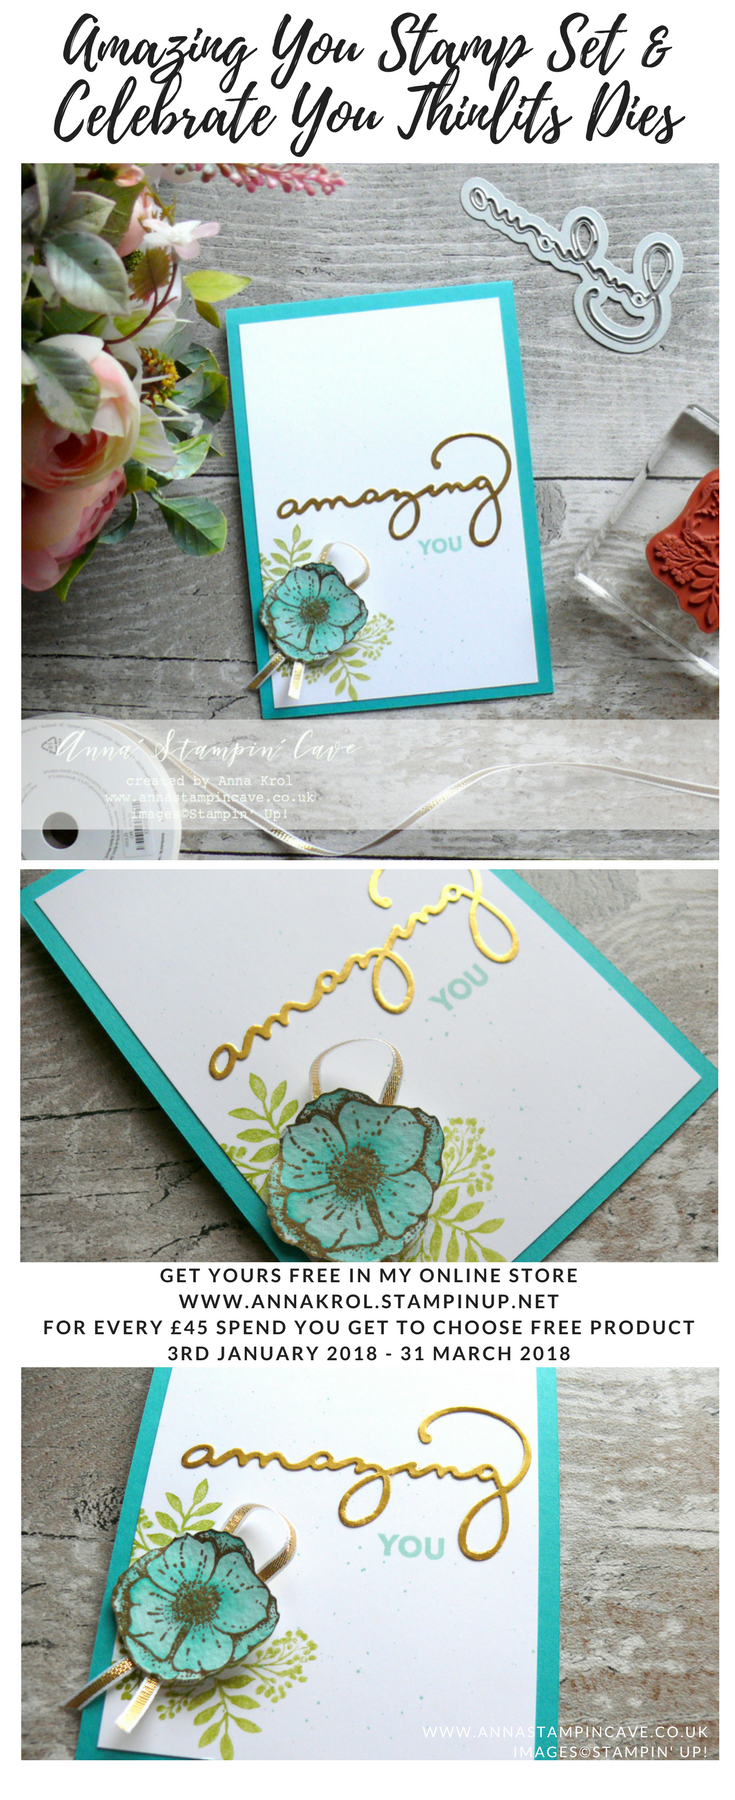
Here’s my card –

Anna' Stampin' Cave - Amazing You Card using Stampin' Up! Amazing You Stamp Set & Celebrate You Thinlits Dies - Bermuda Bay - Pool Party - Gold

Amazing You card dimensions:

  • Bermuda Bay cardstock: 11-6/8″ x 4-1/8″ scored in half at 5-7/8″ (29.7 x 10.5 cm scored in half at 14.8 cm)
  • Whisper White cardstock: 3-5/8″ x 5-3/8″ (9.3 cm x 13.6 cm)
  • Whisper White cardstock (for inside): 3″ x 4-5/8″ (7.6 cm x 11.7 cm)
  • a piece of watercolour paper for stamping the flower
  • a strip of Gold Foil cardstock for die cutting
  • Gold 1/8″ Ribbon: 8″ approximately

Anna' Stampin' Cave - Amazing You Card using Stampin' Up! Amazing You Stamp Set & Celebrate You Thinlits Dies - Bermuda Bay - Pool Party - Gold

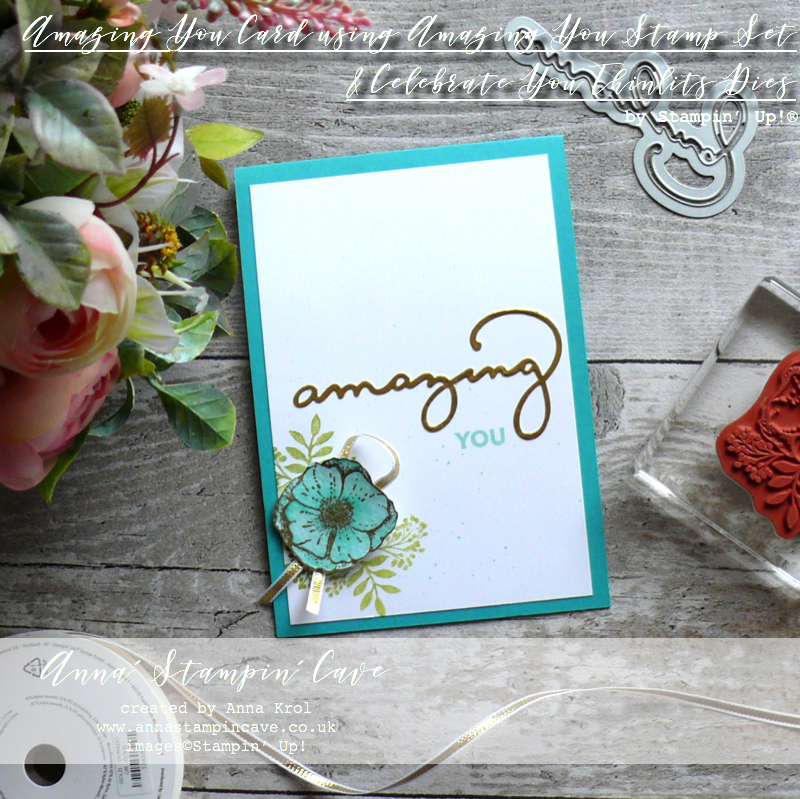
In today’s card I still encorporated gold elements, but I swapped Berry Burst and Powder Pink inks for Bermuda Bay and Pool Party. I love this dreamy teal-y flower!

Anna' Stampin' Cave - Amazing You Card using Stampin' Up! Amazing You Stamp Set & Celebrate You Thinlits Dies - Bermuda Bay - Pool Party - Gold

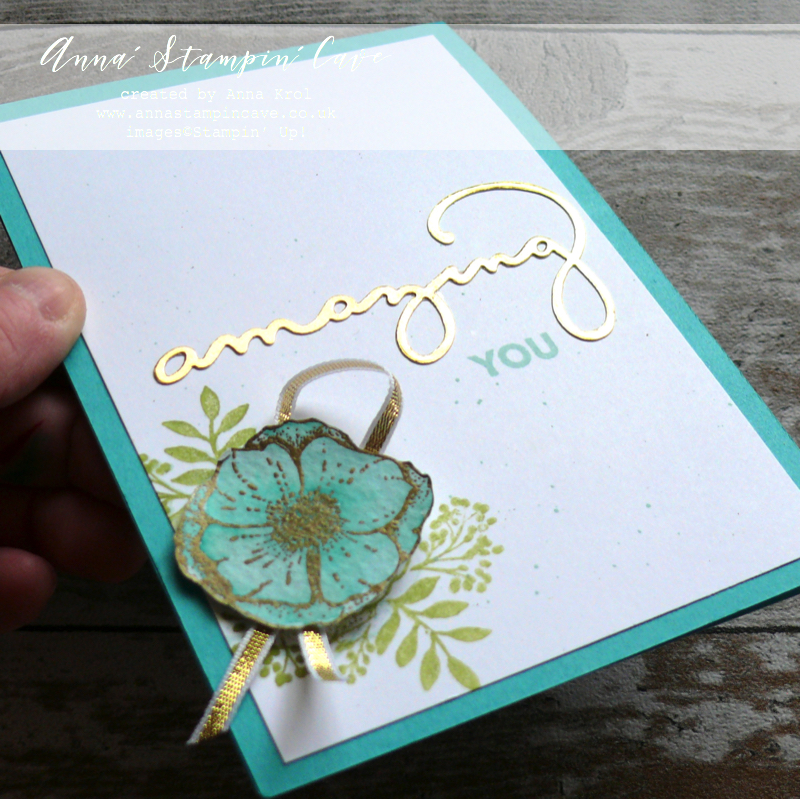
I love the script on this ‘amazing’ die cut. It’s bit tricky to adhere but totally worth the hustle. ‘You’ is stamped in soft, Pool Party ink. For the greenery this time I used only one shade of green: Pear Pizzazz.

Anna' Stampin' Cave - Amazing You Card using Stampin' Up! Amazing You Stamp Set & Celebrate You Thinlits Dies - Bermuda Bay - Pool Party - Gold

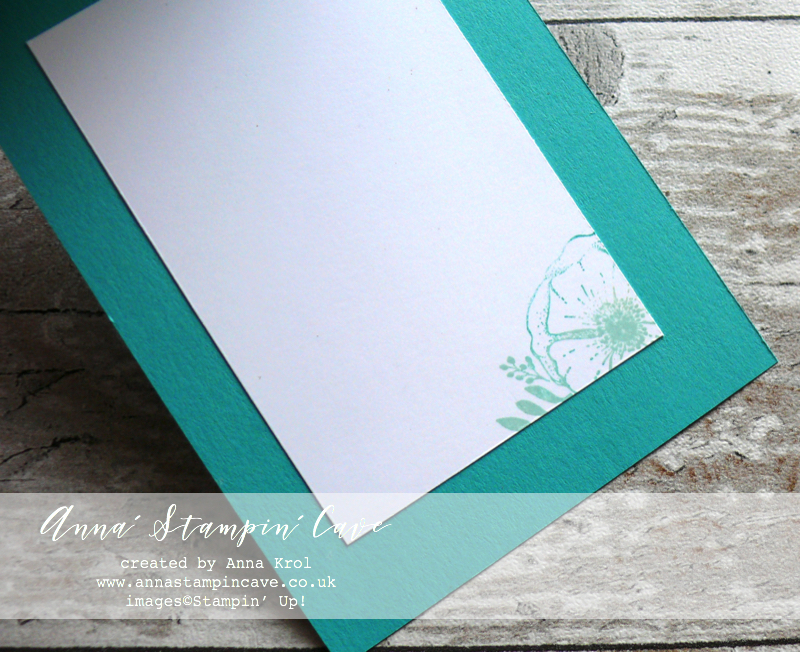
To finish off the inside of the card I stamped the flower in Pool Party ink, in bottom right corner.

So? Are you pink or blue person? I would love to know.

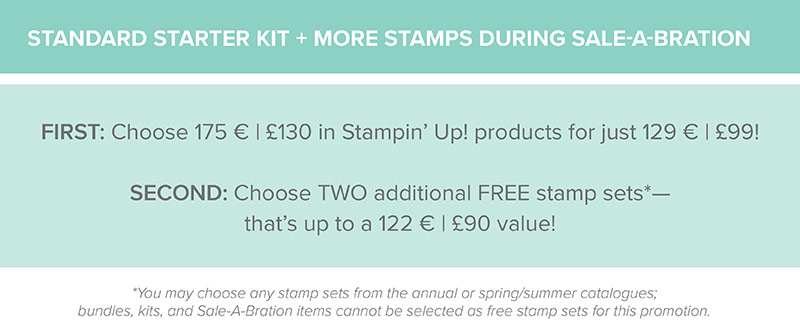
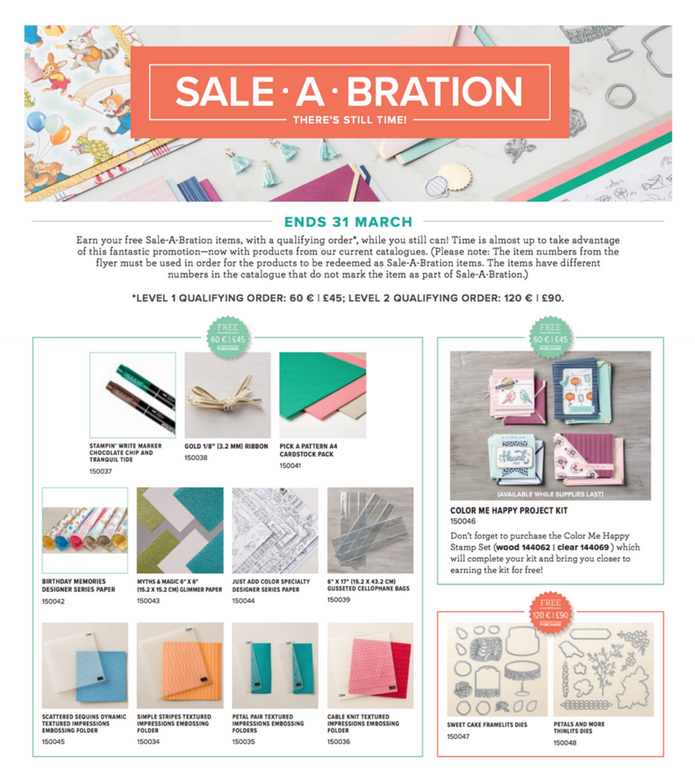
Also don’t forget that there’re still couple of day when you can earn free Sale-a-bration products with each qualifying order. And you don’t only have a brochures to choose from – there are also regular products from current catalogues which you can choose!! Download PDF here.

Please note: The item numbers from the flyer (EN l FR l DEmust be used in order for the products to be redeemed as Sale-A-Bration items. The items have different numbers in the catalogue that do not mark the item as part of Sale-A-Bration.

Anna' Stampin' Cave - Stampin' Up! Sale-a-bration 2018

I add this card to:

If you wish to purchase any of products I have used, simply click the images below to go directly to my online store and don’t forget to enter the hostess code CWKGWDD7 to receive a gift from me.

Thank you for stopping by and have a blessed day

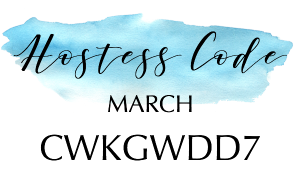
Hostess Code for a month of March: CWKGWDD7 – Use this code in the month of March and receive a gift from me. Spend £25 or more and use the code, and you will receive a Sweet Soiree Suite embellishments sample: one Silver Mini Gable Box + samples of ribbon and ‘shreddies’ (pink, silver or white) + a handmade gift from me.
 Special Notes:

1) Make sure you select Anna Krol as your demonstrator;
2) If you select “No Contact” box I do not have access to your name and can’t send you a gift;
3) If your order is £150 or more do not use the code and grab your own Stampin’ Rewards + gift from me
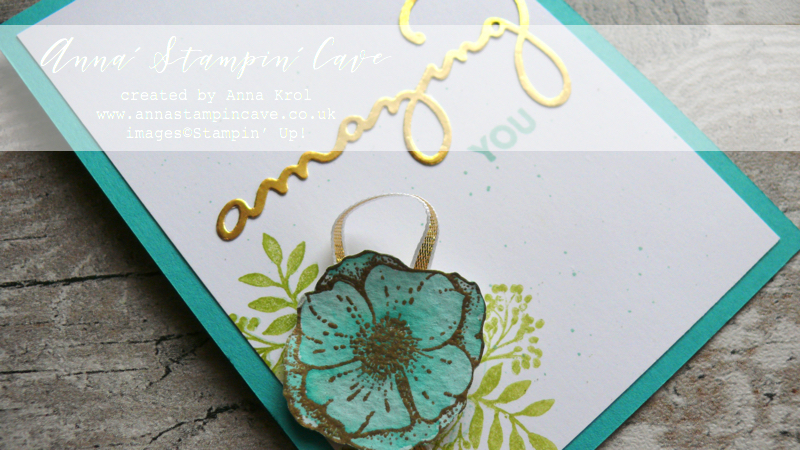
Aqua Painters

£15.50

Big Shot

£99.00

Pin me

Summary of the project which gives all the views of the card in one photo. I’d love if you pinned and called by on Pinterest xx

Anna' Stampin' Cave - Amazing You Card using Stampin' Up! Amazing You Stamp Set & Celebrate You Thinlits Dies - Bermuda Bay - Pool Party - Gold


Don’t forget to check:

New Sale-a-bration release is LIVE. Click here for more details –>

Spring Summer Catalogue Paper & Ribbon Shares. Shares are open to Austria, France, Germany, Netherlands & United Kingdom. 102 sheets of DSP & 2 yards of each type of ribbon from Spring/Summer Catalogue. Click here for more details —>

The New Stampin’ Up! Spring/Summer 2017 Catalogue and Sale-A-Bration are LIVE and it’s AMAZING! For every 60 €/£45, you spend either from Spring Summer Catalogue or Annual Catalogue, you will get to choose one FREE  level 1 product from SAB brochure! If you spend 120 €/£90, you get one FREE level 2 product, OR, you can choose two level 1 items. If you spend 180 €/£135, you have the option to choose three level 1 items or one level 1 item and one level 2 item. Click here for more details —>

Ever wondered what it’s like to join Stampin’ Up!’s community? I may have few answers for you. Click here for more details –>

The Creative Flow Blog Hop – Cookie Cutter Peek-A-Boo Baby Cards

Anna’ Stampin’ Cave – The Creative Flow Blog Hop – Cookie Cutter Peek-A-Boo Baby Cards

the-creative-flow-header

Thank you for joining us on our Creative Flow Blog Hop. Each month we are set a challenge to creatively stretch our imaginations. To hop along, please use the buttons at the bottom of the post to keep hopping.

For this month we’ve been set a challenge to use any carry-over holiday-themed stamps to create a non-Christmassy project.

stampin-up-carry-over-stamp-sets

I knew straight away I wanted to use Cookie Cutter Christmas Stamp Set to create some super cute baby cards.

anna-stampin-cave-cookie-cutter-peek-a-boo-baby-card

I chose rather traditional baby colours: pink and blue. For the pink, I’ve used beautiful dusty Blushing Bride, and Pool Party seemed just perfect for a baby boy card.

anna-stampin-cave-cookie-cutter-peek-a-boo-baby-card-baby-girl

Peek-A-Boo Baby Girl card dimensions:

  • Blushing Bride cardstock: 8-1/4″ x 5-7/8″ scored in half at 4-1/8″ (21 x 14.8 cm scored in half at 10.5 cm)
  • Whisper White cardstock: 4-3/8″ x 3-5/8″ (11.1 x 9.2 cm)
  • Blushing Bride Designer Series Paper from Subtles Designer Series Paper Stack: 4-2/8″ x 3-1/2″ (10.7 x 8.8 cm)
  • Scraps of Whisper White and White Vellum cardstock for die-cutting and sentiment
  • Whisper White Organza Ribbon: approx 6″

First, I stamped the little bear from Cookie Cutter Christmas Stamp Set, in Blushing Bride, onto a piece of Whisper White cardstock. For the little face, I’ve used Basic Black Archival Ink Pad. I die-cut the bear image using the second largest oval from Stitched Shapes Framelits Dies. I also die-cut the same size stitched oval shape from White Vellum. Next, I stamped ‘peek-a-boo’ sentiment from Suite Sayings Stamp Set, also in Blushing Bride, on a strip of Whisper White, and cut it into a banner. A baby card can’t go without a little bling so I added a tiny rhinestone to the sentiment banner.

To add some interest (and cuteness) to the card base, I pull out long forgotten Hearts & Stars Decorative Masks. For the girly card, I’ve used hearts stencil. First, I thought to add some sparkle through the stencil, but at the end, I decided for tone on tone effect and sponged hearts with Blushing Bride Ink.

anna-stampin-cave-cookie-cutter-peek-a-boo-baby-card-pool-party

Peek-A-Boo Baby Boy card dimensions:

  • Whisper White cardstock: 8-1/4″ x 5-7/8″ scored in half at 4-1/8″ (21 x 14.8 cm scored in half at 10.5 cm)
  • Pool Party cardstock: 4-3/8″ x 3-5/8″ (11.1 x 9.2 cm)
  • Pool Party Designer Series Paper from Subtles Designer Series Paper Stack: 4-2/8″ x 3-1/2″ (10.7 x 8.8 cm)
  • Scraps of Whisper White and White Vellum cardstock for die-cutting and sentiment
  • Whisper White Organza Ribbon: approx 6″

This card was made similarly to the baby girl one. The only significant change, except colour combo obviously,  was that I stamped the bear and his ears separately as I planned to punch the bear using Cookie Cutter Bilder Punch. 

It turned out that the bear has a slightly wider ‘body’ than the other images from this stamp set and you can’t punch it without losing a little bit of his chubby shape.

At the end, I had to fussy-cut the bear but it’s quite a straightforward process. I punched out his ears and using snail adhesive I glued his ears behind his head and next I glued the bear flat onto the stitched oval shape.

Assembling these cards was pretty easy. First I adhered DSP panels to the cardstock. I added the ribbon at the bottom of my panels. I secured it at the back of the panels using snail adhesive and glued it to the card base.

Next step was to assemble my little bears. I glued the ovals with bears to the vellum ovals, offsetting them slightly. I adhered them to the card with Stampin’ Dimensionals for some extra dimension. Sentiments are adhered using Stampin’ Dimensionals too.

anna-stampin-cave-cookie-cutter-peek-a-boo-baby-cards

I truly hope you like my cute ‘peek-a-boo’ baby cards. They are not only adorable but also very easy to recreate.

Now, be sure to hop along and see more inspiring projects. Your next stop is lovely and talented Heidi.

Thank you for stopping by and have a blessed day

the-creative-flow-previous-button the-creative-flow-next-button