Today I’ve got for you a card that is very special for me.
I’m a Christian, but I do not belong to any denomination. Long story short: I try my best to follow Jesus, my saviour, and his teachings, not human traditions, in everything I do. So at the time when nearly all christian world celebrate Easter, I and my family, simply commemorate anniversary of Jesus’s death according to the Bible’s lunar calendar. But lets back to the card.
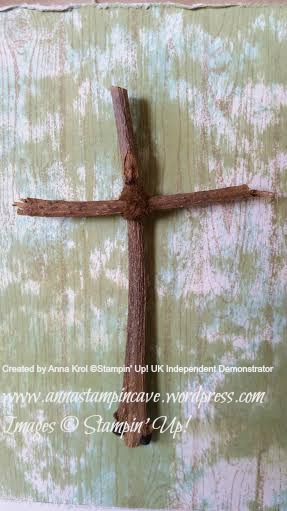
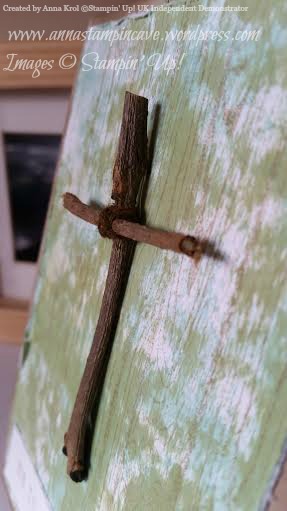
I love all things nature and had this idea for some time now. So went to my garden for a little “foraging” and brought myself few twigs. No, no plant gets hurt 😉 For the base for my card I choose Crumb Cake card stock. Sponged the edges to add a little depth.
My background is created using acrylic block stamping technique. This technique is really easy. Take an acrylic block and ink pads of your choice. I used Pear Pizzazz and Pool Party. Then just press or tap (gently) your acrylic block into the pad. When you’ve got the ink transferred on your block (as much or as less as desired) swipe the block across your card stock. Repeat these steps until you’re happy with a result. You can use just one colour, or as many as you wish. There’s no right or wrong if it comes to this technique.
I was really pleased how my background turned out. I inked Hardwood stamp in Crumb Cake, added some Soft Suede on edges and stamped it onto my background. Before adhered it to the base I distressed all edges with scissors.
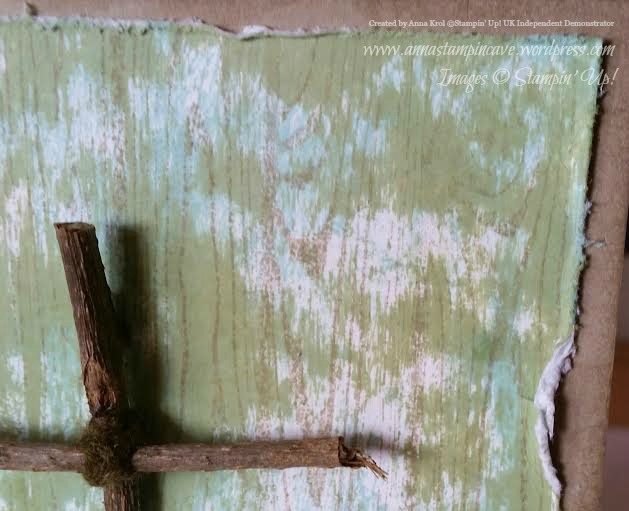
To form the cross I tied my twigs with piece of white baker’s twine. I coloured twine with Soft Suede marker after, because I wasn’t sure how much of a twine I will need in first place. Added my cross to the card using sticky strip. Hot glue would be better idea but my hands are not “safe” to hold glue gun 😉
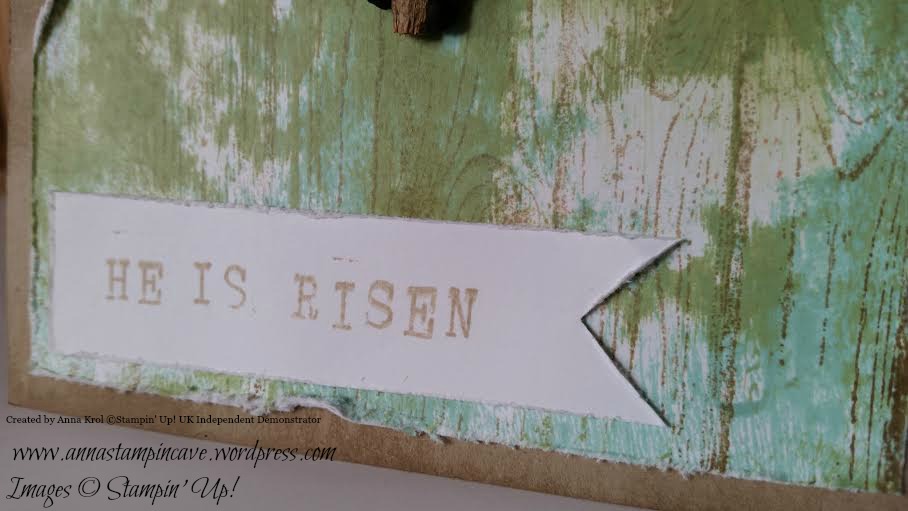
Long time I couldn’t decide what sentiment to use. I even thought about printing something from the internet. But then I had a lightbulb moment: Alphabet Rotary Stamp! It’s font is simple and rough – perfect for my card! I created my phrase “he is risen” in no time. Stamped on piece of card stock with Crumb Cake again and cut it into a banner. First I thought to rise a sentiment with dimensionals, but I really wanted the cross to stand out.
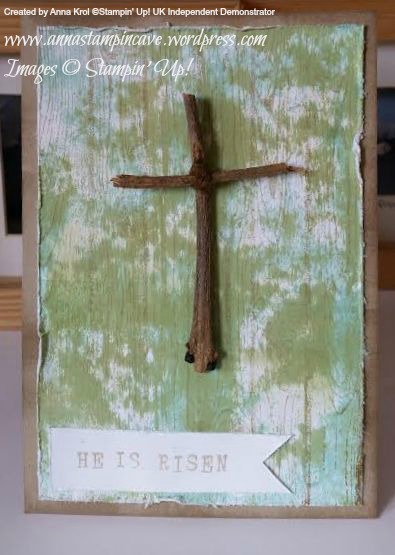
I’m really pleased with my card. With acrylic block stamping technique I made it in no time. Hope you like this technique and that I inspired you to give it a try. If so please give me a “like” or live a comment below. Thank you for stopping by and happy crafting!