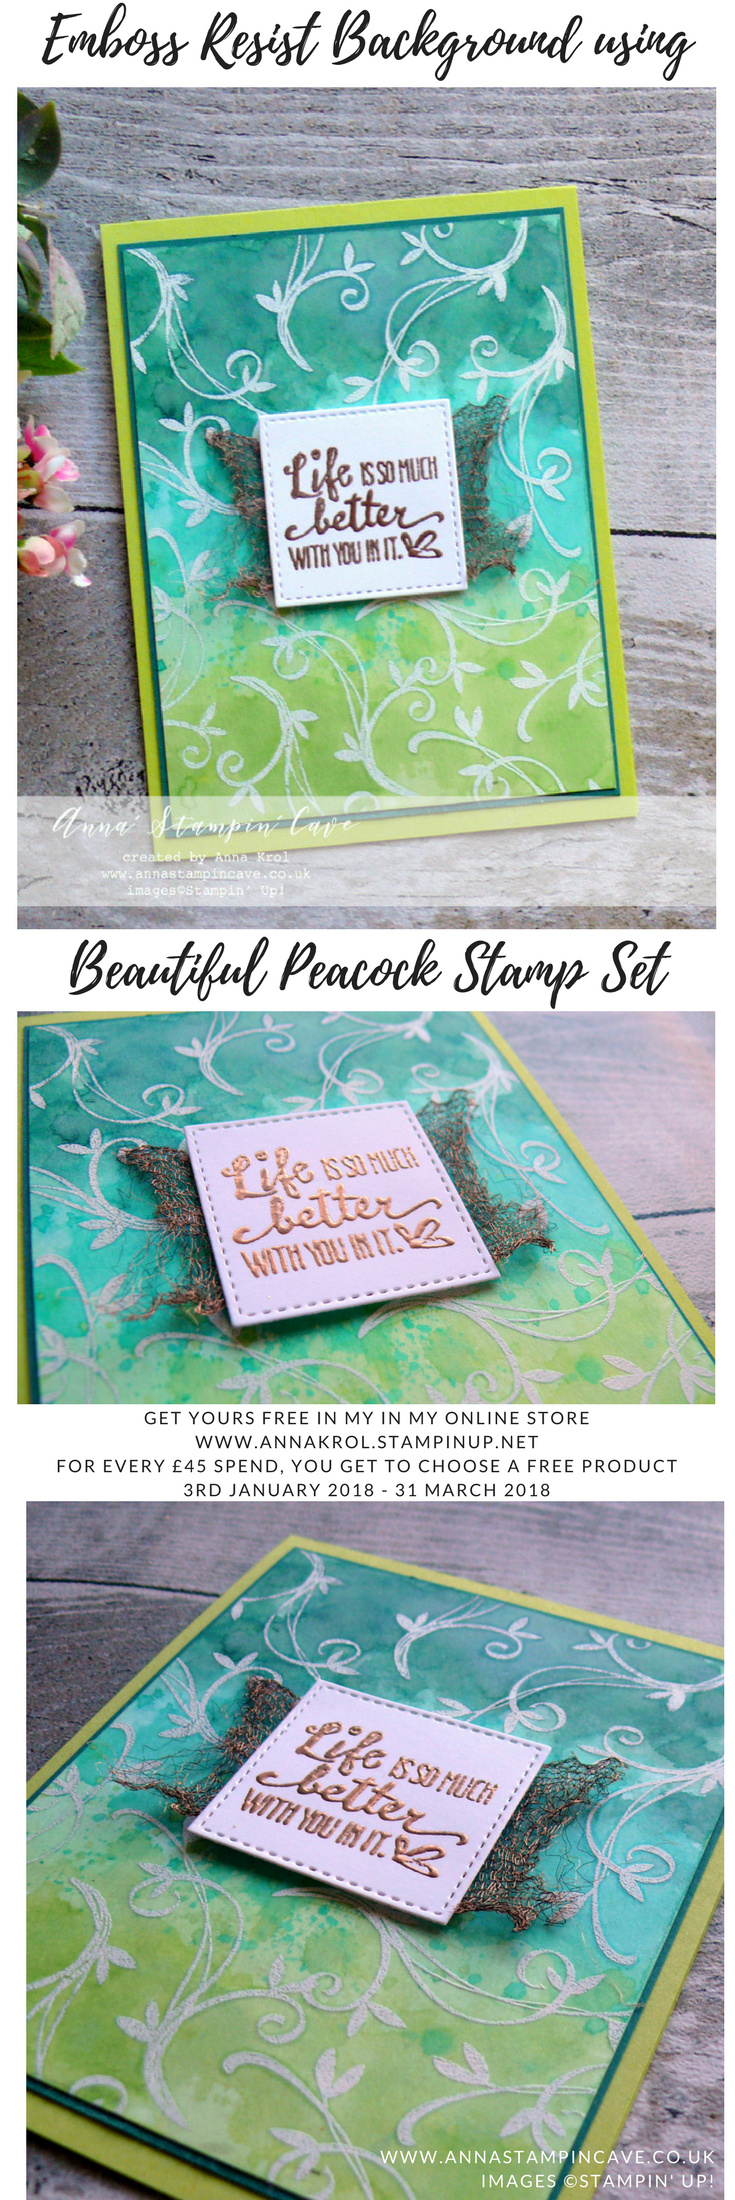
Anna’ Stampin’ Cave – Emboss Resist Watercolour Background With Beautiful Peacock Stamp Set
Hello everyone and thank you for visiting my little stampin’ cave.
Today, I’m playing along with Global Design Project and their #GDP126 Sketch Challenge. And I’ve got for you really simple, yet beautiful card, using FREE Sale-a-bration stamp set: Beautiful Peacock. I don’t know exactly why, but I really love this set, even though it’s completely not in my style.
But except the peacock image, its got all those beautiful, swirly stamps, which supposed to be its tail. And I couldn’t resist using one of these for creating a beautiful, emboss resist watercolour background for my card.

Dimensions:
- Lemon Lime Twist cardstock: 11-6/8″ x 4-1/8″ scored in half at 5-7/8″ (29.7 x 10.5 cm scored in half at 14.8 cm)
- Tranquil Tide cardstock: 3-7/8″ x 5-1/8″
- Shimmery White cardstock: 3-3/4″ x 5″
- Whisper White cardstock for die cutting
- Copper Trim: around 2-1/2″
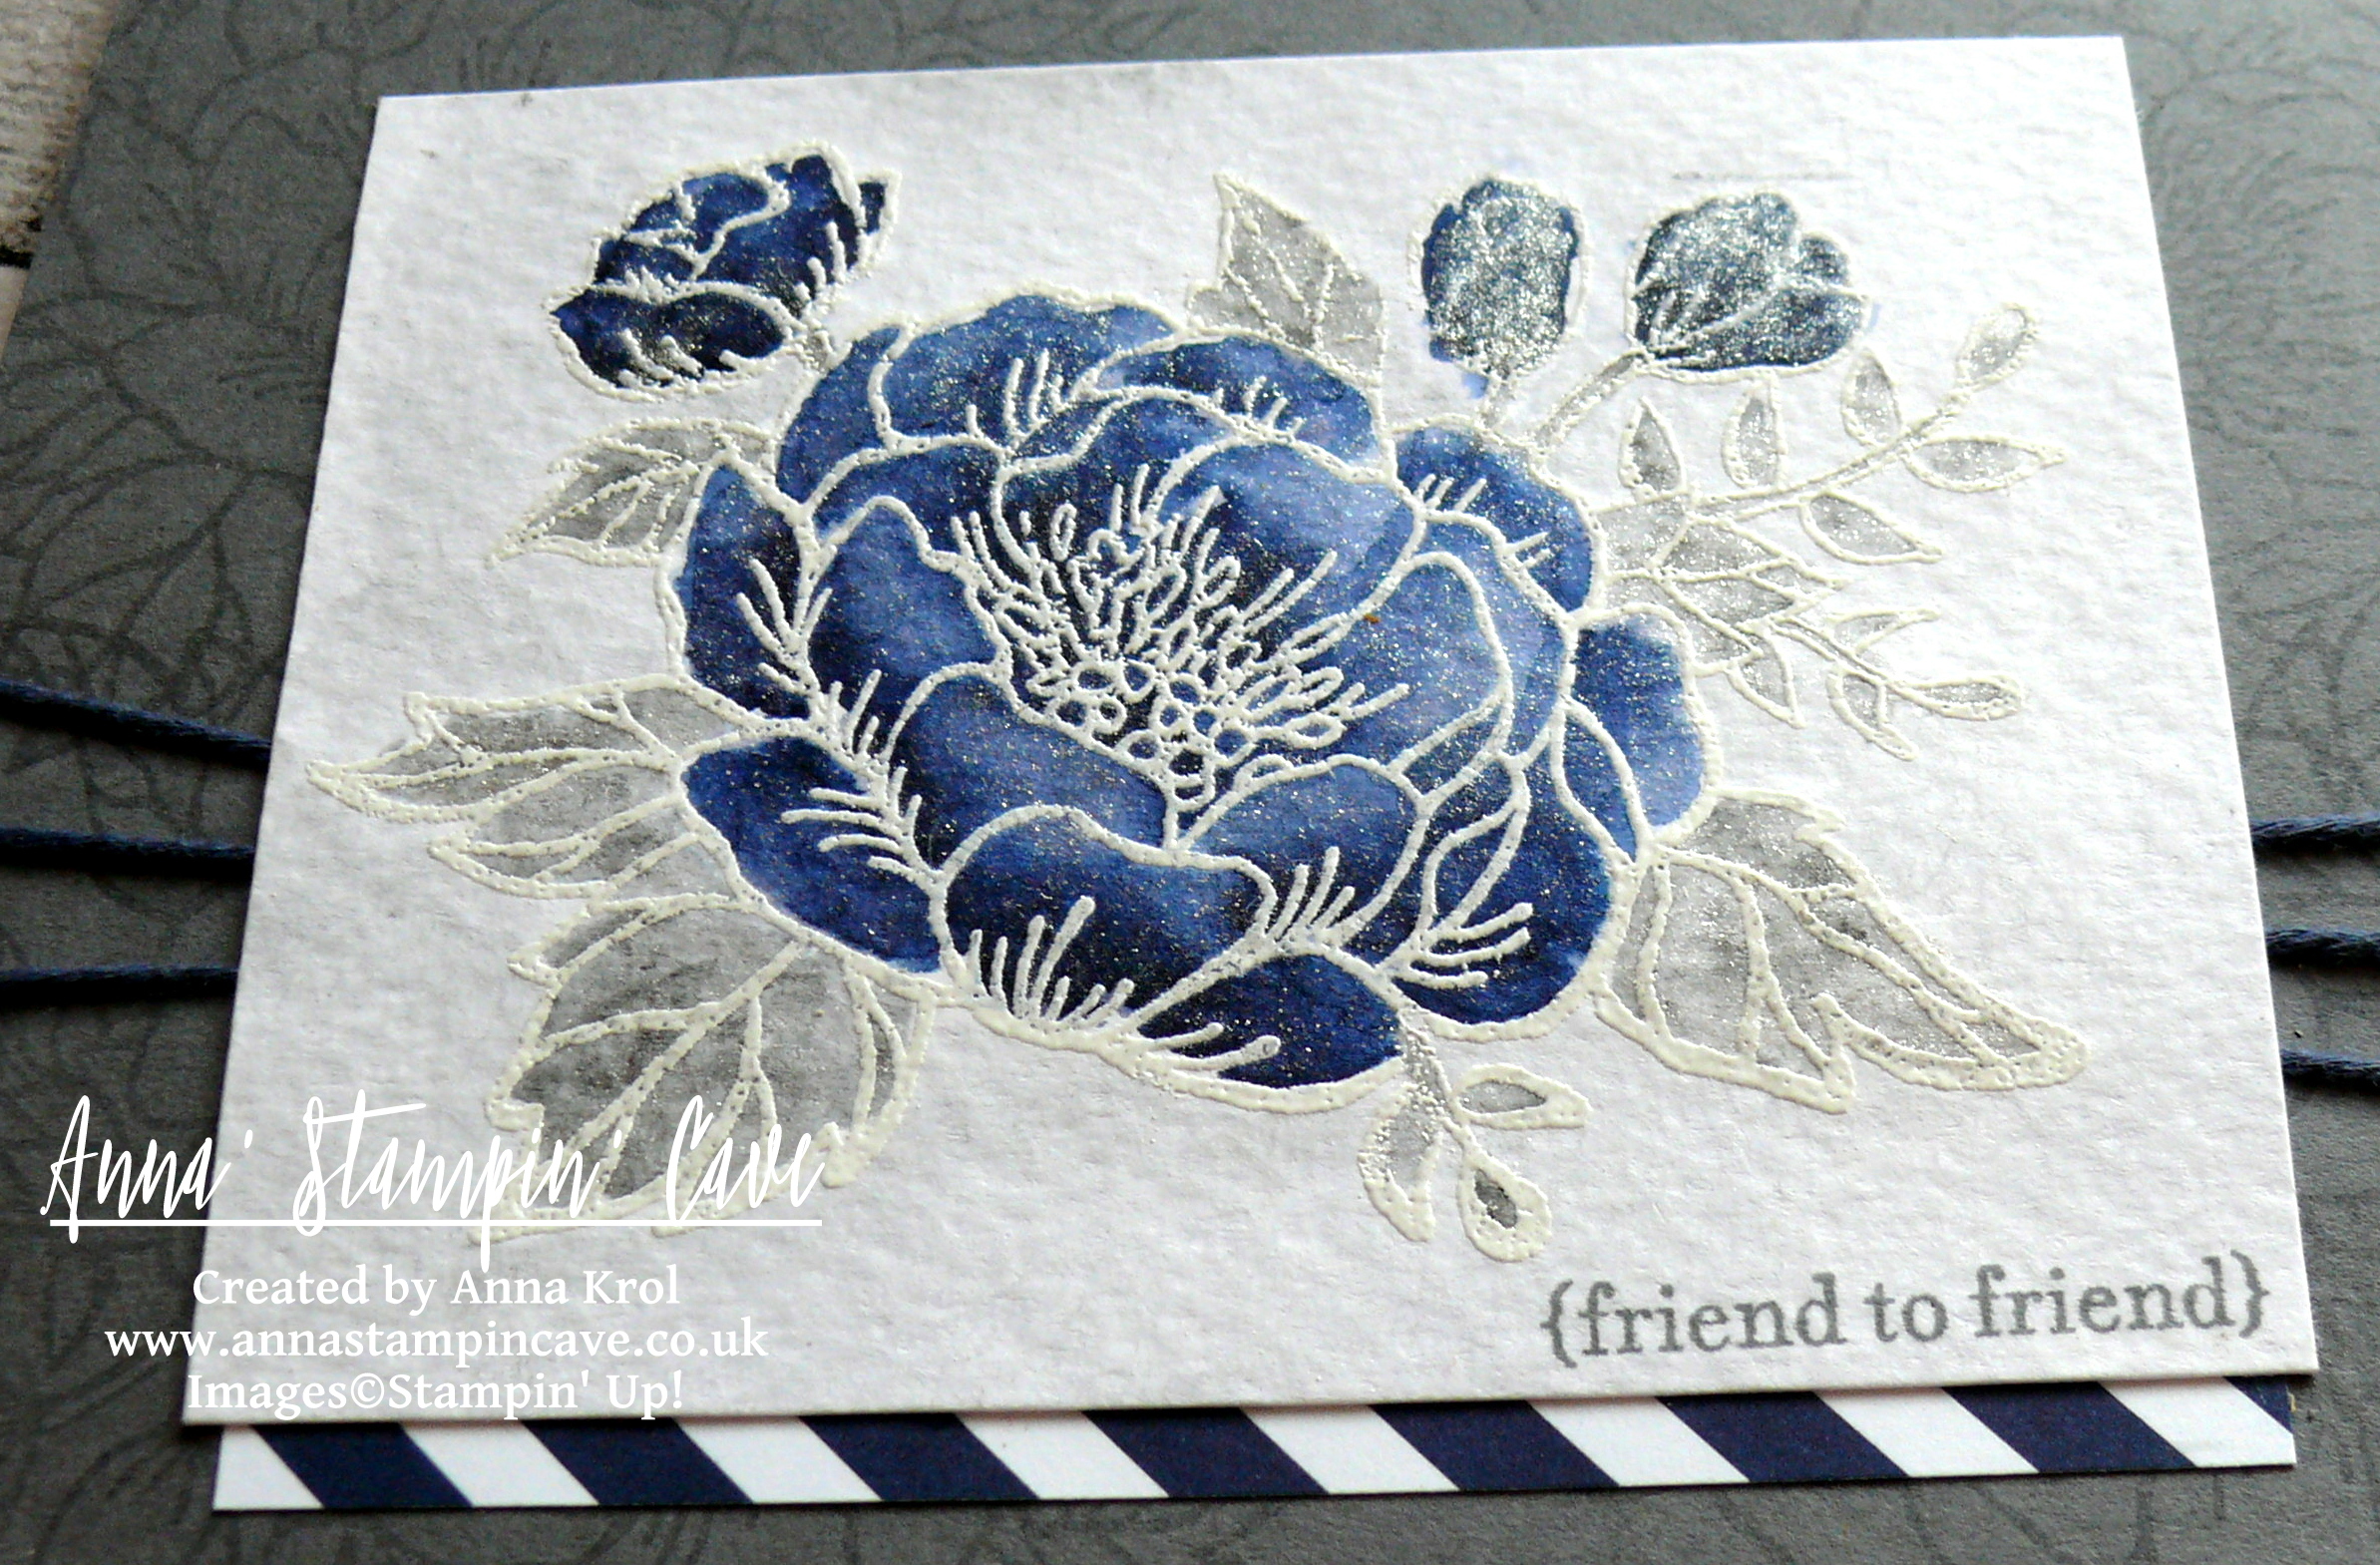
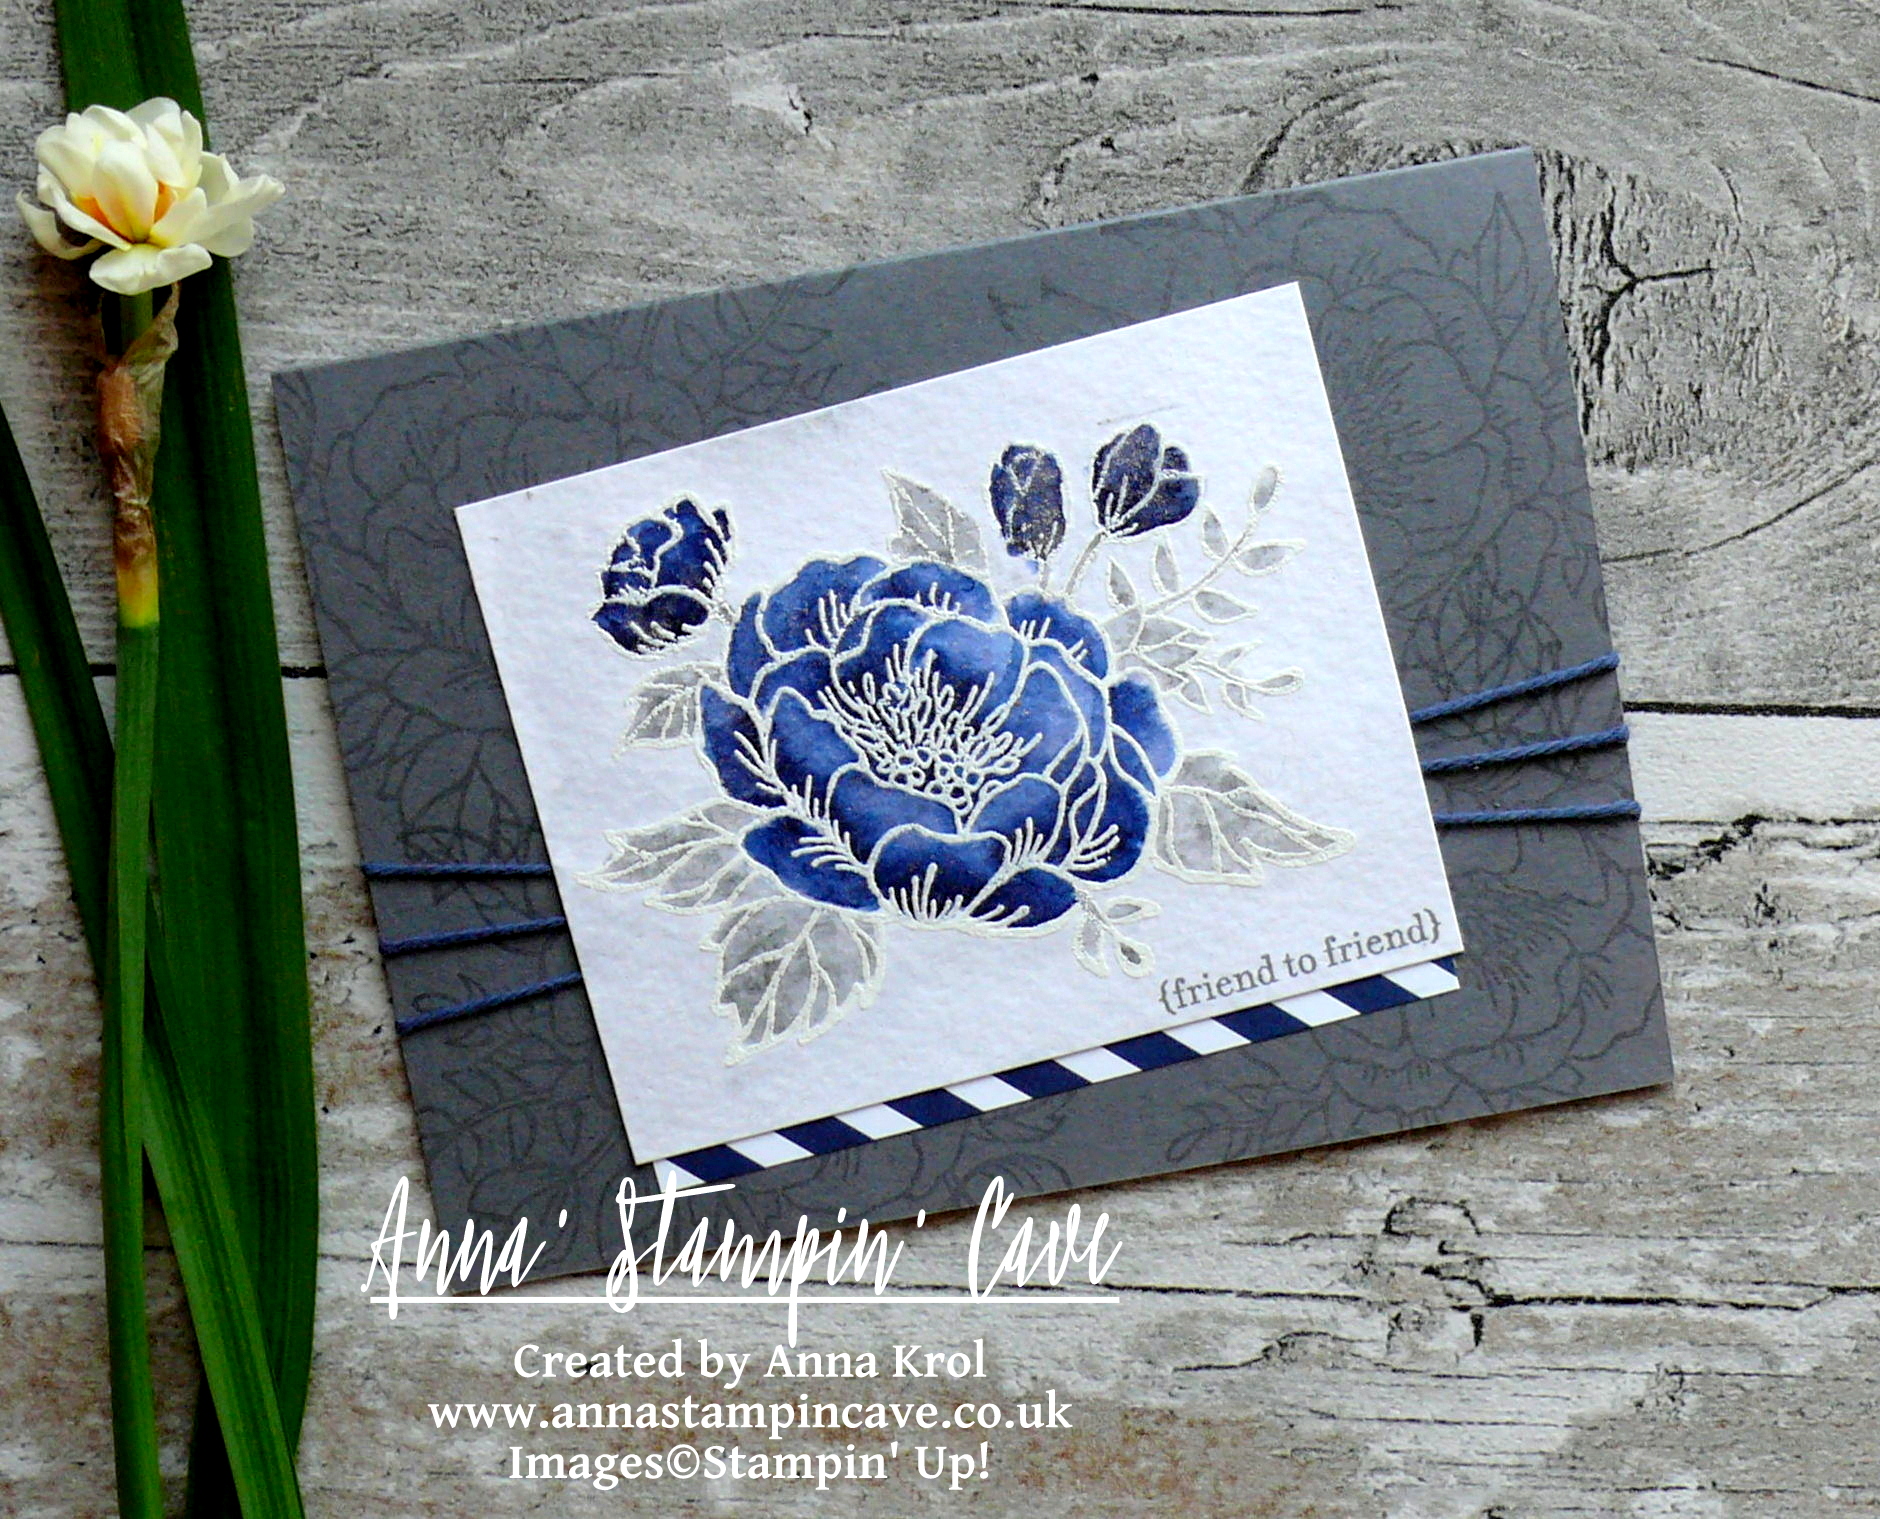
First, I took Shimmery White panel and dust it with embossing buddy. Next, using Versamark, I stamped peacock’s tail all over the panel. sprinkled with white embossing powder and heat set it using a heat tool.
I pulled out three inkpads I wanted to use: Lemon Lime Twist, Bermuda Bay and Tranquil Tide. To prepare my colour palettes I squeezed each inkpad in the middle lightly to transfer ink from foam to the lid and opened the inkpads.
I wet the entire Shimmery White panel, using aqua painter, and next, I started adding my colours: Lemon Lime Twist at the top, Bermuda Bay in the middle and Tranquil Tide on the bottom. I let the colours to bleed into each other.
I love to watch how embossed images resist the ink – it’s like magic
Remember, watercolours dry lighter, so once my piece was dry, I added more water and more colour, and repeat the process until I was happy.
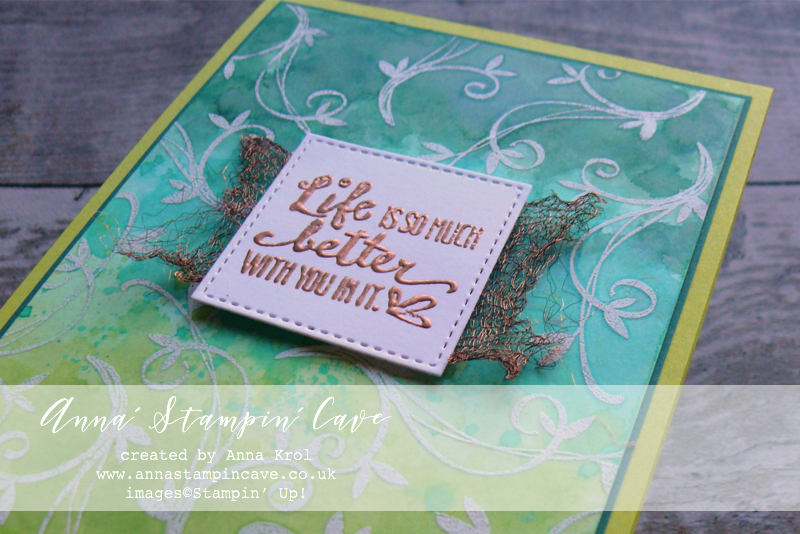
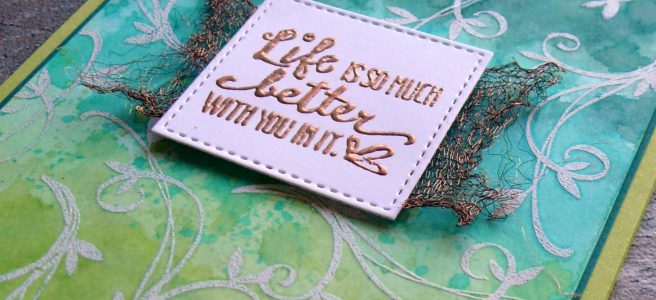
The sentiment I chose comes from Petal Palette Stamp Set. I stamped in on a piece of Whisper White cardstock with Versamark and heat embossed it in copper. Next, I die-cut it using the second smallest square die from Stitched Shapes Framelits Dies.
When assembling the card, I decided to turn my panel upside down – it looked so much better with Tranquil Tide on top.
Instead of a ribbon or twine from the sketch, I swap it for a Copper Trim. I cut briefly 2-1/2 piece and I pulled it apart to create this cool mat for my sentiment. I add it to the card with dimensionals.
As always, I really want to encourage you to visit the Global Design Project challenge blog to see other beautiful projects from all around the world. Just click on their logo below to visit the website

I’m also adding my card to:
If you wish to purchase any of products I have used, simply click the images below to go directly to my online store and don’t forget to enter the hostess code RRMR76JH to receive a gift from me.
Thank you for stopping by and have a blessed day

Hostess Code for February: RRMR76JH – Use this code in the month of February and receive a gift from me. Spend £50 or more and use the code, and you will receive Whisper White 1/4″ (6.4mm) Organza Ribbon + a handmade gift from me

Special Notes: 1) Make sure you select Anna Krol as your demonstrator;
2) If you select “No Contact” box I do not have access to your name and can’t send you a gift;
3) If your order is £150 or more do not use the code and grab your own Stampin’ Rewards + gift from me
Product List
|
|
|
|
||
|
|
|
|
||
|
|
|
|
|
|
|
|
|
|
|
|
|
|
|
|


Pin me
Summary of the project which gives all the views of the card in one photo. I’d love if you pinned and called by on Pinterest xx
Don’t forget to check:
New Sale-a-bration release is LIVE. Click here for more details –>


Spring Summer Catalogue Paper & Ribbon Shares. Shares are open to Austria, France, Germany, Netherlands & United Kingdom. 102 sheets of DSP & 2 yards of each type of ribbon from Spring/Summer Catalogue. Click here for more details —>
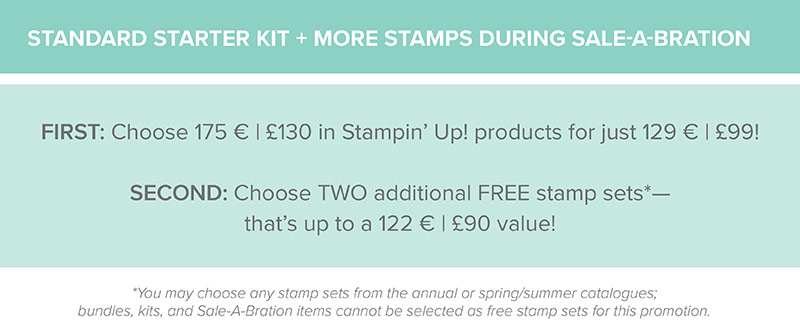
 The New Stampin’ Up! Spring/Summer 2017 Catalogue and Sale-A-Bration are LIVE and it’s AMAZING! For every 60 €/£45, you spend either from Spring Summer Catalogue or Annual Catalogue, you will get to choose one FREE level 1 product from SAB brochure! If you spend 120 €/£90, you get one FREE level 2 product, OR, you can choose two level 1 items. If you spend 180 €/£135, you have the option to choose three level 1 items or one level 1 item and one level 2 item. Click here for more details —>

Ever wondered what it’s like to join Stampin’ Up!’s community? I may have few answers for you. Click here for more details –>