Negative Die-Cutting

Anna’ Stampin’ Cave – Negative Die-Cutting


Hello everyone and welcome! Today I’ve got for you super cool & easy technique to try out: negative die-cutting. Just a reminder: each week we are using Ronald McDonald House stamp set ‘My Hero’.
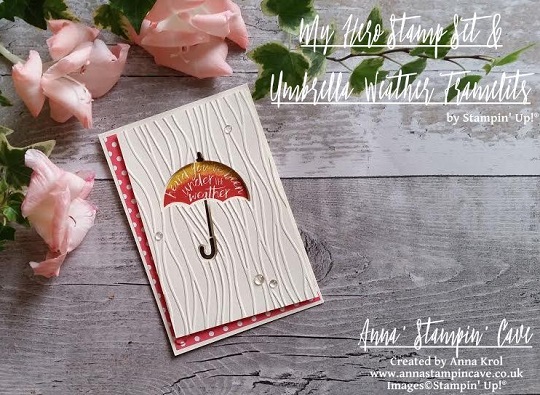
anna-stampin-cave-my-hero-stamp-set-with-negative-die-cutting

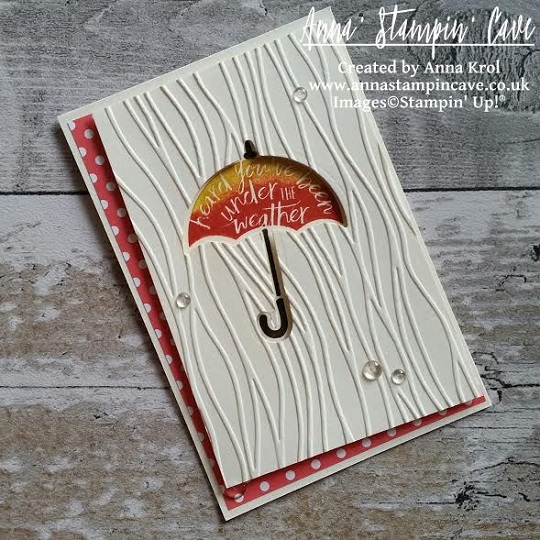
For today’s project, I’ve decided to use this lovely umbrella image. To create my card I started with a Very Vanilla card base and a Very Vanilla panel, slightly smaller than my base. First, I arranged the layout of my card using the Umbrella Weather Framelits. When I was happy with the placing, I die cut the umbrella first and the handle next, from my panel. But instead of using the die-cut piece on the card (as we usually do, don’t we?), I’ve used the negative image. Savvy tip: Don’t throw your die cuts away. You can use them for your next project.

I took my panel, placed it on the card base without adhering it, and I stamped the umbrella and the handle through a die cut holes. Stamp-A-Ma-Jig ( I love this tool!!!) was a big help to position my stamps perfectly. To create an ombre effect on umbrella image, I coloured the stamp with Crushed Curry and Tangerine Tango Stampin’ Markers (Crushed Curry to the top and Tangerine Tango in the middle). And, because I don’t own the 2015-2017 In Colour Stampin’ Markers, I carefully dabbed Watermelon Wonder ink pad to the bottom of the stamp.
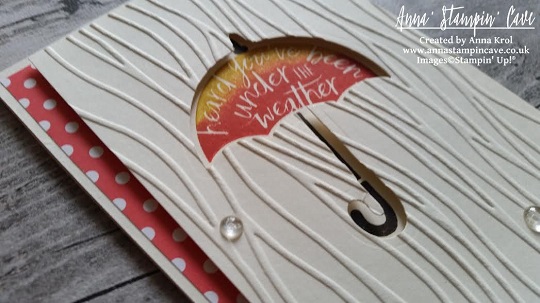
my-hero-stamp-set-with-negative-die-cutting-2

When I was done with the stamping, I trimmed my layer at slightly ‘wonky’ angles, and run it through the Big Shot with a Seaside embossing folder. This folder is intended to imitate the waves, but if you turn it aside, it looks like rain streaks on a window, which is totally cool 🙂

I took a piece of Watermelon Wonder DSP from 2015-2017 In Color Designer Paper Stack (there are four different designs to choose from, but I’ve gone for dots). It was slightly bigger than my top layer, but I  didn’t want to use it all on my card. I only wanted it to peek from underneath my top layer where the ‘wonky’ angles were. So I measured it up, trimmed the piece and adhered it to the base. next, using dimensionals, I’ve added the top layer.
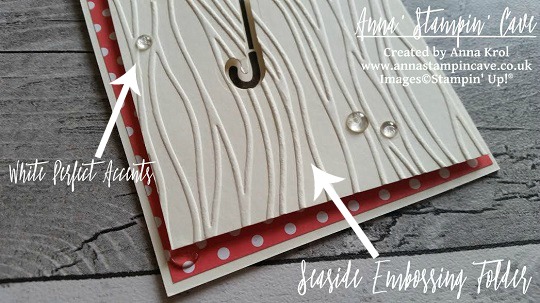
my-hero-stamp-set-with-negative-die-cutting

I decided not to use any additional sentiment on my card, as I think the one on the umbrella says it all. To embellish the card I’ve used White Perfect Accents. But hey, you say, these are clear, right? But did you know that you can peel off the white, sticky backing from your  White Perfect Accents, and you get these super awesome clear, perfectly round embellishments?! It’s cool or what?! But, of course, once you peel the backing off, you need to use glue to adhere them.
pootlers-design-team-week-2

So, did you liked my project?! I hope I inspired you to give this technique a go. It’s really cool and you will be hooked in no time!

Thank you for stopping by and have a blessed day,

Timeless Love Wedding Card – Colouring On Vellum Technique

Anna’ Stampin’ Cave Timeless Love Wedding Card – Colouring On Vellum Technique

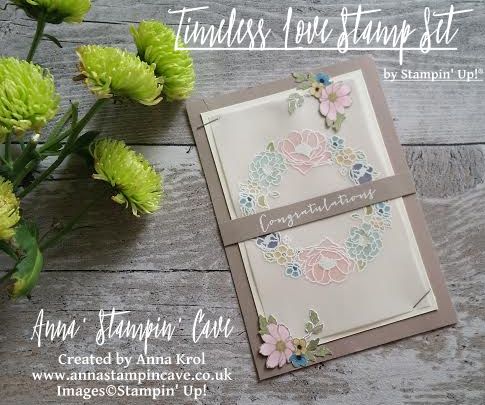
Hello! Today I wanted to share with you this beautiful card I created for my card swap teamie last month. Our theme was ‘Wedding Bells’ and I think this card fits perfectly.

Timeless Love Wedding Card with Vellum Panel

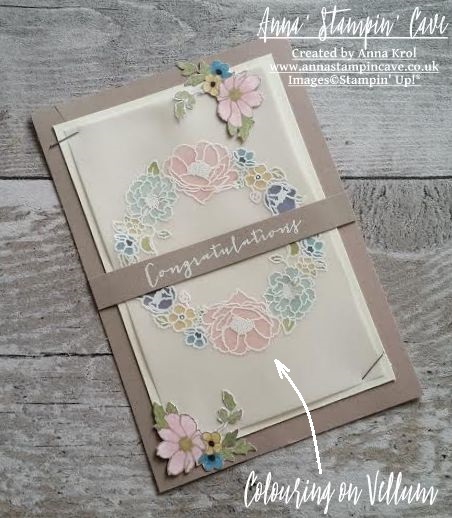
I think I forgot how amazing working with vellum is. There are so many techniques you could use it for. And my card shows just one of them: colouring on vellum. It’s a really easy technique that even a newbie could do. And it adds that extra OOMPH to your card too 🙂

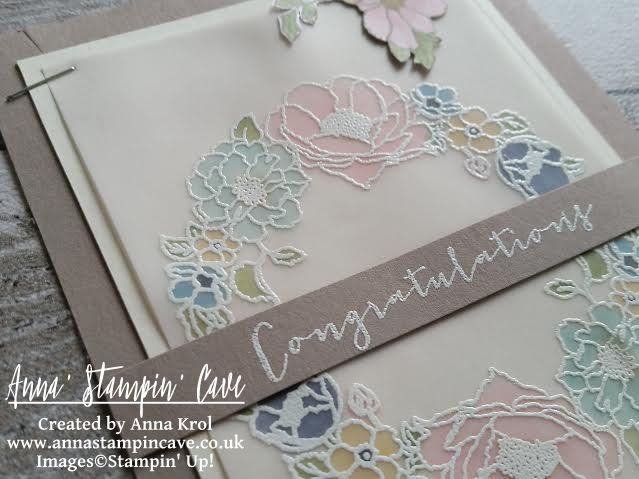
First, I stamped this floral arc from Timeless Love Stamp Set onto my vellum panel with Versamark Ink. I’ve stamped it twice to create a wreath. Of course, I’ve used my embossing buddy before stamping (any anti-static product will work). Next, I heat embossed it using white embossing powder. TIP! You probably know that already but just in case: When heat embossing on vellum make sure you pre-heat your heat gun. Just switch it on and let it warm up for 30 seconds or so, before hitting the vellum. I usually heat the back of the vellum, which prevents any unwanted warping.

Timeless Love Wedding Card Vellum Panel

Now to the fun part: colouring! It’s so easy to add colour to the image heat embossed on vellum. I just chose my favourite markers and colour on the back of the vellum. The colours I’ve used are Pink Pirouette, Marina Mist, Pear Pizzazz, So Saffron, Soft Sky and Wisteria Wonder.

It doesn’t have to be perfect: vellum is semi-transparent so it’s very forgiving, and you can’t really see marker strokes on the other side.

Once the colouring was done I stamped two flower clusters from the same set on some Whisper White cardstock, coloured them in with blender pen and fussy-cut them.

Now to assemble the card. I took my vellum and adhered it onto the Very Vanilla panel using glue dots, I hide them behind flower centres. Next, I adhered it to the Tip Top Taupe base. I’ve used the clusters of flowers I fussy-cut earlier, to secure the vellum on two opposite corners, and I also used simple stapler on the other corners. I love how simple stapler can add character to the card!

For the sentiment, I cut a strip of Tip Top Taupe cardstock, heat embossed ‘Congratulations’ in white and I’ve added it to the middle of my card, between two arcs.

Timeless Love Congratulations Card

I really hope you like my project, and that I inspired you to try, and have some fun with vellum too. As always, if you wish to purchase any of the products I have used, simply click the images below to go directly to my online shop and don’t forget to enter the hostess code for the month of July GUHXWAR6, to receive a gift from me.

I’m adding my card to:

Thank you for stopping by and have a blessed day,

Simply Sketched Saturday Challenge Blog Hop #8 – Easter Lamb At Wildflower Fields

Simply Sketched Saturday Challenge Blog Hop #8 – Easter Lamb At Wildflower Fields

SSSC Header

Thank you for joining us for another Simply Sketched Saturday Challenge!  We’re so excited to be sharing this hop with you. The products used are all available in the current Annual, or seasonal, Stampin’ Up!®  Catalogues*. Simply use the buttons at the bottom of the post to keep hopping!

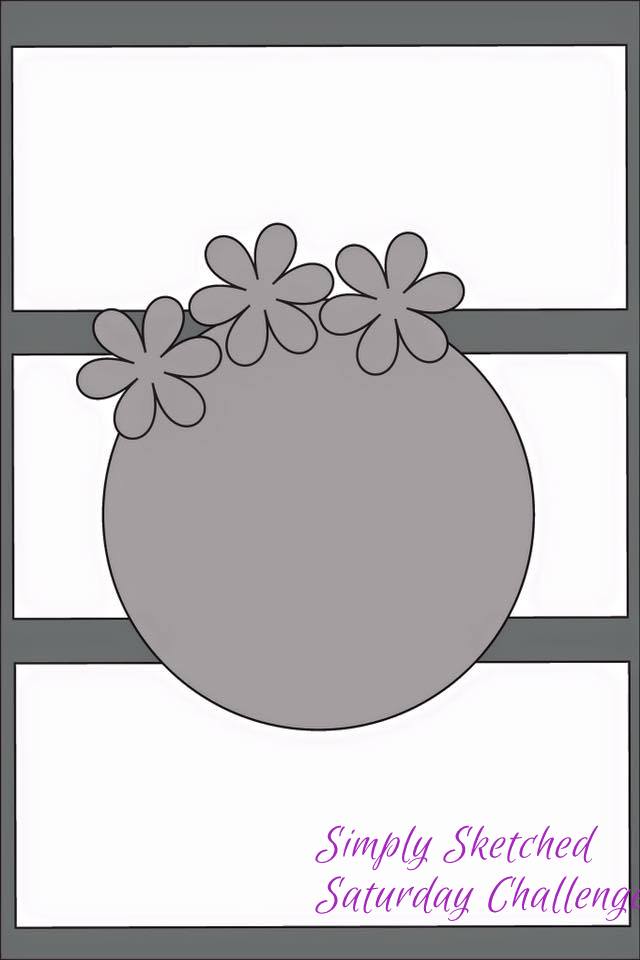
I really like today’s sketch designed by lovely Justyna from Perfect Crafts.

SSSC 8

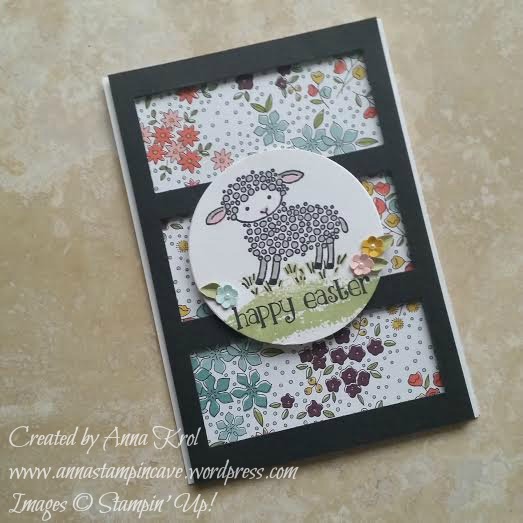
Don’t you just love it?! I had so many ideas for this sketch, I couldn’t decide which way to go. But I really wanted to use super cute Easter Lamb stamp as my focal point. So here’s my take on the sketch:

Easter Lamb

My very first idea for this sketch was to make a shaker card. So I created a frame for my card first. I’ve used foam adhesive at the back of my frame – you could use Stampin’ Dimensionals too. But because I only have the metallics sequins at this moment, and I really didn’t want to go into silver/gold colour theme, I gave up this idea. But then I thought: hey, you can still use the “frame” to create a dimensional layout.

Easter Lamb 2

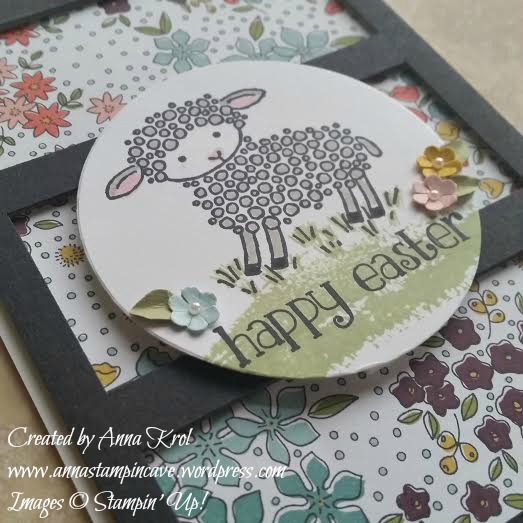
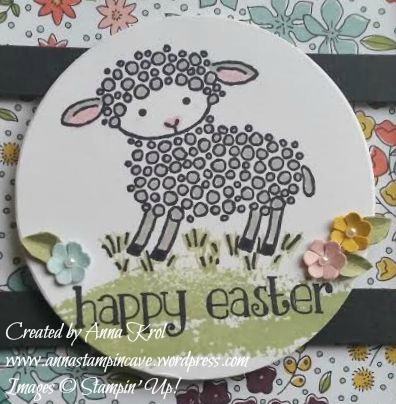
I had some leftover pieces of Wildflower Fields DSP, so I cut three strips and adhered them to the card base, beneath my frame. I stamped Easter Lamb in Stampin’ Up! Black Archival ink on a piece of Whisper White, and die-cut it using the middle circle from Circles Collection Framelits. I’ve used Stampin’ Write Markers to add some colour to my little cutie: Pink Pirouette for ears, nose and cheeks, Sahara Sand for wool and Pear Pizzazz for grass. I also stamped some grassland using swoosh stamp from Sheltering Tree.

Easter Lamb 3

To make it even cuter I punched few tiny flowers in Blushing Bride, Daffodil Delight and Pool Party using Tree Builder Punch. I’ve made a little cut between each petal to add some extra dimension to my flowers. I also punched few raindrops using the same punch and Pear Pizzazz cardstock and turned them into tiny leaves for my flowers. To finish off my card I added smallest of the Pearl Basic Jewels to the centre of each flower. For the inside, I stamped beautiful sentiment from Suite Sayings.

Easter Lamb 4

I would love to hear from you. Do you like my take on the sketch?

Now, be sure to hop along and see more inspiring projects. Your next stop is Karen’s blog  go and see what she has made for you.

Thank you for stopping by and have a blessed day!

SSSC Previous   SSSC Next Blog

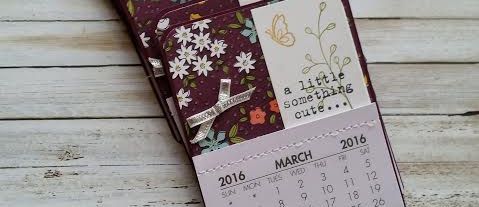
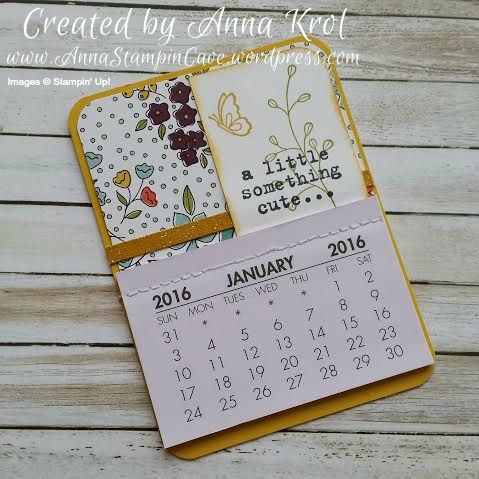
Wildflower Fields Fridge Mini Calendars

Wildflower Fields Fridge Mini Calendars

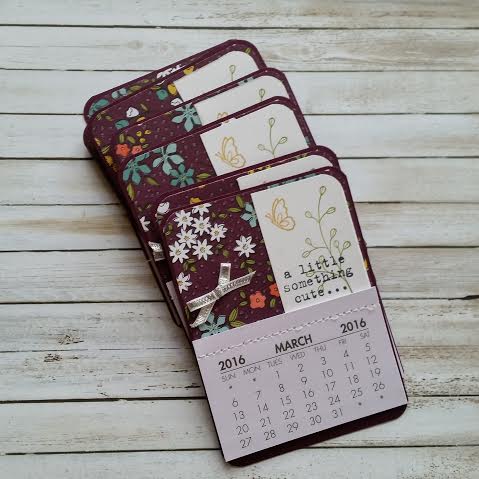
Wildflower Fields Fridge Mini Calendars - Blackberry Bliss

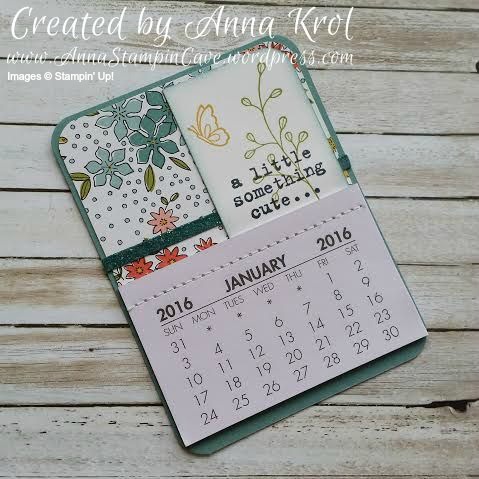
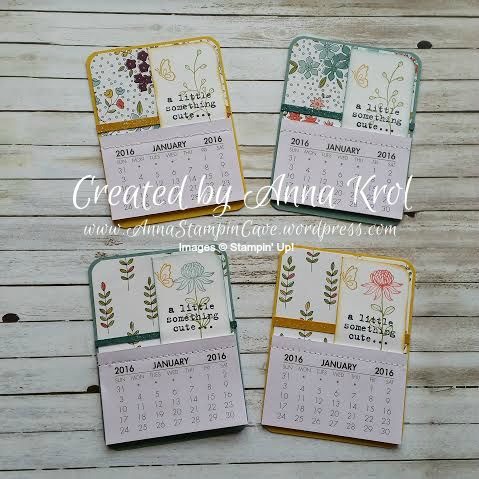
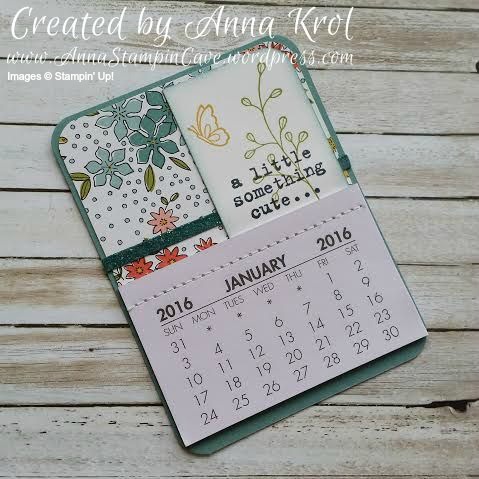
Good evening everyone. A few days ago, on my facebook page,  I’ve posted some fridge mini calendars I’ve made as a thank you gifts for my customers. But they were such a hit that I thought I will make a blog post, to show how to make them. Just a warning, it’s gonna be picture heavy 😉

Wildflower Fields Fridge Mini Calendars - Blackberry Bliss 2

I’ve bought these mini calendars on eBay while ago, but due to chronic fatigue I just couldn’t push myself to sit down and craft – maybe except for the cards once in a while. But I was wondering about customers gifts the other day and had a lightbulb moment – why not make cute magnetic fridge calendars?! Each calendar measures approx 2-7/8″ x 1-7/8″, and on their size, I’ve based my design.

Wildflower Fields Fridge Mini Calendars - Instructions 1

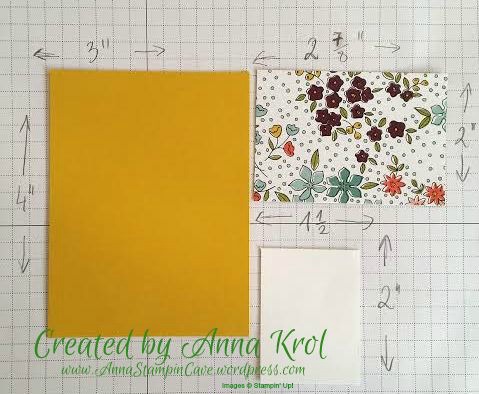
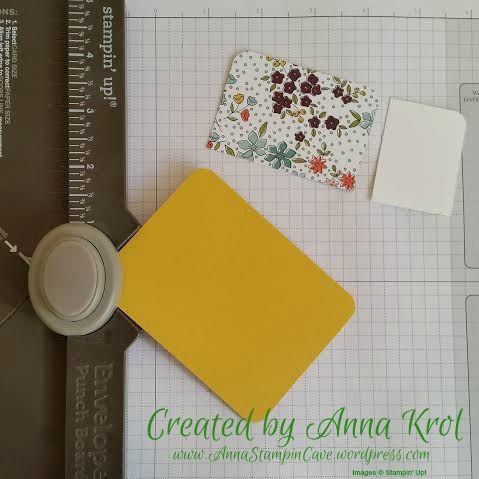
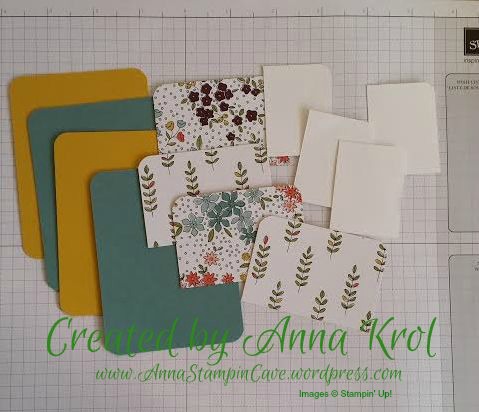
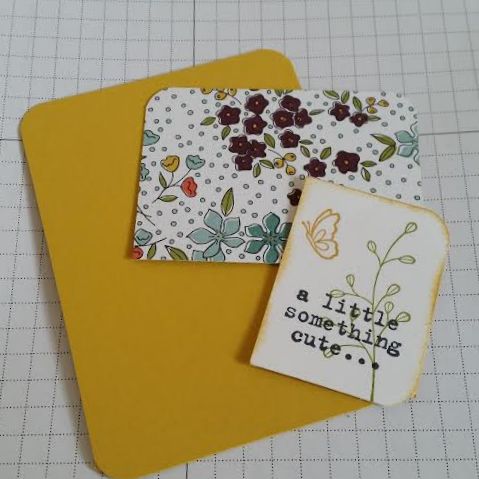
The base for my calendar measures 3″x 4″ – here I’ve used Hello Honey. Designer Series Paper measures 2-7/8″x 2″ and Whisper White piece for stamping measures 1-1/2″x 2″. I rounded all the edges of my base, top edges of DSP and right top corner of Whisper White. I’ve used my Envelope Punch Board to do so, but you could use the corner rounder punch if you have one.

Wildflower Fields Fridge Mini Calendars - Instructions 2 Wildflower Fields Fridge Mini Calendars - Instructions 3

I stamped “a little something cute…” sentiment from Something To Say stamp set on my Whisper White pieces. Next, I stamped floral images from Flowering Fields stamp set. I just love this set! Don’t forget that this beautiful stamp set you can earn free with every £45 purchase during Sale-a-bration.

instrukcje

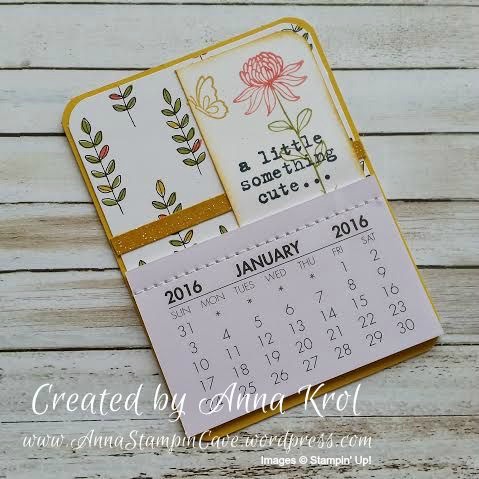
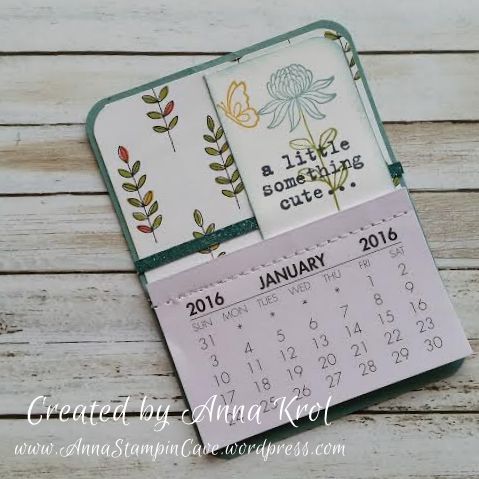
I’ve used Hello Honey for butterflies, Old Olive for stems and leaves, and Lost Lagoon and Calypso Coral for flowers. I’ve used ink pads as well as Stampin’ Markers to do my stamping. I have to say here, I love that all Stampin’ Up’s Designer Series Papers got all coordinating colours listed at the back of the paper pack. It makes creating so much easier if you don’t have to work out which colours to use. I also sponged stamped panels, so they stand out nicely from the background.

Wildflower Fields Fridge Mini Calendars - Hello Honey 2 Wildflower Fields Fridge Mini Calendars - Lost Lagoon

Wildflower Fields Fridge Mini Calendars - Lost Lagoon 2 Wildflower Fields Fridge Mini Calendars - Hello Honey

To embellish my Blackberry Bliss calendars I’ve used Silver 1/8″ Ribbon as it looked pretty neat on a dark background. But it didn’t work as good on the light one. So I cut “skinny” strips of cardstock in Lost Lagoon and Hello Honey, smooshed Versamark over them and heat embossed with Iridescent Ice Embossing Powder. I love this gentle shimmer.

Wildflower Fields Fridge Mini Calendars - Instructions 5

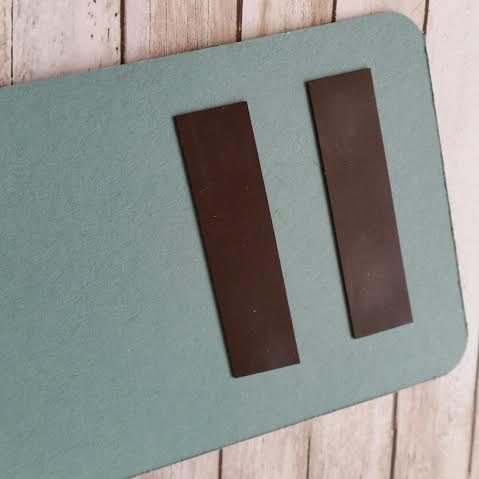
I assembled my calendars using Tombow glue. I also added two strips of a magnet at the back of each one.

Wildflower Fields Fridge Mini Calendars - Lost Lagoon & Hello Honey

I really hope you like my little project and that you give them a go. Or maybe you have different ideas to use these little calendars for? I would love to hear from you!

Have a blessed day,
Watercolor Wings, Cotton Paper, Same Design And Two Different Cards

Hello everyone! Today I wanted to share with you couple of cards I created a few weeks back. In August we had two birthdays in close family: my niece had her 15th birthday, and my little sister was celebrating her round 20 🙂

For both cards, I’ve used the same layout, but by simply changing focal point and embellishments I created two cards that looked completely different 🙂

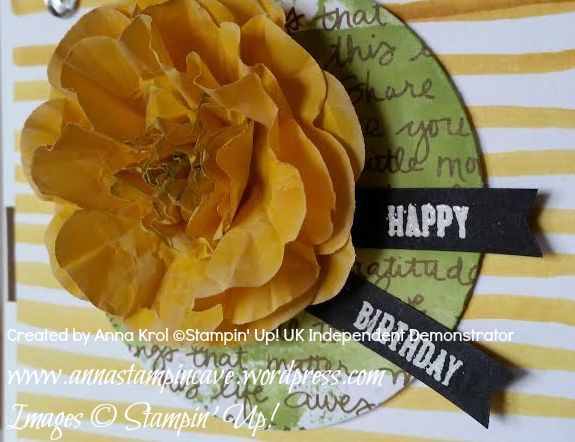
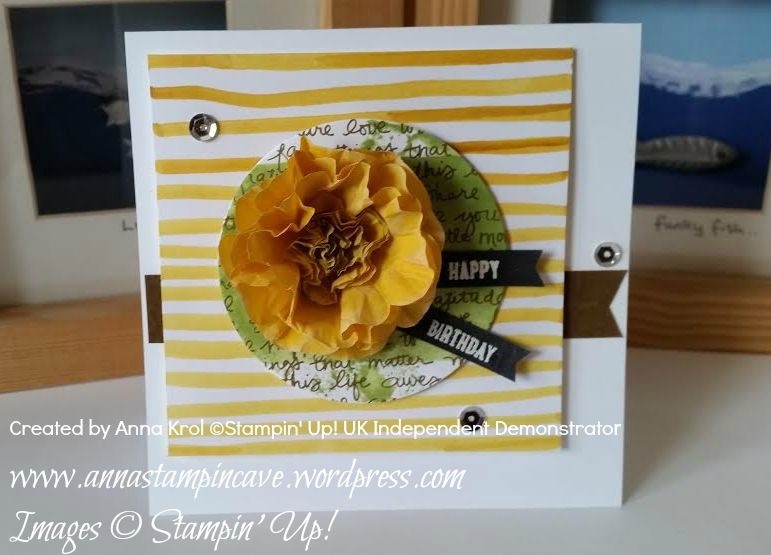
The first card I’ve made for my niece and I was dying to use our new Cotton Paper. With Floral Frames framelits, Pansy Punch and Petite Petals Punch I created this amazing 3D flower.

cotton paper 5

I’ve sponged edges of petals with Whisper White Craft ink and close to center slightly in Wild Wasabi. The sentiment comes from Sprinkles Of Life; stamped in Versamark and heat embossed in white on a piece of Basic Black.

cotton paper flower

The base for a card is 4×4″. The first layer is 3×3″ and I created this patterned paper myself. I simply used Stampin’ Write Marker in Crushed Curry and hand-drawn horizontal lines – cool, isn’t it? The second layer is a circle cut out from a piece of Neutrals DSP Stack (Soft Suede) with Wild Wasabi watercolour “wash”. For more interest, I added a banner underneath my layers and few sequins.

Watercolor wings

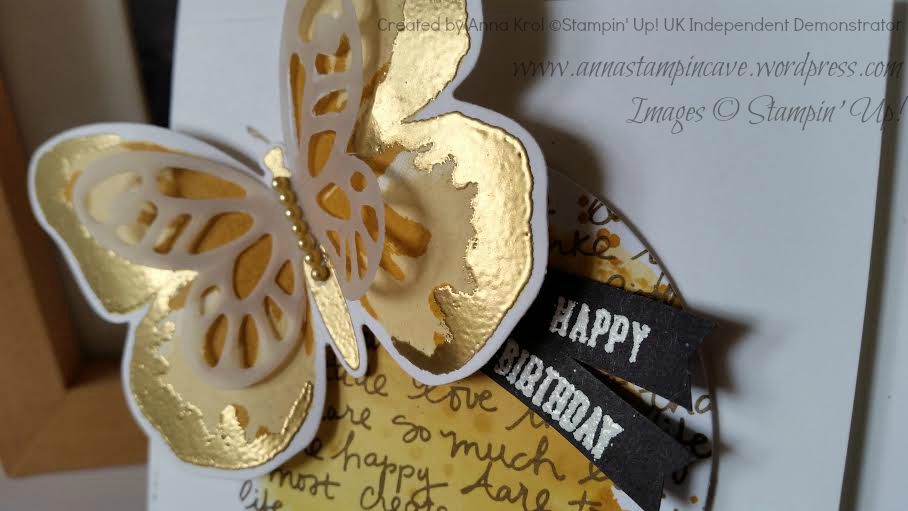
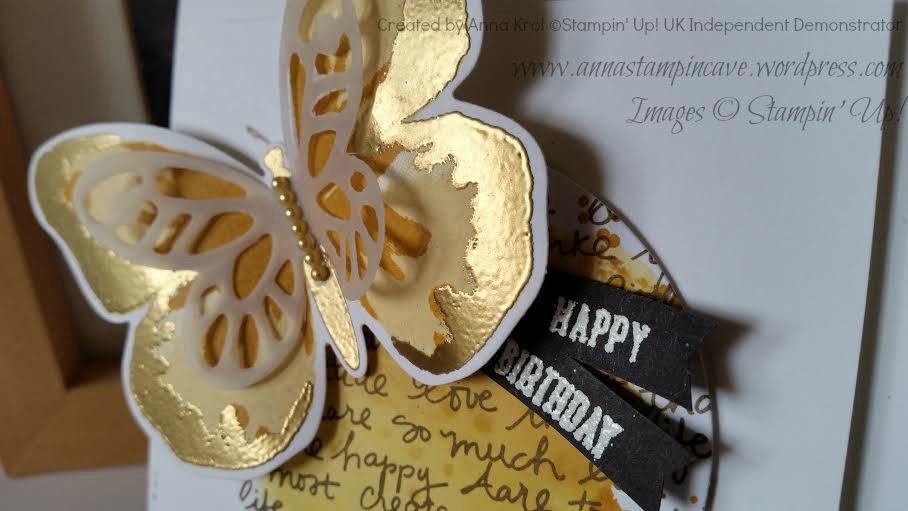
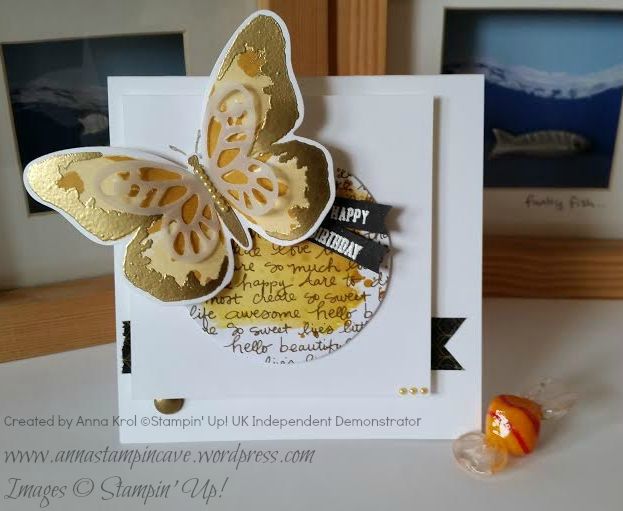
The second card I’ve made for my sister’s birthday. As I mentioned it’s the same design. The only difference is that I kept 2nd layer clean and for the circle, I used So Saffron, Hello Honey and Delightful Dijon “wash”. Same colours I’ve used for this gorgeous butterfly from Watercolor Wings.

Watercolors wings 4

The edges of wings and the body of butterfly I heat embossed in gold. On top, I added small vellum butterfly. Tiny yellow pearls, as well as a piece of black/gold washi tape, comes from my stash. Can you see little gold “bauble” peeking from underneath white layer? It’s one of White Perfect Accents, heat embossed in gold.

So what do you think about my cards? My niece and sister loved them to bits, so I really hope you like them too.

Thank you for stopping by and have a blessed day,