Petal Palette Split Background 1 For 2

Anna’ Stampin’ Cave – Petal Palette Split Background 1 For 2 for Kylie Bertucci’s International Project Highlights

Thanks for coming to my blog today! We are being highlighted internationally by Kylie Bertucci and you are able to VOTE  for my project. The top ten winners will get to be part of an international blog hop so please vote for my project. My project is under number 7!  You can do it here or use a button at the end of my post.

Our theme for this highlight is, again, ‘Favourite Sale-a-bration Or Occasions Catalogue Products’ – because they are so amazing!! Last time I’ve used my ever favourite medium: Brusho Crystal Colour – you can check that post HERE.

This time, however, I decided to use a stamp set I seem to be using a lot lately, called Petal Palette. And this is also my second project in ‘Bedazzled‘ series, as I have a thing (or two lol) for a glitter lately too haha
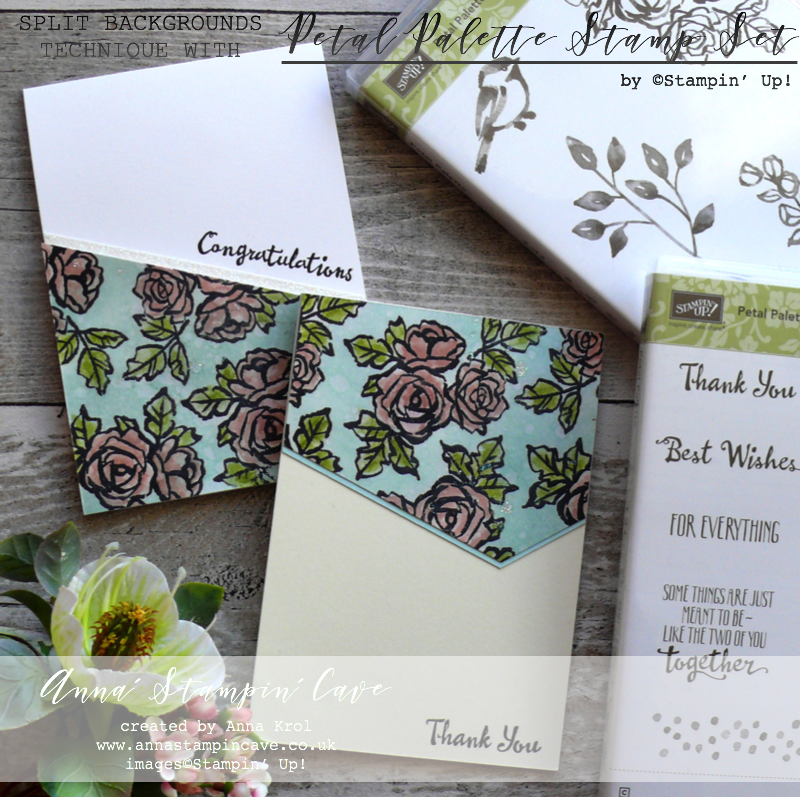
Dimensions for both cards:

  • card base: 11-6/8″ x 4-1/8″ scored in half at 5-7/8″ (29.7 x 10.5 cm scored in half at 14.8 cm) – Whisper White Thick & Very Vanilla cardstock
  • Shimmery White cardstock: 4-1/4″ x 5-3/4″ (10.8 cm x 14.6 cm)
  • Soft Sky cardstock: 3-2/8″ x 4-1/8″ (8.26 cm x 10.5 cm)
  • Dazzling Diamonds Glimmer Paper: narrow, long strip – 4-1/2″ x 1/2″ (11.4 cm x 1.3 cm) approx

First I created the background. I didn’t have a plan for my cards yet, I just played – but this is how many of projects start.

I stamped the cluster of roses from Petal Palettes Stamp Set all over the piece of Shimmery White cardstock using Basic Black Archival ink pad. Next, I watercoloured them. I’ve used my ink pads as palettes: Powder Pink with Blushing Bride for roses and Pear Pizzazz with Old Olive for leaves.
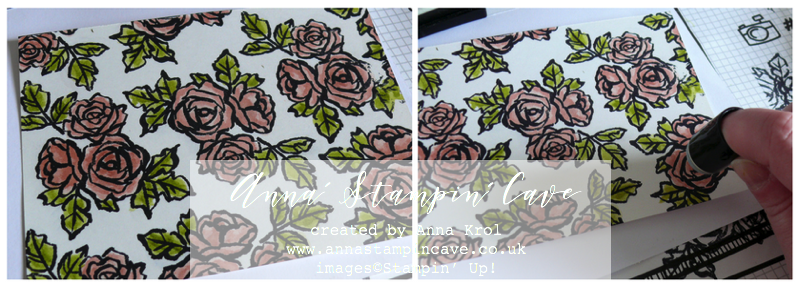
When my piece dried, I decided I want to add some colour to the background. I’ve used a sponge dauber to add Versamark ink to my flowers and let it dry. Next, I sponged Soft Sky ink over my piece. Versamark helped my roses not to be stained with blue ink, but it also allowed the blueish hue to make it’s ‘mark’ (hope you know what I mean).

Once happy with the background, I flicked some water droplets on and picked them up with a paper towel. I truly love subtle texture that those droplets create.

Now the ‘bedazzled’ part: I flicked some more water on my background, sprinkled with clear embossing powder and heat set it. Next, I re-heat it once again, added Dazzling Diamonds Stampin’ Glitter and heat set it again so the glitter stays put. And I cut my piece diagonally to create two cards.

Because of the bold design, I decided to keep the rest of my cards clean & simple.
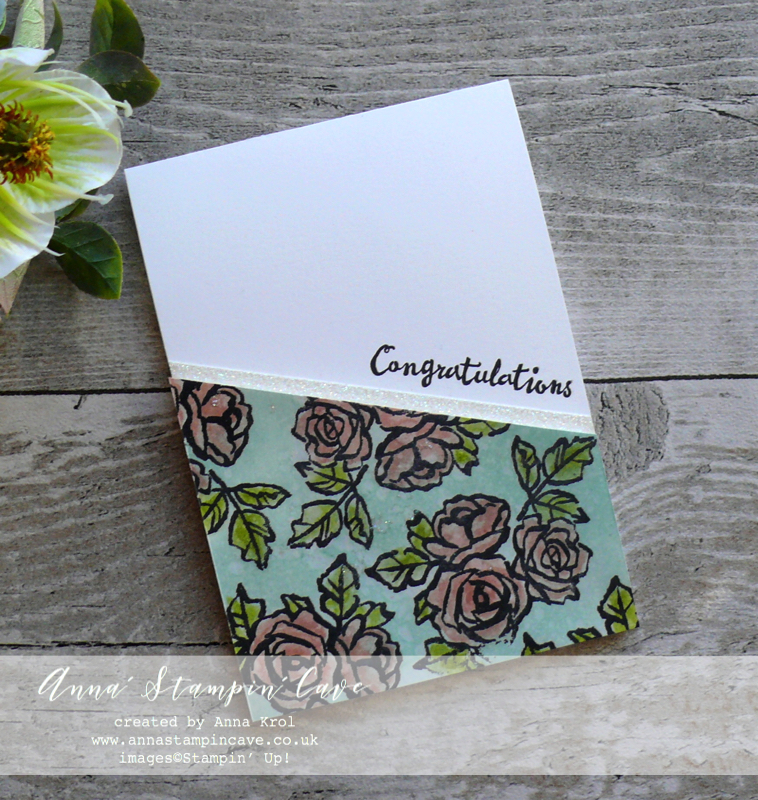
For first card, I decided to mount my diagonal piece at the very bottom of the card. But first, I stamped the sentiment, with help of Stamp-a-ma-jig, in Basic Black Archival ink.
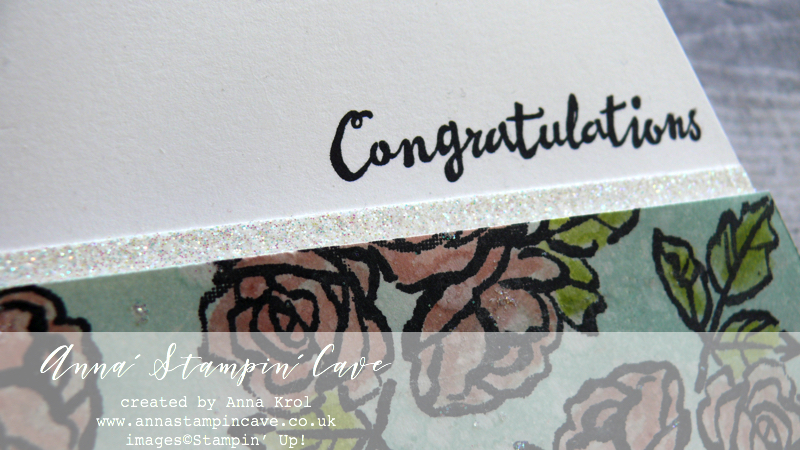
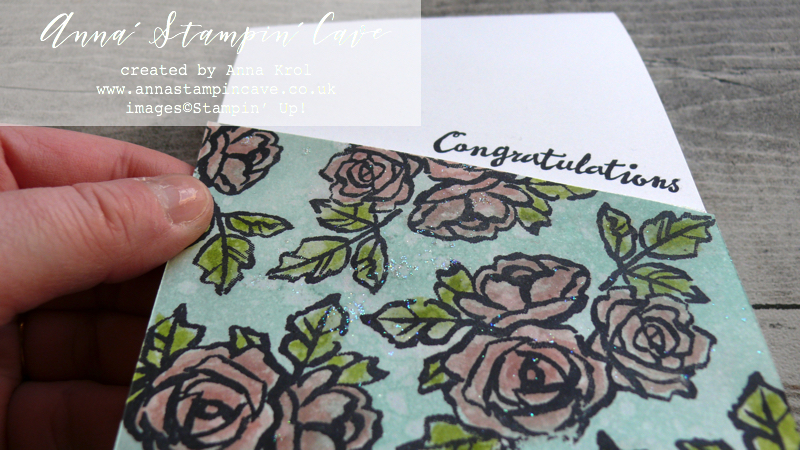
I stamped it diagonally, just above where the diagonal piece will go and I  added a strip of Dazzling Diamonds Glimmer Paper just below my sentiment. Next, using Foam Adhesive Strips I adhered my background to the card base
For the second card’s card base I’ve used Very Vanilla thick cardstock and I tweaked the layout slightly.
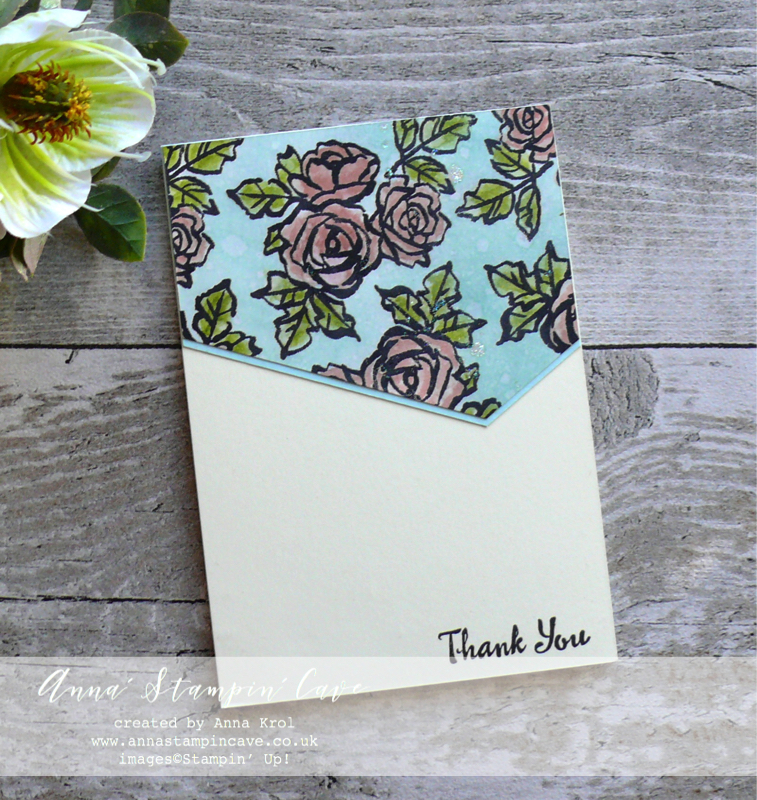
This time background landed on top of my card and I also cut off the end of my diagonal panel.
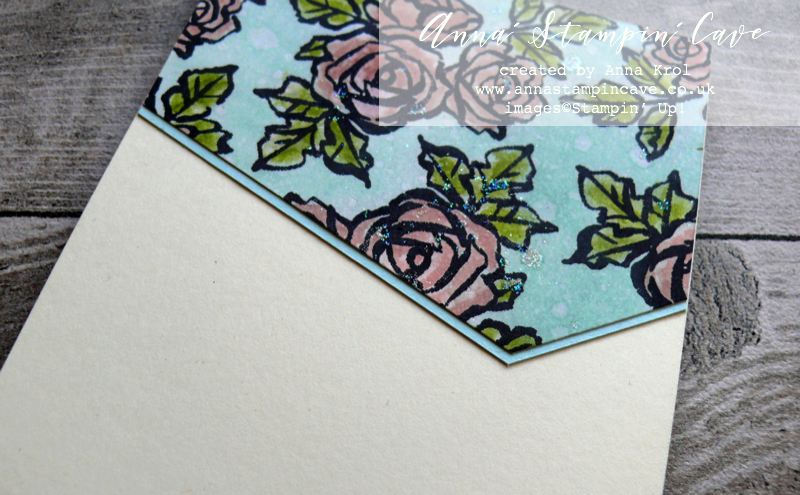
I backed it with a piece of Soft Sky cardstock and adhered it to the card base flat with snail adhesive.
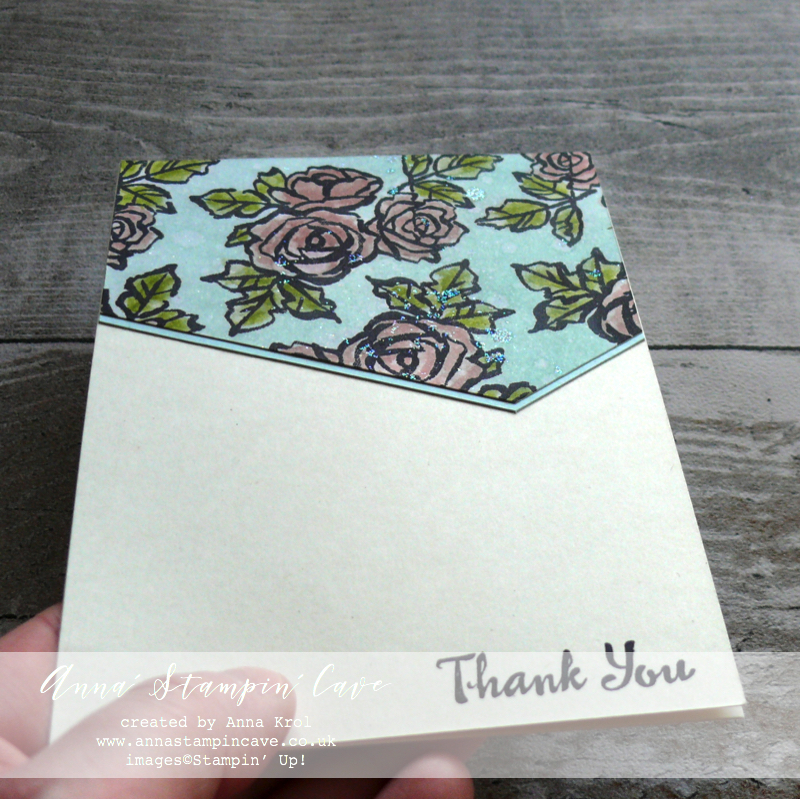
I stamped the sentiment at the bottom Right corner of the card base, in Basic Black Archival ink.

I really had fun creating these cards and I hope you like them too. And can you spot soft, blueish shiny speckles of Dazzling Diamond Stampin’ Glitter on my backgrounds? Just yummy!

Thank you so much for visiting my blog today! Make sure you head over to Kylie’s blog to check all lovely projects and vote for your favourites. Hope my project will be among them. My project is under number 7!

If you wish to purchase any of products I have used, simply click the images below to go directly to my online store and don’t forget to enter the hostess code RRMR76JH to receive a gift from me.

Thank you for stopping by and have a blessed day

Hostess Code for February: RRMR76JH – Use this code in the month of February and receive a gift from me. Spend £50 or more and use the code, and you will receive a Whisper White 1/4″ (6.4mm) Organza Ribbon + a handmade gift from me

Special Notes: 1) Make sure you select Anna Krol as your demonstrator;
2) If you select “No Contact” box I do not have access to your name and can’t send you a gift;
3) If your order is £150 or more do not use the code and grab your own Stampin’ Rewards + gift from m

Aqua Painters

£15.50

Pin me

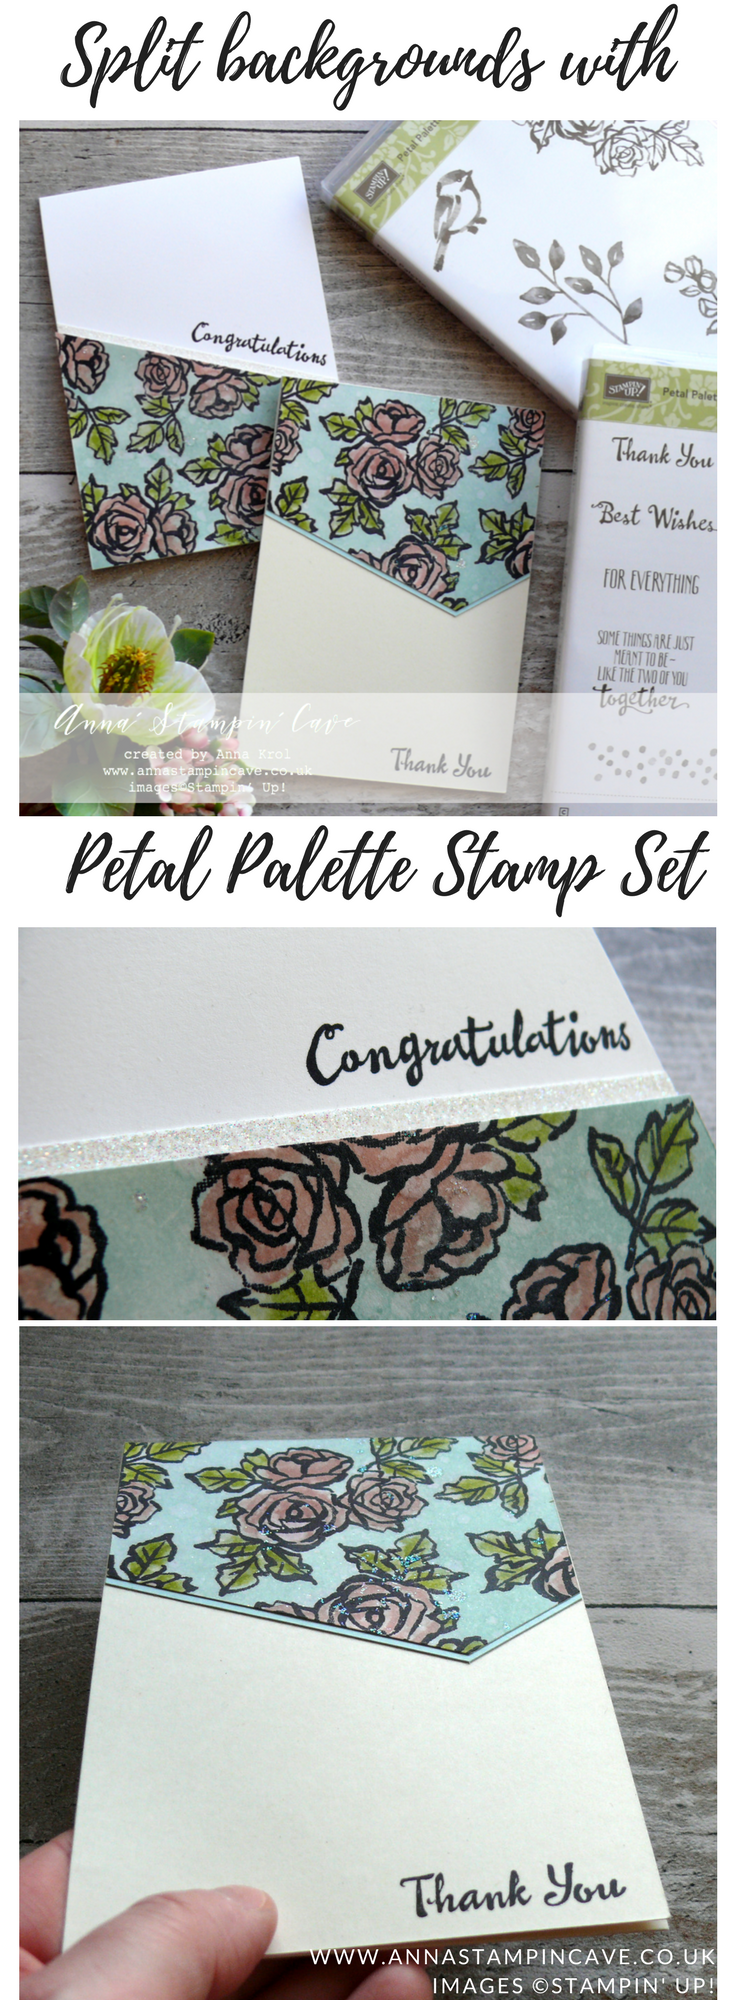
Summary of the project which gives all the views of the card in one photo. I’d love if you pinned and called by on Pinterest xx
Don’t forget to check:

New Sale-a-bration release is LIVE. Click here for more details –>

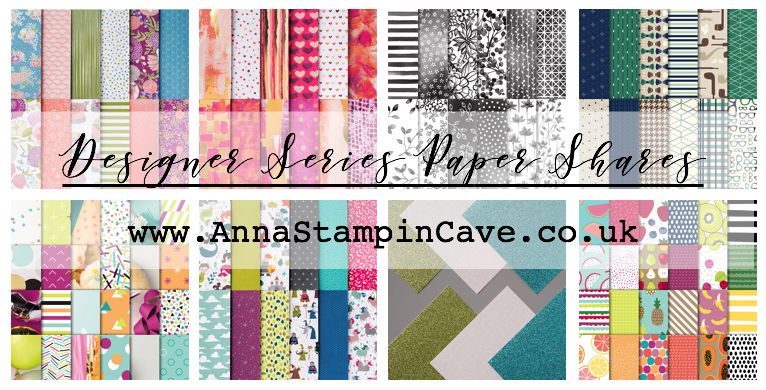
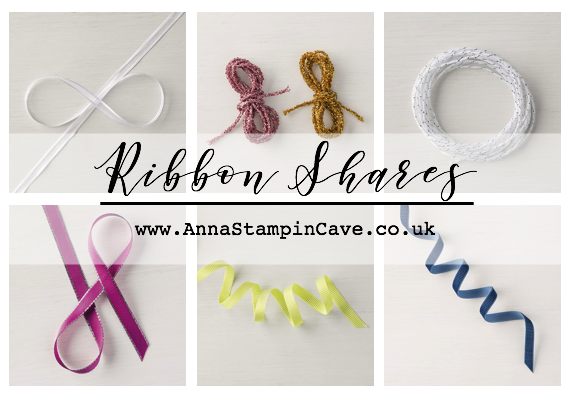
Spring Summer Catalogue Paper & Ribbon Shares. Shares are open to Austria, France, Germany, Netherlands & United Kingdom. 102 sheets of DSP & 2 yards of each type of ribbon from Spring/Summer Catalogue. Click here for more details —>

The New Stampin’ Up! Spring/Summer 2017 Catalogue and Sale-A-Bration are LIVE and it’s AMAZING! For every 60 €/£45, you spend either from Spring Summer Catalogue or Annual Catalogue, you will get to choose one FREE  level 1 product from SAB brochure! If you spend 120 €/£90, you get one FREE level 2 product, OR, you can choose two level 1 items. If you spend 180 €/£135, you have the option to choose three level 1 items or one level 1 item and one level 2 item. Click here for more details —>

Ever wondered what it’s like to join Stampin’ Up!’s community? I may have few answers for you. Click here for more details –>

Hooray! New Sale-a-bration Release Is Now Available!!

Hooray! New Sale-a-bration Release Is Now Available!!

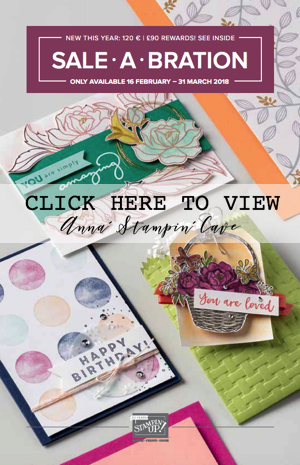
Starting today, 16th February, Stampin’ Up! is adding three more FREE product options to the Sale-A-Bration offering.

click HERE to download your FREE copy
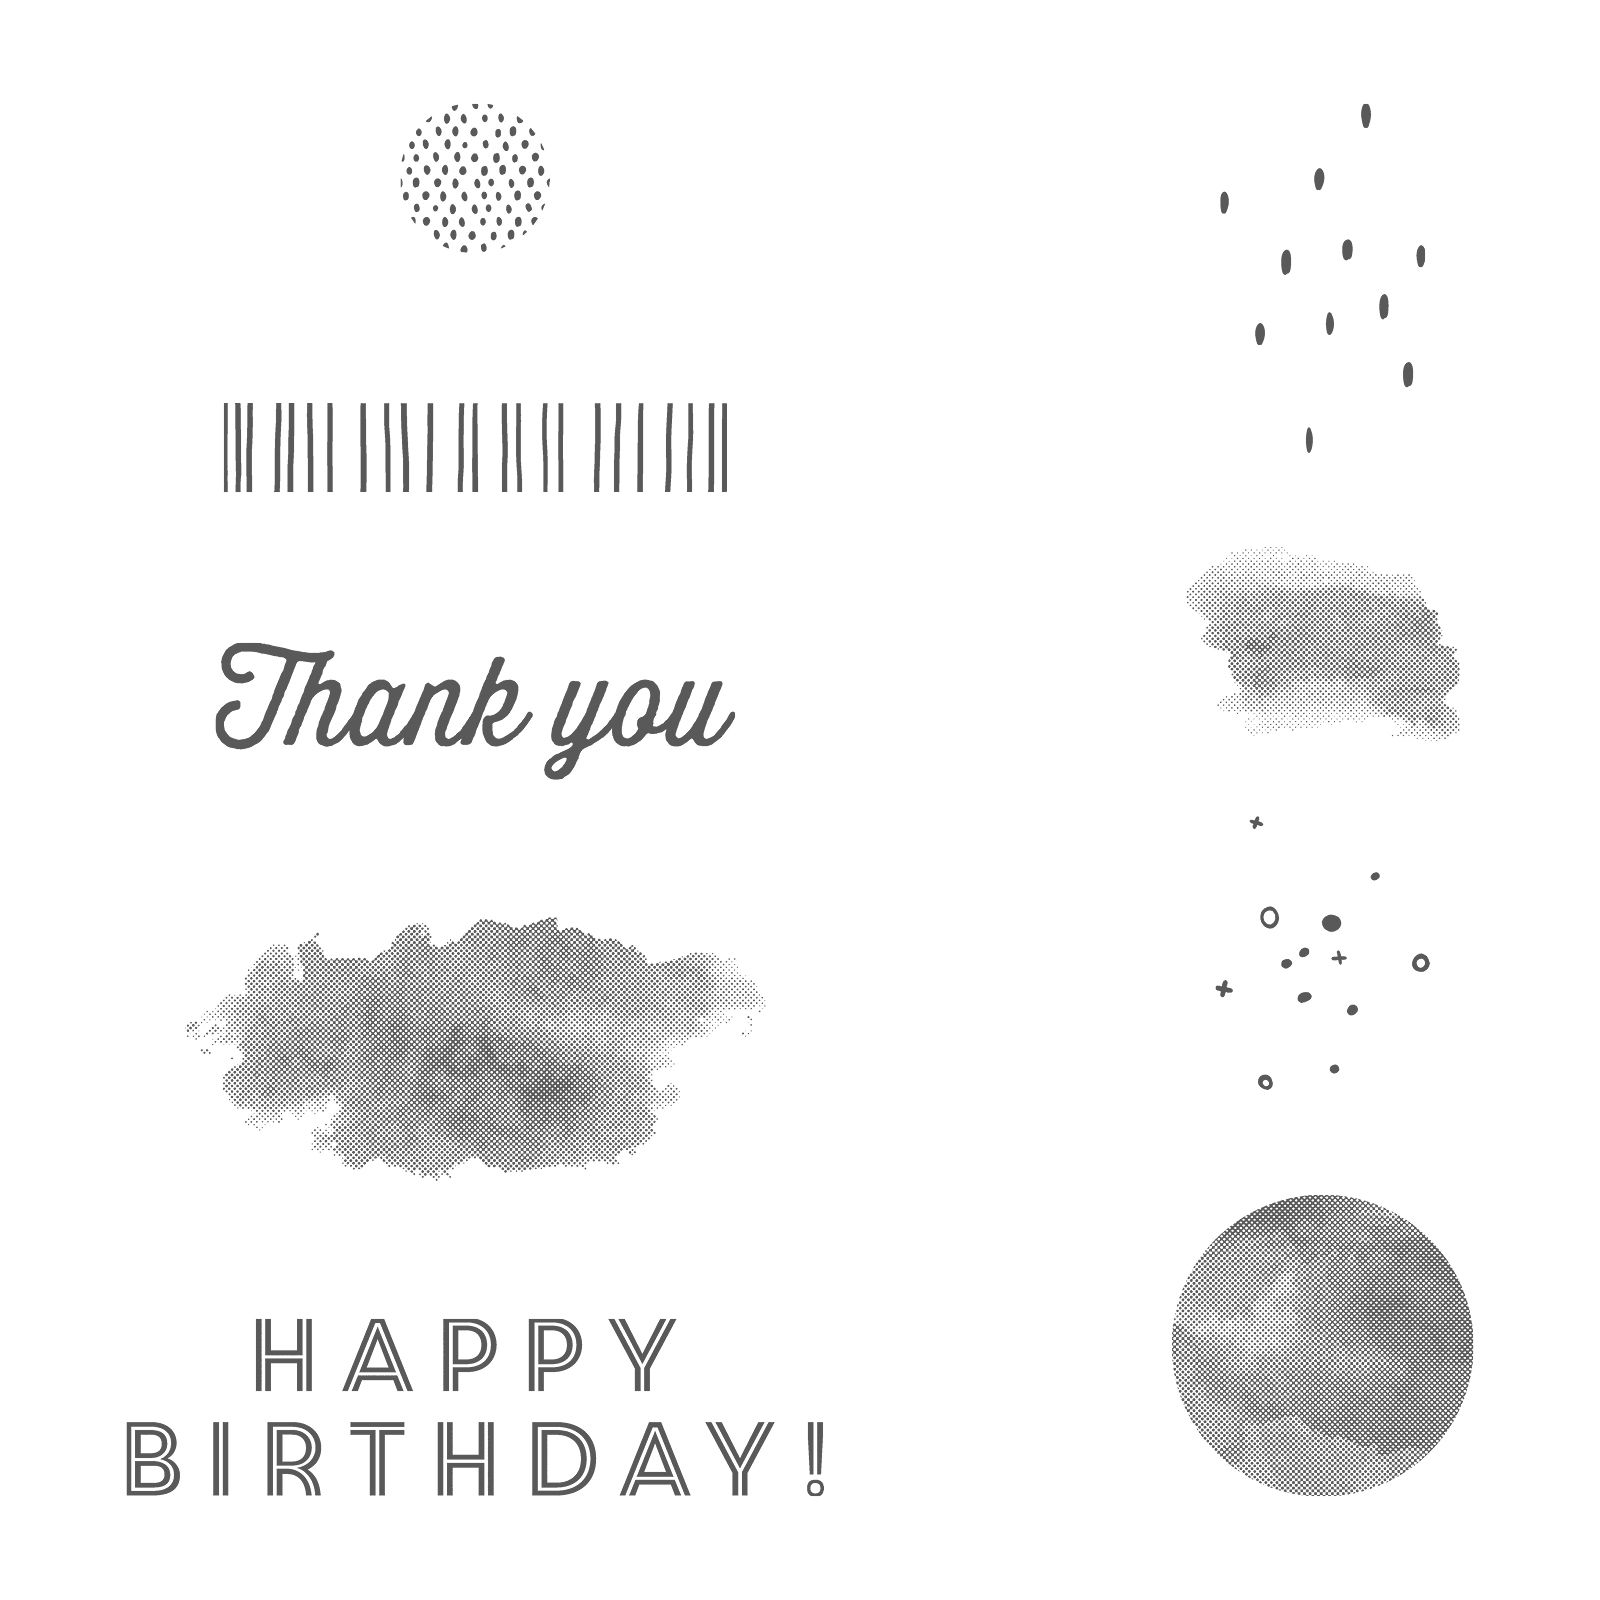
Eclectic Expressions Stamp Set – images ©Stampin’ Up!

Eclectic Expressions Stamp Set (Clear-Mount and Wood-Mount) is available for FREE with a 60 €/£45 order .

If you like experimenting with abstract patterns, then this set is the one for you! Repeat, layer, overlap images.

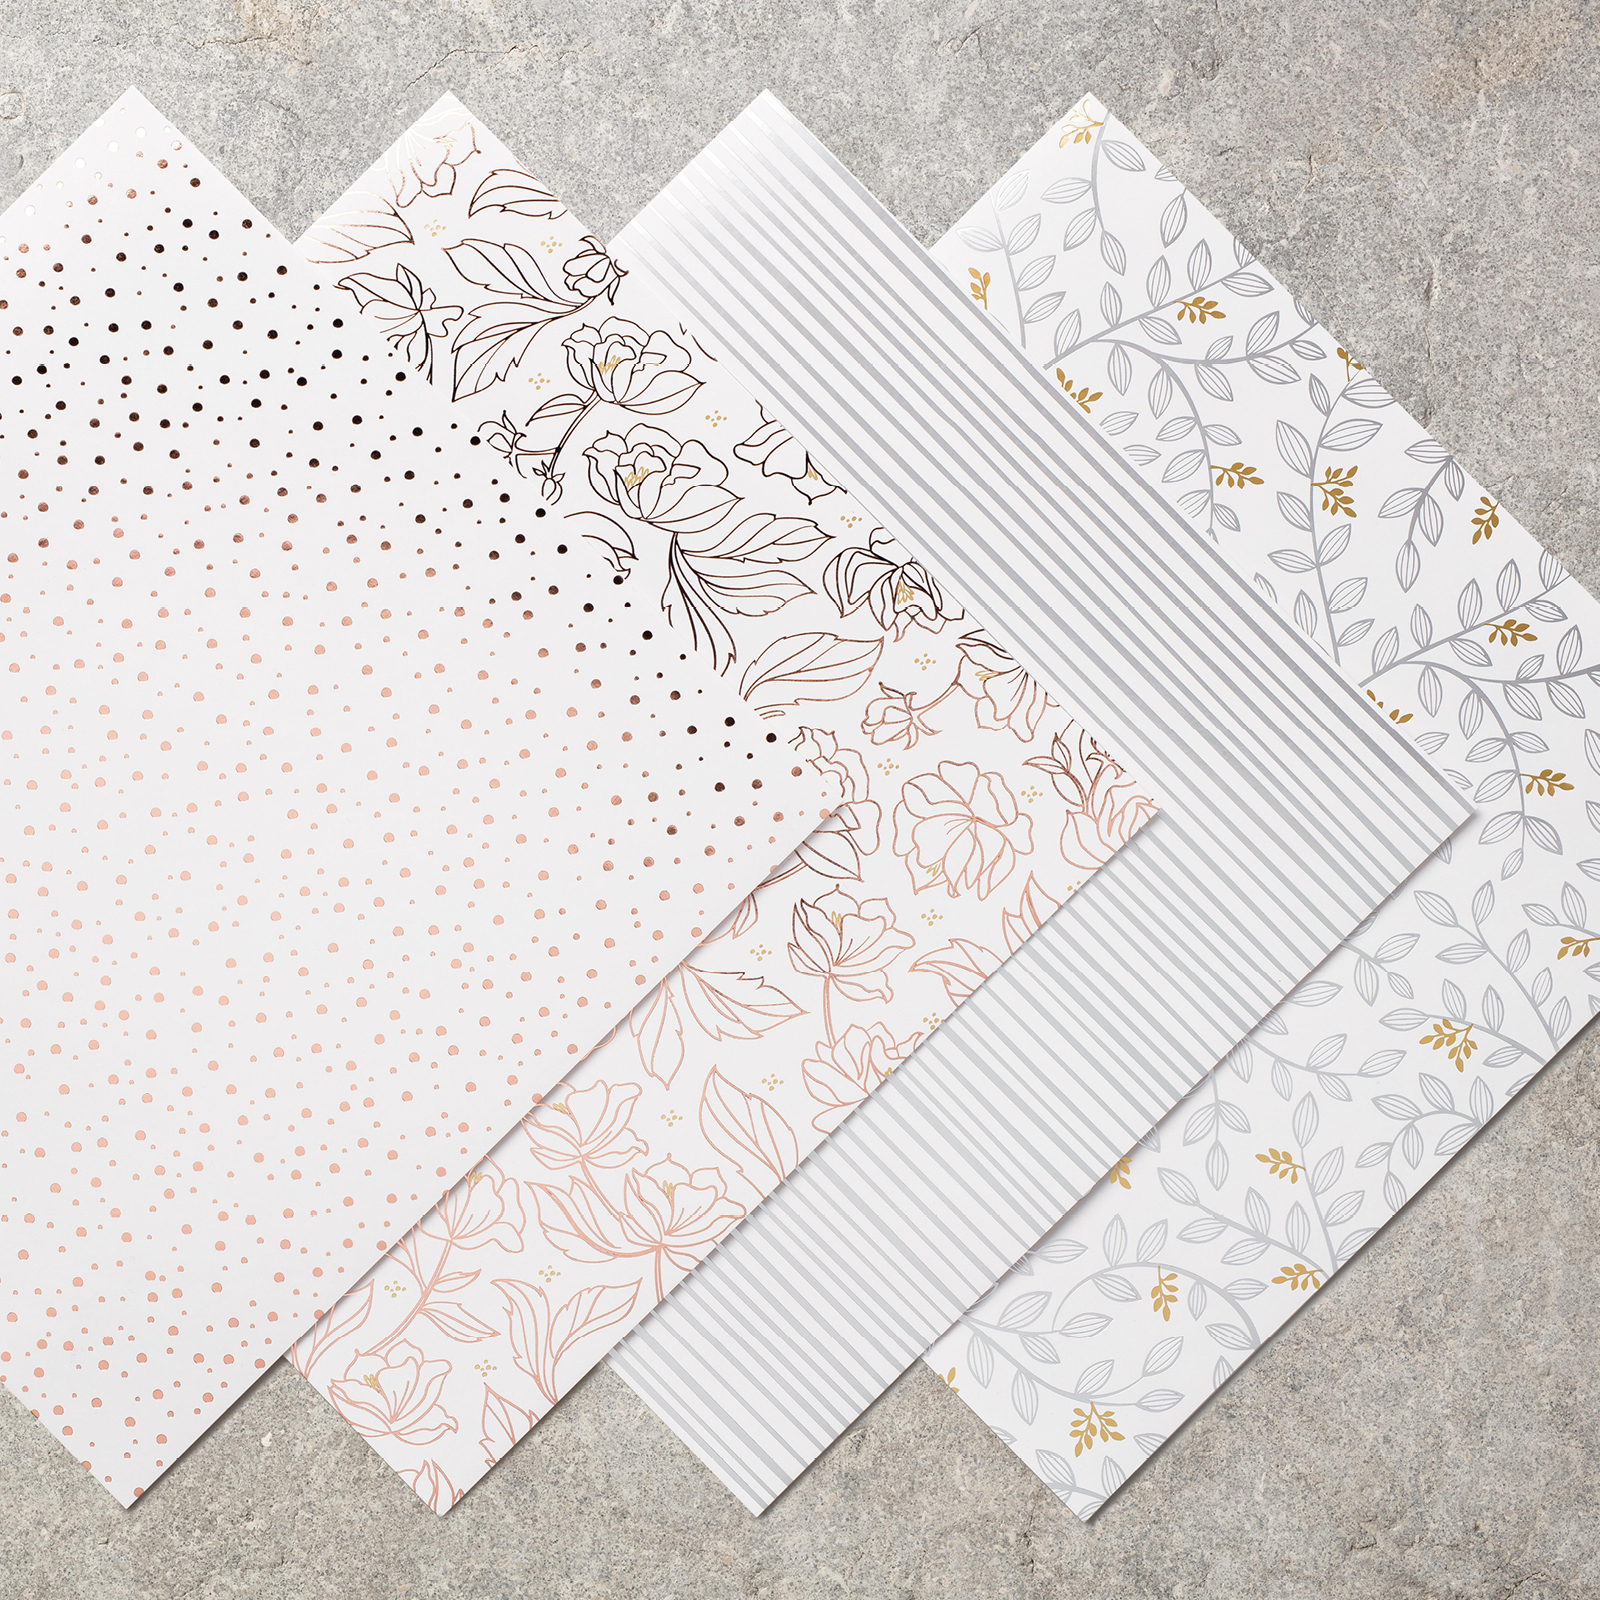
Springtime Foils Specialty Designer Series Paper – images ©Stampin’ Up!

Springtime Foils Specialty Designer Series Paper is available for FREE with a 60 €/£45 order .

Give spring an elegant spin with foil-designed, spring-inspired paper. Beautiful patterns comes in three colors: Gold foil, Rose Gold foil & Silver foil.

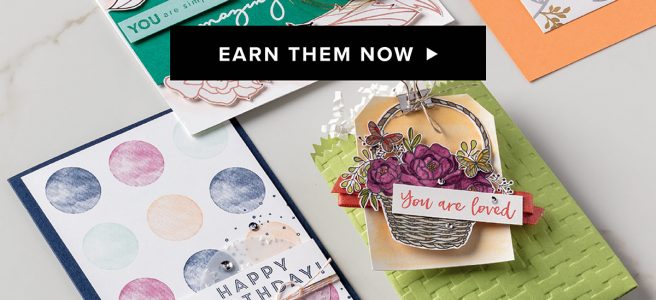
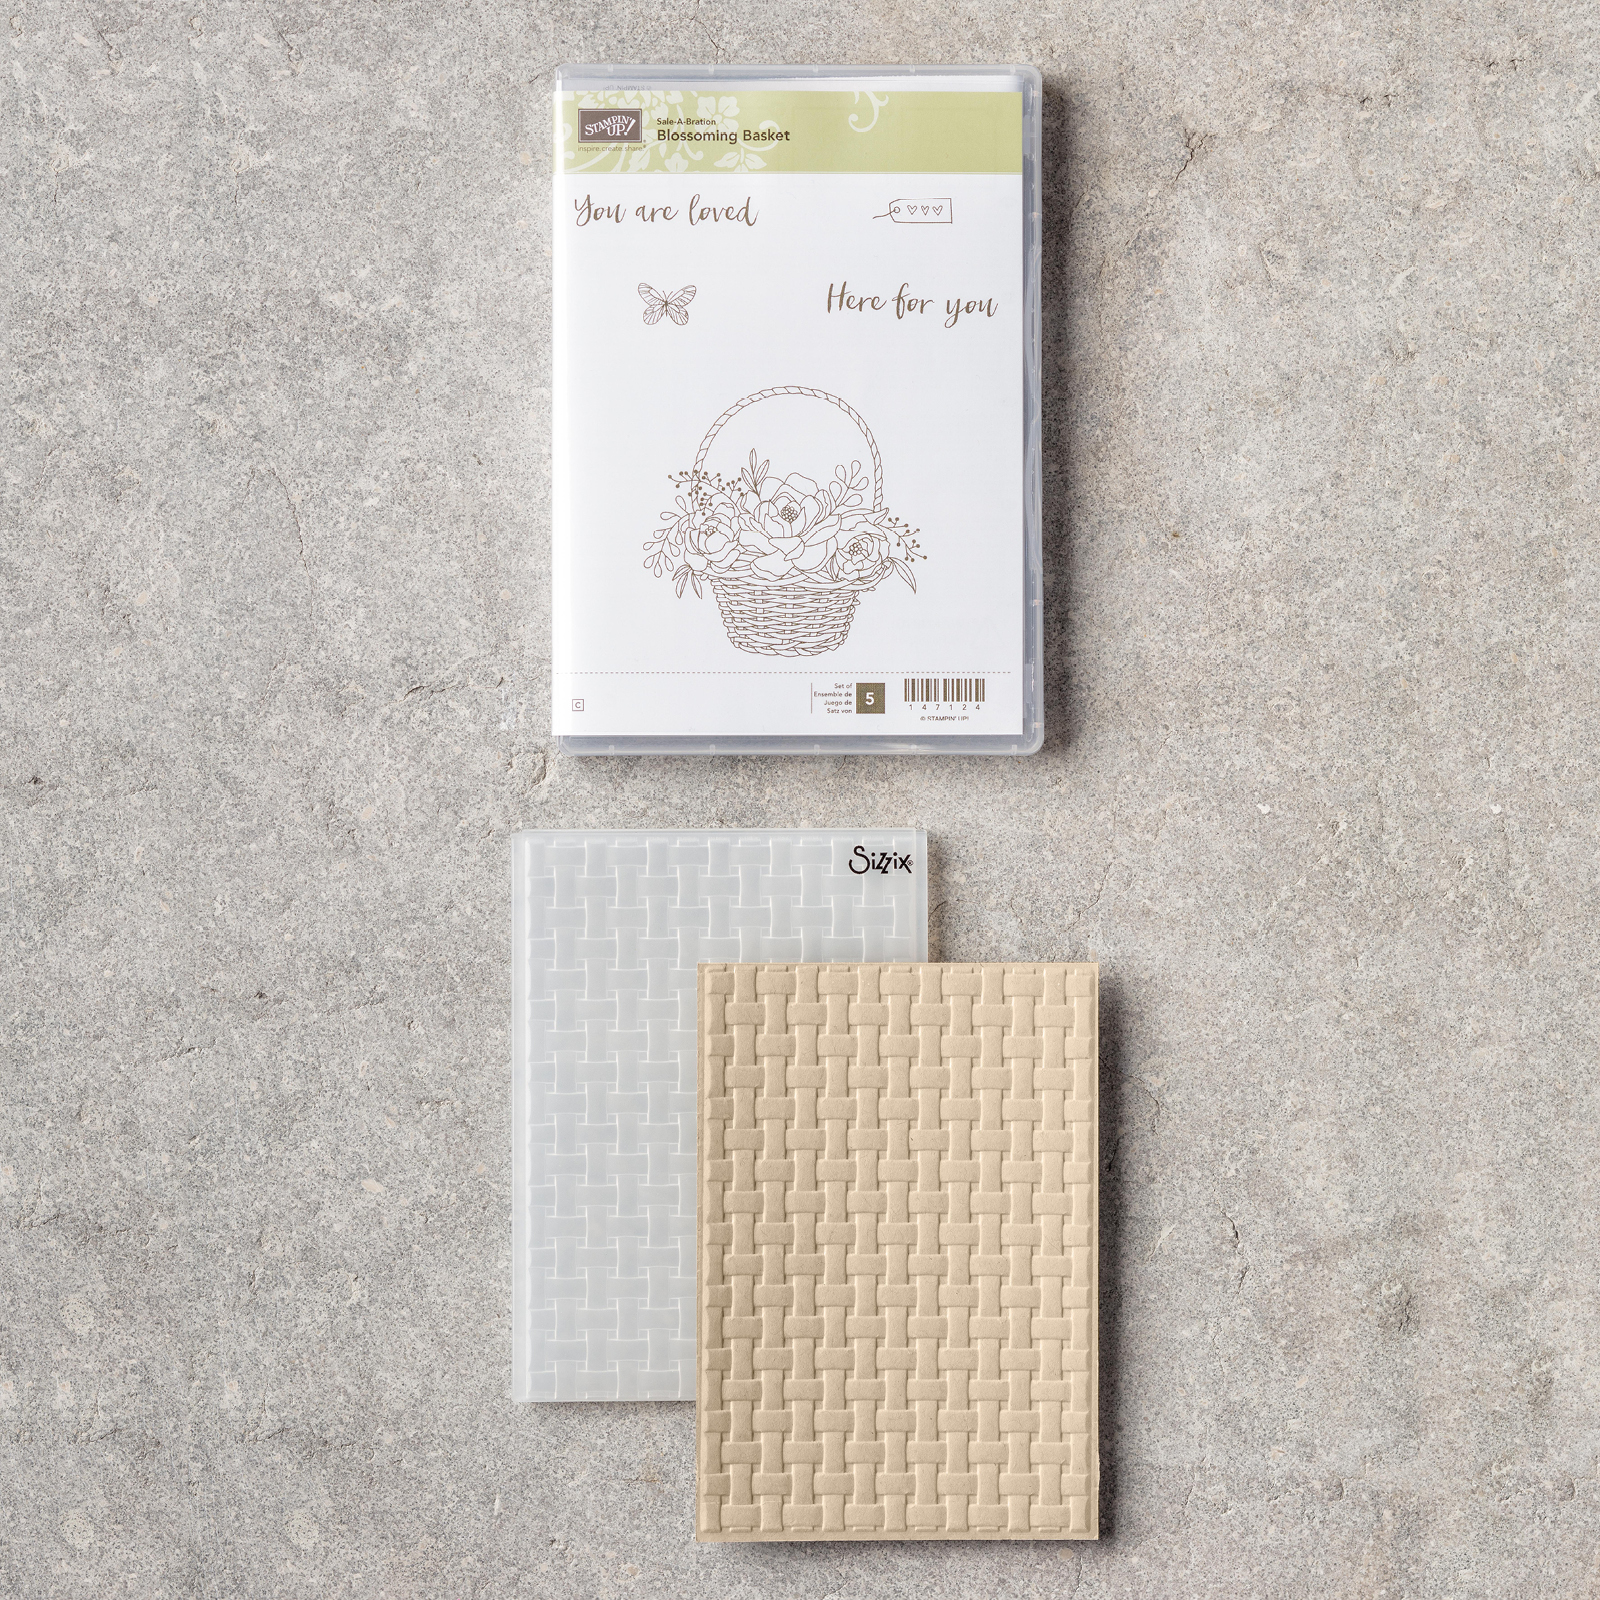
Blossoming Basket Stamp Set & Basket Weave Dynamic Textured Impressions™ Embossing Folder Bundle

Blossoming Basket Bundle (Clear-Mount and Wood-Mount) is available for FREE with a 120 €/£90 order.

It includes beautiful Blossoming Basket Stamp Set with images you can colour using your favourite technique, and a 3D effect Basket Weave Dynamic Textured Impressions™ Embossing Folder.

Watch Stampin’ Up! video below on different waysto use this bundle:

Enjoy Sale-a-bration in THREE WAYS:

  • SHOP!
  1. If you spend 60 €/£45, you get one free level 1 product.
  2. If you spend 120 €/£90, you get one free level 2 product, OR, you can choose two level 1 items.
  3. If you spend 180 €/£135, you have the option to choose three level 1 items or one level 1 item and one level 2 item.
  • HOST & EARN!

As you will know, there are ‘benefits’ when you place an order over £150. For this time only, if you place one single order of 275 € | £200 or more, during Sale-A-Bration, you will earn 27 € | £20 more in Stampin’ Rewards!* These rewards can even be applied towards a Starter Kit, allowing you to join and become a demonstrator.

*Additional Stampin’ Rewards can also be earned by an individual purchase or order of 275 € | £200 or more.

12.01.17_HOSTCHART_SAB_PRE-EARN_UK

  • JOIN!
Sale-A-Bration it’s the best time of year to join Stampin’ Up!
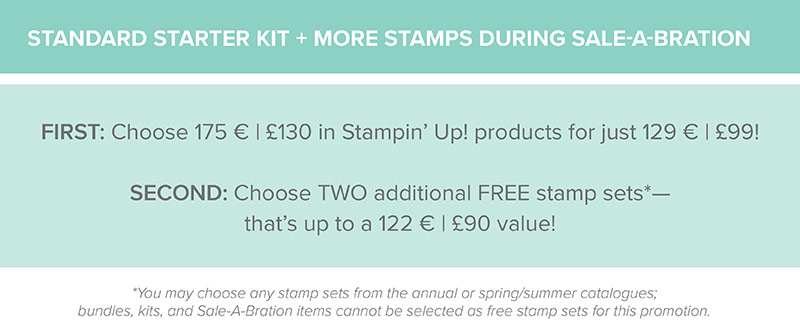
Have a big wish list and want it ALL? I’m not surprised! But if you want the most product for your money, I highly recommend purchasing the £99 Starter Kit. It’s the ULTIMATE BUNDLE
01.03.17_JOIN_SAB_UK

For a limited time (Sale-A-Bration 3 January – 31 March):

1.Purchasing the £99 Starter Kit during Sale-A-Bration gets you £130 in your choice of Stampin’ Up! Products. In addition, you can select TWO FREE STAMP SETS* of your choice extra. Plus Business Pack on top of that! (*excludes bundles and Sale-A-Bration sets.)

2. The Starter Kit ships FREE

3. You’ll become part of the Stampin’ Up! family and enjoy demonstrator discounts (20% or more) and benefits through at least July 31, 2016.

4. Do it for YOU! There’s no risk and no obligation to purchase anything further. £270 in quarterly sales is required to renew after 30 June. However, there’s no penalty to drop. You don’t lose anything!

5. Access exclusive virtual resources at Stampin’ University and become a member of my team when you purchase the kit and join through me.

Want to join only for a discount? – that’s brilliant! I welcome hobby stampers from across the UK, The Netherlands. Germany, France & Austria. That’s how I started! So what are you waiting for? CLICK HERE to join my team.

If you have got any questions, please do not hesitate and drop me a message. I am here to help.

Thank you so much for stopping by. Have a blessed day


Hostess Code for February: RRMR76JH – Use this code in the month of February and receive a gift from me. Spend £50 or more and use the code, and you will receive a Whisper White 1/4″ (6.4mm) Organza Ribbon + a handmade gift from me

Special Notes:1) Make sure you select Anna Krol as your demonstrator;
2) If you select “No Contact” box I do not have access to your name and can’t send you a gift;
3) If your order is £150 or more do not use the code and grab your own Stampin’ Rewards + gift from me

Don’t forget to check:

Spring Summer Catalogue Paper & Ribbon Shares. Shares are open to Austria, France, Germany, Netherlands & United Kingdom. 102 sheets of DSP & 2 yards of each type of ribbon from Spring/Summer Catalogue. Click here for more details —>

In And Out Pop-Up Birthday Card

Anna’ Stampin’ Cave – Fun In and Out Birthday Card Using Birthday Delivery Bundle

Hello and thank you for stopping by.

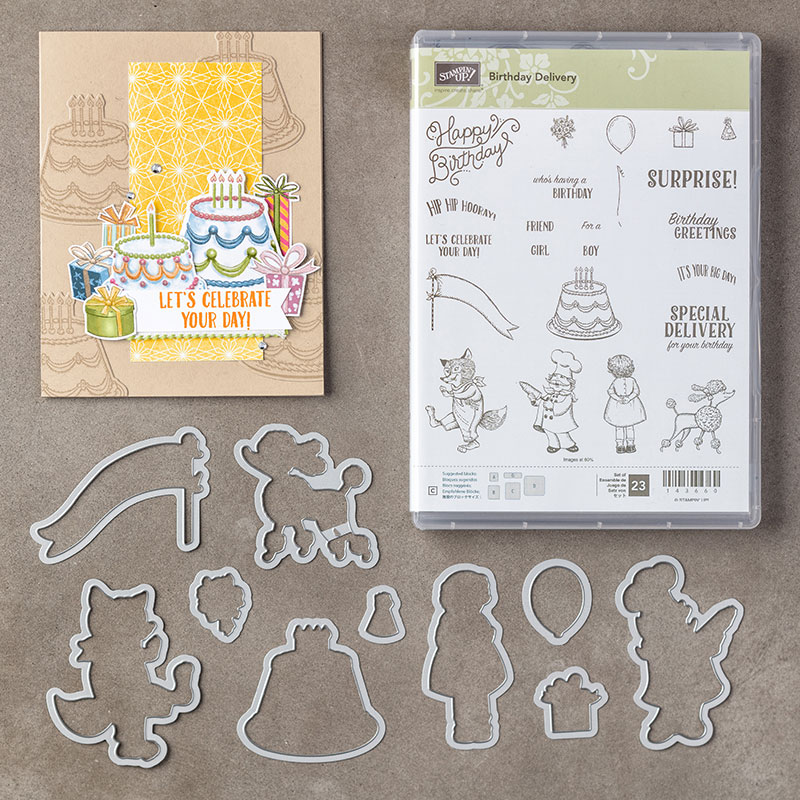
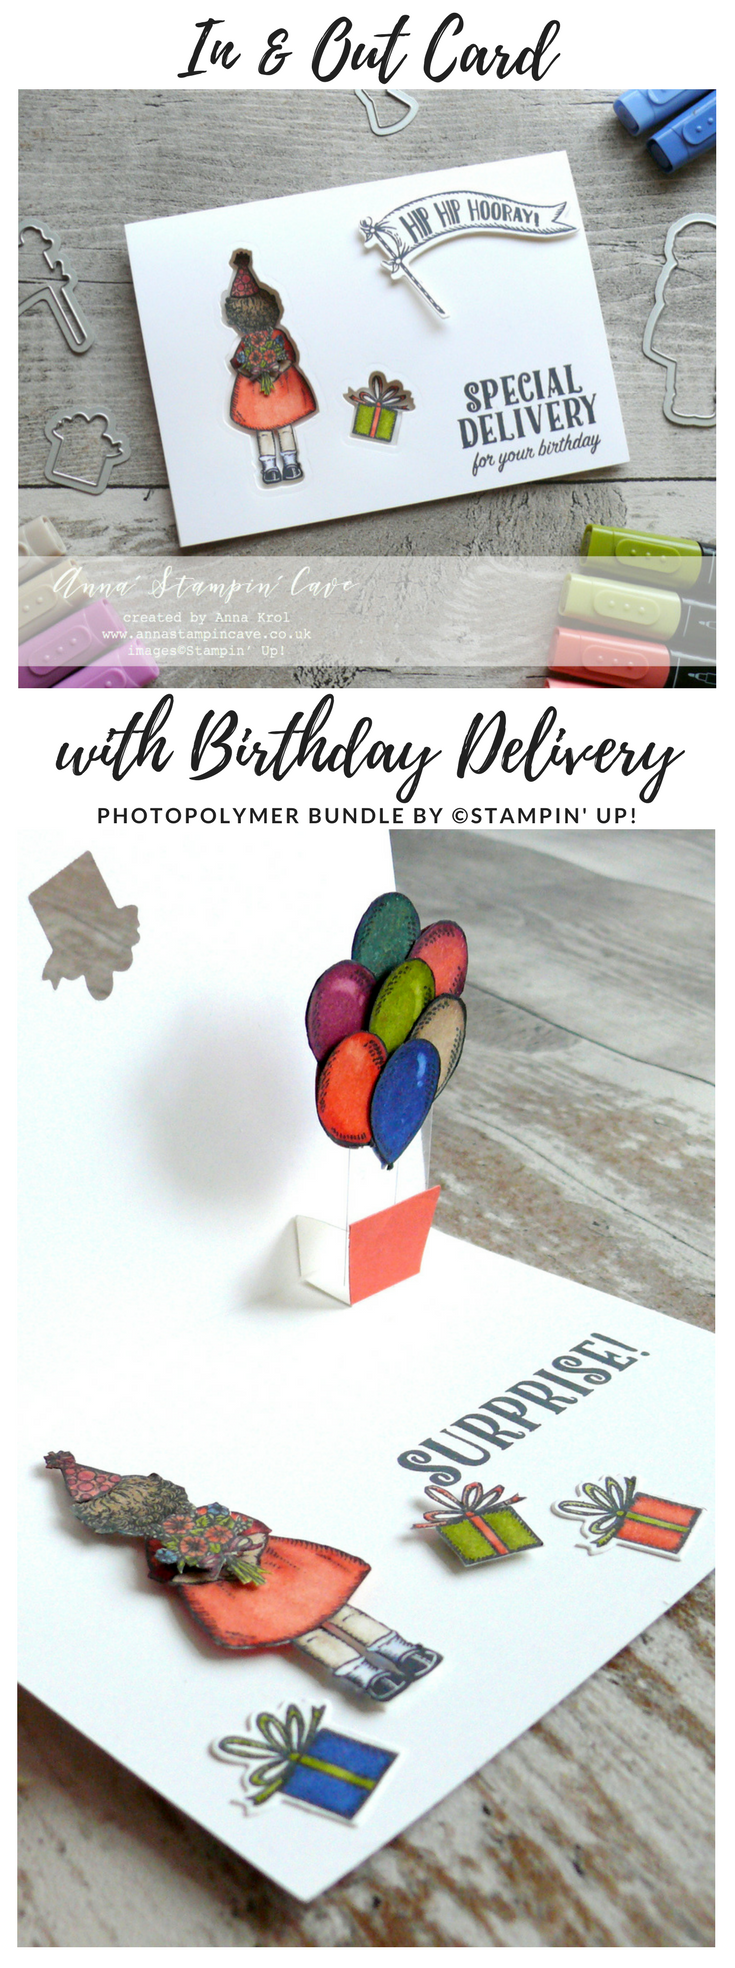
Today, I wanted to show you a fun card I created for my grand niece’s 6th birthday recently. I got an idea for this card from ever amazing Jennifer McGuire, and its called ‘In & Out Card’. For her technique, you need a stamp set that comes with coordinating dies. And Birthday Delivery Stamp Set with Birthday Friends Framelits Dies was just perfect!

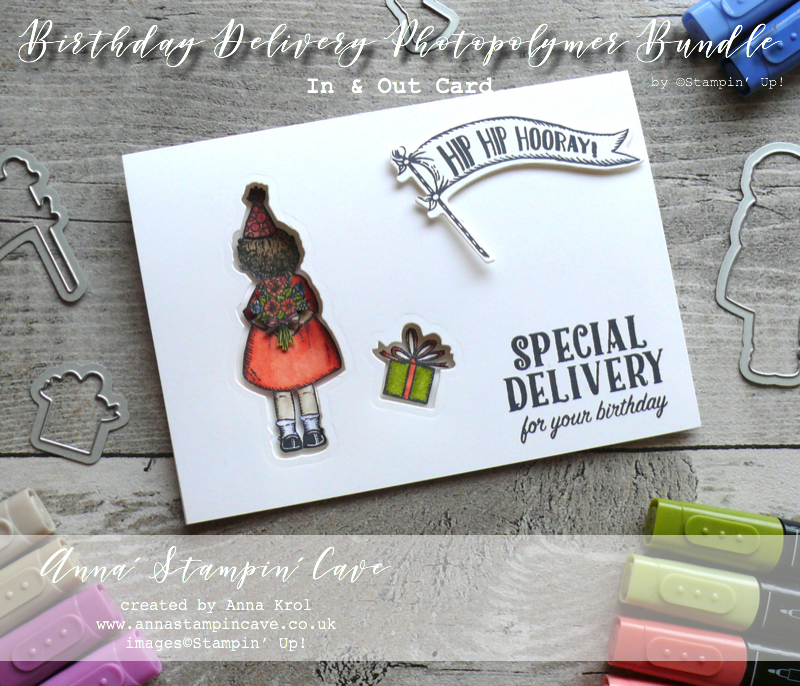
And here’s my card:

First, I stamped all the images I wanted to include in my card, on a scrap of Whisper White cardstock. I wanted to use my Stampin’ Blends to colour images in (bear in mind I only had five colours in the dark and light shade at that time) so I’ve used Black Memento Ink Pad for my stamping. I also stamped a sentiment in the bottom right corner of the card base.

Because I had the ink pad out already, I stamped ‘Hip, Hip, Hooray’ flag on a scrap of Whisper White cardstock, which I die-cut later.

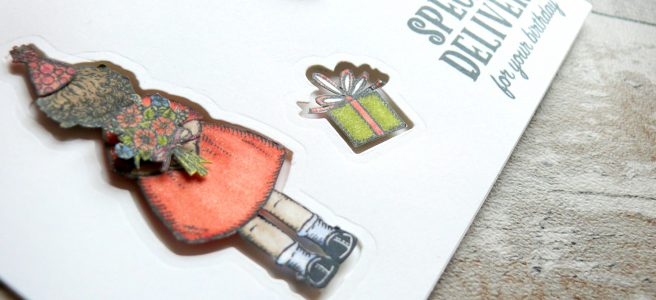
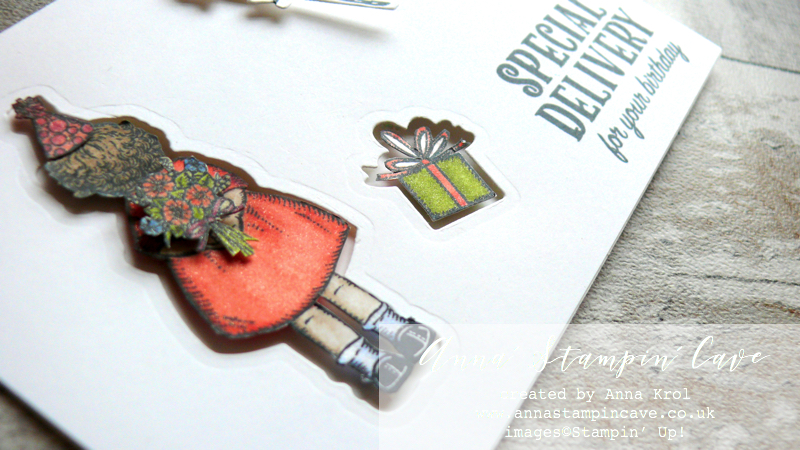
When finished my colouring, I fussy cut the images which I wanted to ‘peek’ through. I cut them out right up against the edge of the stamping. Next, I planned on their placing on the card and using coordinating dies, I die cut their shapes from the card base.

The party hat was bit tricky, but once I die cut the girl shape, I adhered my fussy cut party hat to girl’s head, place the image through the opening and using a piece of washi tape, I secured party hat die where it should go. Done!

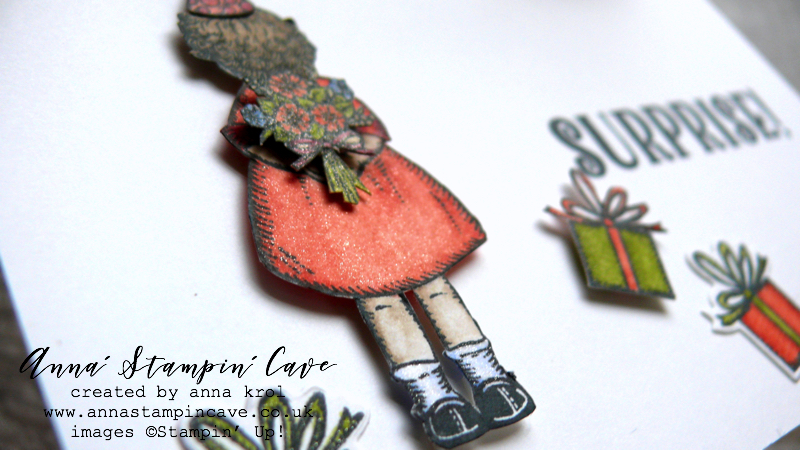
I adhered them through these openings, using dimensionals. Because these images are fussy cut, they fit snugly and don’t interfere with opening/closing the card. I also stamped, coloured and fussy cut the bouquet, And adhered it with dimensionals so it looks like my girl is carrying the flowers.

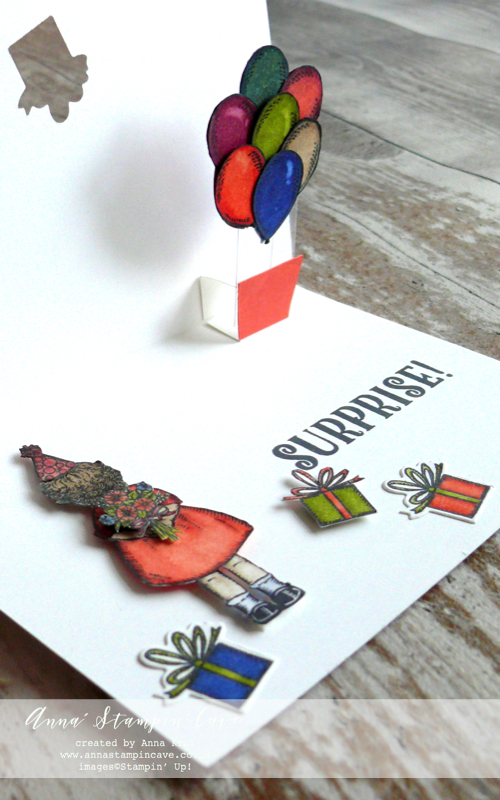
I stamped the second sentiment that says: ‘Surprise’ inside of the card. I also adhered two more pressie images inside of the card using snail adhesive.

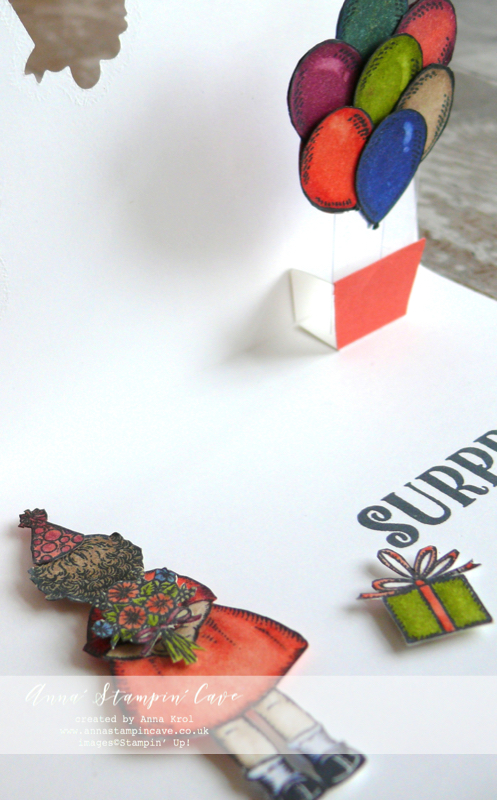
I still wasn’t entirely happy with the card so I thought: Balloons!! I stamped 14 balloons from Birthday Delivery Stamp Set on a piece of Whisper White cardstock and coloured them in with Stampin’ Blends. Because I didn’t have many, I mixed some of the colours to create new shades. Also these I fussy cut.

I created a small pop up element on the inside of the card.

I’ve used few strips of acetate and adhered my balloons – back to back – on one end of these acetate strips. The second end I adhered to the pop-up element and I hide it with a piece of Calypso Coral cardstock.

Now to finish off my card.

Using dimensionals I popped up ‘Hip Hip Hooray’ flag on the front of my card. I also added Clear Wink of Stella to my images for a bit of shimmer.

I truly hope you like my card. I surely had fun putting it together for my grand niece. And if you would like to check Jennifer’s video just click HERE.

If you wish to purchase any of products I have used, simply click the images below to go directly to my online store and don’t forget to enter the hostess code RRMR76JH to receive a gift from me.

Thank you for stopping by and have a blessed day

Hostess Code for February: RRMR76JH – Use this code in the month of February and receive a gift from me.

Special Notes:1) Make sure you select Anna Krol as your demonstrator;
2) If you select “No Contact” box I do not have access to your name and can’t send you a gift;
3) If your order is £150 or more do not use the code and grab your own Stampin’ Rewards + gift from me
Product List

Big Shot

£99.00

Pin me

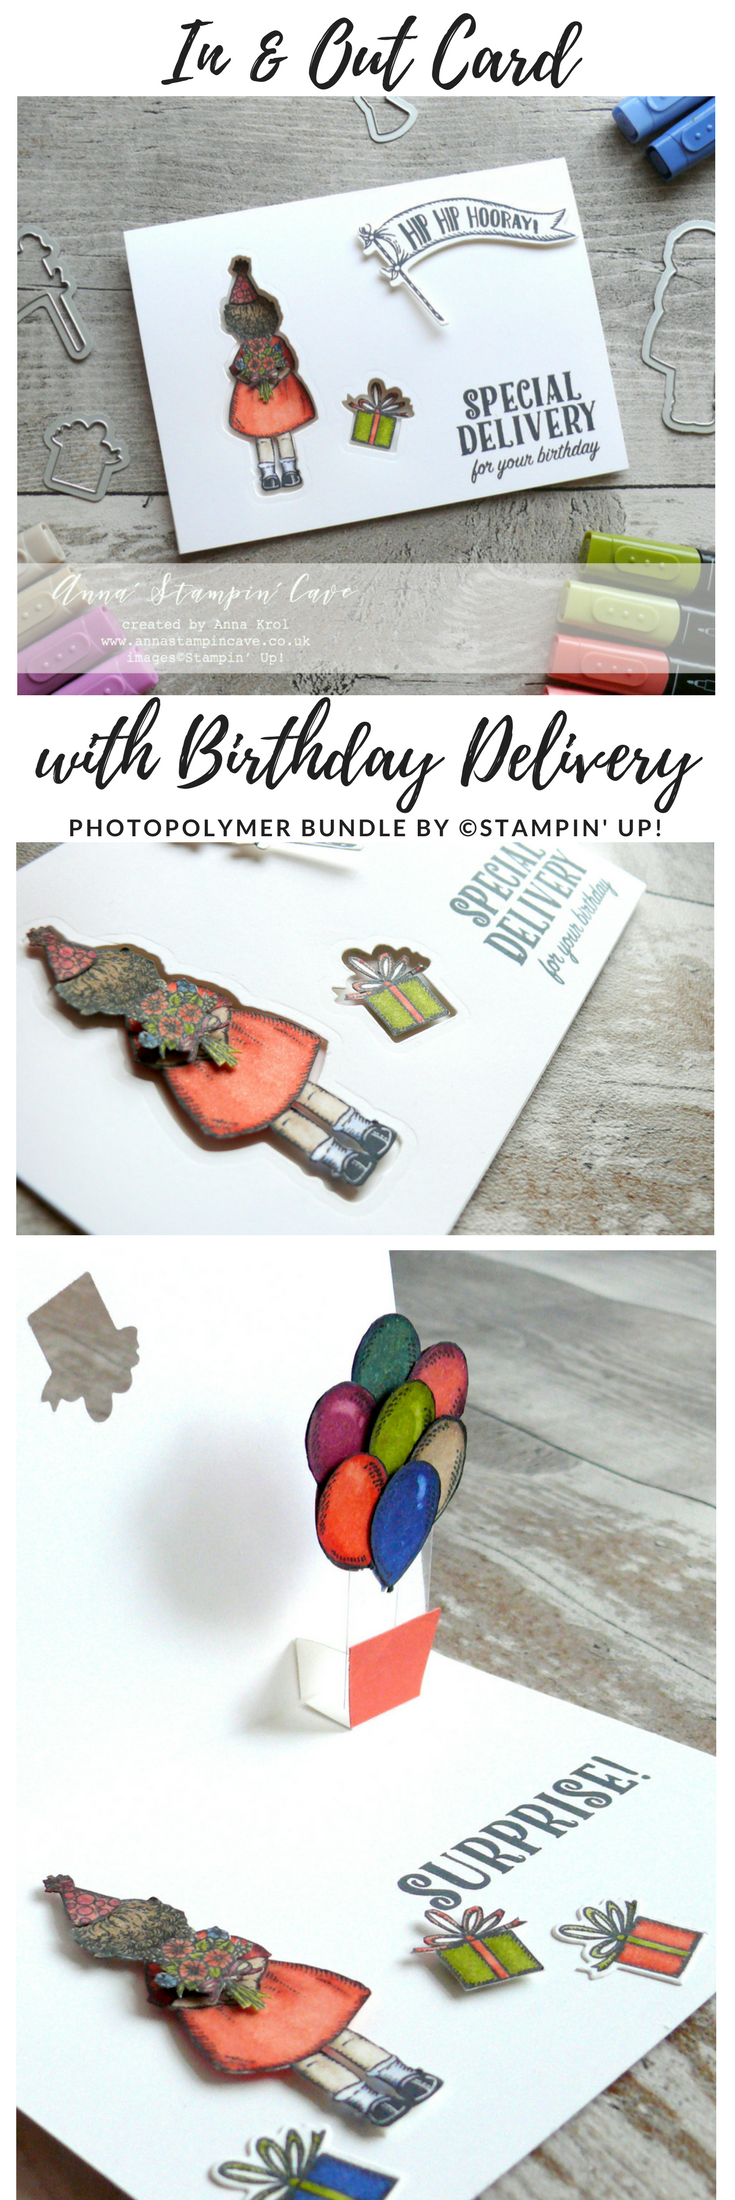
Summary of the project which gives all the views of the card in one photo. I’d love if you pinned and called by on Pinterest xx


Don’t forget to check:

Spring Summer Catalogue Paper & Ribbon Shares. Shares are open to Austria, France, Germany, Netherlands & United Kingdom. 102 sheets of DSP & 2 yards of each type of ribbon from Spring/Summer Catalogue. Click here for more details —>

The New Stampin’ Up! Spring/Summer 2017 Catalogue and Sale-A-Bration are LIVE and it’s AMAZING! For every 60 €/£45, you spend either from Spring Summer Catalogue or Annual Catalogue, you will get to choose one FREE  level 1 product from SAB brochure! If you spend 120 €/£90, you get one FREE level 2 product, OR, you can choose two level 1 items. If you spend 180 €/£135, you have the option to choose three level 1 items or one level 1 item and one level 2 item. Click here for more details —>

Ever wondered what it’s like to join Stampin’ Up!’s community? I may have few answers for you. Click here for more details –>

For The Love of Creating Blog Hop

Anna’ Stampin’ Cave – For The Love of Creating – Beautiful Day Stamp Set

Hello and welcome to our very first For the Love of Creating with Stampin’ Up! Blog Hop run by the amazing Australian demonstrator, Kim Oliver. We are super excited to share with you an array of creations showcasing products from 2018 Occasions (Spring-Summer in the UK) catalogue and Sale-A-Bration freebies too. We hope you find great inspiration from our projects. If you have arrived here from Jay Soriano a big welcome to you. You are currently visiting Anna Krol from the United Kingdom.

I really want to encourage you to hop along with us – you are in for a real treat, as we are demonstrators from all over the world. Below is a list of all designers, but you can also use the NEXT  button further down to continue your journey on this blog hop.

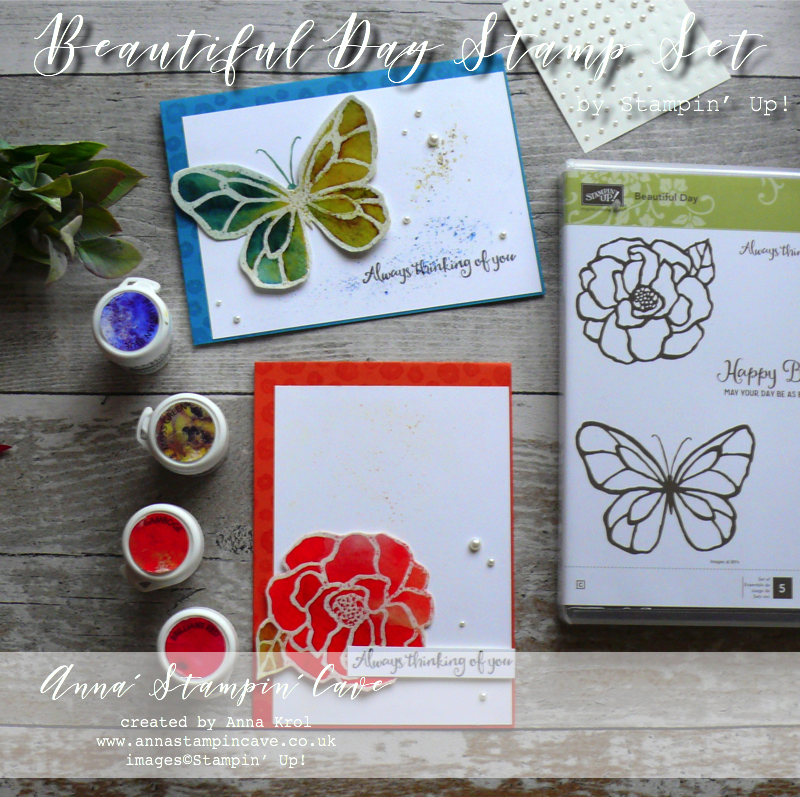
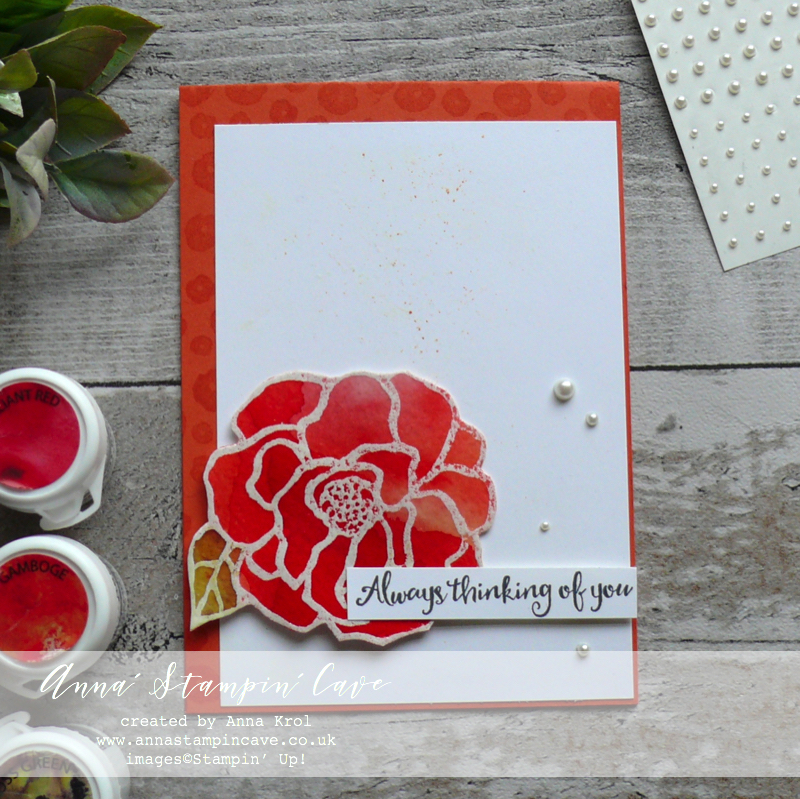
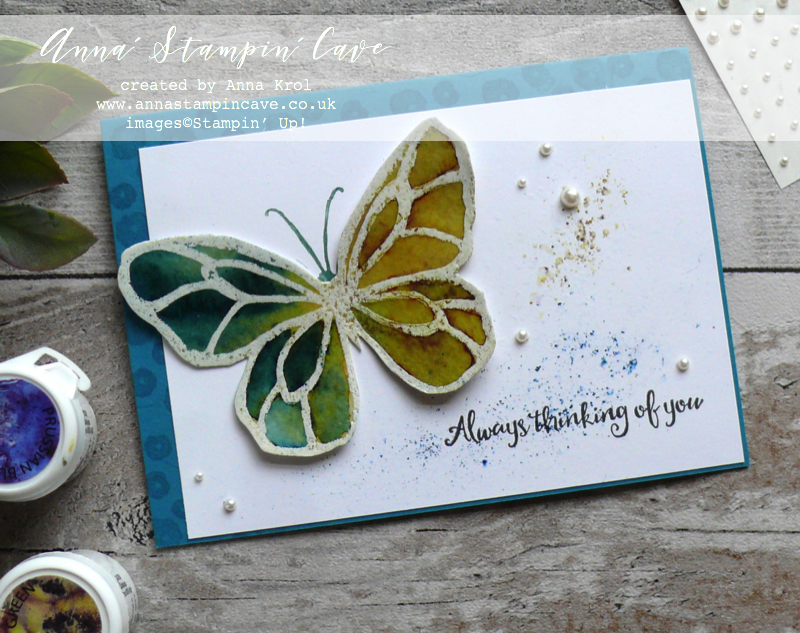
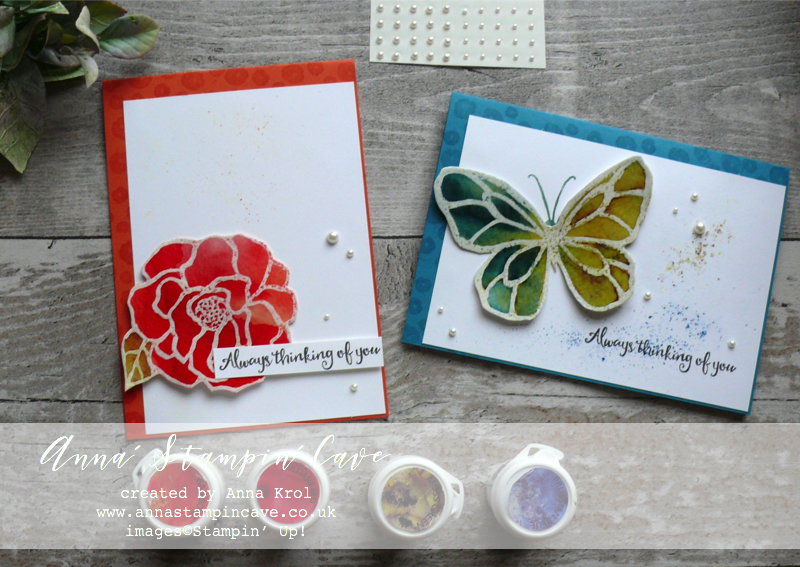
For my projects today I decided to showcase beautiful stamp set called (not mistakenly) Beautiful Day. I will show you how to achieve stained glass effect using two different mediums.

Stained Glass Effect With Brusho –

I love these bold images with its stained glass look – perfect for techniques and colouring. And that’s exactly what I did.

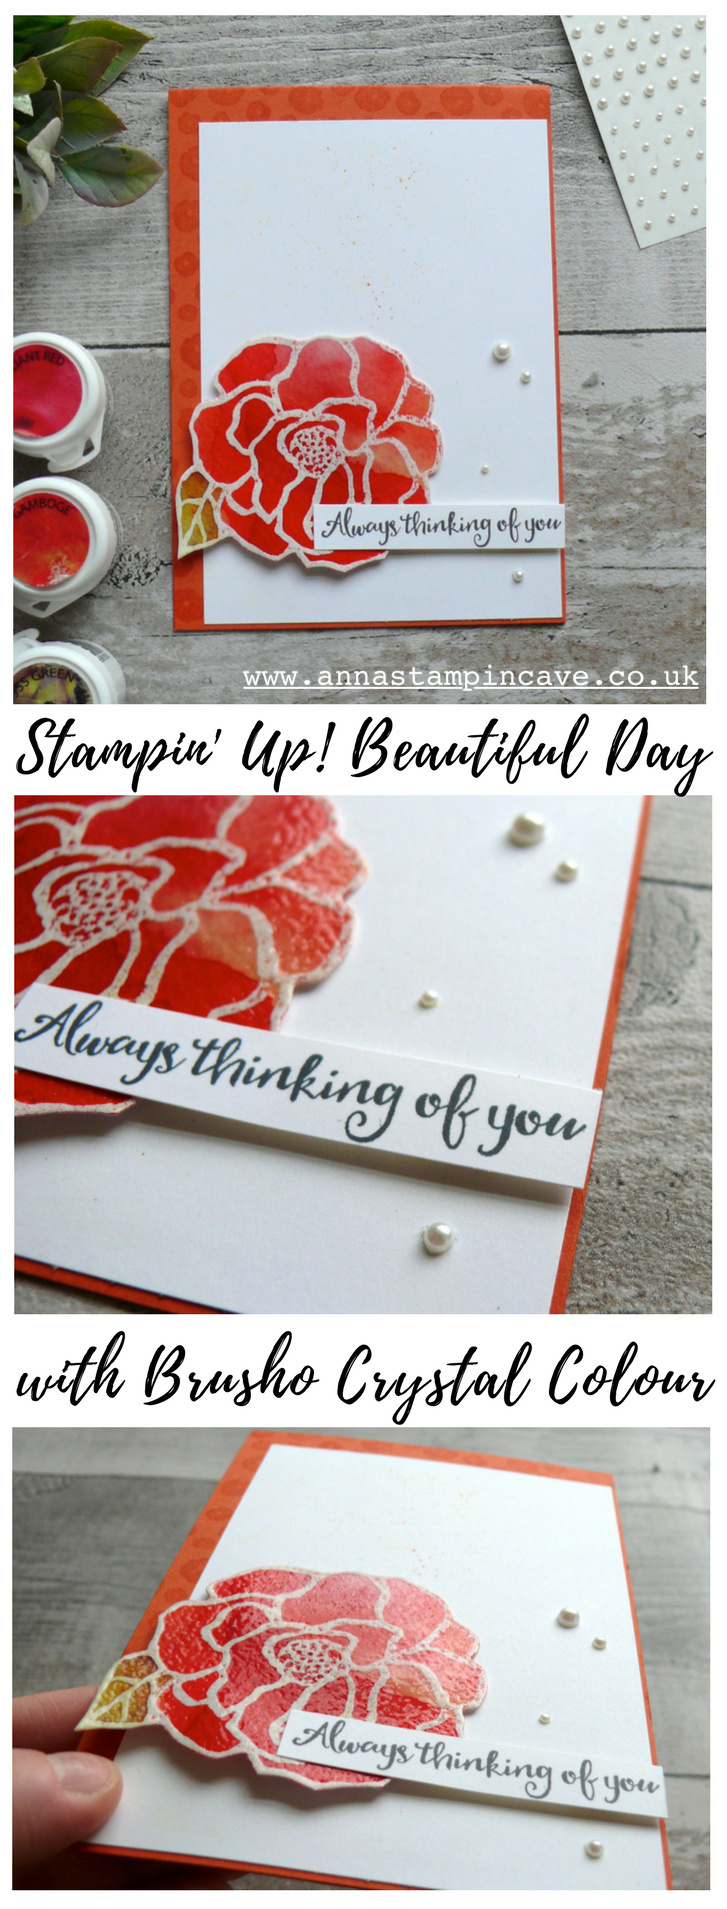
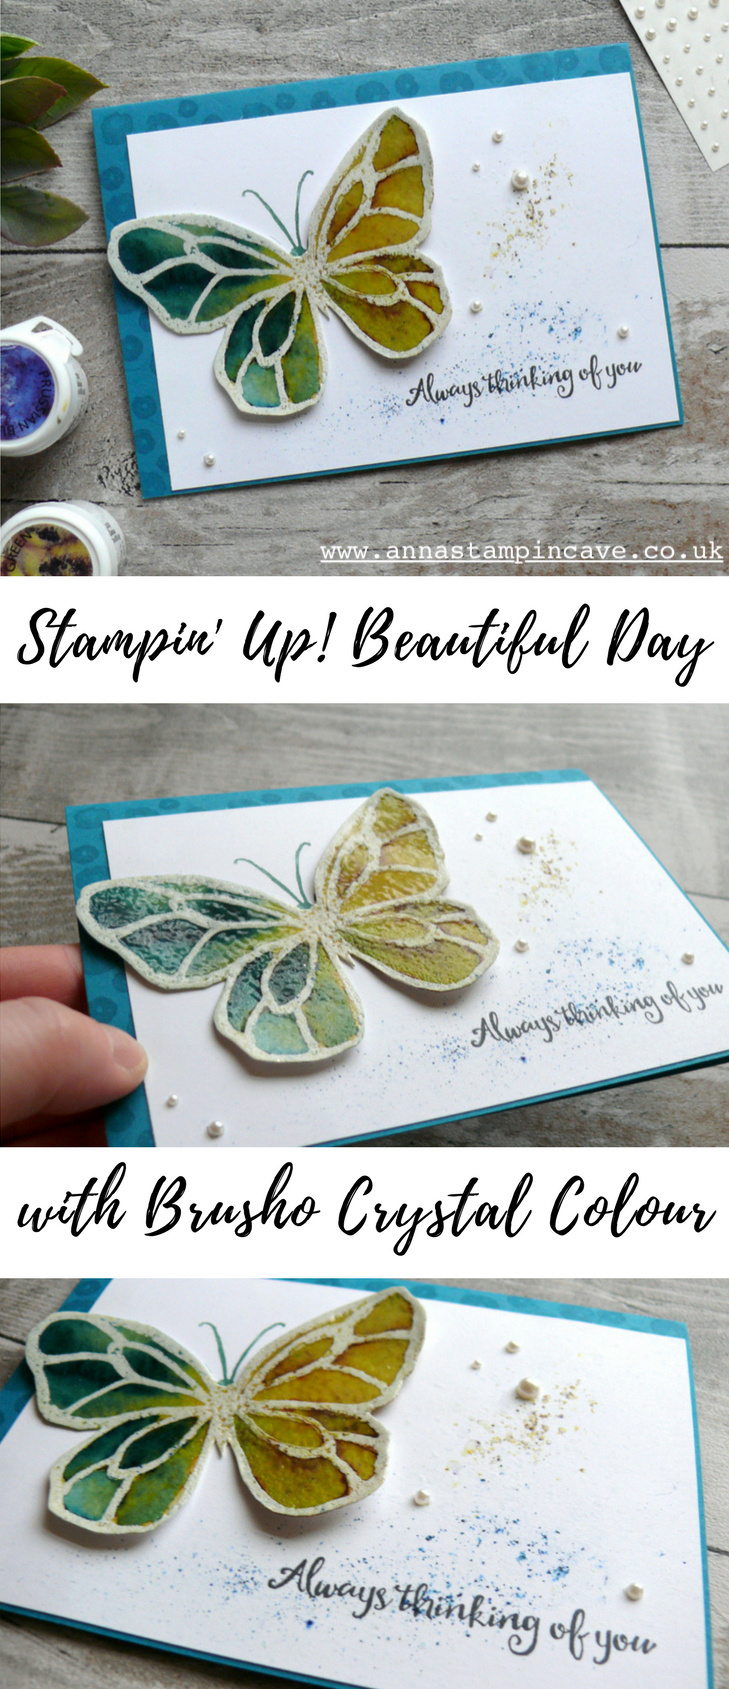
I stamped the flower and the butterfly on a piece of watercolour paper in Versamark and heat embossed them in white. Next, I filled them in with water and sprinkled Brusho Crystal Colour over the top.

Heat embossing creates a barrier for the water and colour, so you can easily control how the colour spread. I’ve also used the aqua painter to move the colour around.

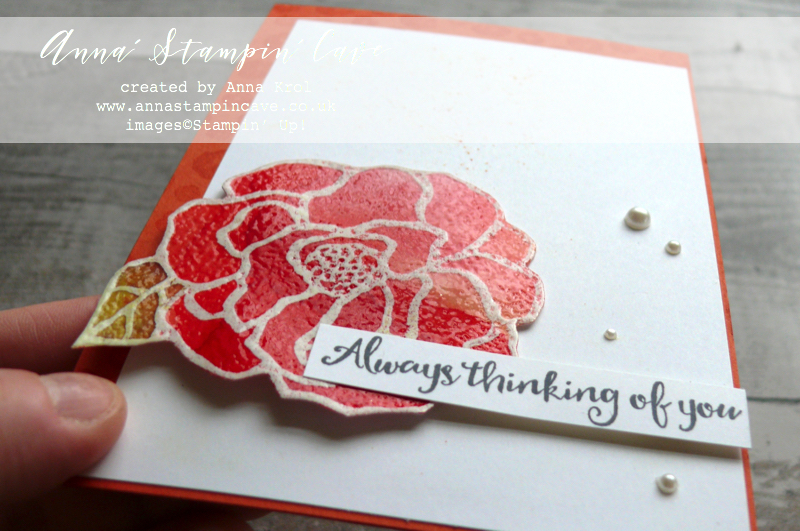
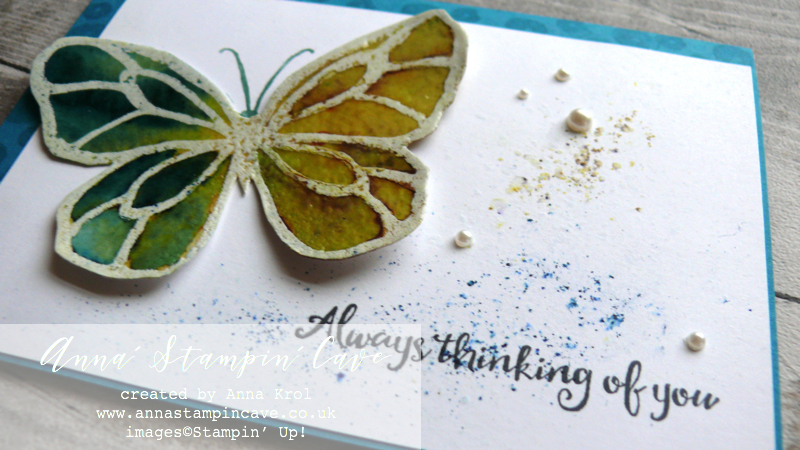
For the flower, I’ve used Brilliant Red, Gamboge and Moss Green for the leaf. The butterfly is a mix of my favourite Prussian Blue and Moss Green.

Once the flower and butterfly were dry I fussy cut them. To add that stained glass look, I smooshed Versamark on top of both images, sprinkled with clear embossing powder and heat set it.

I love this rough texture of watercolour paper!

I kept the rest of design very clean. I sprinkled some brusho on Whisper White panels and spritzed with water (very, very lightly) before assembling my cards.

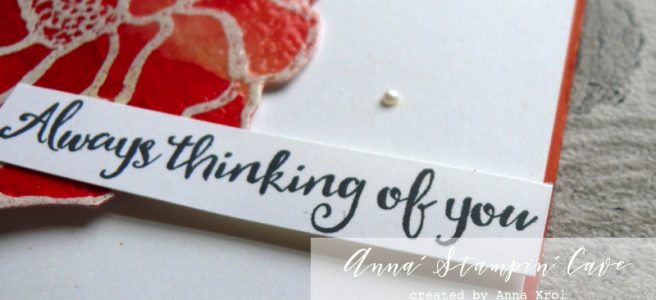
The edges of both card bases are stamped with three tiny flowers from the same stamp set, and I’ve used Versamark ink. Sentiments are stamped in Archival Basic Black ink. Few pearls finish off the look. I love these vibrant colours.


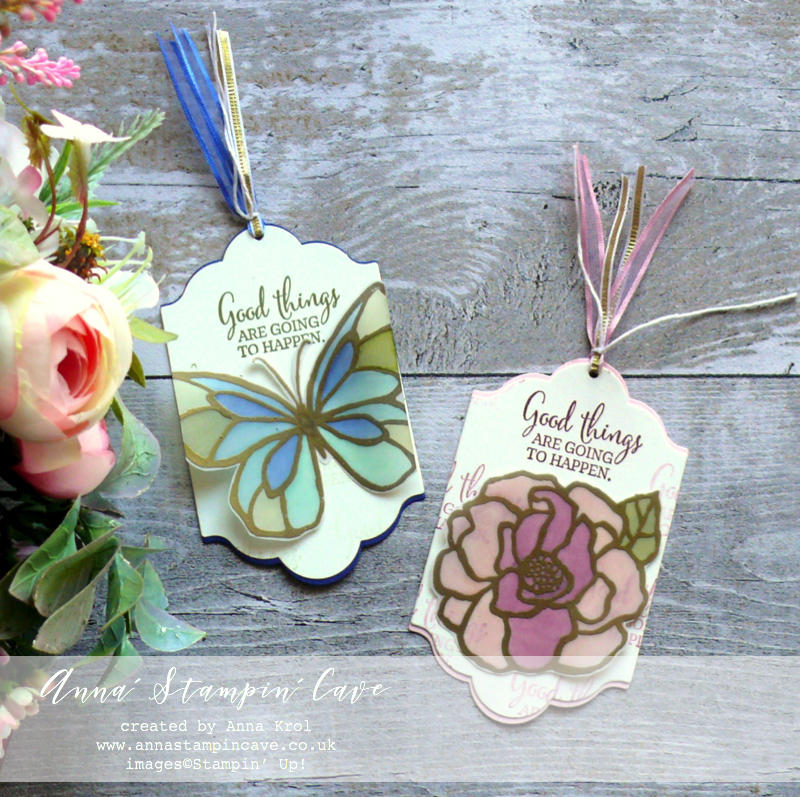
Stained Glass Effect With Stampin’ Blends –

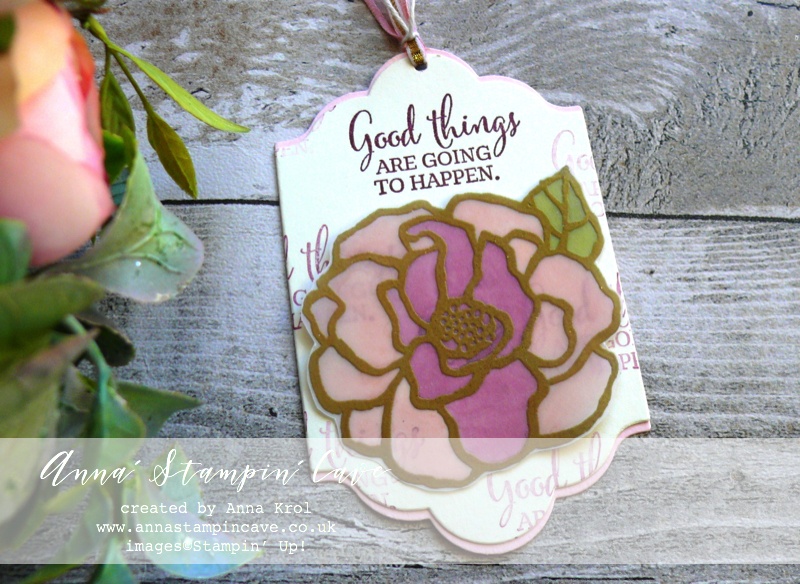
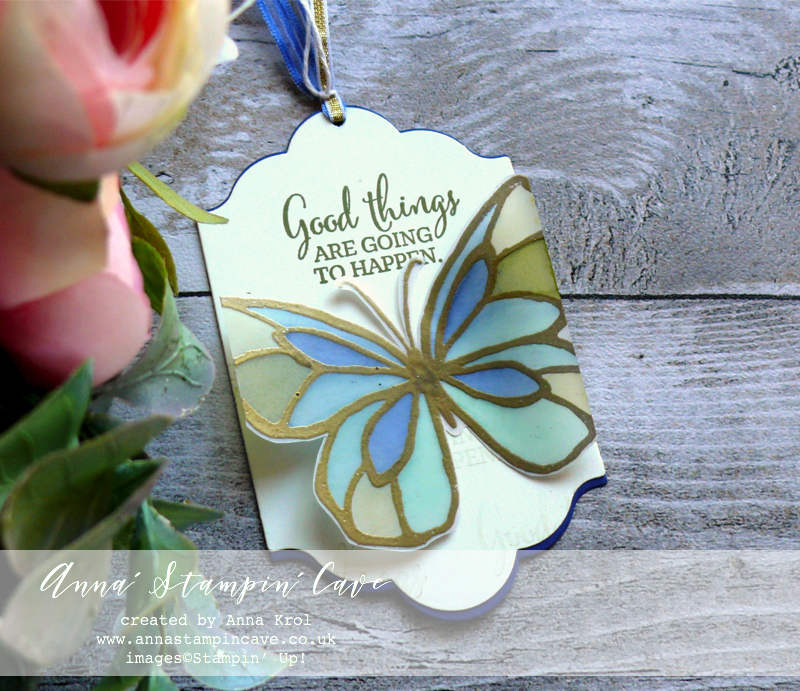
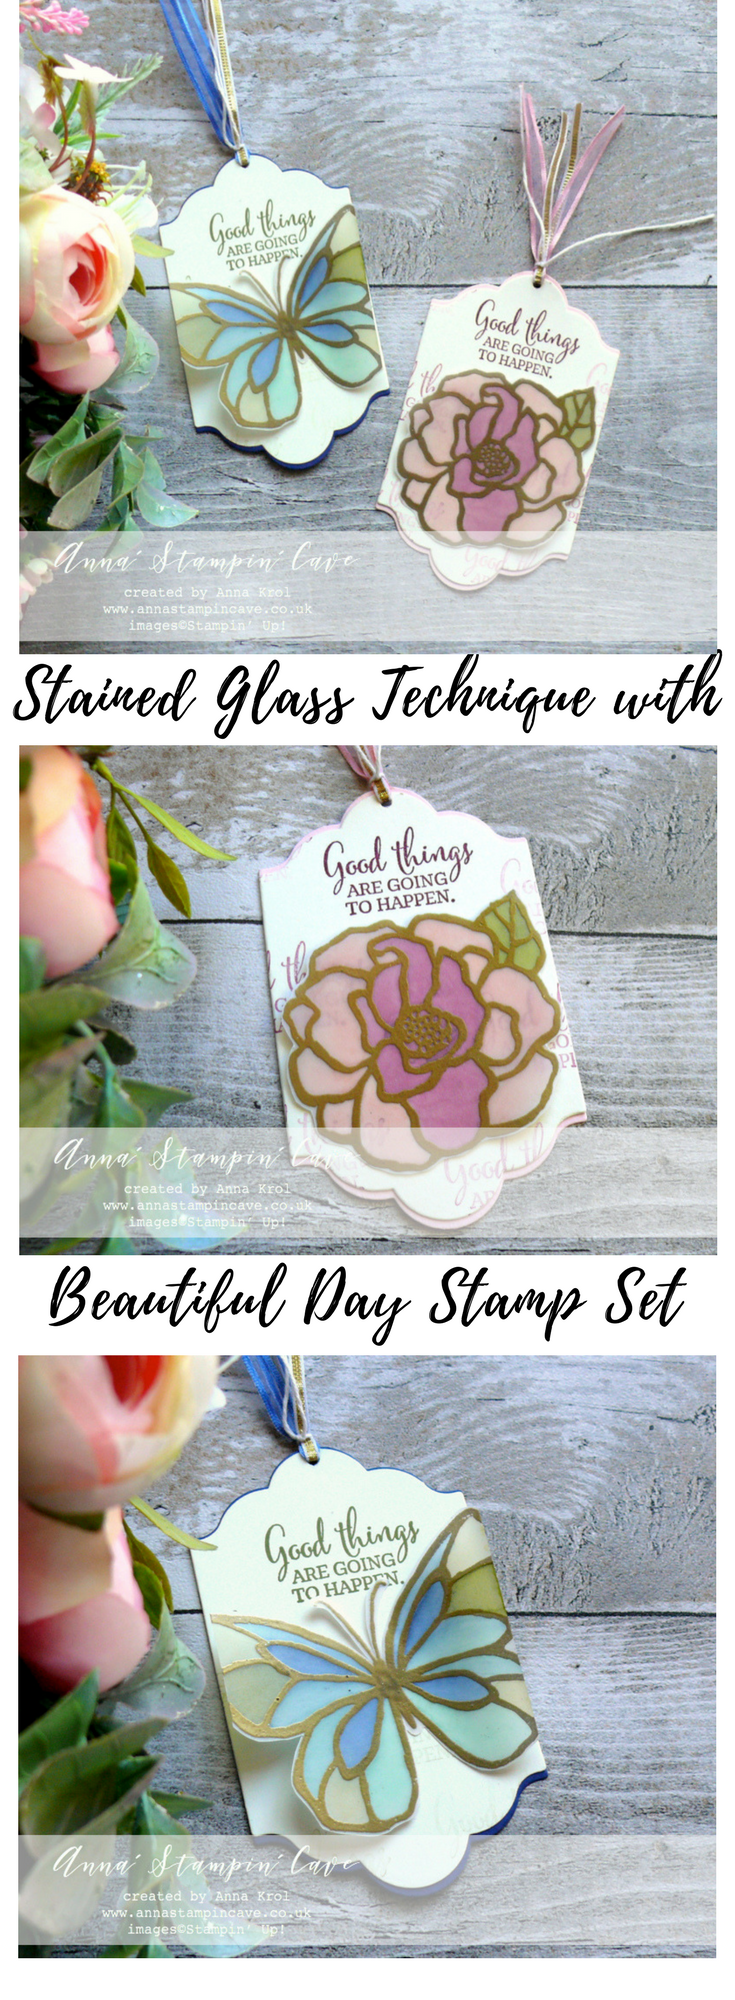
First, I stamped both images onto two pieces of vellum using Versamark ink and heat embossed them in gold.

Next, I  colour on the back of te vellum with Stampin’ Blends Alcohol Markers as follows:

  • flower – Pink Pirouette, Calypso Coral, Rich Razzleberry & Old Olive
  • butterfly – Pool Party, Night of Navy & Old Olive

I even used Stampin’ Blends to dye Whisper White Organza Ribbon so it coordinates with my bookmarks – so much easier and quicker than using reinkers!

I fussy cut my images.

I die-cut four labels using Lots of Labels Framelits dies – two in Very Vanilla, one in Pink Pirouette and one in Night of Navy so they would coordinate with colours on the images. I die cut the Very Vanilla pieces slightly shorter.

I stamped, repeatedly. greeting from You’ve Got This Stamp Set (without re-inking) on my Very Vanilla pieces: For the butterfly bookmark using Old Olive ink pad; and for the flower bookmark in Rich Razzleberry.

I assembled my bookmarks and adhered butterfly and the flower in the middle using Fast Fuse.

Hope you like my little showcase and that you give the stained glass technique a go.

Now, be sure to hop along and see more inspiring projects. Below is the list of all the participants but you can also use the buttons to keep hopping. Your next stop is lovely Pia Gerhardt from Germany  go and see her beautiful projects

If you wish to purchase any of products I have used, simply click the images below to go directly to my online store and don’t forget to enter the hostess code RRMR76JH to receive a gift from me.

Thank you for stopping by and have a blessed day

Hostess Code for February: RRMR76JH – Use this code in the month of February and receive a gift from me.

Special Notes:1) Make sure you select Anna Krol as your demonstrator;
2) If you select “No Contact” box I do not have access to your name and can’t send you a gift;
3) If your order is £150 or more do not use the code and grab your own Stampin’ Rewards + gift from me

Product List

Aqua Painters

£15.50

Big Shot

£99.00

Pin me

Summary of the project which gives all the views of the card in one photo. I’d love if you pinned and called by on Pinterest xx


Don’t forget to check:

Spring Summer Catalogue Paper & Ribbon Shares. Shares are open to Austria, France, Germany, Netherlands & United Kingdom. 102 sheets of DSP & 2 yards of each type of ribbon from Spring/Summer Catalogue. Click here for more details —>

The New Stampin’ Up! Spring/Summer 2017 Catalogue and Sale-A-Bration are LIVE and it’s AMAZING! For every 60 €/£45, you spend either from Spring Summer Catalogue or Annual Catalogue, you will get to choose one FREE  level 1 product from SAB brochure! If you spend 120 €/£90, you get one FREE level 2 product, OR, you can choose two level 1 items. If you spend 180 €/£135, you have the option to choose three level 1 items or one level 1 item and one level 2 item. Click here for more details —>

Ever wondered what it’s like to join Stampin’ Up!’s community? I may have few answers for you. Click here for more details –>
Clean & Simple New Home Card For #GDP123

Anna’ Stampin’ Cave – Clean & Simple New Home card featuring ‘In The City’ Stamp Set from Stampin’ Up!

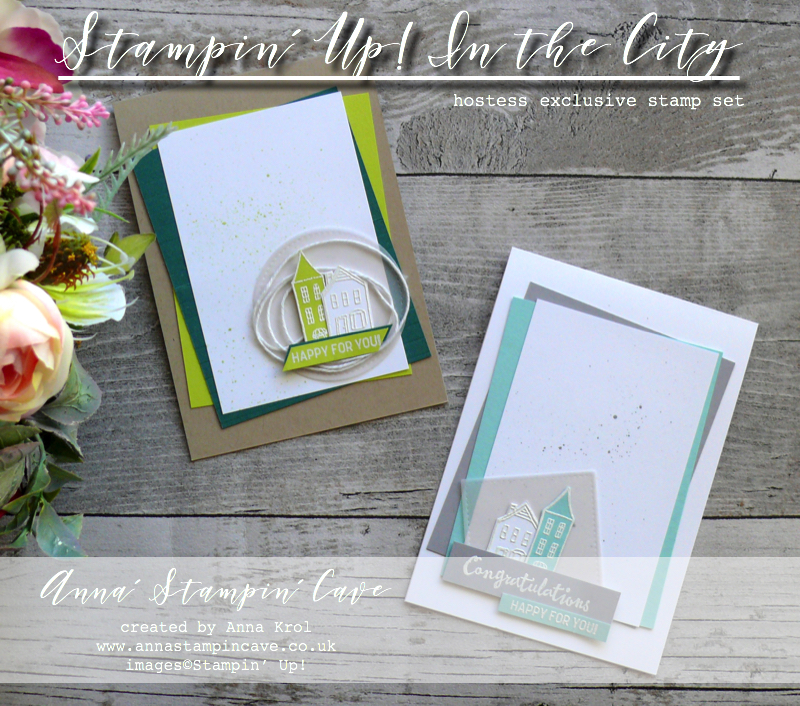
Hello and welcome! I’m so happy you popped in to visit my stampin’ cave. Today I’ve got for you beautiful, clean & simple cards using ‘In the City’ Stamp Set from Stampin’ Up!

My hubby’s younger sister & her husband are in the middle of buying their first house, hence the theme of my cards. There are still few weeks, maybe even a month until the completion date, but we are so, SO happy for them!

Dimensions for both cards:

  • card base: 11-6/8″ x 4-1/8″ scored in half at 5-7/8″ (29.7 x 10.5 cm scored in half at 14.8 cm) – Whisper White Thick & Crumb Cake cardstock
  • colour cardstock panels: 4-1/2″ x 3-1/2″ (11.4 cm x 8.9 cm) – Smoky Slate, Pool Party, Lemon Lime Twist & Tranquil Tide
  • Whisper White panels: 4-1/2″ x 3″ (11.4 cm x 7.6 cm)
  • scraps of cardstock & vellum for die-cutting and stamping
  • Whisper White Baker’s Twine: 20″ (approx)

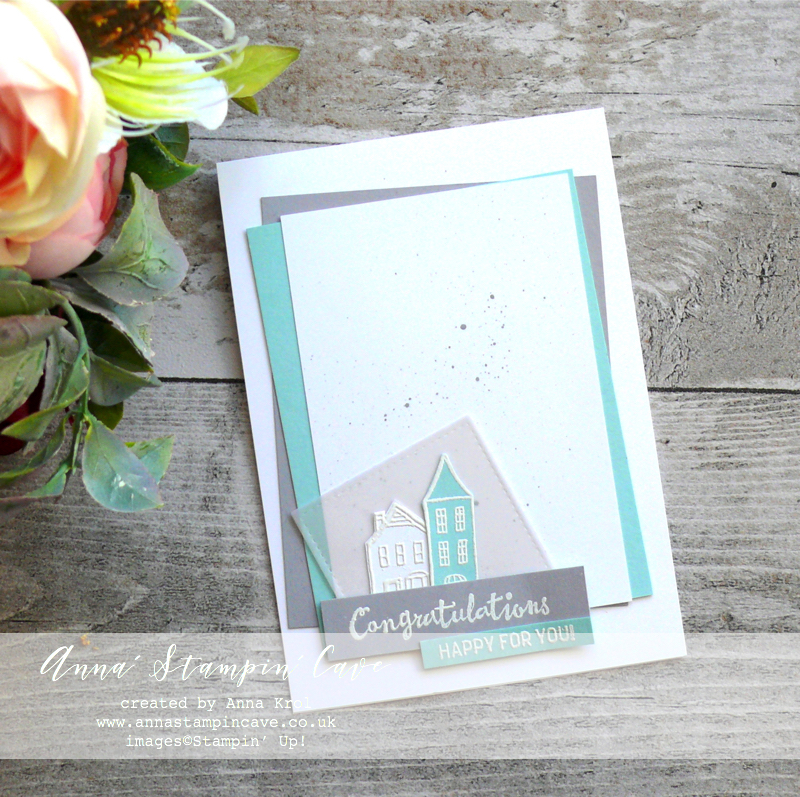
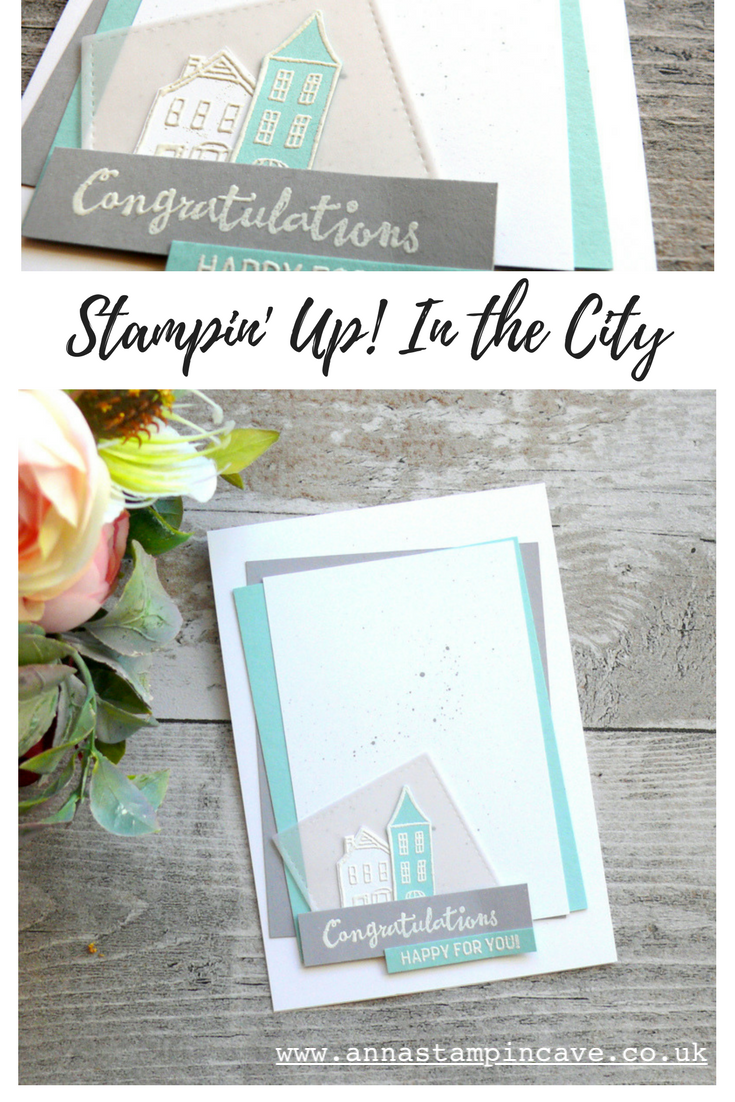
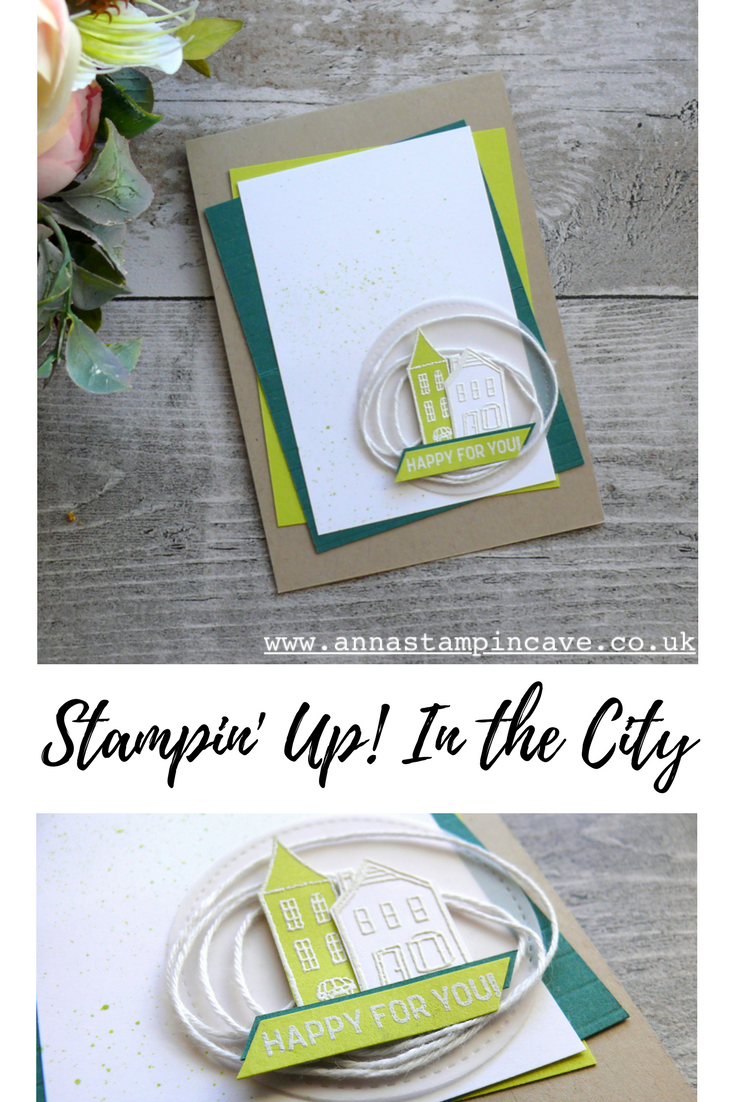
For this first card, I decided to use soft colours. Smoky Slate and Pool Party accompanied by Whisper White make such an elegant combination.

First, I adhered all panels to the card base with snail adhesive. To add some interest to the layout, I assembled them at wonky angles.

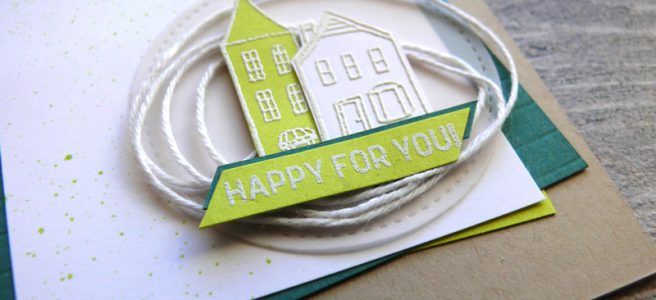
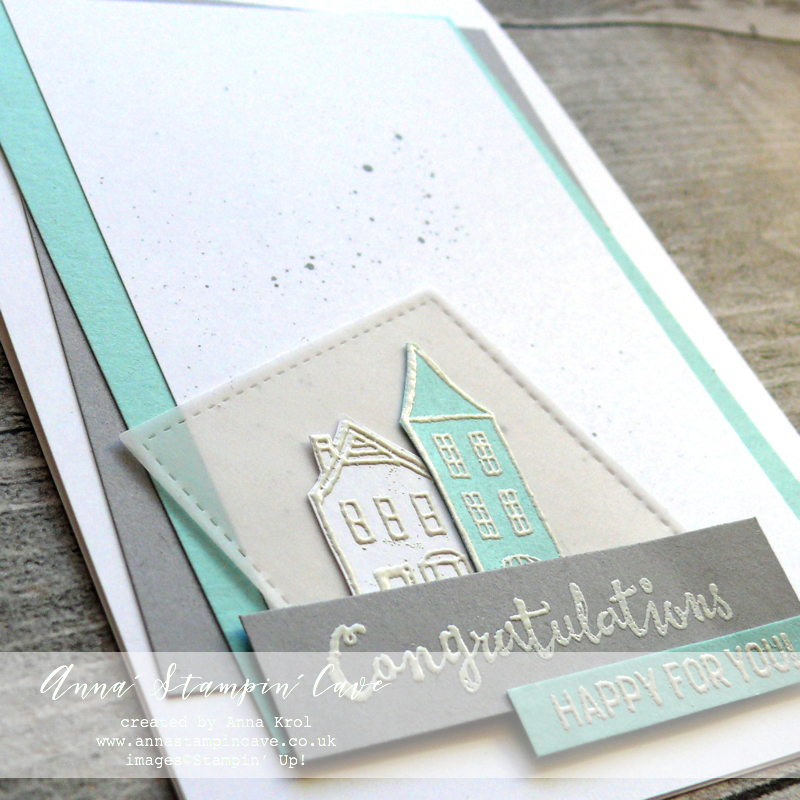
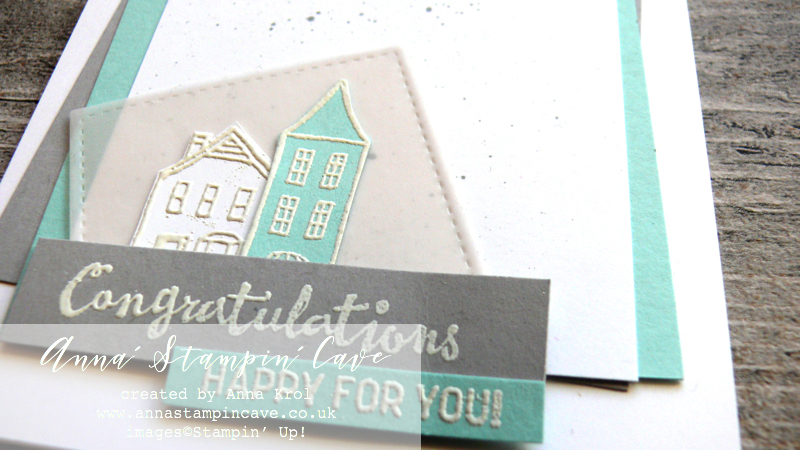
I stamped two tiny houses from In The City Stamp Set in Versamark ink; taller on a scrap of Pool Party cardstock, and lower one on Whisper White; and heat embossed them in white. This set stamp set doesn’t come with coordinating dies, but images are so easy to fussy-cut I did it in no time.

Sentiments are stamped in Versamark on two separate pieces of cardstock: I stamped ‘congratulations’ from Petal Palette Stamp Set on a strip of Smoky Slate cardstock, and ‘happy for you’ from In The City Stamp Set on a smaller strip of Pool Party and heat embossed both in white.

I die-cut a square of vellum using 2nd largest square die from Stitched Shapes Thinlits Dies. While playing with placement, I thought it would look cool if the square was kinda wonky too (to echo panels) so once happy, I adhered my tiny houses briefly in the middle of that’ wonky’ square. Next, I adhered them to the card and added sentiments using dimensionals.

I know this card supposed to be CAS (clean & simple) but too much white hurts my eyes, honest haha. So before I finished assembling it, I took Smoky Slate ink pad and transferred some ink onto an acrylic block. Next, using aqua painter I flicked few tiny ‘splatters’ of ink into the top Whisper White panel.

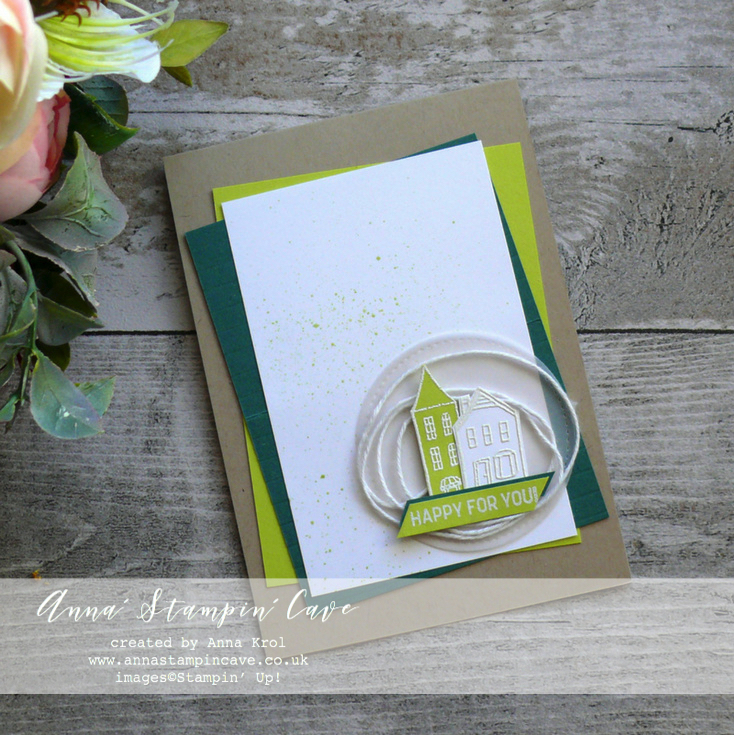
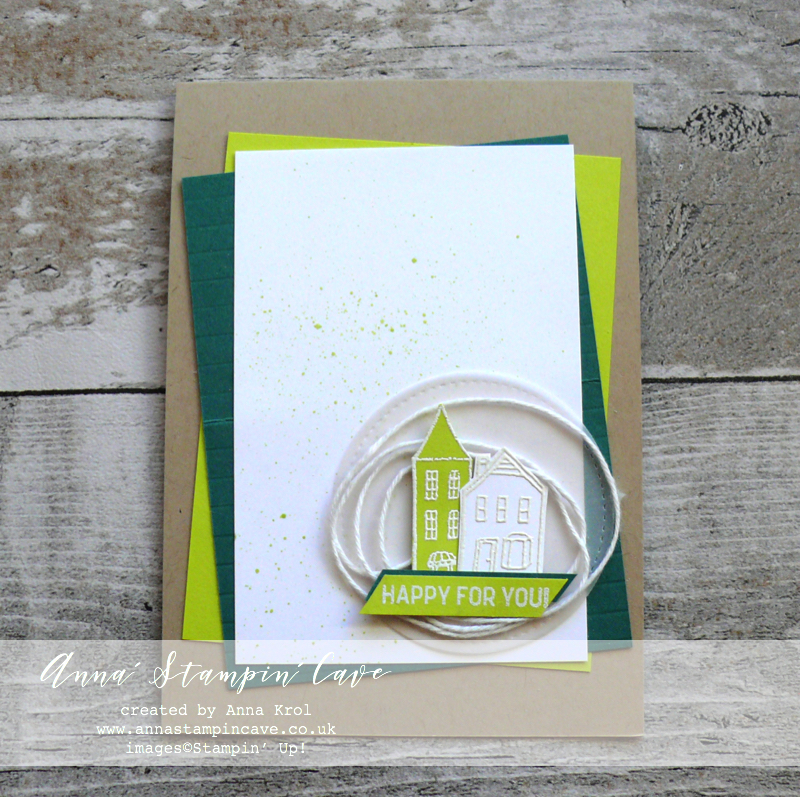
For this second card, I decided to use brighter colours. I chose Tranquil Tide and Lemon Lime Twist for some fun pop of colour. The base is Crumb Cake.

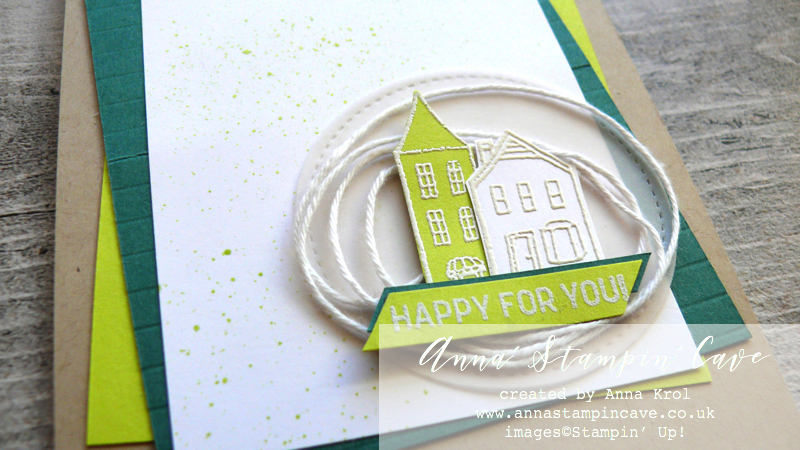
I wanted to add some extra texture and interest to this card. I really like the Simply Stripes Textured Embossing Folder from Spring Summer catalogue. But because I don’t have it yet I decided to imitate the look. I took my Tranquil Tide panel and with a help of Stampin’ Trimmer, I scored it every 1/4″. I love how it looks.

I also added Lemon Lime Twist splatters to Whisper White panel and adhered all the layers to the card base.

To soften up wonky angles I die-cut a circle from vellum using the 2nd largest circle from Stitched Shapes Framelits Dies. I wrapped some Whisper White Baker’s Twine around my fingers to create ‘wreath-like’ shape, and add it in the centre of the vellum circle with a dab of glue (snail adhesive).

I took tiny buildings and simple sentiment strip, put dimensionals to the back and mounted them onto my circle. Dimensionals not just keep all elements together, but they also secure twine from slipping off. I adhered my circle to the card with snail adhesive.

I love how these cards turned out. And to be honest, with a little tweak, they could easily fit any occasion really.

As always, I really want to encourage you to visit the Global Design Project challenge blog to see other beautiful projects from all around the world. Just click on their logo below to visit the website

I’m also adding my cards to Simon Says Stamp – Anything Goes Challenge

If you wish to purchase any of products I have used, simply click the images below to go directly to my online store and don’t forget to enter the hostess code RRMR76JH to receive a gift from me. Just a reminder that In The City Stamp Set is an exclusive Hostess Set, which means you can’t buy it, you can only earn it (choose) free when you spend £150 or more in my online store.

Thank you for stopping by and have a blessed day

Hostess Code for February: RRMR76JH – Use this code in the month of February and receive a gift from me.

Special Notes:1) Make sure you select Anna Krol as your demonstrator;
2) If you select “No Contact” box I do not have access to your name and can’t send you a gift;
3) If your order is £150 or more do not use the code and grab your own Stampin’ Rewards + gift from me

Product List

Aqua Painters

£15.50

Big Shot

£99.00

Pin me

Summary of the project which gives all the views of the card in one photo. I’d love if you pinned and called by on Pinterest xx

Don’t forget to check:

Spring Summer Catalogue Paper & Ribbon Shares. Shares are open to Austria, France, Germany, Netherlands & United Kingdom. 102 sheets of DSP & 2 yards of each type of ribbon from Spring/Summer Catalogue. Click here for more details —>

The New Stampin’ Up! Spring/Summer 2017 Catalogue and Sale-A-Bration are LIVE and it’s AMAZING! For every 60 €/£45, you spend either from Spring Summer Catalogue or Annual Catalogue, you will get to choose one FREE  level 1 product from SAB brochure! If you spend 120 €/£90, you get one FREE level 2 product, OR, you can choose two level 1 items. If you spend 180 €/£135, you have the option to choose three level 1 items or one level 1 item and one level 2 item. Click here for more details —>

Ever wondered what it’s like to join Stampin’ Up!’s community? I may have few answers for you. Click here for more details –>