In And Out Pop-Up Birthday Card

Anna’ Stampin’ Cave – Fun In and Out Birthday Card Using Birthday Delivery Bundle

Hello and thank you for stopping by.

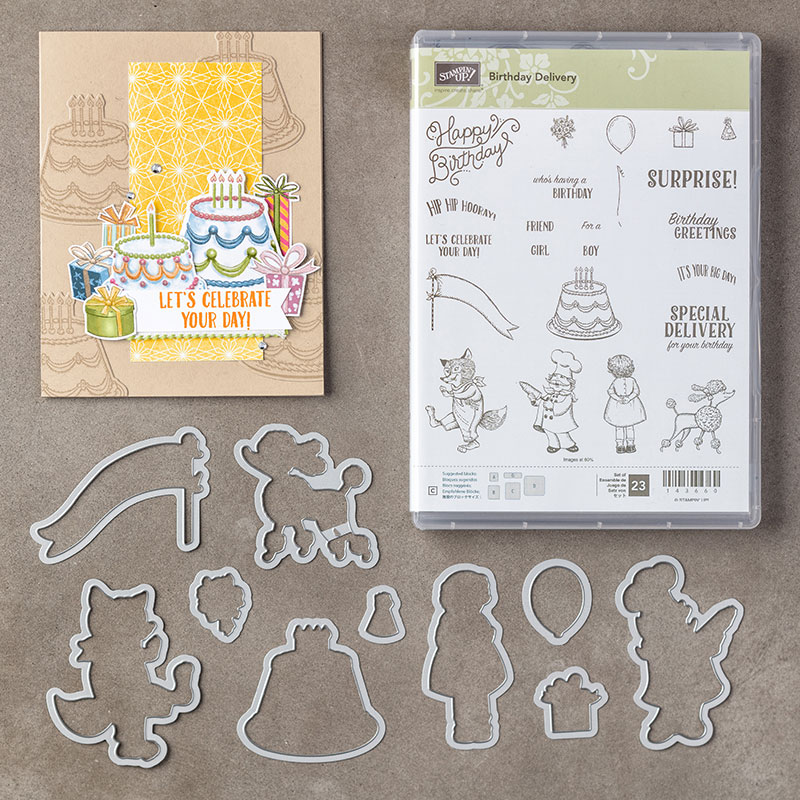
Today, I wanted to show you a fun card I created for my grand niece’s 6th birthday recently. I got an idea for this card from ever amazing Jennifer McGuire, and its called ‘In & Out Card’. For her technique, you need a stamp set that comes with coordinating dies. And Birthday Delivery Stamp Set with Birthday Friends Framelits Dies was just perfect!
And here’s my card:
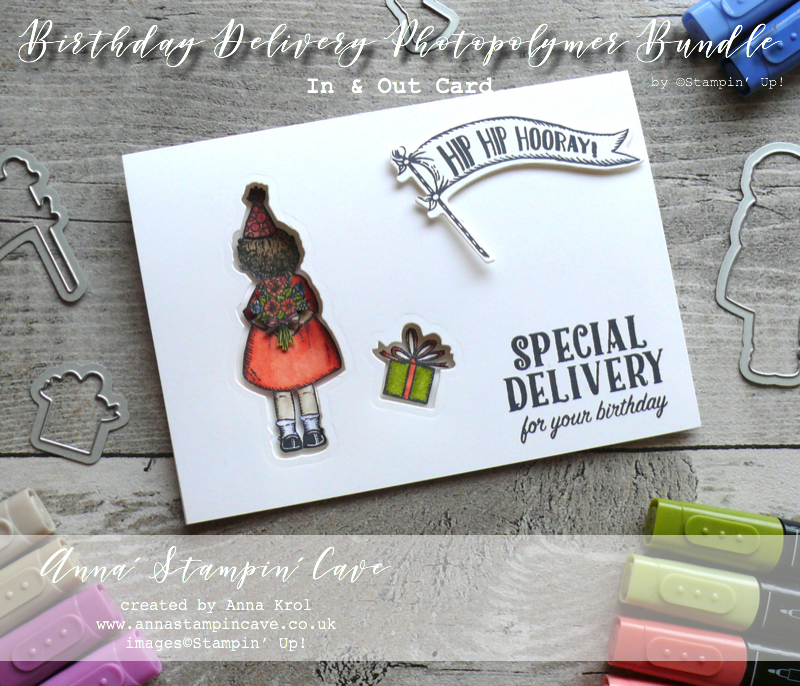
First, I stamped all the images I wanted to include in my card, on a scrap of Whisper White cardstock. I wanted to use my Stampin’ Blends to colour images in (bear in mind I only had five colours in the dark and light shade at that time) so I’ve used Black Memento Ink Pad for my stamping. I also stamped a sentiment in the bottom right corner of the card base.

Because I had the ink pad out already, I stamped ‘Hip, Hip, Hooray’ flag on a scrap of Whisper White cardstock, which I die-cut later.
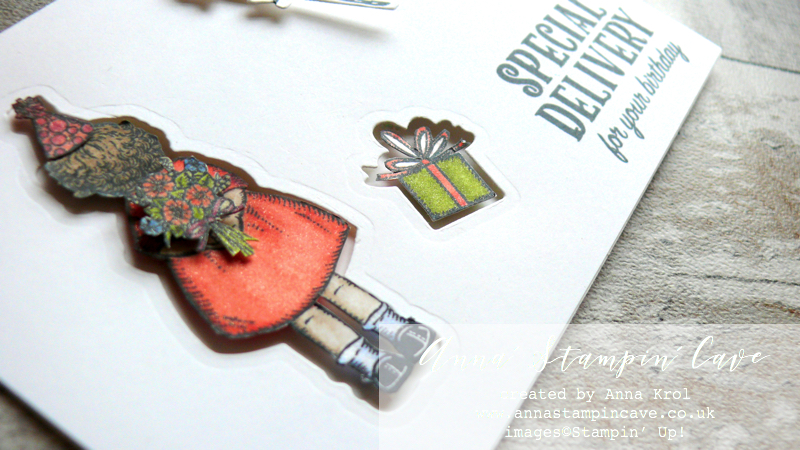
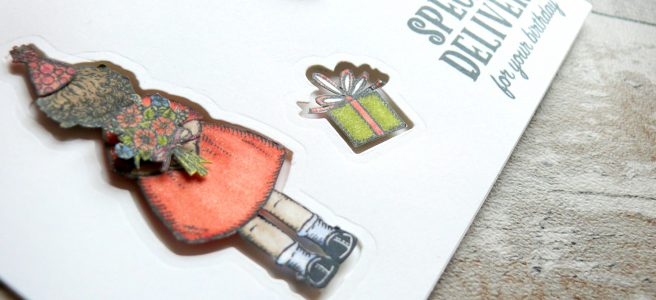
When finished my colouring, I fussy cut the images which I wanted to ‘peek’ through. I cut them out right up against the edge of the stamping. Next, I planned on their placing on the card and using coordinating dies, I die cut their shapes from the card base.

The party hat was bit tricky, but once I die cut the girl shape, I adhered my fussy cut party hat to girl’s head, place the image through the opening and using a piece of washi tape, I secured party hat die where it should go. Done!
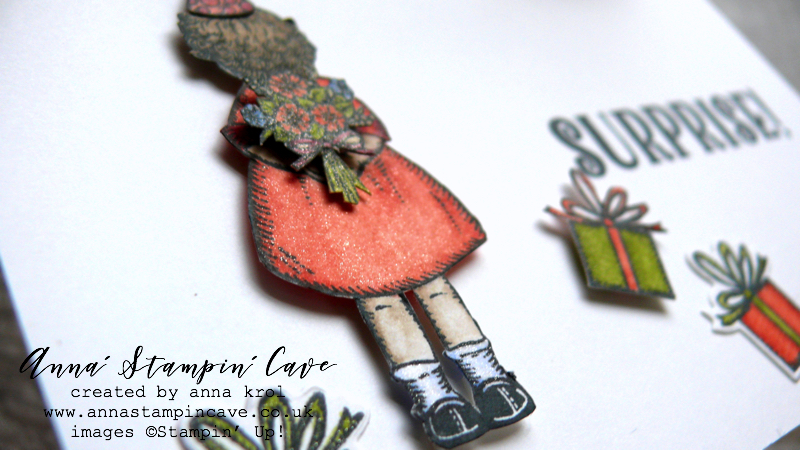
I adhered them through these openings, using dimensionals. Because these images are fussy cut, they fit snugly and don’t interfere with opening/closing the card. I also stamped, coloured and fussy cut the bouquet, And adhered it with dimensionals so it looks like my girl is carrying the flowers.

I stamped the second sentiment that says: ‘Surprise’ inside of the card. I also adhered two more pressie images inside of the card using snail adhesive.

I still wasn’t entirely happy with the card so I thought: Balloons!! I stamped 14 balloons from Birthday Delivery Stamp Set on a piece of Whisper White cardstock and coloured them in with Stampin’ Blends. Because I didn’t have many, I mixed some of the colours to create new shades. Also these I fussy cut.
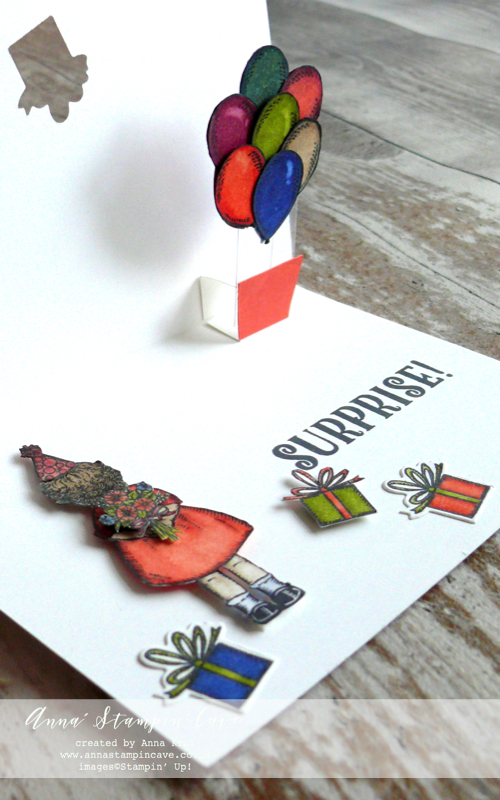
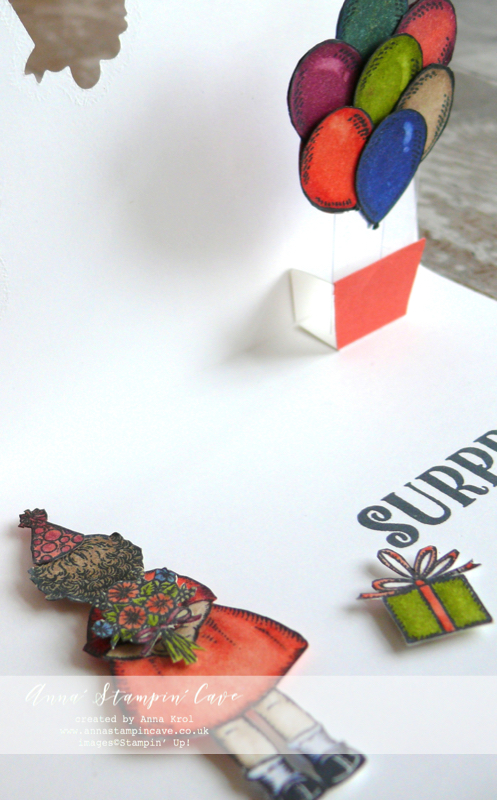
I created a small pop up element on the inside of the card.

I’ve used few strips of acetate and adhered my balloons – back to back – on one end of these acetate strips. The second end I adhered to the pop-up element and I hide it with a piece of Calypso Coral cardstock.
Now to finish off my card.

Using dimensionals I popped up ‘Hip Hip Hooray’ flag on the front of my card. I also added Clear Wink of Stella to my images for a bit of shimmer.

I truly hope you like my card. I surely had fun putting it together for my grand niece. And if you would like to check Jennifer’s video just click HERE.

If you wish to purchase any of products I have used, simply click the images below to go directly to my online store and don’t forget to enter the hostess code RRMR76JH to receive a gift from me.

Thank you for stopping by and have a blessed day

Hostess Code for February: RRMR76JH – Use this code in the month of February and receive a gift from me.
Special Notes:1) Make sure you select Anna Krol as your demonstrator;
2) If you select “No Contact” box I do not have access to your name and can’t send you a gift;
3) If your order is £150 or more do not use the code and grab your own Stampin’ Rewards + gift from me
Product List

Big Shot

£99.00

Pin me

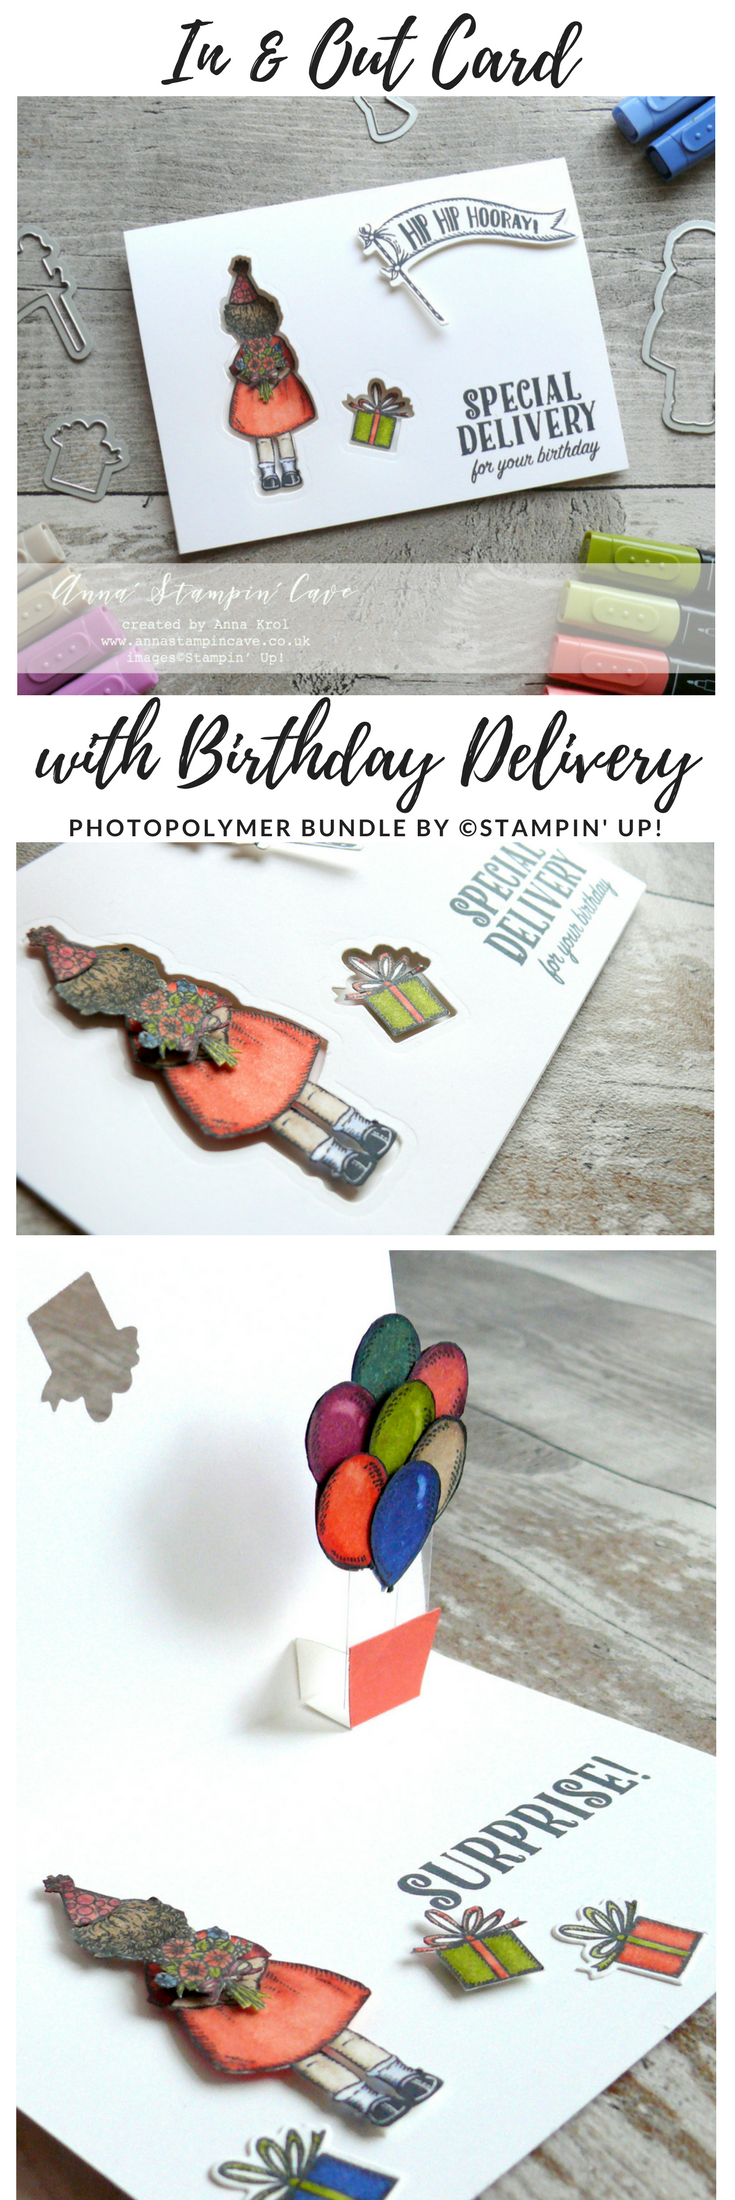
Summary of the project which gives all the views of the card in one photo. I’d love if you pinned and called by on Pinterest xx


Don’t forget to check:

Spring Summer Catalogue Paper & Ribbon Shares. Shares are open to Austria, France, Germany, Netherlands & United Kingdom. 102 sheets of DSP & 2 yards of each type of ribbon from Spring/Summer Catalogue. Click here for more details —>

The New Stampin’ Up! Spring/Summer 2017 Catalogue and Sale-A-Bration are LIVE and it’s AMAZING! For every 60 €/£45, you spend either from Spring Summer Catalogue or Annual Catalogue, you will get to choose one FREE  level 1 product from SAB brochure! If you spend 120 €/£90, you get one FREE level 2 product, OR, you can choose two level 1 items. If you spend 180 €/£135, you have the option to choose three level 1 items or one level 1 item and one level 2 item. Click here for more details —>

Ever wondered what it’s like to join Stampin’ Up!’s community? I may have few answers for you. Click here for more details –>

For The Love of Creating Blog Hop

Anna’ Stampin’ Cave – For The Love of Creating – Beautiful Day Stamp Set

Hello and welcome to our very first For the Love of Creating with Stampin’ Up! Blog Hop run by the amazing Australian demonstrator, Kim Oliver. We are super excited to share with you an array of creations showcasing products from 2018 Occasions (Spring-Summer in the UK) catalogue and Sale-A-Bration freebies too. We hope you find great inspiration from our projects. If you have arrived here from Jay Soriano a big welcome to you. You are currently visiting Anna Krol from the United Kingdom.

I really want to encourage you to hop along with us – you are in for a real treat, as we are demonstrators from all over the world. Below is a list of all designers, but you can also use the NEXT  button further down to continue your journey on this blog hop.

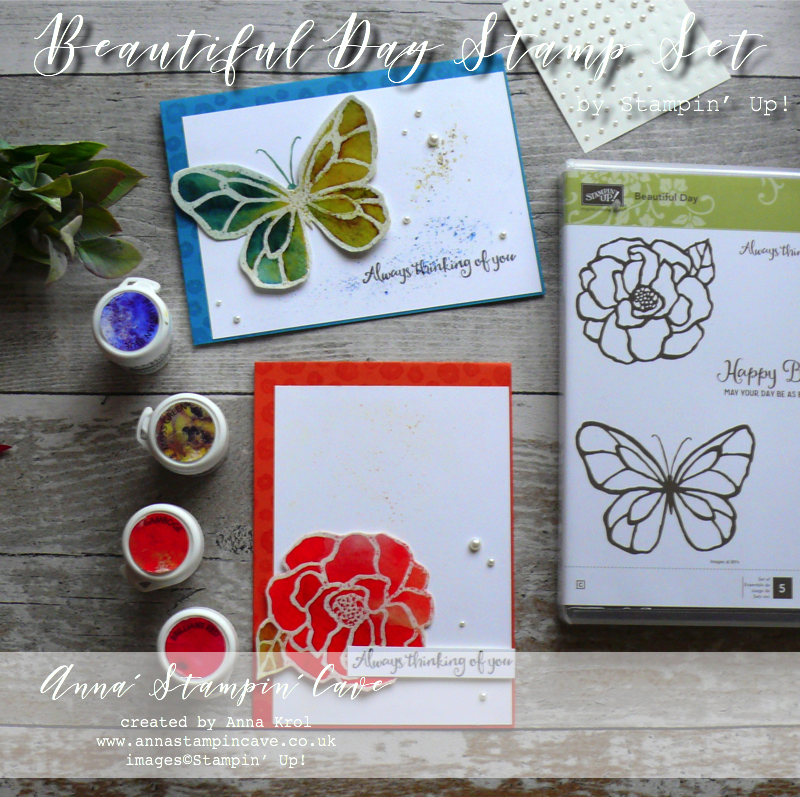
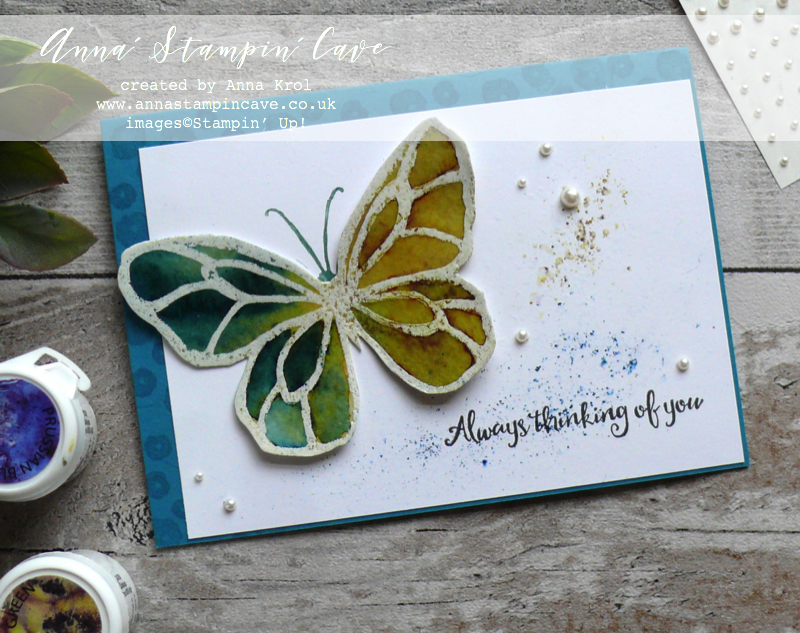
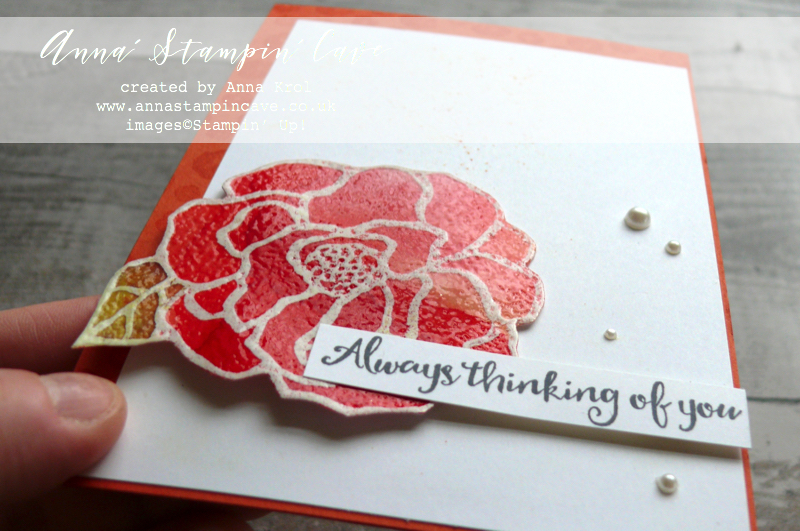
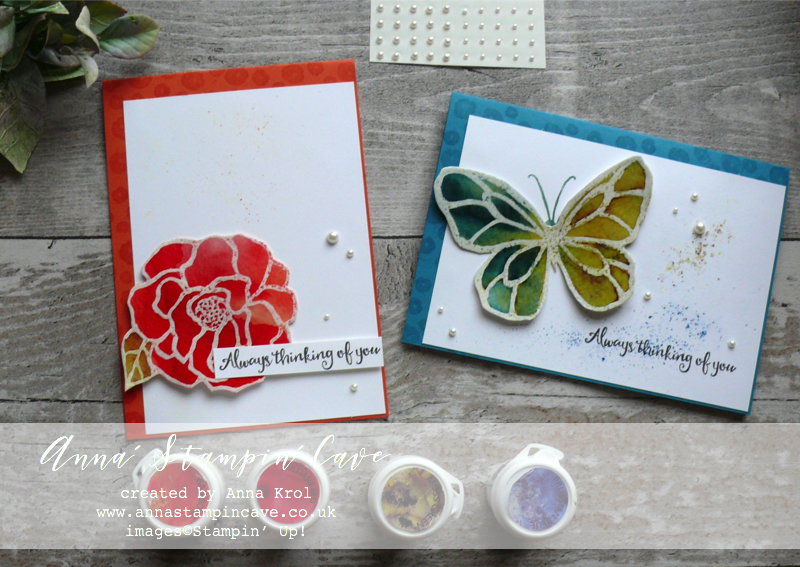
For my projects today I decided to showcase beautiful stamp set called (not mistakenly) Beautiful Day. I will show you how to achieve stained glass effect using two different mediums.

Stained Glass Effect With Brusho –

I love these bold images with its stained glass look – perfect for techniques and colouring. And that’s exactly what I did.

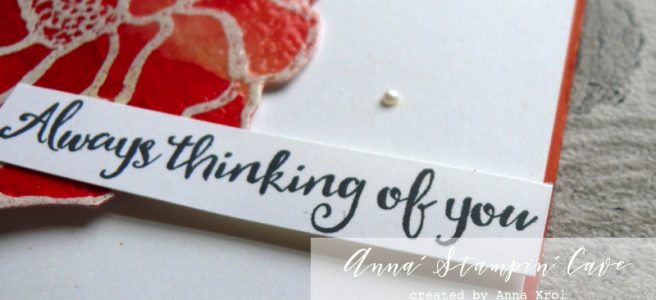
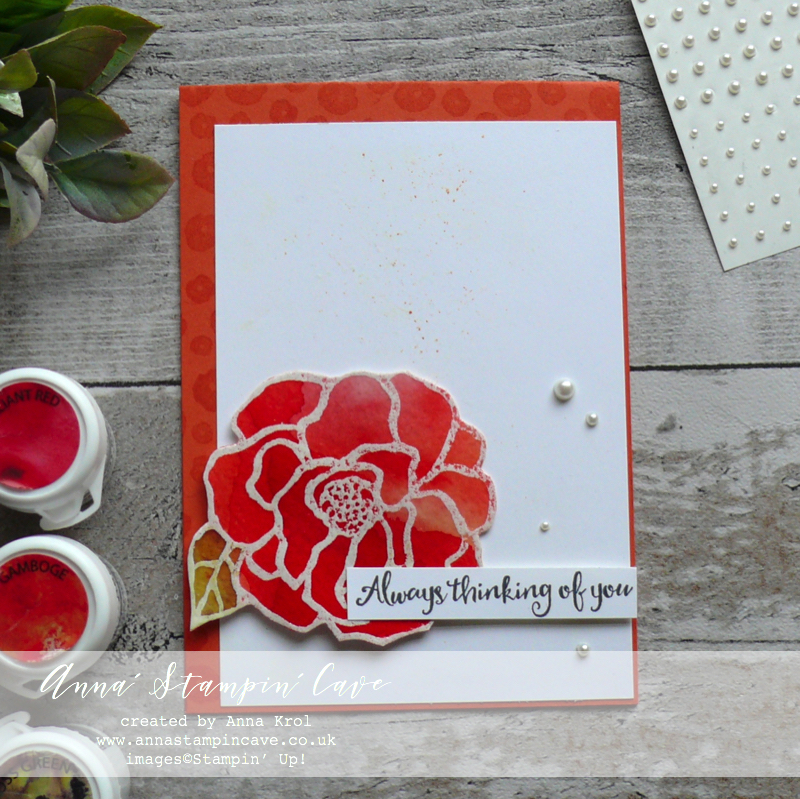
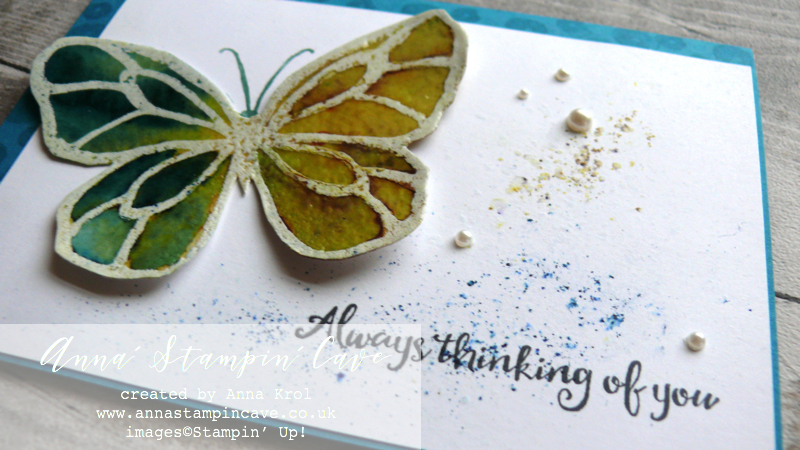
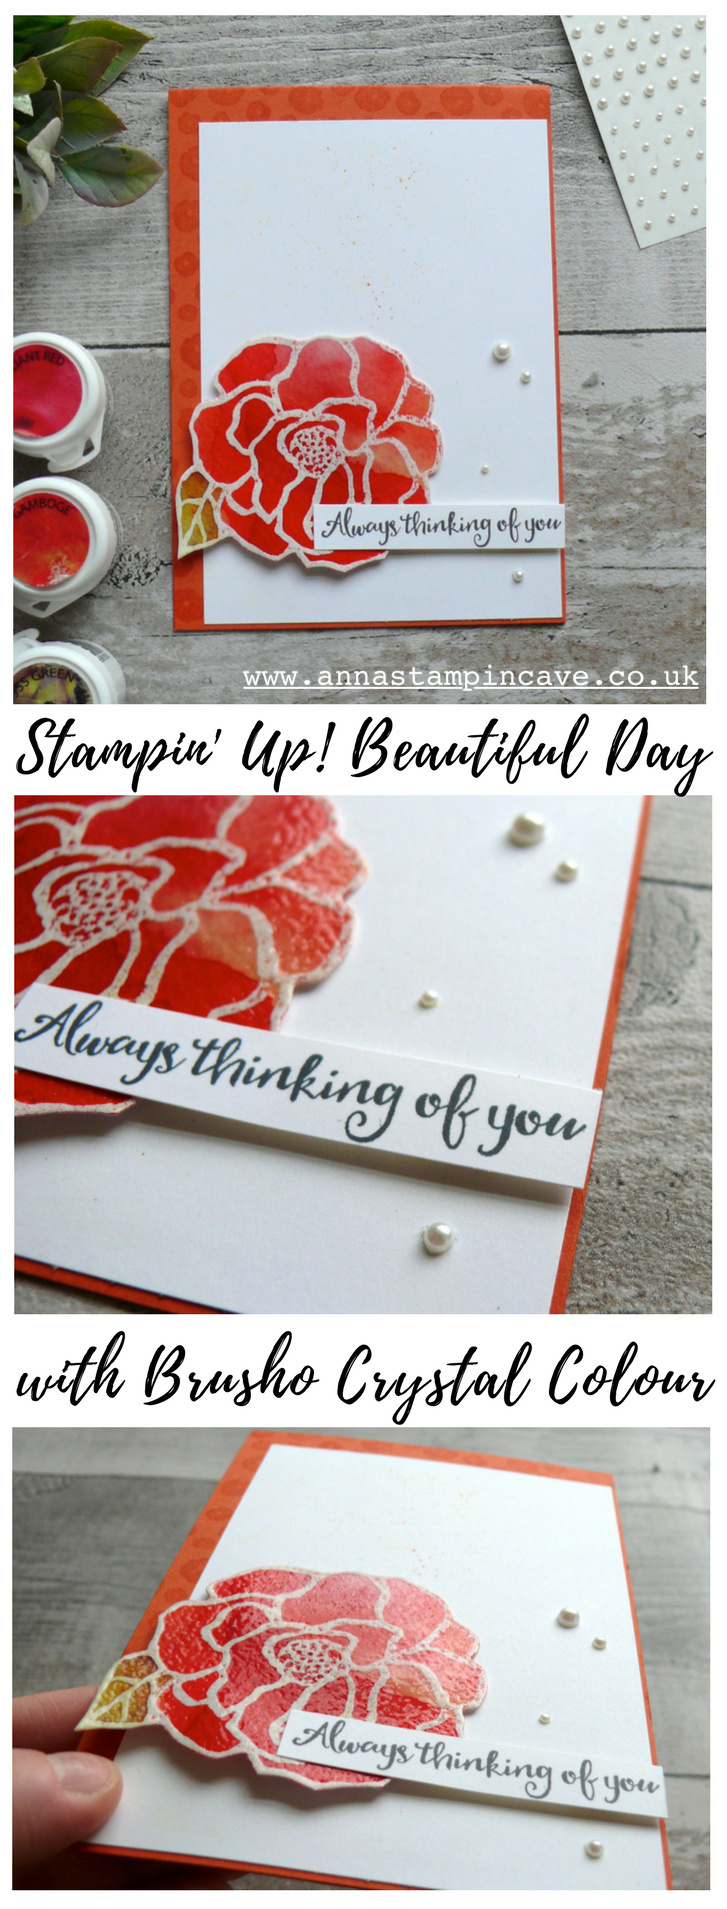
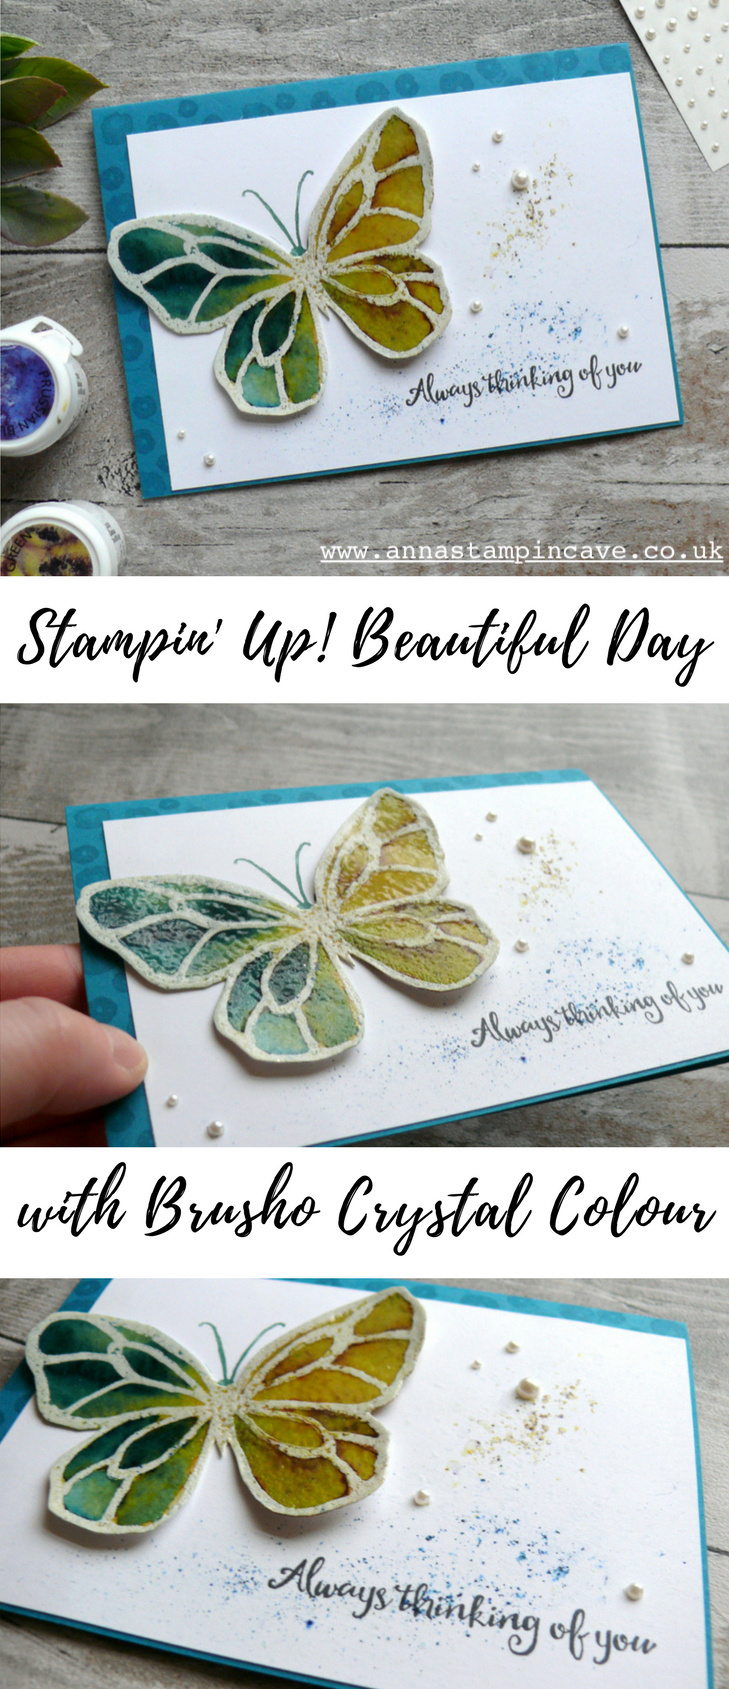
I stamped the flower and the butterfly on a piece of watercolour paper in Versamark and heat embossed them in white. Next, I filled them in with water and sprinkled Brusho Crystal Colour over the top.

Heat embossing creates a barrier for the water and colour, so you can easily control how the colour spread. I’ve also used the aqua painter to move the colour around.

For the flower, I’ve used Brilliant Red, Gamboge and Moss Green for the leaf. The butterfly is a mix of my favourite Prussian Blue and Moss Green.

Once the flower and butterfly were dry I fussy cut them. To add that stained glass look, I smooshed Versamark on top of both images, sprinkled with clear embossing powder and heat set it.

I love this rough texture of watercolour paper!

I kept the rest of design very clean. I sprinkled some brusho on Whisper White panels and spritzed with water (very, very lightly) before assembling my cards.

The edges of both card bases are stamped with three tiny flowers from the same stamp set, and I’ve used Versamark ink. Sentiments are stamped in Archival Basic Black ink. Few pearls finish off the look. I love these vibrant colours.


Stained Glass Effect With Stampin’ Blends –

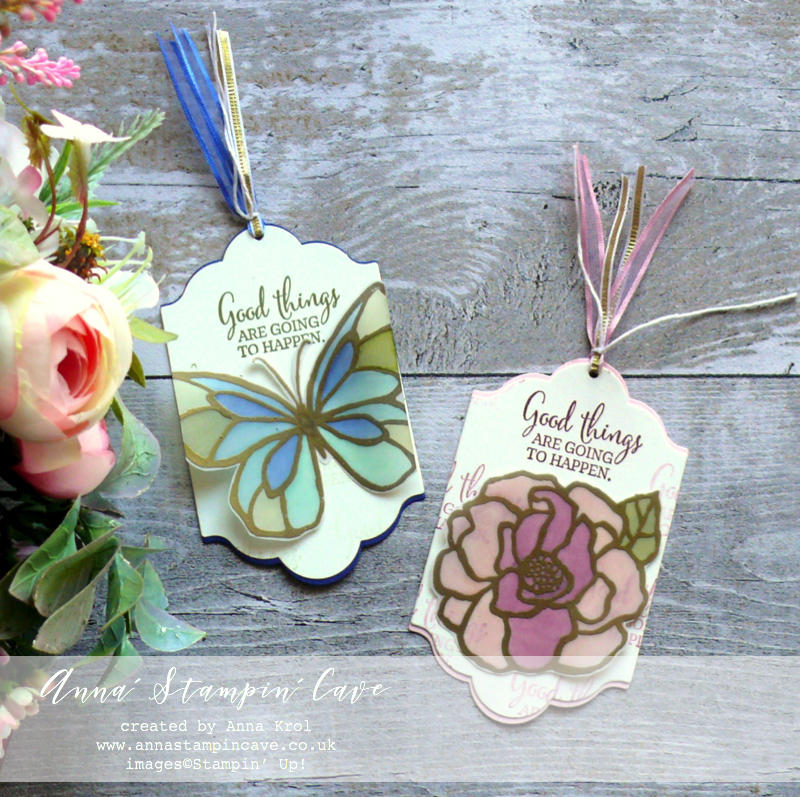
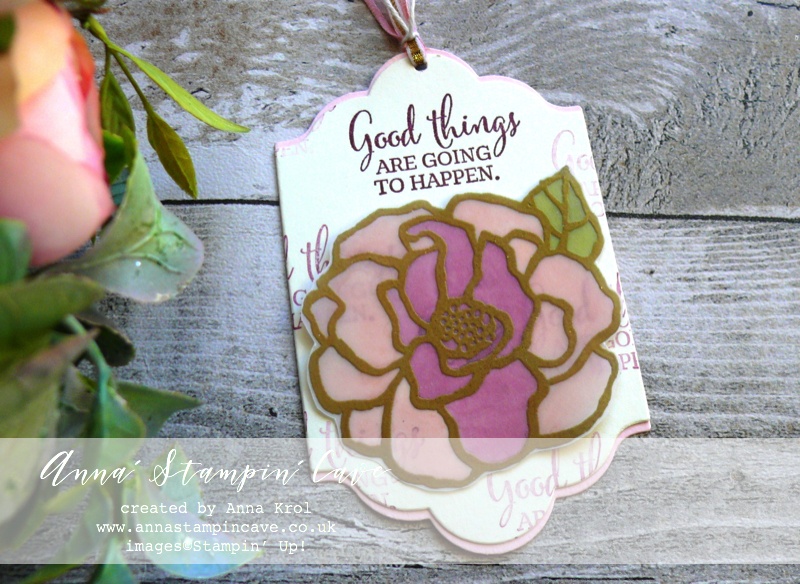
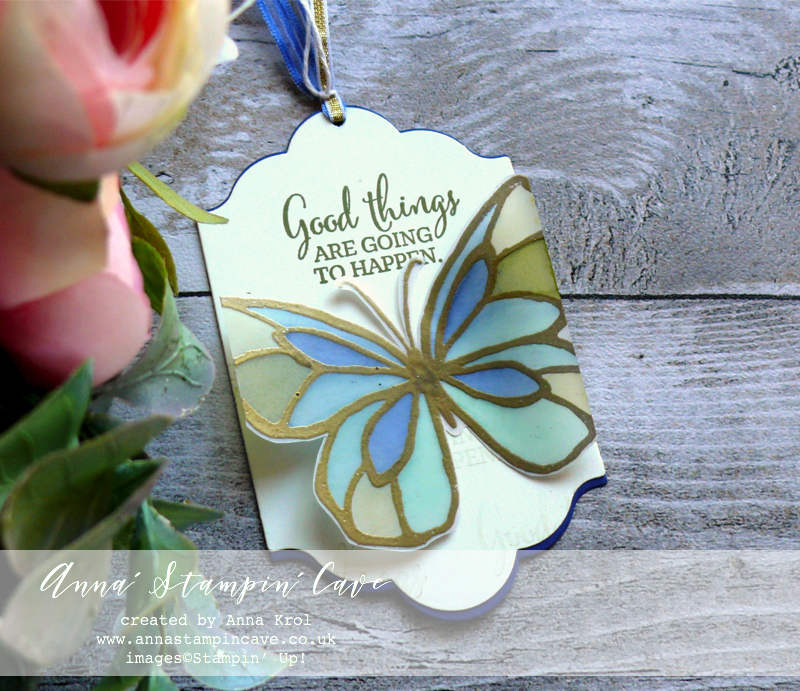
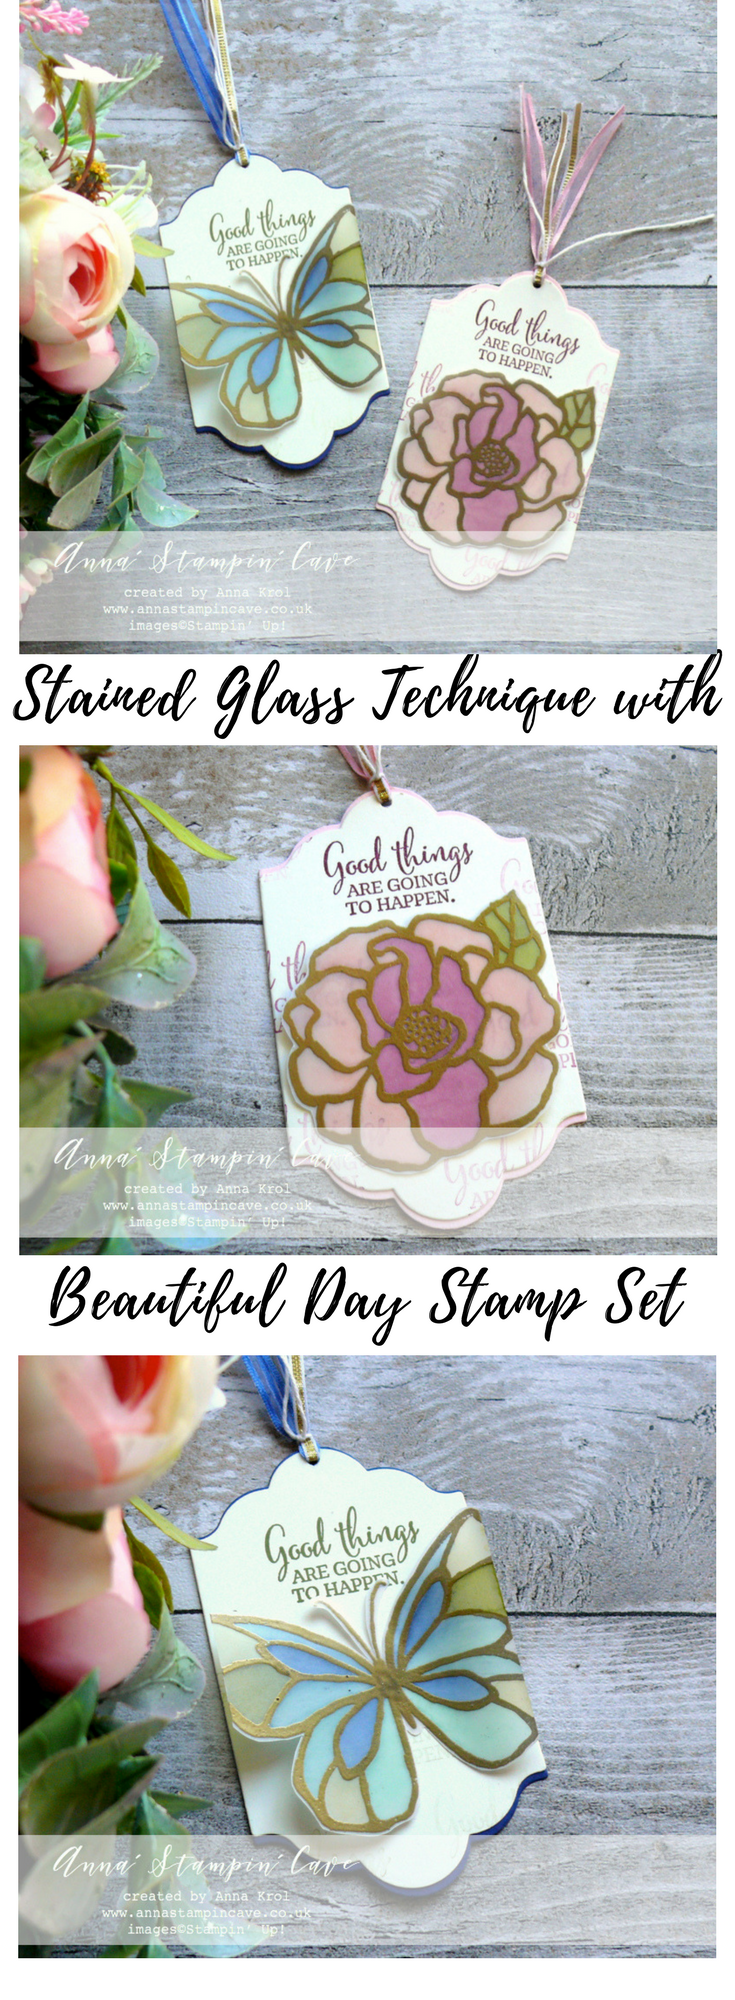
First, I stamped both images onto two pieces of vellum using Versamark ink and heat embossed them in gold.

Next, I  colour on the back of te vellum with Stampin’ Blends Alcohol Markers as follows:

  • flower – Pink Pirouette, Calypso Coral, Rich Razzleberry & Old Olive
  • butterfly – Pool Party, Night of Navy & Old Olive

I even used Stampin’ Blends to dye Whisper White Organza Ribbon so it coordinates with my bookmarks – so much easier and quicker than using reinkers!

I fussy cut my images.

I die-cut four labels using Lots of Labels Framelits dies – two in Very Vanilla, one in Pink Pirouette and one in Night of Navy so they would coordinate with colours on the images. I die cut the Very Vanilla pieces slightly shorter.

I stamped, repeatedly. greeting from You’ve Got This Stamp Set (without re-inking) on my Very Vanilla pieces: For the butterfly bookmark using Old Olive ink pad; and for the flower bookmark in Rich Razzleberry.

I assembled my bookmarks and adhered butterfly and the flower in the middle using Fast Fuse.

Hope you like my little showcase and that you give the stained glass technique a go.

Now, be sure to hop along and see more inspiring projects. Below is the list of all the participants but you can also use the buttons to keep hopping. Your next stop is lovely Pia Gerhardt from Germany  go and see her beautiful projects

If you wish to purchase any of products I have used, simply click the images below to go directly to my online store and don’t forget to enter the hostess code RRMR76JH to receive a gift from me.

Thank you for stopping by and have a blessed day

Hostess Code for February: RRMR76JH – Use this code in the month of February and receive a gift from me.

Special Notes:1) Make sure you select Anna Krol as your demonstrator;
2) If you select “No Contact” box I do not have access to your name and can’t send you a gift;
3) If your order is £150 or more do not use the code and grab your own Stampin’ Rewards + gift from me

Product List

Aqua Painters

£15.50

Big Shot

£99.00

Pin me

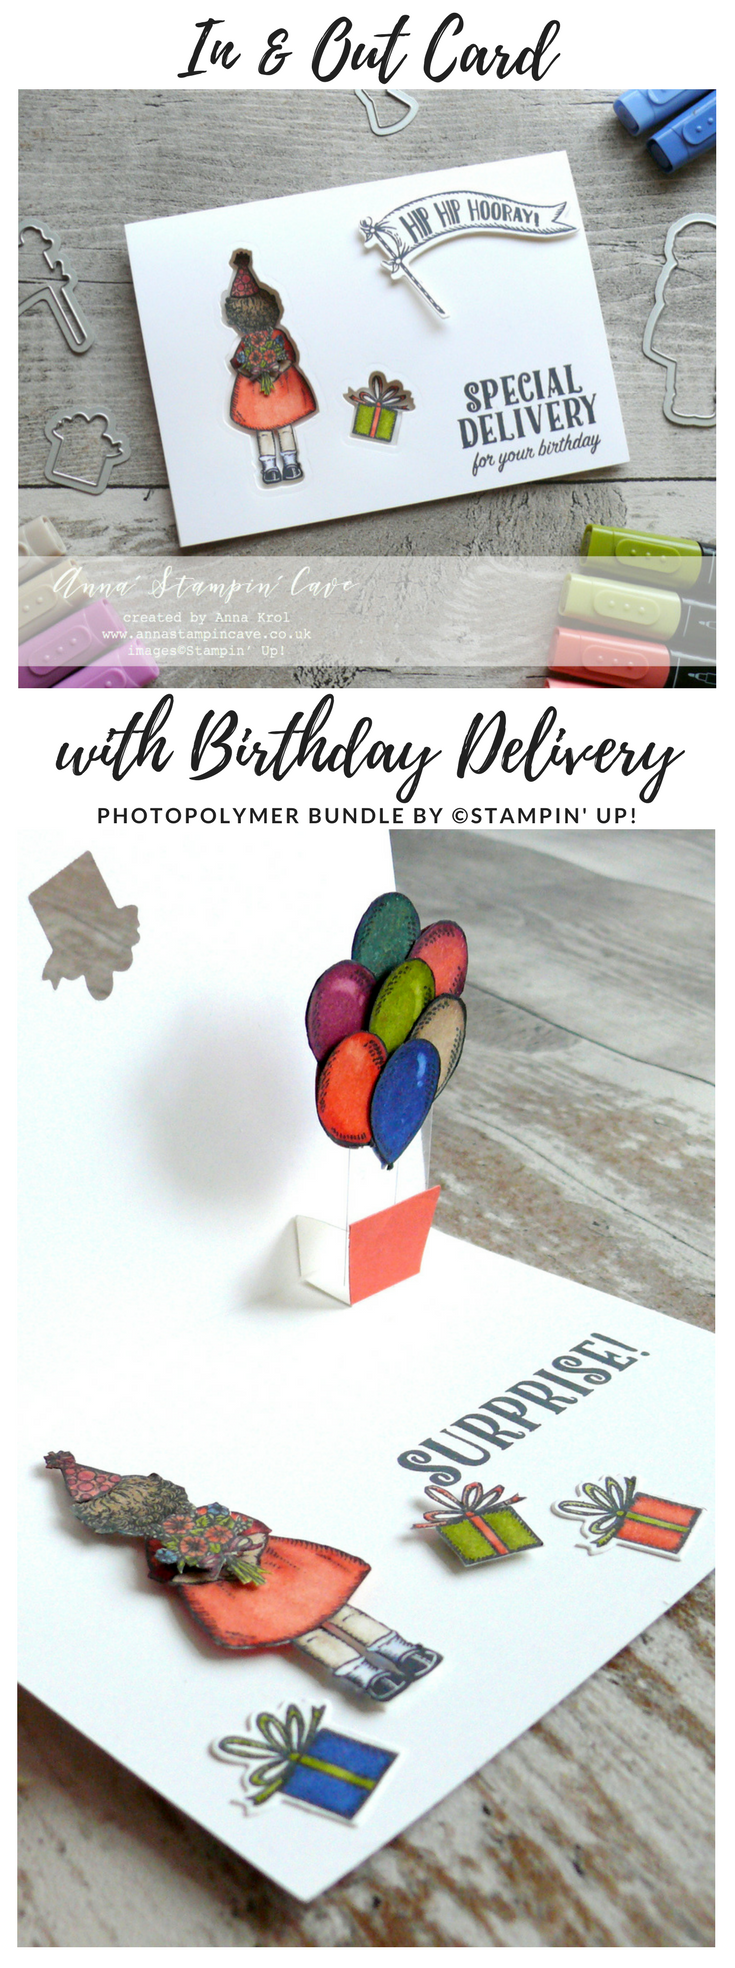
Summary of the project which gives all the views of the card in one photo. I’d love if you pinned and called by on Pinterest xx


Don’t forget to check:
Spring Summer Catalogue Paper & Ribbon Shares. Shares are open to Austria, France, Germany, Netherlands & United Kingdom. 102 sheets of DSP & 2 yards of each type of ribbon from Spring/Summer Catalogue. Click here for more details —>

The New Stampin’ Up! Spring/Summer 2017 Catalogue and Sale-A-Bration are LIVE and it’s AMAZING! For every 60 €/£45, you spend either from Spring Summer Catalogue or Annual Catalogue, you will get to choose one FREE  level 1 product from SAB brochure! If you spend 120 €/£90, you get one FREE level 2 product, OR, you can choose two level 1 items. If you spend 180 €/£135, you have the option to choose three level 1 items or one level 1 item and one level 2 item. Click here for more details —>

Ever wondered what it’s like to join Stampin’ Up!’s community? I may have few answers for you. Click here for more details –>

Clean & Simple New Home Card For #GDP123

Anna’ Stampin’ Cave – Clean & Simple New Home card featuring ‘In The City’ Stamp Set from Stampin’ Up!

Hello and welcome! I’m so happy you popped in to visit my stampin’ cave. Today I’ve got for you beautiful, clean & simple cards using ‘In the City’ Stamp Set from Stampin’ Up!

My hubby’s younger sister & her husband are in the middle of buying their first house, hence the theme of my cards. There are still few weeks, maybe even a month until the completion date, but we are so, SO happy for them!

Dimensions for both cards:

  • card base: 11-6/8″ x 4-1/8″ scored in half at 5-7/8″ (29.7 x 10.5 cm scored in half at 14.8 cm) – Whisper White Thick & Crumb Cake cardstock
  • colour cardstock panels: 4-1/2″ x 3-1/2″ (11.4 cm x 8.9 cm) – Smoky Slate, Pool Party, Lemon Lime Twist & Tranquil Tide
  • Whisper White panels: 4-1/2″ x 3″ (11.4 cm x 7.6 cm)
  • scraps of cardstock & vellum for die-cutting and stamping
  • Whisper White Baker’s Twine: 20″ (approx)

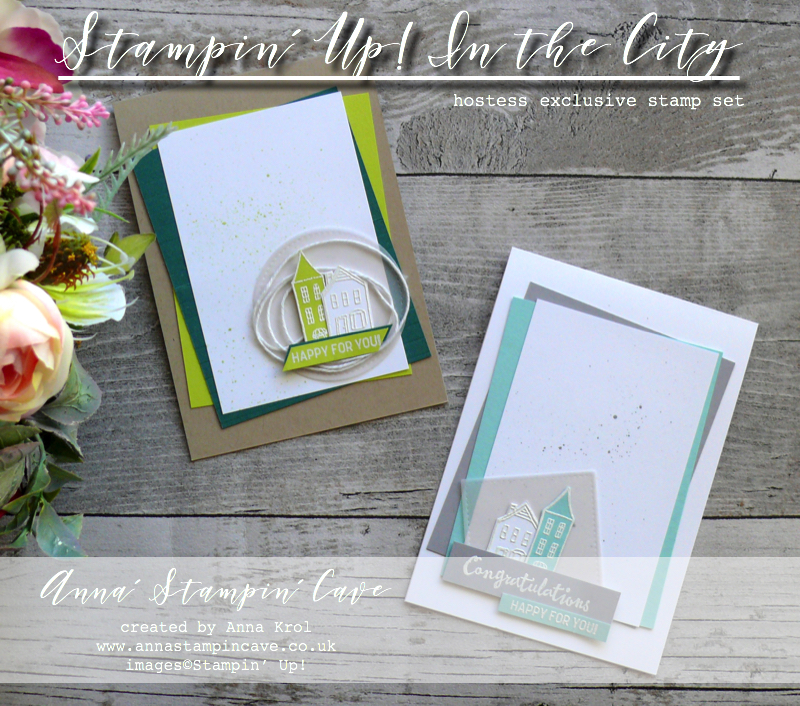
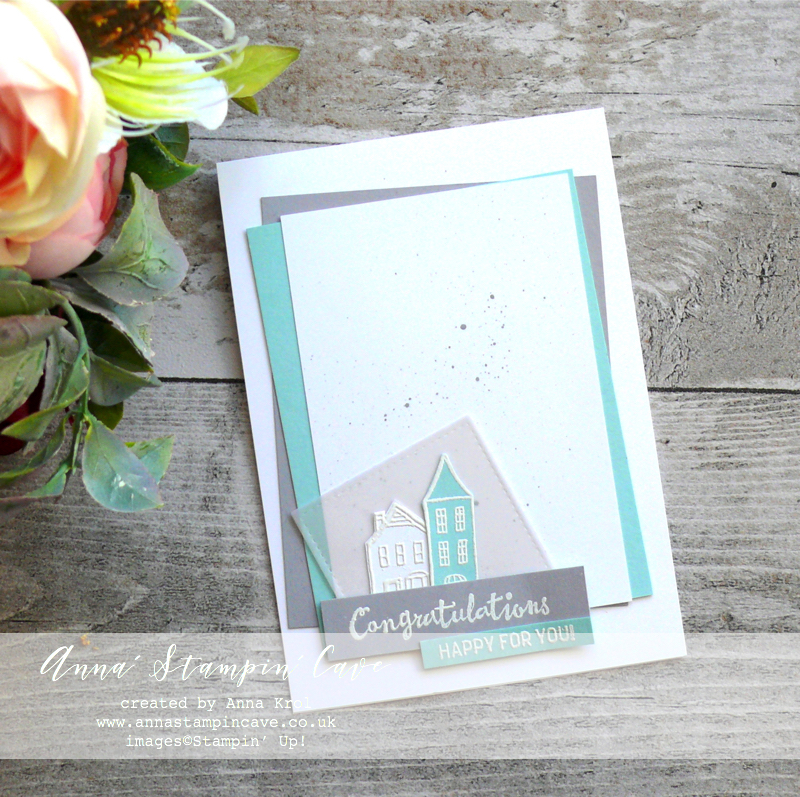
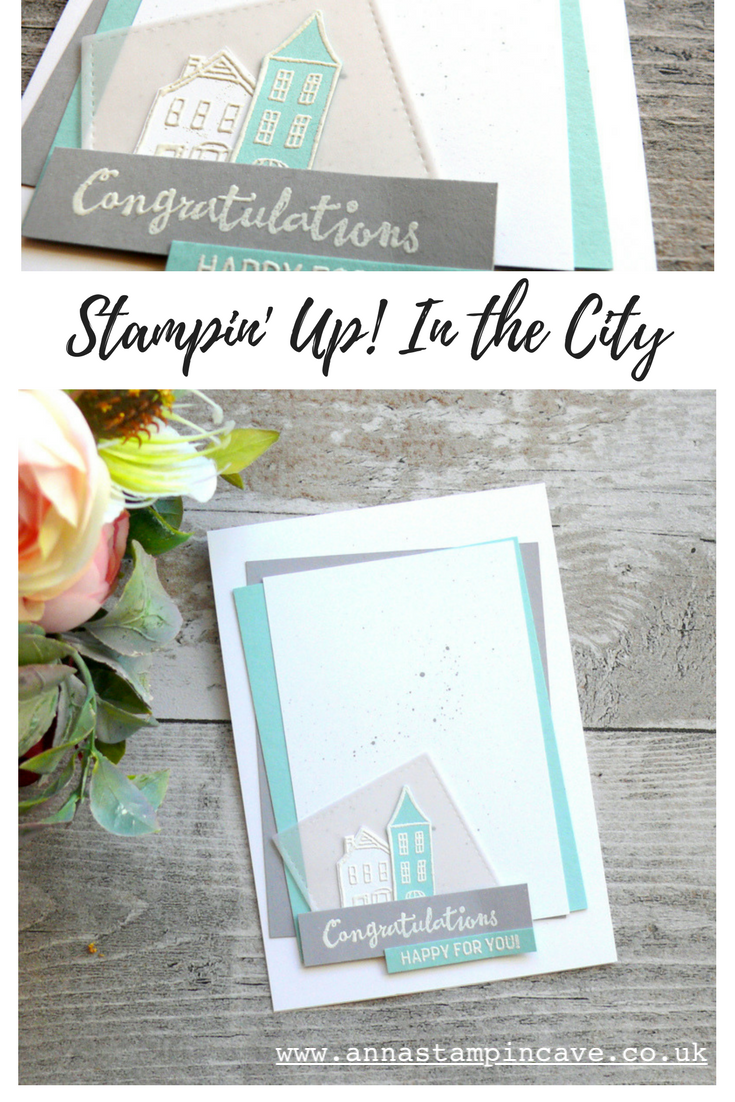
For this first card, I decided to use soft colours. Smoky Slate and Pool Party accompanied by Whisper White make such an elegant combination.

First, I adhered all panels to the card base with snail adhesive. To add some interest to the layout, I assembled them at wonky angles.

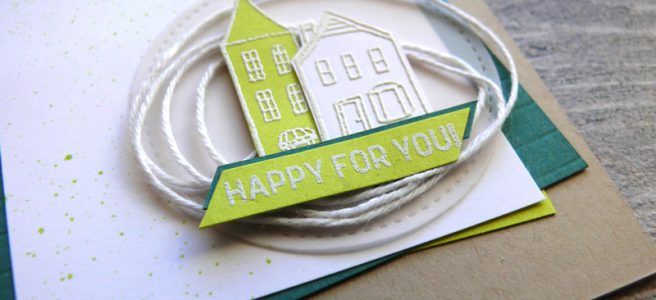
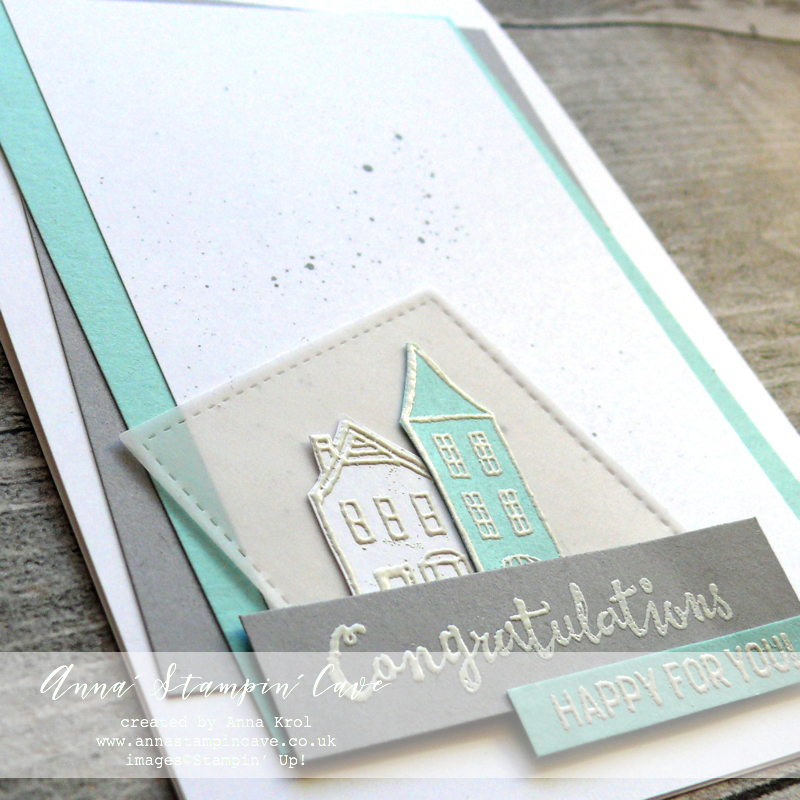
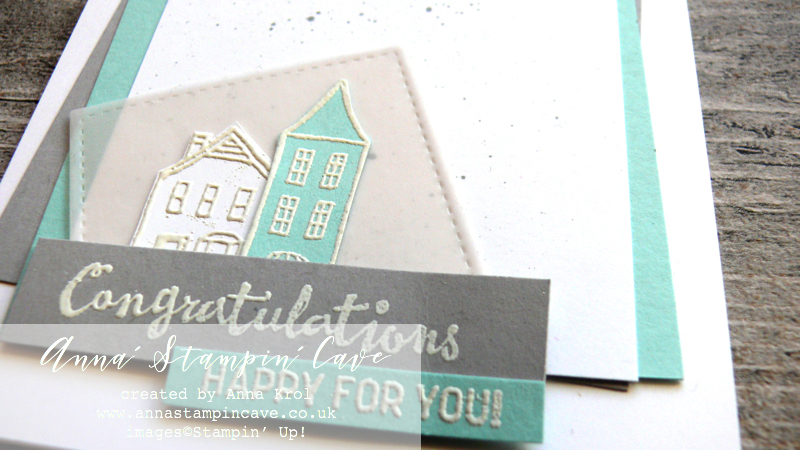
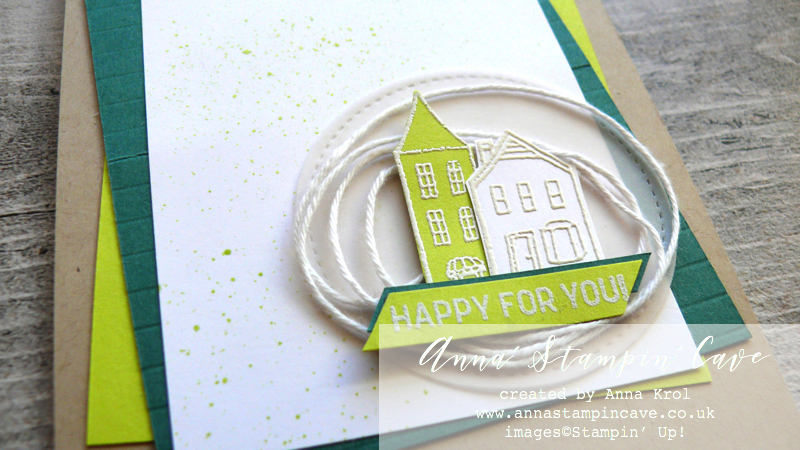
I stamped two tiny houses from In The City Stamp Set in Versamark ink; taller on a scrap of Pool Party cardstock, and lower one on Whisper White; and heat embossed them in white. This set stamp set doesn’t come with coordinating dies, but images are so easy to fussy-cut I did it in no time.

Sentiments are stamped in Versamark on two separate pieces of cardstock: I stamped ‘congratulations’ from Petal Palette Stamp Set on a strip of Smoky Slate cardstock, and ‘happy for you’ from In The City Stamp Set on a smaller strip of Pool Party and heat embossed both in white.

I die-cut a square of vellum using 2nd largest square die from Stitched Shapes Thinlits Dies. While playing with placement, I thought it would look cool if the square was kinda wonky too (to echo panels) so once happy, I adhered my tiny houses briefly in the middle of that’ wonky’ square. Next, I adhered them to the card and added sentiments using dimensionals.

I know this card supposed to be CAS (clean & simple) but too much white hurts my eyes, honest haha. So before I finished assembling it, I took Smoky Slate ink pad and transferred some ink onto an acrylic block. Next, using aqua painter I flicked few tiny ‘splatters’ of ink into the top Whisper White panel.

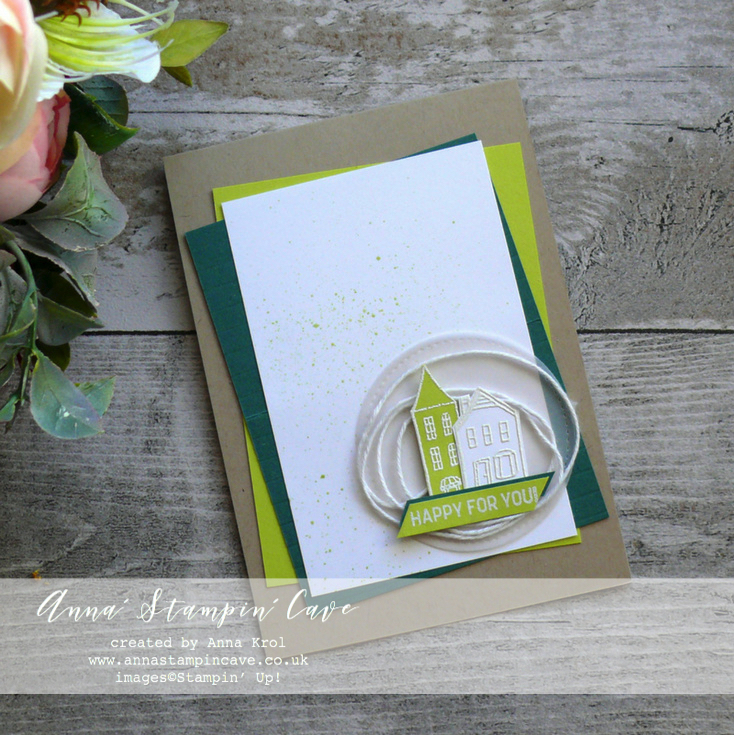
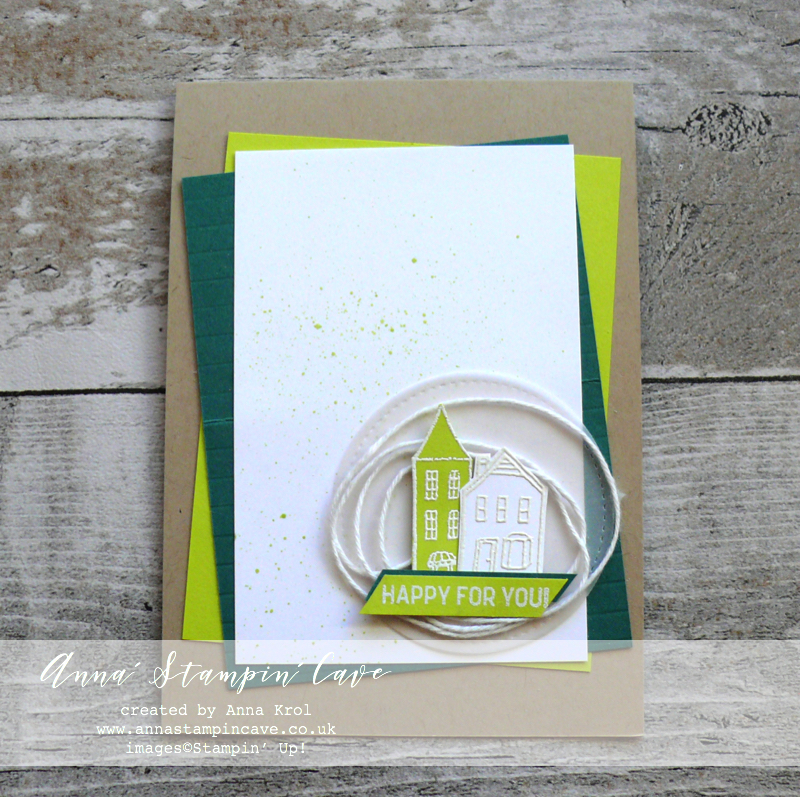
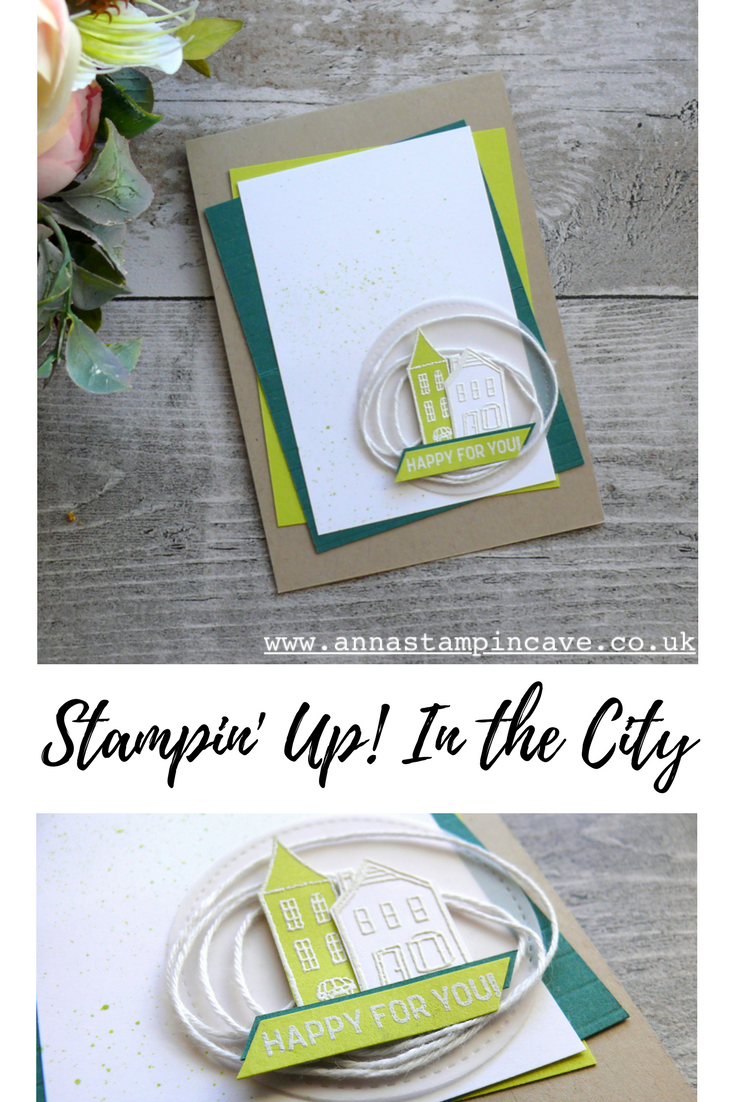
For this second card, I decided to use brighter colours. I chose Tranquil Tide and Lemon Lime Twist for some fun pop of colour. The base is Crumb Cake.

I wanted to add some extra texture and interest to this card. I really like the Simply Stripes Textured Embossing Folder from Spring Summer catalogue. But because I don’t have it yet I decided to imitate the look. I took my Tranquil Tide panel and with a help of Stampin’ Trimmer, I scored it every 1/4″. I love how it looks.

I also added Lemon Lime Twist splatters to Whisper White panel and adhered all the layers to the card base.

To soften up wonky angles I die-cut a circle from vellum using the 2nd largest circle from Stitched Shapes Framelits Dies. I wrapped some Whisper White Baker’s Twine around my fingers to create ‘wreath-like’ shape, and add it in the centre of the vellum circle with a dab of glue (snail adhesive).

I took tiny buildings and simple sentiment strip, put dimensionals to the back and mounted them onto my circle. Dimensionals not just keep all elements together, but they also secure twine from slipping off. I adhered my circle to the card with snail adhesive.

I love how these cards turned out. And to be honest, with a little tweak, they could easily fit any occasion really.

As always, I really want to encourage you to visit the Global Design Project challenge blog to see other beautiful projects from all around the world. Just click on their logo below to visit the website

I’m also adding my cards to Simon Says Stamp – Anything Goes Challenge

If you wish to purchase any of products I have used, simply click the images below to go directly to my online store and don’t forget to enter the hostess code RRMR76JH to receive a gift from me. Just a reminder that In The City Stamp Set is an exclusive Hostess Set, which means you can’t buy it, you can only earn it (choose) free when you spend £150 or more in my online store.

Thank you for stopping by and have a blessed day

Hostess Code for February: RRMR76JH – Use this code in the month of February and receive a gift from me.

Special Notes:1) Make sure you select Anna Krol as your demonstrator;
2) If you select “No Contact” box I do not have access to your name and can’t send you a gift;
3) If your order is £150 or more do not use the code and grab your own Stampin’ Rewards + gift from me

Product List

Aqua Painters

£15.50

Big Shot

£99.00

Pin me

Summary of the project which gives all the views of the card in one photo. I’d love if you pinned and called by on Pinterest xx

Don’t forget to check:
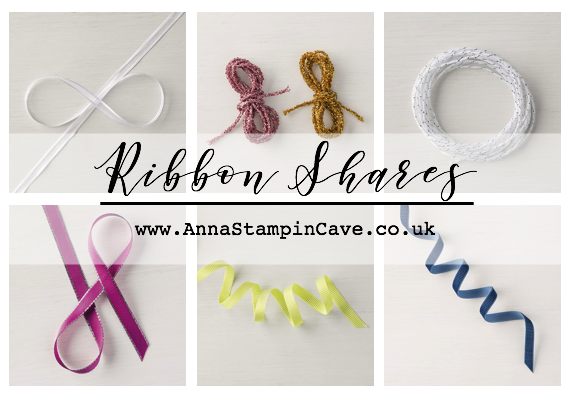
Spring Summer Catalogue Paper & Ribbon Shares. Shares are open to Austria, France, Germany, Netherlands & United Kingdom. 102 sheets of DSP & 2 yards of each type of ribbon from Spring/Summer Catalogue. Click here for more details —>

The New Stampin’ Up! Spring/Summer 2017 Catalogue and Sale-A-Bration are LIVE and it’s AMAZING! For every 60 €/£45, you spend either from Spring Summer Catalogue or Annual Catalogue, you will get to choose one FREE  level 1 product from SAB brochure! If you spend 120 €/£90, you get one FREE level 2 product, OR, you can choose two level 1 items. If you spend 180 €/£135, you have the option to choose three level 1 items or one level 1 item and one level 2 item. Click here for more details —>

Ever wondered what it’s like to join Stampin’ Up!’s community? I may have few answers for you. Click here for more details –>
Cyber Monday – FREE SHIPPING One Day Only!

CYBER MONDAY! Stampin’ Up! Free Shipping One Day Only!

Must love 27 November this year! Not only on Monday, 27 November, shipping is FREE on all Stampin’ Up! orders, but it’s also my birthday!

With free shipping, you get a great deal on any product!

Use this great offer to check everything off your wish list, stock up on paper, embellishments or adhesives. Or why not get one of our All-Inclusive Kits to give at Christmas time to your family or friends: from card kits to trendy planner – we have something for everyone.

Be Merry Kit

£17.75

Free shipping runs from 26 November 11:00 p.m.(GMT) to 27 November 10:59 p.m.(GMT)

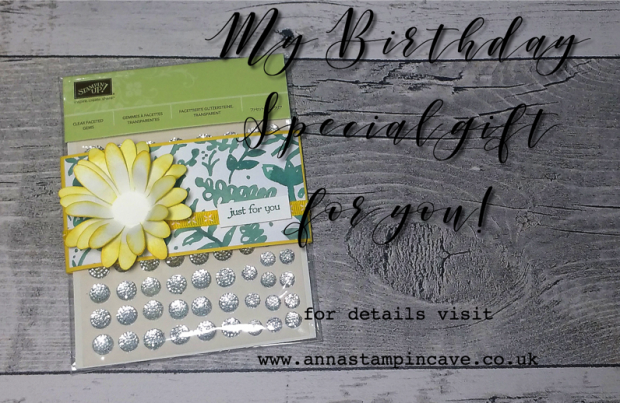
And because it’s my BIRTHDAY I’m offering this lovely pack of Clear Faceted Gems with a qualified order…see details below!

Place a minimum order of £45 (excl p&p) by 30th November on my Stampin’ Up! website using Hostess Code: QFGH469H and receive a pack of Clear Faceted Gems + New Spring Summer Catalogue 2018 with Sale-a-bration Brochure


   *  This offer is with Stampin’ Up! Demonstrator, Anna Krol and you’ll receive your gift and catalogues in approximately two weeks from placing an order.

Stampin’ Up! Daisy Delight Sneak Peek

Anna’ Stampin’ Cave – Stampin’ Up! Daisy Delight Sneak Peek

Hello, everyone! What a beautiful day we had today down here in Coventry, Warwickshire. Even though I can’t fully enjoy the weather (yet) I managed to spend few minutes in the garden. And oh, boy, what a wonderful feeling it was.

Today I’m back with a lovely card I created for this week’s sketch over at Global Design Project Challenge Blog. I truly enjoy their challenges as each week they have a new challenge based on either a colour combination, a sketch, theme and CASE-ing the Designer. Lot’s of fun!

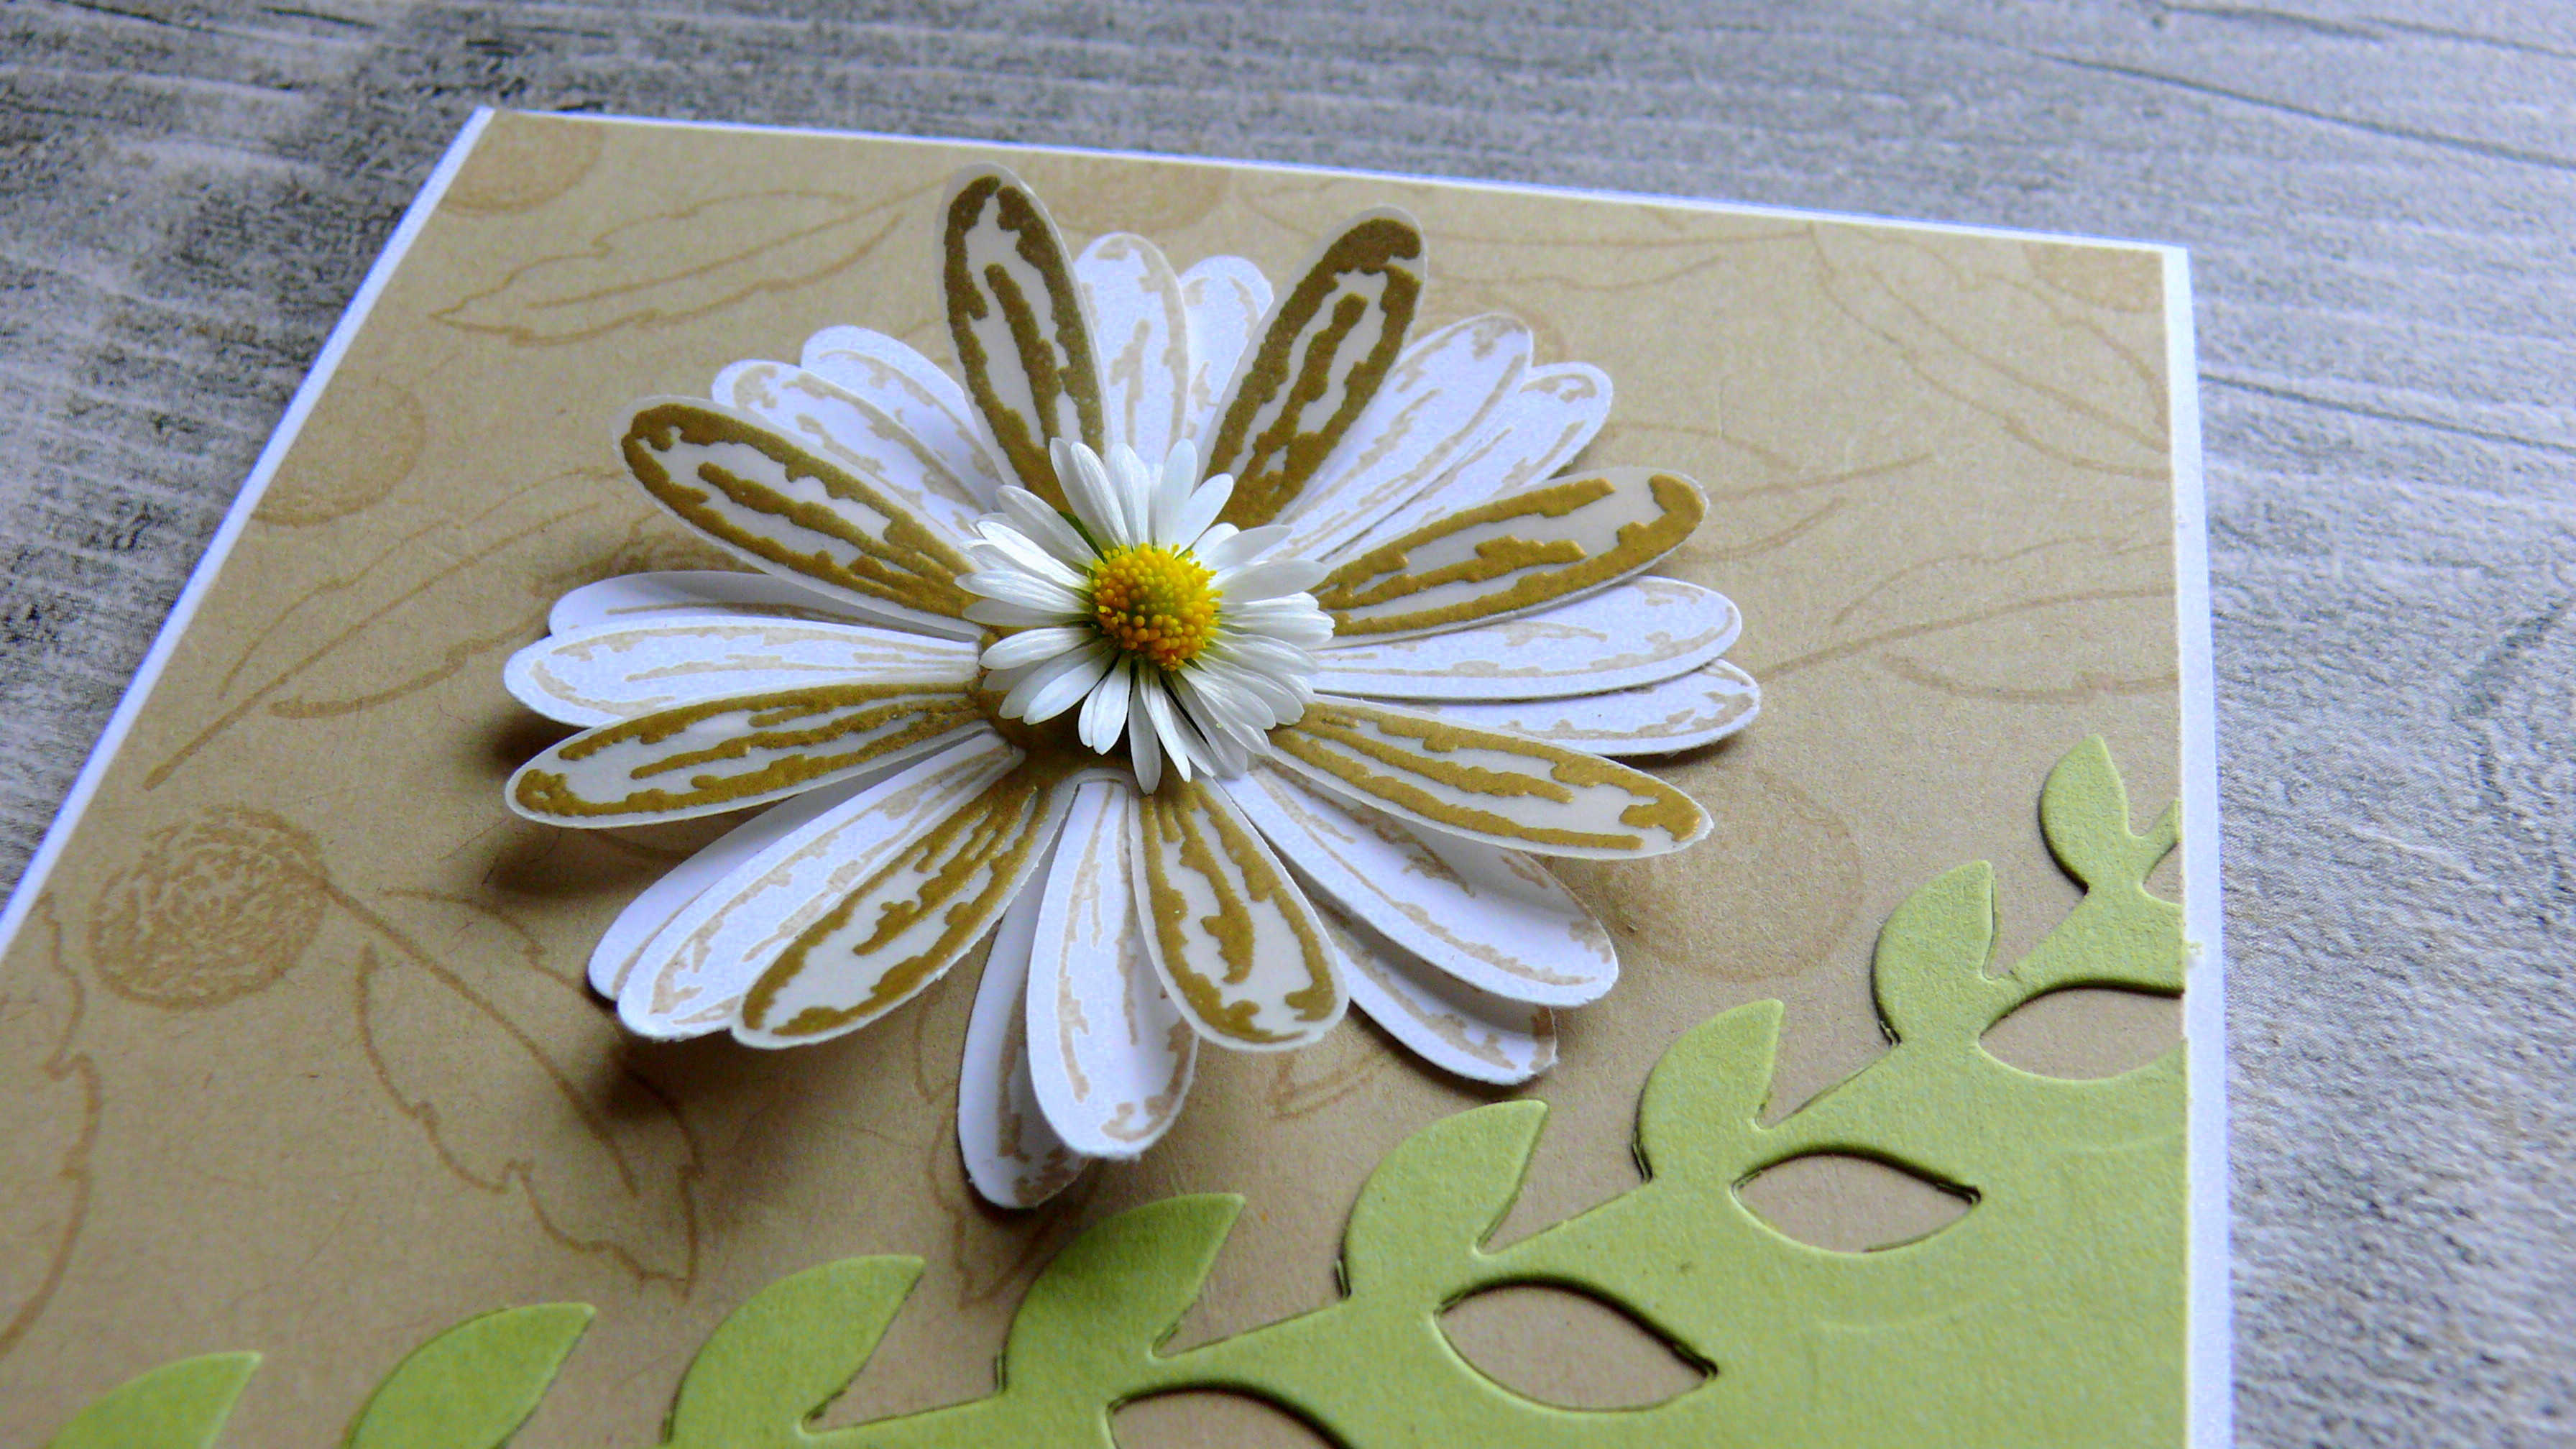
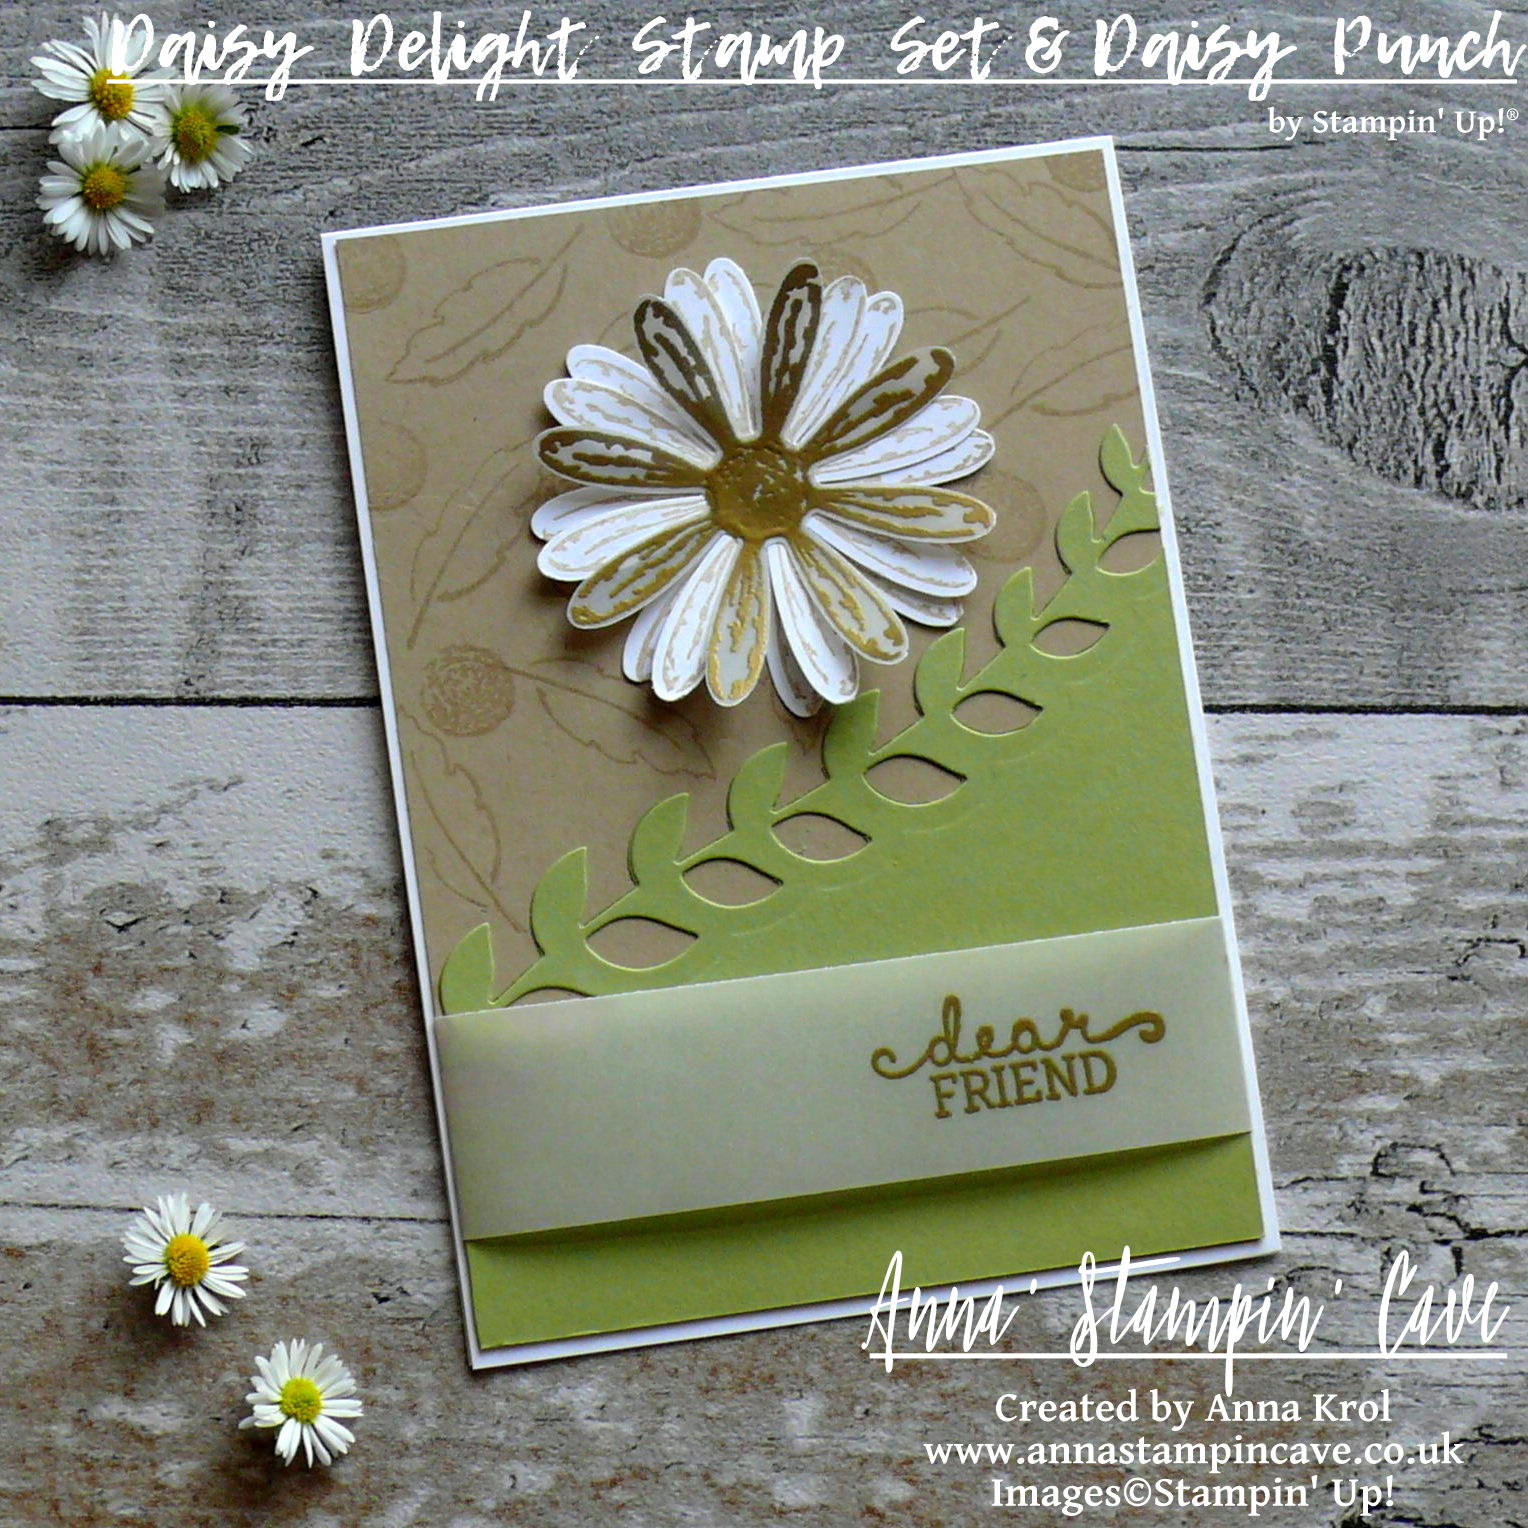
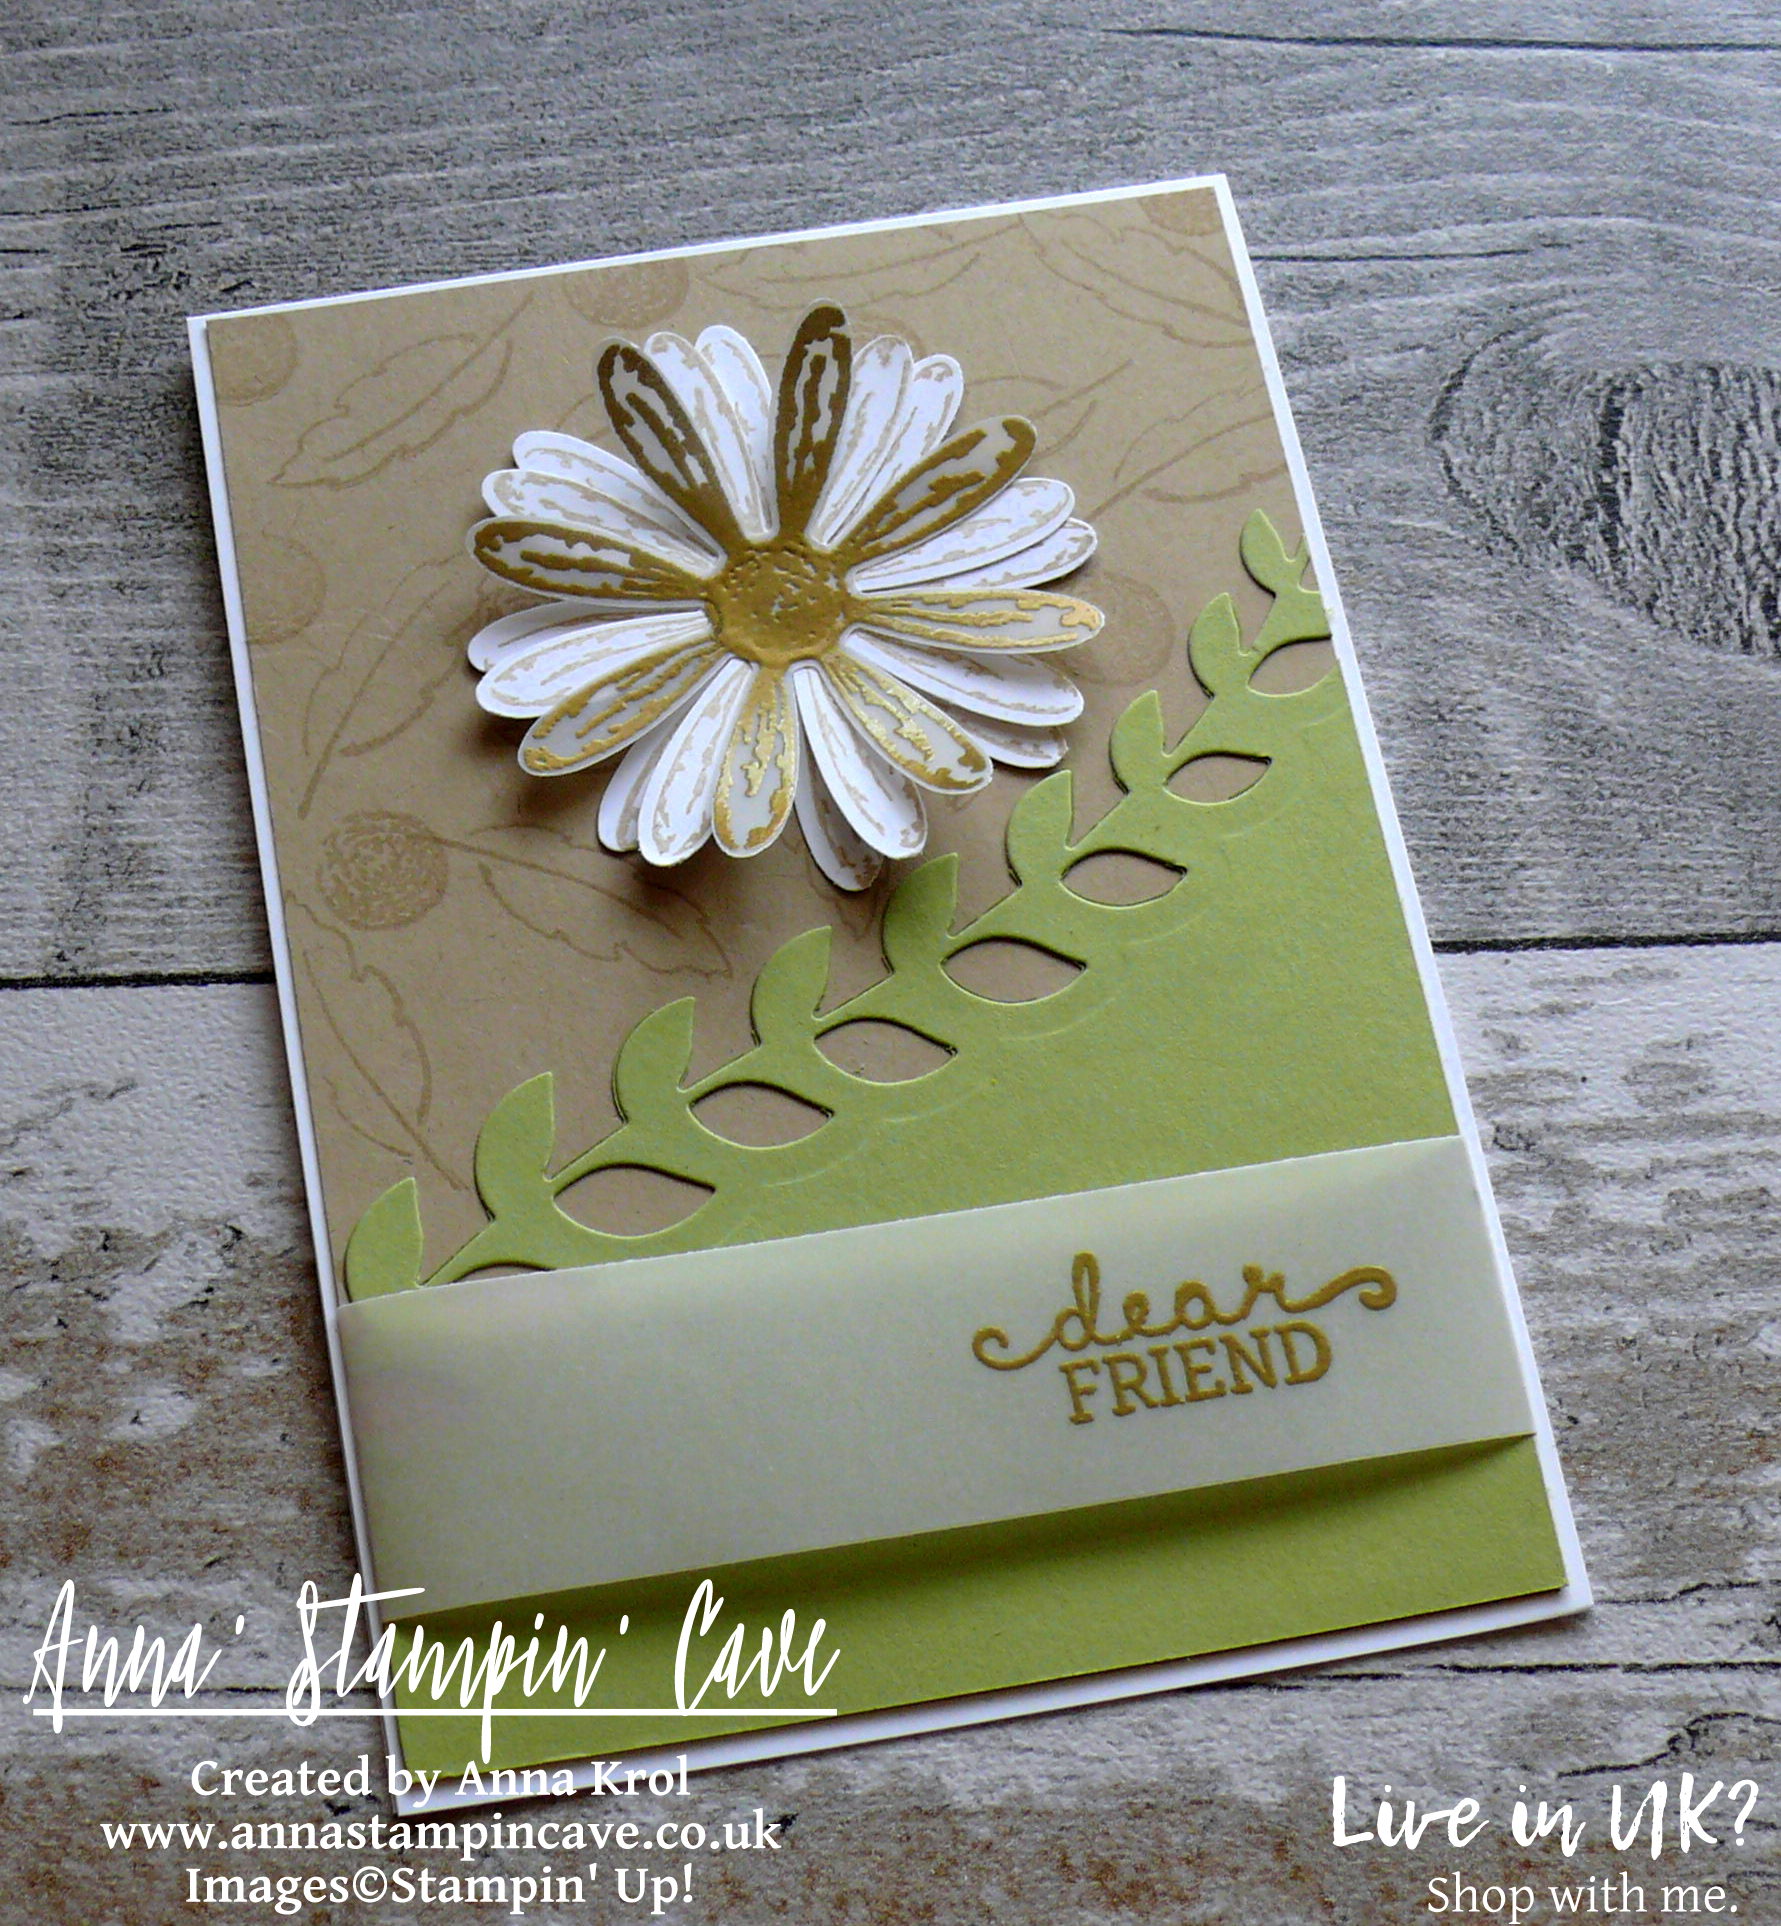
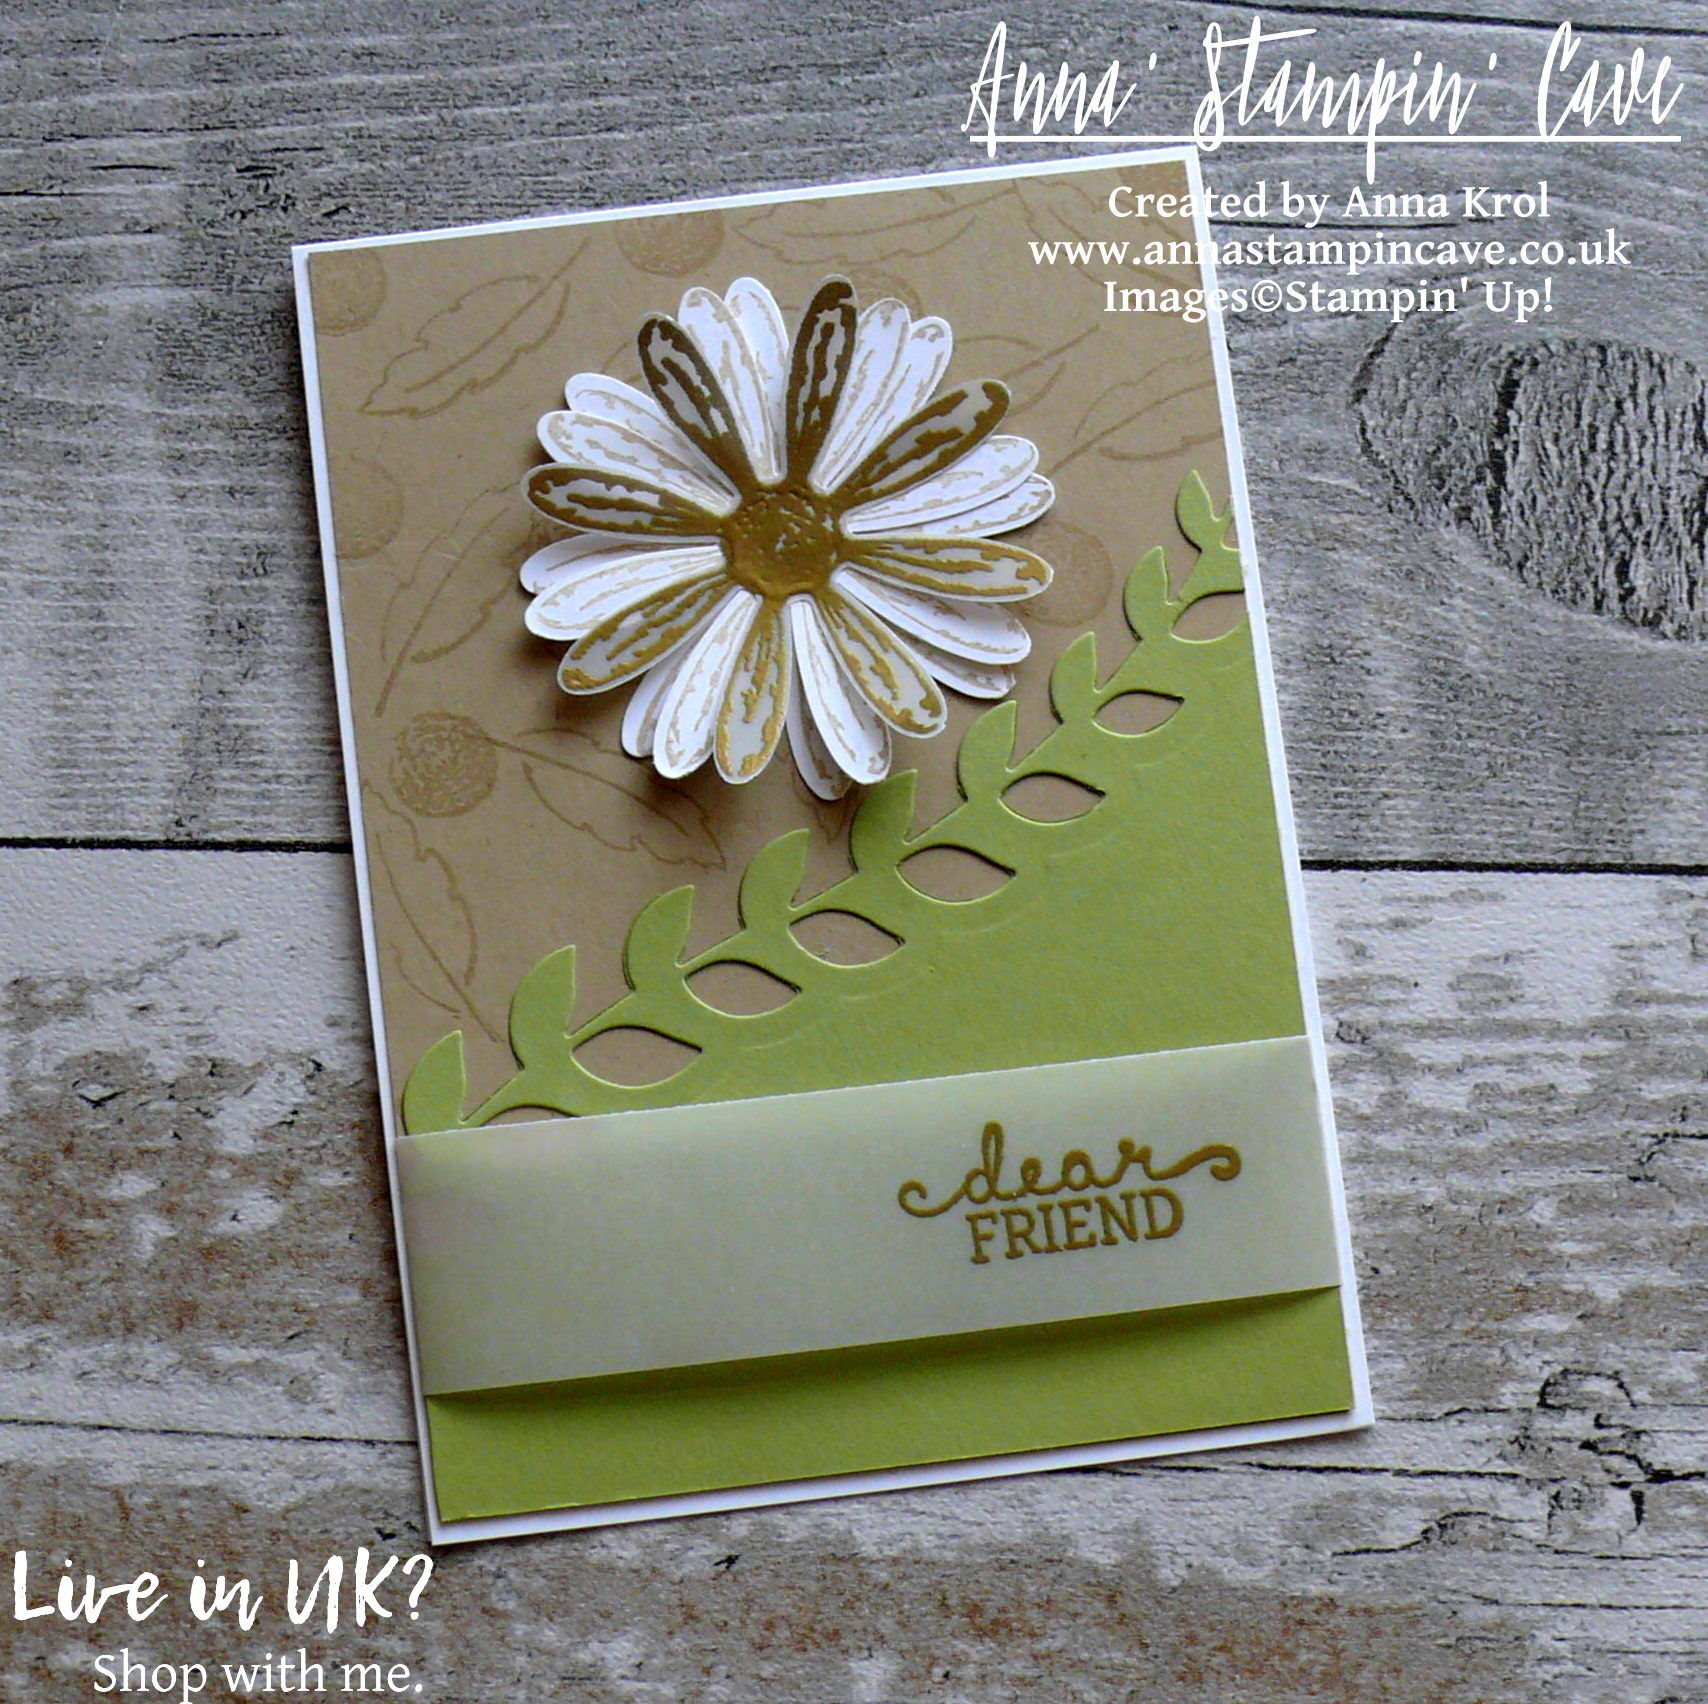
For my card today I decided to use some old favourites, as well as a sneak peek of new, coming soon bundle: Daisy Delight Stamp Set and coordinating Daisy Punch.

Dear Friend card dimensions:

  • Whisper White cardstock: 11-6/8″ x 4-1/8″ scored in half at 5-7/8″ (29.7 x 10.5 cm scored in half at 14.8 cm)
  • Crumb Cake cardstock: 5-6/8″ x 4″ (14.6 cm x 10.2 cm)
  • Pear Pizzazz cardstock: 5″ x 4″ (12.6 cm x 10.2 cm)
  • White Vellum cardstock: 1-1/8″ x 5-1/2″ strip
  • White Vellum and Whisper White cardstock scraps to stamp and punch daisies

First, I created the bottom half of my panel using the border die from retiring Botanical Builder Framelits Dies. I die-cut it at a slight angle, so it creates a diagonal ‘line’, and adhered it to the Crumb Cake panel. I also randomly stamped a couple of images from Daisy Delight Stamp Set: centre of the flowers and outline of the leaves, on the Crumb Cake panel.

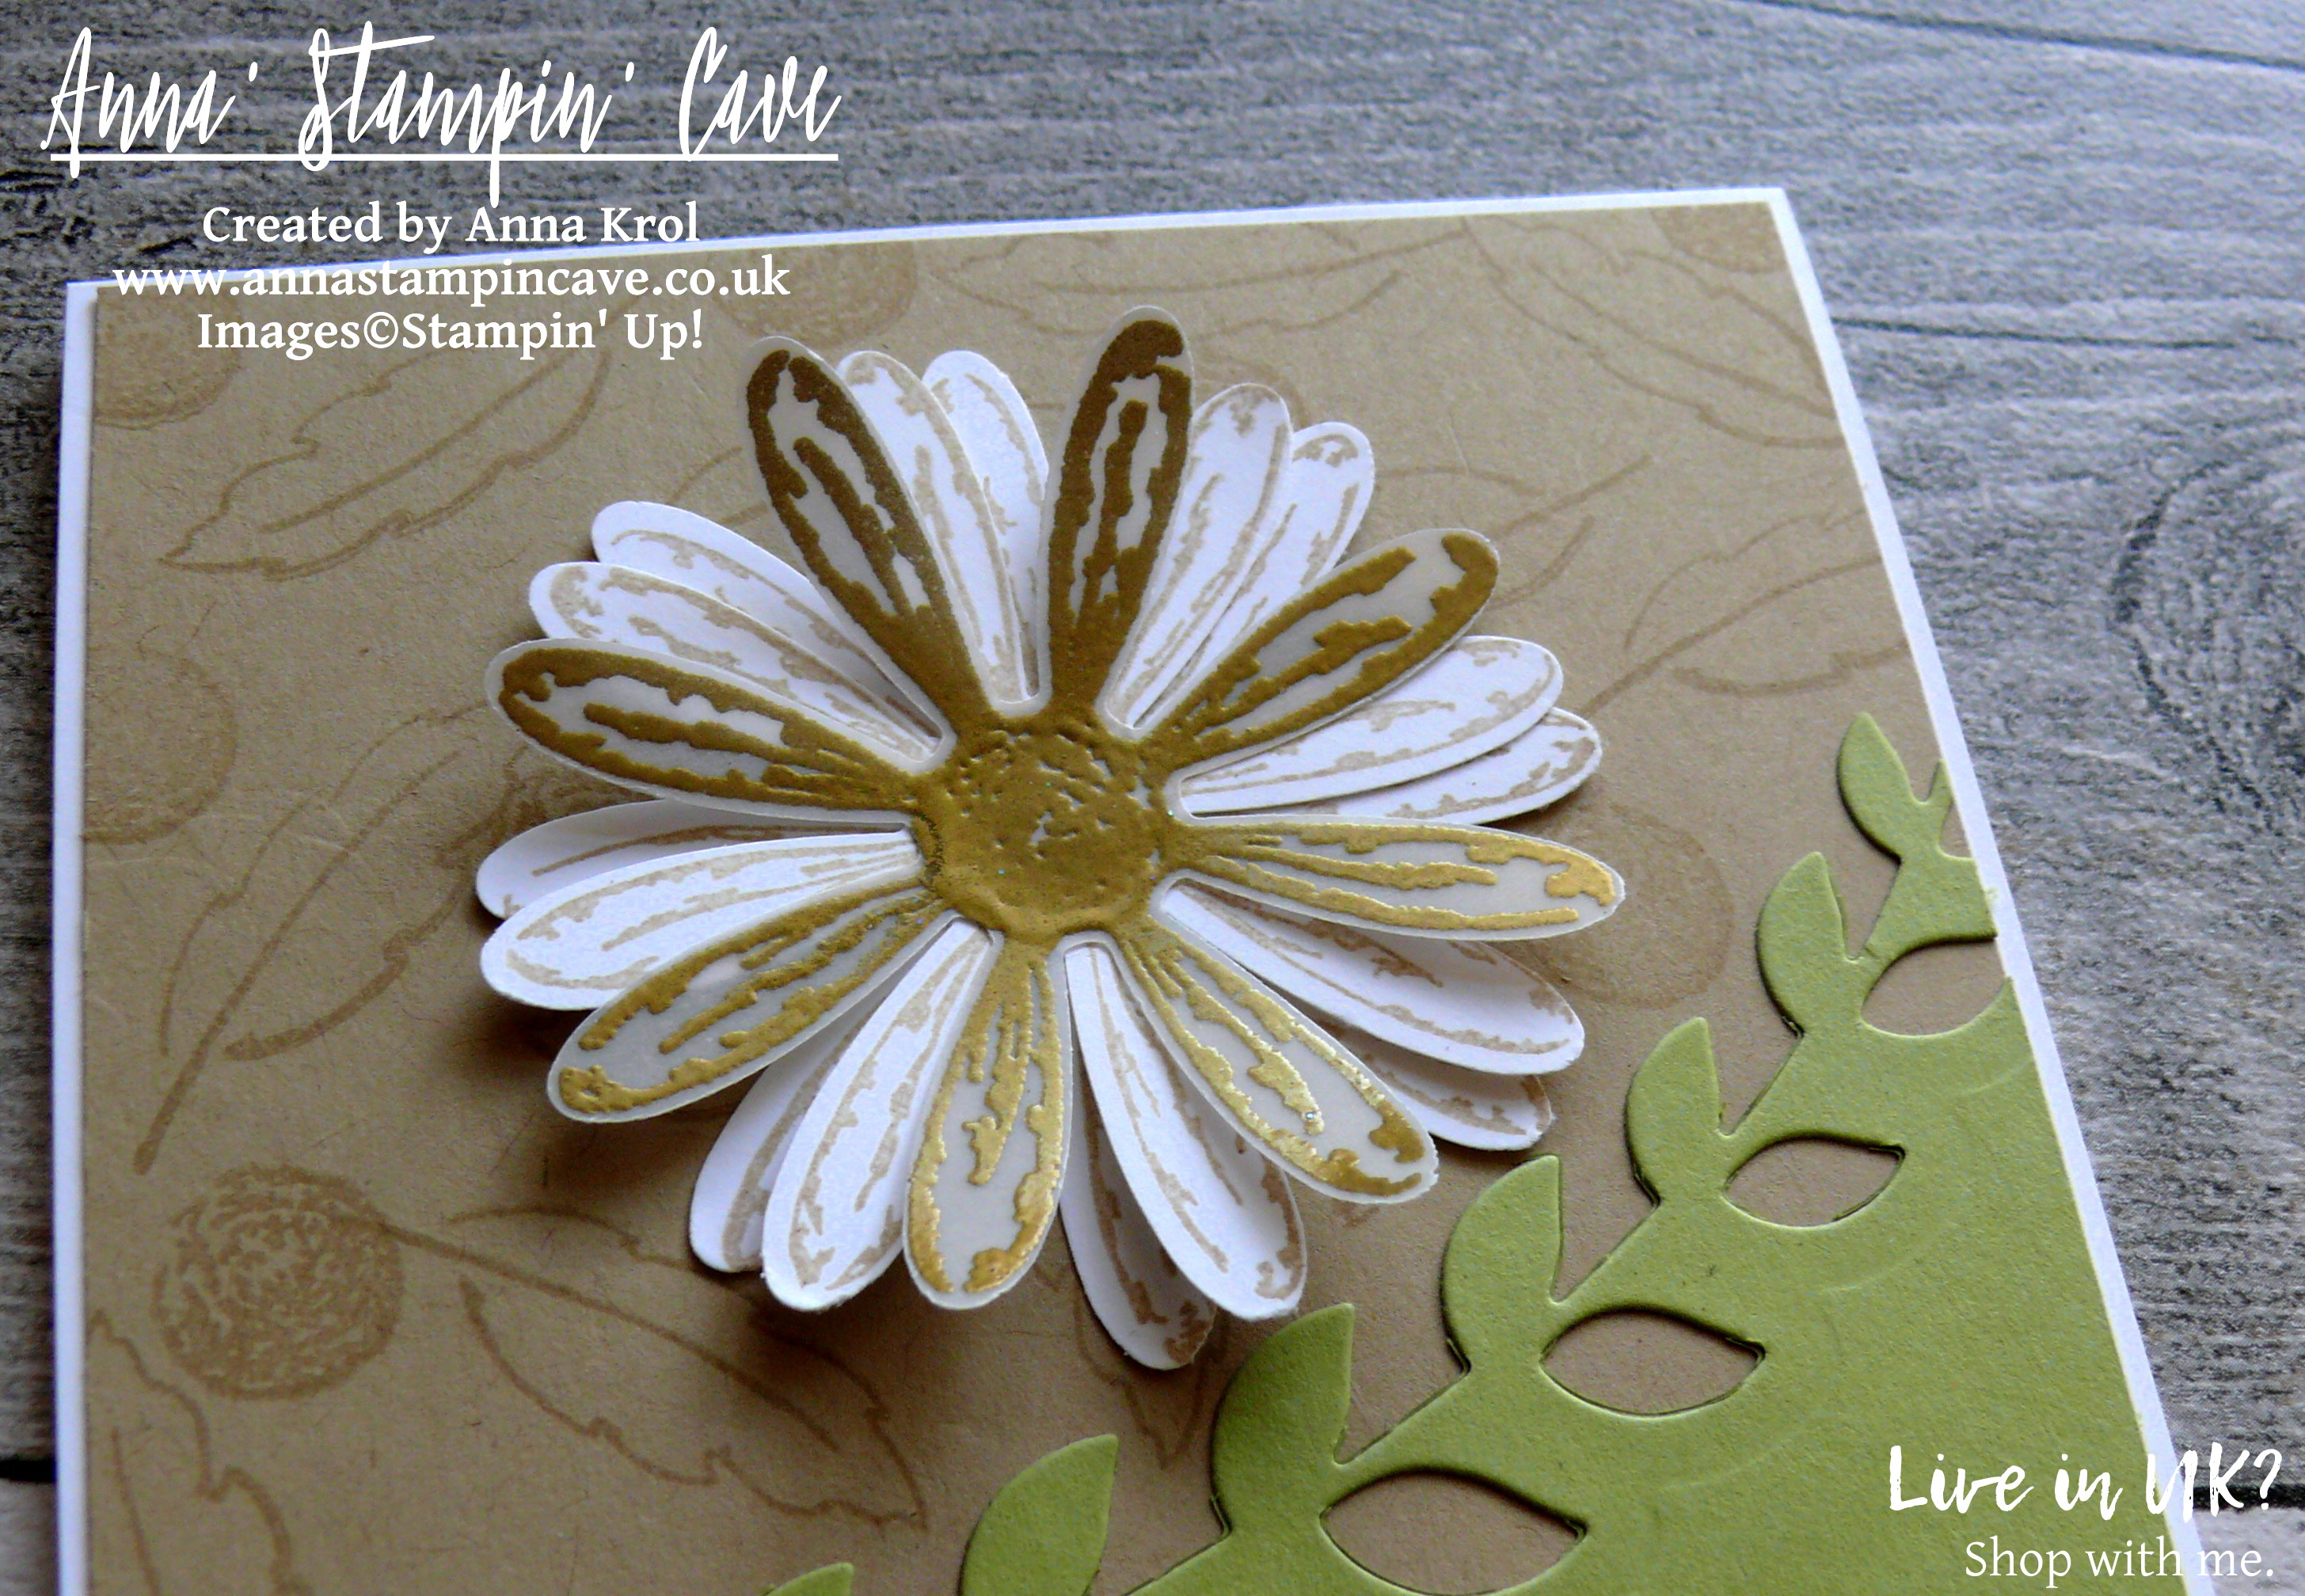
Next, I took a Crumb Cake ink pad and a scrap of Whisper White cardstock. I stamped two flowers from Daisy Delight Stamp Set and punched them out using coordinating Daisy Punch.

I also stamped one daisy and daisy centre onto vellum with Versamark ink, heat embossed it in gold and punched out as well. I layered all flowers together with vellum as a top layer, offsetting them slightly for extra dimension. I adhered them to my panel, just above Pear Pizzazz piece, using liquid adhesive.

The sentiment comes from Birthday Blooms Stamp Set and I heat embossed it in gold on a strip of White Vellum. Because my vellum strip was wider than the Crumb Cake piece I was able to adhere the ends to the back of my panel. This way I didn’t have to worry how to hide the adhesive. I mounted my panel to the card base.

And that’s my card for today. I hope you like it. I also hope you’ve enjoyed seeing a sneak peek of Daisy Delight Stamp Set and Daisy Punch. These both will be available in my shop on 1 June 2017. But if you don’t want to wait, and want to be able to order new products earlier, it’s as easy as 1…2…3… -> simply join the fun and order your Starter Kit. If you have more questions why don’t you drop me a message?

As always, I really want to encourage you to visit the Global Design Project challenge blog to see other beautiful projects from all around the world. Just click on their logo below to visit the website

If you wish to purchase any of products I have used, simply click the images below to go directly to my online store and don’t forget to enter the hostess code for the month of May SS3AK62K to receive a gift from me.

Just a reminder: Botanical Builder Framelits Dies are still available at a fraction of a price! But only until the end of May. After that date, you won’t be able to purchase them. So if you waited for a better moment to buy them – this moment is now.

Thank you for stopping by and have a blessed day,


Don’t forget to check:

Stampin’ Up! Spring Summer & Annual Catalogue 2016 2017 Retiring List

Anna' Stampin' Cave Stampin' Up! Retiring Products 2017

It’s that time of the year again, when Stampin’ Up! is getting ready to retire stamps and accessories from both the Annual and Spring Summer catalogues. As sad as it is to see these products go, there’s still time for you to get them before they’re gone. Retiring products will only be available until 31 May, or while supplies last. So if there’s something from retiring products on your wishlist, don’t wait until last day – once they’re gone, they’re gone. And they are selling fast! Click here for more details ->