Global Design Project #081 Colour Challenge – Watercolour Birthday Blooms

Anna’ Stampin’ Cave – Global Design Project #081 Colour Challenge – Watercolour Birthday Blooms

GDP81

Hello and welcome! Today I decided to play along with Global Design Project and their Colour Challenge. I love that one of the colours can be our own choice.

I had couple of ideas which colour to use, but because I couldn’t decide which one to choose I created two cards instead of one 🙂

Anna' Stampin' Cave_Stampin' Up! Birthday Blooms Stamp Set_Watercolour Card_Basic Grey Night Of Navy

Basic Grey/Night of Navy ‘Friend To Friend’ card dimensions:

  • Basic Grey cardstock: 8-1/4″ x 5-7/8″ scored in half at 4-1/8″ (21cm x 14.8 cm scored in half at 10.5 cm)
  • Watercolour Paper: 3-6/8″ x 3″  (9.5 cm x 7.6 cm)
  • Regals Designer Series Paper Paper Stack: 3-5/8″ x 3/8″ (9.2 cm x 1 cm) strip of diagonal stripes design paper in Night of Navy
  • Night of Navy Solid Baker’s Twine: approx 33″ (84 cm) + strip of Basic Grey cardstock to secure/hide the twine ends inside the card

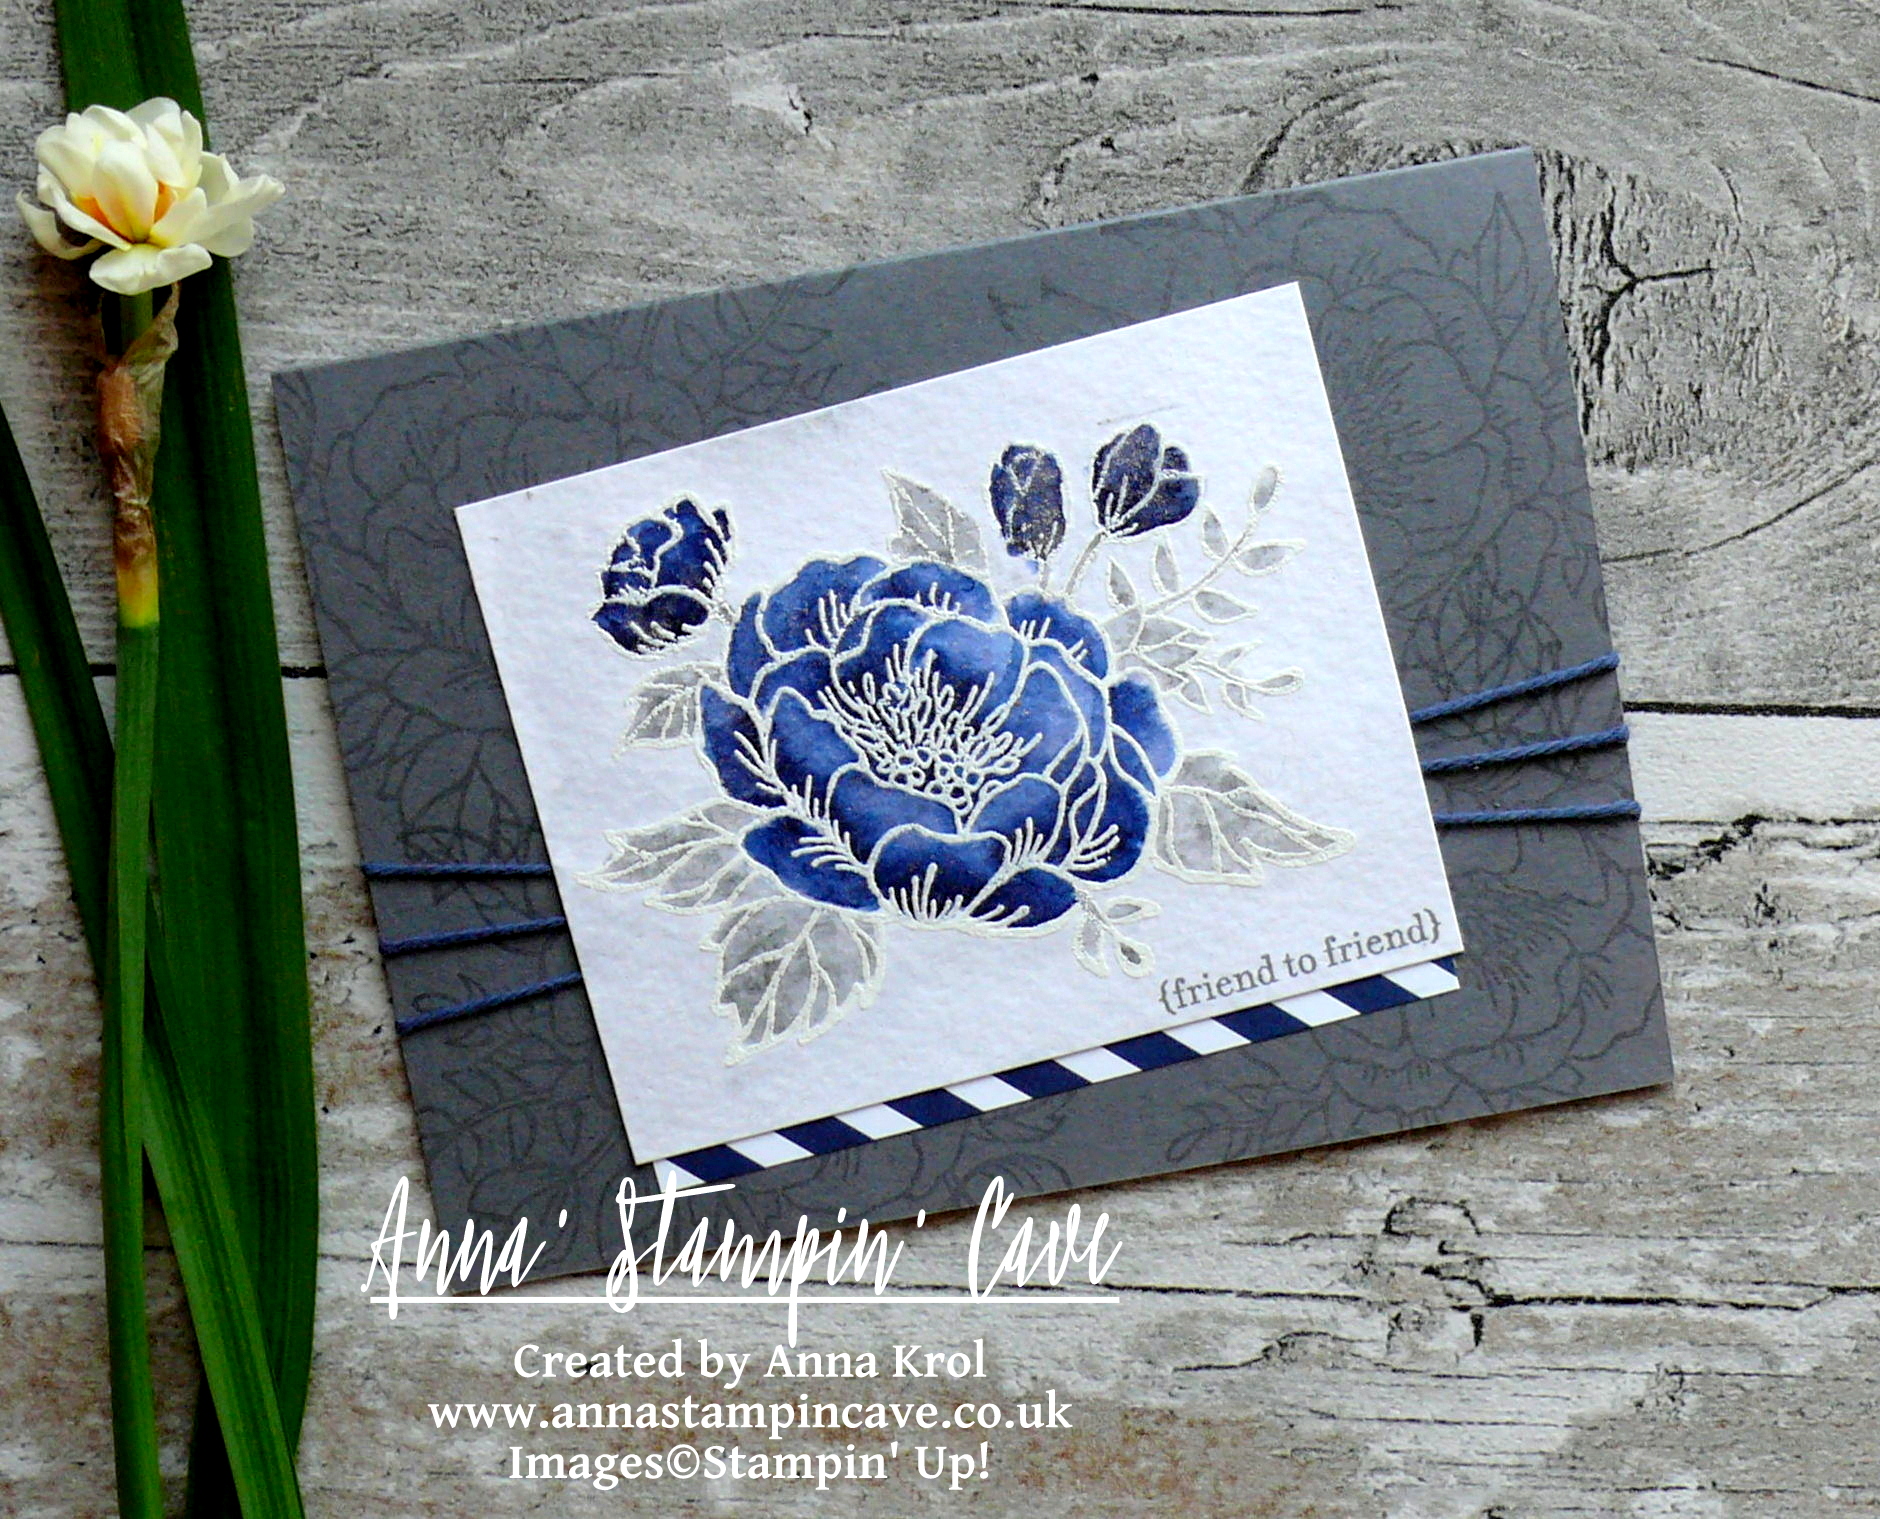
For this first card, I decided to use rather classic Night of Navy with Basic Grey colour combination.

Anna' Stampin' Cave_Stampin' Up! Birthday Blooms Stamp Set_Watercolour Card_Basic Grey Night Of Navy 2.JPG

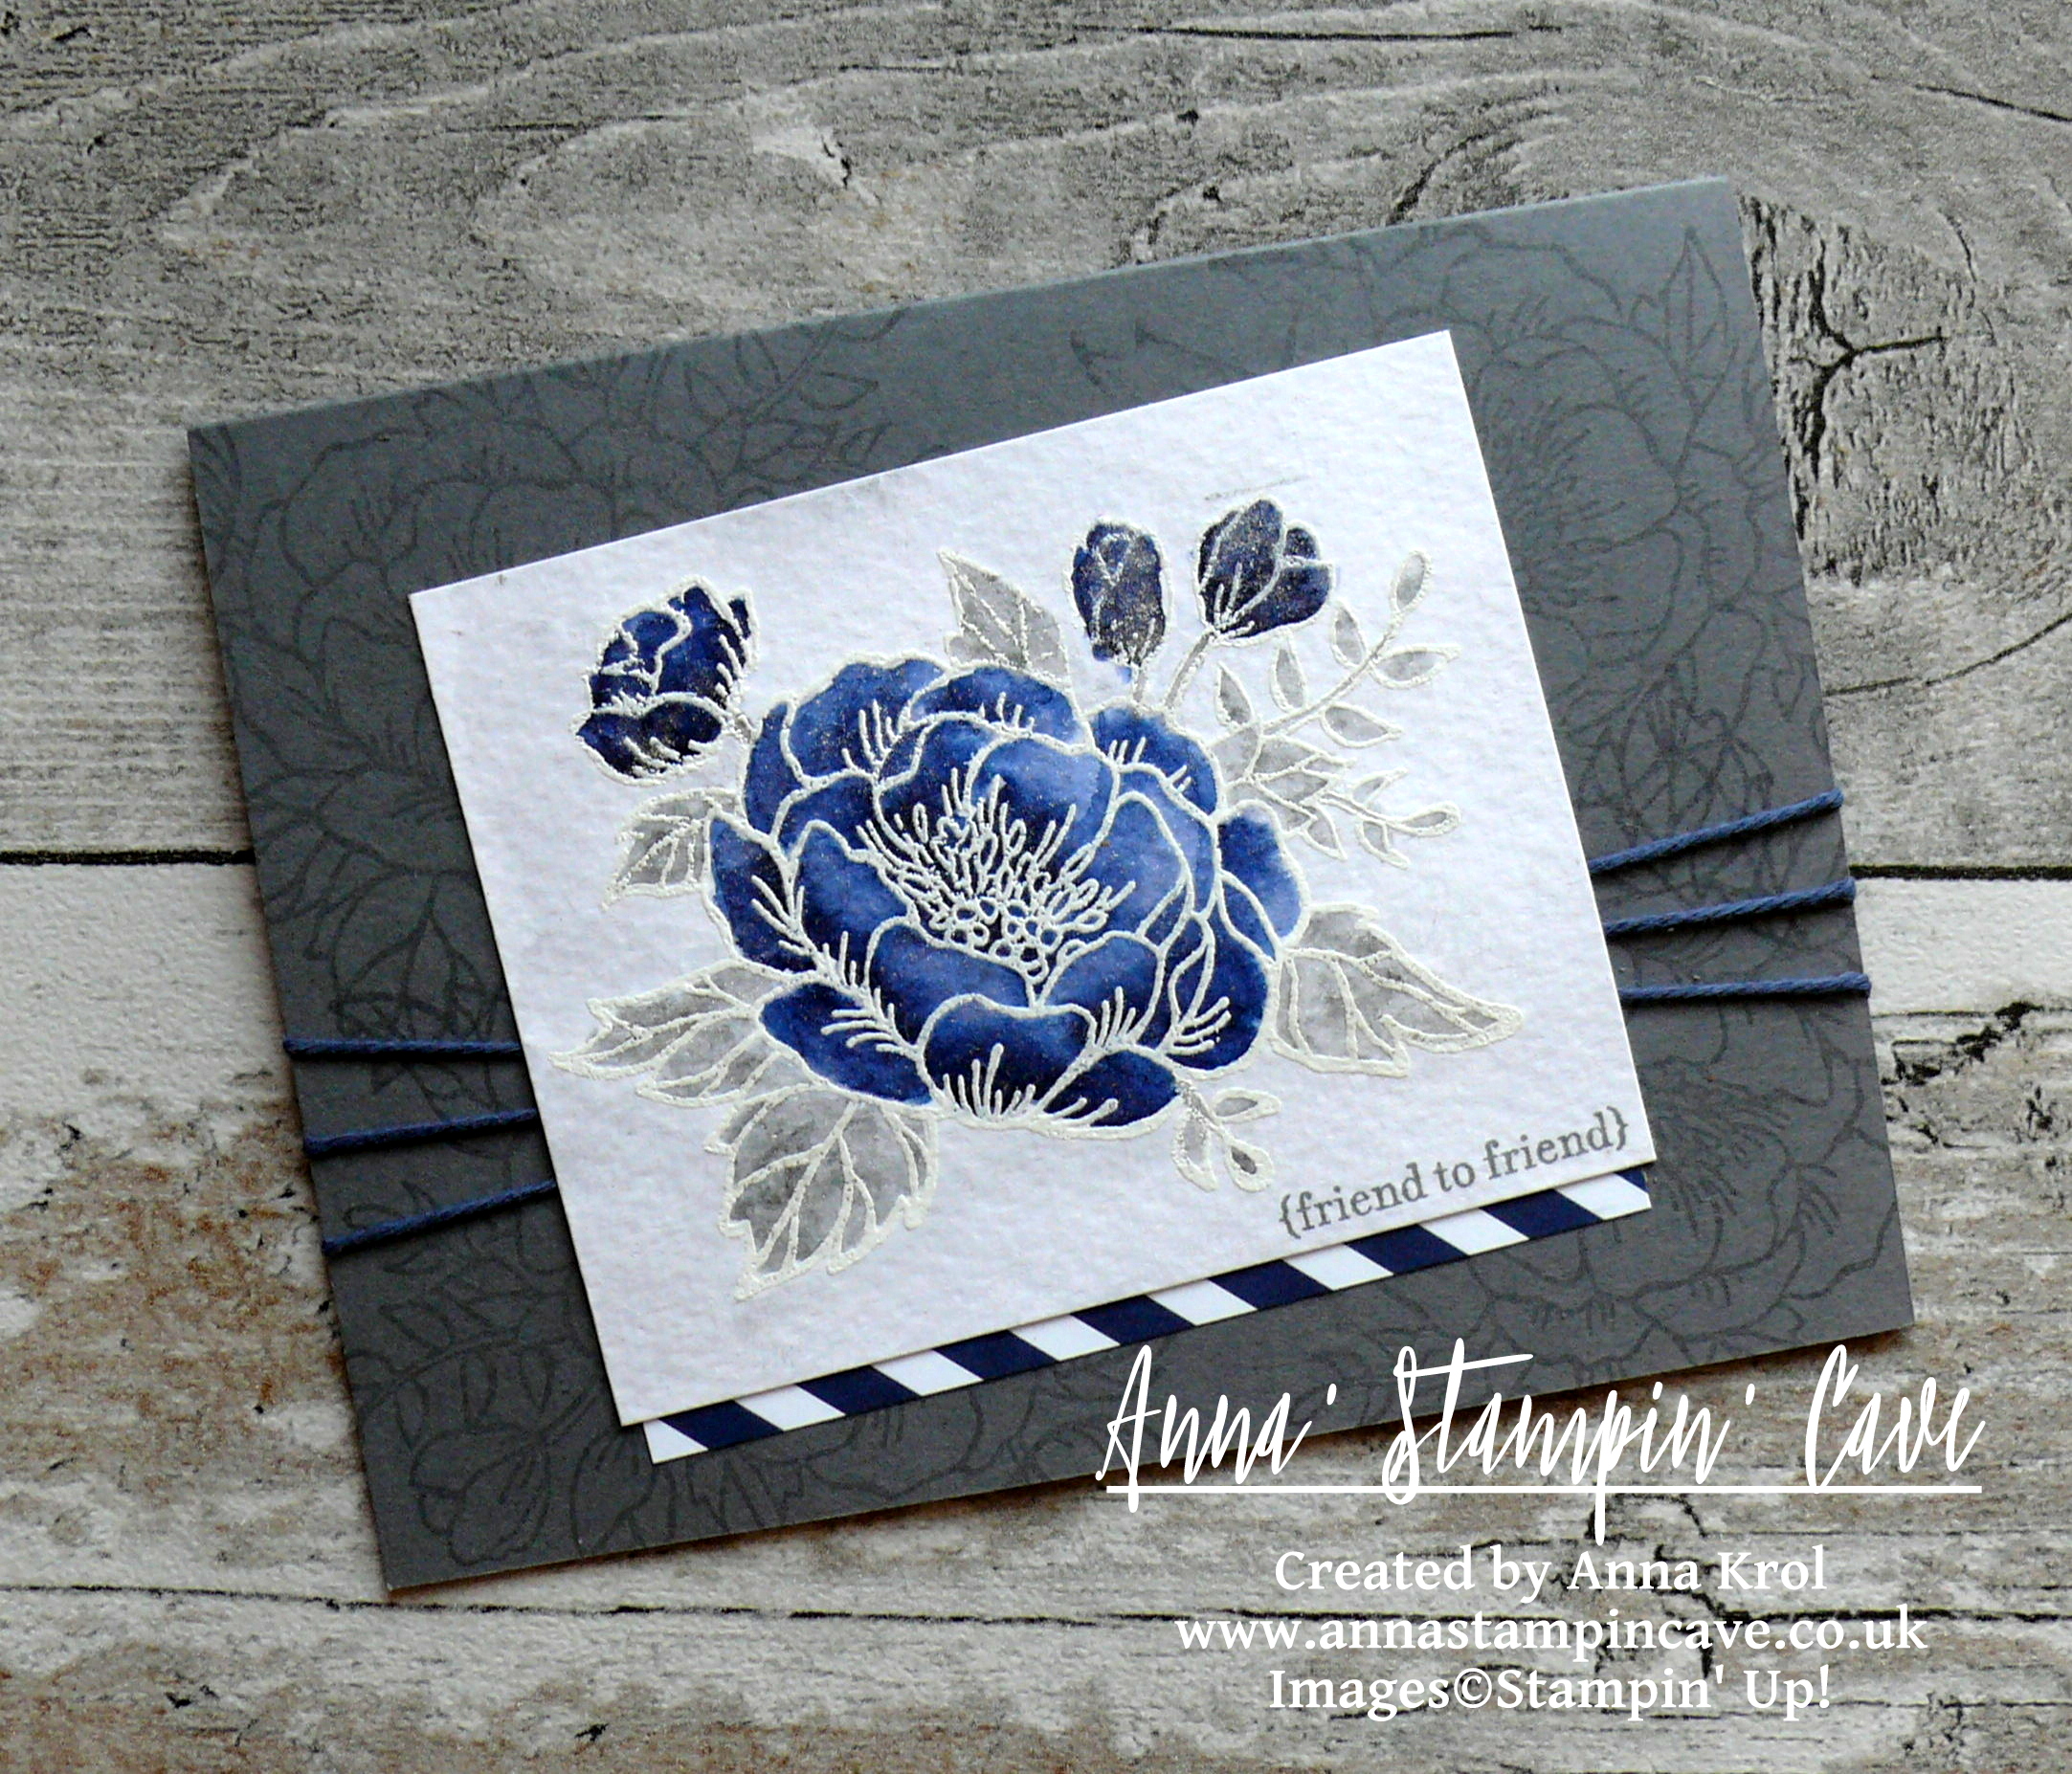
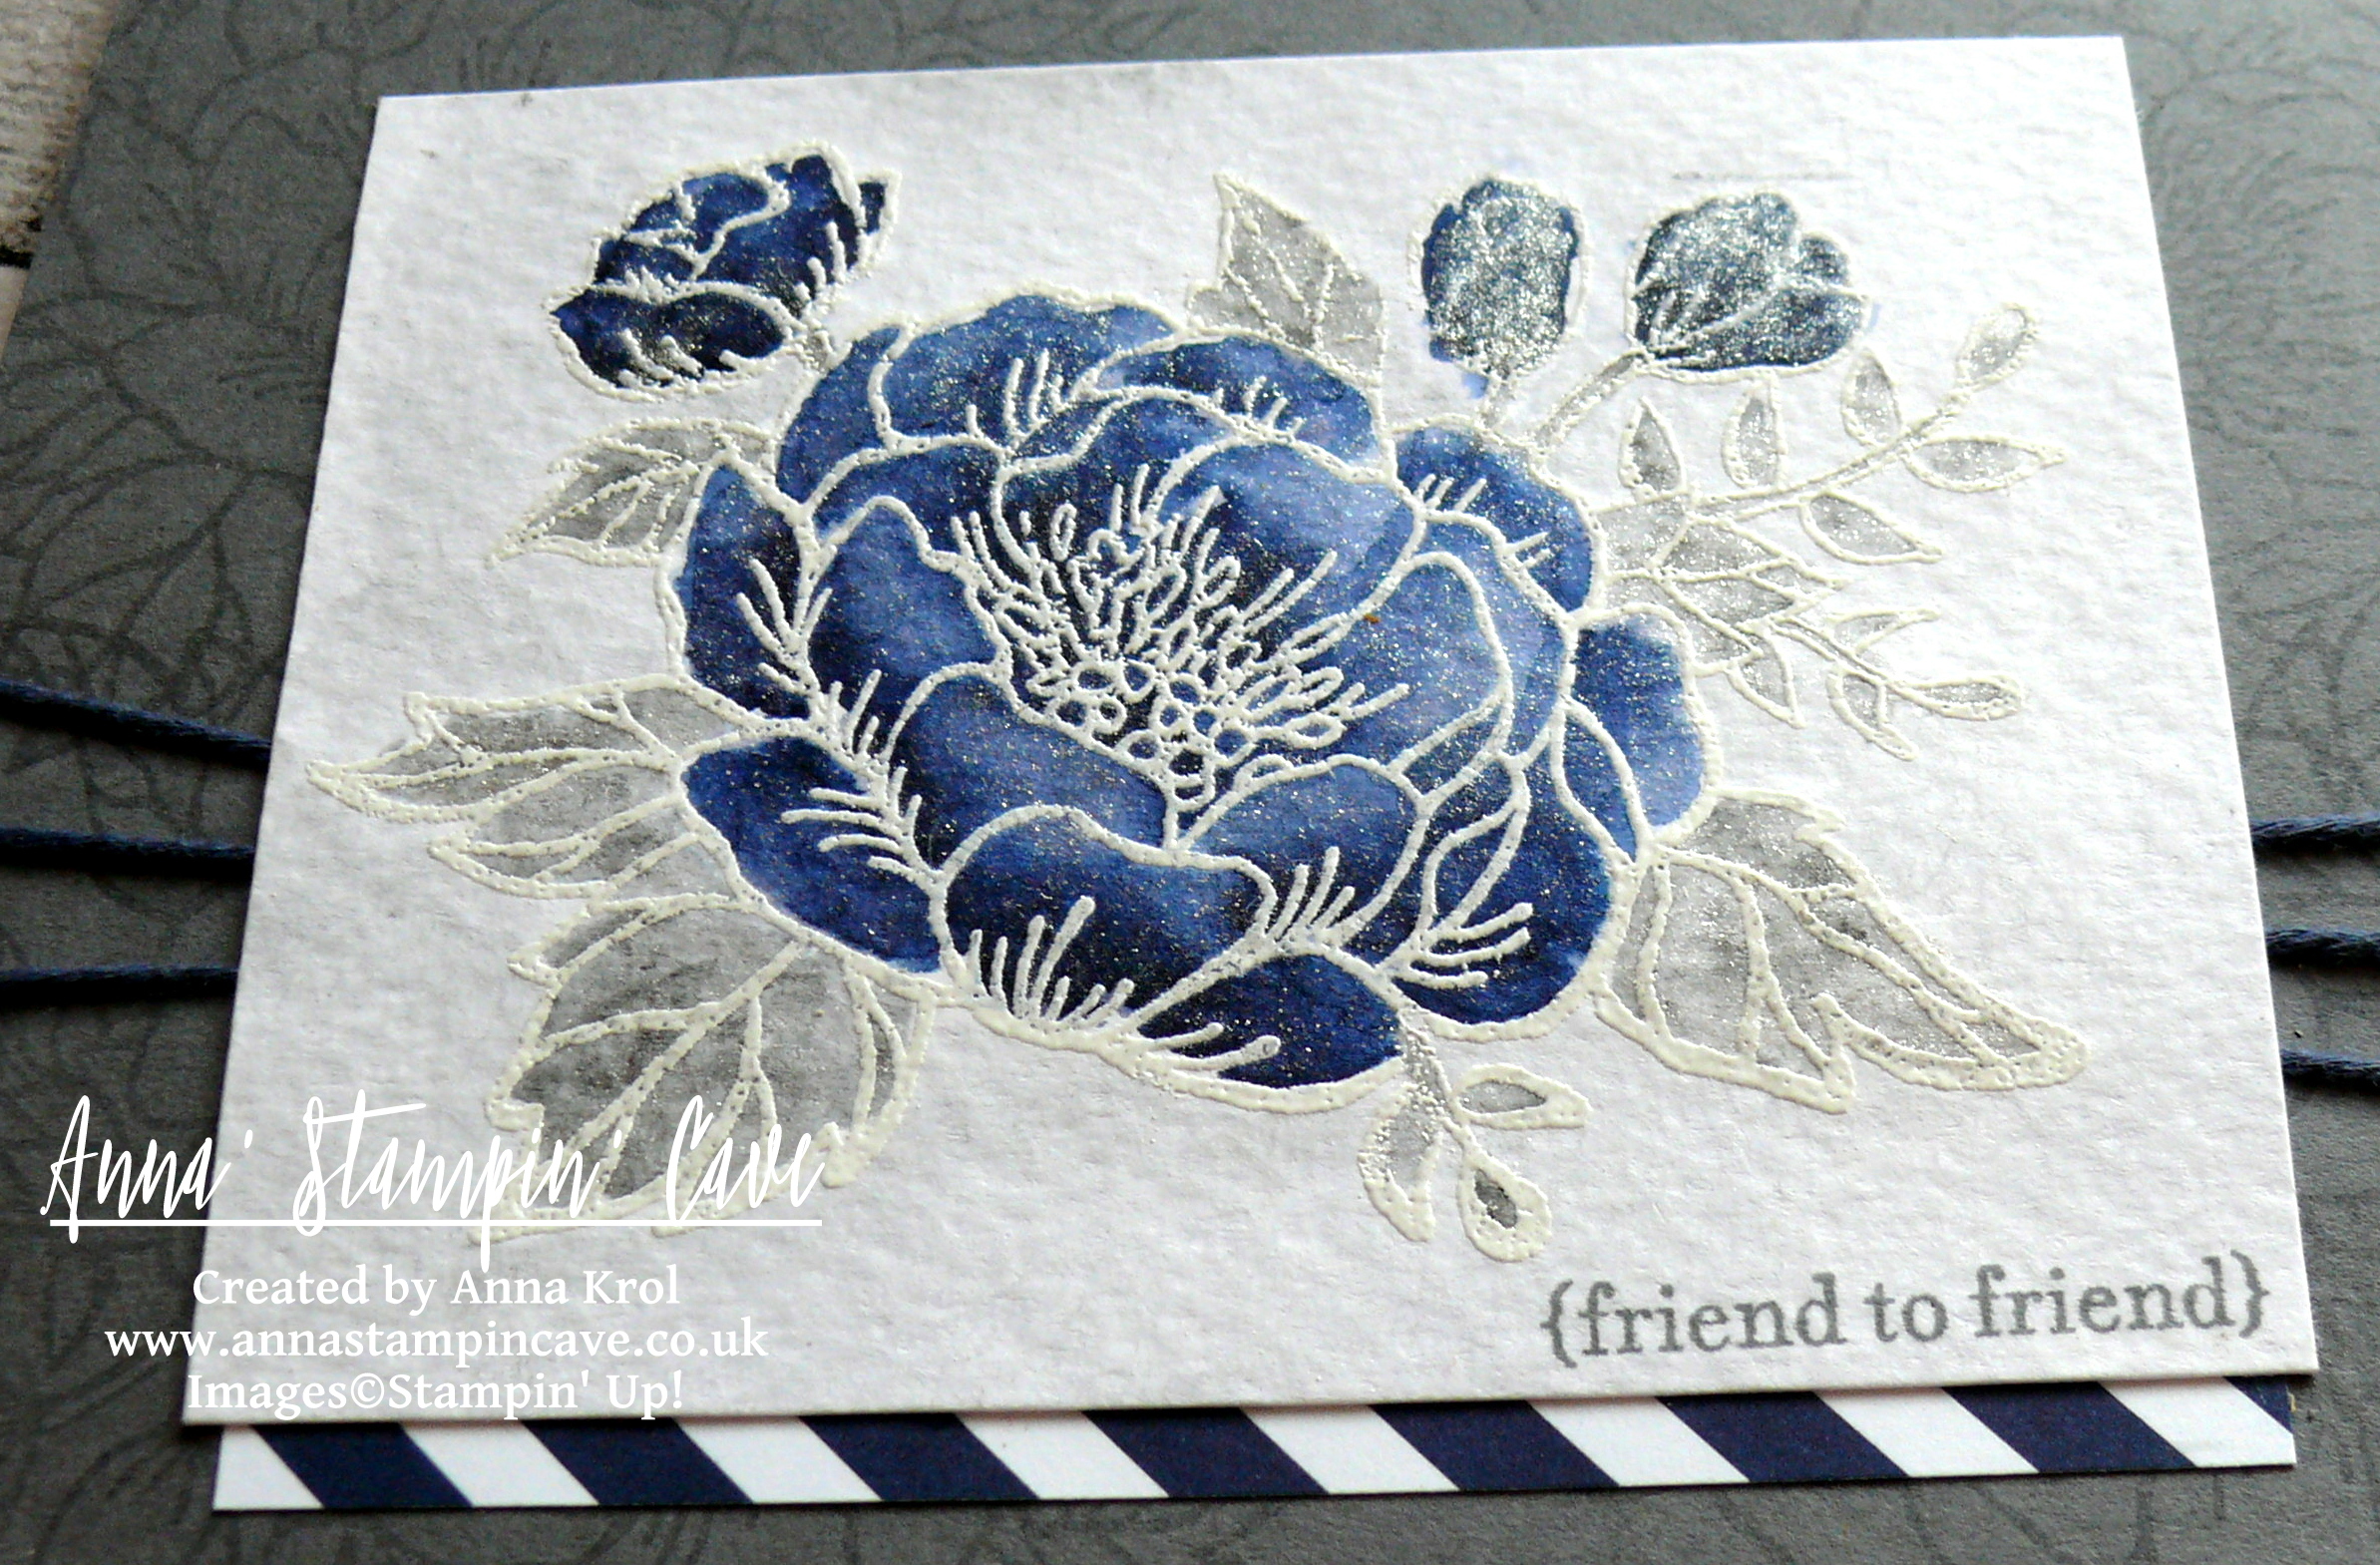
I heat embossed beautiful floral image from Birthday Blooms Stamp Set on a piece of Watercolour Paper in Whisper White Embossing Powder. Next, I watercolour the image using my ink pads as palettes.  For the flower, I’ve used Night of Navy ink pad. For the leaves, I’ve used Basic Grey Archival ink pad, which was a little bit tricky but doable. Just had to work really fast once I squished some ink onto my ink pad cover flap. When finished my leaves, I’ve added more water to the ink that left on the cover and I’ve done a quick wash of light grey around the flower.

For the sentiment, I chose sweet ‘friend to friend’ from Teeny Tiny Wishes Stamp Set and stamped it in Basic Grey Archival Ink in the bottom right corner of my watercolour panel.

Tip: If using clear mount or wood mount stamp sets, always use Stamp-A-Ma-Jig to align your sentiment. It’s best tool ever!

Anna' Stampin' Cave_Stampin' Up! Birthday Blooms Stamp Set_Watercolour Card_Basic Grey Night Of Navy 3.JPG

To prepare my base I stamped the same floral image all over the card front with Versamark ink. Next, I wrapped Night Of Navy Solid Baker’s Twine around the front of the card and secured it at the back with a piece of cardstock.

I adhered a strip of DSP underneath the watercolour piece and added it to the card base, slightly offsetting my piece. The final touch was to add Clear Wink Of Stella to my floral.

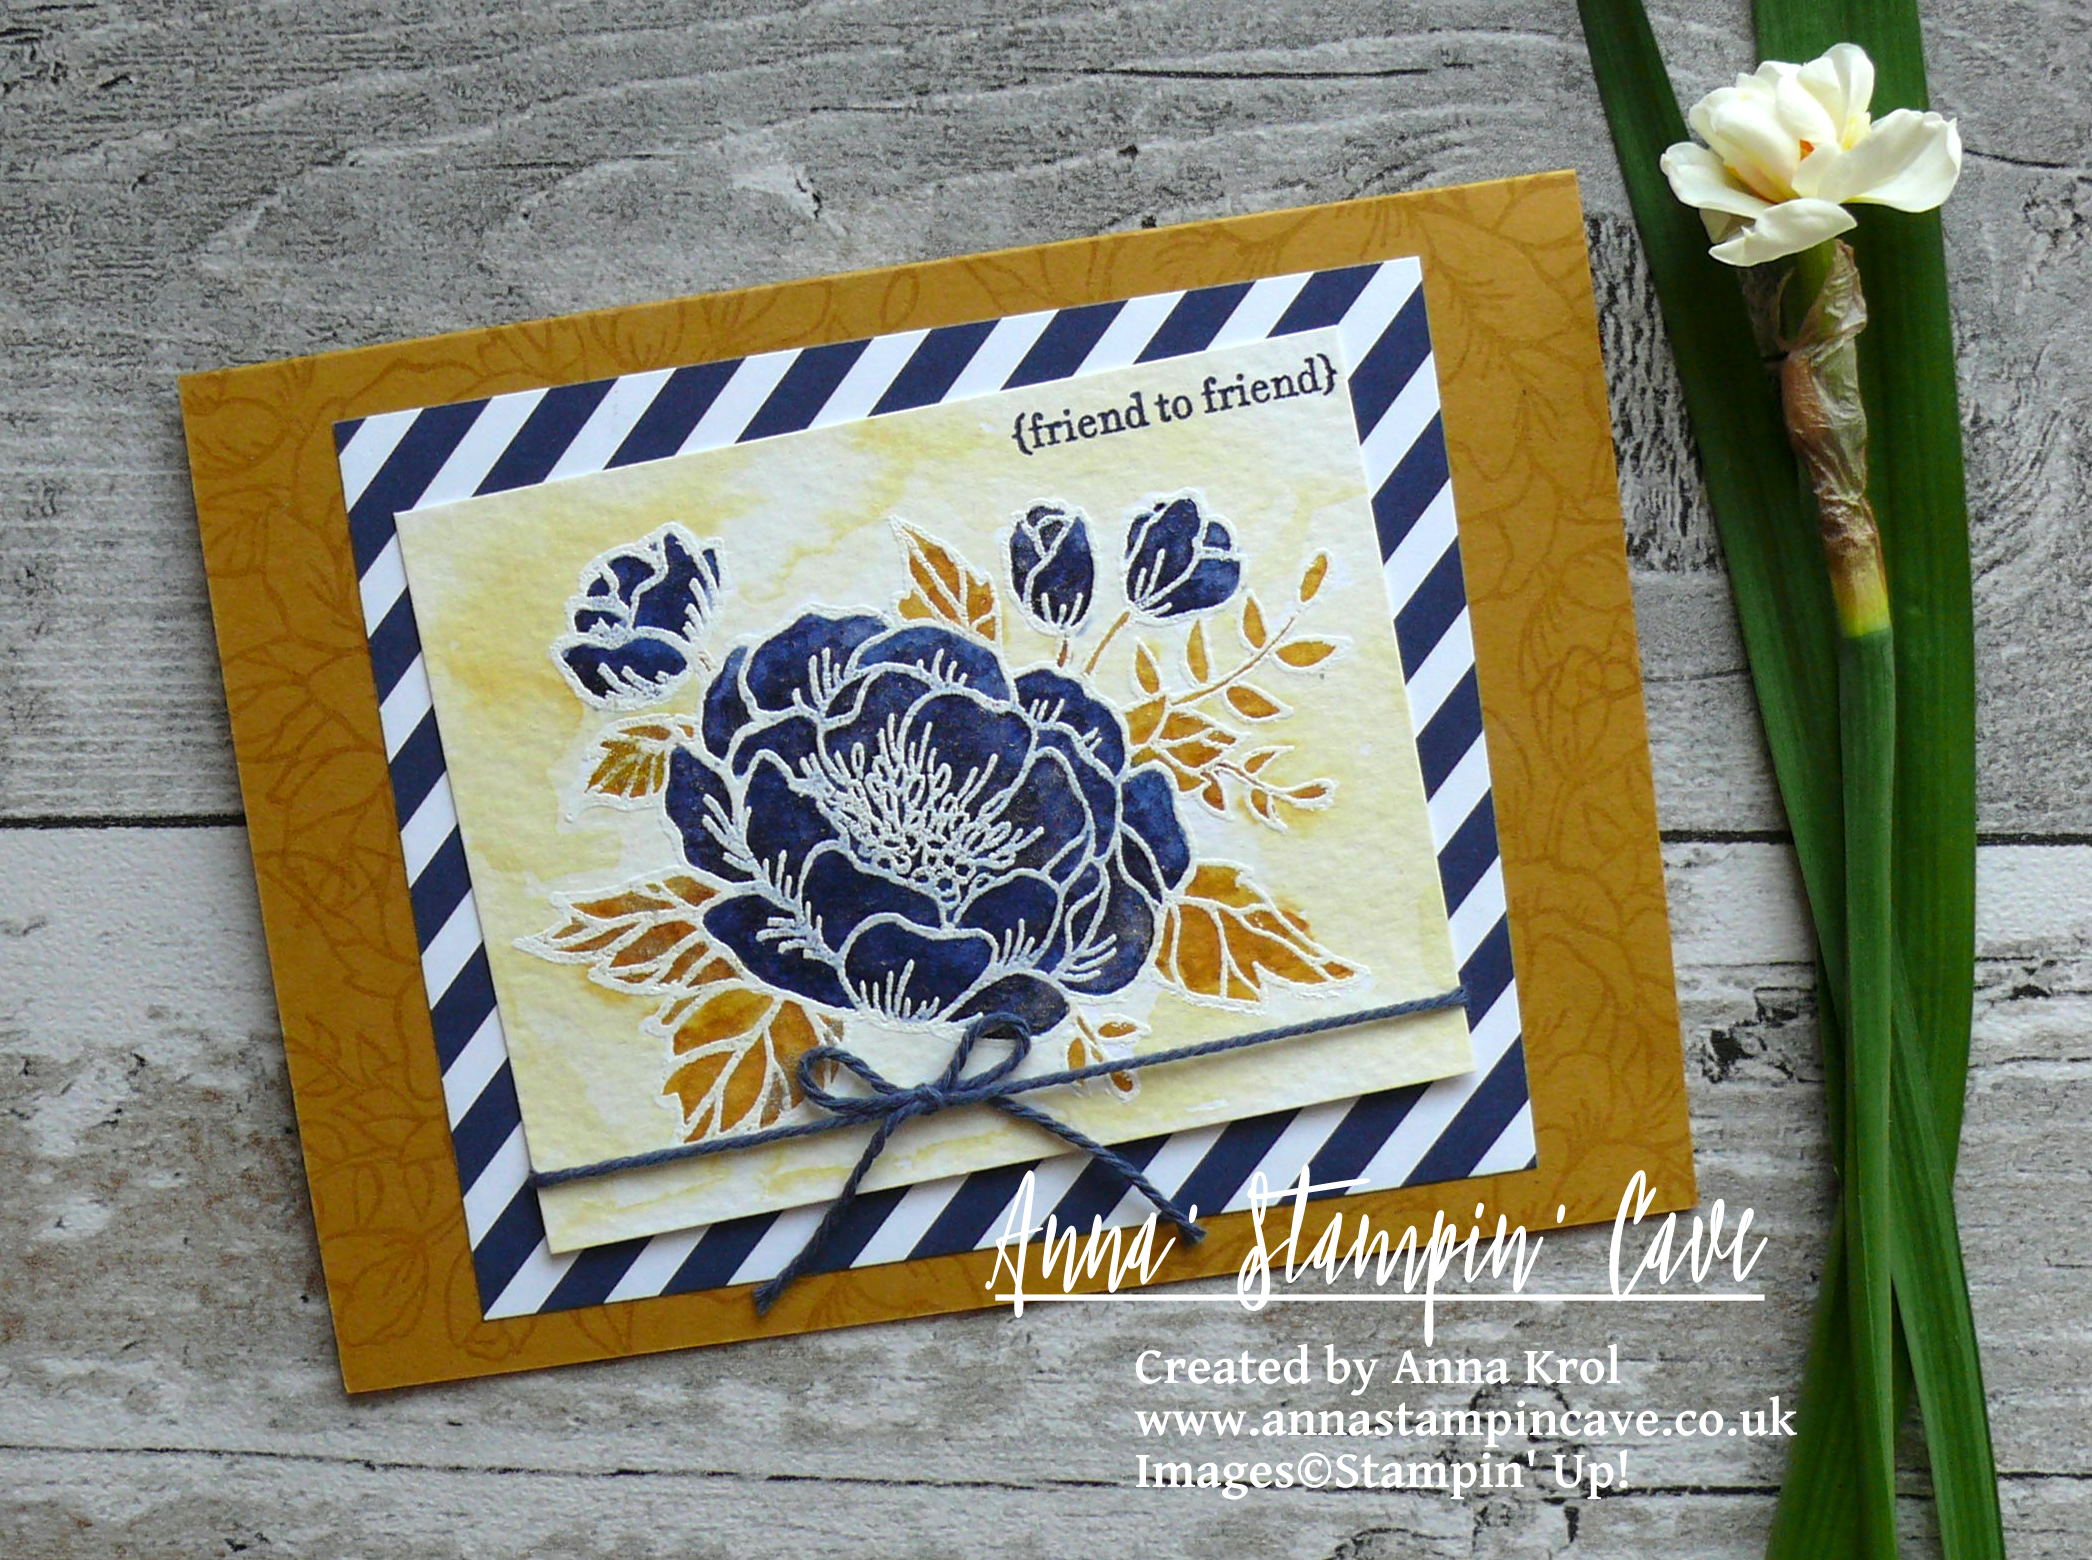
For my next card colour combination, I took an idea from Stampin’ Up!’s Annual Catalogue, page 76.  I love how Night of Navy and Delightful Dijon complement each other creating distinguished look.

Anna' Stampin' Cave_Stampin' Up! Birthday Blooms Stamp Set_Watercolour Card_Delightful Dijon Night Of Navy

Delightful Dijon/Night of Navy ‘Friend To Friend’ card dimensions:

  • Delightful Dijon cardstock: 8-1/4″ x 5-7/8″ scored in half at 4-1/8″ (21cm x 14.8 cm scored in half at 10.5 cm)
  • Regals Designer Series Paper Paper Stack, Night of Navy diagonal stripes design: 4-2/8″ x 3-5/8″ (10.8 cm x 9.2 cm)
  • Watercolour Paper: 3-6/8″ x 3″  (9.5 cm x 7.6 cm)
  • Night of Navy Solid Baker’s Twine: approx 12″ (30 cm)

Same as with my first card, I stamped the whole card front with a floral image from Birthday Blooms Stamp Set in Versamark Ink and adhered the piece of DSP in the middle of my card base.

Anna' Stampin' Cave_Stampin' Up! Birthday Blooms Stamp Set_Watercolour Card_Delightful Dijon Night Of Navy 2

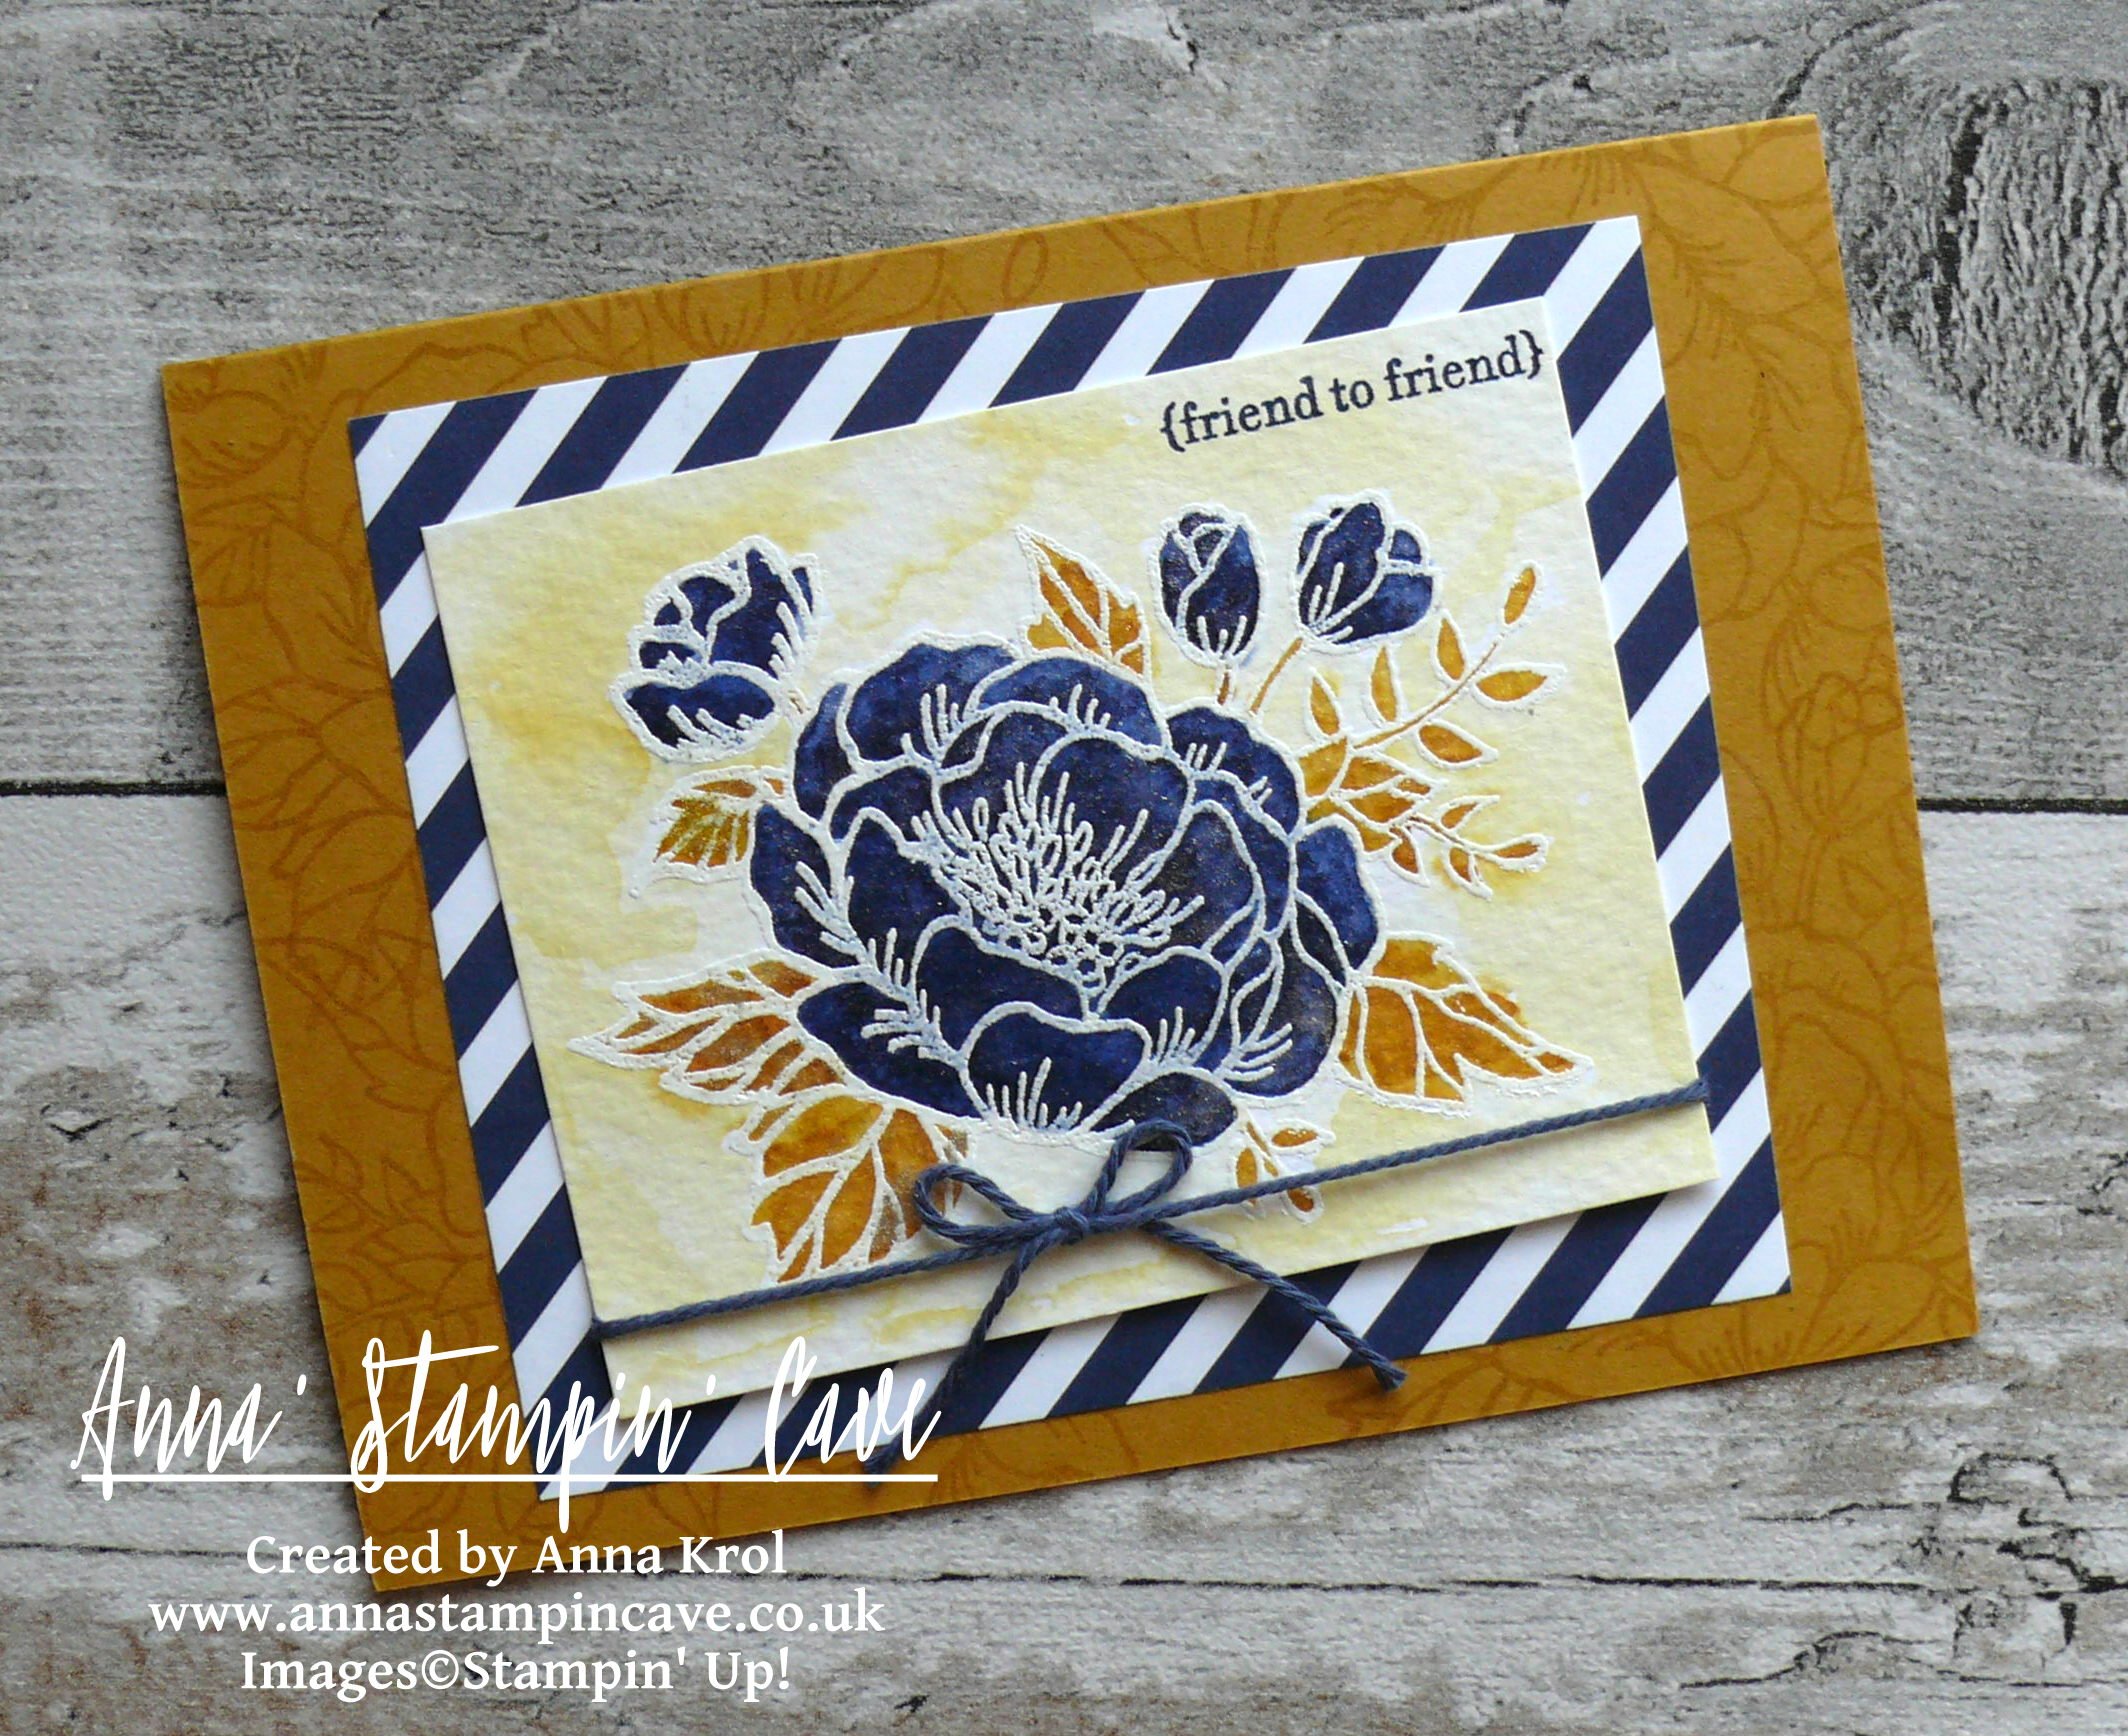
Next, I stamped and heat embossed the same image on the watercolour panel in Whisper White. Flowers, as before, are watercoloured with Night of Navy ink, just this time I decided for darker, deeper shade. For the leaves, however, I’ve used Delightful Dijon ink, with a very light wash of DD in the background.

Anna' Stampin' Cave_Stampin' Up! Birthday Blooms Stamp Set_Watercolour Card_Delightful Dijon Night Of Navy 3

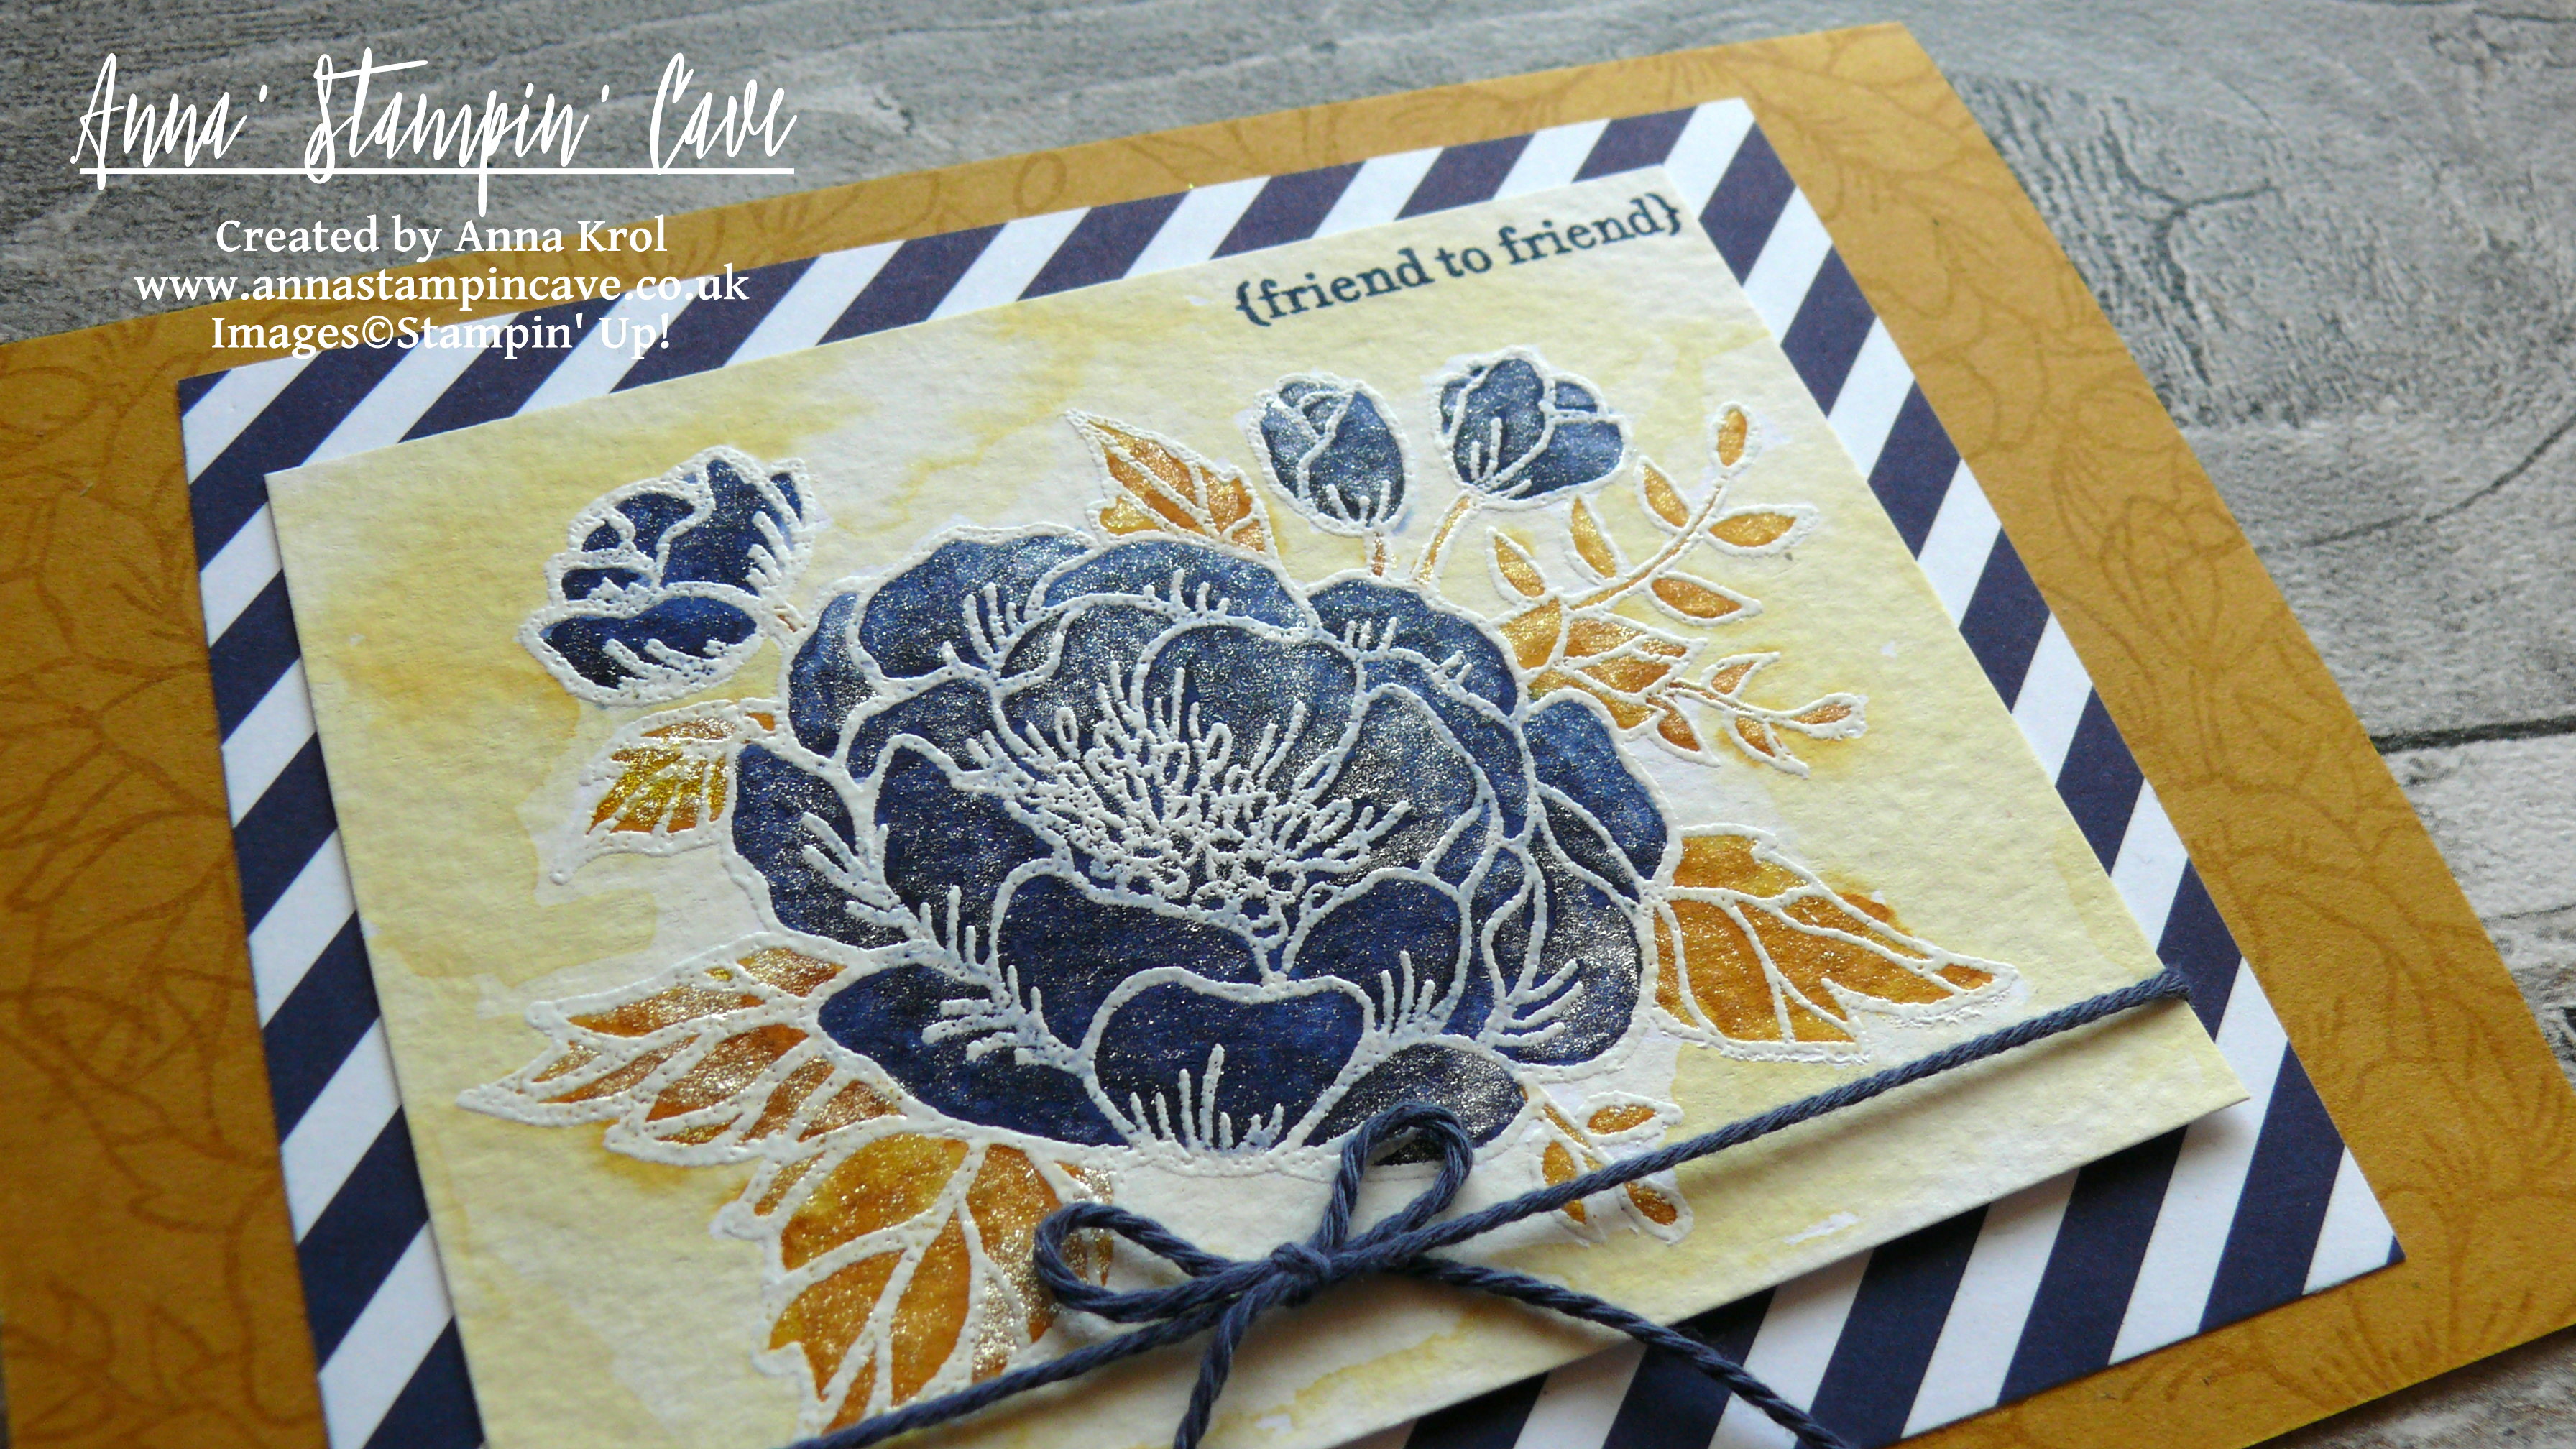
A sentiment, same again, is stamped in Night of Navy ink in the top right corner of the panel. I took a piece Night of Navy Solid Baker’s Twine, wrapped it at the bottom of my watercolour piece and tied a little bow. I adhered my panel to the card base, offsetting again. Clear Wink of Stella finishes off the look.

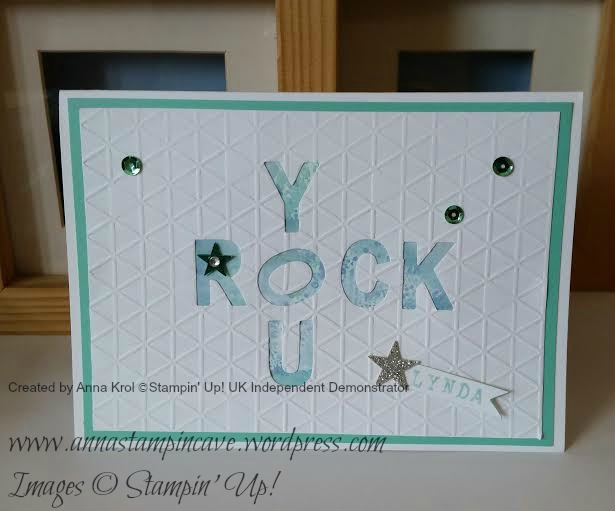
And here are both of my cards together:

Anna' Stampin' Cave_Stampin' Up! Birthday Blooms Stamp Set_Watercolour Card_Delightful Dijon with Night Of Navy_Basic Grey with Night Of Navy

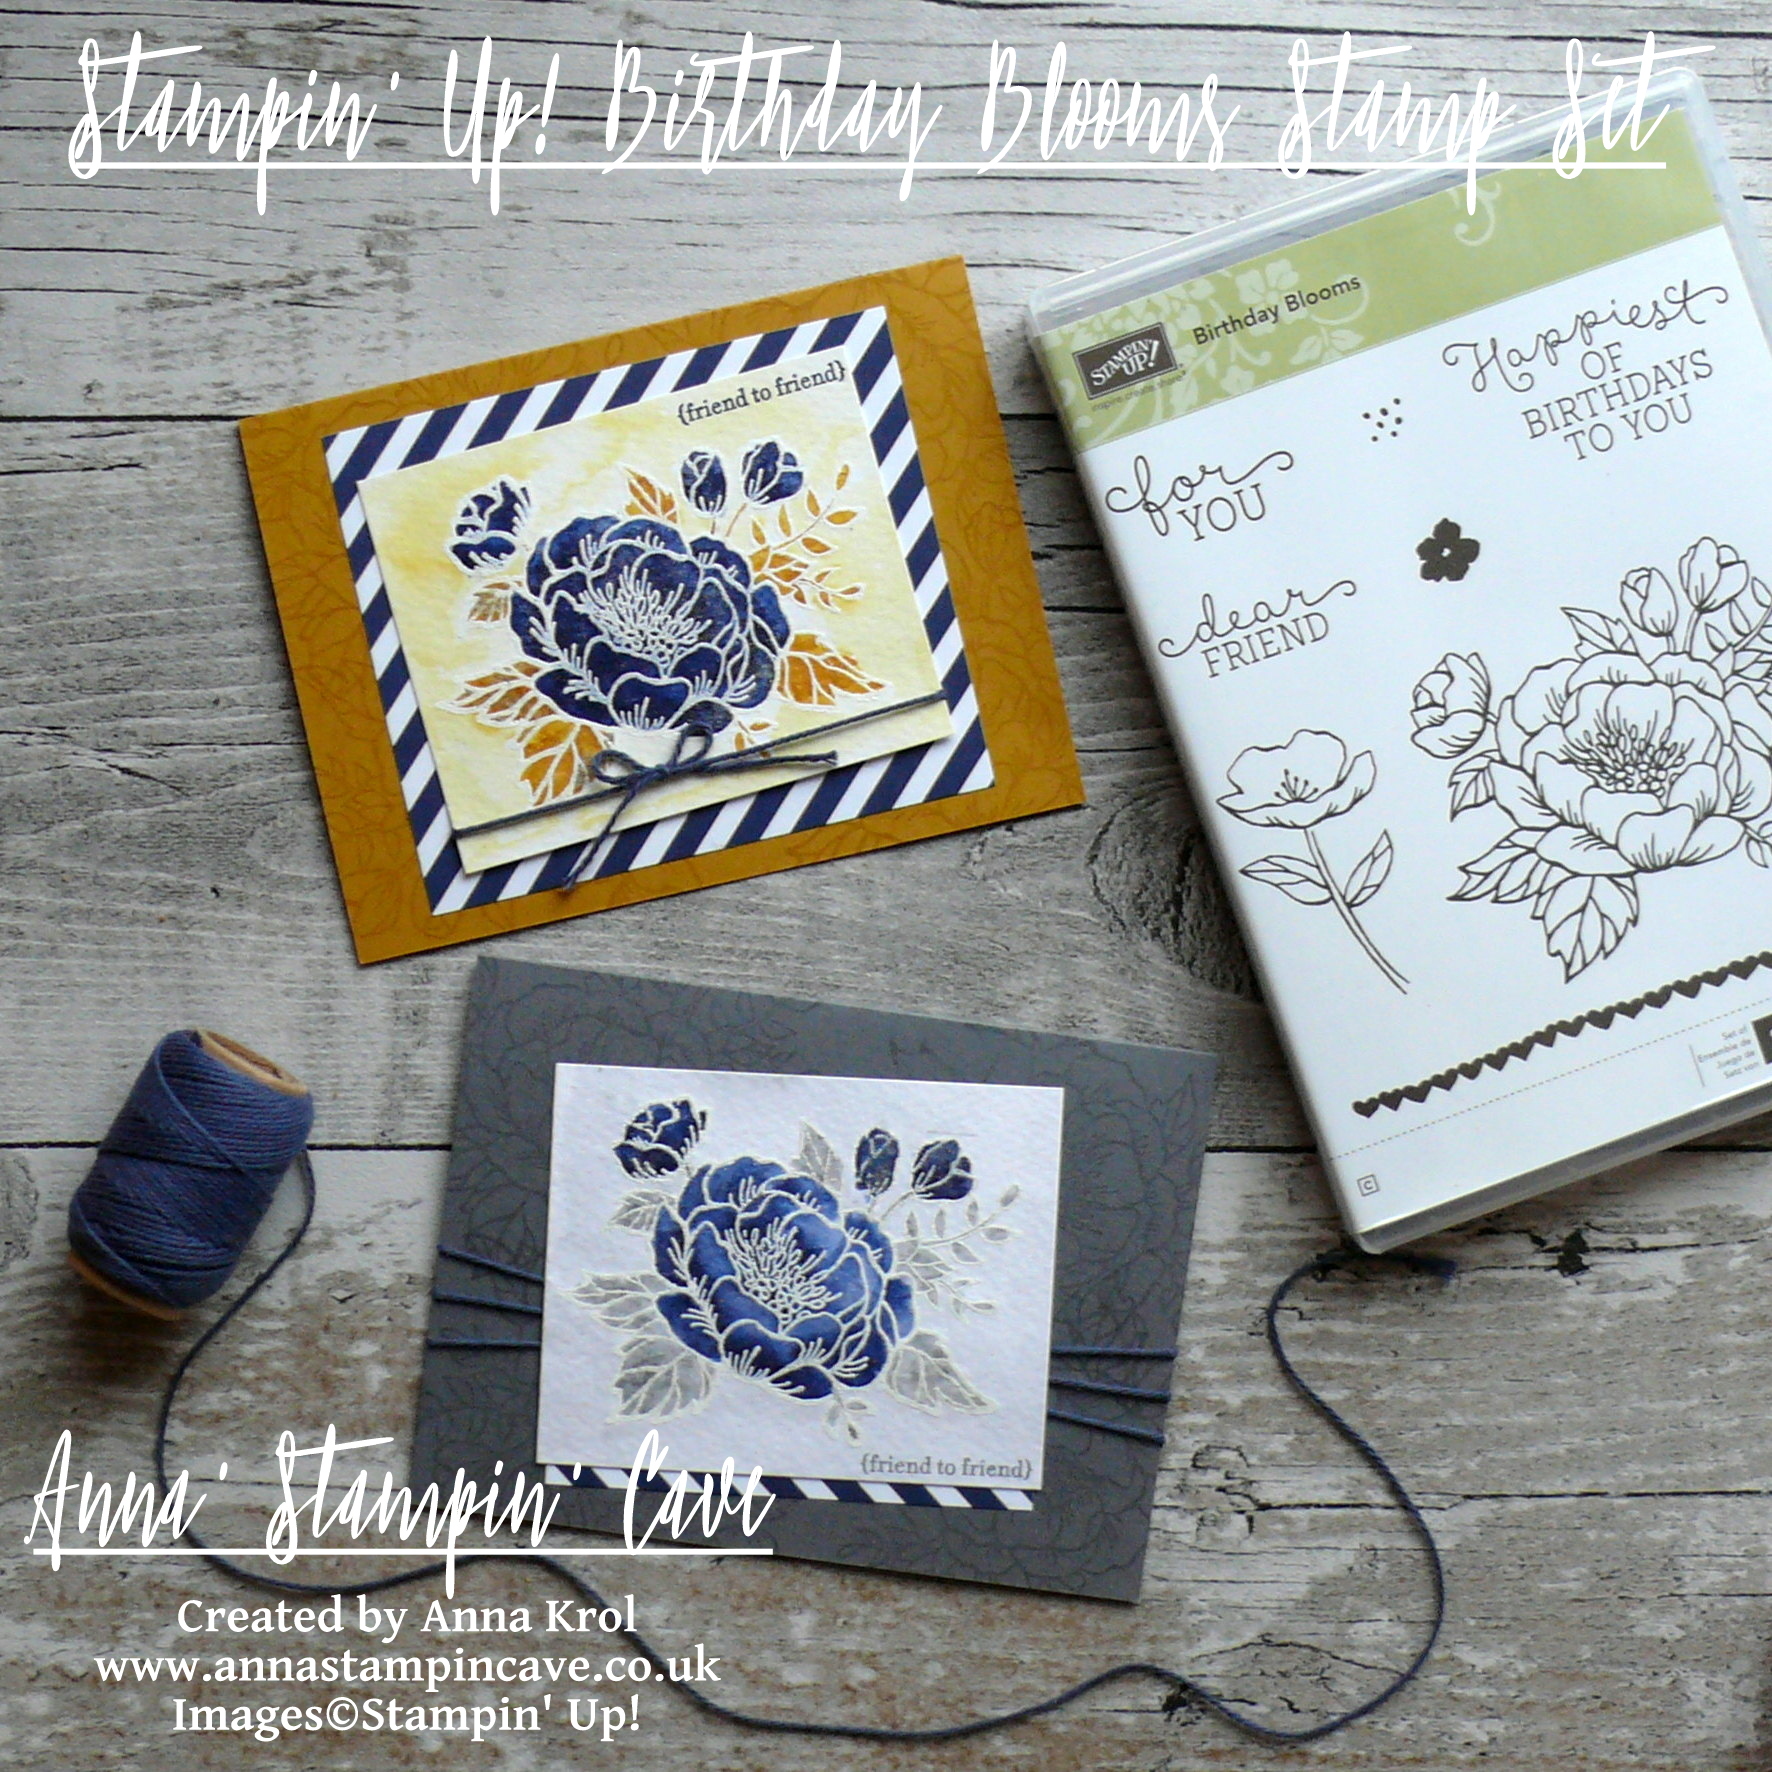
I love how they turned out! Same stamp set, same technique, and same design but two completely different looks. Which one do you like the most? Please let me know in comments below.

As always, I really want to encourage you to visit the Global Design Project challenge blog to see other beautiful projects from all around the world. Just click on their logo below to visit the website

Thank you for stopping by and have a blessed day,


You Are Amazing – Kylie Bertucci’s International Stampin’ Up! Blog Highlights

Anna’ Stampin’ Cave – You Are Amazing – Kylie Bertucci’s International Stampin’ Up! Blog Highlights

International-Highlights-header-vote-fav

Thanks for coming to my blog today! We are being highlighted internationally by Kylie Bertucci and you are able to VOTE on my project. The top ten winners will get to be part of an international blog hop so please vote for my project. You can do it here or use button at the end of my post.

Anna' Stampin' Cave - Stampin' Up! All Things Thanks Stamp Set CAS Card You Are Amazing

Our theme for this highlight is using the stamp set All Things Thanks! This is a Wonderful stamp set with so many gorgeous sentiments. We wanted to highlight how versatile it really is.

This is my first time taking part in Kylie Bertucci’s International Stampin’ Up! Blog Highlight so I’m a little bit nervous. For my card, I went with monochromatic clean and simple design.

Anna' Stampin' Cave - Stampin' Up! All Things Thanks Stamp Set Monochromatic CAS Card You Are Amazing.JPG

You Are Amazing Card dimensions:

  • Whisper White cardstock: 11-6/8″ x 4-1/8″ scored in half at 5-7/8″ (29.7 x 10.5 cm scored in half at 14.8 cm)
  • Basic Grey DSP from Neutrals DSP Stack: two pieces 3″x 3″ each (7.6 cm x 7.6 cm)
  • Basic Grey cardstock: 1/2″ x 3-3/6″ (1.2 cm x 9.5 cm)
  • for sentiment piece of Whisper White cardstock
  • Whisper White Thick Baker’s Twine: 12″

First, I stamped my sentiment in Basic Grey on a piece of Whisper White cardstock and die cut it using 2nd smallest oval from Stitched Shapes Framelits Dies. Next, I took my card base and adhered my squares of Designer Series Paper in the middle, offsetting them slightly.

I took Basic Gray strip of cardstock and created a fun banner using a dotted strip die from Mini Treat Bag Thinlits Dies.

I adhered the banner in in the centre of my card front and popped up the sentiment on top using dimensionals. I wrapped bakers twine around my card and tied a simple knot on the front. For the final touch, I added a rhinestone to the ‘i’ in the sentiment.

Anna' Stampin' Cave - All Things Thanks Stamp Set by Stampin' Up! Monochromatic CAS Card You Are Amazing.JPG

Thanks for visiting my blog today and make sure you head over to Kylie’s blog to check all lovely projects and vote for your favourites. Hope my project will be among them as I would love to be chosen to do an international blog hop.

Vote for me Kylie's Highlights Badge

Thank you for stopping by and have a blessed day,

Pootlers New Seasonal Catalogue Blog Hop – Thankful, Grateful, Blessed With Paisleys & Posies Bundle

pootler's blog hop

Thank you for joining us on another Pootlers Blog Hop! We’re showcasing lots of gorgeous projects using products from the new Stampin’ Up!® Autumn Winter Seasonal Catalogue. Simply use the buttons at the end of each post to keep hopping!

If you arrived here from lovely Louise’s blog, thank you for stopping by. I hope you enjoy seeing all these beautiful projects and inspiration and continue to hop on through to see what everyone has made.

For today’s project, I’ve been using new Paisleys & Posies Stamp Set with Paisley Framelits Dies, and these two are a part of beautiful Petals & Paisleys Product Suite. I used them to create a beautiful contemporary card and matching gift box.

I don’t know about you, but I just love paisley. It is such a trendy design right now, you can find it everywhere: from home decor, through fashion, art and more.

thankful-grateful-blessed-gift-set-with-paisleys-posies-bundle

For my card, I randomly stamped various images from Paisleys & Posies Stamp Set on a piece of Whisper White. It’s like creating your own DSP. To take off the guesswork, I’ve used the colours that coordinate with Petals & Paisleys Suite: Cajun Craze, Rich Razzleberry, Delightful Dijon, Mint Macaron, Soft Suede and Night of Navy.  I adhered it to my card base (Cajun Craze) and added a layer of vellum on the top, to soften the bold colours. Next, I cut a strip of Whisper White and stamped the sentiment from the same stamp set (love this font!), to the left in Cajun Craze. Backed it with a slightly wider piece of Cajun Craze cardstock, and adhered it to the card front. Using Paisley Framelits Dies, I die-cut two intricate leaves, one in Rich Razzleberry and one in Delightful Dijon, and add it to the panel. The final touch for the card was a tiny Rich Razzleberry bow I’ve made using one of the ribbons from new 3/8″ (1 cm) Ribbon Trio Pack.

thankful-grateful-blessed-card-with-paisleys-posies-bundle

Top tip 1: Glue dots are handy to adhere small elements like little bows. Top tip 2: There’s not such a thing as an invisible adhesive for when using vellum; be smart and hide adhesive under panels, die-cuts or embellishments. Savvy tip: To save the precious ribbon, tie a square knot straight from the spool.

For the gift box base, I’ve used, again, Cajun Craze cardstock. It’s really cute dinky little box, with the base being a 2-7/8 x 2-7/8″ square, and 1″ tall. Same as with the card, I created my own piece of DSP to decorate the box. Using dimensionals I slightly elevated the panel that goes on the top of the lid. But panels on the sides of my box are glued flat. Next, I’ve added a panel of vellum to the top of my box, followed by a little banner with a sentiment, and (again) leaves and a bow to match the card.

I don’t make boxes or gift sets too often, but I really like this one. I don’t know why. Perhaps for the autumnal colours and maybe for the paisley design. Whatever the reason, I hope you like it too.

Your next stop is lovely Jerim. Simply click the next button to keep hopping around all the blogs to see lots of new ideas and inspiration.
next pootler blog

previous pootler blog

Thank you for stopping by and have a blessed day,

Truly Blessed And Grateful

It’s been a long time since last time I posted a project on here. I still struggle with crafting a bit but seems like my hands are slowly getting better. Last week I’ve noticed that I can manage to hold a pen, which I wasn’t able to do since February – I nearly cried with happiness.

Today I wanted to share with you cards I’ve made recently for few of my friends from all over the world. Friends who supported me and cheered me up when I was really poorly and in hospital. I have to say I’m truly blessed and grateful to have such an amazing people in my life. These cards have been delivered already so no faux pas here xx

linda 3

Linda 2

Linda

lynda 4

lynda 2lynda 3

And what are you grateful for?

Thank you for stopping by,