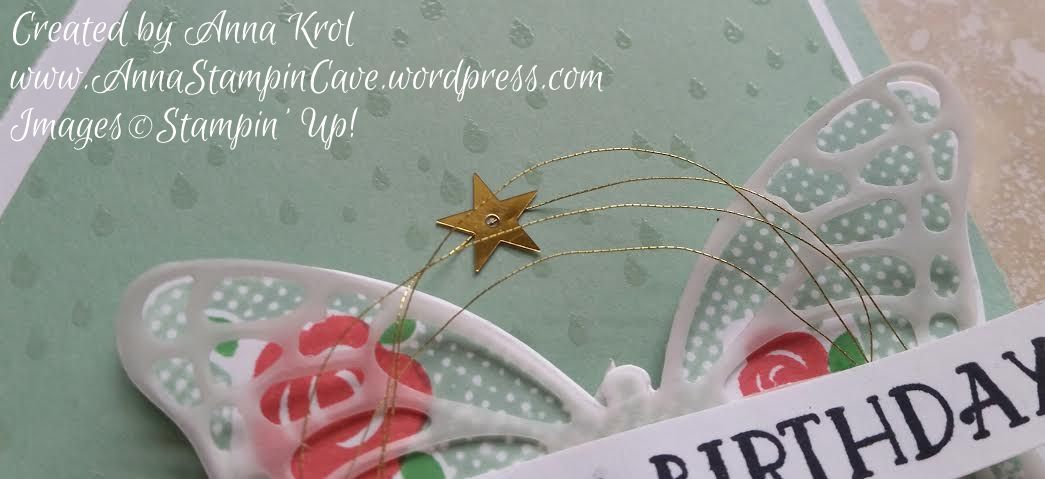
Hello, everyone! From today, for every Thursday, for the next 5 weeks, I’m gonna showcase My Hero Stamp Set by Stampin’ Up!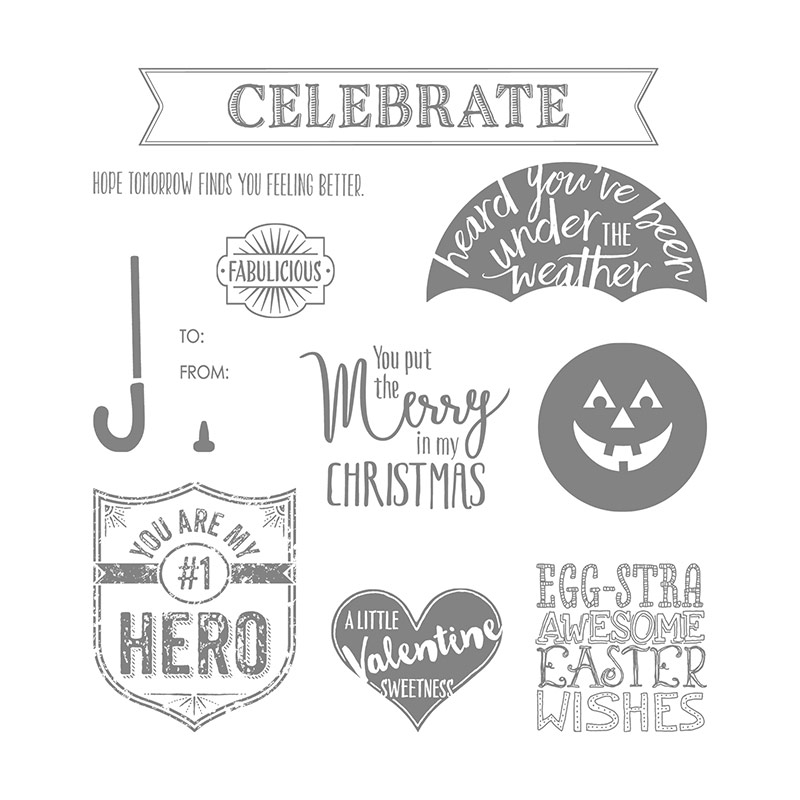
The stamp set is called ‘My Hero’ and what’s amazing about this particular set is that it’s a Ronald McDonald House Charities Stamp Set.
If you haven’t heard about it, here’s how it works: through the Making a Difference program, which Stampin’ Up! launched back in 2003, we partnered with Ronald McDonald House Charities (RMHC). Each year, Stampin’ Up! design an exclusive stamp set to promote the partnership with RMHC, and donate a portion of the proceeds from each sale of that set. To date over $1.5 million has been donated from RMHC stamp set sales!
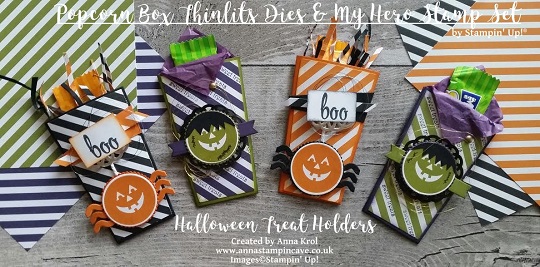
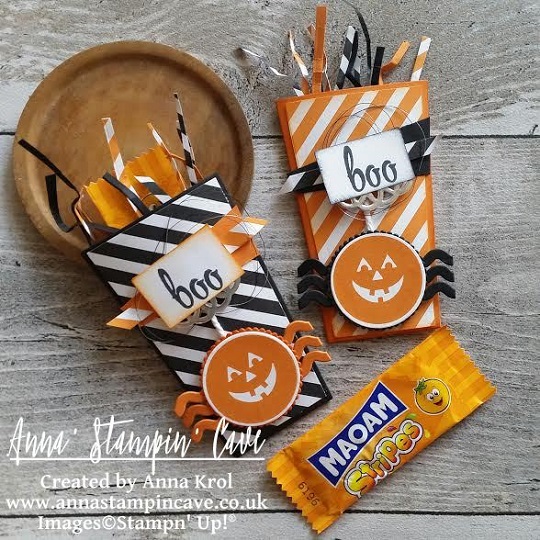
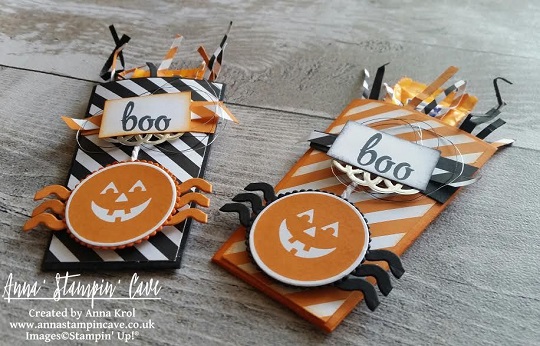
But let’s get back to my project. For this week I’ve decided for something fun and created these Halloween treat holders using Popcorn Box Thinlits Dies.
Aren’t these cute?!! You won’t believe how quick and easy they are to make. For each holder, you only need one die-cut piece (for the box you need two). Next, you trim the larger flap, varnish well all the score lines and use a strong adhesive. I’ve used Tombow Multipurpose glue.
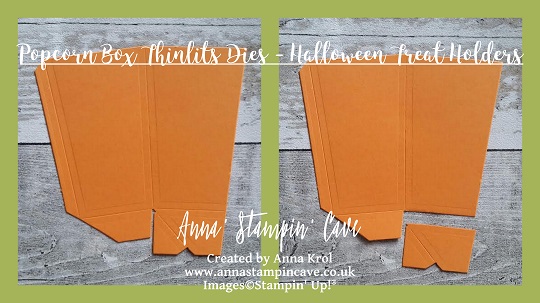
To create panels from Designer Series Paper you just simply die-cut the box and hand cut them following shallow lines created by the die.
For my treat holders, I’ve used two different colour combinations: Basic Black with Pumpkin Pie and Elegant Eggplant with Old Olive. I think these colours suit Halloween perfectly.
I’ve used ‘face’ stamp from My Hero Stamp Set, which I believe supposed to be a pumpkin face (!!?), and created these uber cute spiders. For their legs, I’ve used a wavy die from Popcorn Box Thinlits Dies. And yes, I know that spiders supposed to have 8 legs, but come on! These are mine and they only have six lol The sentiment is stamped using Brushwork Alphabet Stamp Set and the panels underneath are just cut-outs I have left after die-cutting the box itself. These tiny strips of paper in my treat holders are also created using cut-offs. I love it – cute and frugal! For a final touch, I’ve added a piece of Metallic Foil Doily in Silver and also Basic Black and Silver Metallic Threads under the sentiment.
Elegant Eggplant with Old Olive treat holders I have turned into cute Frankenstein. For the hair, I die-cut a circle from a piece of Basic Black cardstock and gave him a trim with scissors. Not that I’m talented hairdresser but hey, for Frankenstein it’s just perfect.
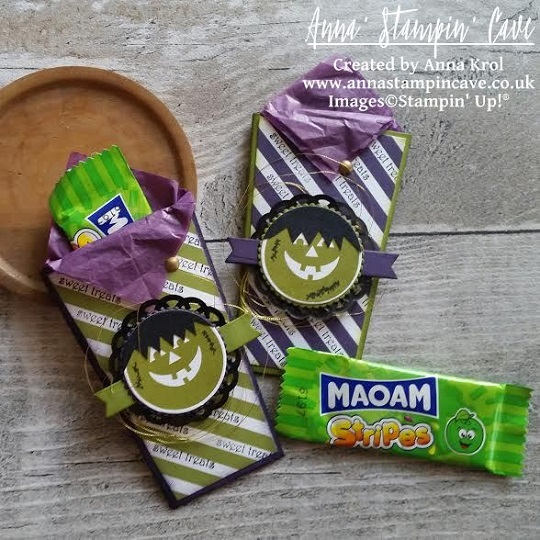
To create black doilies I took the smallest of Metallic Foil Dollies and deepen them in Basic Black Archival ink pad. Remember to set them aside for a while, as it takes some time before the ink dries. I also added few loops of Gold Metallic Thread under the doily. For the sentiment, I’ve stamped (randomly) ‘sweet treats’ from Teeny Tiny Sentiments Stamp Set on the diagonal white stripes. I put some purple tissue paper into my treat holders. I coloured the smallest dot from White Perfect Accents, using a golden sharpie – it holds the overhung tissue paper in place.

So here they are! I really hope you like my little project and that you will try to make these cute treat holders yourself. These would be super cute for Christmas treats too.
Thank you for stopping by and have a blessed day,