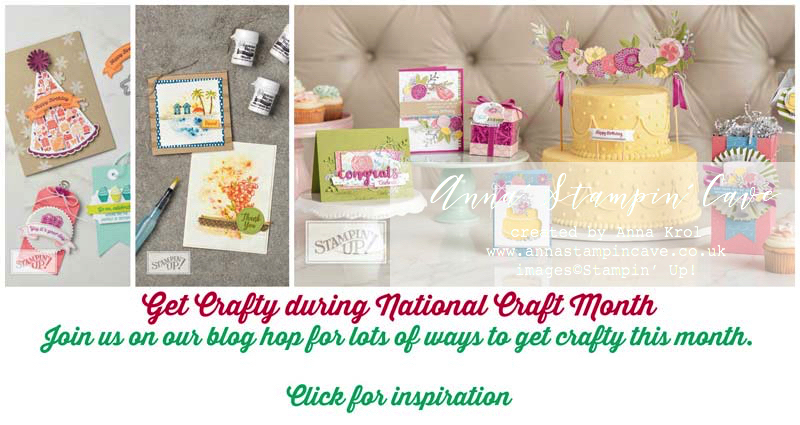
Anna’ Stampin’ Cave – Hold On To Hope
 Hello everyone! Welcome to the monthly Stampin’ Dreams Blog Hop. This month’s theme is Easter/Spring. You are currently visiting Anna Krol from the United Kingdom.
I have to admit I am addicted. I’m addicted to all things that are related to Bible journaling and Bible scriptures art. And every time Stampin’ Up! release a set that includes Bible verses it always ends up in my shopping cart. I love to use them either in my Journaling Bible or to create cards of encouragement and hope.
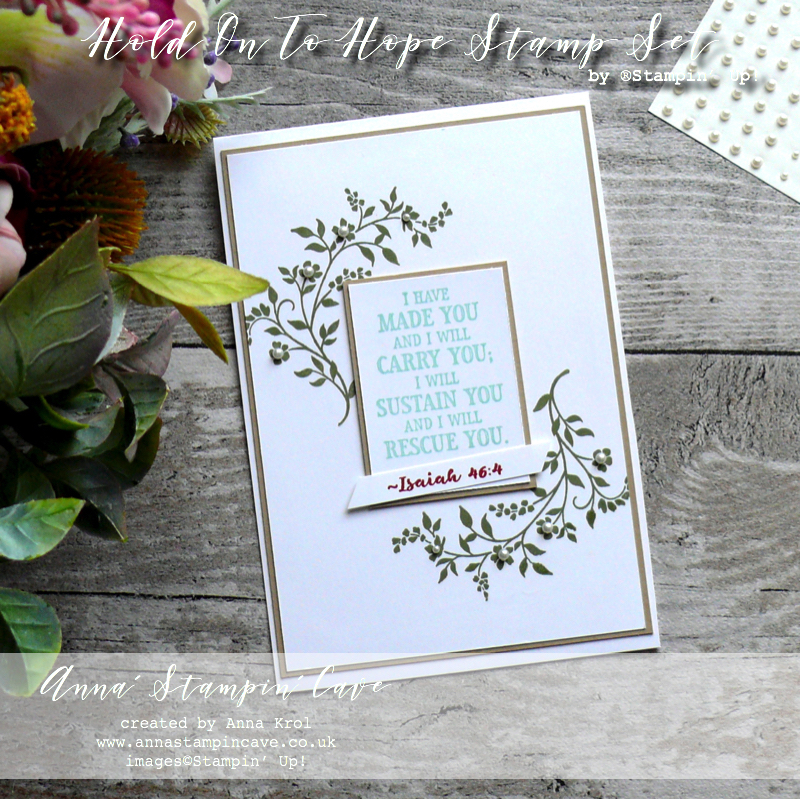
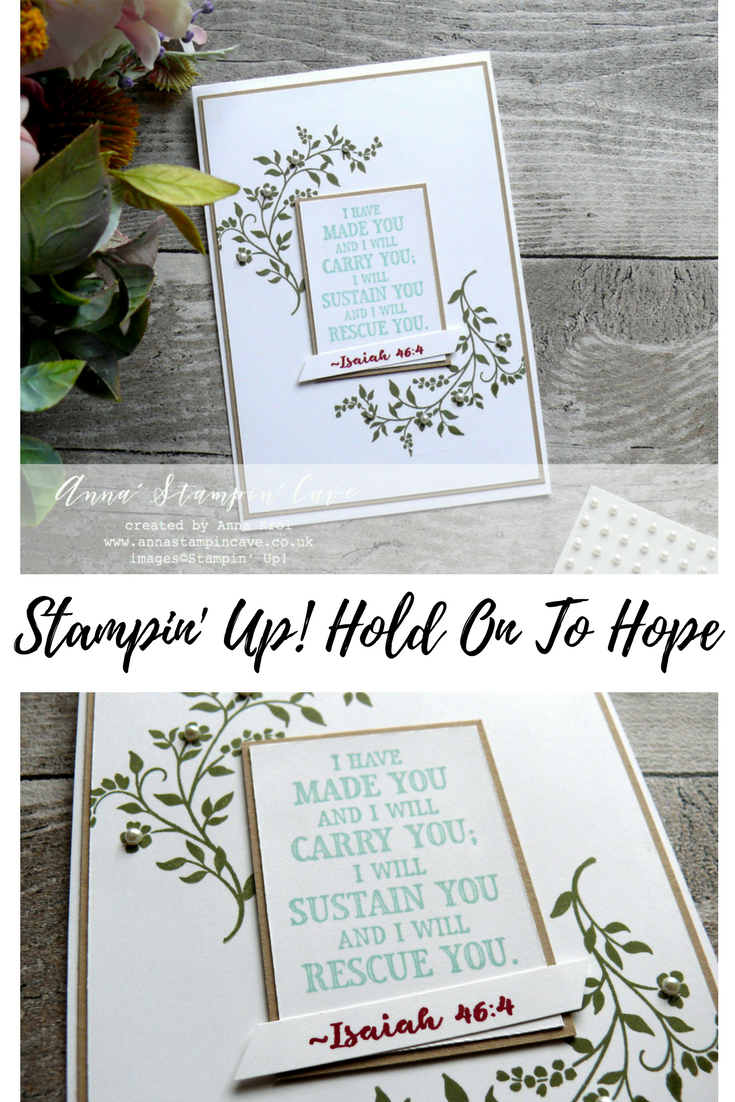
And today I’ve got for you very simple card, showcasing beautiful Hold On To Hope Stamp Set from Stampin’ Up!
This stamp set comes with coordinating dies called Cross Of Hope Framelits Dies. And if you buy them as a BUNDLE you will instantly save 10% on your purchase.
Today I only used stamp set and here’s my card –
Hold On To Hope card dimensions:
- Whisper White Thick cardstock: 11-6/8″ x 4″ scored in half at 5-7/8″ (29.7 x 10.2 cm scored in half at 14.8 cm)
- Crumb Cake cardstock: 3-7/8″ x 5-1/2″ (9.8 cm x 14.1 cm)
- Whisper White cardstock: 3-3/4″ x 5-3/8″ (9.4 cm x 13.8 cm)
- Crumb Cake cardstock for sentiment mat: 1-3/4″ x 2-3/4″ (4.4 cm x 6 cm)
- Whisper White cardstock for the sentiment: 1-5/8″ x 2-1/4″ (4.1 cm x 5.7 cm)
- a strip of Whisper White cardstock for a banner approx 5/16″ x 2-1/4″ (0.8 cm x 5.8 cm)
- Pearl Basic Jewels
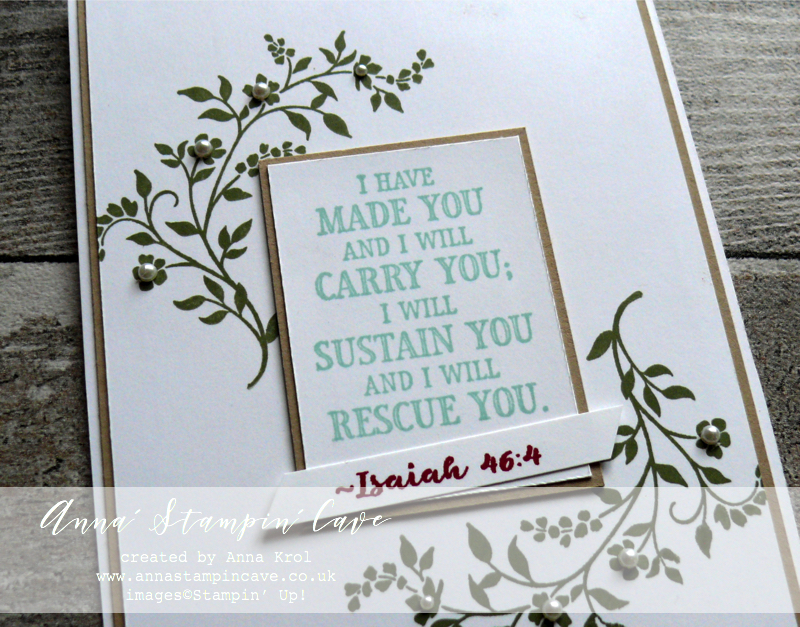
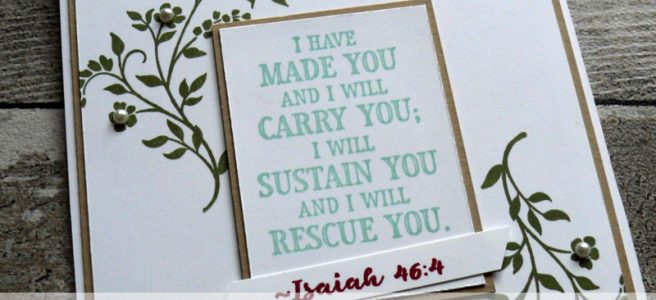
To create this lovely card first I created the focal point: I stamped a Bible verse (Isaiah 46:4, from the stamp set) – on a piece of Whisper White cardstock in Pool Party ink and mat it with a piece of Crumb Cake cardstock.
Next, I took a Whisper White panel and using Stamp-a-ma-jig decided where to stamp the beautiful flourish (from the same stamp set) so it won’t be hidden once I adhere my sentiment panel. I stamped it twice, on opposite corners, using Always Artichoke ink pad.
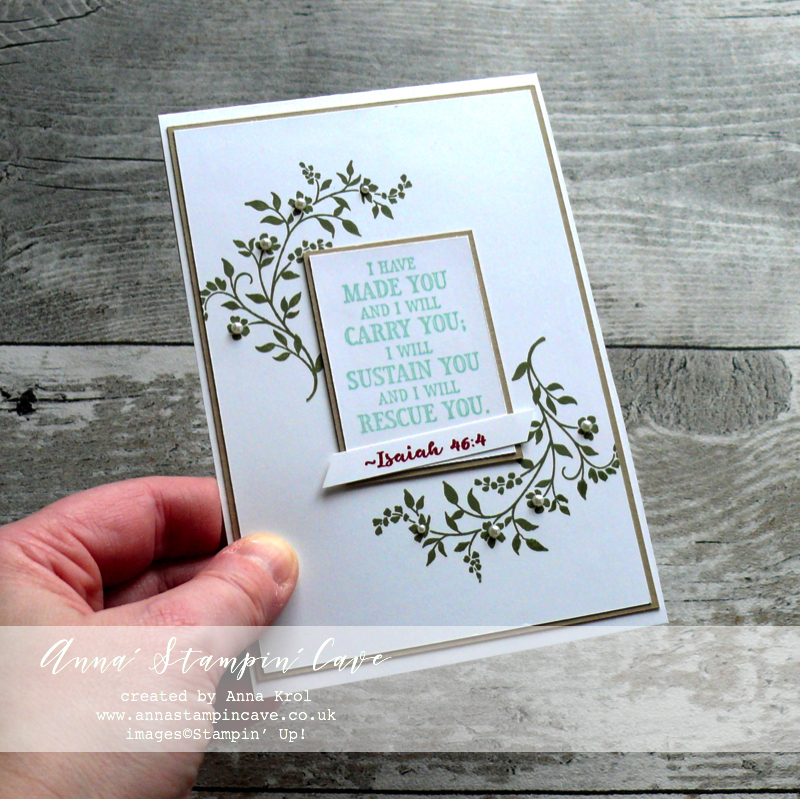 To add some more interest to a rather simple card, I stamped ‘Isaiah 46:4″ in Cherry Cobbler ink on a strip of Whisper White cardstock, snip the ends diagonally and adhered it at an angle to the sentiment. Little pearls in the centres of the flowers finish off the card.
I really hope you enjoyed visiting my blog today and I would love to encourage you to hop along with us and see the rest of beautiful projects designed by amazing artists. Please be sure to continue to hop using the list below. You don’t want to miss any!
I also add this card to:
If you wish to purchase any of products I have used, simply click the images below to go directly to my online store and don’t forget to enter the hostess code CWKGWDD7 to receive a gift from me.
Thank you for stopping by and have a blessed day

Hostess Code for a month of March: CWKGWDD7 – Use this code in the month of March and receive a gift from me. Spend £25 or more and use the code, and you will receive a Sweet Soiree Suite embellishments sample: one Silver Mini Gable Box + samples of ribbon and ‘shreddies’ (pink, silver or white) + a handmade gift from me.

Special Notes:
1) Make sure you select Anna Krol as your demonstrator;
2) If you select “No Contact” box I do not have access to your name and can’t send you a gift;
3) If your order is £150 or more do not use the code and grab your own Stampin’ Rewards + gift from me
Product List
|
|
|
|||
|
|
|
|||
|
|
|
|


Pin me
Summary of the project which gives all the views of the card in one photo. I’d love if you pinned and called by on Pinterest xx
Don’t forget to check:

New Sale-a-bration release is LIVE. Click here for more details –>


Spring Summer Catalogue Paper & Ribbon Shares. Shares are open to Austria, France, Germany, Netherlands & United Kingdom. 102 sheets of DSP & 2 yards of each type of ribbon from Spring/Summer Catalogue. Click here for more details —>
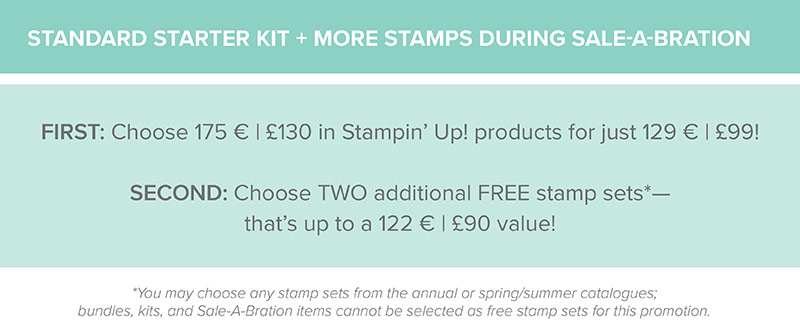
 The New Stampin’ Up! Spring/Summer 2017 Catalogue and Sale-A-Bration are LIVE and it’s AMAZING! For every 60 €/£45, you spend either from Spring Summer Catalogue or Annual Catalogue, you will get to choose one FREE level 1 product from SAB brochure! If you spend 120 €/£90, you get one FREE level 2 product, OR, you can choose two level 1 items. If you spend 180 €/£135, you have the option to choose three level 1 items or one level 1 item and one level 2 item. Click here for more details —>

Ever wondered what it’s like to join Stampin’ Up!’s community? I may have few answers for you. Click here for more details –>

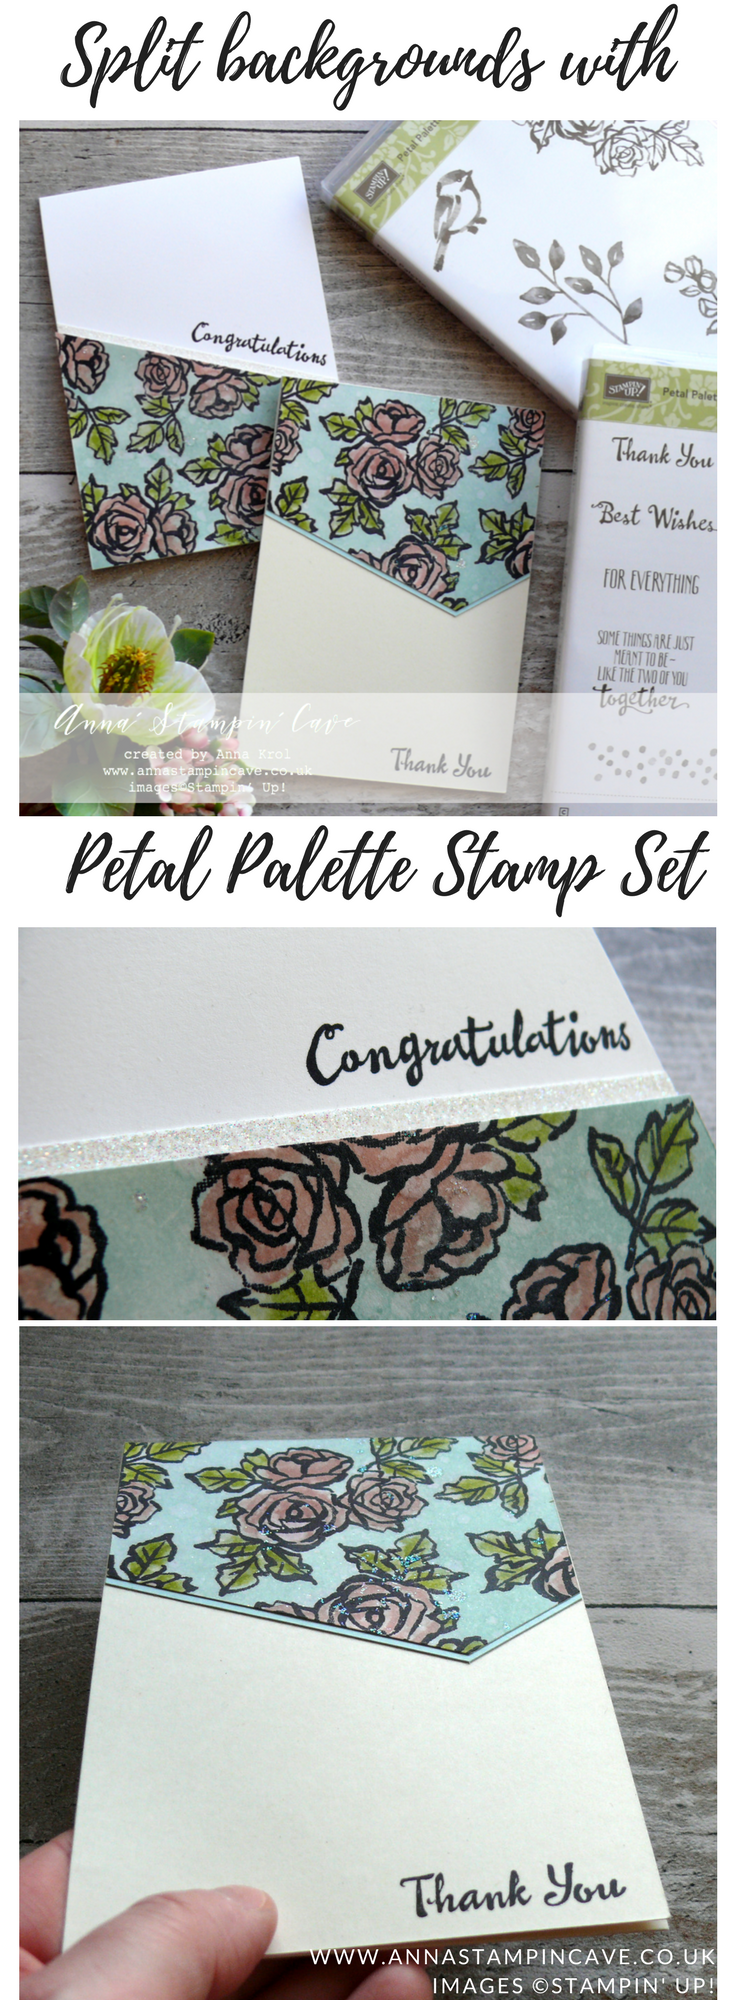
 I die-cut it using a 2nd largest circle die from Stitched Shapes Framelits Dies. Next, I die-cut slightly larger scalloped circle from a piece of Powder Pink cardstock and adhered DSP on top using liquid Tombow glue.


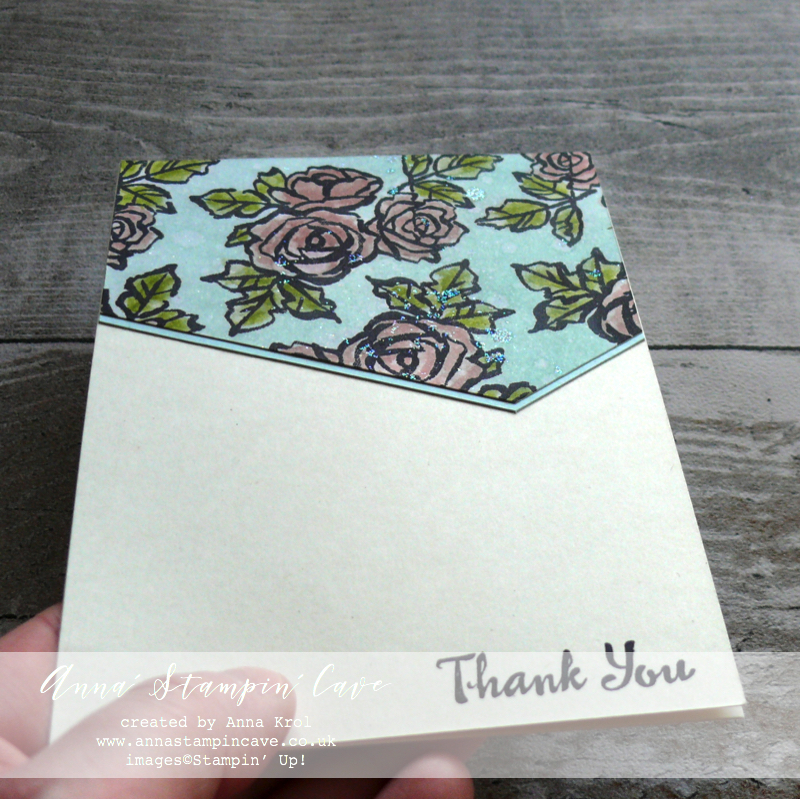
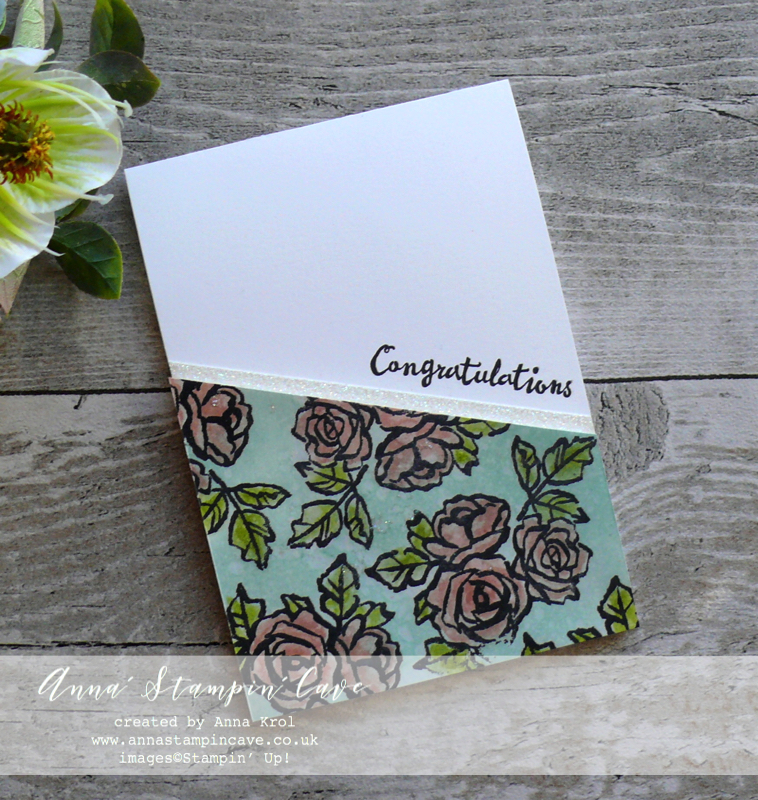 For first card, I decided to mount my diagonal piece at the very bottom of the card. But first, I stamped the sentiment, with help of Stamp-a-ma-jig, in Basic Black Archival ink.
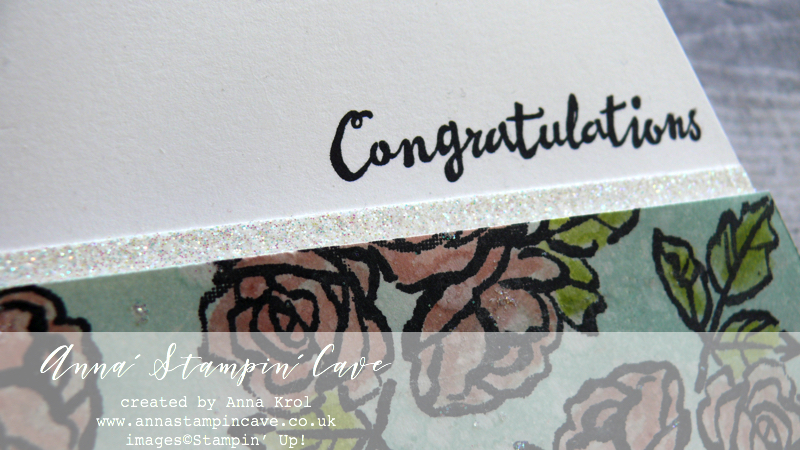
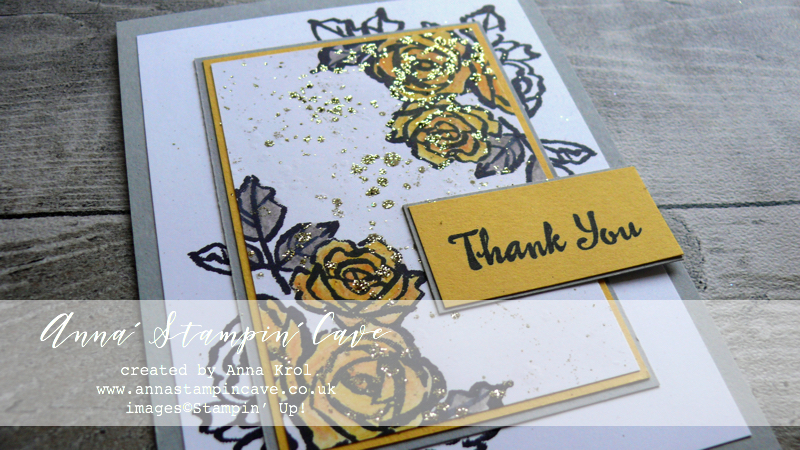
 For the second card’s card base I’ve used Very Vanilla thick cardstock and I tweaked the layout slightly.
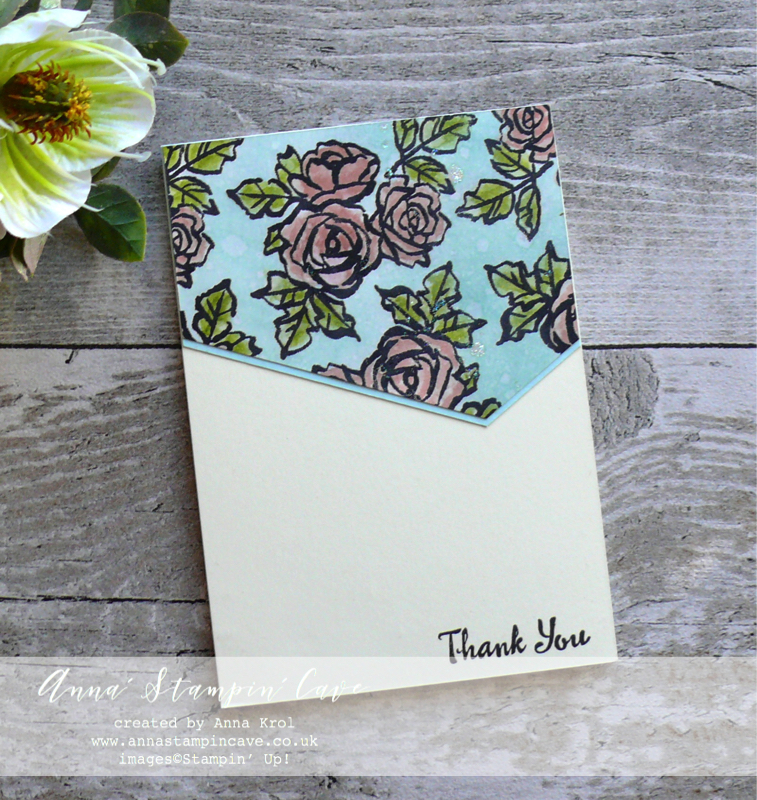


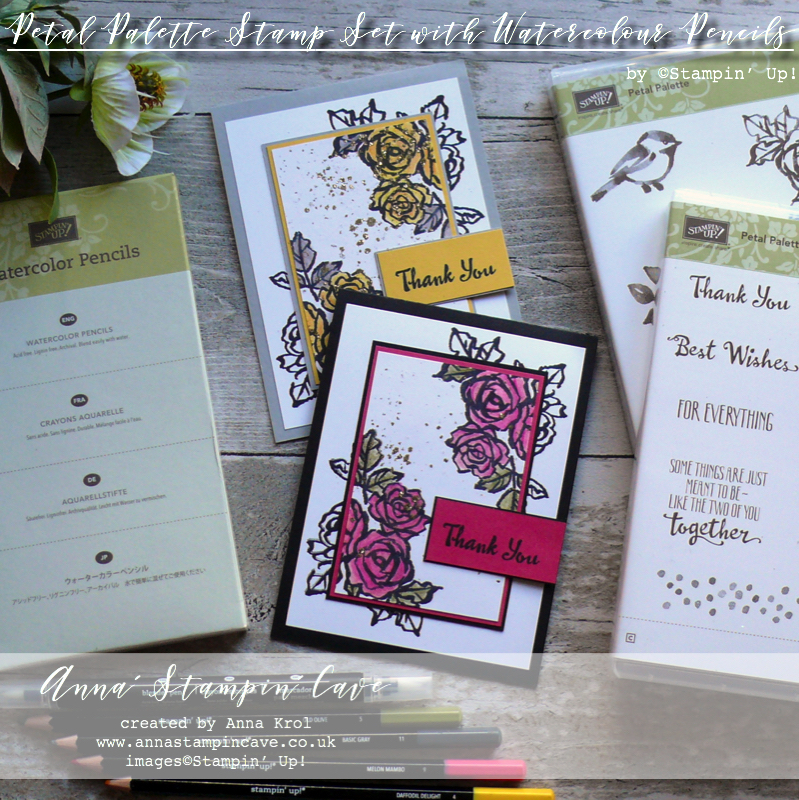
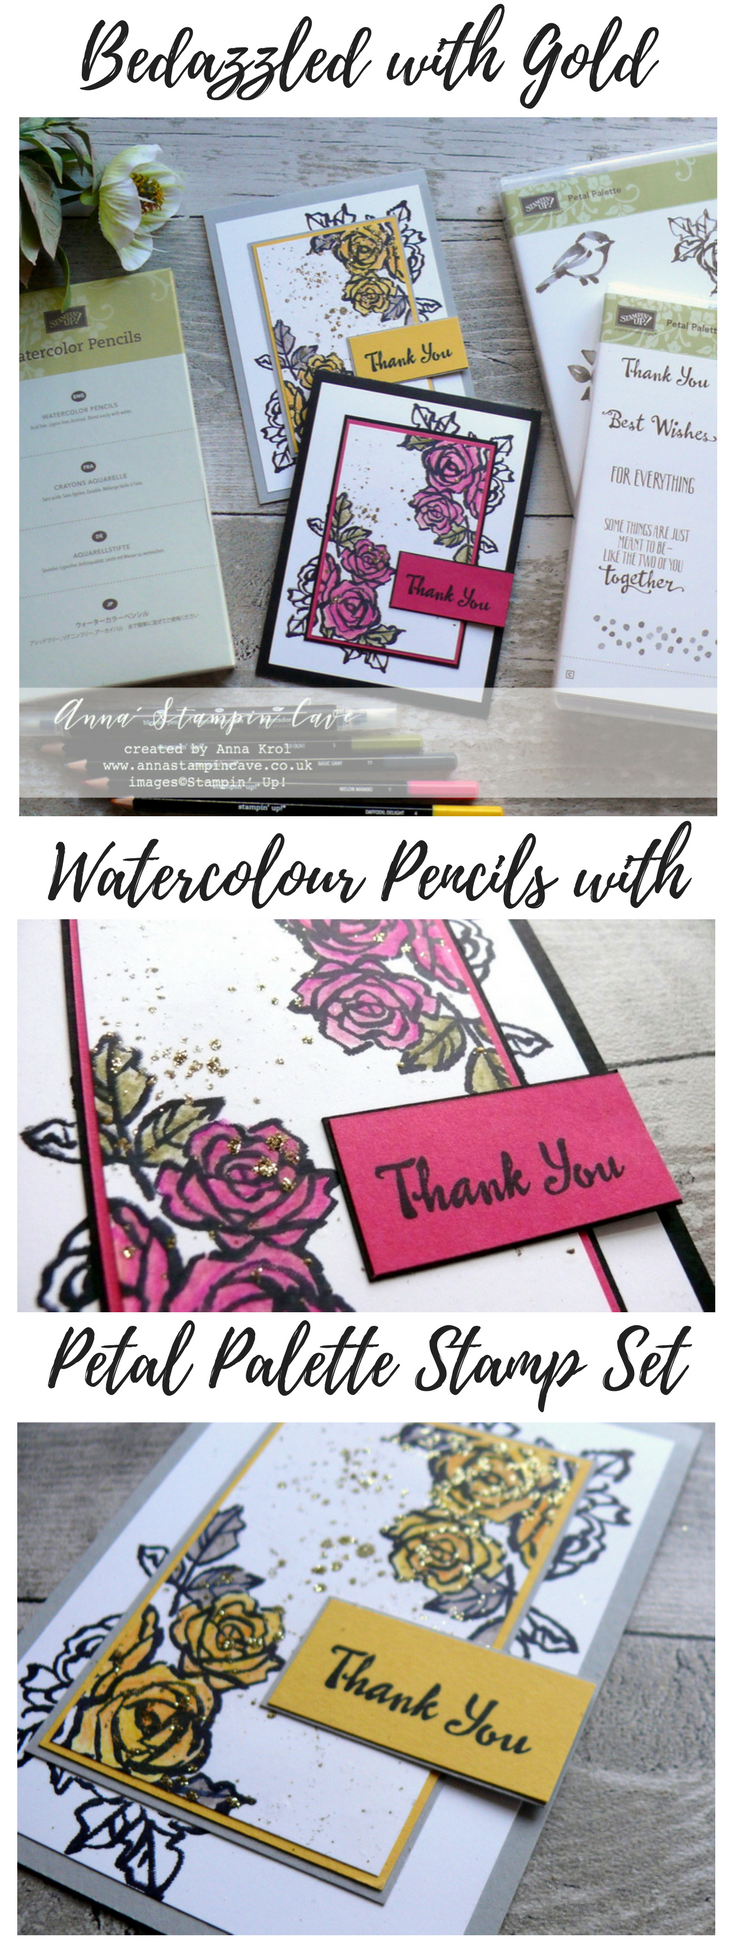
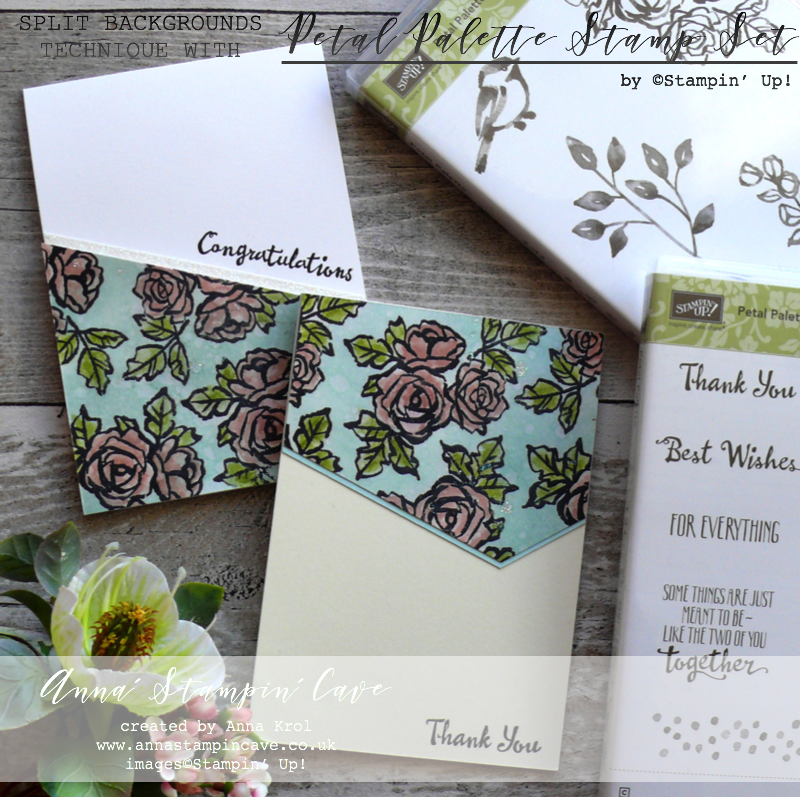
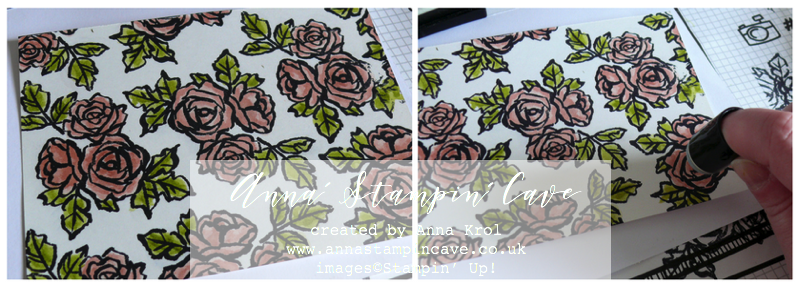
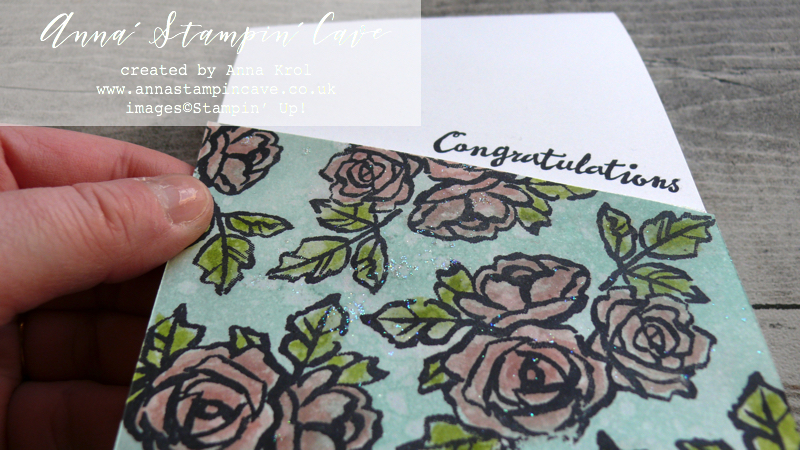
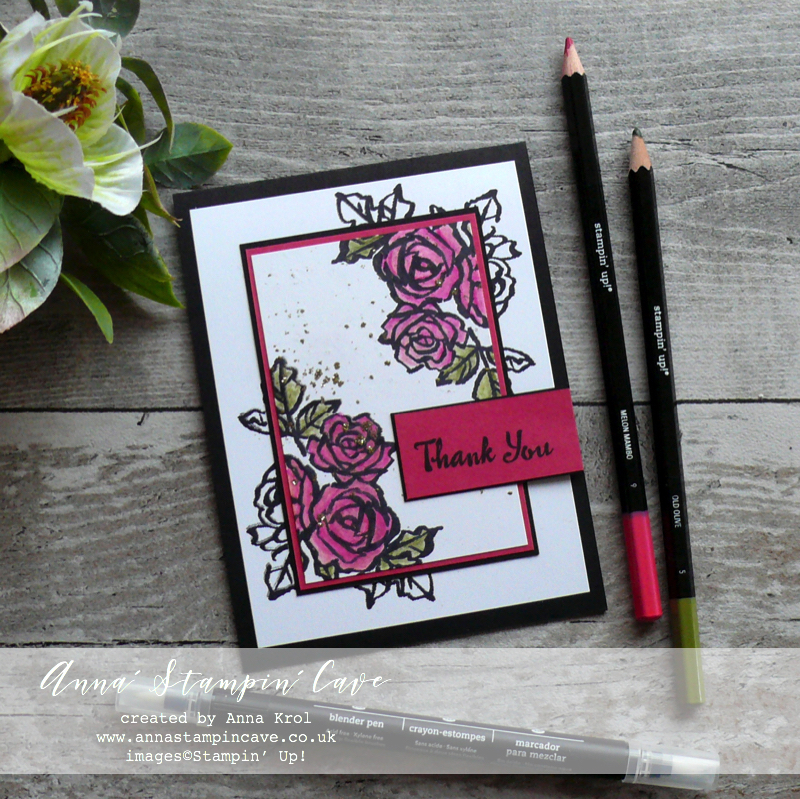 For one of my cards, I’ve used a classic colour combination: Basic Black & Melon Mambo with a hint of Old Olive on the leaves.
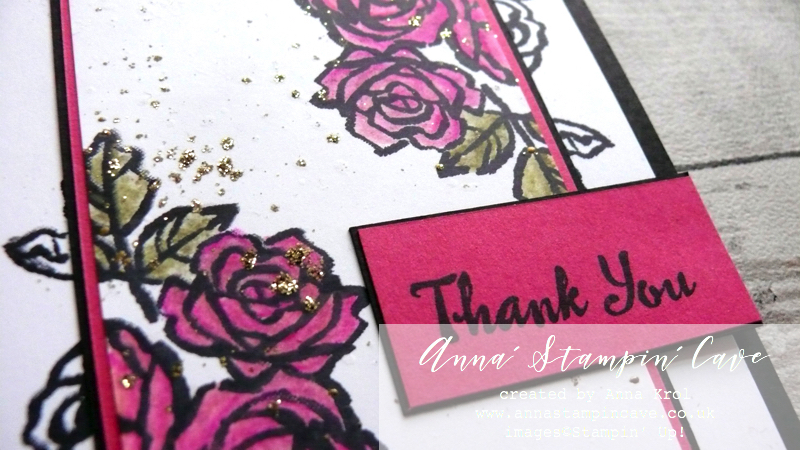 I stamped roses from Petal Palette Stamp Set in two corners of my panel making sure they overlap both layers. Because I planned to use Watercolour Pencils, I stamped them using Basic Black Archival ink.
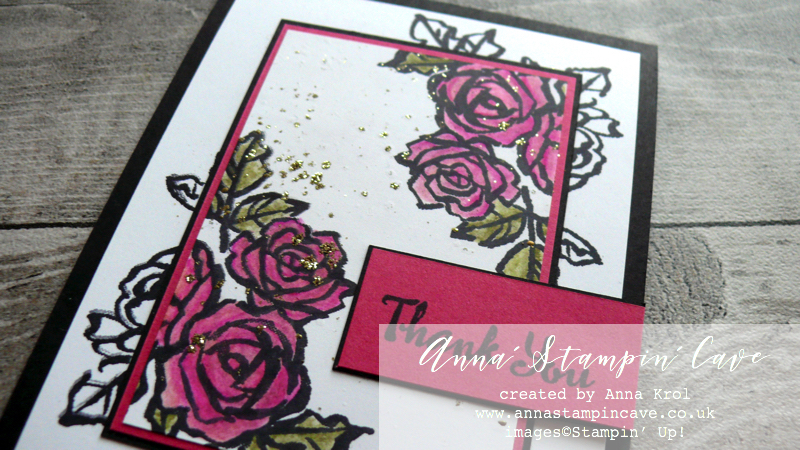 Blender Pens are colourless, but the solution they hold, helps moving colour around, even on regular cardstock.
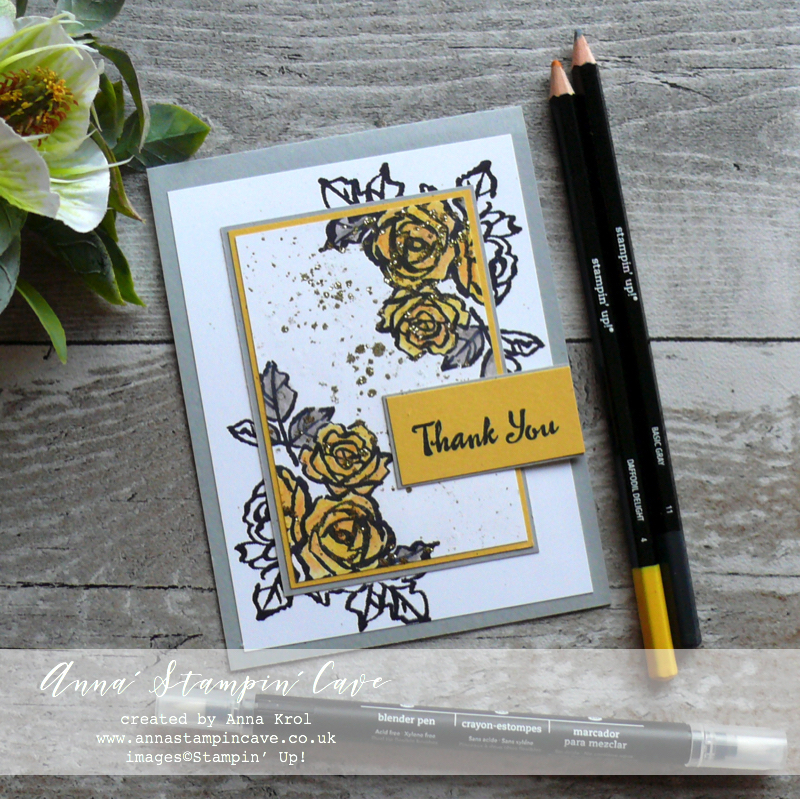
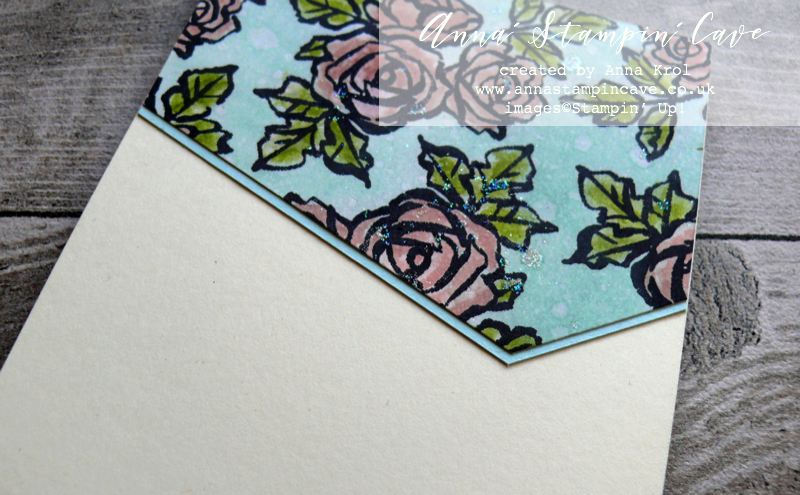
 I admit it is a VERY MESSY TECHNIQUE!! But it was so worth to have a glitter all over the house haha. Do I have to say it wasn’t last time I used this technique?! Can’t say more now lol