Anna’ Stampin’ Cave – Colourful Striped Background For Global Design Project – I am Guest Designer
Hello, my friends! I am so excited as today I am a Guest Designer for Global Design Project. How amazing is that?! I’m so humbled and honoured that GDP team has chosen me to join them for this week’s Colour Challenge. And boy, what a great colours we have to play with!
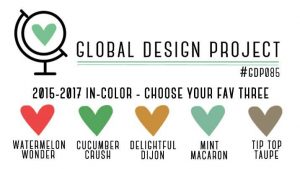
Choose your fav three wasn’t an option for me because I love all of these and wouldn’t know which to choose, to be honest. So I decided to be a rebel and for my project today I’ve used all five. Let’s say this post is a farewell to these beautiful In Colours.
Colourful Striped Background card dimensions:
Mint Macaron cardstock: 11-6/8″ x 4-1/8″ scored in half at 5-7/8″ (29.7 x 10.5 cm scored in half at 14.8 cm)
Very Vanilla cardstock: two panels, one for the card front, one for the inside of the card 5-7/8″ x 4″ (14.8 cm x 10.2 cm) each
cardstock for building the background: 5-7/8″ x 3-1/2″ (14.8 cm x 8.9 cm)
scraps of cardstock in colours: Mint Macaron, Delightful Dijon, Watermelon Wonder, Cucumber Crush and Tip Top Taupe
White Vellum for stamping and die-cutting
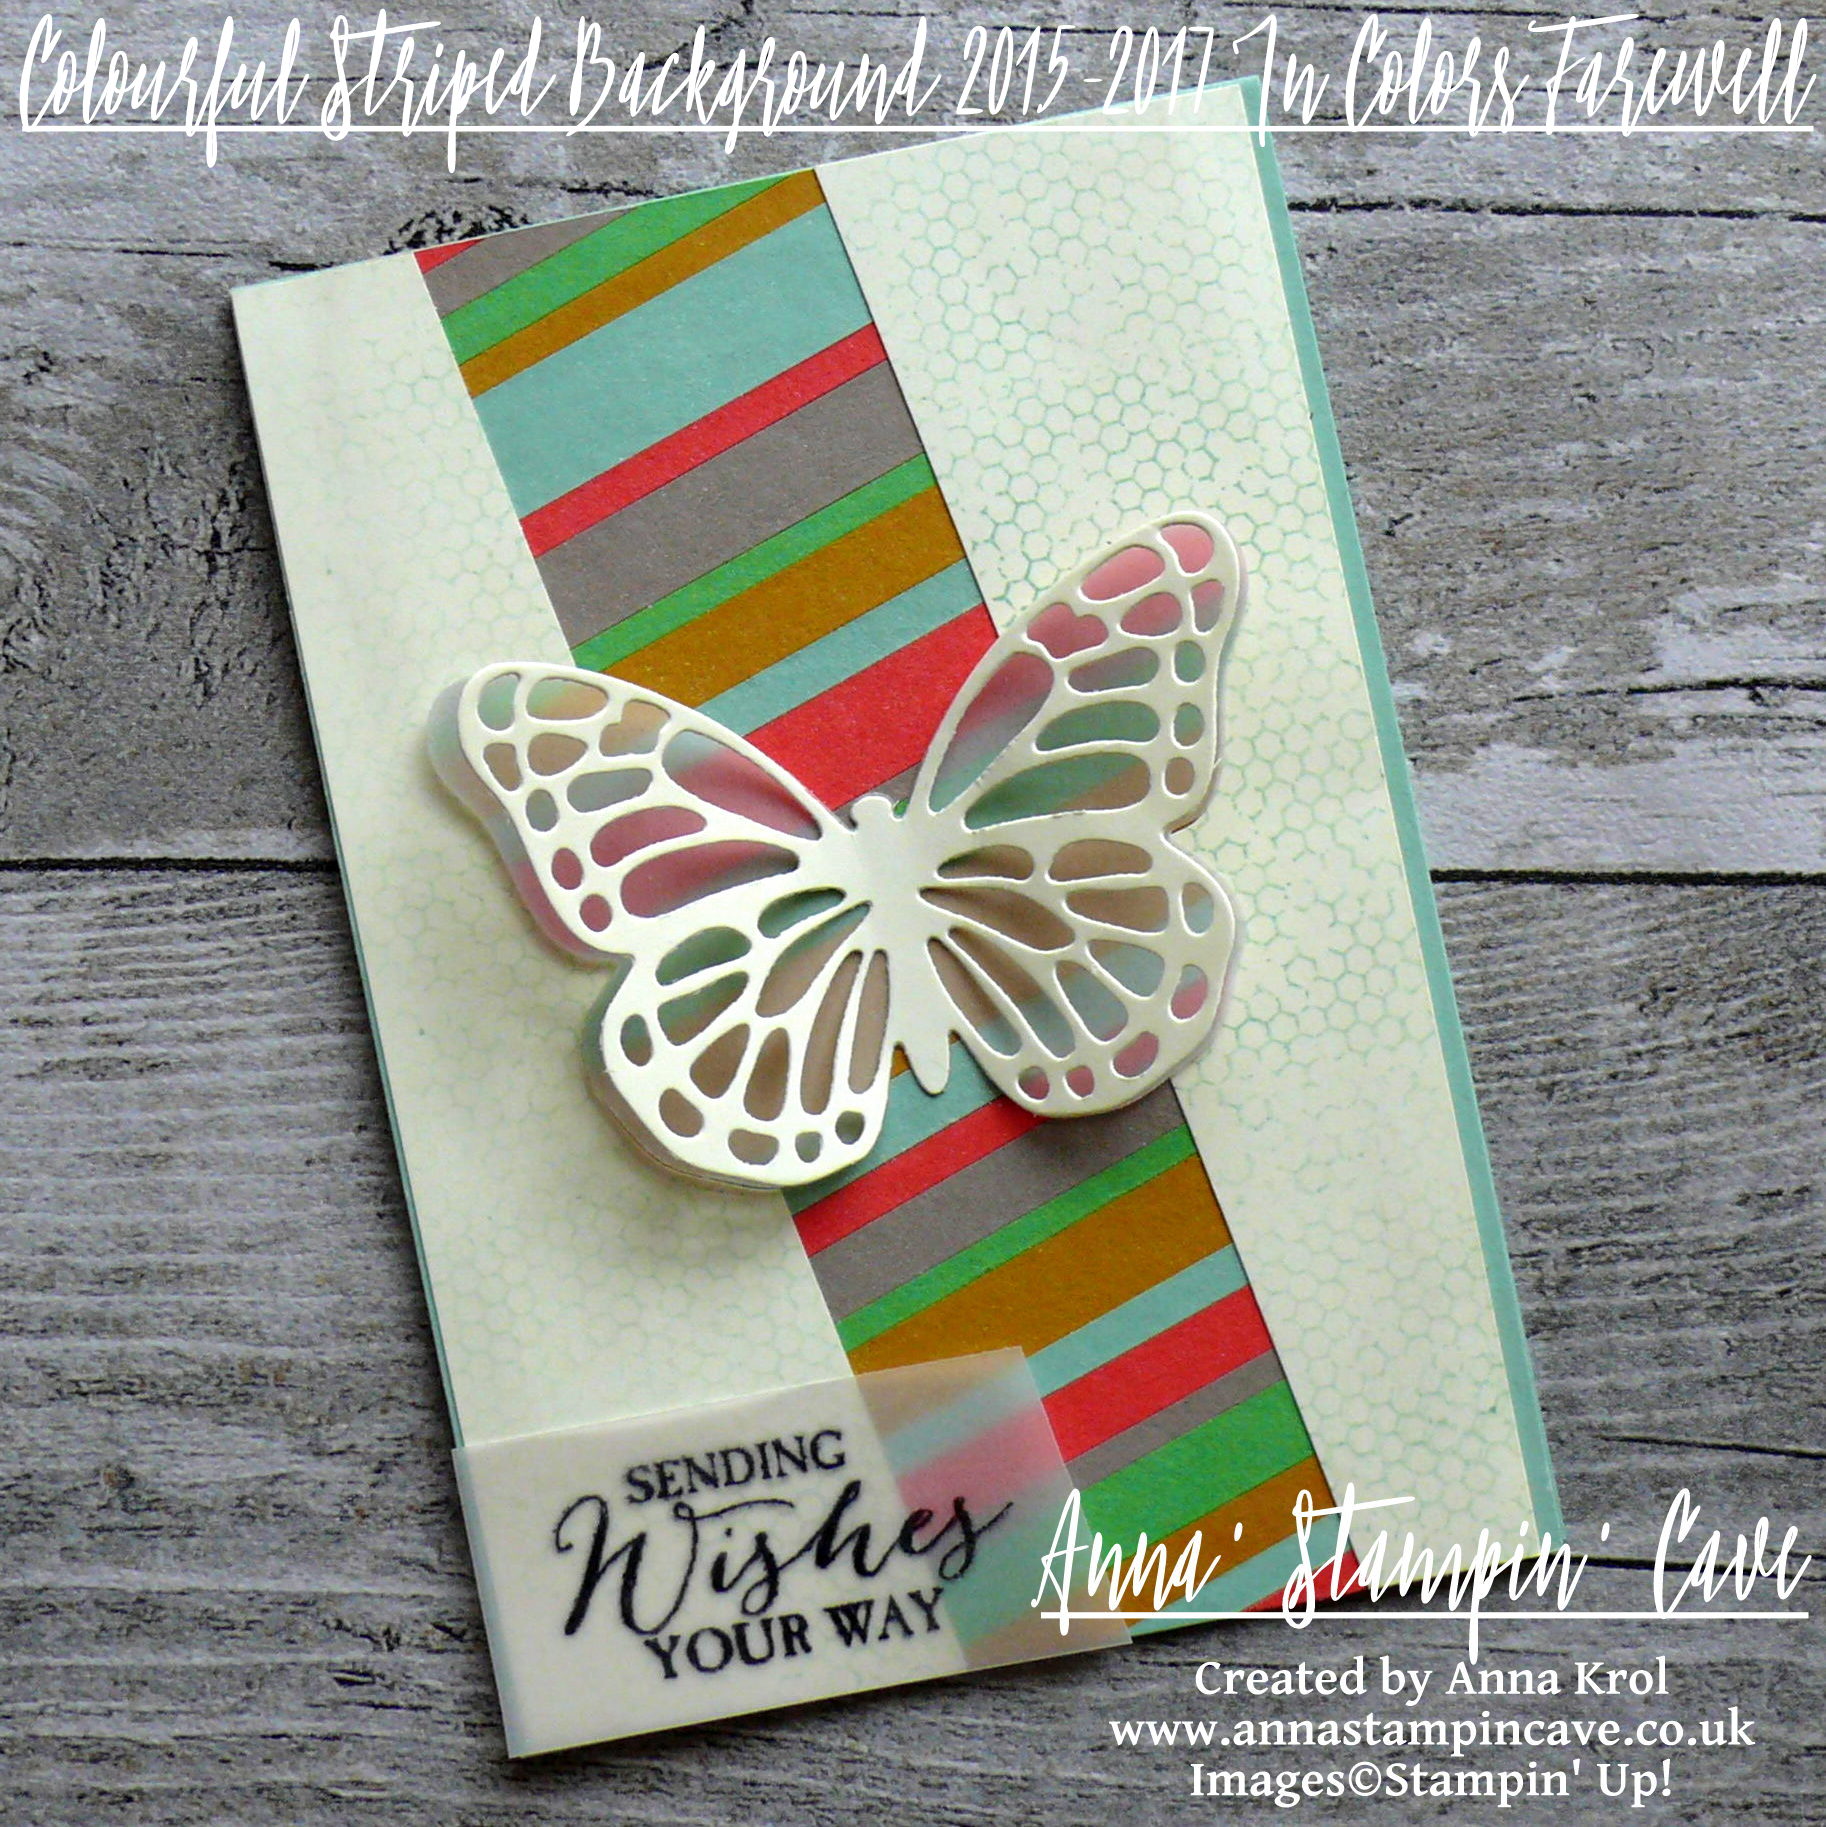
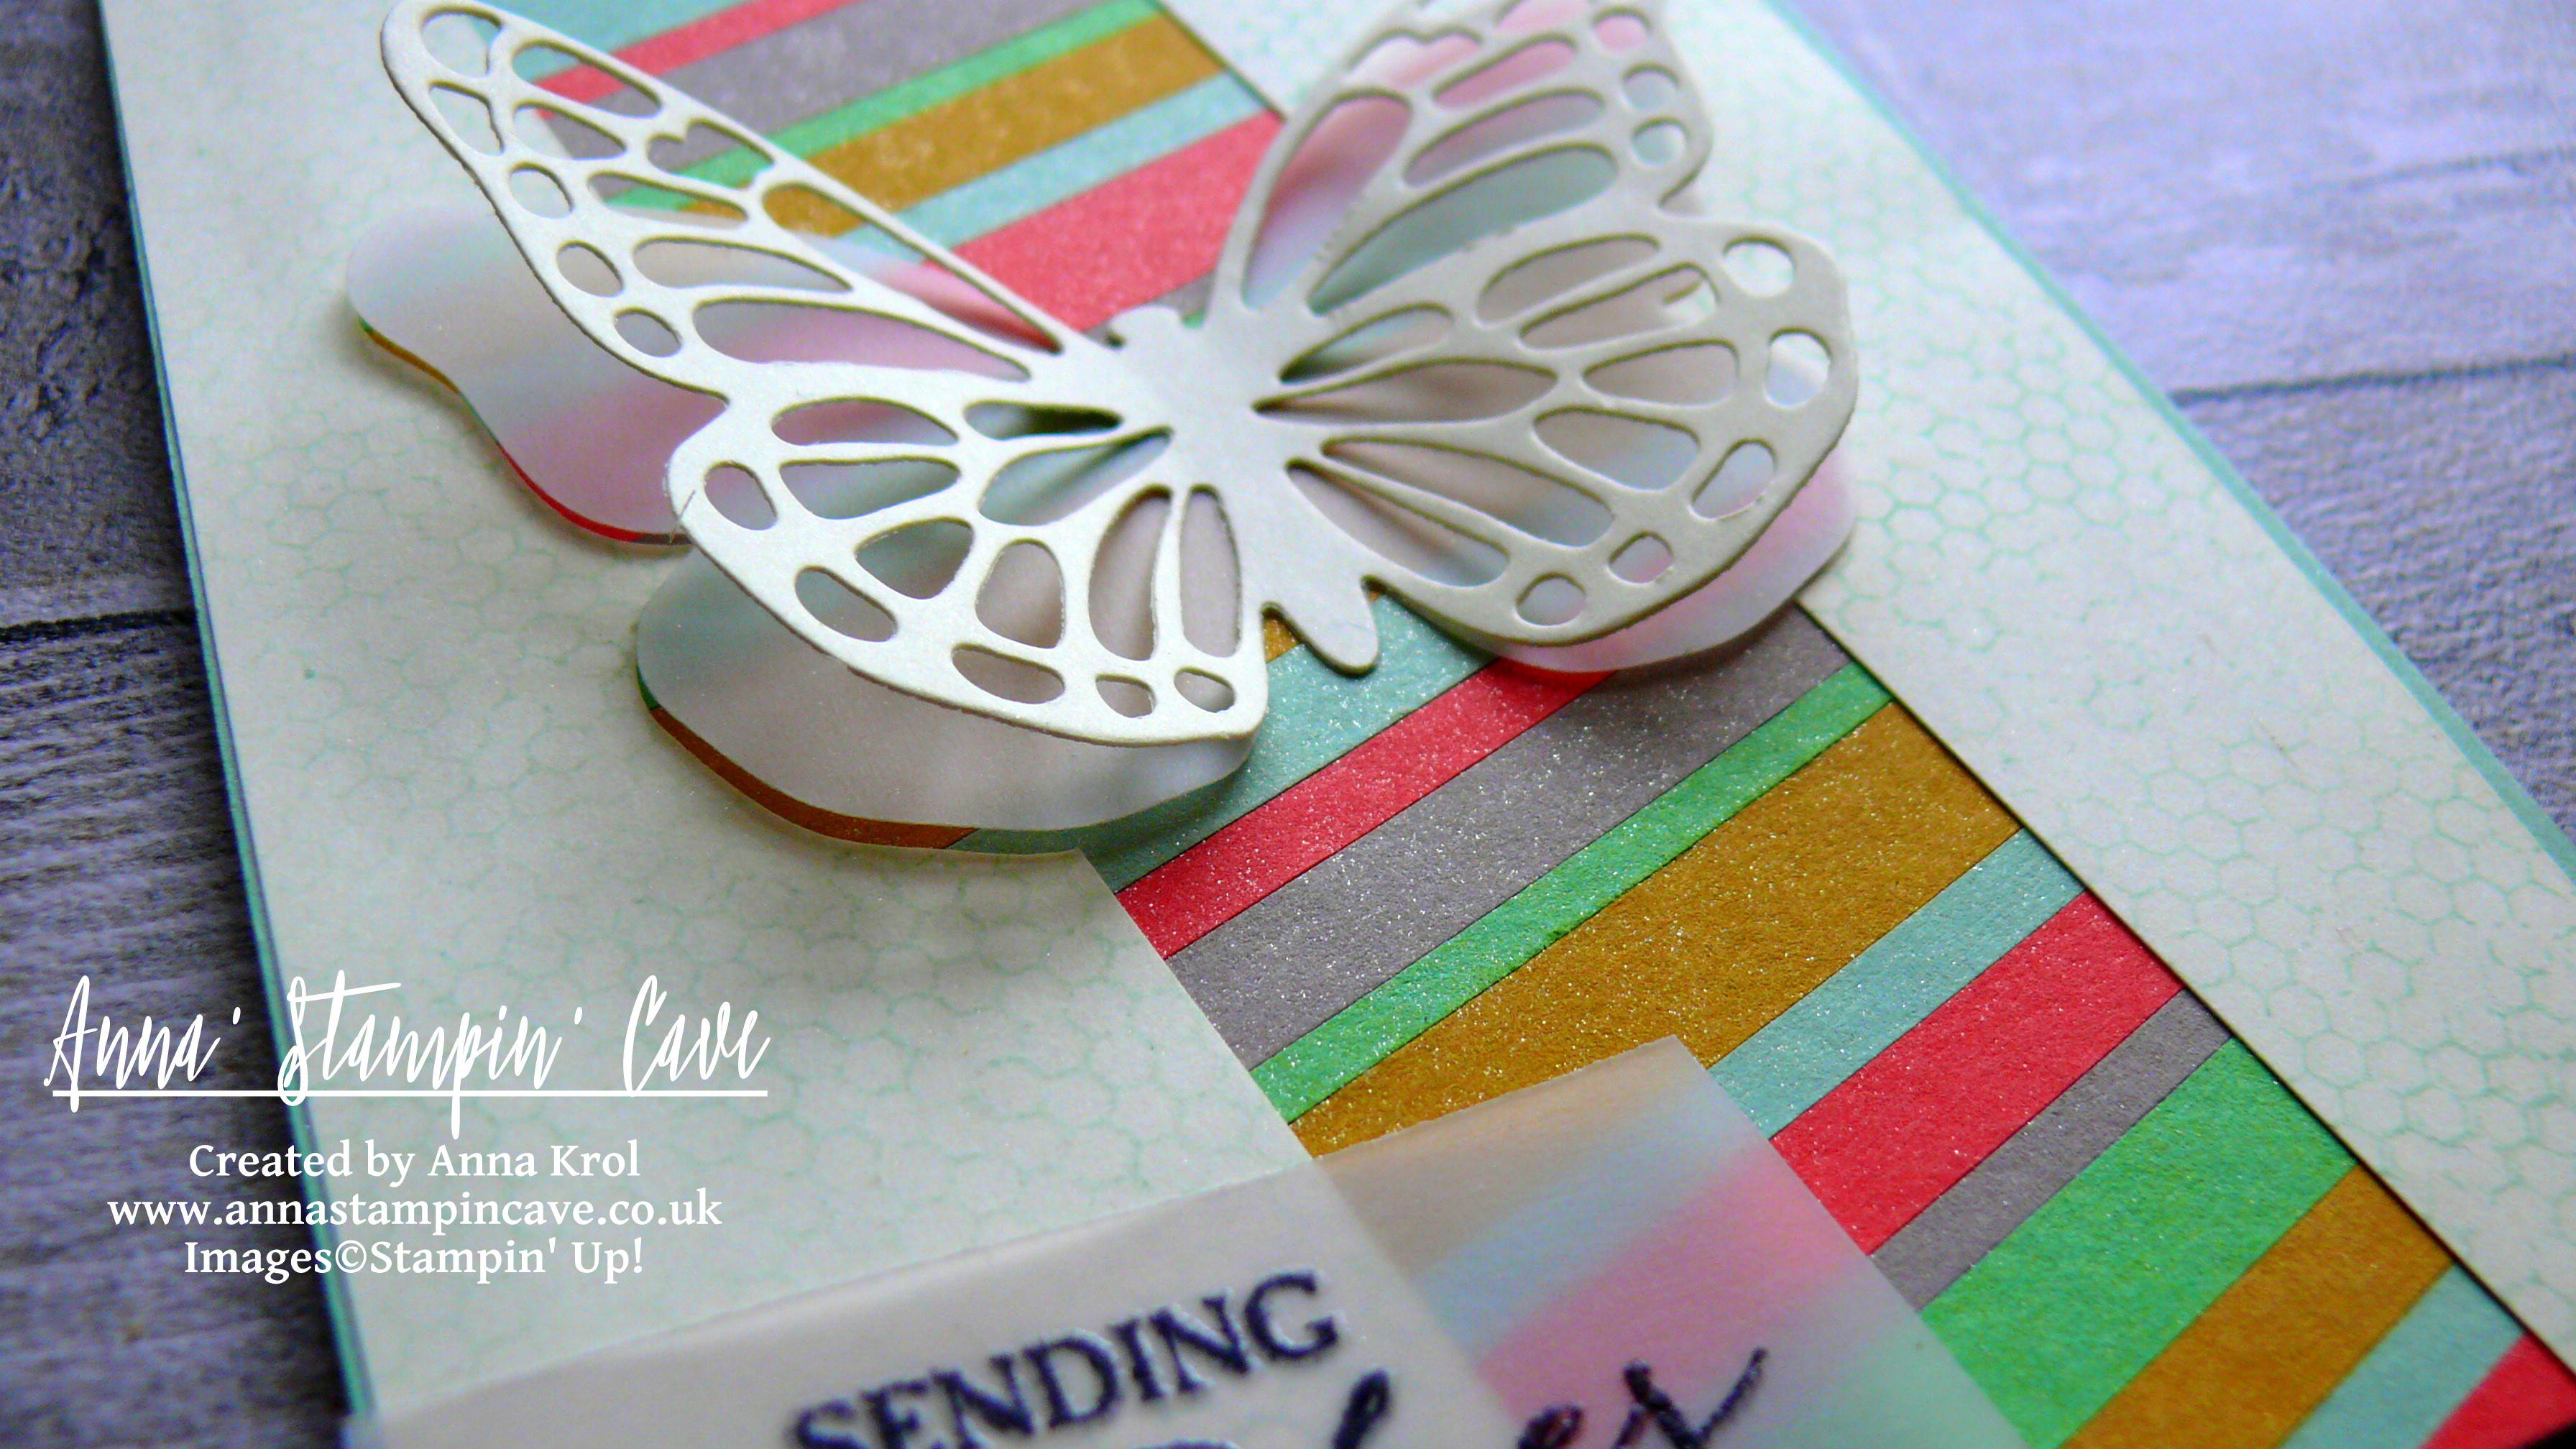
I started my card by creating this fun and colourful striped background. I took my scraps of cardstock of 2015-2017 In Colours and I cut it into strips of different widths. Next, I took a piece of cardstock (random colour as it won’t be seen anyway), covered it in glue, using snail adhesive, and adhered my strips diagonally, mixing colours and widths, making sure there’s no space left in-between the strips. When the whole panel was covered, I trimmed any overhanging stripes.
Can you see the shimmer on this panel? I took empty spritzer bottle and fill it with water. Next, I took Clear Wink of Stella Glitter Brush and squeezed pretty few drops of it into the spritzer. I shake it really well, spritz my entire panel with this glittery mist and let it dry.
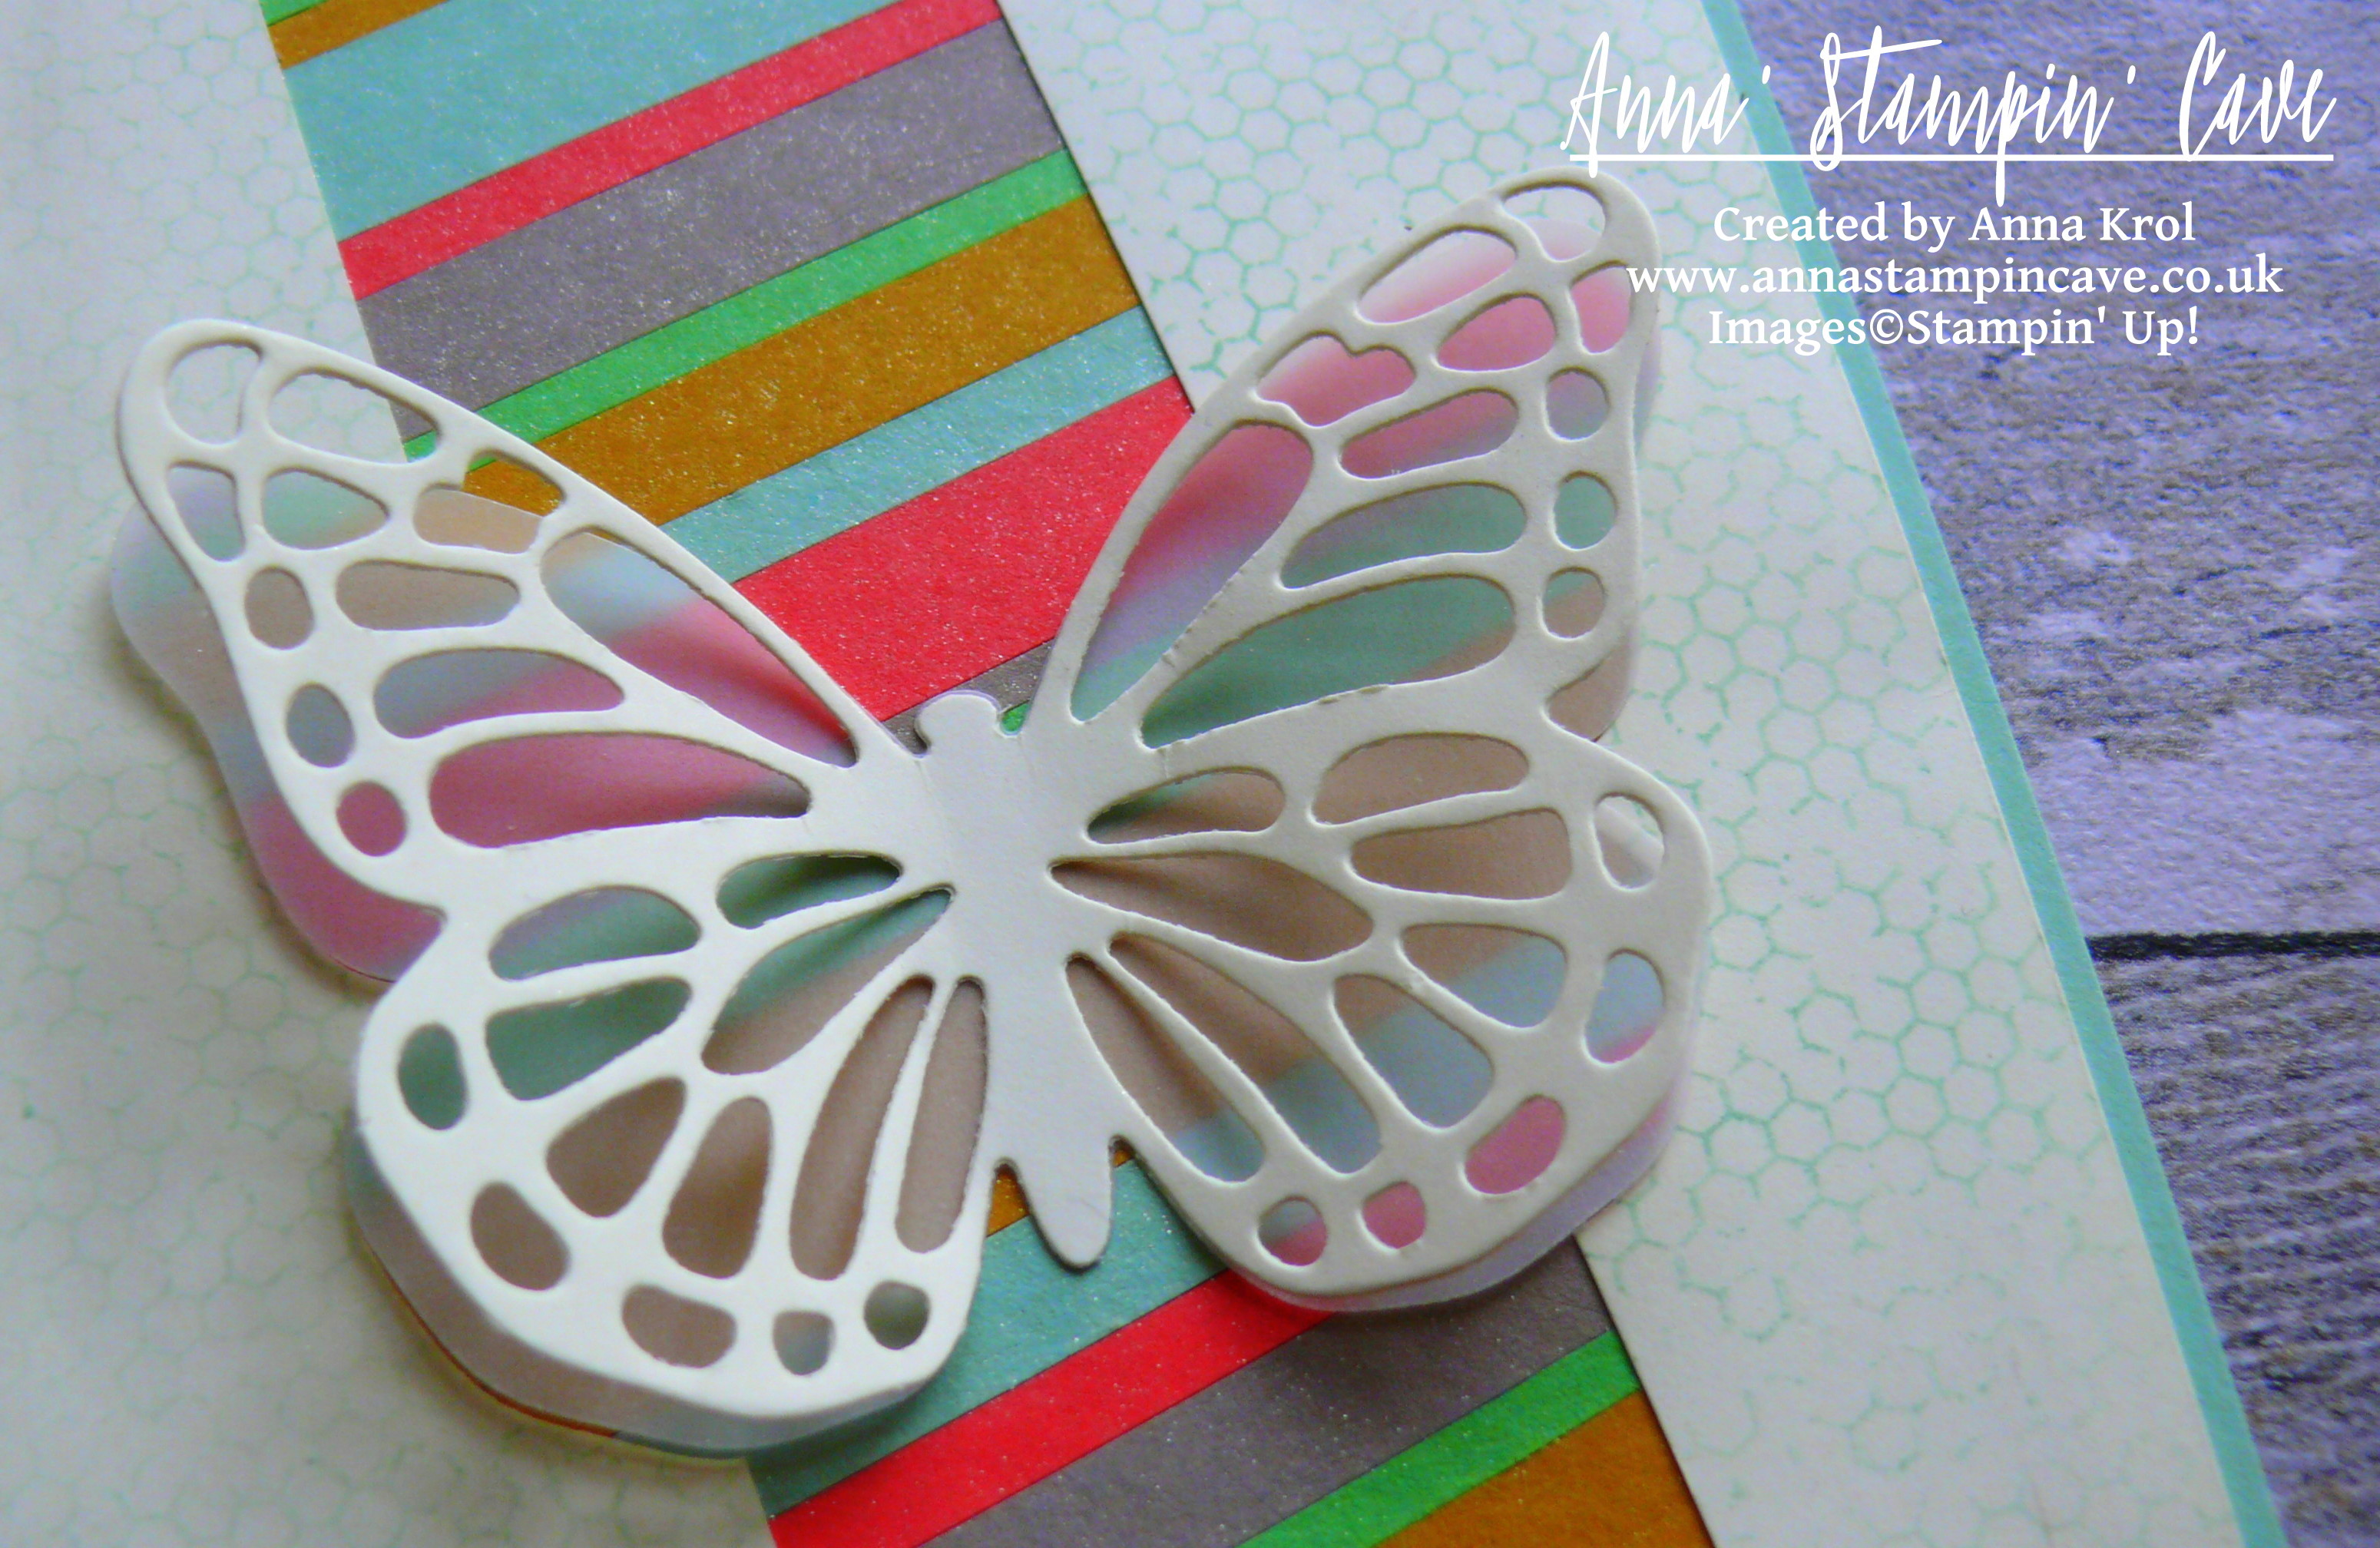
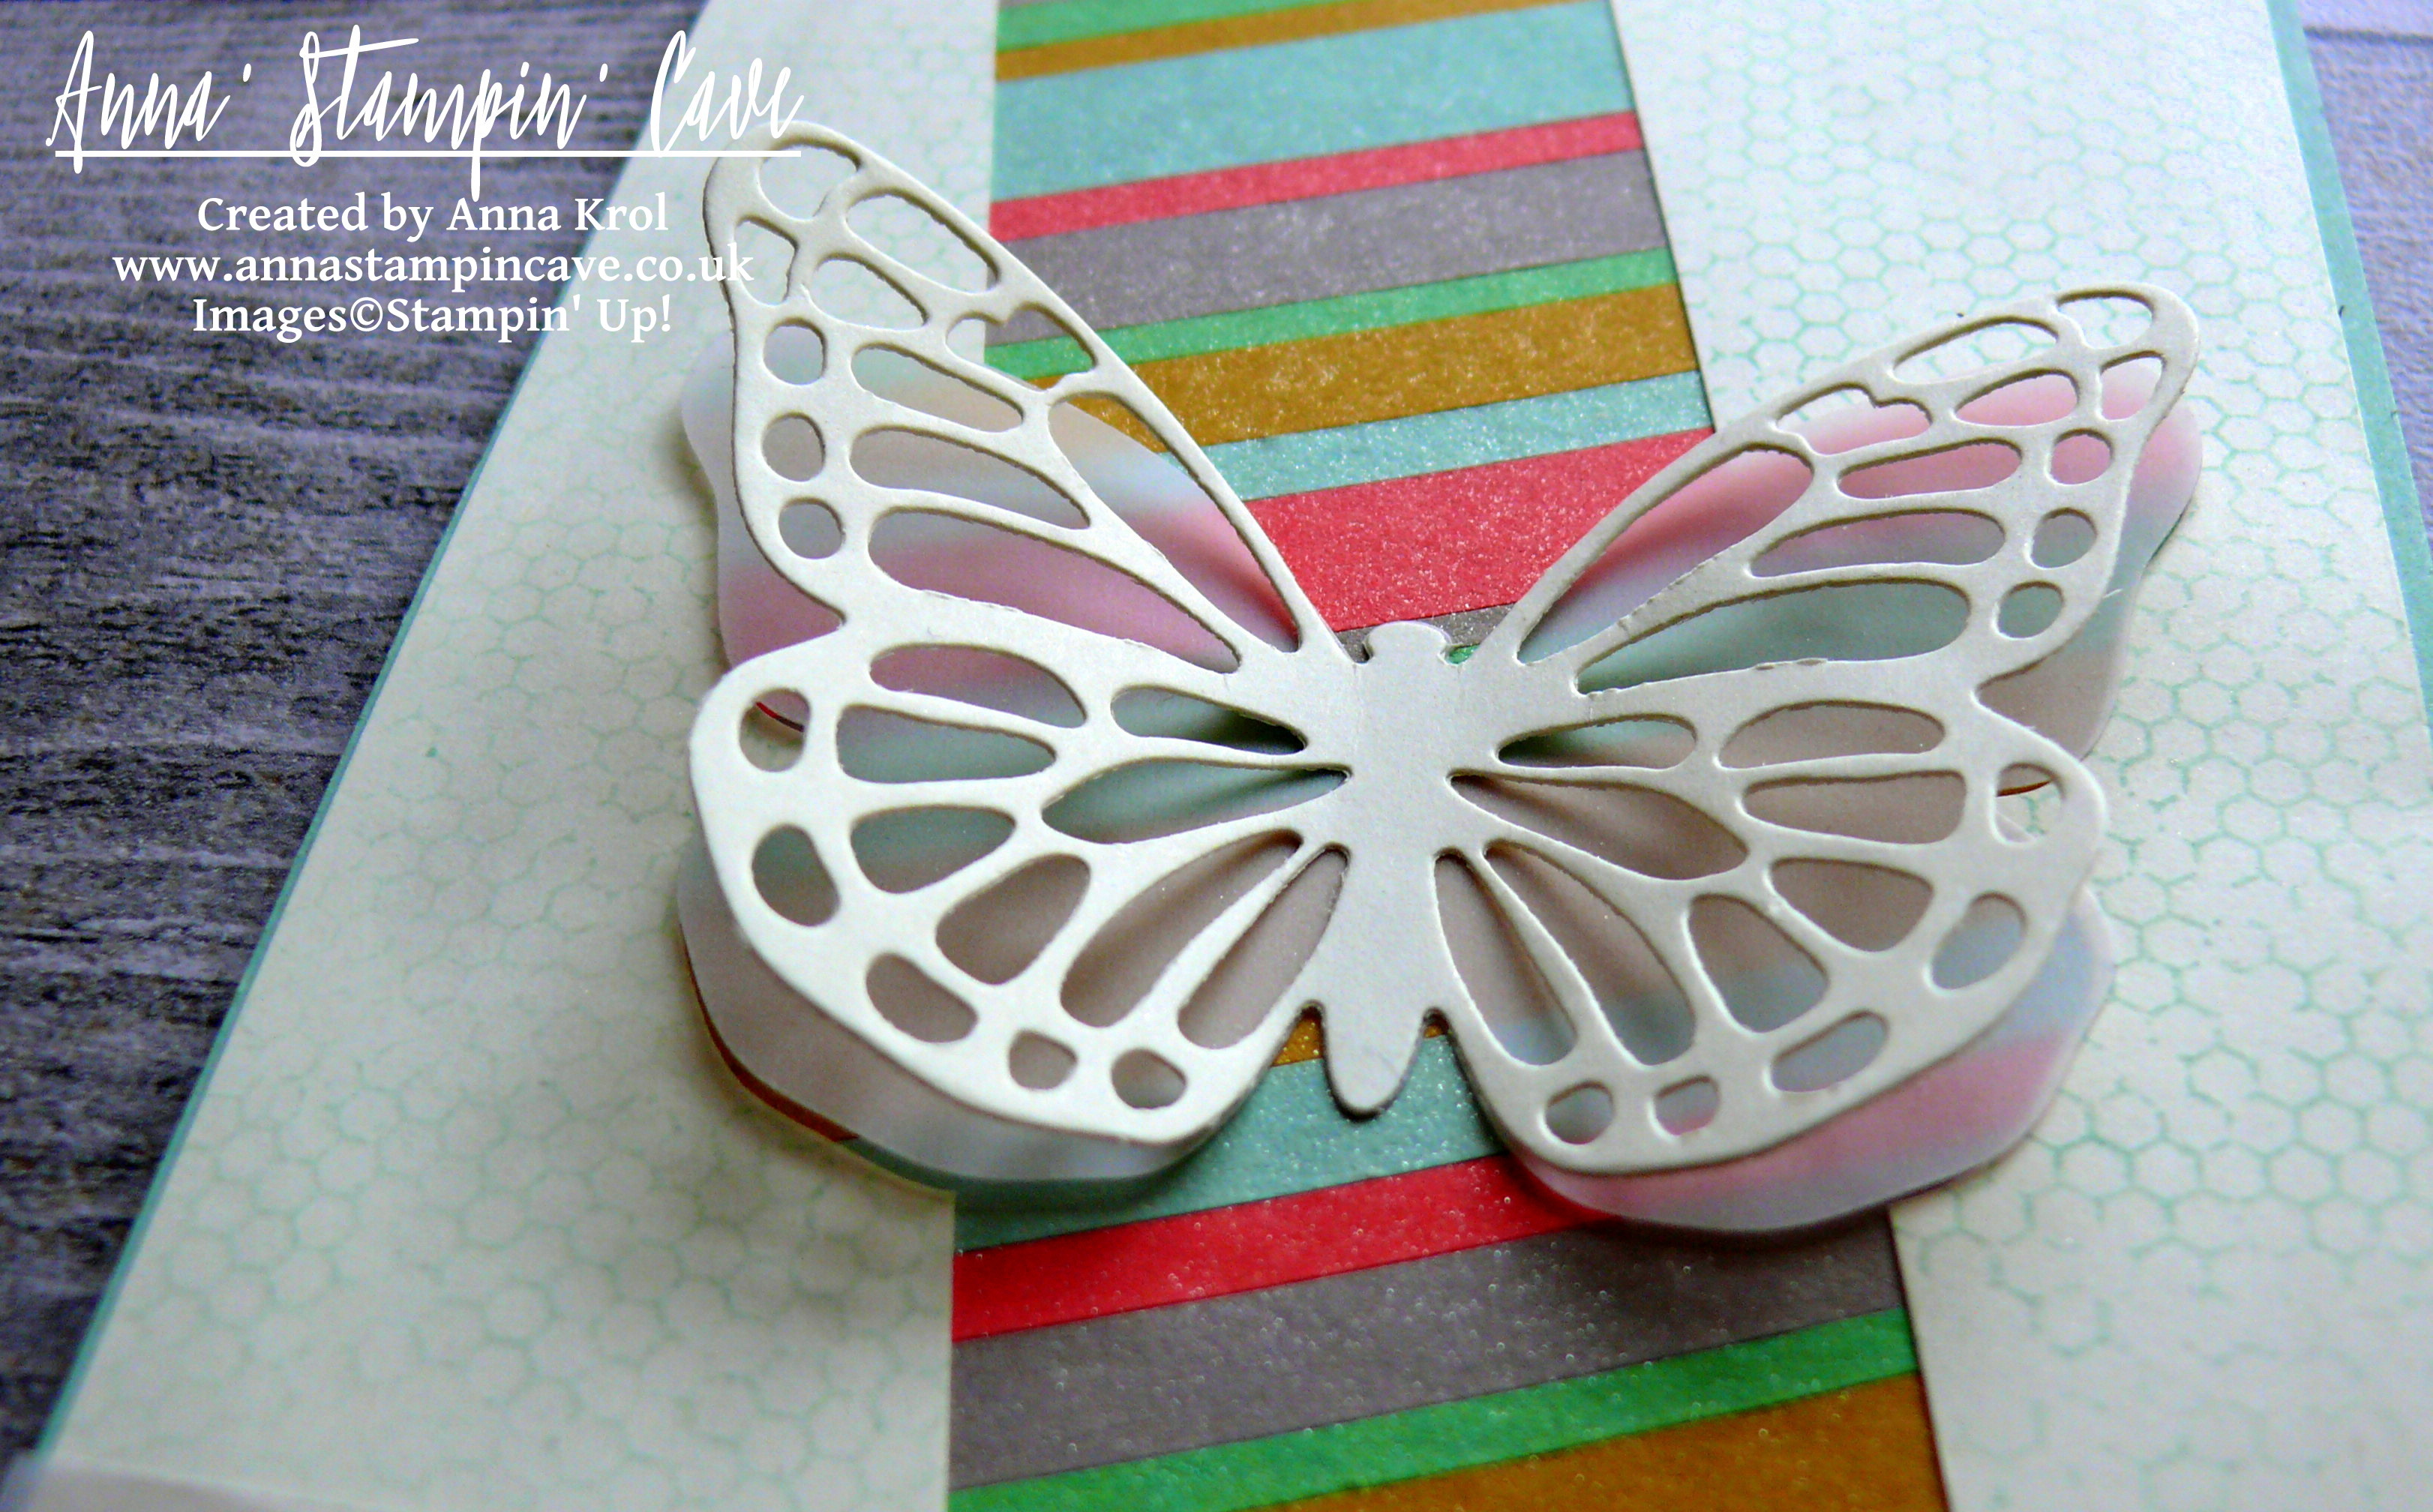
I took the Very Vanilla panel and die-cut this intricate butterfly from Butterflies Framelits Dies in the middle of it. I also die-cut solid butterfly from vellum using Bold Butterfly Framelit Dies.
Using t-ruler, I draw two diagonal (and parallel) lines at the back of my panel. Using these lines as guides, I cut my panel into three and discarded the middle piece. Next, I stamped this lovely chicken wire (kinda) pattern from Butterfly Basics Stamp Set all over the other two pieces. I stamped it in Mint Macaron and to create this faded look I stamp off twice before I stamped on the cardstock.
I adhered my Very Vanilla pieces to the background panel, with butterflies inlaid between them: vellum butterfly at the bottom and vanilla one on the top, and added the whole panel to the card base with liquid adhesive.
For the sentiment, I chose “Sending Wishes Your Way”, also from Butterfly Basics Stamp Set. I prepared vellum with embossing buddy, dabbed my stamp in Versamark and straight away in Basic Black Archival ink, and stamped it onto vellum. Sprinkled it with clear embossing powder and heat set it. Adhered it to the card with few tiny drops of Fine-Tip Glue Pen. All that’s left was to add second Very Vanilla panel inside of the card. Done!
Once again I wanted to thank amazing GDP team for this opportunity and privilege, that I could showcase my project alongside such wonderful artists. Thank you from the bottom of my heart.
As always, I really want to encourage you to visit the Global Design Project challenge and play along. You too have a chance to be the next Guest Designer
Anna’ Stampin’ Cave – Stampin’ Up! Watercolour Wings – Good Things Come In Threes
Hello, everyone! I hope you have an amazing Saturday so far. We have such a beautiful weather today down here in Midlands – it doesn’t feel like I live in the UK at all ? And I really hope this weather will stay for a little while. Even just to cheer me up. This past week was one of the toughest in last few months, as the pain is back and it ain’t go anywhere in near future. It laughs at painkillers too. So my days are filled with enormous pain that truly makes my brain freeze and I find it hard to concentrate, let alone create. But I had such a great idea for this week’s challenge over at Global Design Project that I just HAD TO make it happen! Do you have it sometimes? An idea that feels that if you won’t try it you will POP!? hahaha So a couple of nights back, I hid in my cave, despite the pain, and … five hours later I came out not with one but three cards! How that even happen?! As I was creating my initial card, more ideas popped into my head and obviously, I HAD TO TRY them all, haha So just a warning: this post is long and picture (glitter) heavy ?
So I will start with my first card where it all started: lovely, clean & simple and … pink-ish. Not really something you’ve seen here often. But I actually like it:
Flirty Flamingo card dimensions:
Whisper White Thick cardstock card base: 11-6/8″ x 4-1/8″ scored in half at 5-7/8″ (29.7 x 10.5 cm scored in half at 14.8 cm)
Flirty Flamingo cardstock: 3-6/8″ x 4″ (9.6 cm x 10.2 cm)
Whisper White cardstock: 3-1/2″ x 3-6/8″ (9 cm x 9.6 cm)
Flirty Flamingo Ruched Ribbon: 12″ approx, to tie a bow
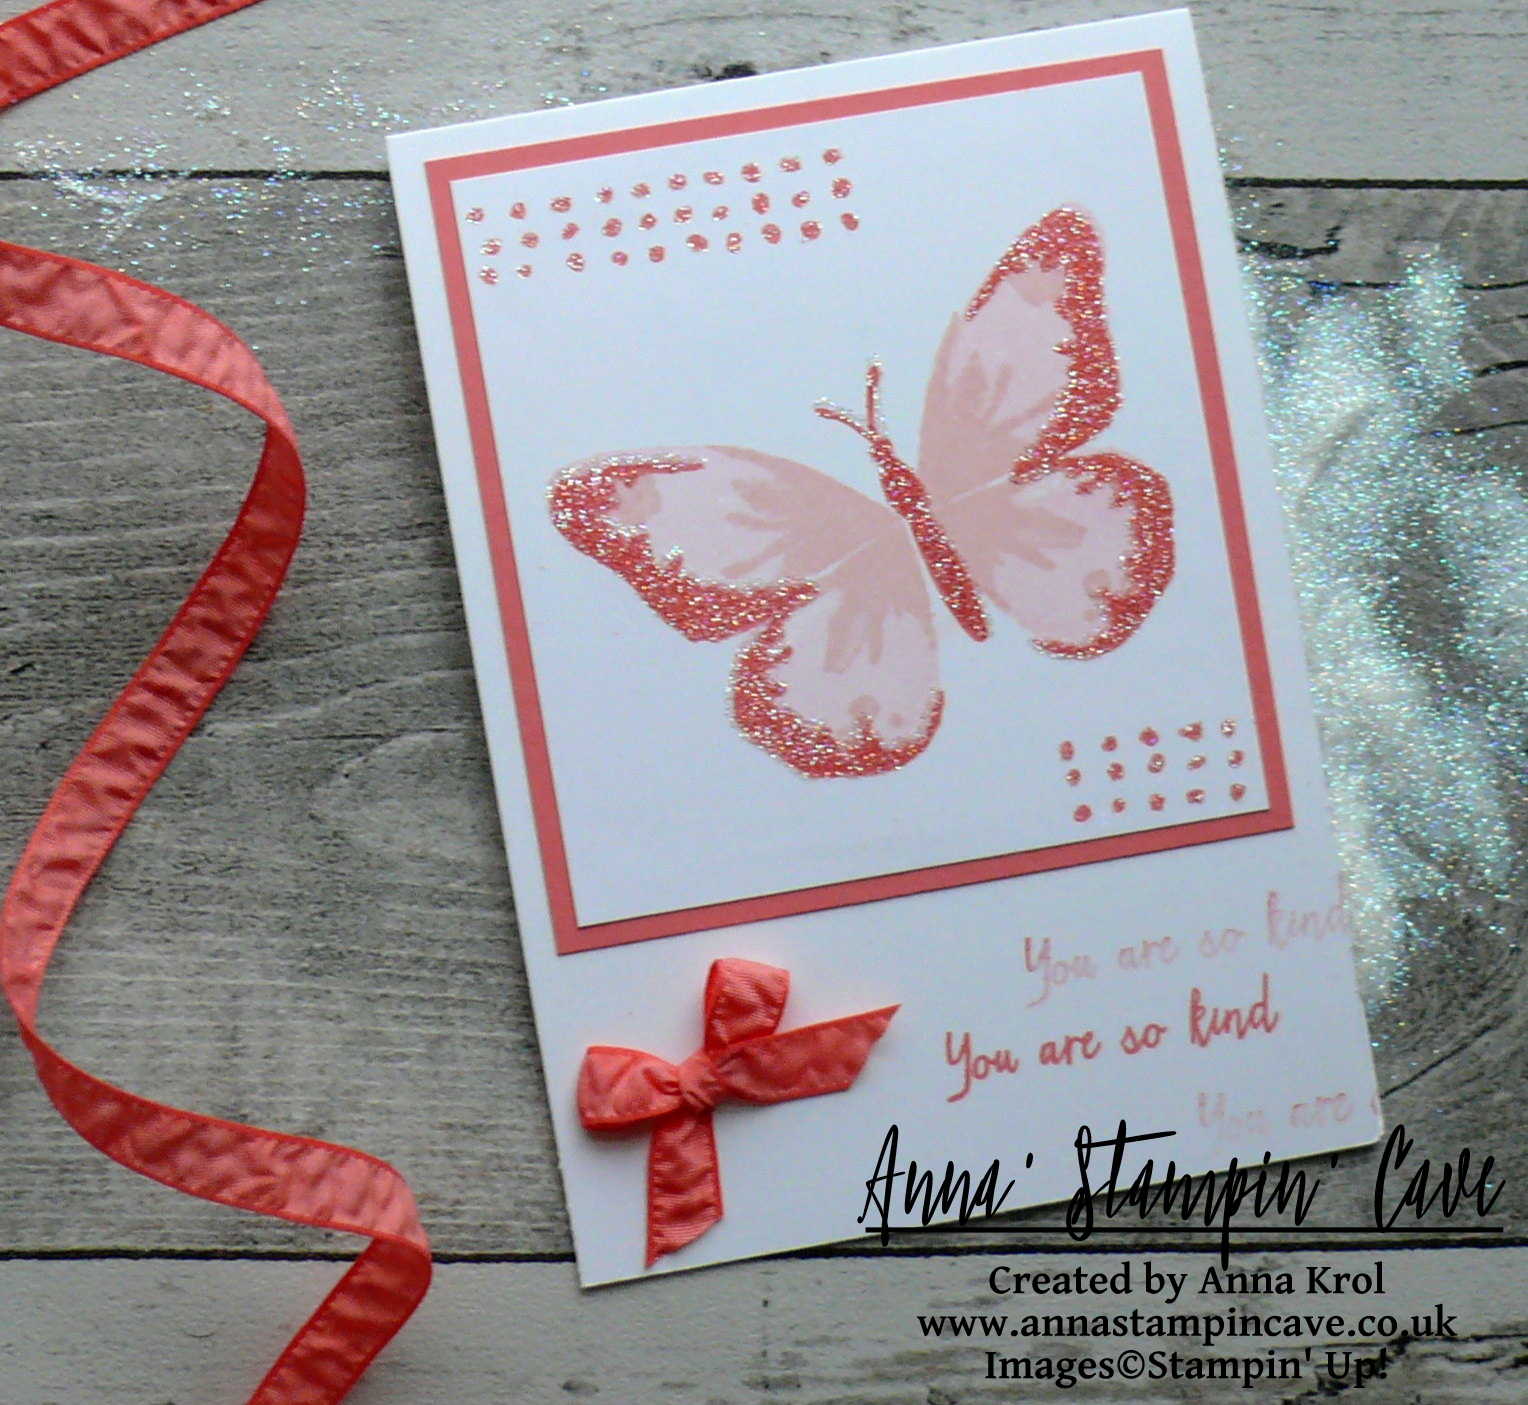
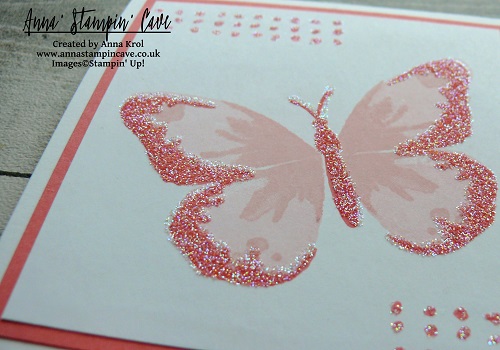
This beautiful butterfly from Watercolour Wings Stamp Set is a three step stamping image as you have three stamps to create the look. I’ve used three different shades of pink: Pink Pirouette for the base, Blushing Bride for the details on the wings and Flirty Flamingo for wings’ edges and the body of the butterfly.
Savvy tip: if you’re just starting your papercraft adventure and don’t have many ink colours (been there, done that) you can use the same ink pad to stamp all the layers. If it’s a light colour ink, you can stamp each layer on top on previous one and it will get slightly darker each time. You can repeat more detailed layers couple of times to get the shade you are happy with. If you have dark colour ink, you can use stamping off technique (also called ghost stamping or second/third generation stamping). You simply stamp off your image couple of times before stamp it on your piece. The rule is: the larger the image like the base here, the lighter the shade.
I also stamped this polka-dot-kind-of image in two opposed corners of my panel. You are probably wondering: OK, but where all that glitter come from? And no, I didn’t use glue for that.
When the image was stamped, I prepared the card with embossing buddy and I stamped the edges of the wings of the butterfly, the body and polka dots once again, but this time using Versamark ink. I sprinkled it with Heat & Stick Powder, heat it till it melts, add Dazzling Diamonds glitter and heat set it again. Heat & Stick Powder once re-heated it melts again, making all that glitter to soak in, so when I send this card out the recipient can enjoy beautiful card and won’t be covered in glitter.
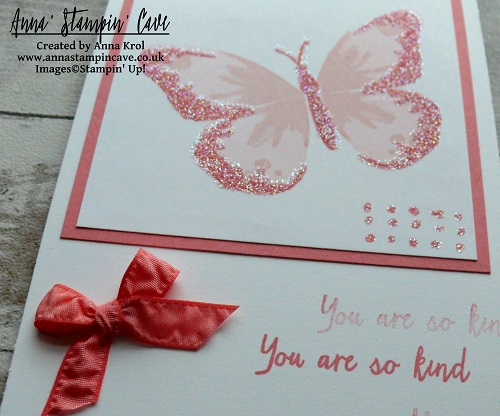
I adhered my panel to a Flirty Flaming mat and next to the card base. Firstly, I wanted to create the banner or a strip of cardstock for a sentiment, but it didn’t look good. So using Stamp-A-Ma-Jig I decided where I want my sentiment to go and stamped it in Flirty Flamingo. Next, to jazz it up a little I stamped it twice more, without re-inking my stamp. It’s called ghost stamping or stampin’ off. A little, dinky bow finish off my card.
Card number 2 (Jazz it up babe ?)
Bermuda Bay & Crumb Cake card dimensions:
Crumb Cake cardstock card base: 11-6/8″ x 4-1/8″ scored in half at 5-7/8″ (29.7 x 10.5 cm scored in half at 14.8 cm)
Bermuda Bay cardstock: 3-6/8″ x 4″ (9.6 cm x 10.2 cm)
Crumb Cake cardstock: 3-1/2″ x 3-6/8″ (9 cm x 9.6 cm)
Bermuda Bay cardstock strip for a sentiment
Bermuda Bay Thick Baker’s Twine two lengths: 16″ and 4″ (approx)
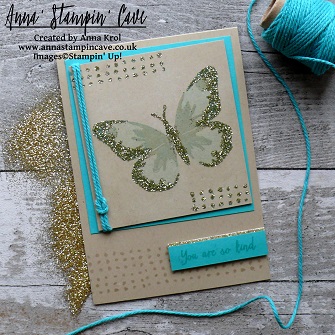
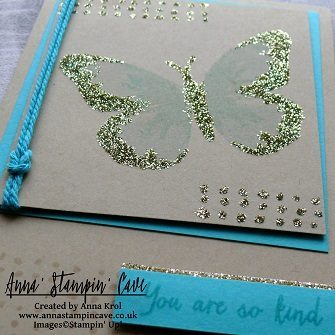
I this card for the butterfly I’ve used Soft Sky for the base, Pool Party for all the details on the wings and Bermuda Bay for the body and edges of its wings. And again I stamped polka dots in the corners. I’ve added gold glitter to my images same way as with my first card, using Heat & Stick Powder.
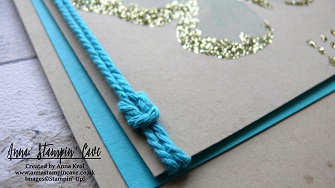
Using two lengths of Bermuda Bay Thick Baker’s Twine I created simple sailor knot. I added mini glue dot behind the knot and adhered it to the Crumb Cake panel. I secured the twine at the back using Fast Fuse. Next, I mounted my panel to the Bermuda Bay mat using thin (1 mm) foam adhesive tape and adhered them both to the card base.
The sentiment is stamped on a strip of Bermuda Bay cardstock and in Bermuda Bay ink for the subtle, tone on tone effect. I also added a strip of DIY gold glimmer paper behind it. I popped it up with dimensionals but before I adhered it to the card base I stamped few rows of polka dot piece on the card base in Versamark.
Card number 3 (the more the fancier ?)
Elegant Eggplant & Basic Black card dimensions:
Basic Black cardstock card base: 11-6/8″ x 4-1/8″ scored in half at 5-7/8″ (29.7 x 10.5 cm scored in half at 14.8 cm)
White Vellum cardstock: 3″ x 3-6/8″ (7.7 cm x 9.6 cm) + extra for die-cutting
Elegant Eggplant Paper From Regals Designer Series Paper Stack: 5-1/2″ x 3-6/8″ (14 cm x 9.6 cm)
Basic Black cardstock for butterfly
Whisper White cardstock for sentiment
Gold Metallic Thread
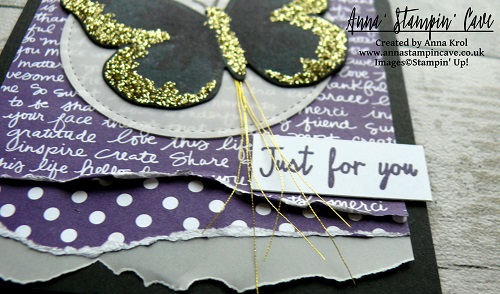
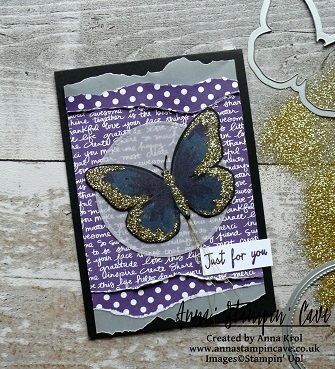
To be able to stamp the butterfly in various colours on black cardstock I stamped the base of my butterfly in Whisper White Craft Ink first. When it dried I stamped the base again, but this time in Perfect Plum. For the details on the centre of the wings, I’ve used Rich Razzleberry. The edges of the wings and body of the butterfly are stamped with Elegant Eggplant ink – I could totally skip this step as honestly, you can’t see that even in person, not only on photos. I added glitter as before and die-cut my butterfly using a coordinating die from Bold Butterfly Framelits Dies.
I took a piece of Elegant Eggplant DSP and I tore two strips of paper from the top and from the bottom. I didn’t measure it, just eyeball it, briefly about 1″. I also tore in half the strip of White Vellum cardstock. I adhered both strips of torn DSP behind the main piece, but showing the reverse design and so the torn edges were showing. I also
I adhered both strips of torn DSP behind the main piece with reverse design up and both strips of vellum behind it with jagged edges showing for extra dimension. I rolled up the edges of my DSP slightly and adhered the whole panel to the card base.
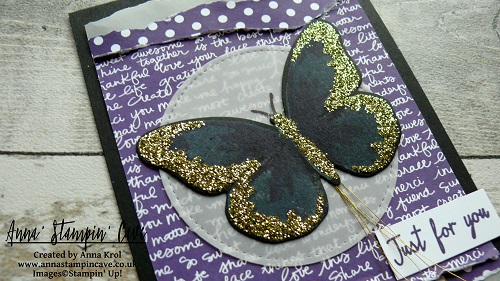
I die-cut a circle from White Vellum using the largest circle die from Stitched Shapes Framelits Dies. Before I added my butterfly on top I stamped the butterfly antenna in Basic Black on the vellum. I adhered few lengths of Gold Metallic Thread behind the butterfly, glued it to the vellum circle with Fast Fuse and next add it to the card base. The sentiment is stamped in Elegant Eggplant n piece of Whisper White cardstock and adhered to the base with glue dots.
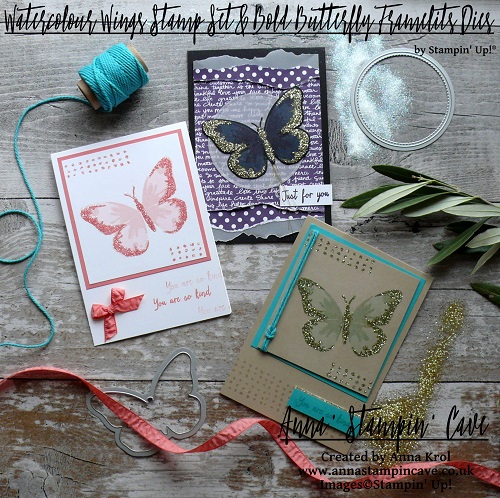
And here are all of the cards together:
I hope you like my cards and that I didn’t bore you with my mouthful-sort-of-directions, haha But this is me: love it or hate it ? Please let me know in comments below which one, which style is your favourite. I would love to hear from you!
As always, I really want to encourage you to visit the Global Design Project challenge blog to see other beautiful projects from all around the world. Just click on their logo below to visit the website.
Thank you for joining us for another Simply Sketched Saturday Challenge! We’re so excited to be sharing this hop with you. The products used are all available in the current Annual, or seasonal, Stampin’ Up!® Catalogues*. Simply use the buttons at the bottom of the post to keep hopping!
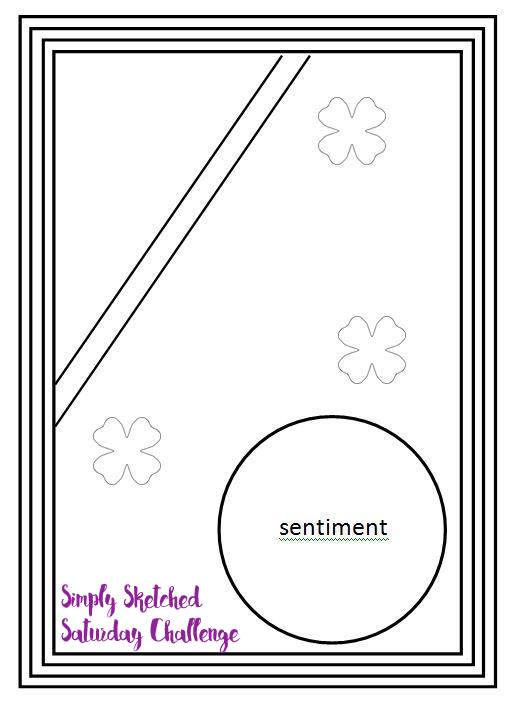
And today’s sketch was designed by lovely Kathleen from Lilypopcrafts.
This is such a great sketch, with lots of layers, which I truly love. But I challenged myself to create CAS (clean and simple) card. And I think I did well.
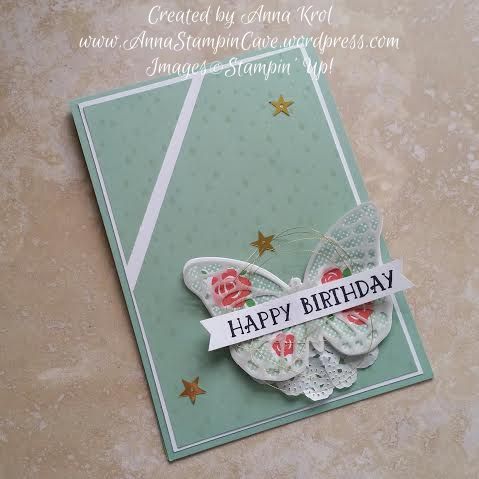
The base of my card is top folded A6 Mint Macaron, with layers of Whisper White and Color Me Irresistible Specialty DSP.
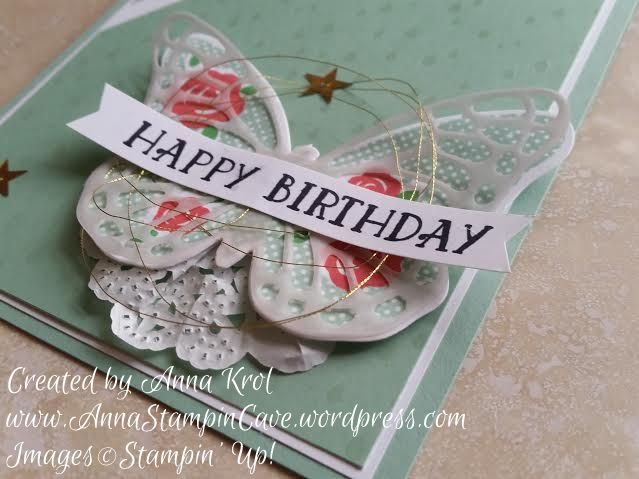
I decided to use beautiful (and retiring) stamp set Floral Wings. I stamped the butterfly in Mint Macaron, roses in Watermelon Wonder and leaves in Cucumber Crush. Next, I die cut the butterfly using Bold Butterflies Framelits and another one on vellum using a middle of Butterflies Thinlits and layered them together. I cut 1/4 of a Tea Lace Paper Doily and attached it underneath my butterfly and adhere it to the card base with dimensionals.
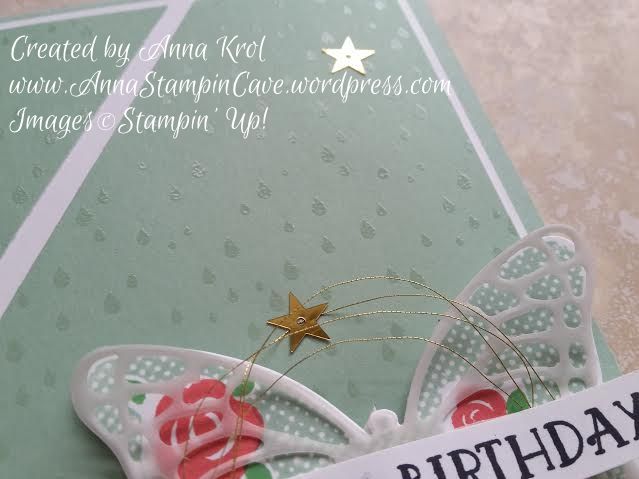
The sentiment comes from Number Of Years. I stamped it in Basic Black Archival Ink on a strip of Whisper White and punched both ends into banners using Banner Punch (also retiring). I took Gold Metallic thread, created some messy loops and add it underneath the banner. Few gold sequins finished off the card.
Do you like my project?! If so please leave me a comment. I would love to hear from you!
Now, be sure to hop along and see more inspiring projects. Your next stop is Karen’s blog – go and see what she has made for you.
Hello everyone! Today I wanted to share with you couple of cards I created a few weeks back. In August we had two birthdays in close family: my niece had her 15th birthday, and my little sister was celebrating her round 20 🙂
For both cards, I’ve used the same layout, but by simply changing focal point and embellishments I created two cards that looked completely different 🙂
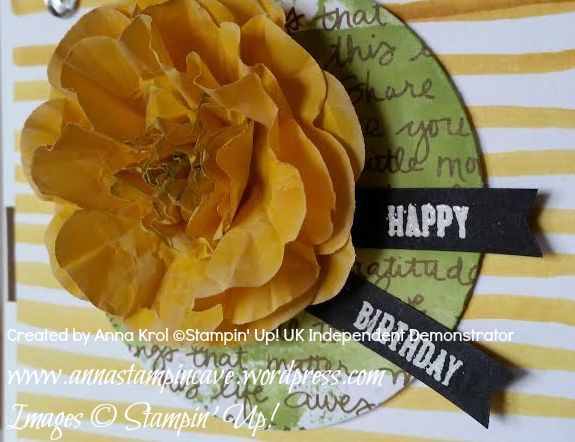
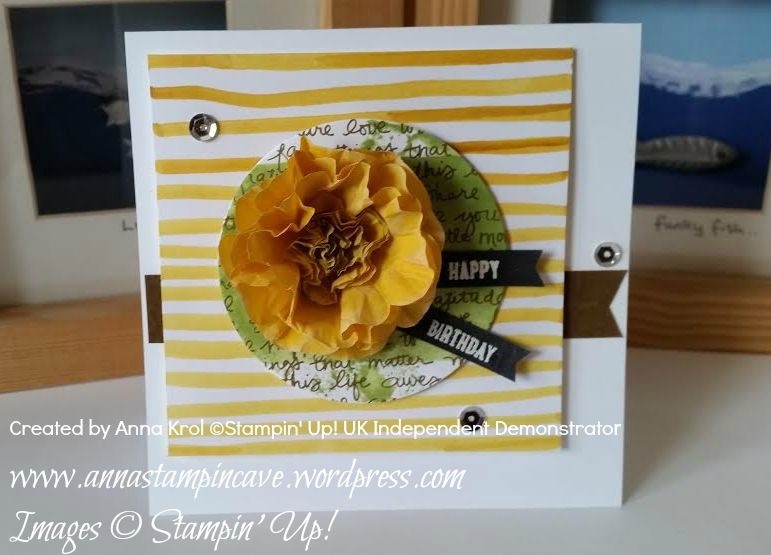
The first card I’ve made for my niece and I was dying to use our new Cotton Paper. With Floral Frames framelits, Pansy Punch and Petite Petals Punch I created this amazing 3D flower.
I’ve sponged edges of petals with Whisper White Craft ink and close to center slightly in Wild Wasabi. The sentiment comes from Sprinkles Of Life; stamped in Versamark and heat embossed in white on a piece of Basic Black.
The base for a card is 4×4″. The first layer is 3×3″ and I created this patterned paper myself. I simply used Stampin’ Write Marker in Crushed Curry and hand-drawn horizontal lines – cool, isn’t it? The second layer is a circle cut out from a piece of Neutrals DSP Stack (Soft Suede) with Wild Wasabi watercolour “wash”. For more interest, I added a banner underneath my layers and few sequins.
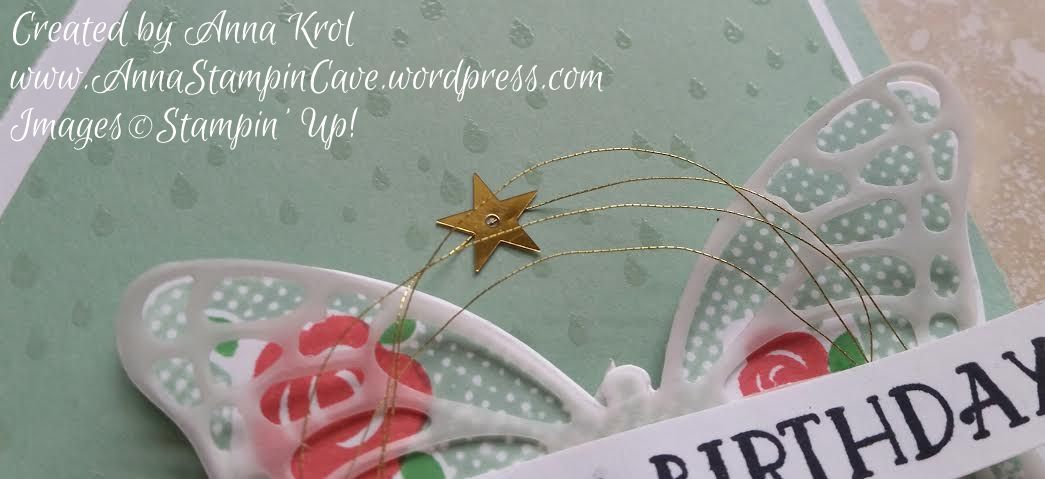
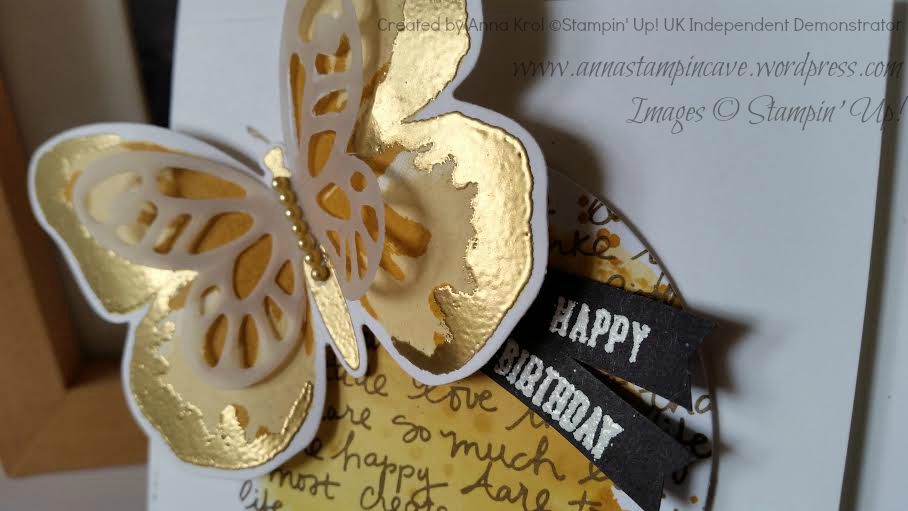
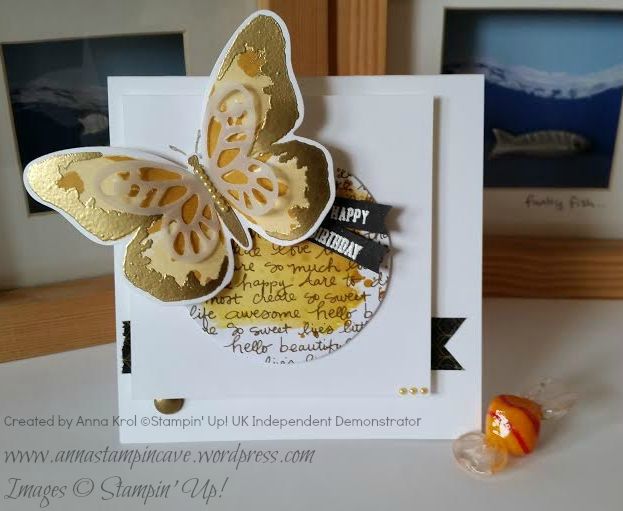
The second card I’ve made for my sister’s birthday. As I mentioned it’s the same design. The only difference is that I kept 2nd layer clean and for the circle, I used So Saffron, Hello Honey and Delightful Dijon “wash”. Same colours I’ve used for this gorgeous butterfly from Watercolor Wings.
The edges of wings and the body of butterfly I heat embossed in gold. On top, I added small vellum butterfly. Tiny yellow pearls, as well as a piece of black/gold washi tape, comes from my stash. Can you see little gold “bauble” peeking from underneath white layer? It’s one of White Perfect Accents, heat embossed in gold.
So what do you think about my cards? My niece and sister loved them to bits, so I really hope you like them too.
Thank you for joining us on our second Pootler’s Blog Hop! This Blog Hop is all about new Stampin’ Up!® Annual Catalogue so prepare yourself for lots of beautiful projects and tonnes of inspiration. Simply use the buttons at the end of each post to keep hopping!
If you have arrived here from Keren’s blog thank you for stopping by. I hope you enjoy seeing the inspiration from our team and continue to hop on through to see what everyone has made.
It’s actually my very first blog hop so I’m a little bit nervous but hey – let’s have some fun!
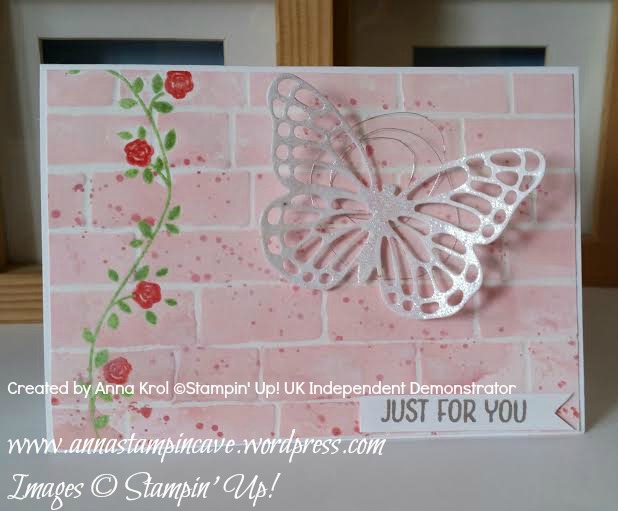
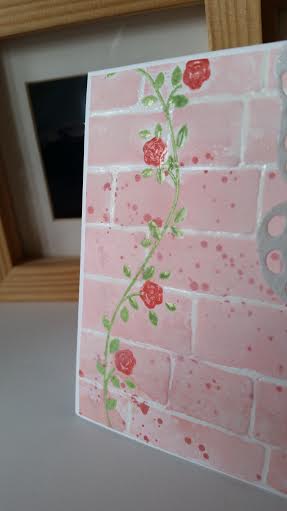
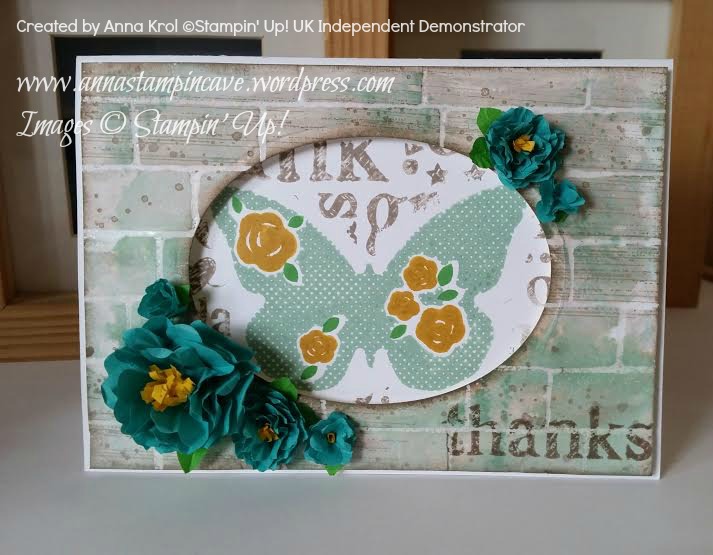
For today’s projects, I’ve chosen gorgeous new hostess set Floral Wings. The idea for today’s cards was born the minute I saw our new 6×6″ Brick Wall Embossing Folder.
For my top layer, I stamped the vine and roses first before embossing it with Brick Wall TIEF. But I wanted to watercolour my panel so needed my images to be water-proof. To achieve it I ink vines stamp in Versamark first, followed by Pear Pizzazz ink pad – this way once stamped Versamark was on top and I could emboss it with clear embossing powder. I did the same with roses, just used one of our new In Colors: Watermelon Wonder ink pad. The sentiment is stamped in another new In Color: Tip Top Taupe.
I’ve used embossing resist technique to create the background. I applied Versamark onto the ridges of embossing folder ( on the side that says Sizzix) and run it through the Big Shot with a piece of Whisper White. Then I heat embossed it with clear embossing powder. I used Pink Pirouette, Blushing Bride and Watermelon Wonder to watercolour my panel, and added few Gorgeous Grunge splotches.
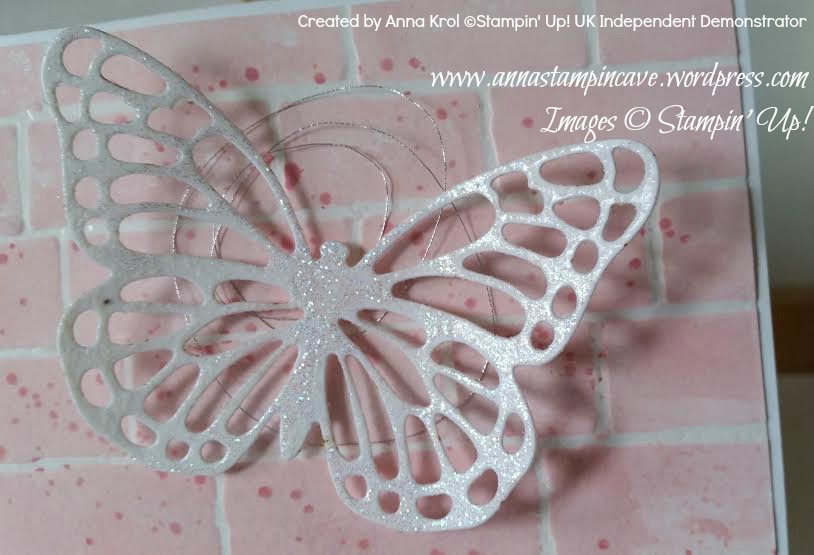
I die cut butterfly from Whisper White and embossed it using Iridescent Ice embossing powder for some sparkle. Tiny bit of new Silver Metallic Thread (L.O.V.E. this stuff!!!) and my card was done 🙂
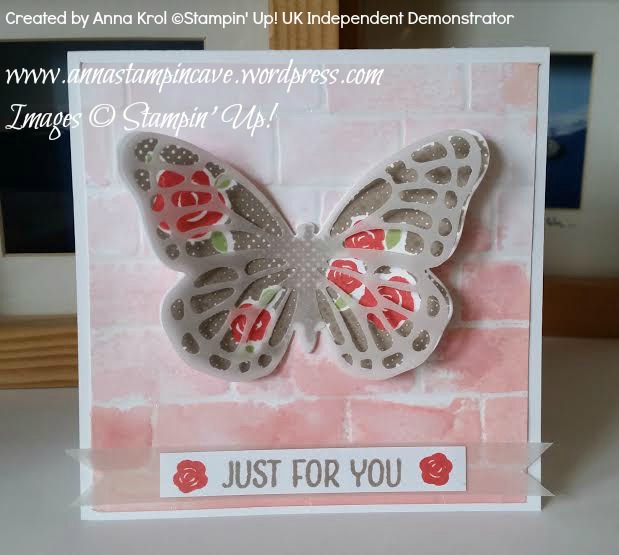
My second card measures 4×4″ and background (panel) is made using the same technique.
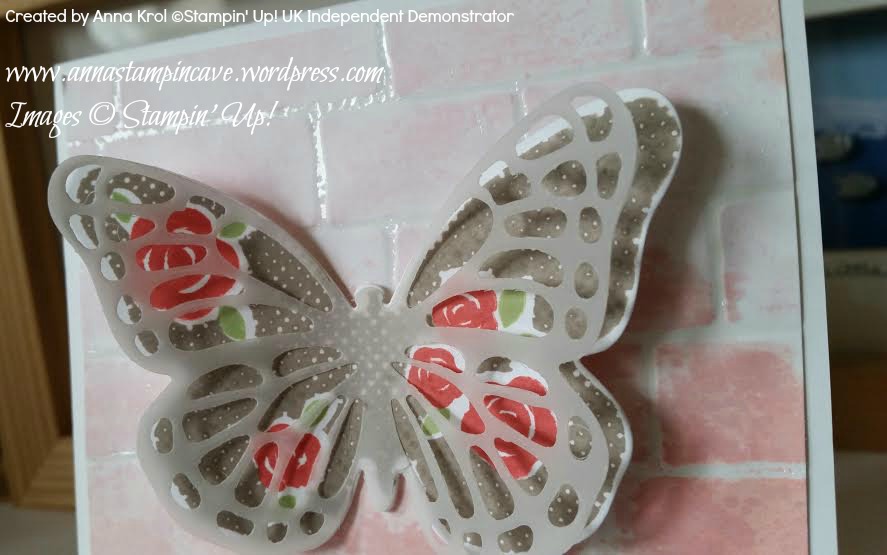
This time for the focal point I’ve used this gorgeous three-step butterfly stamp from Floral Wings set. First I stamped wings in Tip Top Taupe. Next roses in Watermelon Wonder. Leaves are the third step. I’ve used (again) Pear Pizzazz. I die cut the butterfly using new Bold Butterfly Framelits, but if you don’t have dies you can also fussy cut it. The second butterfly is die cut from vellum, this time with Butterfly Thinlits Die. I layered them together to add some more interest and dimension to the card.
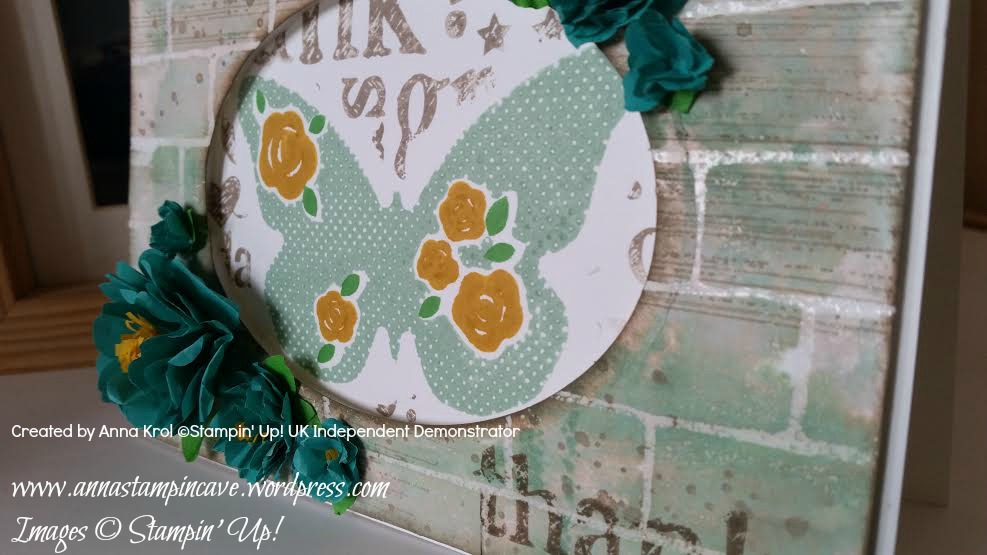
My last card for today uses same technique and stamp set like previous cards – just completely different style and different colours. I also used new background stamp A World Of Thanks and Cotton Paper. And again – I love this stuff! I know that many people got mixed feelings about it but I truly, deeply love it 🙂 Cotton paper is quite thin, like a tissue paper, but is much, much stronger. Really hard to tear it’s perfect for making flowers. It die-cuts beautifully but if you want to use punches (like me in this project) bear in mind that you need to punch through several layers at a time, otherwise it won’t punch. But enough talking – here’s my card:
I won’t go into details how I made the entire card, but…
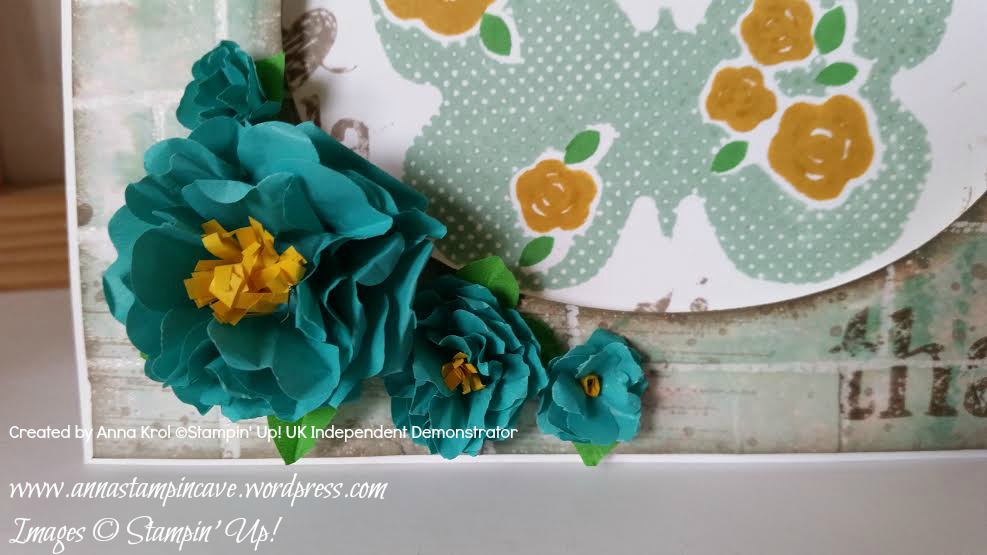
For flowers, I’ve used Bermuda Bay cotton paper and three different punches: Pansy Punch for the largest one (six layers), Petite Petals Punch for medium flowers (six layers) and little flower from Itty Bitty Accents Punch Pack for the tiny ones (three layers for each flower).
To make leaves I’ve used Petite Petals and Flower Medallion punches and Cucumber Crush cotton paper. For the flower centres, I’ve used 2/8″ wide and around 2″ long strips of Crushed Curry cotton paper. I do not own fringe scissors however it wasn’t that hard to make tiny cuts (halfway) through those strips. Adhered them with Tombow glue.
I really hope you’ve enjoyed my projects today. Which one is your favourite? Feel free to leave a comment below. Next stop is lovely Jerim at Willow Piggy. I’m sure she’s made something beautiful for you.