Simply Sketched Saturday Challenge Blog Hop #3 – Sweet & Mint

SSSC Header

Thank you for joining us for another Simply Sketched Saturday Challenge!  We’re so excited to be sharing this hop with you. The products used are all available in the current Annual, or seasonal, Stampin’ Up!®  Catalogues*. Simply use the buttons at the bottom of the post to keep hopping!

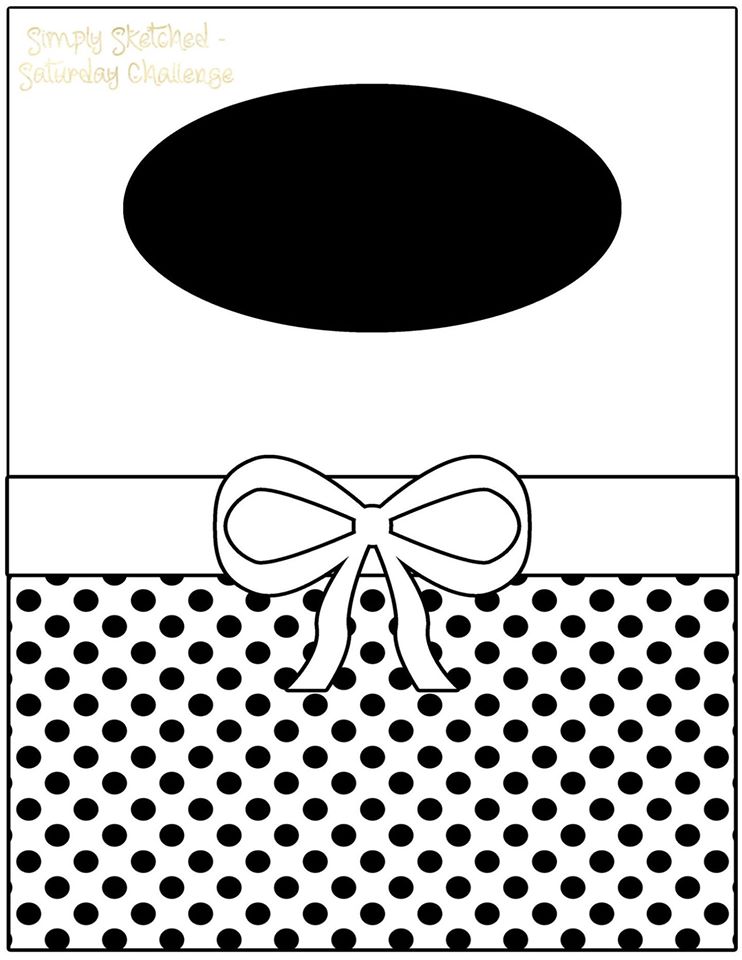
Today’s sketch was designed by very talented Angelina from Intatwyne Designs. I really like the simplicity of this design.

3

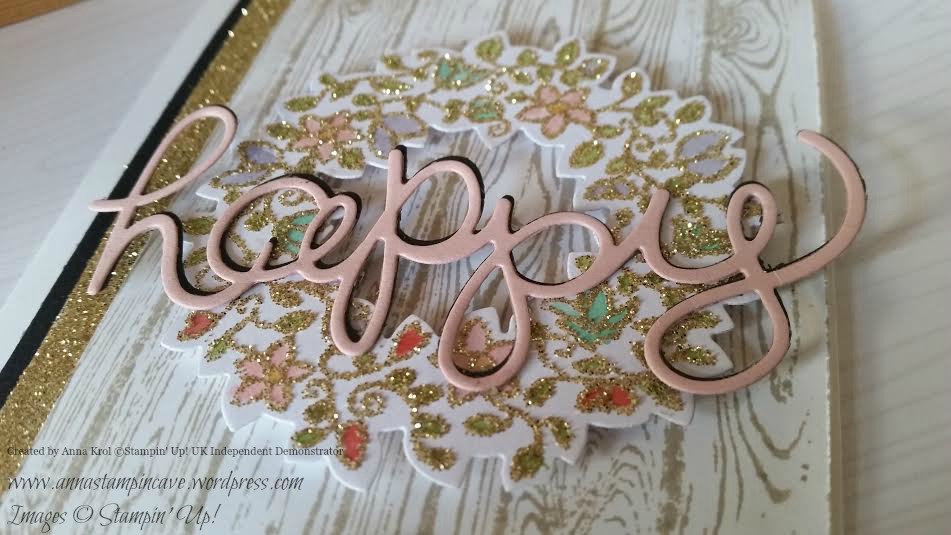
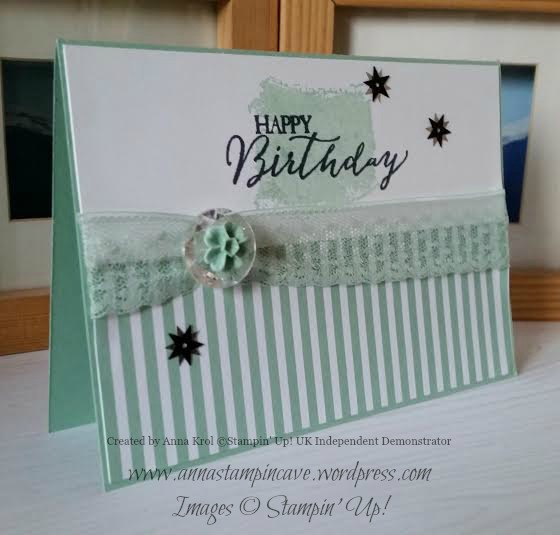
My first thought about this sketch was that it’s sweet. So is my today’s card: sweet & mint. I absolutely love 2015 – 2017 In Colors. But Mint Macaron is definitely my favourite one.

Sweet & Mint

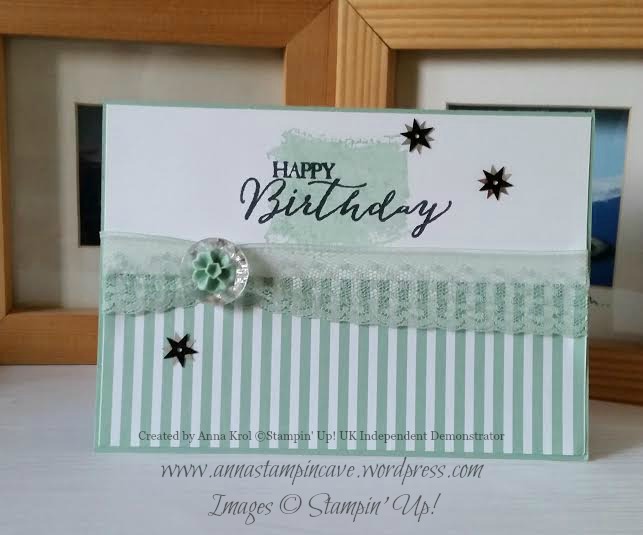
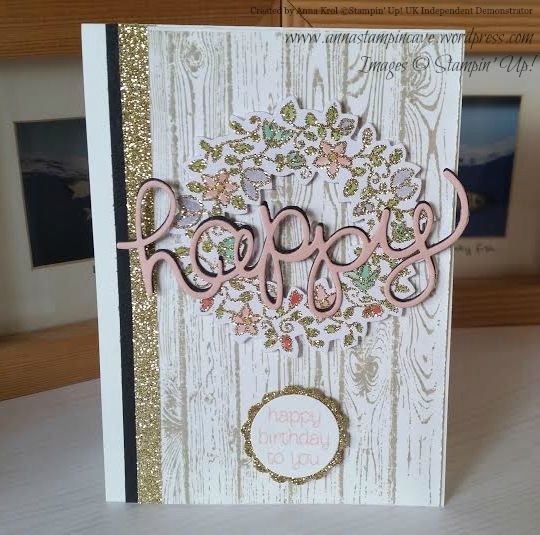
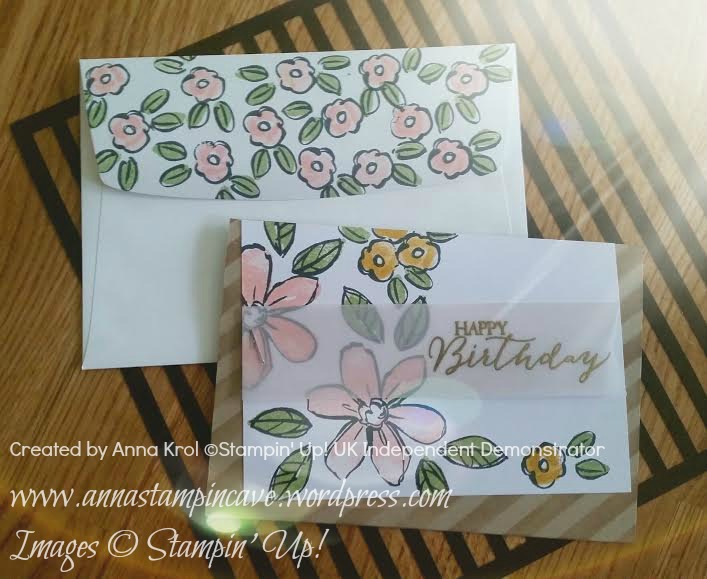
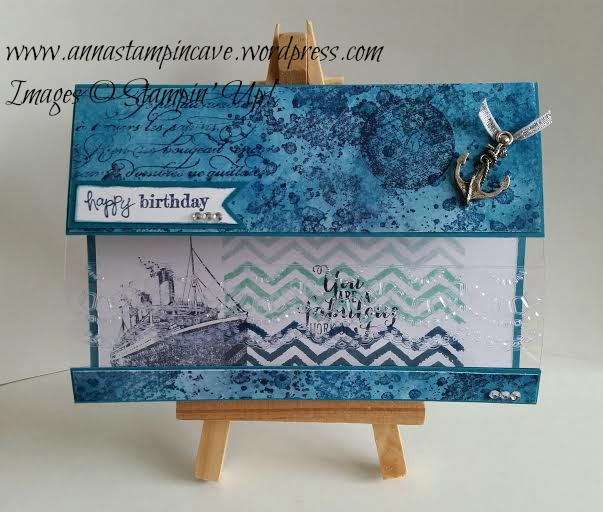
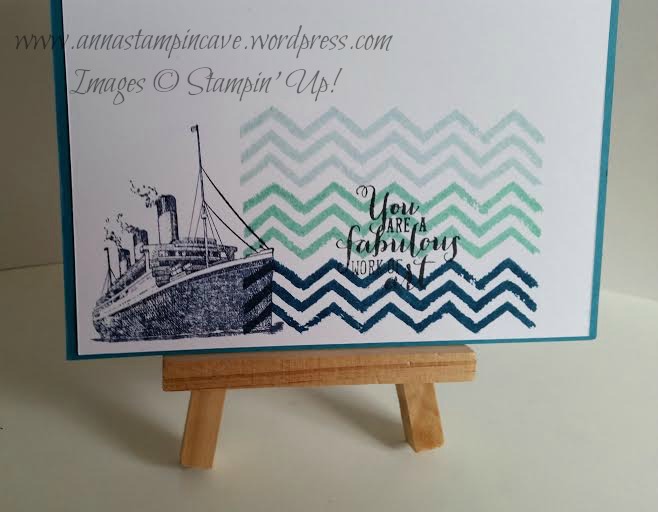
The base of my card is Mint Macaron scored at 4-1/4″ and folded in half in landscape mode. Both panels measure 5-3/4 x 2″. The top panel is a piece of Whisper White. I stamped one of the “swooshes” from Work of Art in Mint Macaron (briefly in the middle of the panel). Then I stamped the sentiment in Memento Black. The bottom panel is a piece of 2015-2017 In Color Envelope Paper.

Sweet & Mint 2

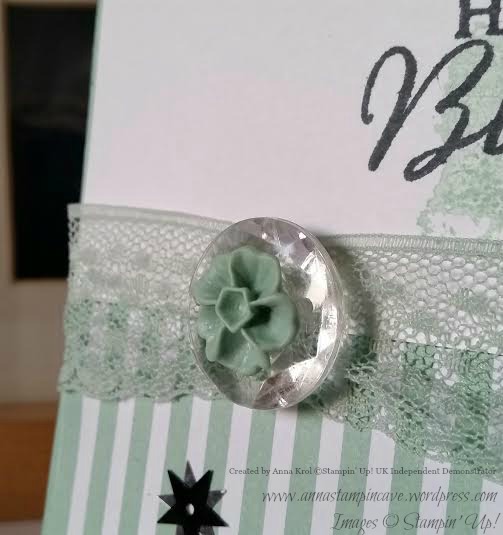
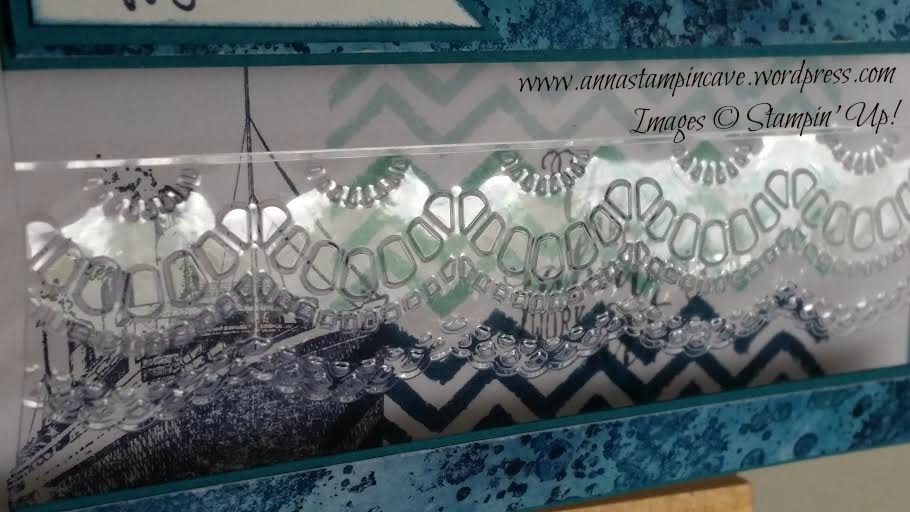
I adhered both panels to the base and added a ribbon in the middle ( I tucked the ends under the panels). Don’t you just love this Dotted Lace Trim Ribbon? I’ve used a glue dot to bunch up the ribbon and adhered button on top. I was planning to add bakers twine bow on top, but I didn’t like it. I added Blossom Accent instead.

Sweet & Mint 3

To finish my card off I added few star sequins. I didn’t plan that but needed to hide a boo-boo. I end up adding three just for a good measure 😉

Hope you like my sweet and simple card. It’s very versatile design and would work nicely with different sentiments. Plus it’s perfect for mass-producing: only took few minutes to put it together. So it’s a win-win.

Now, be sure to hop along and see more inspiring projects. Thank you for stopping by and have a blessed day!

SSSC Previous   SSSC Next Blog

Beautiful Birthday Card Using Circle Of Spring Stamp Set By Stampin’ Up!

I love to make birthday cards for friends and family. Makes me so happy to see their smiles, it makes my day. And when the card I make is a challenge and turn out better then I hoped for?! Well, I nearly squealed with excitement when I finished this card for my friend’s birthday. She received the card already so I can share it with you now.

Spring wreath

My friend Linda is an amazing crafter and she makes the most beautiful, feminine cards ever. So no pressure there, haha

I wanted to create a card that is soft, feminine and exciting. Plus I wanted to use some cool techniques.

Spring wreath 4

I stamped this beautiful wreath in Versamark, heat embossed with Heat & Stick powder and sprinkled with Gold Stampin’ Glitter. I heat set it again and watercoloured flowers and leaves. Then I die-cut ‘happy’ twice: in basic black and blushing bride, and glue them together. I slightly offset both pieces for ‘shadow’ effect.

Spring wreath 3

I love this cute sentiment from Circle of Spring. I do not own many punches, so I had to cut it out with Circle Framelits Dies. But I believe you could use 1″ Circle punch too. The glittery scalloped circle is 1-1/4 Scallop Circle punch. To make it I didn’t use glimmer paper. I punched it from a piece of paper, squashed it into Versamark and again used Heat & Stick powder and gold glitter. It’s so easy to make your own glimmer paper, and I love it.

Spring wreath 6

Just look at all this sparkle ✨✨✨ I love it!

Hope you like my little card, and maybe you will try to add some sparkle to your projects too.

Thank you for stopping by and have a blessed day,


For Our Mum – Birthday Cards Using Garden In Bloom Stamp Set By Stampin’ Up!

This term seems to be really busy: with our daughter having MOCK exams in a few weeks time = parents meetings at school;  my little sister temporarily moving with us ( only for weekdays; she just started Interior Design MDes course at Coventry University); and me trying to cope with MS as best as I can + infusions in hospital every 4 weeks…there are days I can’t do anything and idea of crafting don’t even cross my mind.

But last week there was our mum’s 63rd birthday. My sister said she really wanted to make a handmade card for our mum but she had no idea where to start. She has never done a card in her life. I took her to my “studio” so she could choose stamp sets & ink pads she liked. And she chose gorgeous Garden In Bloom stamp set + Blushing Bride, Calypso Coral, Hello Honey and Pear Pizzazz ink pads. Then I thought: oh well, while teaching her how to make a card I could make one for our mum too, right? So I grabbed all essentials: card, adhesives, masks, sponges etc. and we made our way to kitchen (my craft room is really tiny).

Do I have to say we had a blast?! It was so good to craft together…

annastampincave - collage

..and she did very well as for her first time stamping, don’t you think? The sentiment is a mix of two stamp sets: Crazy About You and retired Delightful Dozen.

paulina woźniak

For my card, I’ve used same design/layout. Just twisted it a bit with a piece of vellum. I also made a matching envelope. Isn’t it pretty? Vellum is attached with stapler

63 urodziny 2

Sentiment on a card comes from Butterfly Basics and is heat embossed in gold.

I’ve also decided to decorate flap of my envelope

annastampincave bday set

Love love love how these two turned out! Chuffed even more because mum loved cards we’ve made. And my sister is now hooked, so I’m pretty sure it wasn’t last time when we were crafting together.

Thank you for stopping by,

Watercolor Wings, Cotton Paper, Same Design And Two Different Cards

Hello everyone! Today I wanted to share with you couple of cards I created a few weeks back. In August we had two birthdays in close family: my niece had her 15th birthday, and my little sister was celebrating her round 20 🙂

For both cards, I’ve used the same layout, but by simply changing focal point and embellishments I created two cards that looked completely different 🙂

The first card I’ve made for my niece and I was dying to use our new Cotton Paper. With Floral Frames framelits, Pansy Punch and Petite Petals Punch I created this amazing 3D flower.

cotton paper 5

I’ve sponged edges of petals with Whisper White Craft ink and close to center slightly in Wild Wasabi. The sentiment comes from Sprinkles Of Life; stamped in Versamark and heat embossed in white on a piece of Basic Black.

cotton paper flower

The base for a card is 4×4″. The first layer is 3×3″ and I created this patterned paper myself. I simply used Stampin’ Write Marker in Crushed Curry and hand-drawn horizontal lines – cool, isn’t it? The second layer is a circle cut out from a piece of Neutrals DSP Stack (Soft Suede) with Wild Wasabi watercolour “wash”. For more interest, I added a banner underneath my layers and few sequins.

Watercolor wings

The second card I’ve made for my sister’s birthday. As I mentioned it’s the same design. The only difference is that I kept 2nd layer clean and for the circle, I used So Saffron, Hello Honey and Delightful Dijon “wash”. Same colours I’ve used for this gorgeous butterfly from Watercolor Wings.

Watercolors wings 4

The edges of wings and the body of butterfly I heat embossed in gold. On top, I added small vellum butterfly. Tiny yellow pearls, as well as a piece of black/gold washi tape, comes from my stash. Can you see little gold “bauble” peeking from underneath white layer? It’s one of White Perfect Accents, heat embossed in gold.

So what do you think about my cards? My niece and sister loved them to bits, so I really hope you like them too.

Thank you for stopping by and have a blessed day,

My favourite Traveler’s Birthday!

Hello everyone. Today a quick share from me. A very special birthday card I’ve made few weeks ago for my dear friend and soul-sister from Australia. And because I know how she loves to travel I came out with this idea:

4

Pretty cool hey?! I really like how this card turned out. I’ve used gorgeous Island Indigo and window sheet for the card base. Window sheet is dry embossed with Delicate Designs TIEF.

5

Then I’ve made my own DSP using Tempting Turquoise, Pacific Point and Night of Navy Stampin Markers, clear block, water and watercolour paper. Just scribble the markers on the clear block, spritz with water and “stamp” ot the paper. repeat until you’re happy with colour intensity. Takes time but it’s well worth the effort. When the background was ready (dry and ironed 😉 ) there was the time for some random stamping. And for that I’ve used Gorgeous Grunge, Traveler and En Francais stamp sets.

3

For the inside of the card I’ve used a piece of Whisper White. Beautiful chevron stamp and sentiment from Work of Art, same as the ship from Traveler set, seemed just perfect. The colours are as follows: Night of Navy, Pool Party, Soft Sky and Memento Black.

6

Cute anchor charm, piece of silver ribbon and some rhinestones complete the card.

7

I’m so happy with the card and the fact that my sweet friend loved it 🙂 And what do you think? Do you like it? Please message me or comment below. Would love to hear from you.

Thank you for stopping by,