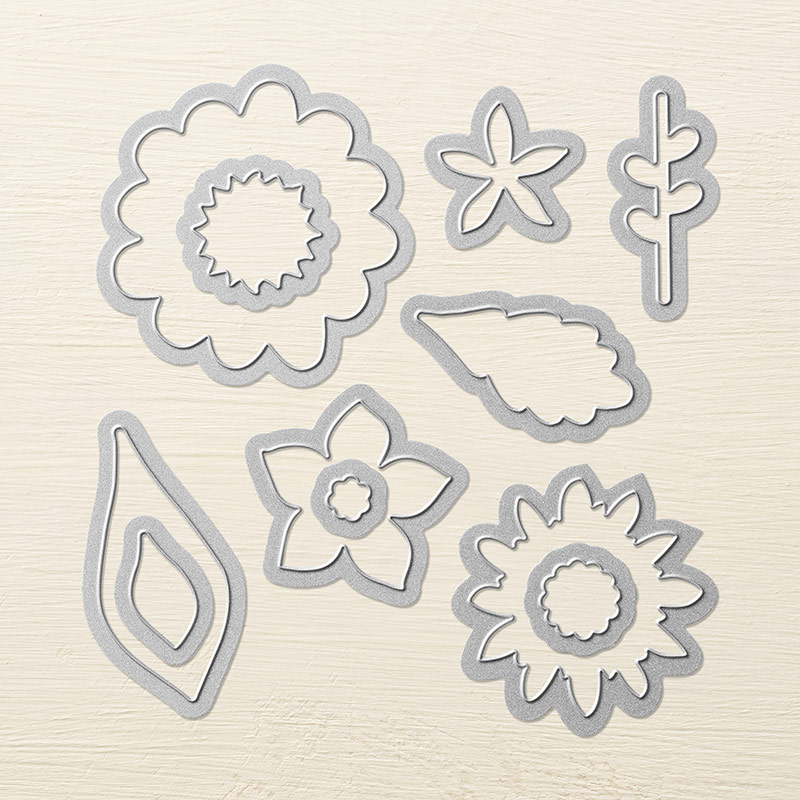
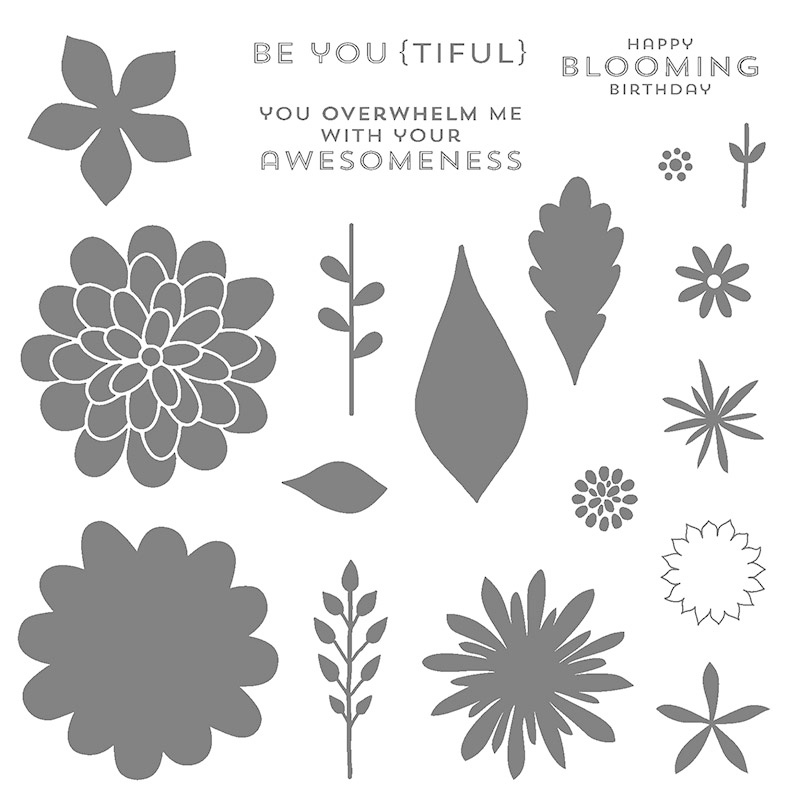
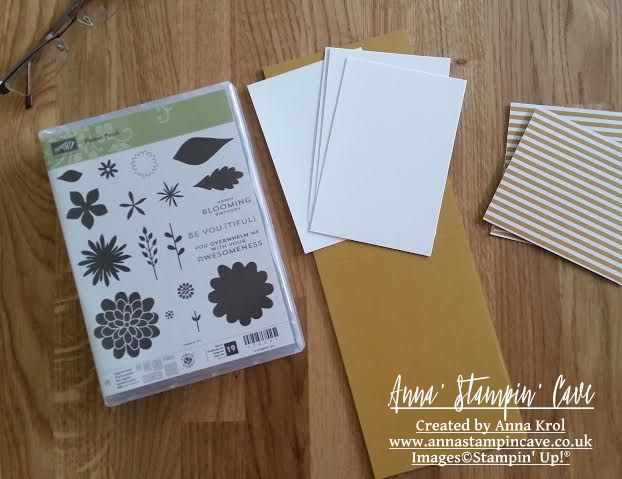
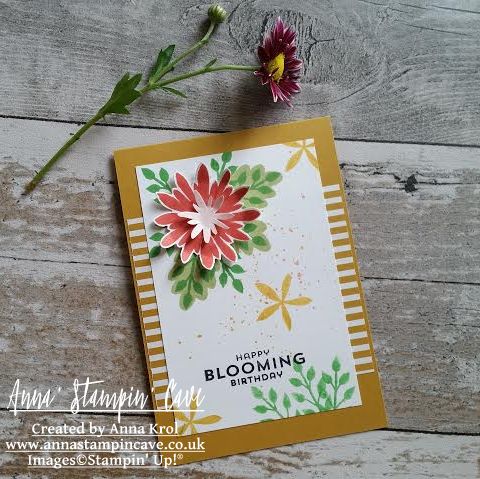
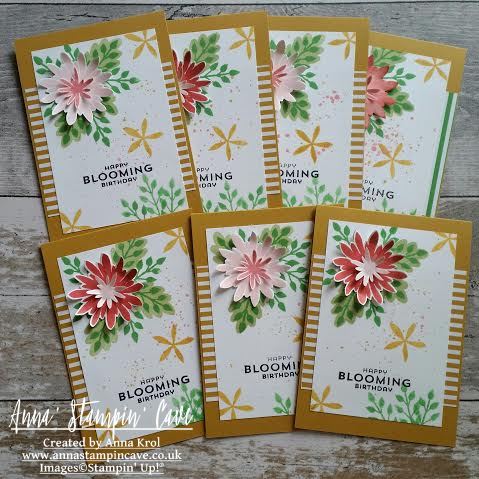
Time flies so quick, I completely forgot to share with you birthday cards I’ve made last month for ladies in our swap group. It was a great opportunity to showcase beautiful Flower Patch Stamp Set and matching Flower Fair Framelits Dies
For the base of my cards, I’ve used Delightful Dijon cardstock (I really, really like this colour!). And for the mats, I’ve used striped paper from now retired 2015-2017 In-colour Envelope Paper.
Because I was making several cards, same design at the same time, I cut all my cardstock and paper first. This way I saved lots of time. Next, I stamped big and small flowers and cut them out: I fussy-cut small ones and die-cut big ones. I’ve used Watermelon Wonder, Flirty Flamingo and Blushing Bride for my flowers.
When I knew the placing of the flowers I stamped my sentiment in Basic Black Archival Ink. I love this sentiment, it’s so fun 🙂
I stamped all the foliage using Cucumber Crush and Pear Pizzazz ink pads. I also stamped few random flowers on each panel, using Delightful Dijon (I stamped them off first for lighter shade). To add some pizzazz to my layouts I added few speckles with watered down Watermelon Wonder and Flirty Flamingo.
Now all I had to do was to assemble my cards. I really love how these turned out. And I truly hope you like them too. As always, if you wish to purchase any of the products I have used, simply click the images below to go directly to my online shop and don’t forget to enter the hostess code for the month of July GUHXWAR6, to receive a gift from me.
Thank you for joining us for another Simply Sketched Saturday Challenge! We’re so excited to be sharing this hop with you. The products used are all available in the current Annual, or seasonal, Stampin’ Up!® Catalogues*. Simply use the buttons at the bottom of the post to keep hopping!
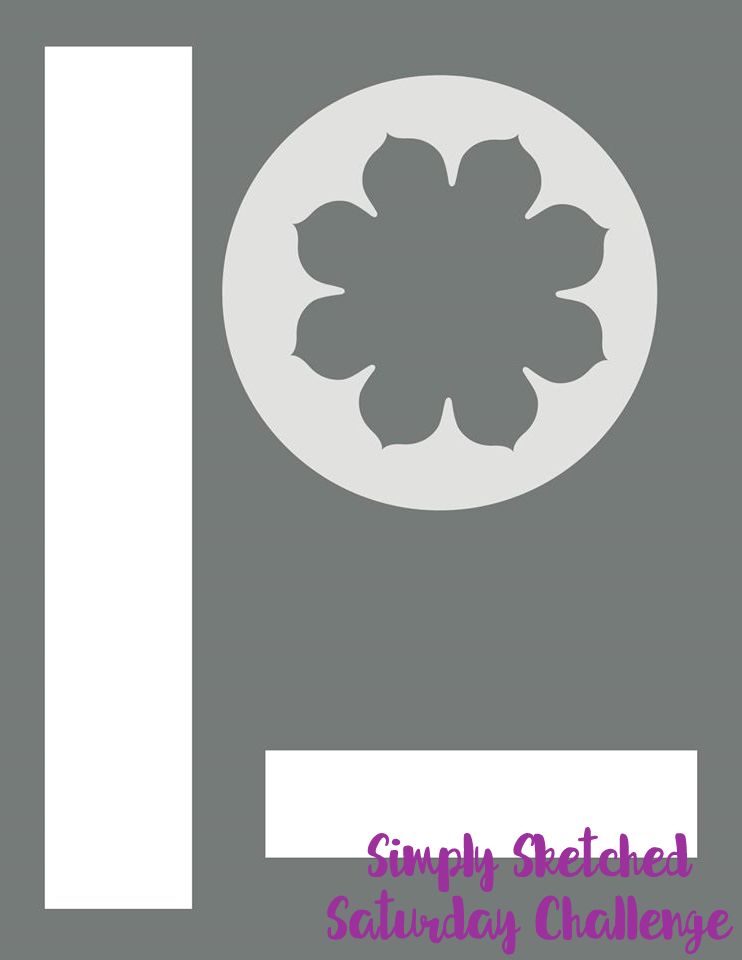
Today’s sketch was designed by very talented and lovely Louise from Whiteflag Designs, who sadly couldn’t take a part in the challenge today. But we hope she’ll be back with us soon.
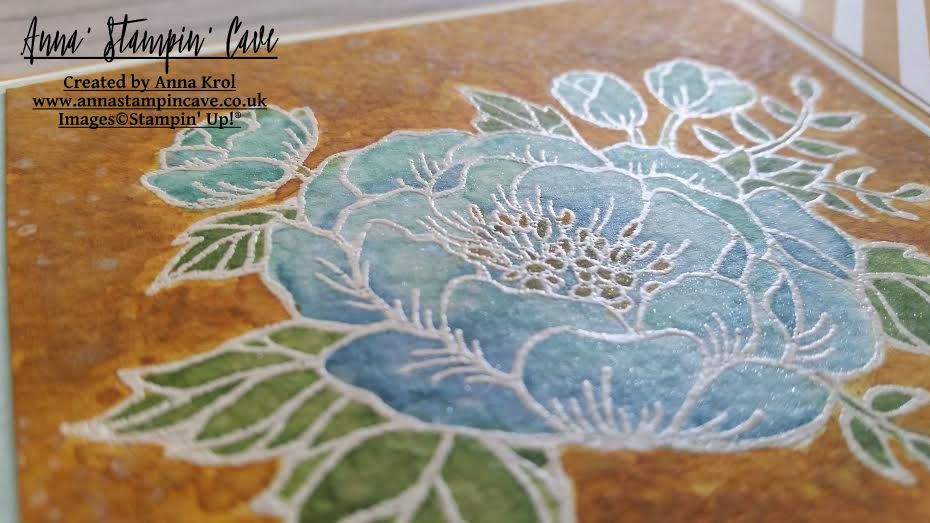
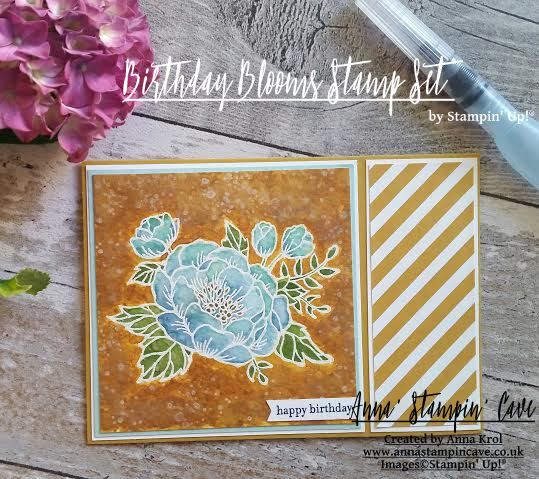
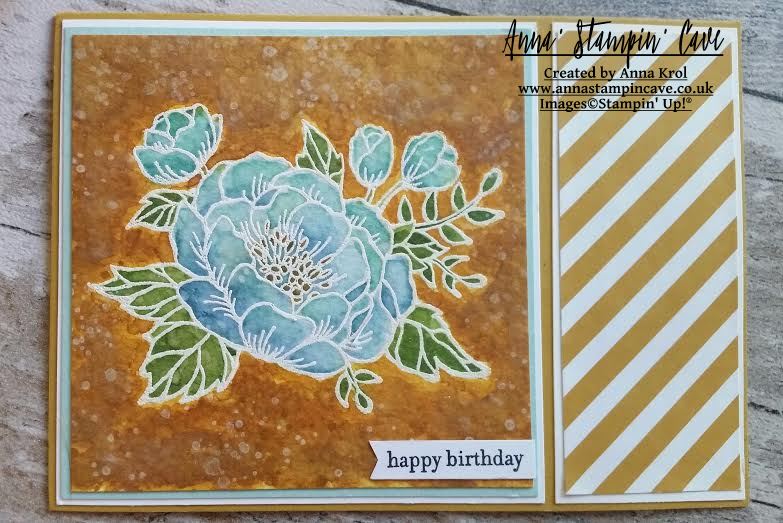
For today’s card I’ve used Birthday Blooms stamp set but in a rather unexpected colour scheme. Since I can remember I always loved blue and yellow colour combination. Firstly, these were the colours of my town’s sports club Avia Świdnik. These were also the colours of my favourite radio station RMF FM, back when I was a teenager. And it’s not surprising that, when I first moved out from my mum’s, I repainted all cabinets in my new kitchen yellow and blue. Even a fridge, that’s how much I loved these two together 🙂 But enough of my babbling, here’s the card I’ve made:
I slightly alternated the sketch: I created landscape fold card instead of portrait one. I also decided to mirror the image, so the largest ‘panel’ is on the right side of the focal point. For the base, I’ve used beautiful but sadly underrated Delightful Dijon. I truly love its deep, earthy shade. I added two panels of Whisper White to the base: a square that measures 4″x 4″, and a strip that measures 4″x 1-5/8″. For next panels, I’ve used a square piece of Pool Party card stock and a piece of a striped pattern paper from Designer Series Paper Stack in Delightful Dijon. And these are accordingly 1/8″ smaller than Whisper White pieces.
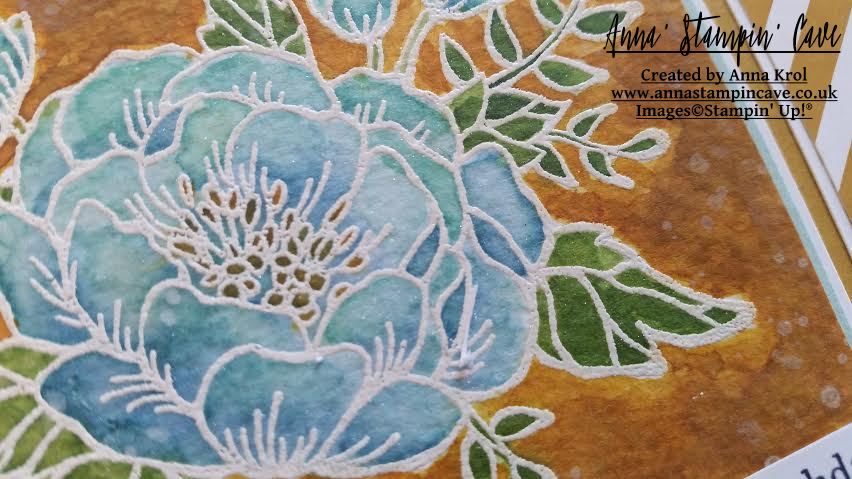
Now for the watercolour. I stamped the flower on a piece of watercolour paper using Versamark, and heat embossed it in white. Using aqua painter, I added water to the petals first and started adding the colour. For the first layer of colour, I’ve used Pool Party. I started really light and added more colour along the way. Next, to add more definition to the flower, I added some shading with Marina Mist. For the leaves, I’ve used a combination of Pear Pizzazz and Wild Wasabi. And again I started light and built up the colour.
When I was happy with the flower it was time to create the background. I added water to my watercolour piece. I had to be really careful to not let the colours from the flower bleed into the background. I’ve used same technique like with the petals: I started with a light wash of Delightful Dijon and I kept adding more colour along the way until I was happy with the results. Next, I’ve used aqua painter to “flick” few droplets of water to the surface of the panel. I think will never get tired of seeing how ink reacts with water and create interesting organic texture. To jazz it up a little more I used Gorgeous Grunge stamp set to stamp some splashes in Delightful Dijon first, followed by Whisper White Craft Ink. When the panel was completely dry I adhered it to my card base. I kept the sentiment really simple: I stamped Happy Birthday from Teeny Tiny Sentiments in Basic Black on a strip of Whisper White and glued it to the card using liquid glue.
To finish off my card I decided to add Delightful Dijon to the centre of the flower with a blender pen, as I don’t own the markers. And the very last touch was to add Clear Wink Of Stella Glitter Brush Pen to the petals and leaves.
I’m so chuffed how this card turned out: beautiful bold colours and textures. I just love how these blue flowers stand out from their deep yellow background. I really hope you like my project too.
Now, be sure to hop along and see more inspiring projects. Your next stop is Karen’sblog – go and see what she has made for you.
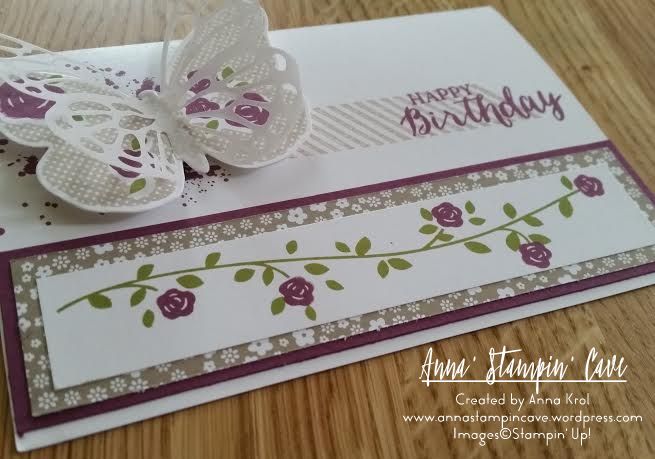
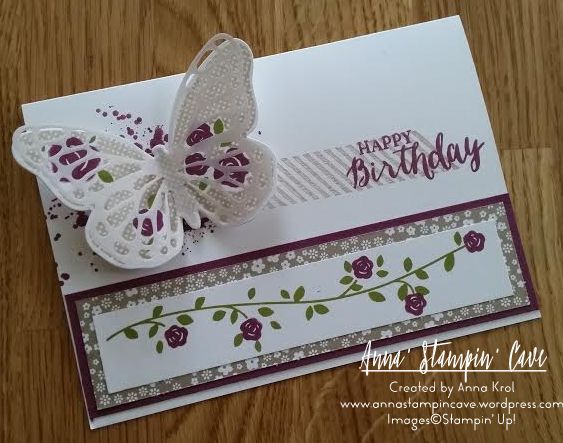
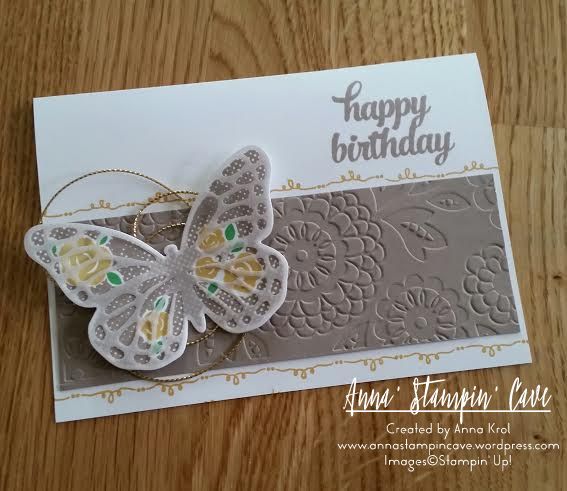
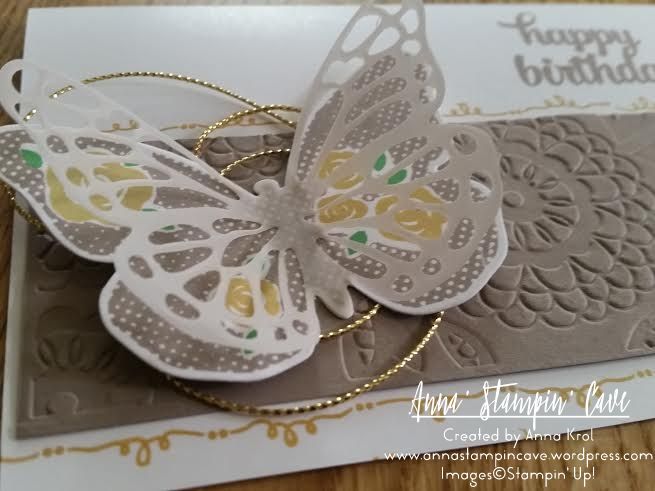
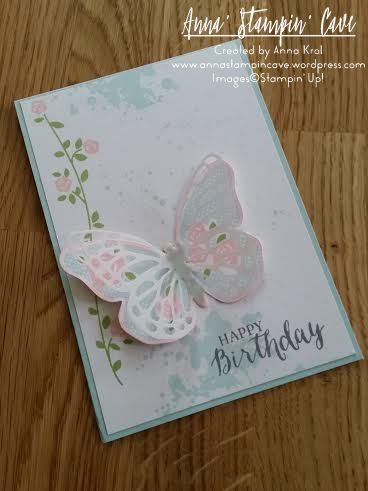
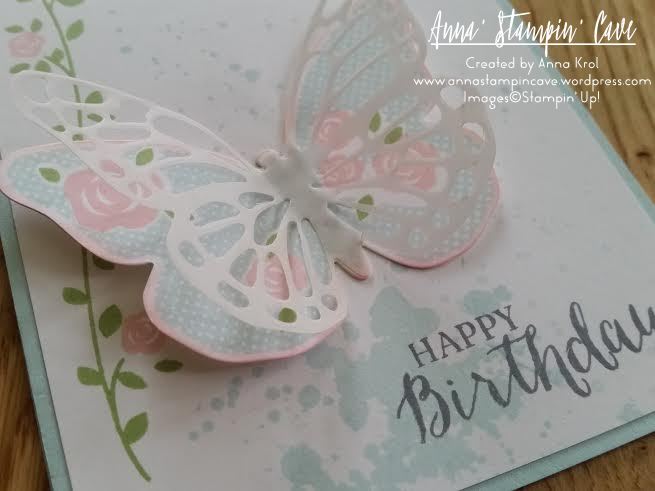
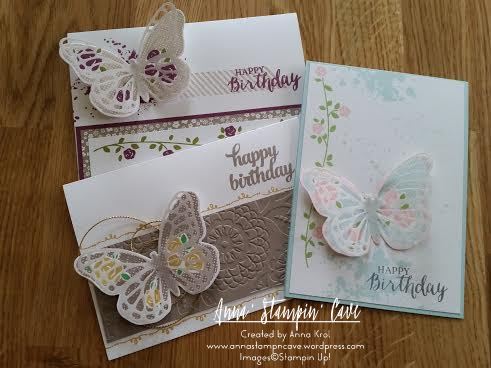
Just get back from night shift and to be honest I should be in bed now and be sleeping. But I really, really, really wanted to stick to my plan and show you few birthday cards I created back in May for ladies in our swap group. For all cards I’ve used, sadly retired, Floral Wings stamp set. But it could be easily substituted with Butterfly Basic stamp set. So here are my cards:
For first one I’ve used Rich Razzleberry, Crumb Cake and Old Olive colour combination
Next one is a Tip Top Taupe, Hello Honey and Cucumber Crush combination
And last, but not least is Soft Sky, Pink Pirouette with a little of Pear Pizzazz
I had lots of fun creating these. And I’m really chuffed that the ladies liked them too 🙂 Here’s once again all three cards
Hope you like my cards. I’m heading to bed now for my well-earned rest.
Thank you for stopping by, and have a blessed day,
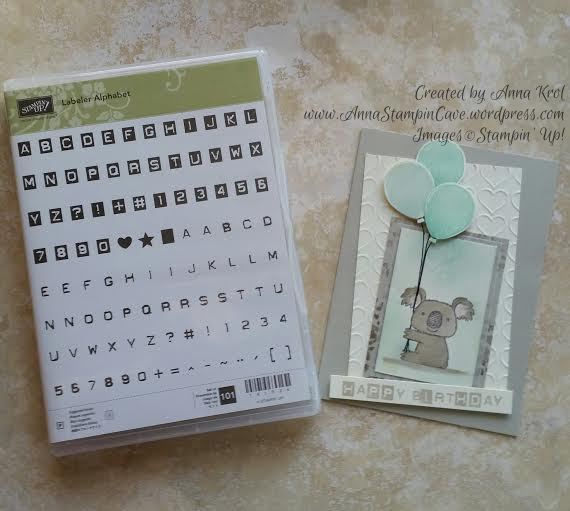
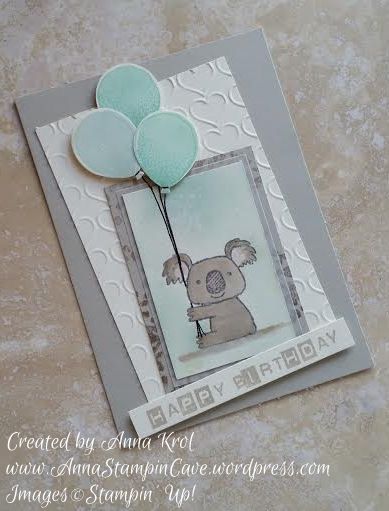
Hello, everyone! Something old, something new…Today I’ve got for you really adorable birthday card using sadly retiring Kind Koala stamp, and also a sneak peek at new Labeler Alphabet stamp set.
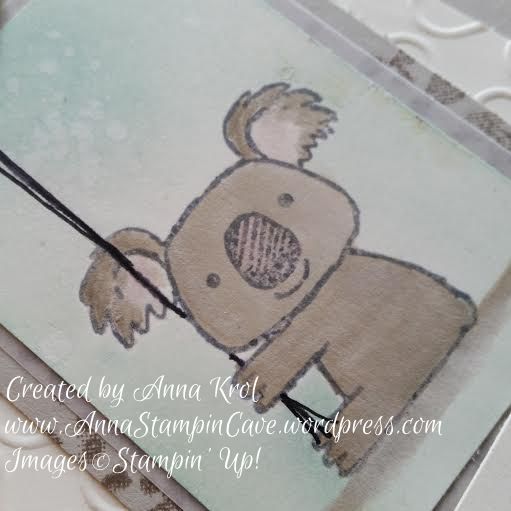
Isn’t this little koala cutest ever!? The base of my card is standard, top folded A6 in Sahara Sand. For the background, I’ve used Very Vanilla and dry embossed it with Happy Heart embossing folder.
Because I wanted this card to be a birthday card I used washi tape to cover the flower and a sentiment on my stamp before I inked it up in Basic Grey Archival Ink. Next, I stamped my cute koala on a piece of Very Vanilla. Just remember to take off the washi tape first or you will have a disaster. Guess how I know lol I also stamped him on a scrap of paper to create a mask I will need later.
I watercolour my little fella in Sahara Sand and added some shadow underneath him. I also added a touch of Blushing Bride to his nose and inside of his ears. When I was happy with the results I masked my koala and sponged the background with Soft Sky and Pool Party. Then I used the aqua painter to add few droplets of water to the background and took off a little bit of the colour.
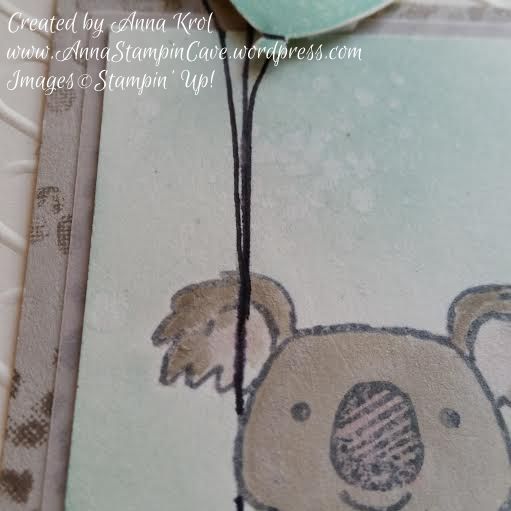
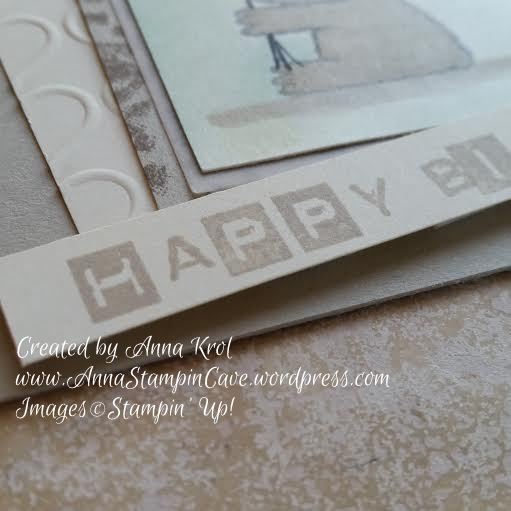
Next, I matted my koala panel with a piece of vellum and a slightly bigger piece of Sahara Sand. But to add some more interest to this panel I stamped it with Tip Top Taupe using the foliage stamp from Sheltering Tree. I assembled all my panels.Now was time for balloons!
I stamped three smaller balloons from Balloon Celebration, two in Pool Party and one in Soft Sky, punch them with Balloon Bouquet punch and arrange them on the card using dimensionals. I also hand-drew balloon strings with Project Life pen (and yes, I know, I probably should have used a lighter colour, maybe Basic Grey or Smoky Slate marker) so it looks like koala is holding them in his paw.
The card was busy enough so I kept the sentiment simple. I cut a strip of Very Vanilla and stamped my sentiment in Sahara Sand, using Labeler Alphabet stamp set. To keep it fun I mixed both types of letters and add it at wonky angle to my card.
Sharing something a little different with you today. I’m so happy I finally had some spare time to post this awesome card (if I do say so myself).
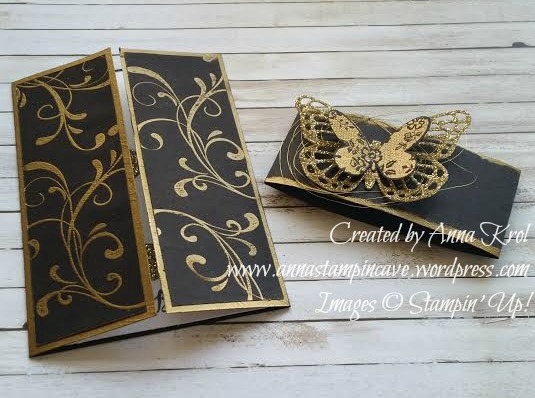
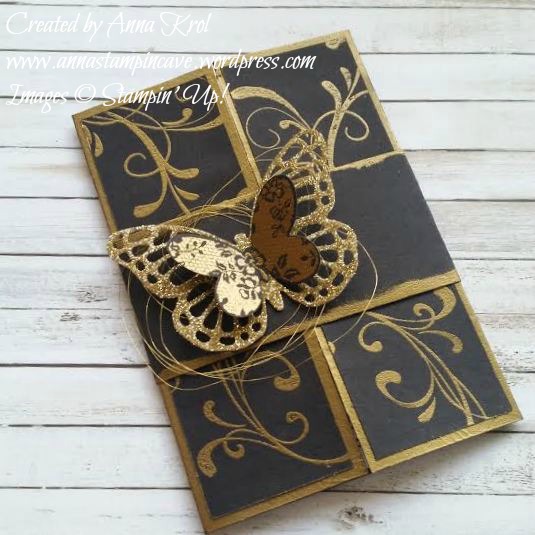
My (not so little anymore) girl had her 16th birthday last Sunday. And because she’s a big fan of Cassandra Clare’s Shadowhunters book series, I really wanted to create something in that theme for her.
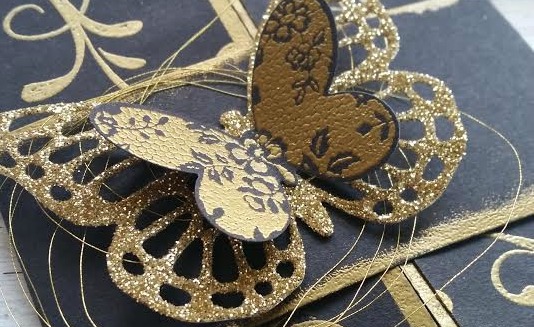
Obviously, I don’t own any matching stamp sets so I had to improvise. I’ve used pretty few current stamp sets to create my card. First I choose black & gold colour combo – I think it fits the theme perfectly. It’s a gate-fold card, with base in Basic Black. I “brushed” Versamark around the edges, added gold embossing powder and heat set it. I didn’t go for perfection – it was meant to be a bit edgy, rough. Next, I cut two panels to go on the front. Using Versamark again, I stamped flourishes from Everything Eleanor stamp set, and heat embossed it in gold. As before, I didn’t pay attention to detail on purpose – the edgier the better.
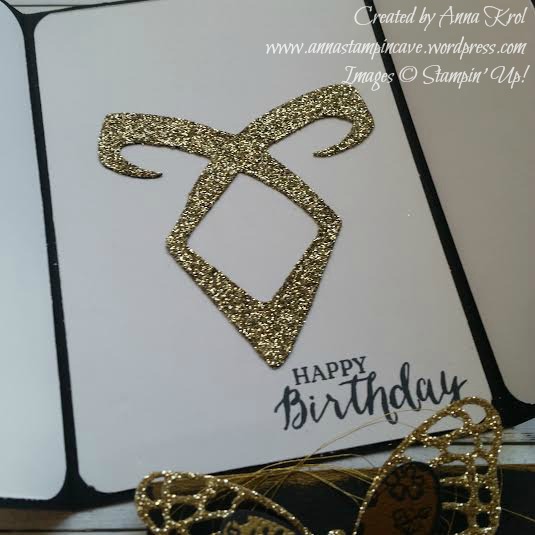
Inside of the card is pretty simple. I’ve found Angelic Rune symbol online, printed it on copy paper and then traced it on a piece of basic black. I hand-cut it and heat embossed it with Iridescent Ice embossing folder first. But I didn’t like how this turned out and decided to add more sparkle to it. I dabbed Versamark on top of my symbol and added Heat & Stick powder. I melt the powder with Heat Tool, covered it with gold glitter and heat set my piece again. I love how this turned out. Sentiment comes from Rose Wonder stamp set.
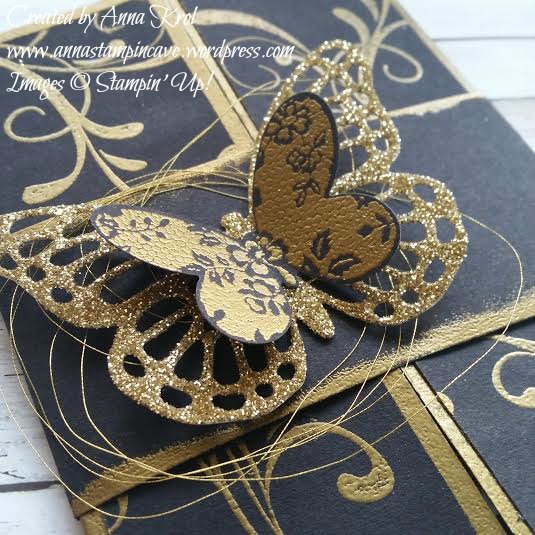
To close my card I created a belly-band. Same as with a card front I added that rough gold edge. I stamped small butterfly from Butterfly Basics, heat embossed it in gold and die-cut it. I also die-cut the more intricate butterfly from gold glimmer paper. I adhered them together, added some gold Metallic Thread underneath and attached it to my belly-band.
And that’s it. That’s my Shadowhunters birthday card. Do you like it? I have to say that my daughter truly loved it. And the moment she opened the card and saw the Angelic Rune symbol – well, that was priceless to see how her eyes light up. Mission completed!