Anna’ Stampin’ Cave – You Are My Hero
Another week has passed by, and it’s that time again when our little group of demonstrators is showcasing you this lovely stamp set called ‘My Hero’. I love the versatility of this set, as it covers all major holidays/occasions throughout the year. But not only that. This is Ronald McDonald House Charities stamp set, which means for every set purchased, Stampin’ Up! donates £2 to the RMHC. Visit www.stampinup.com/giving_uk to learn how you can help too.
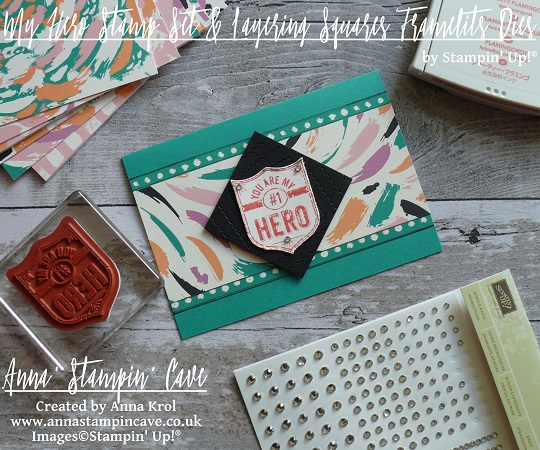
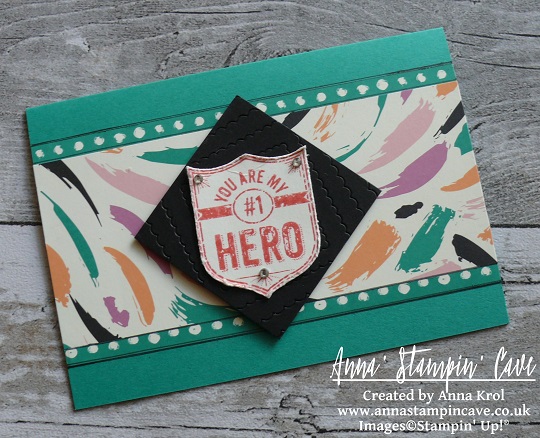
For today’s project, I’ve chosen ‘You are my #1 hero’ sentiment. I’ve seen many beautiful samples using this stamp. It’s perfect for all those oh-so-hard-to-make masculine cards. But I decided to make a card with a feminine twist. After all, women can be heroes too.

This is a very simple card. For the card base, I chose beautiful and very vibrant Emerald Envy cardstock (standard A6 size). Next layer is a piece of DSP from Playful Palette Designer Series Paper Stack. I took half of the sheet of my chosen design ( 3″x 6″) and trimmed 1/4″ from both sides. I adhered the larger piece to the base first and next, those tiny strips on each side of the panel, but reverse side up. Because the base is smaller than 6″ wide, I trimmed any overhanging paper using my scissors. It’s easier, and for sure you won’t end up with a too small panel. Unfortunately, my strips slightly ‘disappeared’, when adhered to the card base. So I draw few black lines along the edges using Project Life Journaling Pens.
Tip: learn from my mistakes! If, like me, you chose a design that has a kinda symmetrical pattern on the reverse, make sure you trim your panel so you have the same pattern on both strips you’ve trimmed.

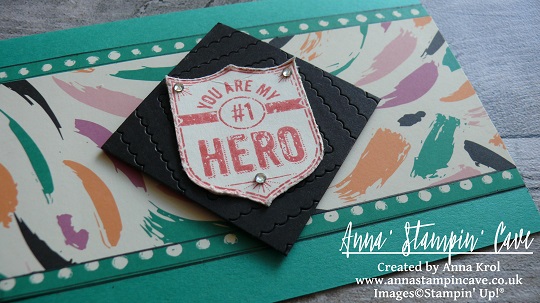
Now to the focal point. I stamped my sentiment in Flirty Flamingo, on a piece of Very Vanilla cardstock and fussy cut it. It’s an easy shape to do so. I distressed the edges slightly. To make the sentiment ‘pop’ I decided to add a square Basic Black cardstock underneath. I could dry emboss it but instead, I decided to create a fun panel using Layering Squares Framelits. I’ve seen this idea just recently, on Carolyn Bennie blog and just had to try it myself. Carolyn is an amazing Australian demo. You should definitely check her out.
I arranged five scalloped squares dies on a piece of Basic Black cardstock, but offset them slightly. I secured dies to the paper with washi tape and run it through the big shot. Before I removed my dies, I’ve added washi tape underneath of the panel, to keep the squares together. I took another piece of Basic Black cardstock and adhered my die cut squares to that panel. I trimmed it to the 2-3/8″ square.

I adhered my fun square to the card base with a couple of dimensionals. Next, I’ve added my sentiment on top of it, with regular snail adhesive. Few rhinestones on the corners of the badge finish off my card.
Thank you for stopping by and have a blessed day,

