Pinkies Annual Catalogue Blog Hop – Tuscan Vineyard

blog hop logo

Thank you for joining us on another Pinkies Blog Hop! We’re showcasing lots of gorgeous projects using products from the new Stampin’ Up!® Annual Catalogue. Simply use the buttons at the end of each post to keep hopping!

Tuscan Vineyard Stamp Set

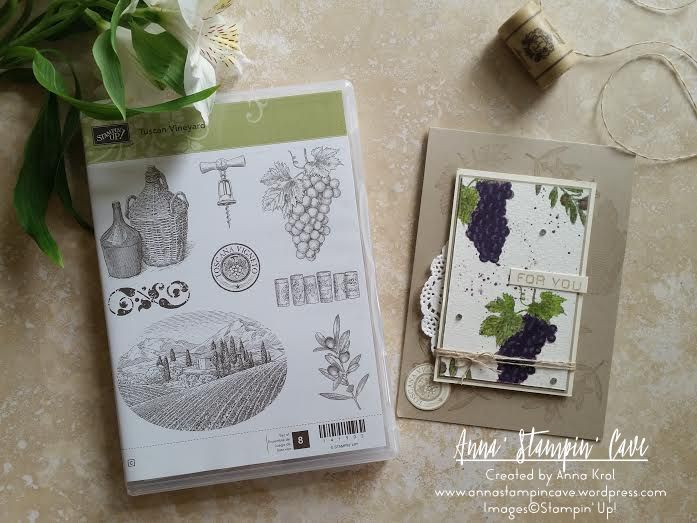
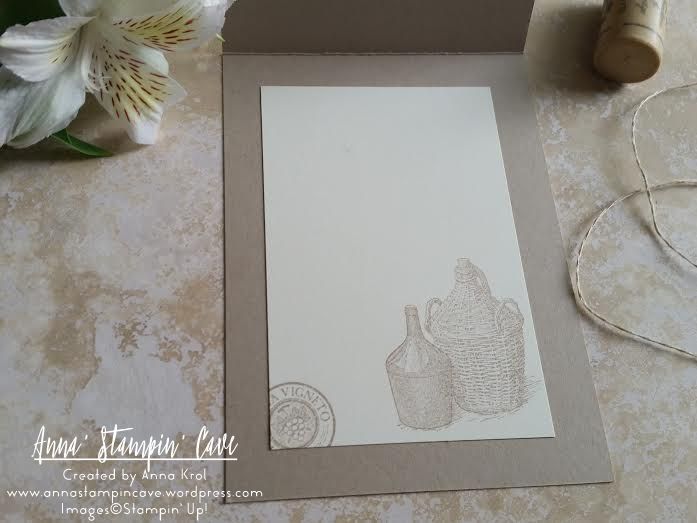
When Chris, my husband, saw Stampin’ Up! Tuscan Vineyard Stamp Set he said: “we have to have it” ;). In our home, we love to have a glass of good wine on special occasion, or when friends come over. We also make our own wine from the fruits of our garden. Chris (my husband) is very passionate about it. When he was young he’s spent some time on a French vineyard, and he fell in love with the art of making wine.

Tuscan Vineyard for you card

I think this set is perfect for collages, but I decided to use my favourite technique – watercolour. First, I randomly stamped the base of my card using various images from the stamp set. I used Crumb Cake cardstock and ink pad for tone on tone look. Next, I took a piece of watercolour paper and I stamped bunches of grapes and olive branches using Basic Grey Archival ink and water coloured them with an aqua painter. For fine lines, I’ve used Blender Pens.

Tuscan Vineyard for you card - close up

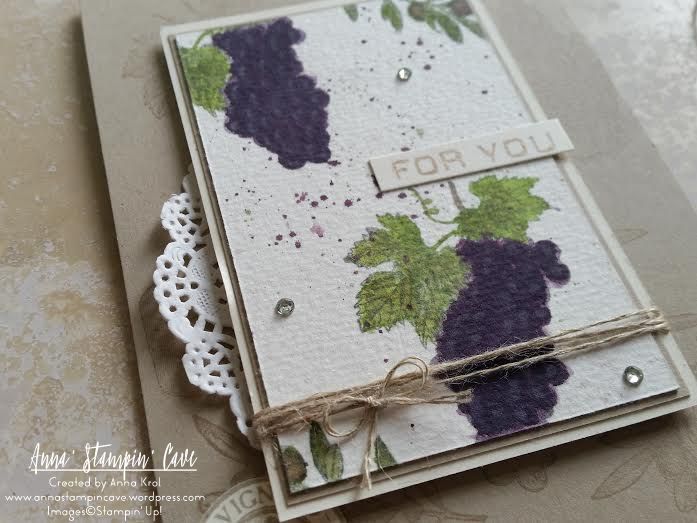
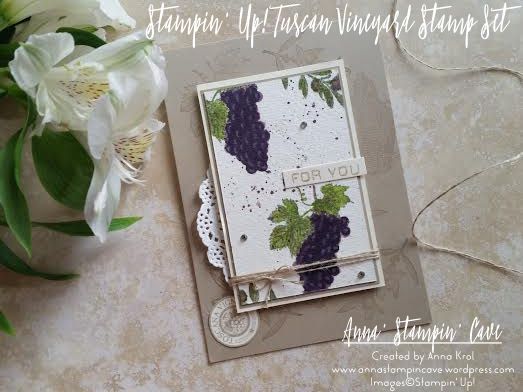
When I was happy with the results I made some random splotches with Perfect Plum and Wild Wasabi. To assemble my card I backed my watercolour panel with a piece of Crumb Cake and Very Vanilla. I wrap linen thread around the panel, added a piece of new doily underneath, and adhere it to the card base using dimensionals. I stamped round image from the same set, that reads Toscana Vigneto on a piece of Very Vanilla and tucked it underneath the panel. Few rhinestones, simple sentiment, and my card was done. I also stamped inside of the card.

Tuscan Vineyard - inside of the card

I truly hope you enjoyed coming to my blog today and see my card. As always, if you wish to purchase any of the products I have used, simply click the images below to go directly to my online shop.

Now, be sure to hop along and see more inspiring projects. Your next stop is lovely Kim  go and see what she has made using the new products.

next

previous

Thank you for stopping by and have a blessed day! Product List

Aqua Painters

£15.50

Blender Pens

£10.75

Linen Thread

£4.25

Simply Sketched Saturday Challenge Blog Hop #8 – Easter Lamb At Wildflower Fields

Simply Sketched Saturday Challenge Blog Hop #8 – Easter Lamb At Wildflower Fields

SSSC Header

Thank you for joining us for another Simply Sketched Saturday Challenge!  We’re so excited to be sharing this hop with you. The products used are all available in the current Annual, or seasonal, Stampin’ Up!®  Catalogues*. Simply use the buttons at the bottom of the post to keep hopping!

I really like today’s sketch designed by lovely Justyna from Perfect Crafts.

SSSC 8

Don’t you just love it?! I had so many ideas for this sketch, I couldn’t decide which way to go. But I really wanted to use super cute Easter Lamb stamp as my focal point. So here’s my take on the sketch:

Easter Lamb

My very first idea for this sketch was to make a shaker card. So I created a frame for my card first. I’ve used foam adhesive at the back of my frame – you could use Stampin’ Dimensionals too. But because I only have the metallics sequins at this moment, and I really didn’t want to go into silver/gold colour theme, I gave up this idea. But then I thought: hey, you can still use the “frame” to create a dimensional layout.

Easter Lamb 2

I had some leftover pieces of Wildflower Fields DSP, so I cut three strips and adhered them to the card base, beneath my frame. I stamped Easter Lamb in Stampin’ Up! Black Archival ink on a piece of Whisper White, and die-cut it using the middle circle from Circles Collection Framelits. I’ve used Stampin’ Write Markers to add some colour to my little cutie: Pink Pirouette for ears, nose and cheeks, Sahara Sand for wool and Pear Pizzazz for grass. I also stamped some grassland using swoosh stamp from Sheltering Tree.

Easter Lamb 3

To make it even cuter I punched few tiny flowers in Blushing Bride, Daffodil Delight and Pool Party using Tree Builder Punch. I’ve made a little cut between each petal to add some extra dimension to my flowers. I also punched few raindrops using the same punch and Pear Pizzazz cardstock and turned them into tiny leaves for my flowers. To finish off my card I added smallest of the Pearl Basic Jewels to the centre of each flower. For the inside, I stamped beautiful sentiment from Suite Sayings.

Easter Lamb 4

I would love to hear from you. Do you like my take on the sketch?

Now, be sure to hop along and see more inspiring projects. Your next stop is Karen’s blog  go and see what she has made for you.

Thank you for stopping by and have a blessed day!

SSSC Previous   SSSC Next Blog

Masculine Birthday Card with Hexagon Hive Thinlits Die by Stampin’ Up!

Hello everyone. Today I will share with you the masculine card I’ve made for a friend request. He needed something special for his brother’s birthday. What I knew about the recipient is that he loves his little boys, Manchester United and heavy metal 😉 I’ve decided to go for the football club colours: black, yellow and red, and to use Stampin’ Up! Hexagon Hive Thinlits Die.

The base is Basic Black cardstock. The background is made on Whisper White cardstock. How I did it? It’s such a cool and effective technique.

 dla neila 5

 I took a stamping clear block and simply I stamped the entire Real Red inkpad on the block, then spritz it with a water and stamped it on the cardstock. I repeat it few times till get the right intense shade. I did dry it in between. Then I’ve done the same with Crushed Curry ink pad for yellow. and to finish it I’ve randomly stamped some stamps from Gorgeous Grunge set. I took a piece of Basic Black cardstock and Hexagon Hive Thinlits and run it through the Big Shot. I’ve attached my background to the base with snail and hexagon die cut on the top with Tombow glue. But then I’ve thought it needs some more twist. I took “happy happy”, “happy birthday” and “chevron” mini stamps from Honeycomb Hello (coordinates with Hexagon Hive Thinlits) and stamp them in the little hexagons on the background.

dla neila 4

For the first sentiment I’ve taken a piece of Whisper White cardstock (watercoloured in Real Red same technique as the background) and a piece of basic black, cut them into mini banners and layer them together. The sentiment is from Something To Say and punched using Word Window Punch. The second sentiment is totally awesome! It’s one of the stamps from Just Saying set and cut out with coordinating framelits from Word Bubbles. Stamped it in Real Red of course in a piece of Whisper White and attached it with dimensionals. Oh, and a black button for that extra touch.

I really love how this card turned out. All supplies I’ve used are Stampin’ Up! except for the button. I know I’ve used lots of different stamp sets and accessories for one card but I’m just starting so don’t have a wide variety of coordinating stamps, punches, framelits etc. But I’m getting there slowly 🙂

Hope you like this project. Thank you for stopping by and happy crafting,

Wedding Card using Scalloped Tag Topper Punch by Stampin’ Up!

Hello everyone! Few days ago I’ve been asked to make a Wedding Day card. The only problem I only had 24 hrs to design and make it.  So I’ve decided to go with Smoky Slate, Pink Pioruette and Whisper White for the colours. The stamp sets I’ve used are (sadly) retired En Francais and Everything Eleanor for the background.

wedding 1

Greetings are from Chalk Talk and Label Love ( used coordinating framelits and punch). I’ve also made a translucent banner with vellum. And who can spot a little SNEAK-PEAK from Autumn-Winter Catalogue? I’ve used new stamp set Four Feathers, heat embossed the image in silver on a piece of vellum and cut it with matching framelits. For the closing as you can see I’ve used my favourite Scalloped Tag Topper Punch. A friend who asked for the card really loved it and so I hope the bride will love it too 🙂

Thank you for stopping by

Who said….

So who said that “Zoo Babies” is a stamp set for babies? 😉 I’m telling you: absolutely not! And here’s the proof 🙂

love ya 1

This is super cute 3×3 note card. You can give your friend, daughter or mum – truly you can give it to anyone who’s got that special spot in your heart – justso they know they’re important for you! 🙂

love ya 2

The base of thi card is 3×3 Basic Black cardstock. I’ve also used a piece of Whisper White cardstock. The sentiment is from “Just Sayin” stamp. I’ve stamped it with Whisper White Pigment Ink. Make sure that ink is completely dry or you will smudge it…just like I did – patience is not my virtue 😉 But you can always use heat gun to speed it up. I’ve used coordinating Word Bubbles framelits to cut out the sentiment.

love ya 3

From “Zoo Babies” I’ve picked the elephant and little rhino and stamped them using Wisteria Wonder, Crumb Cake and one of new in-colours Lost Lagoon. Envelope Punch Board helped me to round the corners of white pieces, then I sponged the edge and taa daaah!  🙂

And at the very end just to add bit of interest I’ve used little stamps from “Something To Say” with coordinating Itty Bitty Accents punch pack and stick them using dimensionals. Oh and bubbles with sentiments are attached using dimensionals too.

Hope you like my little project. Please leave the comments below.

Thank you for stopping by and happy crafting