For The Love of Creating Blog Hop

Anna' Stampin' Cave - Stampin' Up! Sneak Peek First Frost Stamp Set with Frosted Bouquet Framelits Dies and Frosted Floral Specialty DSP

Anna’ Stampin’ Cave – For The Love of Creating – Frosted Floral Suite
Hello and welcome to For the Love of Creating with Stampin’ Up! Blog Hop run by the amazing Australian demonstrator, Kim Oliver. We are super excited to share with you an array of creations showcasing a sneak peek products from 2018 Holiday (Autumn-Winter in the UK) Catalogue.

We hope you find great inspiration from our projects. If you have arrived here from Sandra Mastello, a big welcome to you. You are currently visiting Anna Krol from the United Kingdom.

Frosted Floral Suite

For my projects today I decided to showcase a beautiful suite of products called Frosted Floral Suite.
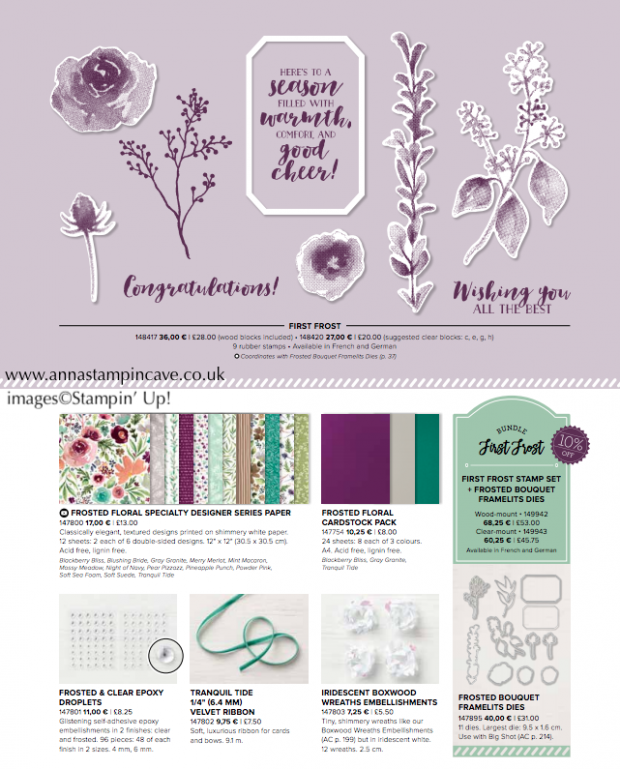
Stampin' Up! Frosted Foral Suite of products

I did not order the whole suite yet, but enough to showcase a beautiful stamp set with coordinating dies, and unique Designer Series Paper.

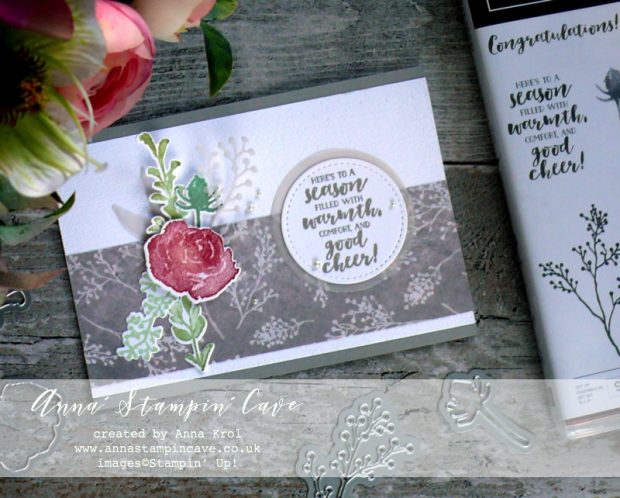
Here’s my card –
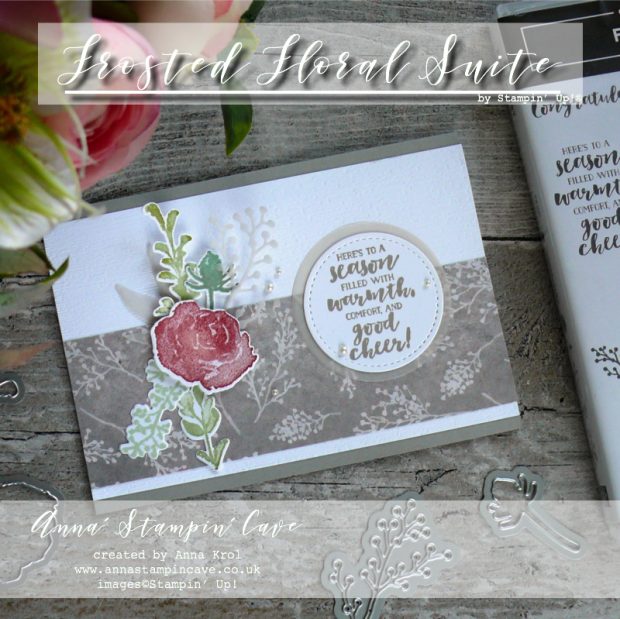
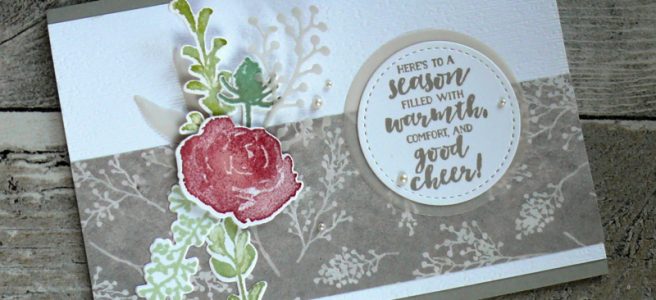
Anna' Stampin' Cave Stampin' Up! Sneak Peek First Frost Stamp Set with Frosted Bouquet Framelits Dies and Frosted Floral Specialty DSP

Card dimensions:

  • Gray Granite cardstock: 11-6/8″ x 4-1/8″ scored in half at 5-7/8″ (29.7 x 10.5 cm scored in half at 14.8 cm)
  • Whisper White panel: 3-3/4″ x 5-7/8″ (9.6 cm x 14.8 cm)
  • Whisper White panel (for inside): 4″ x 5-3/4″ (10.2 cm x 14.5 cm)
  • Frosted Floral Specialty DSP: 2″ x 5-7/8″
  • Whisper White cardstock for sentiment
  • Whisper White and Vellum for die-cutting
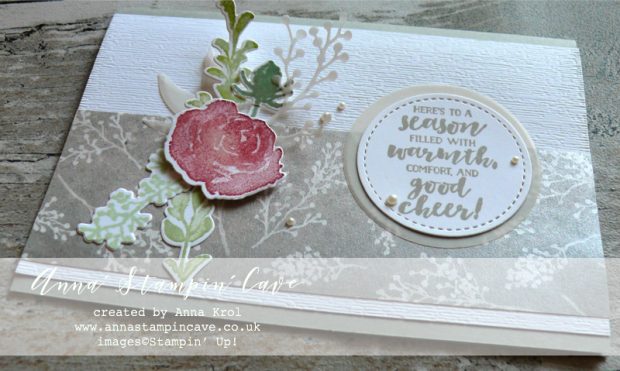
Anna' Stampin' Cave Stampin' Up! Sneak Peek First Frost Stamp Set with Frosted Bouquet Framelits Dies and Frosted Floral Specialty DSP

First, I created my card base. Next, I run my Whisper White panel through the Big Shot using Subtle Dynamic Textured Impressions Embossing Folder. I love this really subtle linen-like texture. I adhered it to the card base.

Frosted Floral Specialty DSP

I’m totally in love with this amazing paper. It’s oh-so-beautiful! Not only because of stunning, handpainted designs. This paper is so yummy and full of shine, like if it was printed on Shimmery White cardstock. What’s more, a  girl can wish for?

I picked a neutral Gray Granite design and cut 2″ strip and glued it into the bottom half of my card base.

Anna' Stampin' Cave Stampin' Up! Sneak Peek First Frost Stamp Set with Frosted Bouquet Framelits Dies and Frosted Floral Specialty DSP

First Frost Bundle

Just as a breathtaking is designer paper, a First Frost Stamp Set and coordinating Frosted Bouquet Framelits Dies are equally beautiful.

I’ve used Stamparatus to stamp my images onto Whisper White cardstock, and die-cut them with matching dies. I also die-cut a few images from vellum.

I played with arranging my die-cuts to decide how I wanted them to go on the card and I snap a photo for a reference. Using either liquid glue, snail adhesive or dimensionals – I added all my pieces to the card.
Anna' Stampin' Cave Stampin' Up! Sneak Peek First Frost Stamp Set with Frosted Bouquet Framelits Dies and Frosted Floral Specialty DSP

I die-cut a circle using second smallest circle from Stitched Shapes Framelits Dies and stamped my sentiment using Gray Granite ink. I also die-cut a slightly bigger vellum circle cut using Layered Circles Framelits Dies (approx 2-1/8″ – 5.4 cm). I adhered them together and mount it onto my card. Few Basic Pearls finish off my card.

I hope you enjoyed coming to my blog today and now, be sure to hop along and see more inspiring projects.

Below is the list of all the participants but you can also use the buttons to keep hopping. Your next stop is lovely Margriet Siekman from the Netherlands  go and see her beautiful projects

As always, if you wish to purchase any of the products I have used, simply click the images below to go directly to my online store.

HOST CODE for the month of AUGUST is U6KK4ACY. Orders of £50+ (excl. p&p) will receive a pack of Stampin’ Up! Pearlised Doilies!

Product List

Stamparatus

£46.00

Pin me

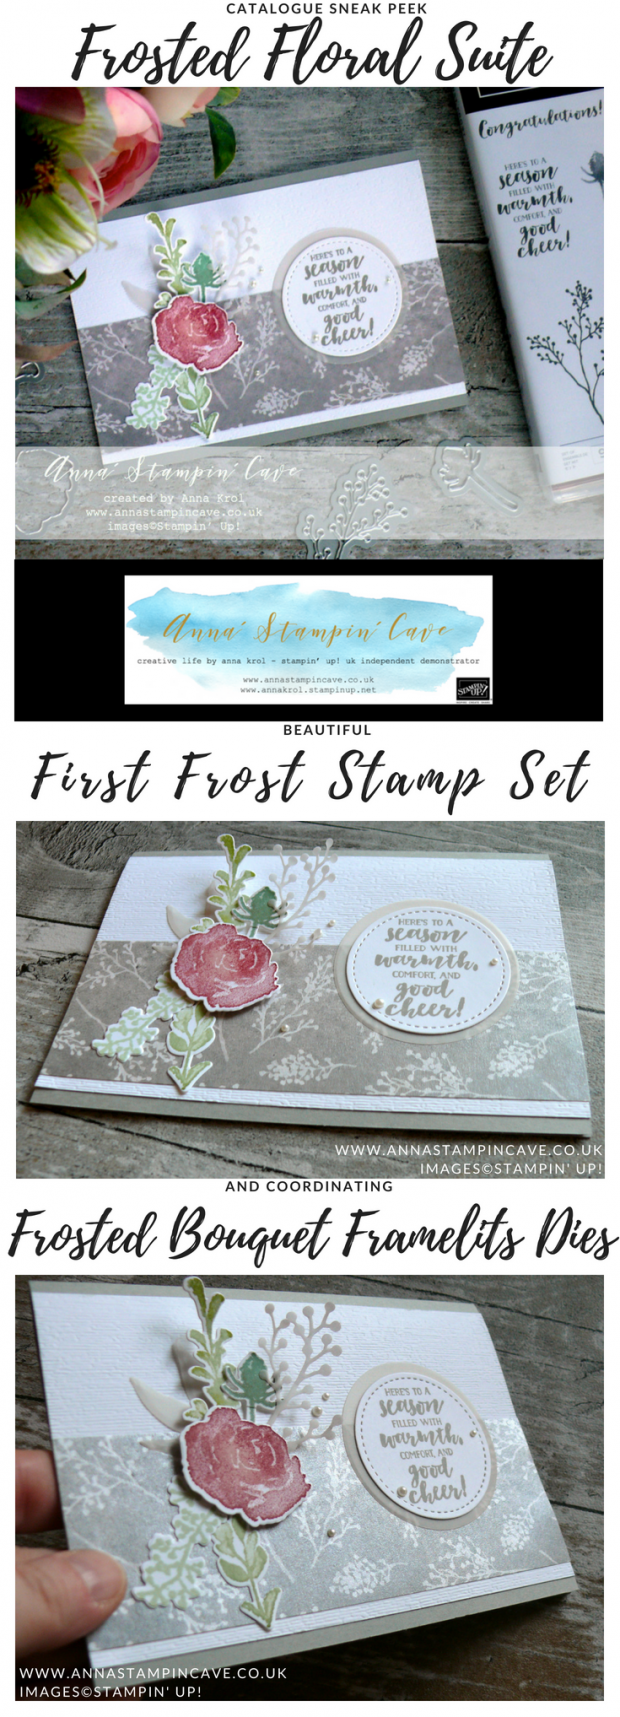
Summary of the project which gives all the views of the card in one photo. I’d love if you pinned and called by on Pinterest xx
Anna' Stampin' Cave - Stampin' Up! Sneak Peek First Frost Stamp Set with Frosted Bouquet Framelits Dies and Frosted Floral Specialty DSP


Don’t forget to check:

My exclusive special offer this month only: FREE Stampin’ Up! Pearlised Doilies

How it works…

  • Place a product order of £50 or more (excl. shipping) in my online store in the month of August. 
  • Add Host Code U6KK4ACY. To claim your reward you must include this code in your ordering process.
  • This August Special Offer will be applied to all qualifying orders placed through my shop using Host Code U6KK4ACY between 1 August – 31 August.
  • If your order is £150 or more do not use Host Code. You will earn your own Host Rewards to spend.
  • IMPORTANT:  My FREE Special Host Gift giveaways are mailed separately from any order and will arrive mid-September.

    Request Autumn/Winter Catalogue

    Stampin' Up! Autumn Winter 2018 Catalogue


    Earn in August – redeem in September –> click here for more details


    All-new, limited-time Colour Your Season products – Products available while supplies last or until 31 August 2018 – order yours today –> click here

Simply Sketched Saturday Challenge #13 – Birthday In Marina Mist Blues

Anna’ Stampin’ Cave – Birthday In Marina Mist Blues

SSSC Header

Thank you for joining us for another Simply Sketched Saturday Challenge!  We are so excited to be sharing this hop with you. The products used are all available in the current Annual, or seasonal, Stampin’ Up!®  Catalogues*. Simply use the buttons at the bottom of the post to keep hopping!

Welcome welcome! We are back with our monthly challenge after a long summer break. Did you miss us?

This week sketch was designed by our lovely Mandy and it is…anything goes. I know! A nice little warm-up for us – thank you, Mandy.

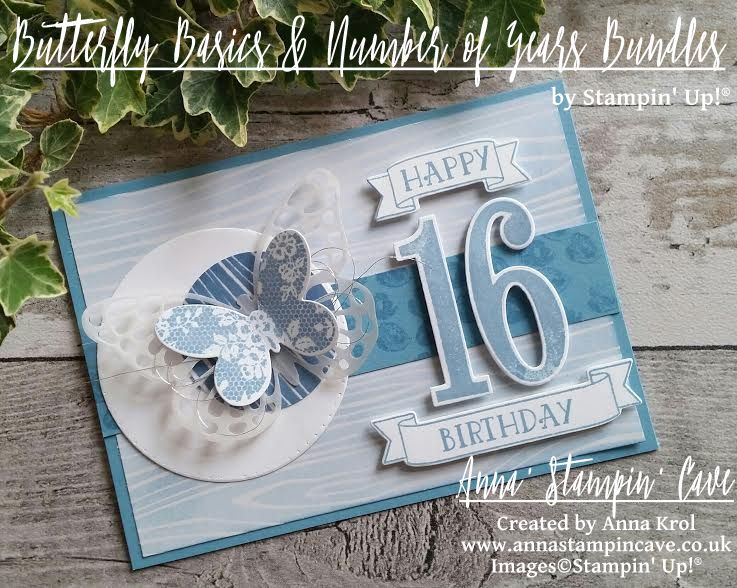
I know you see more and more holidays related projects lately. But I decided to keep the warm summer days for a little bit longer. And what says ‘summer’ more than blue skies and butterflies?

stampin-up-butterfly-basics-meets-number-of-years-bundles

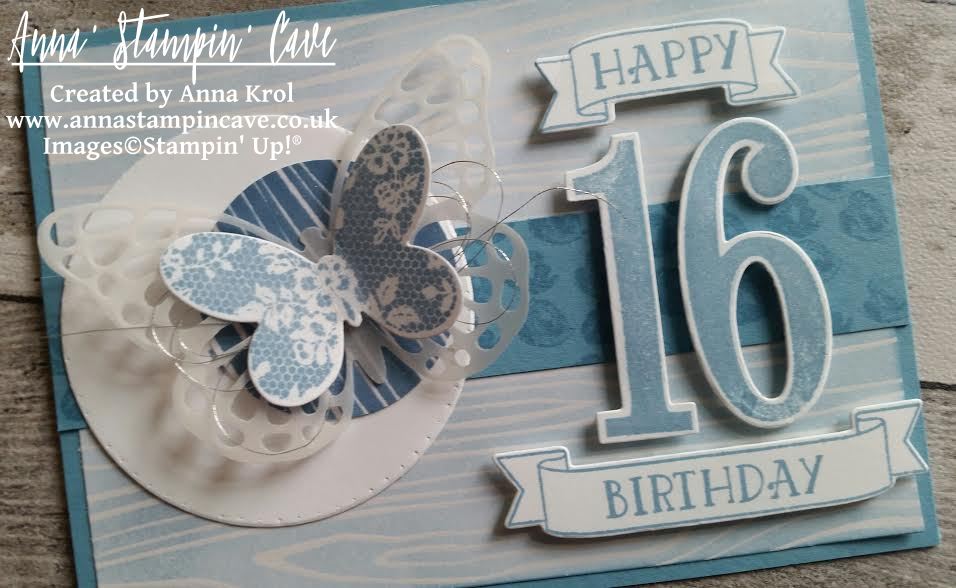
This is a birthday card for sweet ‘sixteen’ who loves blue. The base of my card is Marina Mist cardstock, standard A6 size. The first panel is a piece of Color Me Irresistible Specialty DSP that measures 5-5/8″x 3-7/8″. I chose to use white, embossed woodgrain pattern and gently sponged Marina Mist over my piece and adhere it to the base. Next, I cut a strip of Marina Mist cardstock, 1″ wide, and stamped little roses from Number Of Years Stamp Set all over the piece and adhere it across the sponged panel.

stampin-up-butterfly-basics-meets-number-of-years-with-wink-of-stella

I die-cut two circles: large one from Whisper White ( I pierced it around the edge) and smaller one again from Color Me Irresistible Specialty DSP. I sponged this smaller one with Marina Mist. But this time, I’ve added lots of ink for really deep shade. I adhered smaller circle on top of the large one, off-setting it.

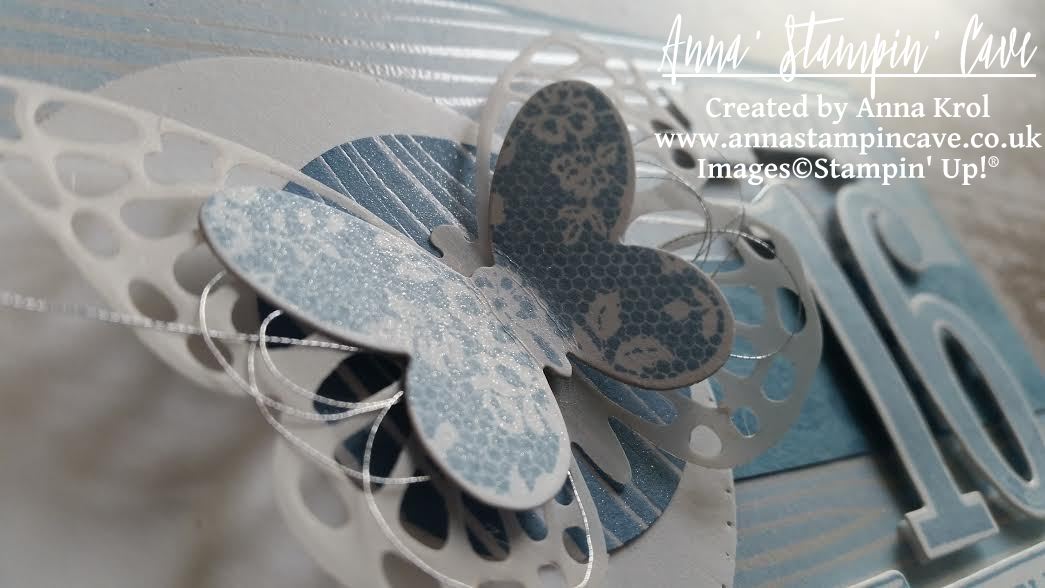
I stamped butterfly from Butterfly Basics on a piece of Whisper White in Marina Mist and die cut it using coordinating die. I also die cut larger, detailed butterfly from vellum, using the same die set. Next, I attached small butterfly on top of detailed one, with Silver Metallic Thread in between. I adhered them both to the circles using glue dots and attached the whole piece to the card base, off-setting it to the left.

stampin-up-butterfly-basics-meets-number-of-years

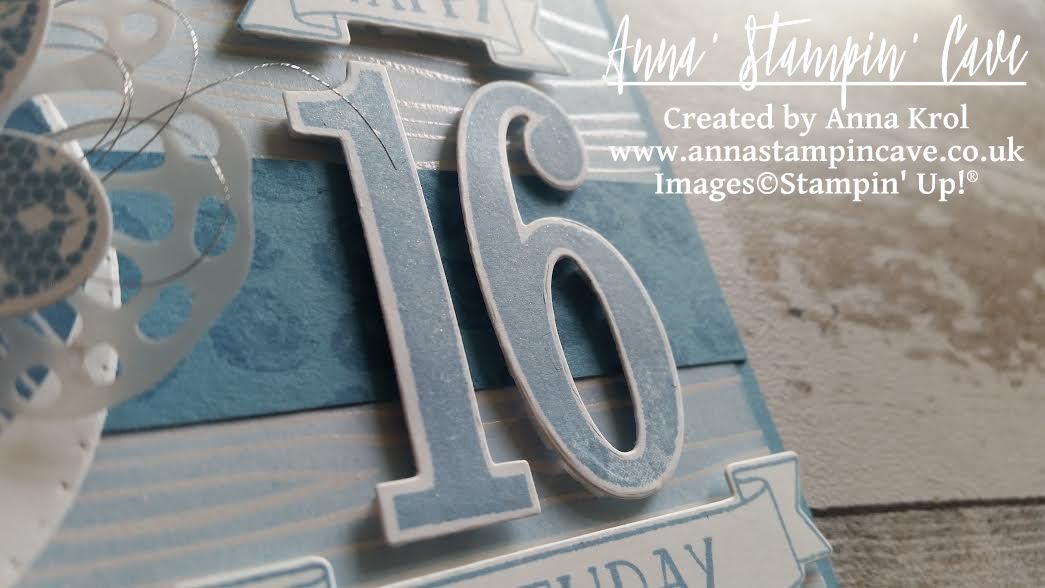
I stamped numbers 1 and 6, from Number of Years Stamp Set, in Marina Mist of course, and die-cut it with coordinating dies (I love this set!!!). Next, I stamped banner and word ‘birthday’ inside of the banner and die-cut it. For the word ‘happy’ I had to adjust it a little bit, and with help of masking, and partial die-cutting, I was able to create matching smaller banner. I attached the numbers and banners to the card base using dimensionals.

stampin-up-butterfly-basics-meets-number-of-years

There’s no such a thing as bling-free teenage girl card, right? So my finish touch was to add a gentle shimmer to the butterfly, circle, and numbers with Clear Wink of Stella Glitter Brush. I think it’s my first card ever where I’ve used one ink pad colour only. And to be honest I really like this monochromatic look.

And what do you think? Do you like monochromatic? Please let me know in comments below.

As always, if you wish to purchase any of the products I have used, simply click the images below to go directly to my online shop and don’t forget to enter the hostess code for the month of September RKW34AHD, to receive a gift from me.

Now, be sure to hop along and see more inspiring projects. Your next stop is Mandy’s blog  go and see what she has made for you.

Thank you for stopping by and have a blessed day

SSSC Previous   SSSC Next Blog

Product List

Glue Dots

£4.75

Big Shot

£99.00

You Put The Merry In My Christmas

Anna’ Stampin’ Cave – You Put The Merry In My Christmas


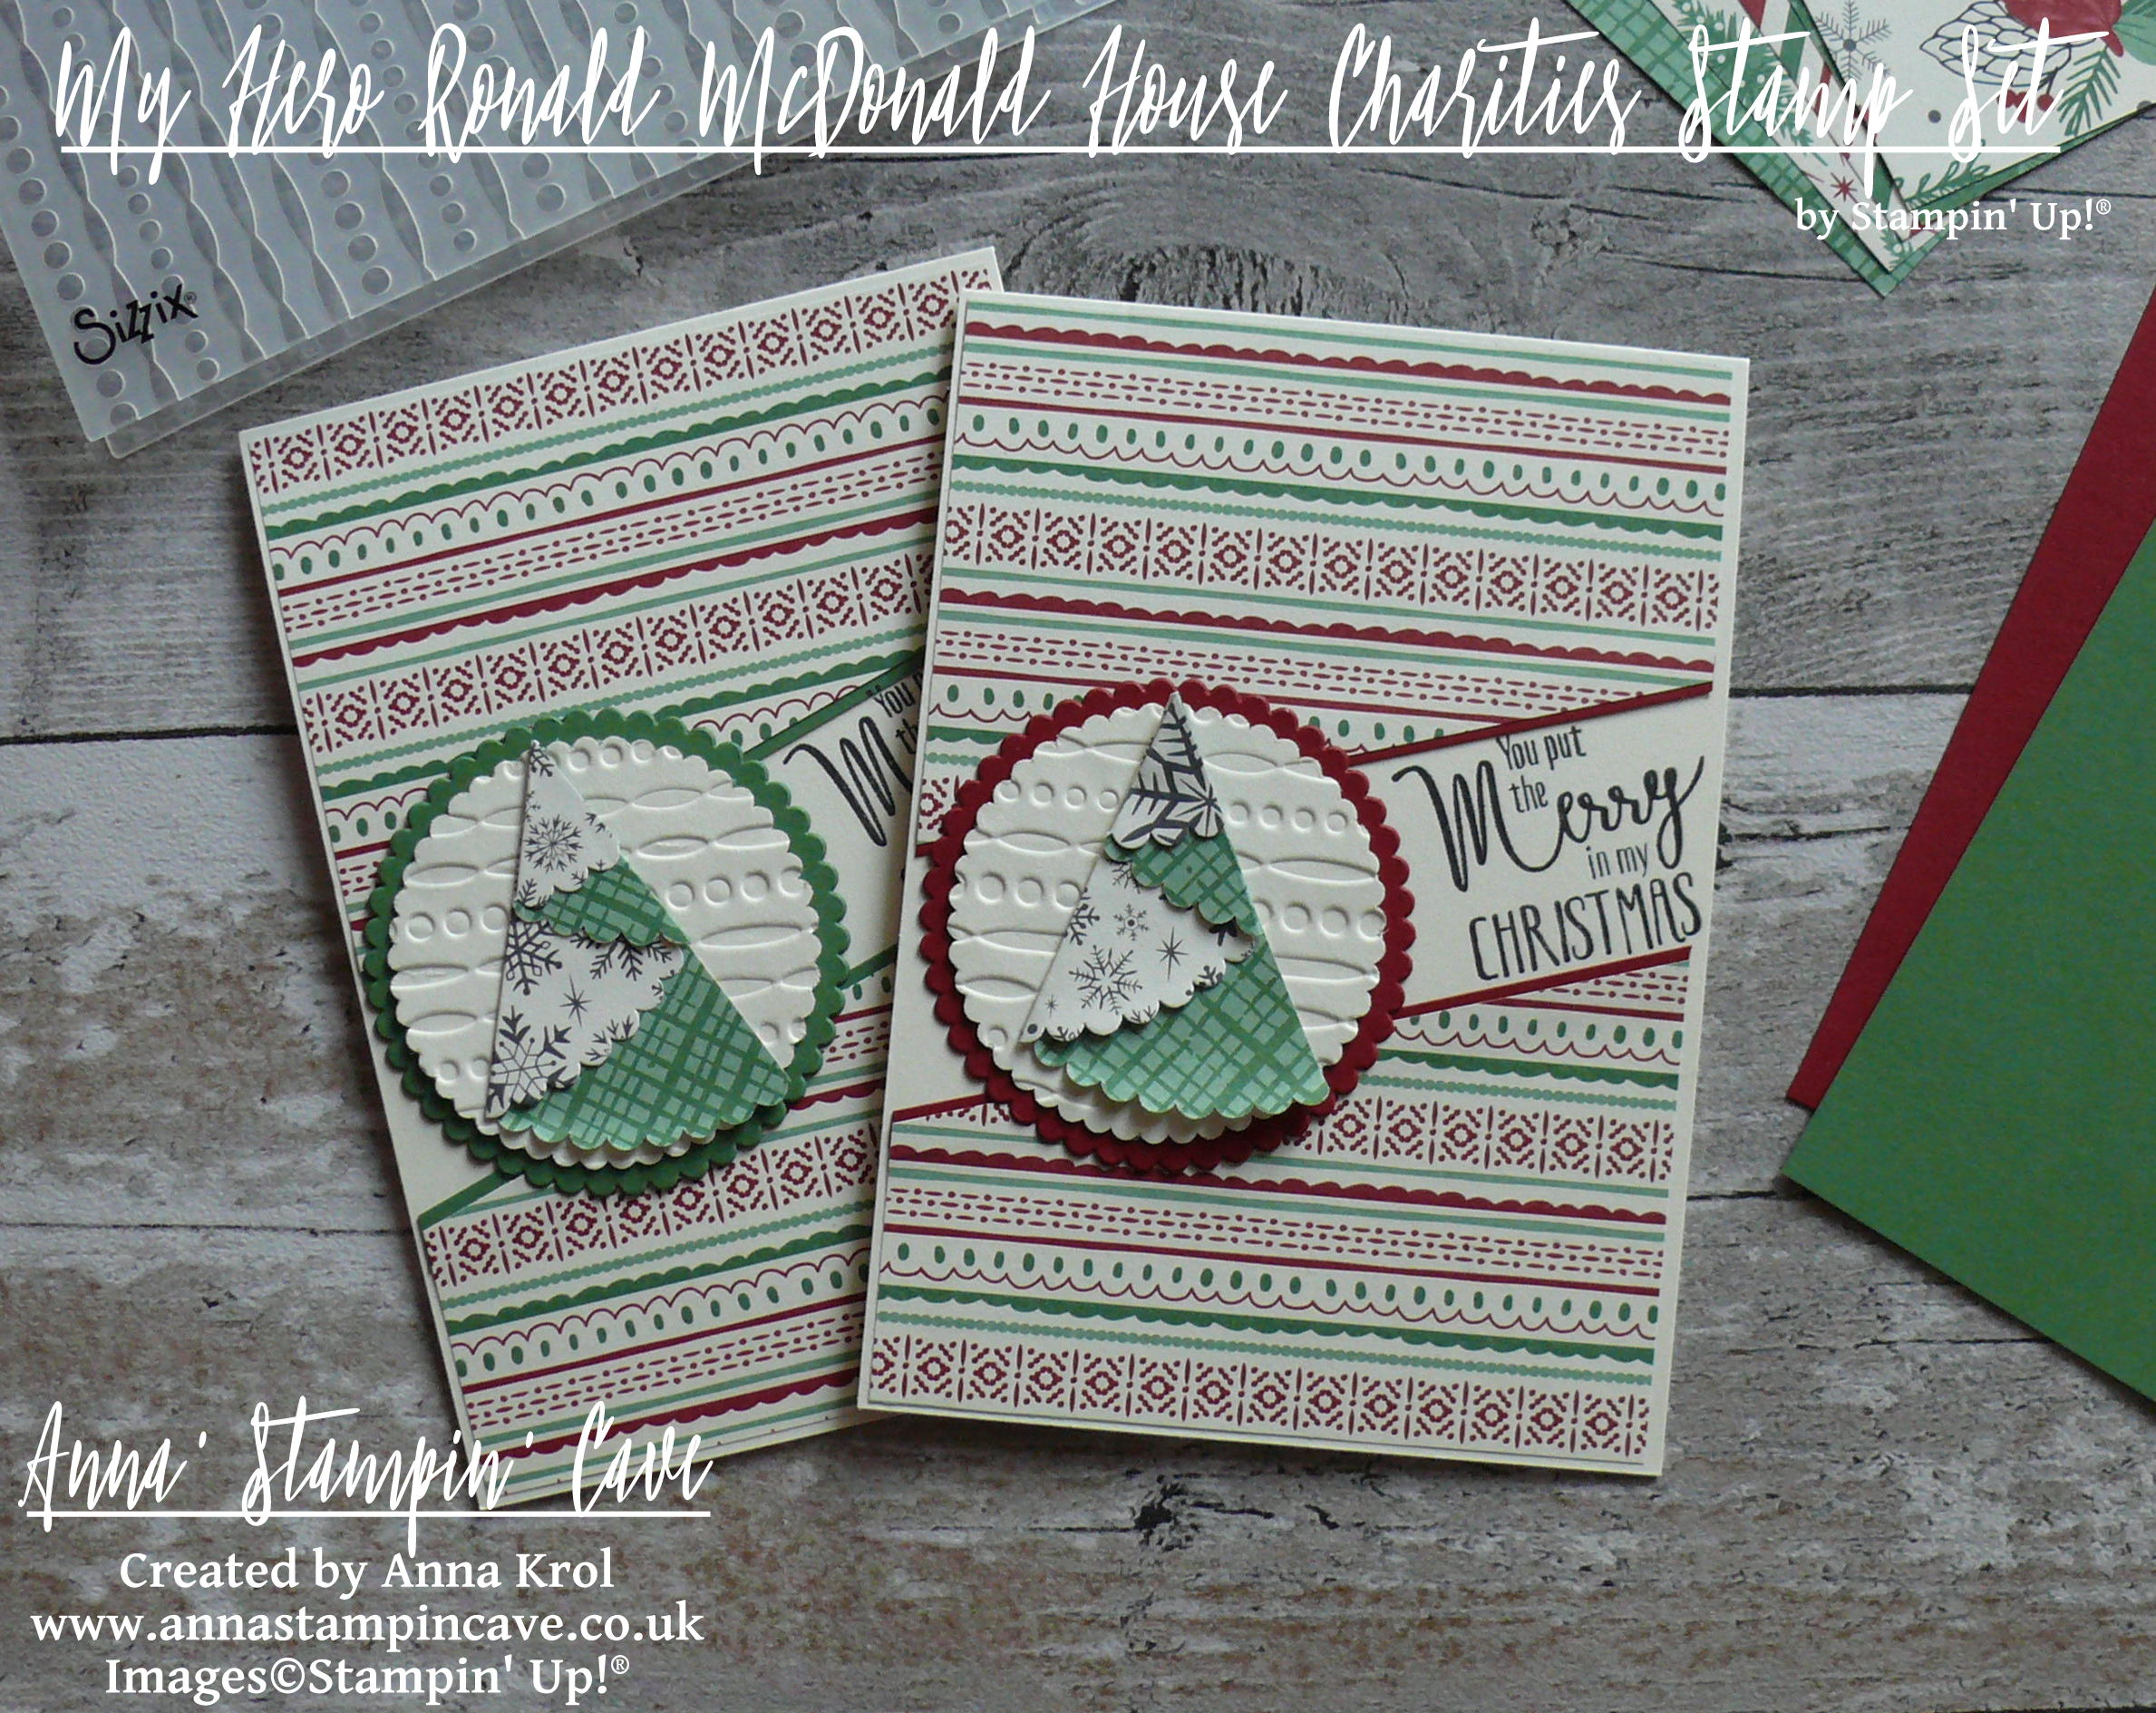
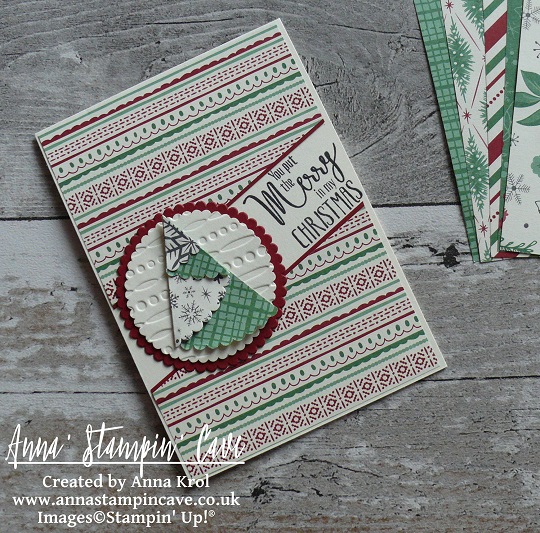
Hello, and welcome! Today I’ve got for you a couple of rather traditional Christmas cards. As you probably remember we are showcasing My Hero RMHC Stamp Set by Stampin’ Up!®

stampin-up-my-hero-rmhc-stamp-set-you-put-the-merry-in-my-christmas

Aren’t they lovely?! And they are so easy to make.

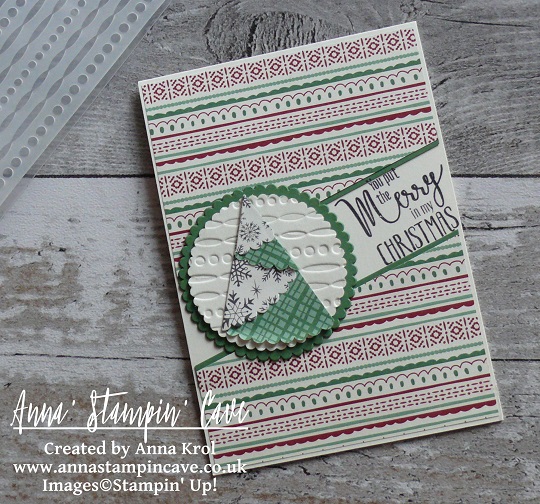
The card base is standard top folded A6 in Very Vanilla and I’ve used beautiful This Christmas Specialty Designer Series Paper for my panels. These were supposed to be simple, straightforward cards, but then again, I can’t make things that are too easy, can I?! So I decided to turn them into a split panels cards.

The panels I prepared earlier were 4 x 5-6/8″ in size. To create split panels, I cut them diagonally into 3 and removed the middle piece. I cut narrow strips of Garden Green and Cherry Cobbler cardstock and glued them underneath my split panels to accent the’split’. I adhered the panels to the base using snail adhesive.

stampin-up-my-hero-stamp-set-you-put-the-merry-in-my-christmas-cherry-cobbler

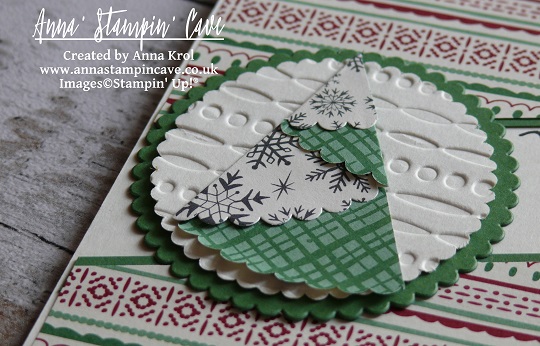
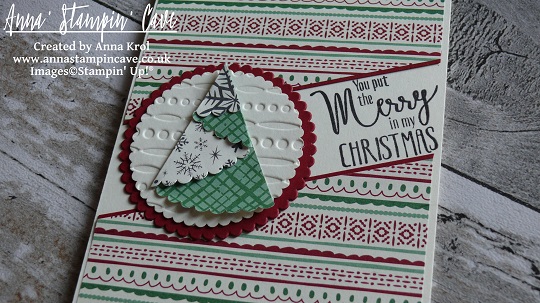
Using my Stamp-A-Ma-Jig I stamped the sentiment in the ‘split’ area. Next, I created these uber cute mini Christmas trees. To make them, I die cut a scalloped circle from a sheet of the same DSP, just a different design. I cut it in half, fold it into ‘tree’ and secured my folds with mini glue dots.

stampin-up-my-hero-stamp-set-you-put-the-merry-in-my-christmas-cherry-cobbler-2

Because design on this paper is quite ‘busy’, you couldn’t really see the trees, once attached to the card. So I die cut 2 scalloped circles in Very Vanilla and run them through my big shot with Festive Embossing Folder.

stampin-up-my-hero-stamp-set-you-put-the-merry-in-my-christmas-garden-green

Next, I die cut 2 slightly bigger scalloped circles: one in Garden Green and one in Cherry Cobbler to create mats for Very Vanilla pieces. Adhered them together (de-bossed side up) and then added my trees on top.

stampin-up-my-hero-stamp-set-you-put-the-merry-in-my-christmas-garden-green-2

First I thought to pop my circles up with dimensionals. But because these cards got quite of dimension anyway, I adhered them to the base with snail adhesive.

Super easy, aren’t they? I hope you like them. As always, if you wish to purchase any of the products I have used, simply click the images below to go directly to my online shop and don’t forget to enter the hostess code for the month of September RKW34AHD, to receive a gift from me.

I’m also adding my card to Craftyhazelnut’s Patterned Paper September 2016 challenge

Thank you for stopping by and have a blessed day,

Pootlers New Seasonal Catalogue Blog Hop – Thankful, Grateful, Blessed With Paisleys & Posies Bundle

pootler's blog hop

Thank you for joining us on another Pootlers Blog Hop! We’re showcasing lots of gorgeous projects using products from the new Stampin’ Up!® Autumn Winter Seasonal Catalogue. Simply use the buttons at the end of each post to keep hopping!

If you arrived here from lovely Louise’s blog, thank you for stopping by. I hope you enjoy seeing all these beautiful projects and inspiration and continue to hop on through to see what everyone has made.

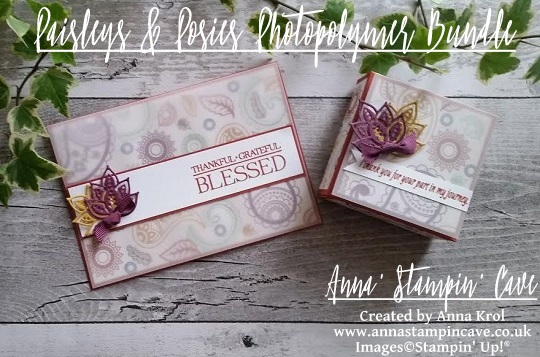
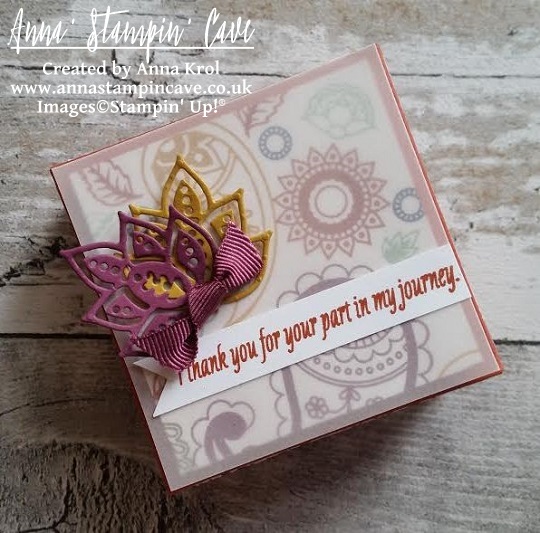
For today’s project, I’ve been using new Paisleys & Posies Stamp Set with Paisley Framelits Dies, and these two are a part of beautiful Petals & Paisleys Product Suite. I used them to create a beautiful contemporary card and matching gift box.

I don’t know about you, but I just love paisley. It is such a trendy design right now, you can find it everywhere: from home decor, through fashion, art and more.

thankful-grateful-blessed-gift-set-with-paisleys-posies-bundle

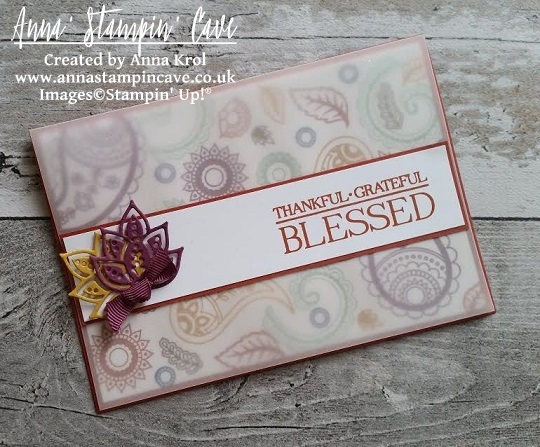
For my card, I randomly stamped various images from Paisleys & Posies Stamp Set on a piece of Whisper White. It’s like creating your own DSP. To take off the guesswork, I’ve used the colours that coordinate with Petals & Paisleys Suite: Cajun Craze, Rich Razzleberry, Delightful Dijon, Mint Macaron, Soft Suede and Night of Navy.  I adhered it to my card base (Cajun Craze) and added a layer of vellum on the top, to soften the bold colours. Next, I cut a strip of Whisper White and stamped the sentiment from the same stamp set (love this font!), to the left in Cajun Craze. Backed it with a slightly wider piece of Cajun Craze cardstock, and adhered it to the card front. Using Paisley Framelits Dies, I die-cut two intricate leaves, one in Rich Razzleberry and one in Delightful Dijon, and add it to the panel. The final touch for the card was a tiny Rich Razzleberry bow I’ve made using one of the ribbons from new 3/8″ (1 cm) Ribbon Trio Pack.

thankful-grateful-blessed-card-with-paisleys-posies-bundle

Top tip 1: Glue dots are handy to adhere small elements like little bows. Top tip 2: There’s not such a thing as an invisible adhesive for when using vellum; be smart and hide adhesive under panels, die-cuts or embellishments. Savvy tip: To save the precious ribbon, tie a square knot straight from the spool.
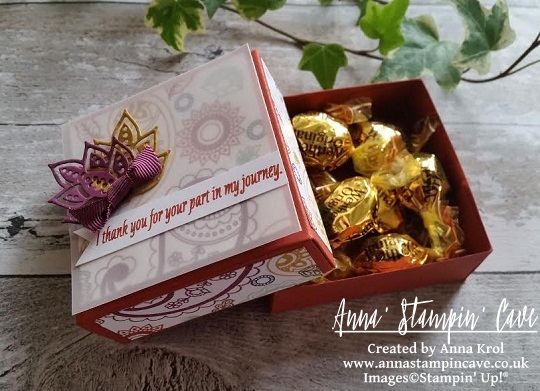
For the gift box base, I’ve used, again, Cajun Craze cardstock. It’s really cute dinky little box, with the base being a 2-7/8 x 2-7/8″ square, and 1″ tall. Same as with the card, I created my own piece of DSP to decorate the box. Using dimensionals I slightly elevated the panel that goes on the top of the lid. But panels on the sides of my box are glued flat. Next, I’ve added a panel of vellum to the top of my box, followed by a little banner with a sentiment, and (again) leaves and a bow to match the card.

I don’t make boxes or gift sets too often, but I really like this one. I don’t know why. Perhaps for the autumnal colours and maybe for the paisley design. Whatever the reason, I hope you like it too.

Your next stop is lovely Jerim. Simply click the next button to keep hopping around all the blogs to see lots of new ideas and inspiration.
next pootler blog

previous pootler blog

Thank you for stopping by and have a blessed day,

Pootler’s Autumn-Winter Catalogue Blog Hop – Christmas Bauble Shaker Card!

pootler's blog hop

Thank you for joining us again on Pootler’s Blog Hop! This is our team Blog Hop to showcase products from new Stampin’ Up!® Autumn-Winter Catalogue. So prepare yourself for lots of beautiful projects and tonnes of inspiration. Simply use the buttons at the end of each post to keep hopping!

If you have arrived here from Lea’s blog thank you for stopping by. I hope you enjoy seeing the inspiration from our team and continue to hop through to see what everyone has made.
My little project features pretty few of new products from our seasonal catalogue, but I just simply couldn’t decide which one to choose 🙂

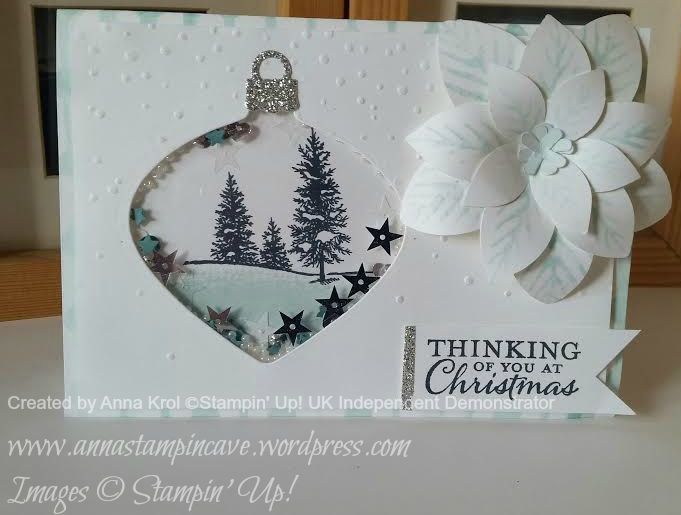
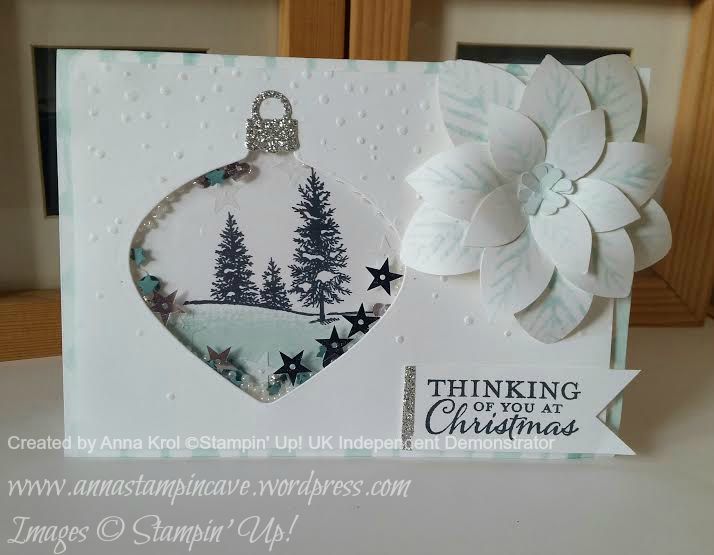
Does it happen to you that when you see a new product, it “talk to you”? haha. No, I’m not crazy! Just the moment I saw Delicate Ornaments Thinlits Dies it screamed to me: shaker card!

Christmas Bauble Shaker Card 2.1

I wanted to keep my card in soft, washed colours. The base of the card, as well as the top layer, is Whisper White. To break a little bit all the whiteness I added pattern to my base. I took one of the stencils (fancy dots) from Happy Patterns set and sponged over the stencil with Soft Sky. But I only sponged on the edges, leaving the centre white for stamping.

For the layer, I took a piece that measures 5-3/8 x 3-6/8″ so my sponged base could slightly peek around the edges. I run it through Big Shot with new Softly Falling 6×6″ Embossing Folder. I love how it adds gentle texture to the card. Next, I run it through the Big Shot with a bauble die from Delicate Ornament Thinlits Dies, to create a “window” for my shaker.

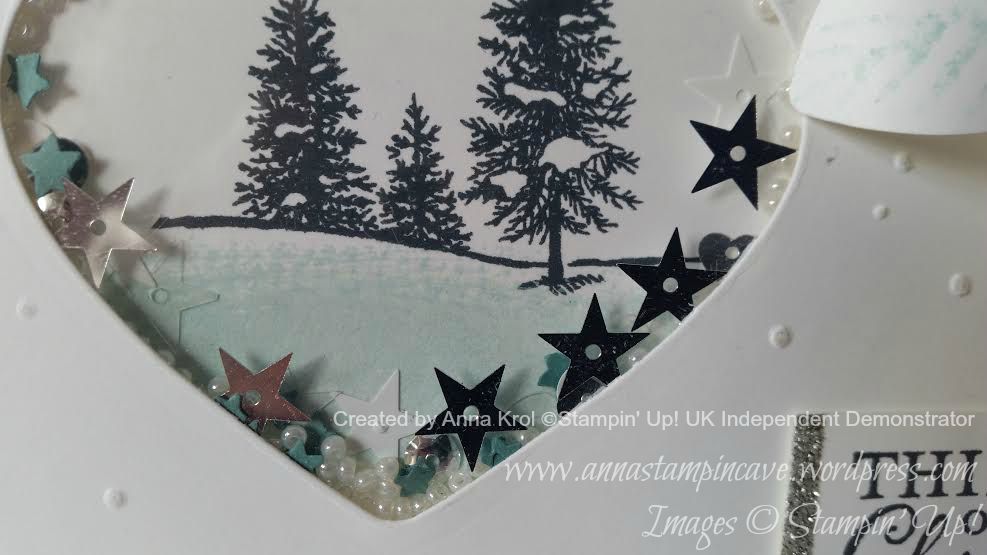
Christmas Bauble Shaker Card 4

Winter scene comes from Happy Scenes stamp set. Snow on the ground is “swoosh” stamp from Work Of Art. For my shakers I used Metallics Sequin Assortment, Lost Lagoon stars punched with Confetti Stars Border punch and seed beads from my stash. To create shaker I used edges from dimensionals and a piece of acetate. If you don’t have dimensionals you could use foam tape.

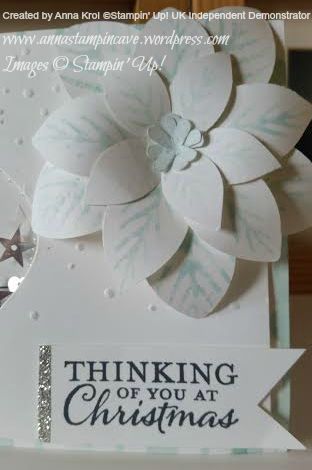
Christmas Bauble Shaker Card 3

To keep rest of the card simple the only “embellishment” on my card is Poinsettia flower. I was so excited to use Festive Flower Builder Punch together with Reason for the Season stamp set. I punched poinsettia leaves from Whisper White cardstock. I used five large leaves, five medium, five small ones (I cut them in half) and three centres to build my poinsettia. Each leaf was stamped in Sky Blue but I stamp it off first so the colour was even softer. I curl each leaf with a bone folder and assembled it using Tombow glue.

Christmas Bauble Shaker Card 2.2

This gorgeous sentiment comes from Embellished Ornaments stamp set. I cut it into a banner and backed it with a piece of silver glimmer paper. As I had it out I also die-cut a little fixing for my bauble from glimmer paper too.

Now that you’ve seen my project please use the buttons below to keep “hopping”. Next in our hop is Sarah, and I know she has a lovely project to share with you. Once again thank you for stopping by.

Have a blessed day,

previous pootler blog