Anna’ Stampin’ Cave – New Stitched Shapes Framelits Dies
Not only stitches are a classic trend, they illustrate the quality, precision, and extra care is taken when creating a piece. Giving a stitched gift shows just how much you value that relationship.
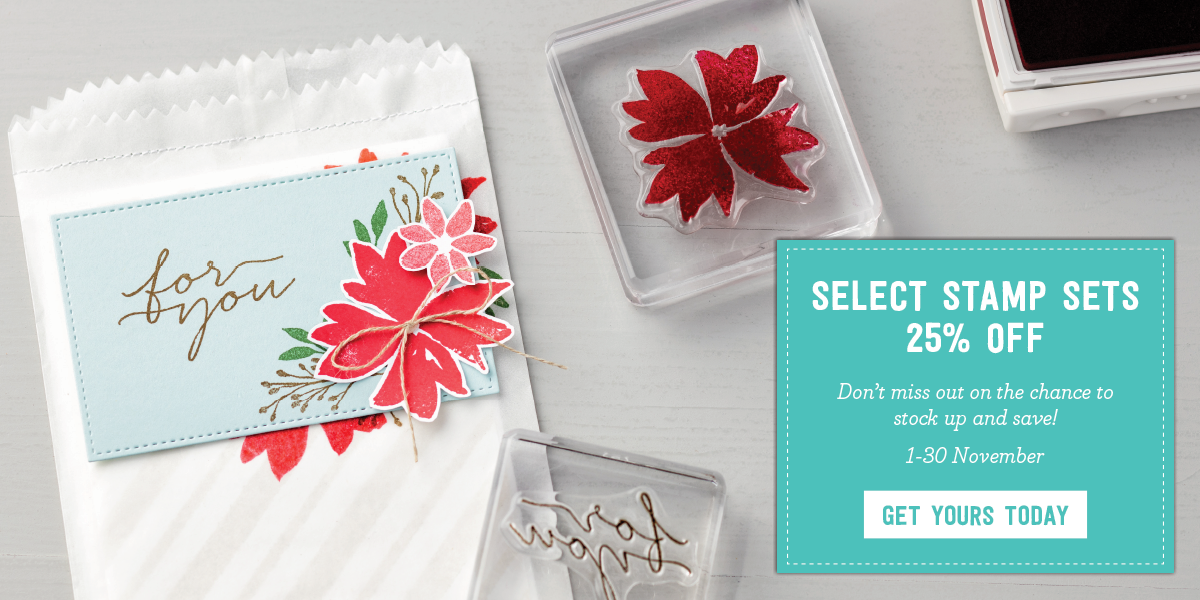
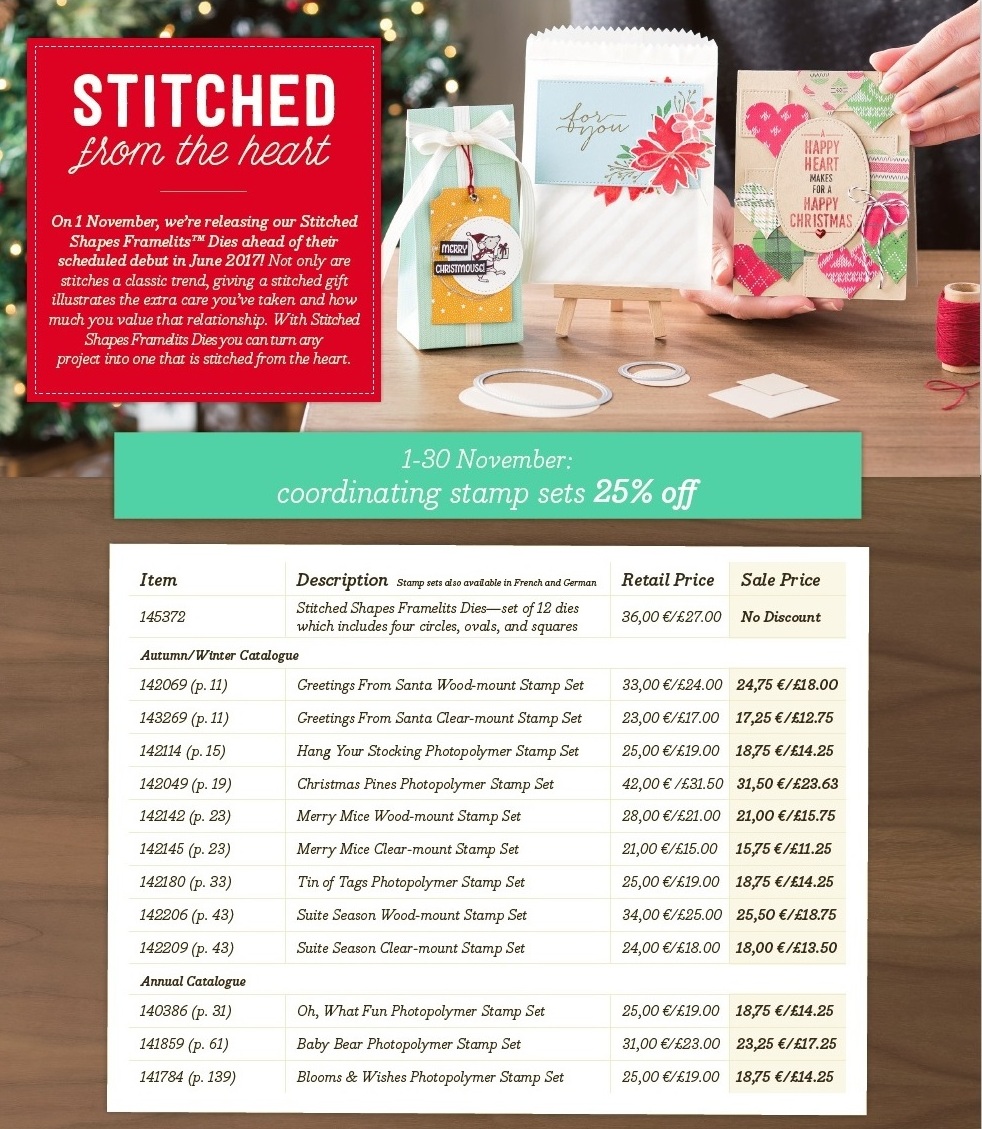
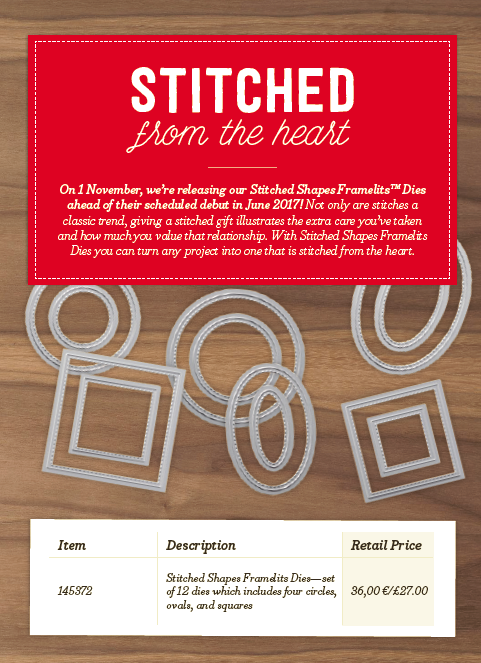
Now you have the opportunity to purchase Stitched Shapes Framelits ahead of their official release in the 2017-2018 annual catalogue and get 25% off coordinating stamp sets.
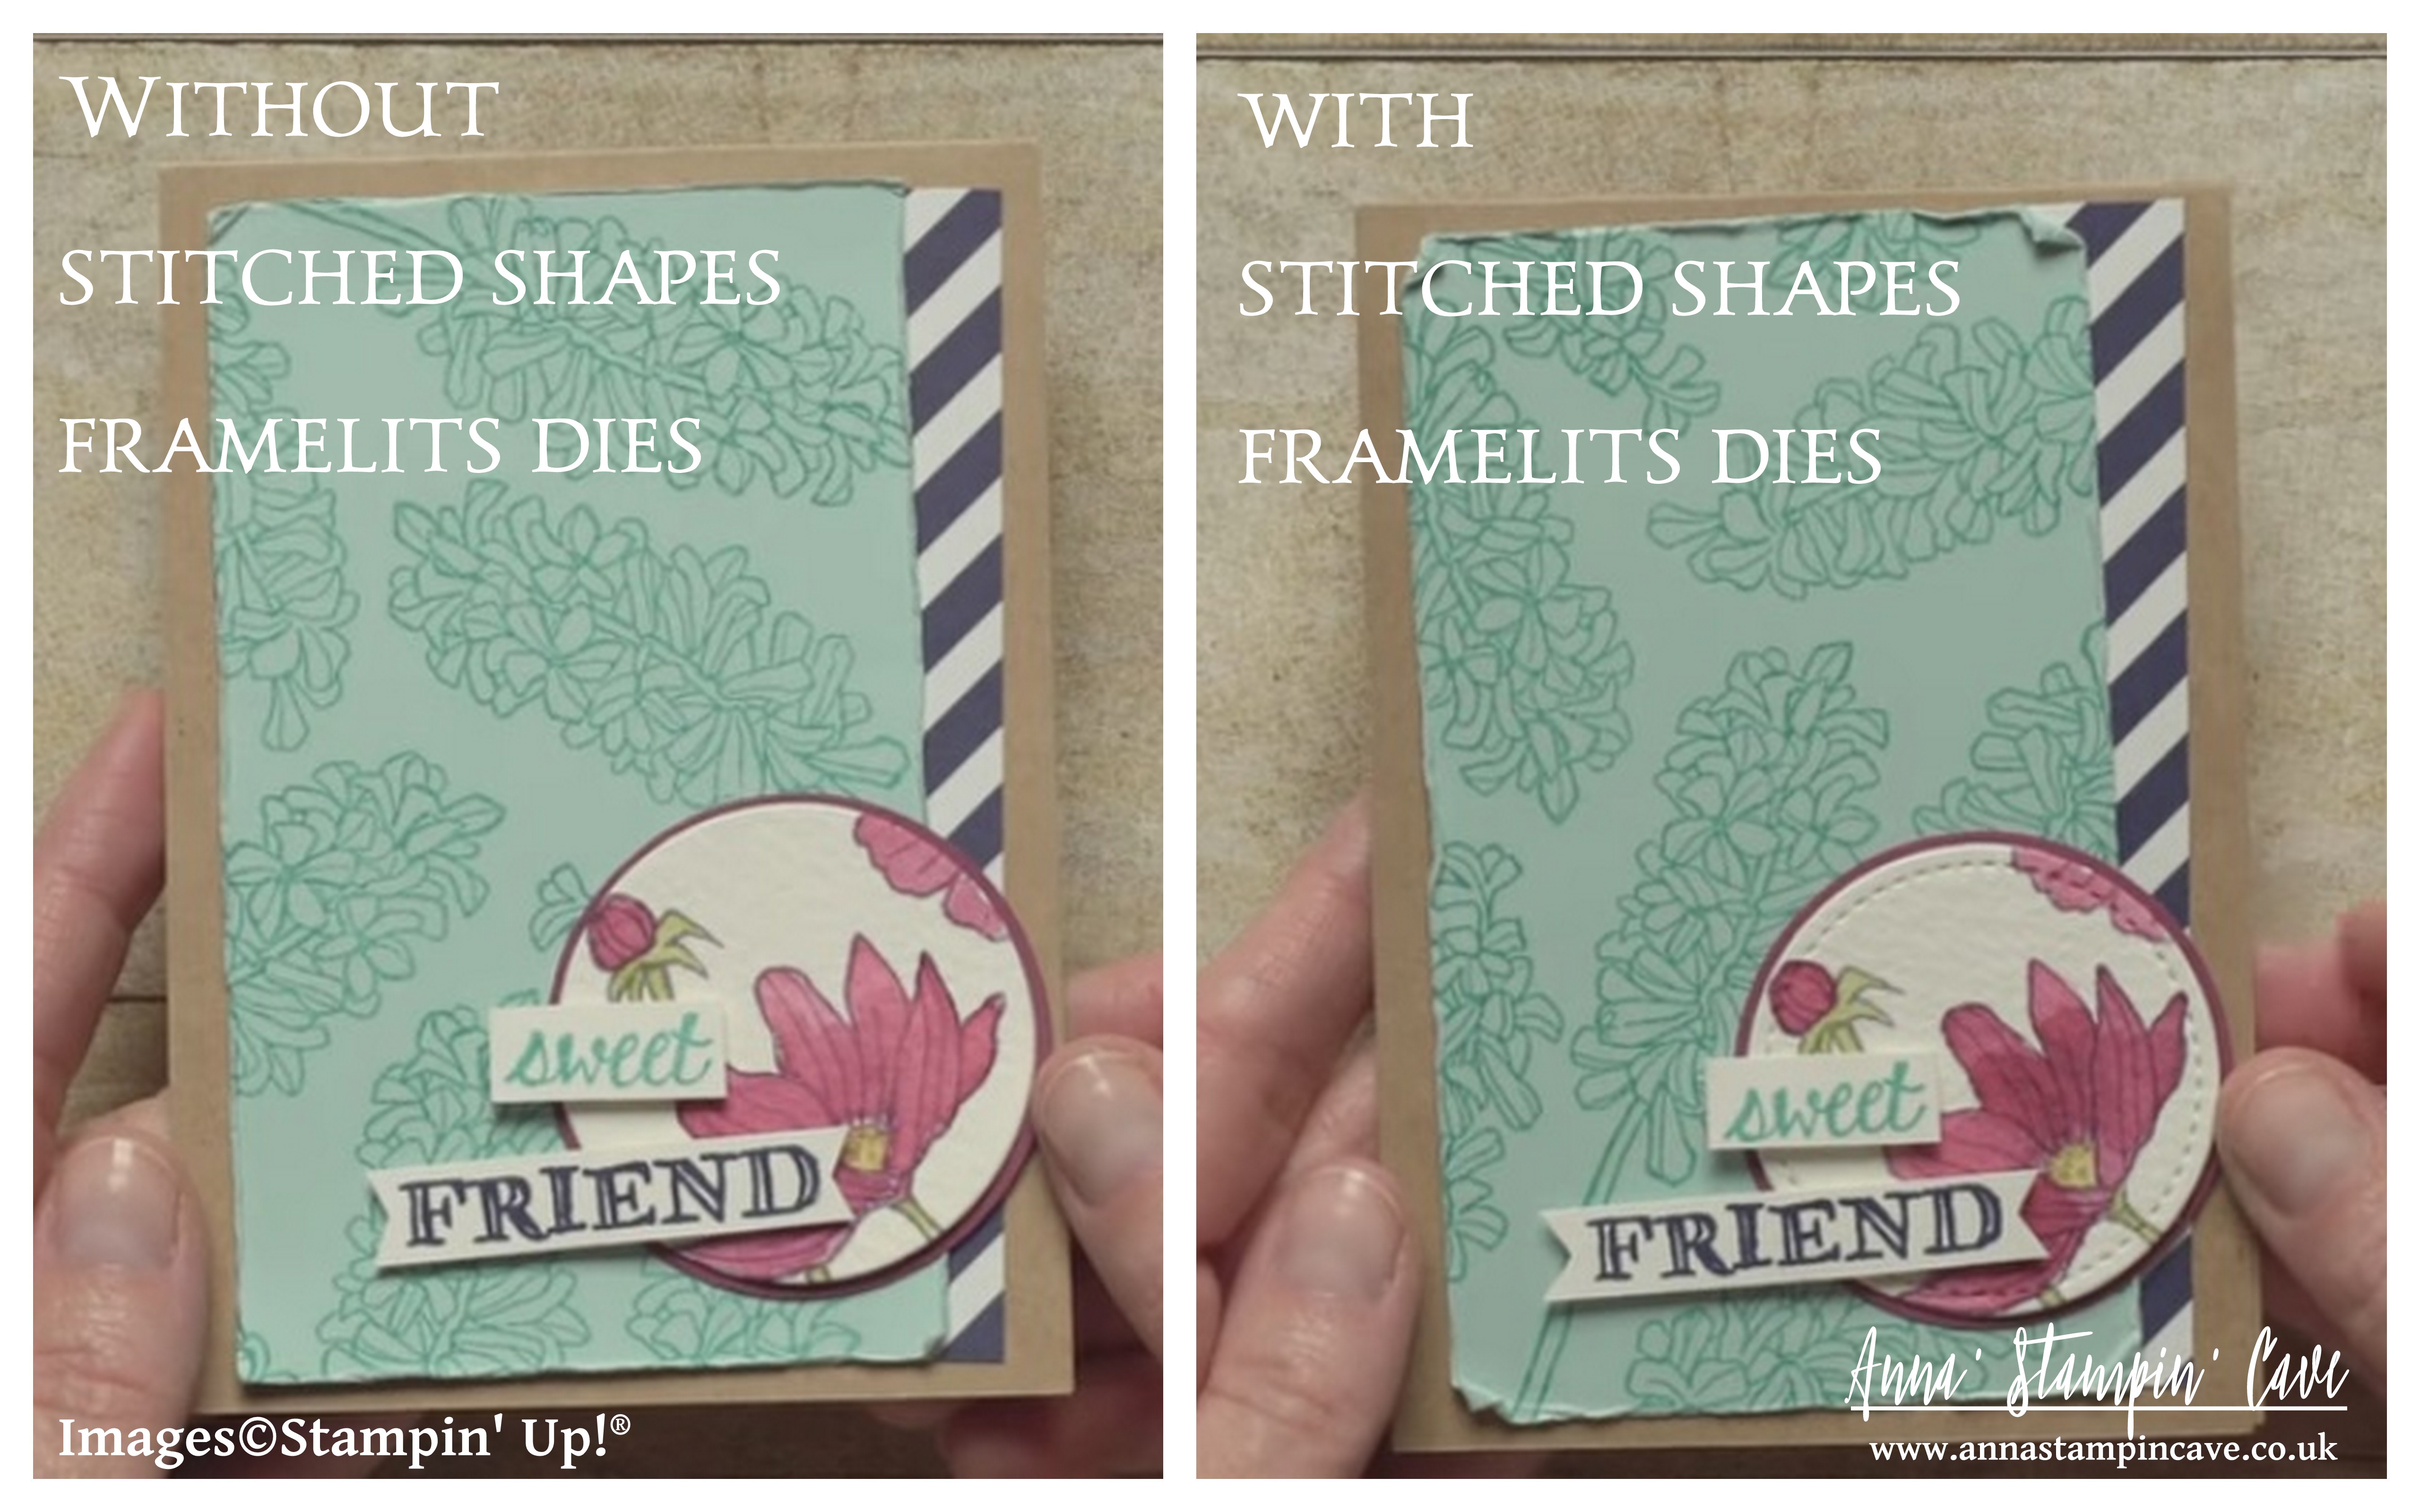
With Stitched Shapes Framelits you can make paper stitches in seconds, turning any project into one that is stitched from the heart.
And there’s more great news…although the 25% off stamps sets ends 30 November, you will still be able to get the Stitched Shapes Framelits after that date.
25% off stamps sets ends 30 November. I will post all the stamps sets with clickable images and links at the very end of this post
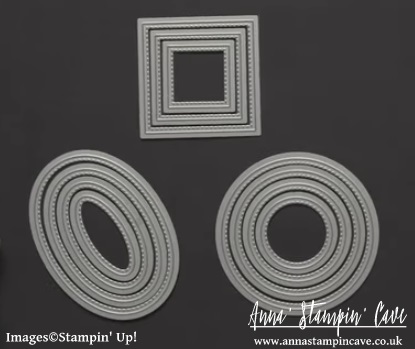
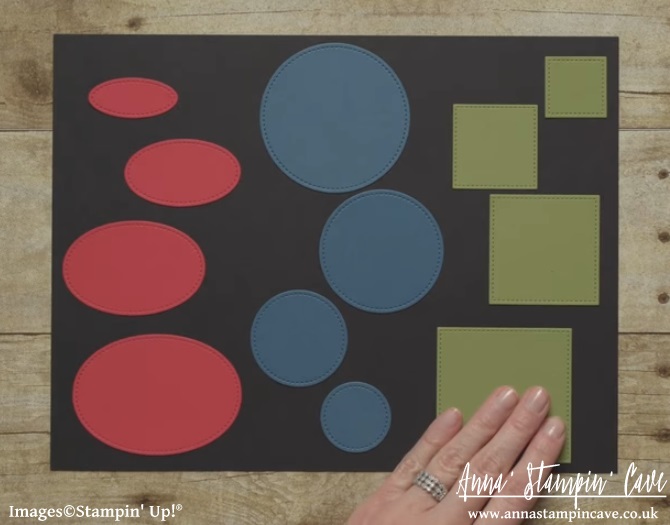
There are 12 pieces all together in the Stitched Shapes Framelits Dies. You get 4 each of the squares, circles, and ovals.
They are sized for the stamped images that you tend to use the most.
The stitched shape sits approximately 1/6″ from the edge of the cutout, making the stamp-able dimensions roughly 1/8″ smaller than the cut-out.
Here are all the sizes:
Squares
1-3/16”
1-5/8”
2-1/8”
2-5/8”
Circles
1-3/8”
1-7/8”
2-3/8”
2-7/8”
Ovals
1-3/4” x 13/16”
2-1/4” x 1-5/16”
2-3/4” x 1-13/16”
3-1/4” x 2-5/16”
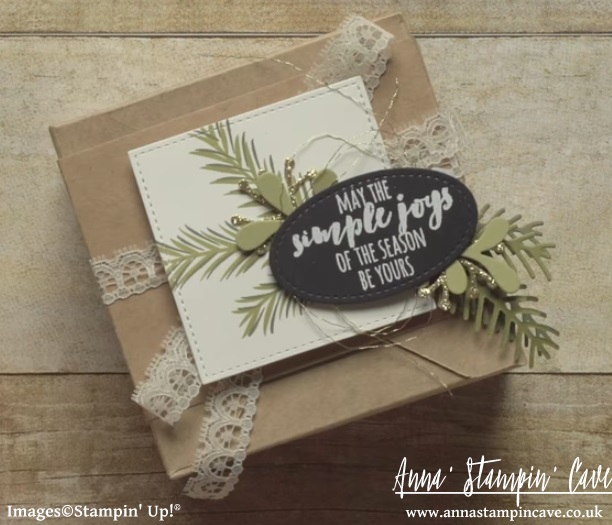
Here are few of the projects from Stampin’ Up! to showcase the versatility of Stitched Shapes Framelits Dies.
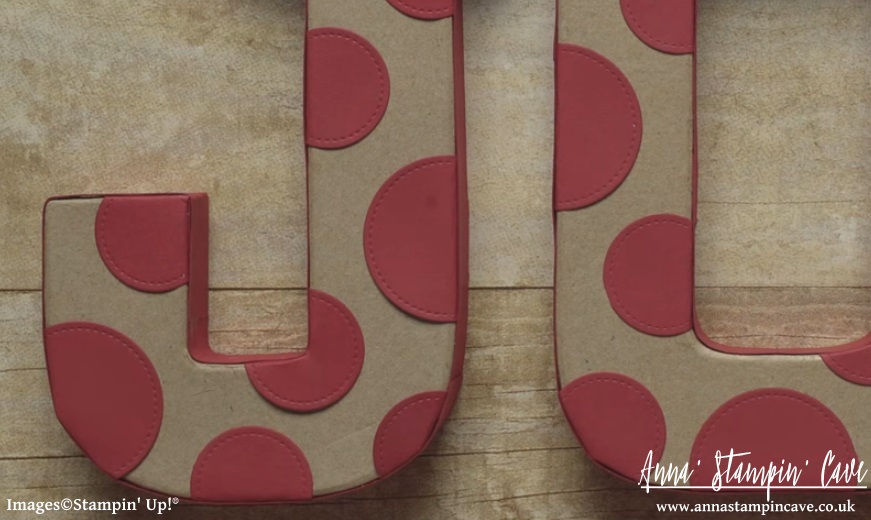
Stitched Shapes Framelits Dies are not reserved for cardmaking only…
Anna’ Stampin’ Cave – Elegant Monochromatic With Pop Of Colour
Wow! It’s hard to believe, but today is last day with My Hero Stamp Set from Stampin’ Up! Yep, 5 weeks have passed!
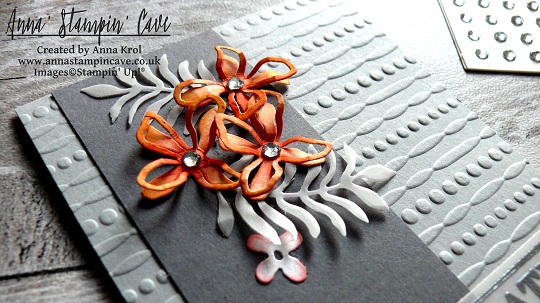
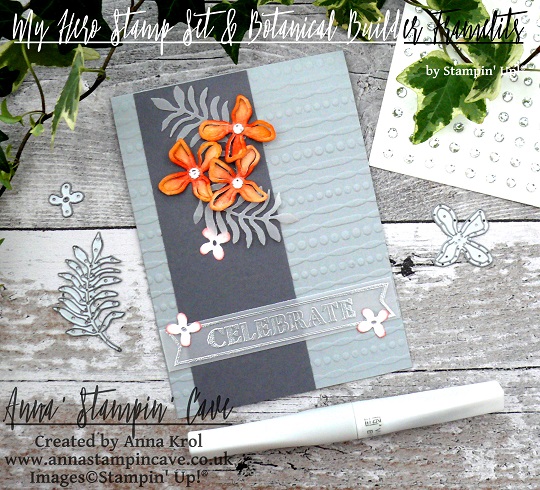
For my final project, I’ve created this striking yet elegant, almost monochromatic card, in shades of grey but with a pop of colour in form of dainty orange flowers.
For the base of my card I took an A4 sheet of Smoky Slate cardstock, cut it in half at 4-1/8″ and folded in half at 5-7/8″. I run the front of the base through Big Shot with Festive Embossing Folder. The panel is a piece of Basic Grey cardstock that measures 2″ x 5-7/8″. I adhere it to the base with Multipurpose Liquid Adhesive.
Next, I created my floral composition using Botanical Builder Framelits Dies. I die cut a couple of leaves from vellum and six flowers: three tiny flowers and three small 3D flowers from a scrap of Whisper White cardstock.
Savvy Tip: Don’t know what to do with random off cuts that are to small to use on cards or to punch anything out of them? Don’t throw them away! I save all my off cuts and use them up when need to die cut small elements, flowers, etc using framelits dies
To add a little bit of colour to my flowers I sponged the edges of the tiny flowers with Watermelon Wonder. For 3D flowers, I decided for more ‘dramatic’ look I sponged entire flowers using Pumpkin Pie ink pad and a dab of Watermelon Wonder to the centres. I also added a large rhinestone to each centre. You can’t really tell from the photos (blame the awful English weather) but I’ve added a touch of shimmer using Clear Wink Of Stella Glitter Brush to each flower (tiny ones too).
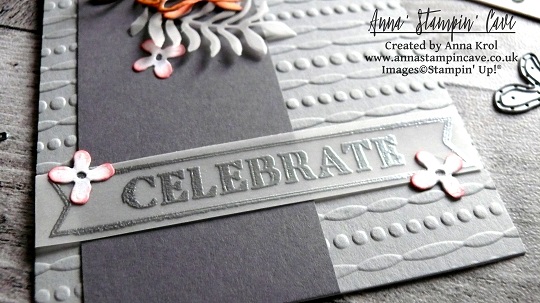
Next, I took a strip of vellum ( 1/2″ x 4-1/8″) and stamped a ‘Celebrate’ from My Hero Stamp Set in Versamark. Of course, I’ve used an Embossing Buddy prior to stamping. I heat embossed the sentiment with Silver Stampin’ Emboss Powder.
Tip: For best results with heat embossing always treat your cardstock, dsp, vellum, etc with embossing buddy. I takes off the statick from the surface of your paper, and makes the powder stick only to the areas you stamped.
Tip 2: If you don’t have an embossing buddy or any other antistatic tool you can use cornflour instead. Just sprinkle a little amount of flour over the surface of your cardstock, spread it with fingers or paint brush, and shake off the excess. Now you can stamp and heat emboss.
I assembled my composition using Glue Dots and liquid adhesive. Two tiny flowers on the vellum banner are hiding adhesive that I’ve used to adhere the banner to the card base.
I really like how this card turned out. I love the monochromatic, cold look of greys with a pop of bright orange. And what do you think about this colour combination? Do you like it? I would love to hear from you in comments below.
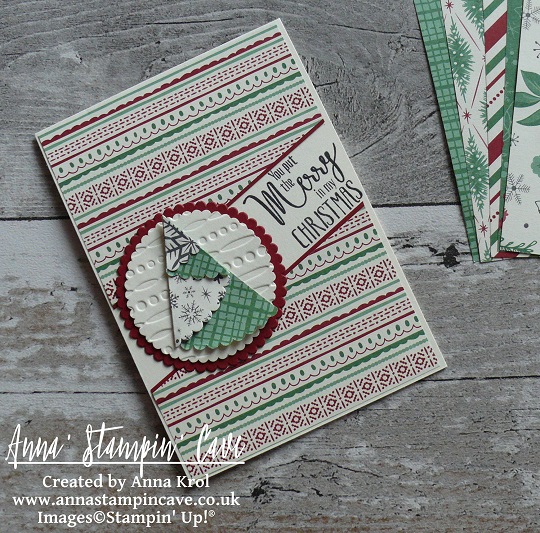
Anna’ Stampin’ Cave – You Put The Merry In My Christmas
Hello, and welcome! Today I’ve got for you a couple of rather traditional Christmas cards. As you probably remember we are showcasing My Hero RMHC Stamp Set by Stampin’ Up!®
Aren’t they lovely?! And they are so easy to make.
The card base is standard top folded A6 in Very Vanilla and I’ve used beautiful This Christmas Specialty Designer Series Paper for my panels. These were supposed to be simple, straightforward cards, but then again, I can’t make things that are too easy, can I?! So I decided to turn them into a split panels cards.
The panels I prepared earlier were 4 x 5-6/8″ in size. To create split panels, I cut them diagonally into 3 and removed the middle piece. I cut narrow strips of Garden Green and Cherry Cobbler cardstock and glued them underneath my split panels to accent the’split’. I adhered the panels to the base using snail adhesive.
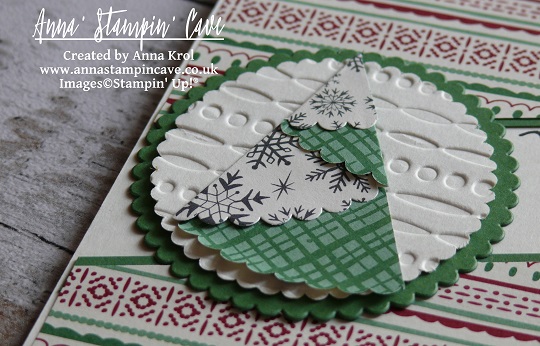
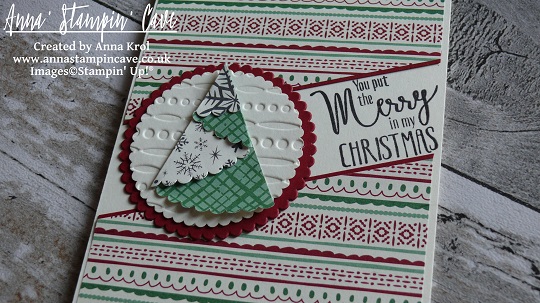
Using my Stamp-A-Ma-Jig I stamped the sentiment in the ‘split’ area. Next, I created these uber cute mini Christmas trees. To make them, I die cut a scalloped circle from a sheet of the same DSP, just a different design. I cut it in half, fold it into ‘tree’ and secured my folds with mini glue dots.
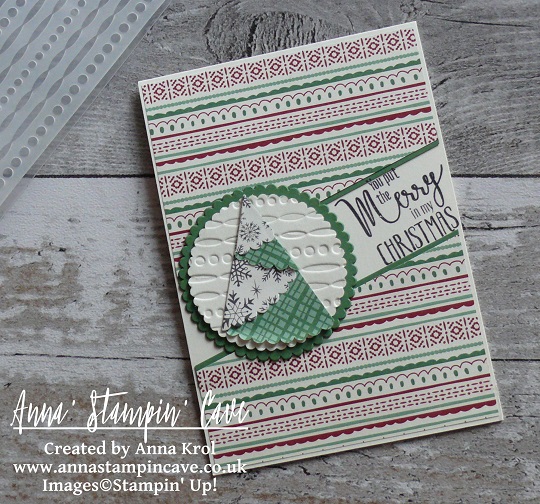
Because design on this paper is quite ‘busy’, you couldn’t really see the trees, once attached to the card. So I die cut 2 scalloped circles in Very Vanilla and run them through my big shot with Festive Embossing Folder.
Next, I die cut 2 slightly bigger scalloped circles: one in Garden Green and one in Cherry Cobbler to create mats for Very Vanilla pieces. Adhered them together (de-bossed side up) and then added my trees on top.
First I thought to pop my circles up with dimensionals. But because these cards got quite of dimension anyway, I adhered them to the base with snail adhesive.
Super easy, aren’t they? I hope you like them. As always, if you wish to purchase any of the products I have used, simply click the images below to go directly to my online shop and don’t forget to enter the hostess code for the month of September RKW34AHD, to receive a gift from me.
Thank you for joining us on another Pootlers Blog Hop! We’re showcasing lots of gorgeous projects using products from the new Stampin’ Up!® Autumn Winter Seasonal Catalogue. Simply use the buttons at the end of each post to keep hopping!
If you arrived here from lovely Louise’s blog, thank you for stopping by. I hope you enjoy seeing all these beautiful projects and inspiration and continue to hop on through to see what everyone has made.
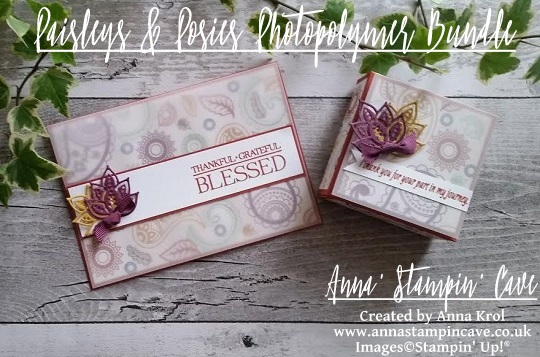
For today’s project, I’ve been using new Paisleys & Posies Stamp Set with Paisley Framelits Dies, and these two are a part of beautifulPetals & Paisleys Product Suite. I used them to create a beautiful contemporary card and matching gift box.
I don’t know about you, but I just love paisley. It is such a trendy design right now, you can find it everywhere: from home decor, through fashion, art and more.
For my card, I randomly stamped various images from Paisleys & Posies Stamp Set on a piece of Whisper White. It’s like creating your own DSP. To take off the guesswork, I’ve used the colours that coordinate with Petals & Paisleys Suite: Cajun Craze, Rich Razzleberry, Delightful Dijon, Mint Macaron, Soft Suede and Night of Navy. I adhered it to my card base (Cajun Craze) and added a layer of vellum on the top, to soften the bold colours. Next, I cut a strip of Whisper White and stamped the sentiment from the same stamp set (love this font!), to the left in Cajun Craze. Backed it with a slightly wider piece of Cajun Craze cardstock, and adhered it to the card front. Using Paisley Framelits Dies, I die-cut two intricate leaves, one in Rich Razzleberry and one in Delightful Dijon, and add it to the panel. The final touch for the card was a tiny Rich Razzleberry bow I’ve made using one of the ribbons from new 3/8″ (1 cm) Ribbon Trio Pack.
Top tip 1: Glue dots are handy to adhere small elements like little bows. Top tip 2: There’s not such a thing as an invisible adhesive for when using vellum; be smart and hide adhesive under panels, die-cuts or embellishments. Savvy tip: To save the precious ribbon, tie a square knot straight from the spool.
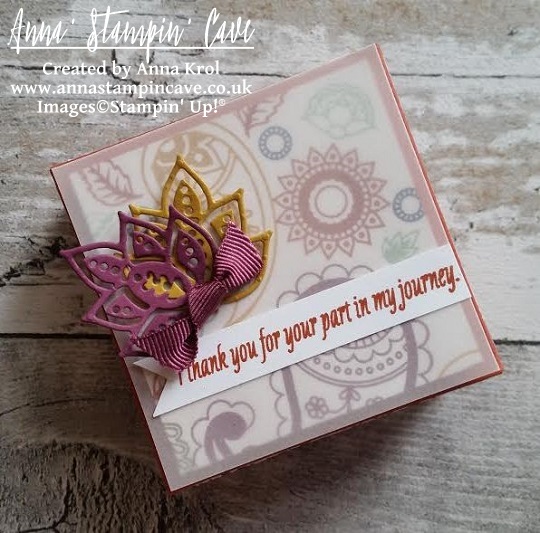
For the gift box base, I’ve used, again, Cajun Craze cardstock. It’s really cute dinky little box, with the base being a 2-7/8 x 2-7/8″ square, and 1″ tall. Same as with the card, I created my own piece of DSP to decorate the box. Using dimensionals I slightly elevated the panel that goes on the top of the lid. But panels on the sides of my box are glued flat. Next, I’ve added a panel of vellum to the top of my box, followed by a little banner with a sentiment, and (again) leaves and a bow to match the card.
I don’t make boxes or gift sets too often, but I really like this one. I don’t know why. Perhaps for the autumnal colours and maybe for the paisley design. Whatever the reason, I hope you like it too.
Your next stop is lovely Jerim. Simply click the next button to keep hopping around all the blogs to see lots of new ideas and inspiration.
Hello, everyone! From today, for every Thursday, for the next 5 weeks, I’m gonna showcase My Hero Stamp Set by Stampin’ Up!
The stamp set is called ‘My Hero’ and what’s amazing about this particular set is that it’s a Ronald McDonald House Charities Stamp Set.
If you haven’t heard about it, here’s how it works: through the Making a Difference program, which Stampin’ Up! launched back in 2003, we partnered with Ronald McDonald House Charities (RMHC). Each year, Stampin’ Up! design an exclusive stamp set to promote the partnership with RMHC, and donate a portion of the proceeds from each sale of that set. To date over $1.5 million has been donated from RMHC stamp set sales!
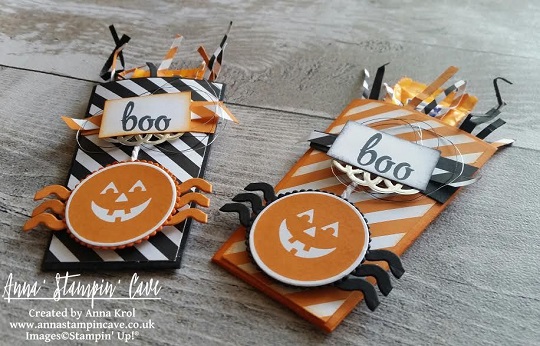
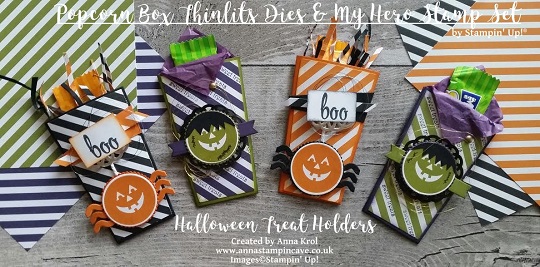
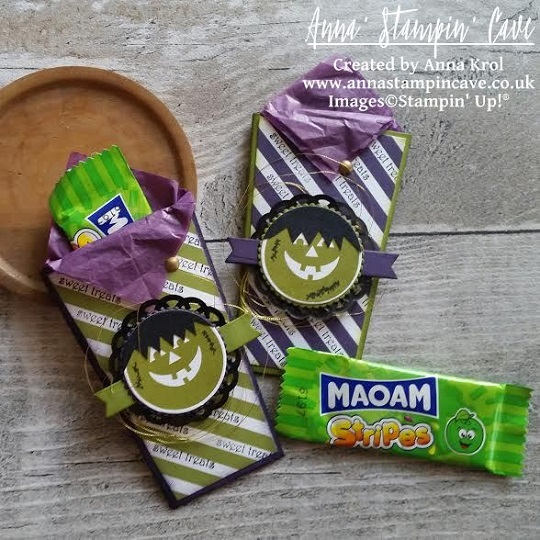
But let’s get back to my project. For this week I’ve decided for something fun and created these Halloween treat holders using Popcorn Box Thinlits Dies.
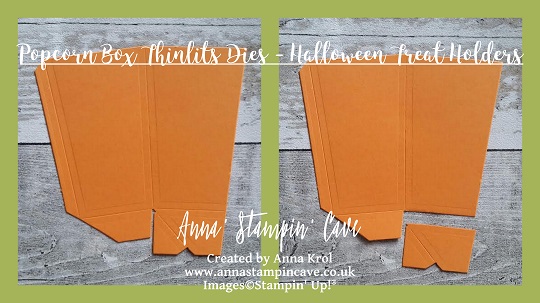
Aren’t these cute?!! You won’t believe how quick and easy they are to make. For each holder, you only need one die-cut piece (for the box you need two). Next, you trim the larger flap, varnish well all the score lines and use a strong adhesive. I’ve used Tombow Multipurpose glue.
To create panels from Designer Series Paper you just simply die-cut the box and hand cut them following shallow lines created by the die.
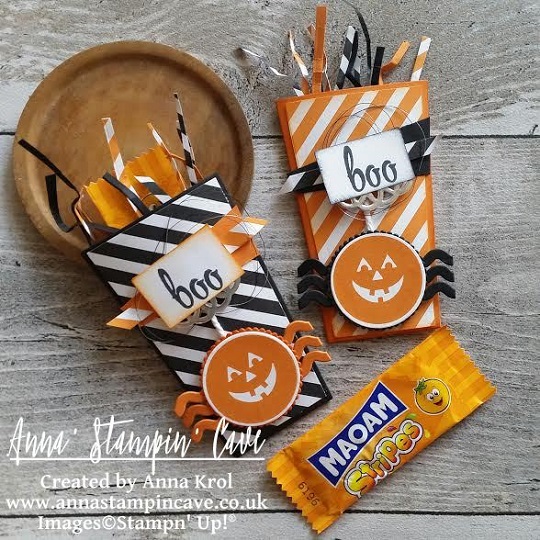
For my treat holders, I’ve used two different colour combinations: Basic Black with Pumpkin Pie and Elegant Eggplant with Old Olive. I think these colours suit Halloween perfectly.
I’ve used ‘face’ stamp from My Hero Stamp Set, which I believe supposed to be a pumpkin face (!!?), and created these uber cute spiders. For their legs, I’ve used a wavy die from Popcorn Box Thinlits Dies. And yes, I know that spiders supposed to have 8 legs, but come on! These are mine and they only have six lol The sentiment is stamped using Brushwork Alphabet Stamp Set and the panels underneath are just cut-outs I have left after die-cutting the box itself. These tiny strips of paper in my treat holders are also created using cut-offs. I love it – cute and frugal! For a final touch, I’ve added a piece of Metallic Foil Doily in Silver and also Basic Black and Silver Metallic Threads under the sentiment.
Elegant Eggplant with Old Olive treat holders I have turned into cute Frankenstein. For the hair, I die-cut a circle from a piece of Basic Black cardstock and gave him a trim with scissors. Not that I’m talented hairdresser but hey, for Frankenstein it’s just perfect.
To create black doilies I took the smallest of Metallic Foil Dollies and deepen them in Basic Black Archival ink pad. Remember to set them aside for a while, as it takes some time before the ink dries. I also added few loops of Gold Metallic Thread under the doily. For the sentiment, I’ve stamped (randomly) ‘sweet treats’ from Teeny Tiny Sentiments Stamp Set on the diagonal white stripes. I put some purple tissue paper into my treat holders. I coloured the smallest dot from White Perfect Accents, using a golden sharpie – it holds the overhung tissue paper in place.
So here they are! I really hope you like my little project and that you will try to make these cute treat holders yourself. These would be super cute for Christmas treats too.