You Are My Hero

Anna’ Stampin’ Cave – You Are My Hero


Another week has passed by, and it’s that time again when our little group of demonstrators is showcasing you this lovely stamp set called ‘My Hero’. I love the versatility of this set, as it covers all major holidays/occasions throughout the year. But not only that. This is Ronald McDonald House Charities stamp set, which means for every set purchased, Stampin’ Up! donates £2 to the RMHC. Visit www.stampinup.com/giving_uk to learn how you can help too.

For today’s project, I’ve chosen ‘You are my #1 hero’ sentiment. I’ve seen many beautiful samples using this stamp. It’s perfect for all those oh-so-hard-to-make masculine cards. But I decided to make a card with a feminine twist. After all, women can be heroes too.

stampin-up-my-hero-stamp-set-you-are-my-1-hero

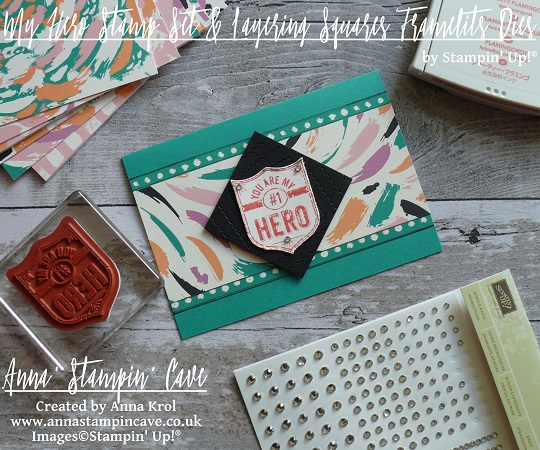
This is a very simple card. For the card base, I chose beautiful and very vibrant Emerald Envy cardstock (standard A6 size). Next layer is a piece of DSP from Playful Palette Designer Series Paper Stack. I took half of the sheet of my chosen design ( 3″x 6″) and trimmed 1/4″ from both sides. I adhered the larger piece to the base first and next, those tiny strips on each side of the panel, but reverse side up. Because the base is smaller than 6″ wide, I trimmed any overhanging paper using my scissors. It’s easier, and for sure you won’t end up with a too small panel. Unfortunately, my strips slightly ‘disappeared’, when adhered to the card base. So I draw few black lines along the edges using Project Life Journaling Pens.

Tip: learn from my mistakes! If, like me, you chose a design that has a kinda symmetrical pattern on the reverse, make sure you trim your panel so you have the same pattern on both strips you’ve trimmed.

stampin-up-my-hero-stamp-set-you-are-my-1-hero

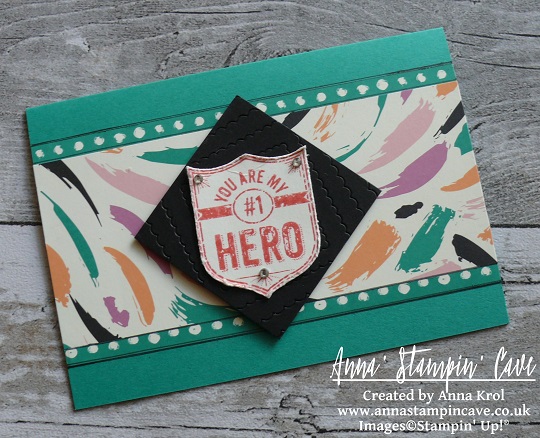
Now to the focal point. I stamped my sentiment in Flirty Flamingo, on a piece of Very Vanilla cardstock and fussy cut it. It’s an easy shape to do so. I distressed the edges slightly. To make the sentiment ‘pop’ I decided to add a square Basic Black cardstock underneath. I could dry emboss it but instead, I decided to create a fun panel using Layering Squares Framelits. I’ve seen this idea just recently, on Carolyn Bennie blog and just had to try it myself. Carolyn is an amazing Australian demo. You should definitely check her out.

I arranged five scalloped squares dies on a piece of Basic Black cardstock, but offset them slightly. I secured dies to the paper with washi tape and run it through the big shot. Before I removed my dies, I’ve added washi tape underneath of the panel, to keep the squares together. I took another piece of Basic Black cardstock and adhered my die cut squares to that panel. I trimmed it to the 2-3/8″ square.

stampin-up-my-hero-stamp-set-you-are-my-1-hero

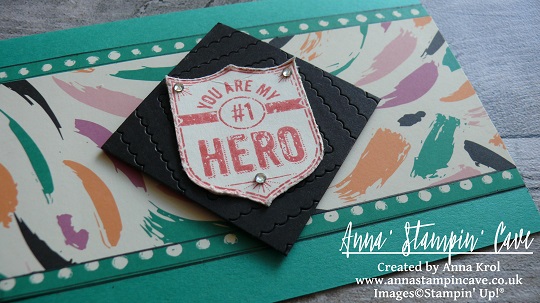
I adhered my fun square to the card base with a couple of dimensionals. Next, I’ve added my sentiment on top of it, with regular snail adhesive. Few rhinestones on the corners of the badge finish off my card.

Thank you for stopping by and have a blessed day,

Pootlers Spring / Summer Celebration Blog Hop

pootler's blog hop

Thank you for joining us on another Pootlers Blog Hop! We’re showcasing lots of gorgeous projects using products from the new Stampin’ Up!® Spring/Summer Catalogue. Simply use the buttons at the end of each post to keep hopping!

If you have arrived here from Jerim Dickins, a big welcome to you. To continue your journey simply use the buttons at the end of each post to keep hopping!

I hope you had a chance to look through our Spring/Summer catalogue and you’ve got your favourites already. I have chosen to use Rose Wonder Bundle from page 18.

Rose Wonder Bundle Watercolour

I know I said that many times but I will say it again: I love everything about this bundle. I’ve played with this stamp set many times, but in today’s project, I incorporated watercolour with inlaid die-cutting. And yes, I’ve used these two techniques with this bundle already in this project.

This time I stamped my image straight onto watercolour paper with Versamark and heat embossed it in white. I’ve added water to the rose petals first and used Calypso Coral and Blushing Bride as my watercolours.

Rose Wonder Bundle Watercolour 4

I let the flower dry completely before I moved to the leaves. And again I added water first. For the leaves, I choose Pear Pizzazz, Wild Wasabi and just a hint of Old Olive.

Rose Wonder Bundle Watercolour 3.jpg

When my rose and leaves were dry I added water to the background. I didn’t want it to be as intense as last time so I mixed Lost Lagoon with Mint Macaron. I love how these two colours complement each other.

When my background was dry I gave it a little spray with water, and “lifted” those water droplets with a paper towel. As you can see it lifted some colour from background too – beautiful effect.

When my card was dry I’ve used Rose Garden Thinlits Dies to die-cut rose straight from my watercolour piece.

Rose Wonder Watercolour 4.jpg

I separated the “frame” and put all these “inside” tiny pieces aside. I dabbed the frame in Versamark, added Heat & Stick powder and heat embossed it for a second. Enough to melt the powder. When it was nice and sticky I cover it with Gold Stampin’ Glitter and heat set it again.

My base is Whisper White. I trimmed the watercolour piece to be slightly smaller than the base. I added Gold Glitter to the bottom of my WW base so this gold will peek a little from underneath the panel.

Now I could assemble the card. I added background panel first, then the frame and all the little die-cuts at the end. I have to say it was really time-consuming but well worth the effect.

Rose Wonder Watercolour bundle 5

For the sentiment, I choose “What a  beautiful blessing you are to me” but decided to use only part of the sentiment. I heat embossed it in gold on a strip of Whisper White and finish it with a piece of a doily.

I truly hope you enjoyed coming to my blog and see my card. Now, be sure to hop along and see more inspiring projects. Below is the list of all the participants but you can also use the buttons to keep hopping. Your next stop is lovely Kathleen Rintoul-Waite  go and see what she has made using the new products.

Thank you for stopping by and have a blessed day!

next pootler blog

previous pootler blog

Full blog line up:

 Sam Hammond

Mandy Barton

Sandra Ronald

Camille Moriaty

Heidi Smith

Hannah McCurley

Louise Thomas

Karen Taylor

Jerim Dickins

Anna Krol –> you are here

Kathleen Rintoul-Waite

Angelina Clark

Crazy Crafters & Pootlers Spring/Summer & Sale-A-Bration Catalogue Blog Hop

blog hop header

Hello everyone! Welcome to the Crazy Crafters / Pootlers Blog Hop. We are super excited to share with you lots of new products from the soon to be launched seasonal catalogue. We hope you’ll find great inspiration from our projects. If you have arrived here from Stephanie Fischer, a big welcome to you. Be sure to click on the buttons further down to continue your journey on this blog hop.

This blog hop is very exciting not only for the sneak peeks. This is our first collaboration with amazing Kylie Bertucci and her lovely team of Crazy Crafters all the way from Australia! We are thrilled that they invited us to play along. Thank you, Kylie and her team.x

In my project today I decided to incorporate two of my favourite techniques: watercolour and inlaid die-cutting. I have used a brand new set called Rose Wonder with coordinating Rose Garden Thinlit Dies – perfect for techniques!

Stampin' Up! Rose Wonder Bundle

We’ve been given a theme ONE, to use only one stamp set, one ink pad, one DSP, one cardstock etc. Luckily we could also use heat embossing and embellishments. I had to come up with some smart idea how to create my watercolour card with just one ink pad.

For a watercolour panel, I’ve used Lost Lagoon ink pad. It’s such a beautiful shade of blue. But how to create a rose if you only have one ink colour? Perfectly Artistic DSP came as a rescue! All inner pieces of my flower and leaves were die-cut from this DSP and “inlaid” into the rose frame. I love this beautiful paper. It has a marbled effect design on one side, while the reverse side has a watercolour wash. And what’s even better, this paper will be available as a FREEBIE during Sale-a-bration!

Stampin' Up! Rose Wonder Bundle

The frame of the flower, as well as sentiment, are heat embossed in silver. A glittery strip of paper is heat embossed too, using Heat and Stick powder and silver glitter.

Stampin' Up! Rose Wonder Bundle

For my sentiment, I created simple, little banner with a piece of silver doily underneath to add some dimension. Don’t you just love this beautiful font? I’m in love with sentiments in this set.

I truly hope you enjoyed coming to my blog and see my card.

Now, be sure to hop along and see more inspiring projects. Below is the list of all the participants but you can also use the buttons to keep hopping. Your next stop is lovely Emilie Robinson – go and see what she has made using the new items.

Thank you for stopping by and have a blessed day!

previous button   next button

Full Blog Line Up:

Sam Hammond Donald
Angela Lorenz
Angelina Clark
Nicole Spicer
Lea Denton
Bruno Bertucci
Angela Westland
Wendy Boag
Jessie Holton
Camille Moriarty
Stephanie Fischer