Anna’ Stampin’ Cave – The Creative Flow Blog Hop -Shaun The Sheep Punch Art

Thank you for joining us on our Creative Flow Blog Hop. Each month we are set a challenge to creatively stretch our imaginations. The products we have used are all available in the current Annual and/or seasonal Stampin’ Up!® catalogues. To hop along, please use the buttons at the bottom of the post to keep hopping.
Hello hello! This is our very first The Creative Flow Blog Hop, and I’m really excited to be a part of it. Today’s theme was a quite a stumper. We’ve been set a challenge to create an ‘animal’ project using Pretty Pines Thinlits Dies. Yes, I know!?!? How is that even possible!!! 😀 But hey, with a little bit of imagination everything is possible!
Because not every one of us had these dies, our lovely Jerim has sent some of us (including me) a foam die-cuts so we could actually use them as stamps! How cool! Thank you, Jerim, you are a ⭐
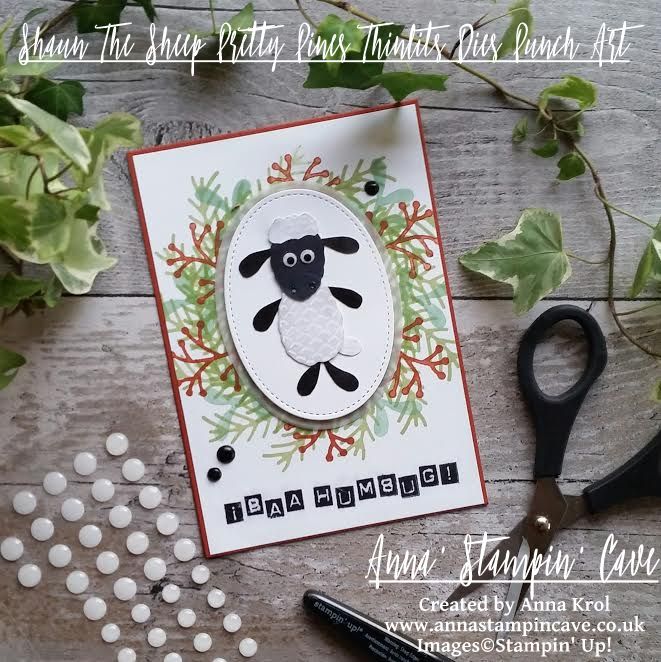
So I’ve spent some time looking at these shapes and…nothing sparked! Typical, right? And then one day: Eureka!!! I saw a sheep 😉 But not just normal, ordinary sheep. I saw Shaun the Sheep, how wicked is that lol Yet I had to figure out how to bring him to life, not literally of course 😉 After few attempts and different combinations I knew exactly which shapes will become Shaun the Sheep. At this point, I wasn’t sure yet what occasion for this card would be.
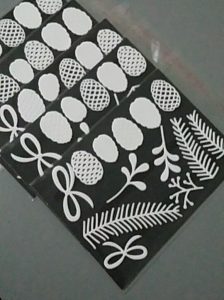
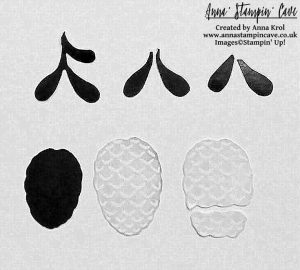
First, for tummy, ‘curls’ and tail, I stamped one of the large pinecones twice, using Smoky Slate Ink Pad. I stamp-it-off twice for a lighter shade. To create ‘curls’ for my Shaun the Sheep I cut off the bottom of one of the pinecones. I used what’s left to hand cut his little tail. For the head, I stamped the smallest pinecone using Basic Black Archival Ink Pad. To create legs, rams and ears I’ve used larger mistletoe branch. I stamped it three times, also in Basic Black Archival Ink and cut them apart. For his eyes, I punched two 3/16″ circles from Whisper white cardstock using Crop-a-Dile, and two Basic Black tiny circles using Owl Builder Punch. When I had all my pieces ready I assembled my Shaun the Sheep using liquid glue. To make his eyes ‘pop’ I added Fine-Tip Glue to them. I also used Fine-Tip Glue Pen to create his nostrils.
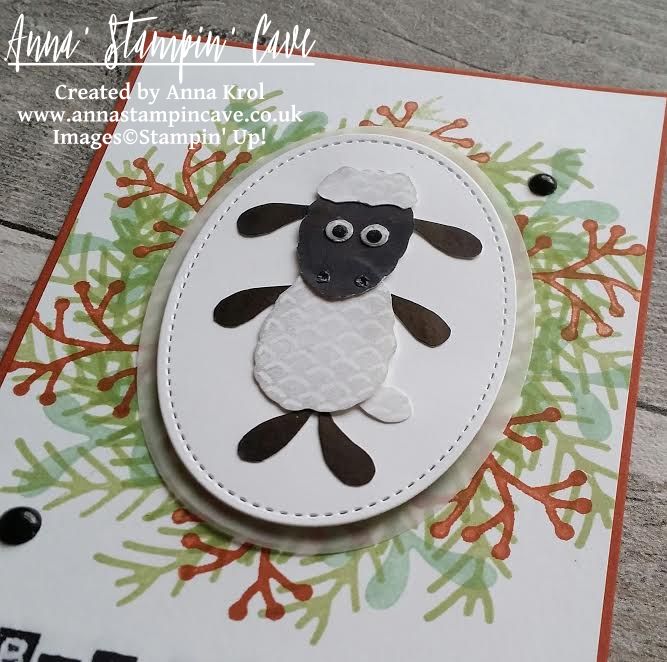
So now, when I had my sheep created I had to decide what kind of card/sentiment I want to make. And I have to tell you my mind went blank. I only knew it has to be something fun. And while looking for some fun ‘sheepy’ sentiment (if it’s even a word lol) I came across this ‘Christmassy’ sentiment: ‘Bah humbug’ or even ‘Baa humbug’ haha. Yes! That was it! Let it be a Christmas (kinda) card then.
I took a piece of Whisper White cardstock that measures 4″ x 5-6/8″ and stamped a wreath using following colours: Pear Pizzaz and Wild Wasabi for fir branches, Mint Macaron for mistletoe and Cajun Craze for twigs. Mint Macaron and Cajun craze has been stamped off. The sentiment is stamped at the bottom of my panel using Labeler Alphabet stamp set in Basic Black Archival Ink.
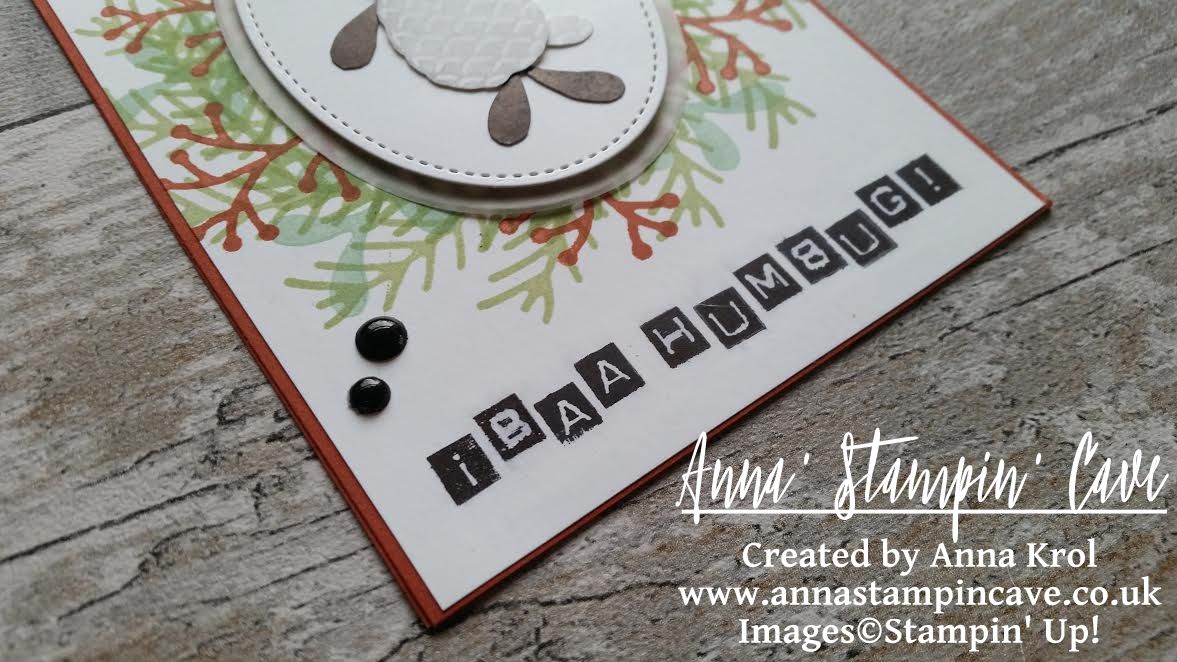
I die-cut two ovals: one from vellum using largest of the Layering Ovals Framelits Dies, and the second one from Whisper White cardstock using the largest Oval Stitched Die. I assembled them using dimensionals and adhered Shaun the Sheep on top. I adhered my panel to the Cajun Craze card base.
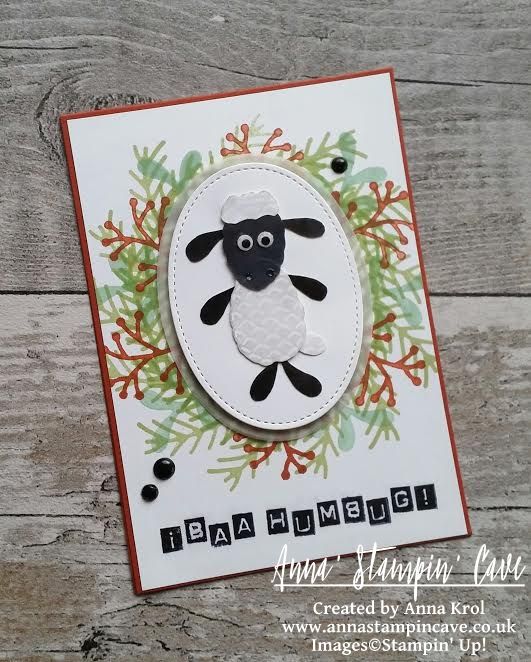
For the final touch, I took three White Perfect Accents, paint them in black using nail polish (couldn’t find my sharpie doh) and added them to the card. I think it really finished the look of the card. I like how this card turned out. It’s quirky and fun. I hope you like it too. Please let me know in the comments below. I would love to hear from you.
Your next stop is lovely Keila – go and see what she has made for you. Thank you for stopping by and have a blessed day

