Tag-tastic Festival of Trees by Stampin’ Up!

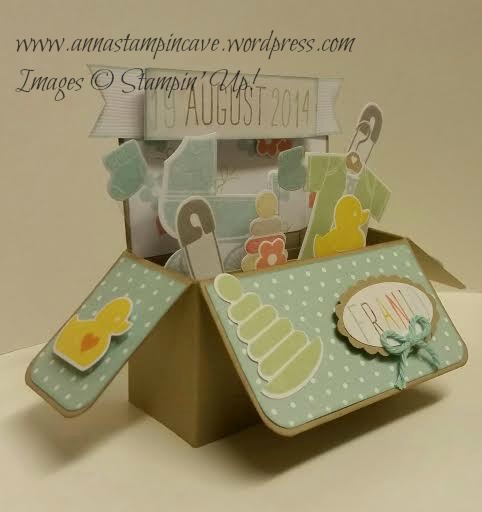
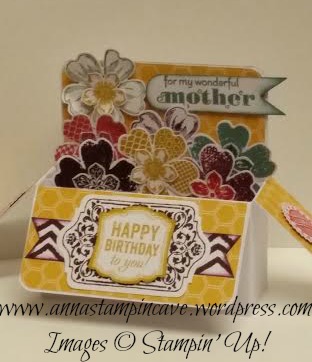
Hello everyone! A quick post from me today – or tonight I shall say šŸ˜‰Ā I’ve been playing with Festival of Trees stamp set lately and I have to tell you I’m addicted!!! In a positive way of course šŸ˜‰ I think this stamp set is very versatile and I’m sure I’m gonna use it many more times. But today I wanted to show you some tags.

lovely 7

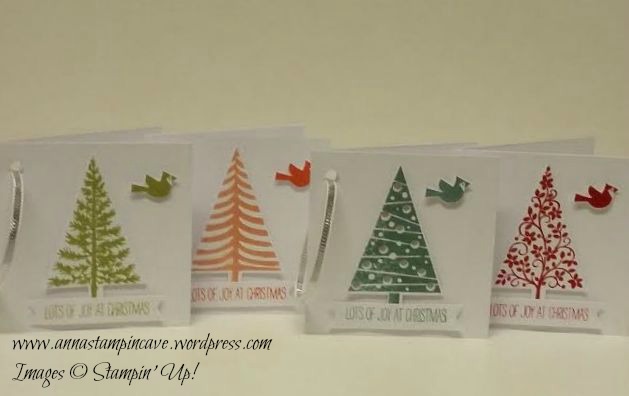
Aren’t they darn cute??!! To make them you don’t need any fancy equipment. All you need is a piece of card stock, ink pad, pair of scissors, Festival of Trees stamp set and coordinating punch, some dimensionals and ribbon.

lovely 3

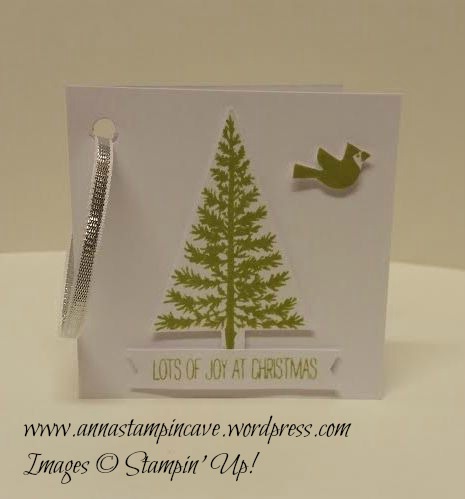
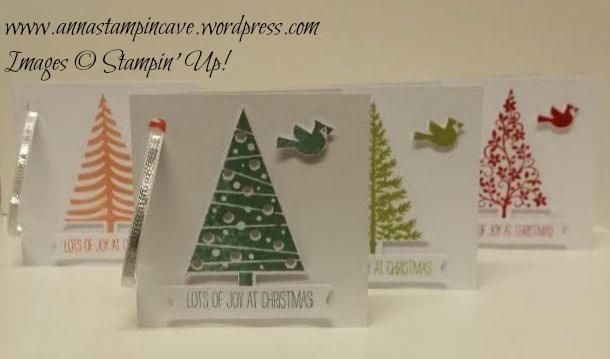
For the base of each tag you need a piece of card stock that measure 2 6/8 x 5 4/8″ which is 7 x 14 cm. You can use any colour you like but I have used Whisper White.

lovely 5

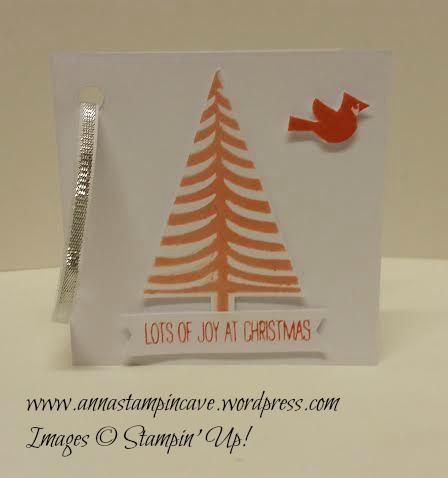
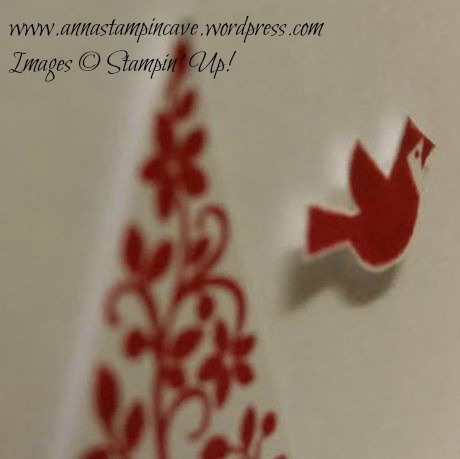
When it comes to stamping possibilities are endless with this set. For theĀ tagsĀ I show you today I’ve used not typical christmas colours:Ā  Pear Pizzazz, Crisp Cantaloupe, Real Red and Lost Lagoon. And for each one I’ve used different stamp from Festival of Trees. This set consist 13 Ā stampsĀ and is fabulous šŸ™‚

fe

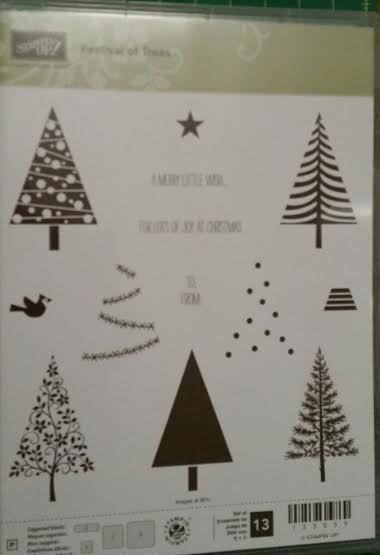
Now you only need to punch the trees out. If you don’t have a punch you can use scissors, but trust me theĀ punch will make your life way much easier šŸ™‚ To jazz up my tags a little bit I’ve stamped the sentiment and a bird that comes with a setĀ using the same colours I’ve used with a trees. I fussy cut the birds…

lovely 2

…and sentiments turned into nice tiny banners šŸ™‚

Lovely 1

I’ve assembled tagsĀ using dimensionals, but if you want everything more flat you can use any adhesive. But I really wanted them to stand out. Now just punch a little hole, tread some ribbon and tags are done! For mine I’ve used a piece of silver 1/8″ ribbon.

lovely 8

I really hope you like my little project. It really doesn’t take much time to put a bunch of these together. So if you like it please live a comment. Or maybe you want to try them yourself? Please share your pictures with me on my facebookĀ page

Thank you for stopping by,

Super Cute Card in a Box For a Baby Using Something for a Baby by Stampin’ Up!

OMG! It has been ages since my last post and honestly, I’ve missed you all terribly! On aĀ sad note, it seems like my hands and legs are giving up and MS taking it’s toll slowly. On a positive note though I’m not giving up just yet! In a past week I’ve managed to make some fun projects, but today I want to share with you a card in a box I’ve made while back for our new family addition: my husband’s nephew Franio. He’s our little star and true miracle but it’s a long story I won’t share on here. And even though he came to this world in August I just recently seen Franio’s mummy and daddy to give them this special card.

3

Dimensions: card base is made with aĀ piece of cardstock thatĀ measures 11-1/2 x 4-1/8 inches ( half of A4). HereĀ I’ve used Crumb Cake but you can use any colour really. Score the base atĀ 3-7/8, 5-1/2, 9-3/8 & 11″ on the long side. Then score at 2-1/8 on aĀ short side. You will also need two extra pieces of cardstock for the inserts. Each piece should measure 4-7/8 x 3/4″ and need to be scored at 1/2″ on each side.

2

Dotted DSP I’ve used is from Subtles DSP pack which is amazing! 40 sheets high quality 12×12″ double-sided designs in 10 colours for 19.50! Bargain! But let us get back to the project. DSP goes only on front and side panels. on the back panel and reverse (not on the pictures) I’ve used pieces of Whisper White stamped randomly using hearts, flowers and safety pins from Something For A Baby set. All DSP panels and base of the card has been sponged either with Crumb Cake or Pool Party ink pads.Ā And now the fun part! I took all of the stamps (except for a bib) from Something For A Baby stamp set and assigned ( wow sounds too serious šŸ˜‰ ) the colours for each one – just to avoid aĀ mess later on. The colours I’ve used are as follows: Crisp Cantaloupe, Crumb Cake, Pool Party, Smoky Slate, Daffodil Delight and Pistachio Pudding. But hey, if you spot different colour please let me know as I may forget all of the coloursĀ used by now.

1

Every shapeĀ has been stamped and then cut out using coordinating Baby’s First Framelits Dies. It’s so much easier than fussy cut everything. But you’re probably wondering how I’ve made the stack of rings. I’ve simply coloured each ring in aĀ different colour using Stampin’ MarkersĀ and then stamped on the piece of whisper white, just like the other shapes. Same technique with Stampin’ Markers I’ve used for the name using Stampin’ Up and Project Life stamp set Day to Day and Stamp-a-ma-jig to line up letters perfectly. The banner is made with theĀ same stamp set.Ā I’ve used a piece of white core’dination paper from American Crafts just to add some extra dimension.

4

And now the easiest part: put the card together. All cut out pieces are assembled using either glue dots or dimensionals. For the socks and one of the safety pins I’ve used tiny straps of window sheet so the can keep “floating”. And that’s it! The card is finished. Oh, I forgot about little bow made with thick bakers twine!

If you like this project please leave a comment below. Thank you all so much for stopping by. Happy crafting,

The Rectangle Card in the Box using Stampin’ Up! goodies!

Hello hello hello!Ā Today I want to share with you really lovely card in the box. But this one is slightly different than those you’ve probably seen already as it’s in the shape of aĀ rectangle.

dla neila 1

For the base, you need a piece of cardstock which measures 11-1/2 x 4-1/8 inches ( half of A4). I’ve used Whisper White. Score the base at 3-7/8, 5-1/2, 9-3/8 & 11″ on the long side. Then score at 2-1/8 on aĀ short side. You will also need two extra pieces of cardstock for the inserts. Each piece should measure 4-7/8 x 3/4″ and need to be scored at 1/2″ on each side. If I find a time I will add a template to make it easier to follow.

dla neila 3

To decorate the box I’ve used beautiful paper from Moonlight DSP Paper Stack. It’s gorgeous design in new in-colour Hello Honey. For the flowers, I’ve used Petite Petals and Flower Shop stamp sets with coordinating punches. The colours I’ve chosen Blackberry Bliss, Hello Honey, Lost Lagoon and Strawberry Slush.

dla neila 2

The main sentiment is from Label Love – stamped in Hello Honey and punched with Artisan Label Punch. As the backing for the sentiment, I’ve used Chalk Talk stamp set and framelits, and banner stamped with chevron design from Work Of Art. Both stamped in Blackberry Bliss. On the sides, you can see tiny “celebrate” circles from Starburst Sayings in Strawberry Slush. The other sentiment: “for my wonderful mother” comesĀ from one of our retired stamp sets: Delightful Dozen. Truly hope you like this project.

Thank you for stopping by,

Masculine Birthday Card with Hexagon Hive Thinlits Die by Stampin’ Up!

Hello everyone. Today I will share with you the masculine card I’ve made for a friend request. He needed something special for his brother’s birthday. What I knew about the recipient is that he loves his little boys, Manchester United and heavy metal šŸ˜‰ I’ve decided to go for the football club colours: black, yellow and red, and to use Stampin’ Up! Hexagon Hive Thinlits Die.

The base is BasicĀ Black cardstock. The background is made on Whisper White cardstock. How I did it? It’s such a cool and effective technique.

Ā dla neila 5

Ā I took a stamping clear block and simply I stamped the entire Real Red inkpad on the block, then spritz it with a water and stamped it on the cardstock.Ā I repeat it few times till get the right intense shade. I did dry it in between. Then I’ve done the same with Crushed Curry ink pad for yellow. and to finish it I’ve randomly stamped some stamps from Gorgeous Grunge set. I took a piece of Basic Black cardstock and Hexagon Hive Thinlits and run it through the Big Shot. I’ve attached my background to the base with snail and hexagon die cut on the top with Tombow glue. But then I’ve thought it needs some more twist. I took “happy happy”, “happy birthday” and “chevron” mini stamps from Honeycomb Hello (coordinates with Hexagon Hive Thinlits) and stamp them in the little hexagons on the background.

dla neila 4

For theĀ firstĀ sentiment I’ve taken a piece of Whisper White cardstock (watercoloured in Real Red same technique as the background) and a piece of basicĀ black, cut them into mini banners and layer them together. The sentiment is from Something To Say and punched using Word Window Punch. The second sentiment is totally awesome! It’s one of the stamps from Just Saying set and cut out with coordinating framelits from Word Bubbles. Stamped it in Real Red of course in aĀ piece of Whisper White and attached it with dimensionals. Oh, and a black button for that extra touch.

I really love how this card turned out. All supplies I’ve used are Stampin’ Up! except for the button. I know I’ve used lots of different stamp sets and accessories for one card but I’m just starting so don’t have aĀ wide variety of coordinating stamps, punches, framelits etc. But I’m getting there slowly šŸ™‚

Hope you like this project. Thank you for stopping by and happy crafting,

Wedding Card using Scalloped Tag Topper Punch by Stampin’ Up!

Hello everyone! Few days ago I’ve been asked to make a Wedding Day card. The only problem I only had 24 hrs to design and make it.Ā  So I’ve decided to go with Smoky Slate, Pink Pioruette and Whisper White for the colours. The stamp sets I’ve used are (sadly) retired En Francais and Everything Eleanor for the background.

wedding 1

Greetings are from Chalk Talk and Label Love ( used coordinating framelits and punch). I’ve also made a translucent banner with vellum. And who can spot a little SNEAK-PEAK from Autumn-Winter Catalogue? I’ve used new stamp set Four Feathers, heat embossed the image in silver on a piece of vellum and cut it with matching framelits. For the closing as you can see I’ve used my favourite Scalloped Tag Topper Punch. A friend who asked for the card really loved it and so I hope the bride will love it too šŸ™‚

Thank you for stopping by