Anna’ Stampin’ Cave – International Highlights Winners Hop: You Are The Greatest

Hello and welcome to my stampin’ cave today.
First of all, I wanted to say a massive THANK YOU to all my followers and visitors to my blog for VOTING on my project for this month’s International Project Highlights! My little fridge magnet and card took the 5th place. I’m so humbled!
Every month, the ‘top ten’ get to blog hop with Kylie, using the same theme, which was a “Teachers Gifts”.
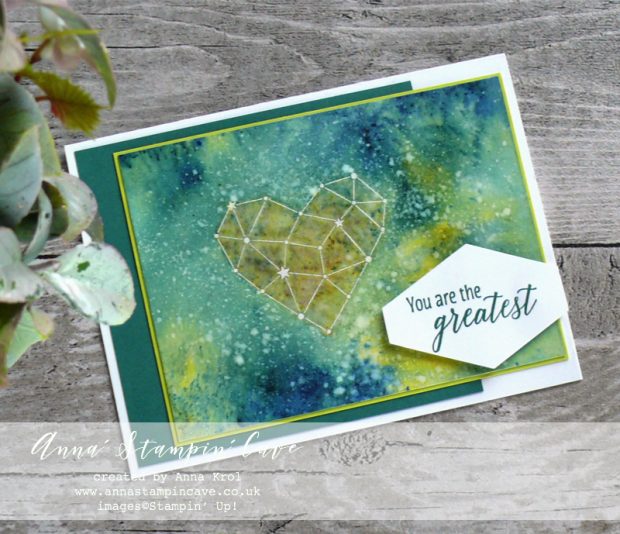
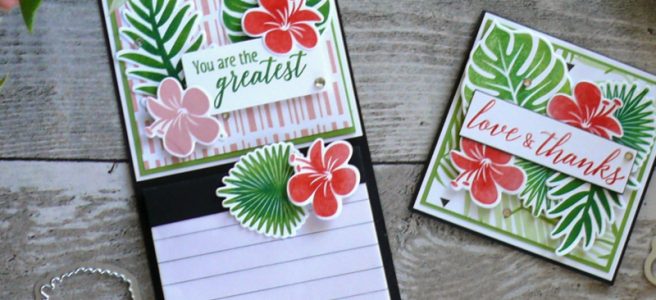
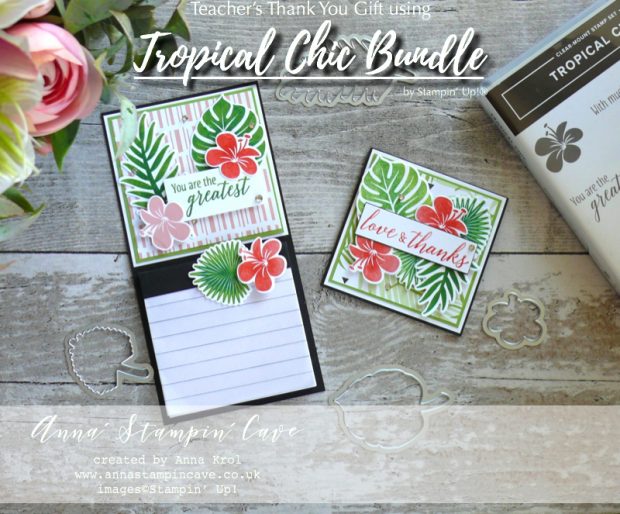
You Are The Greatest
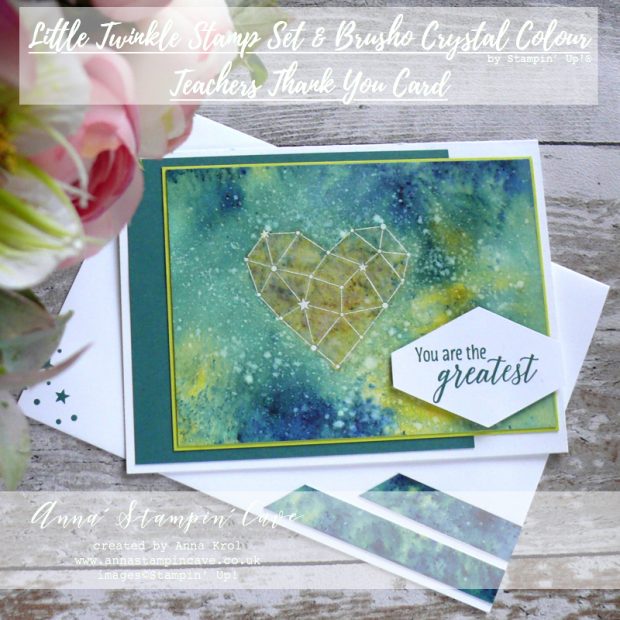
For today’s project, I decided to go back to one of my favourite products and techniques – watercolour with Brusho® Crystal Colour.
Here’s my card –
Card dimensions:
- Whisper White Thick cardstock: 11-6/8″ x 4-1/8″ scored in half at 5-7/8″ (29.7 x 10.5 cm scored in half at 14.8 cm)
- Tranquil Tide cardstock panel: 3-7/8″ x 4-1/4″ (9.8 cm x 10.6 cm)
- Lemon Lime Twist cardstock panel: 3-5/8″ x 5-13/16″ (9.2 cm x 12.2 cm)
- Watercolour Paper panel: 3-1/2″ x 5-3/4″ (9 cm x 12 cm)
- Whisper White cardstock for sentiment
My thought behind this card was to create one that could be suitable either for a female or male teacher.
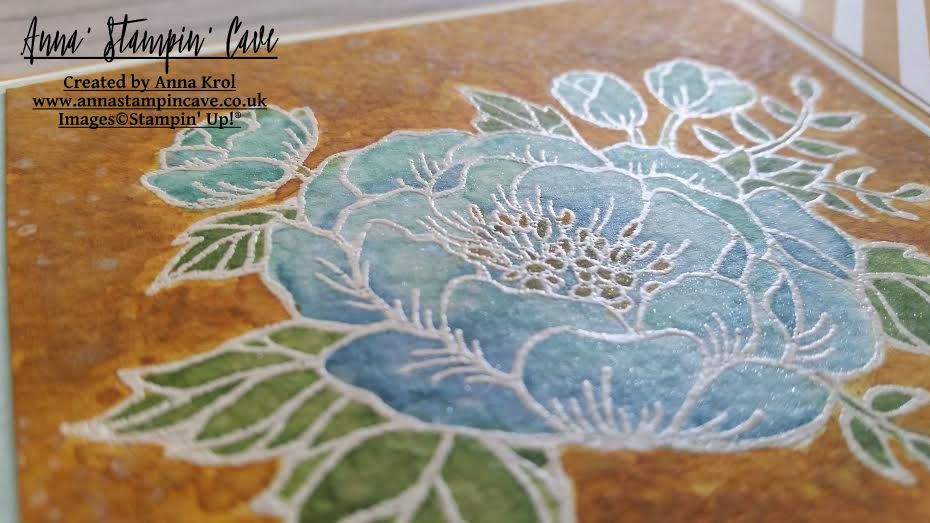
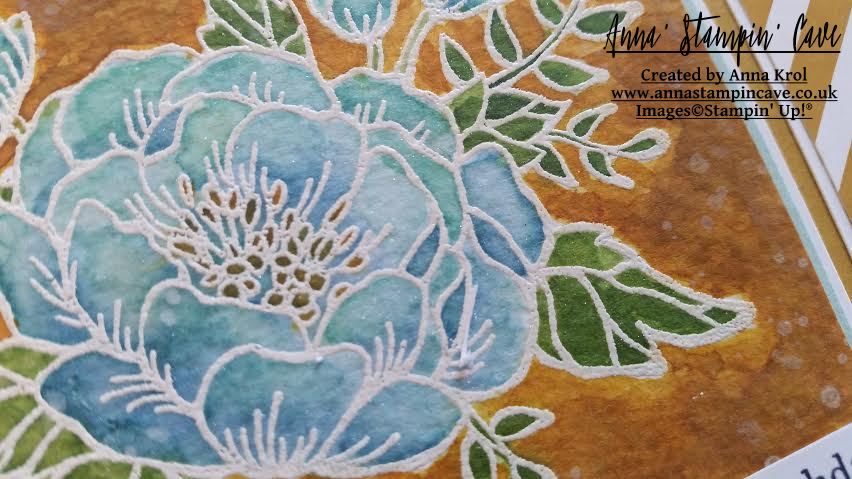
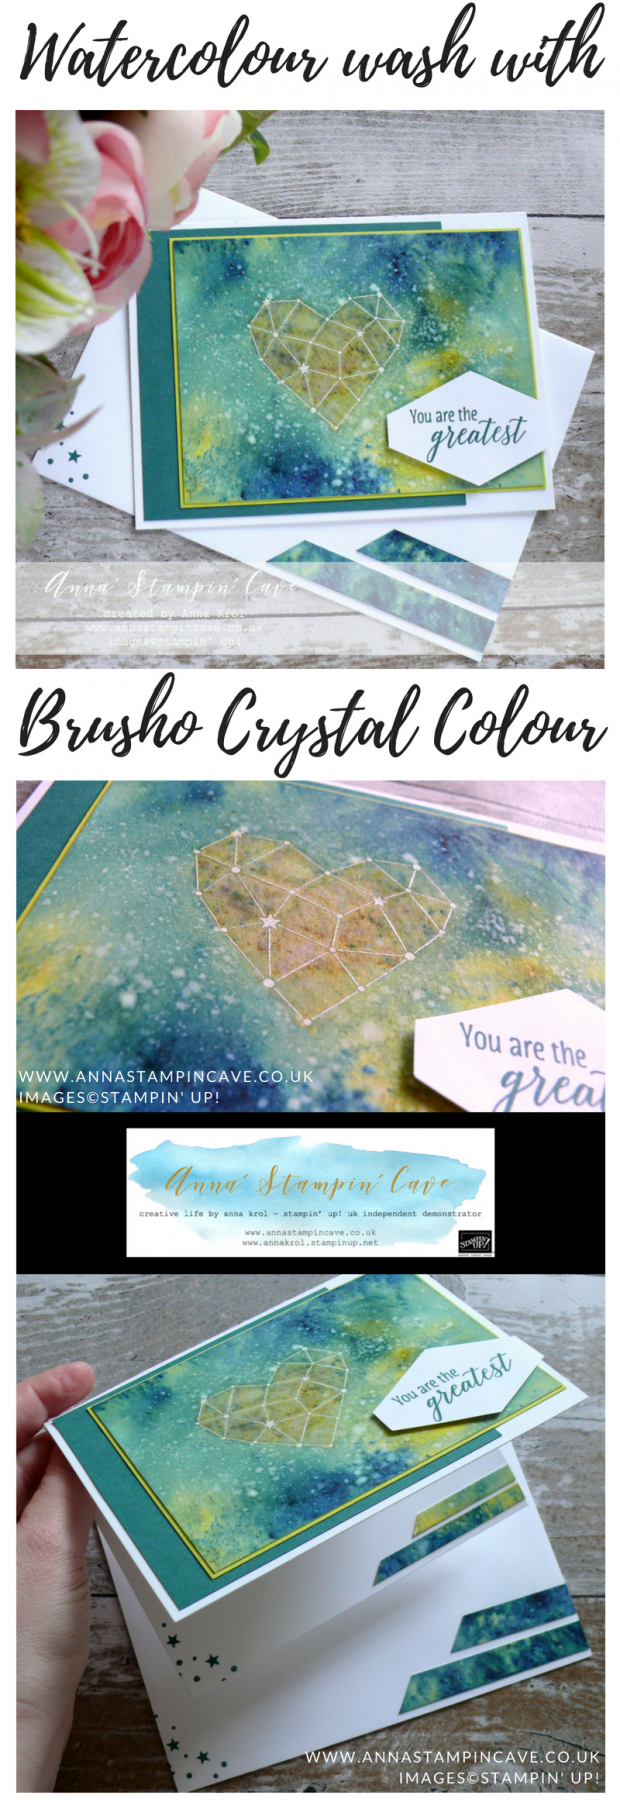
I prepared my watercolour panel – it was bit larger than what I needed – with embossing buddy and stamped the ‘heart constellation’ using Versamark ink. I sprinkled it with a White Emboss Powder and heat set it with my Heat Tool.
When heat embossing on Watercolor Paper, because it’s a quite porous surface, you need to make sure all the image has transferred very well. It can take a little bit longer for the embossing powder to melt, so be patient.

Brusho Crystal Colour
They are high quality and highly pigmented paint powders. They are water-based and most of all completely non-toxic. For my card, I chose two colours to work with: Prussian Blue and Moss Green.
I added my water to the embossed heart, sprinkled it with Moss Green and using the aqua painter I moved the water around.
Before adding Prussian Blue I wet the panel under a running water. I wasn’t too concerned and didn’t worry too much that the Mossy Green will run. Once my panel was really wet I sprinkled it richly with Prussian Blue.
I moved the colour tilting the panel in each direction dabbing off any colour that got into the heart – I wanted to keep it green. Once my panel was dry I spritz it with water (very selectively avoiding the heart) and added more Prussian Blue with a few Moss Green areas for the contrast and moved it around with aqua painter again. Once happy with results, and when the panel was still slightly damp, I sprinkled some more of Prussian Blue and let it dry without moving the paper. I love the effect it left on the panel.
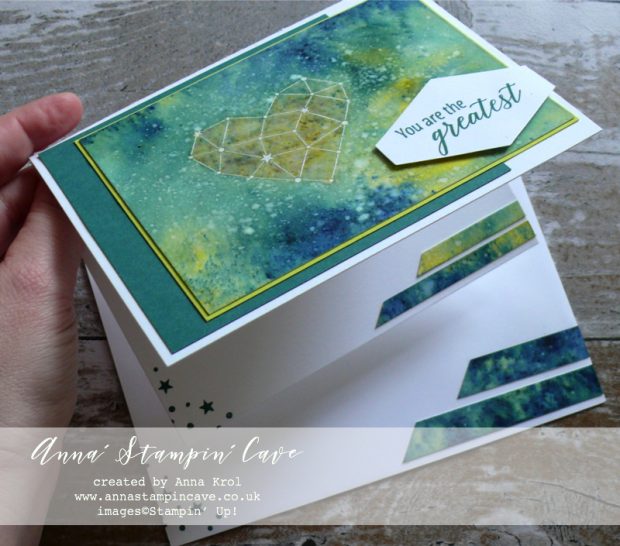
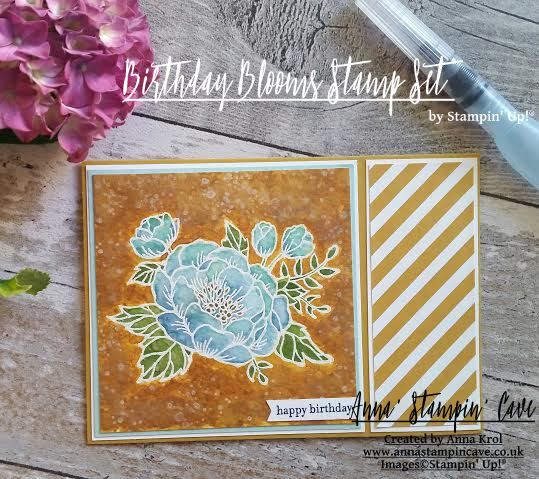
Assembling the card
For the final touch, I took a Whisper White Craft Ink Refill and with a help of clear block and aqua painter, I splashed white all over the panel.
Once my panel was dry I cut it to the size but I saved my colourful off cuts to use them later for some accents.
I adhered Tranquil Tide panel to the card base with liquid glue. Next, I mounted watercolour piece onto a Lemon Lime Twist panel and adhered them both to the base.
The sentiment comes from Tropical Chic Stamp Set. I stamped it in Tranquil Tide ink and punched out with Tailored Tag Punch. I have added it to my card with few dimensionals.
Final touches
For some interest, I stamped a cluster of stars inside of my card, in a bottom left corner. Besides that, I also took one of the watercolour strips that left, cut it at an angle and add it to the inside as well. I think it looks pretty cool.
I also decided to decorate the envelope with the same elements as the inside of my card: clusters of stars and another watercolour strip cut at an angle.
And that’s it from me for today. I hope you’ve enjoyed visiting my blog. Do you like the card I created? I would love to hear your thoughts.
Below is the list of all the winners, so be sure to hop along. Your next stop is lovely and very talented Janneke de Jong from the Netherlands – go and see her beautiful project.
As always, if you wish to purchase any of the products I have used, simply click the images below to go directly to my online store.
I add this card to:
HOST CODE for the month of AUGUST is U6KK4ACY. Orders of £50+ (excl. p&p) will receive a pack of Stampin’ Up! Pearlised Doilies!


Product List
|
|
|
|||
|
|
|
|
|
|
|
|
|
|
|
|
|
|
|
|
||
|
|
|
|
|


Pin me
Summary of the project which gives all the views of the card in one photo. I’d love if you pinned and called by on Pinterest xx
Don’t forget to check:
 My exclusive special offer this month only: FREE Stampin’ Up! Pearlised Doilies
How it works…
- Place a product order of £50 or more (excl. shipping) in my online store in the month of August.
- Add Host Code U6KK4ACY. To claim your reward you must include this code in your ordering process.
- This August Special Offer will be applied to all qualifying orders placed through my shop using Host Code U6KK4ACY between 1 August – 31 August.
- If your order is £150 or more do not use Host Code. You will earn your own Host Rewards to spend.
- IMPORTANT: My FREE Special Host Gift giveaways are mailed separately from any order and will arrive mid-September.
Request Autumn/Winter Catalogue
 Earn in August – redeem in September –> click here for more details

All-new, limited-time Colour Your Season products – Products available while supplies last or until 31 August 2018 – order yours today –> click here


 Specialty Designer Series Paper")


 Designer Series Paper")