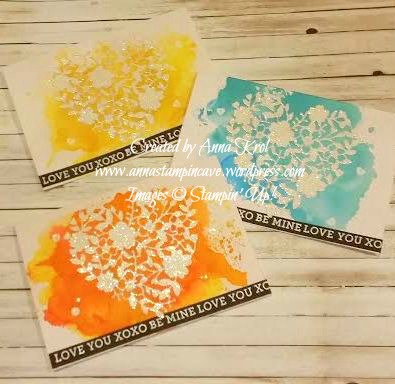
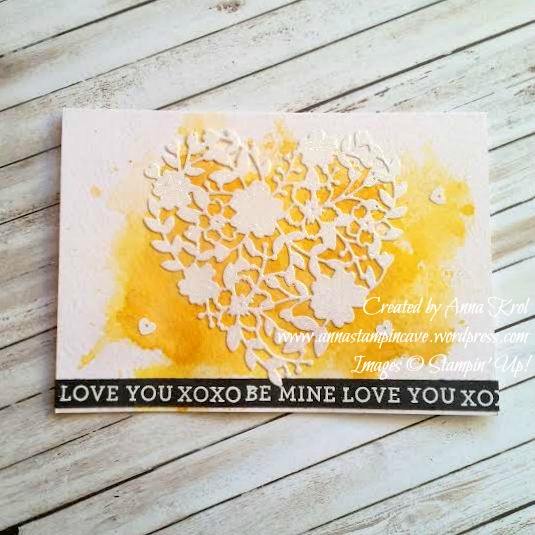
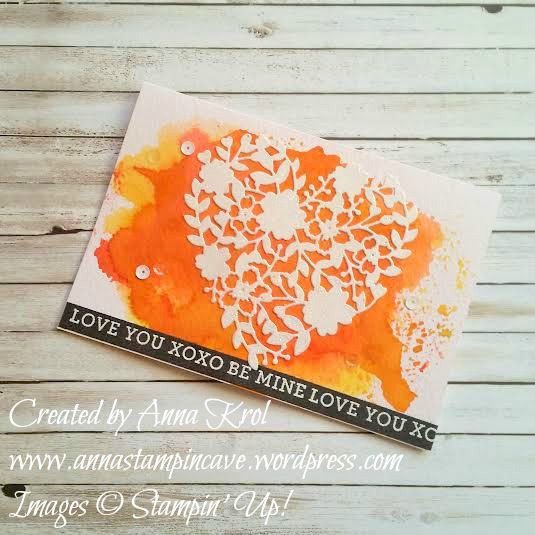
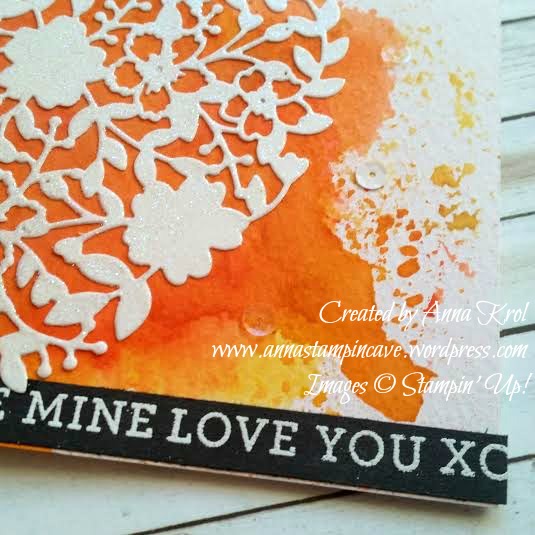
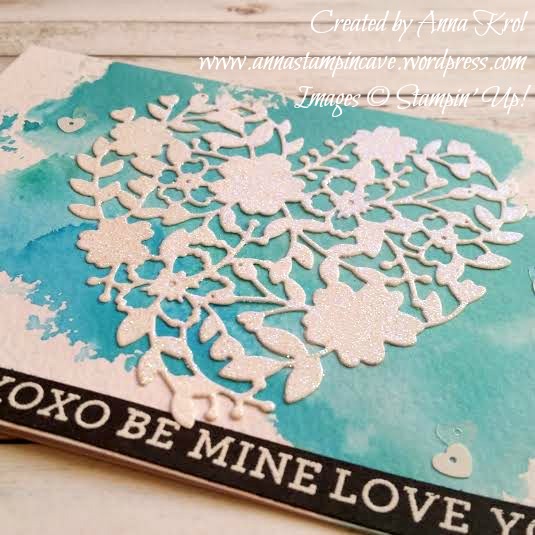
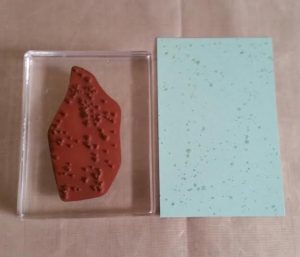
I have to say when I first saw Bloomin’ Hearts Thinlits Dies in new Stampin’ Up! Spring Summer Catalogue I couldn’t wait to put my hands on them and try ink smooshing technique.
Aren’t these awesome?! And ink smooshing is childishly easy. All you need is a piece of acetate or craft mat, you can use a plastic packaging too (any sleek surface works really).
Then you choose the colours you want to use on your card and you simply smoosh them onto your surface. Spritz it with water and dip your card into the ink droplets. Let your card dry completely before you add more colour.
For my cards, I decided for really bright, intense colours. But you can make it as soft as you wish just add less ink and more water. And I have to say here I highly recommend using watercolour paper with this technique.
I’ve used the same design for all my cards. I die-cut hearts from a piece of Whisper White cardstock using Precision Base Plate. Trust me you need this plate! It’s perfect for more detailed thinlits dies to give you extra fine cuts. I saved the negatives (not tiny bits just “frames”) for another project.
I then dabbed my die-cuts in Versamark and heat-embossed it with Iridescent Ice embossing powder. I love the gentle bling/shimmer it gives.
I wanted the sentiment to really stand out so I took a strip of Basic Black c/s and stamped my sentiments in Versamark and heat embossed them in white.
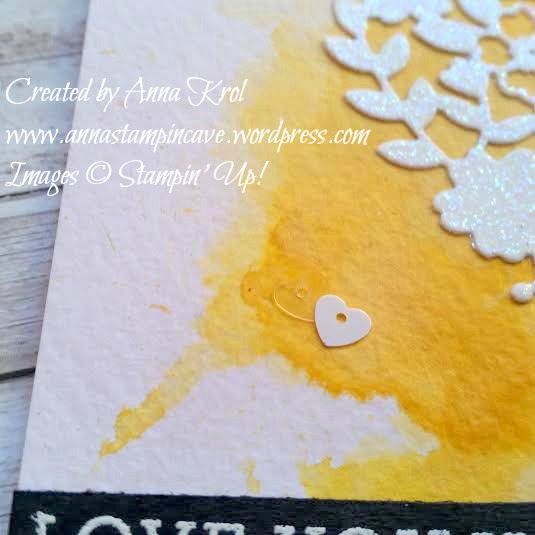
To finish off my cards I added few white and clear sequins from Metallics Sequin Assortment.
I love how these turned out, really pleased! I know these are not typical cards you would think off for Valentine’s Day, but I love the unusual.
Hello everyone! Welcome to the Crazy Crafters / Pootlers Blog Hop. We are super excited to share with you lots of new products from the soon to be launched seasonal catalogue. We hope you’ll find great inspiration from our projects. If you have arrived here from Stephanie Fischer, a big welcome to you. Be sure to click on the buttons further down to continue your journey on this blog hop.
This blog hop is very exciting not only for the sneak peeks. This is our first collaboration with amazing Kylie Bertucci and her lovely team of Crazy Crafters all the way from Australia! We are thrilled that they invited us to play along. Thank you, Kylie and her team.x
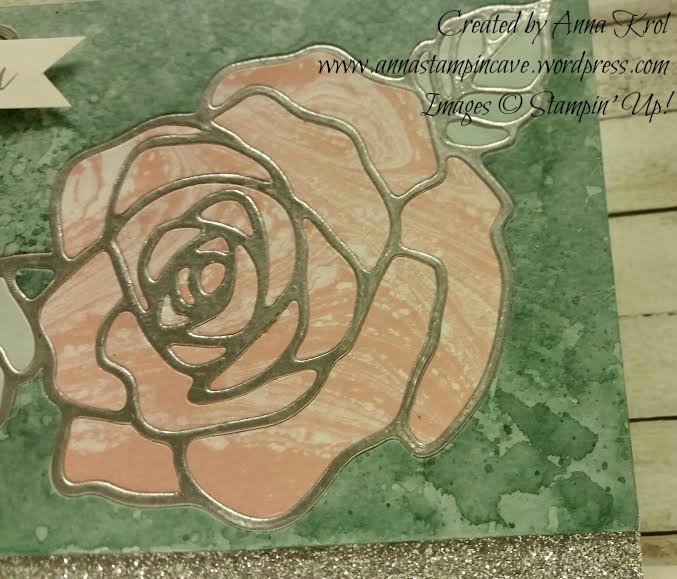
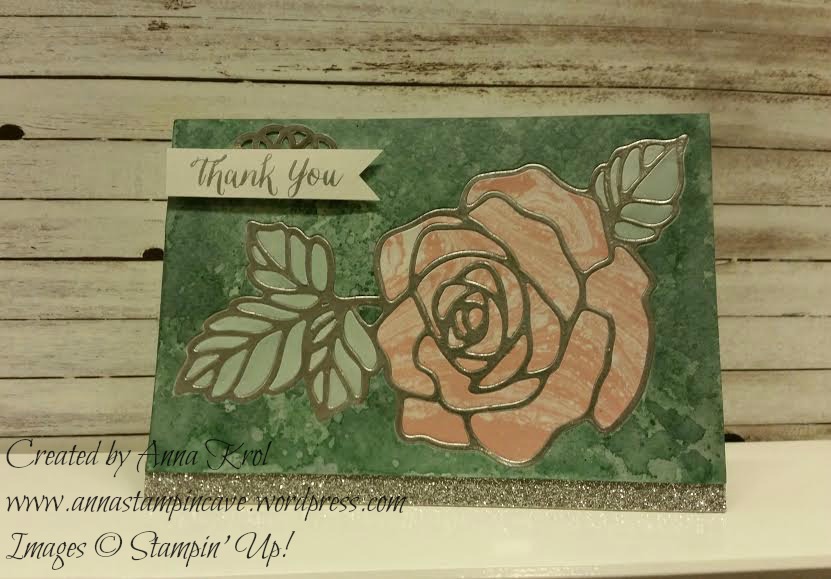
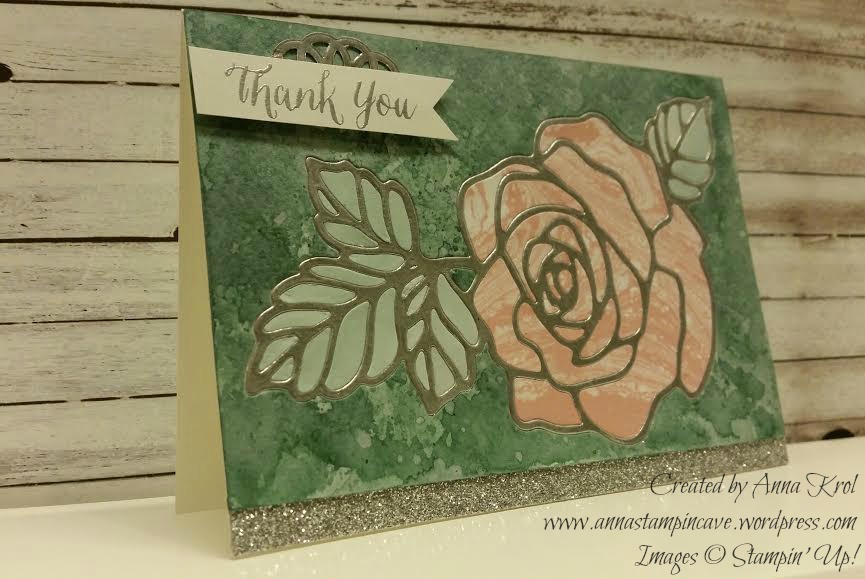
In my project today I decided to incorporate two of my favourite techniques: watercolour and inlaid die-cutting. I have used a brand new set called Rose Wonder with coordinating Rose Garden Thinlit Dies – perfect for techniques!
We’ve been given a theme ONE, to use only one stamp set, one ink pad, one DSP, one cardstock etc. Luckily we could also use heat embossing and embellishments. I had to come up with some smart idea how to create my watercolour card with just one ink pad.
For a watercolour panel, I’ve used Lost Lagoon ink pad. It’s such a beautiful shade of blue. But how to create a rose if you only have one ink colour? Perfectly Artistic DSP came as a rescue! All inner pieces of my flower and leaves were die-cut from this DSP and “inlaid” into the rose frame. I love this beautiful paper. It has a marbled effect design on one side, while the reverse side has a watercolour wash. And what’s even better, this paper will be available as a FREEBIE during Sale-a-bration!
The frame of the flower, as well as sentiment, are heat embossed in silver. A glittery strip of paper is heat embossed too, using Heat and Stick powder and silver glitter.
For my sentiment, I created simple, little banner with a piece of silver doily underneath to add some dimension. Don’t you just love this beautiful font? I’m in love with sentiments in this set.
I truly hope you enjoyed coming to my blog and see my card.
Now, be sure to hop along and see more inspiring projects. Below is the list of all the participants but you can also use the buttons to keep hopping. Your next stop is lovely Emilie Robinson – go and see what she has made using the new items.
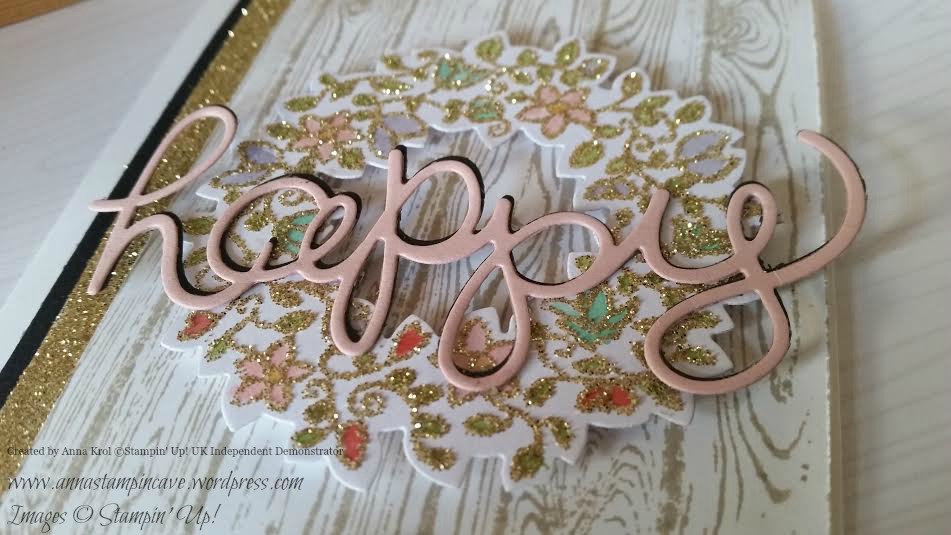
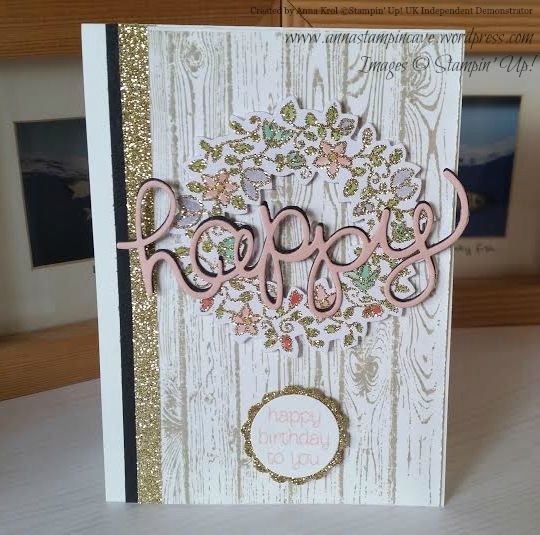
I love to make birthday cards for friends and family. Makes me so happy to see their smiles, it makes my day. And when the card I make is a challenge and turn out better then I hoped for?! Well, I nearly squealed with excitement when I finished this card for my friend’s birthday. She received the card already so I can share it with you now.
My friend Linda is an amazing crafter and she makes the most beautiful, feminine cards ever. So no pressure there, haha
I wanted to create a card that is soft, feminine and exciting. Plus I wanted to use some cool techniques.
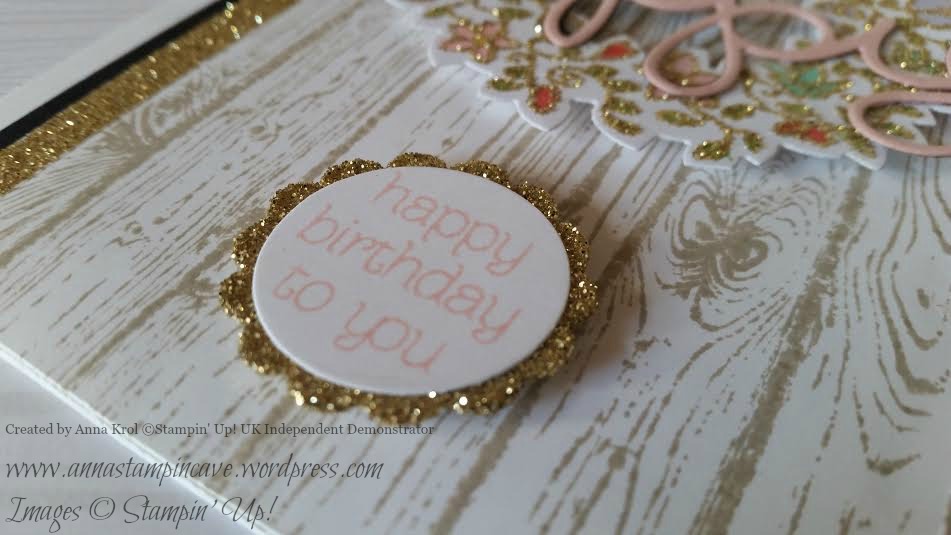
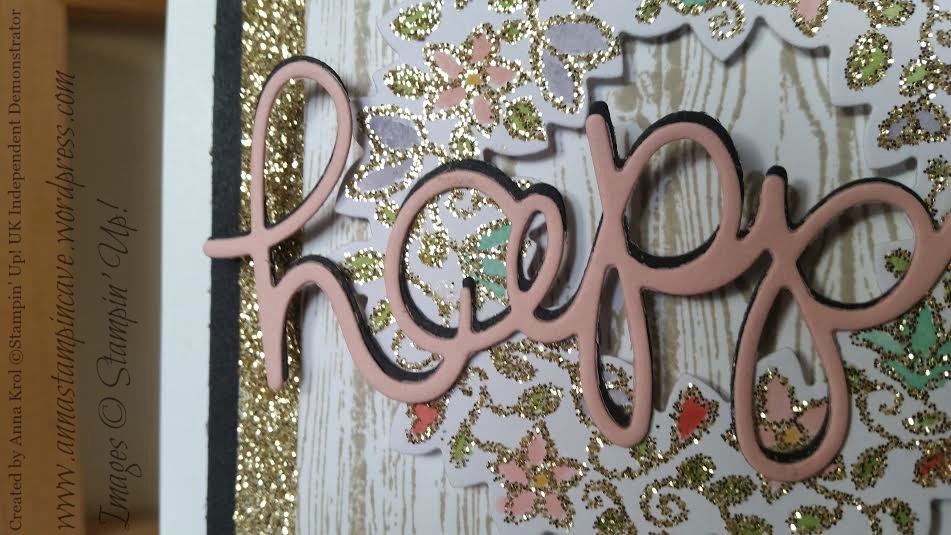
I stamped this beautiful wreath in Versamark, heat embossed with Heat & Stick powder and sprinkled with Gold Stampin’ Glitter. I heat set it again and watercoloured flowers and leaves. Then I die-cut ‘happy’ twice: in basic black and blushing bride, and glue them together. I slightly offset both pieces for ‘shadow’ effect.
I love this cute sentiment from Circle of Spring. I do not own many punches, so I had to cut it out with Circle Framelits Dies. But I believe you could use 1″ Circle punch too. The glittery scalloped circle is 1-1/4 Scallop Circle punch. To make it I didn’t use glimmer paper. I punched it from a piece of paper, squashed it into Versamark and again used Heat & Stick powder and gold glitter. It’s so easy to make your own glimmer paper, and I love it.
Just look at all this sparkle ✨✨✨ I love it!
Hope you like my little card, and maybe you will try to add some sparkle to your projects too.
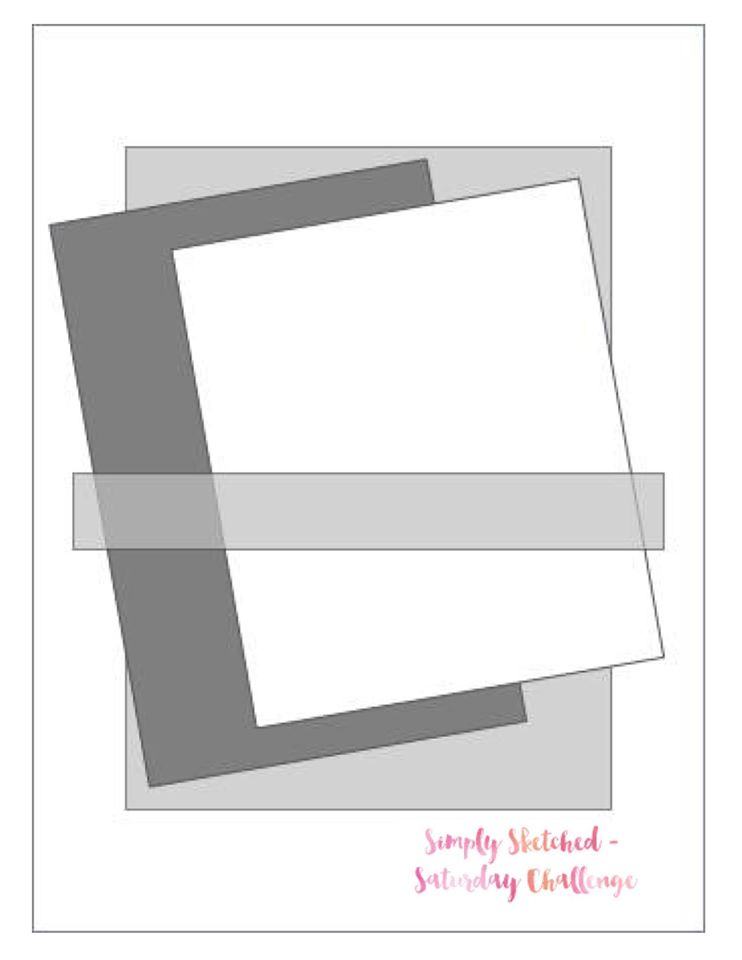
Thank you for joining us for another Simply Sketched Saturday Challenge! We’re so excited to be sharing this hop with you. The products used are all available in the current Annual, or seasonal, Stampin’ Up!® Catalogues*. Simply use the buttons at the bottom of the post to keep hopping!
If you have arrived here from Mandy’s blog thank you for stopping by. If you just start here please keep “hopping” to see the inspiration from our little group. I’m sure you will enjoy what everyone prepared for you this time.
I was really excited about this week’s sketch designed by Amy from blog Engineering Home. Not that it’s an easy one. Oh, and it was her BIRTHDAY yesterday!!! Happy Birthday, Amy! ??????
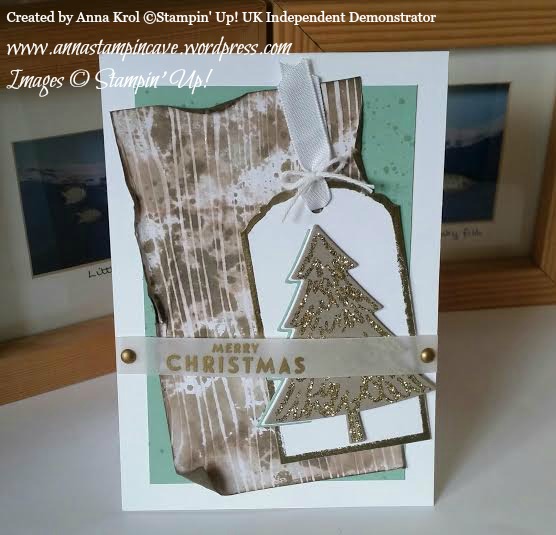
This time I decided to go with Christmas theme. And yes I know there’s still a time for Christmas cards, but hey, you’ve got to start somewhere 🙂 So here’s my interpretation of this week’s brilliant sketch:
I know that many cardmakers prefer ever-so-popular clean and simple style, but I’m a big fan of distressing. And in my card today I tried to incorporate both styles.
The base of my card is Whisper White card stock. A slightly smaller panel of Mint Macaron measures 5″ x 3-3/8″. I knew this panel will be mostly covered but I wanted to add some interest to it. First I thought about dry embossing but it would be too busy for an idea I had in my head. Instead, I stamped some splotches with Gorgeous Grunge in Mint Macaron for a subtle tone-on-tone look.
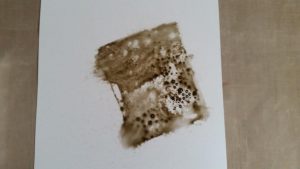
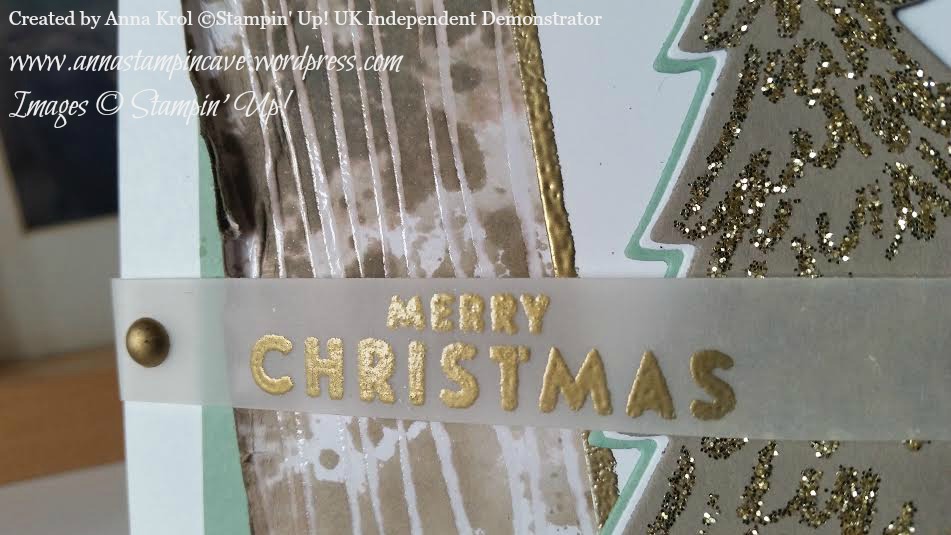
A distressed panel is a piece of white woodgrain patterned paper from Color Me Irresistible Specialty DSP. This paper is amazing, as each sheet is clear embossed, ready for inking, sponging, spritzing – getting messy in short 🙂
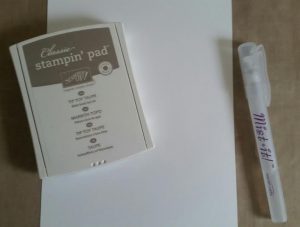
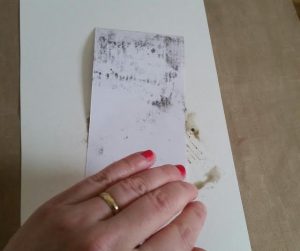
I squeezed Tip Top Taupe ink pad on the sleek surface (you can use acetate or craft sheet), spritz it with water and swooshed my paper into this puddle of colour. I added ink and water until achieved the look I wanted. I love how embossing resists the colour. When the paper was dry I stamped few splotches from Gorgeous Grunge and distressed and sponged the edges. Just a warning, this technique will warp your paper so you have to be careful, or use watercolour paper.
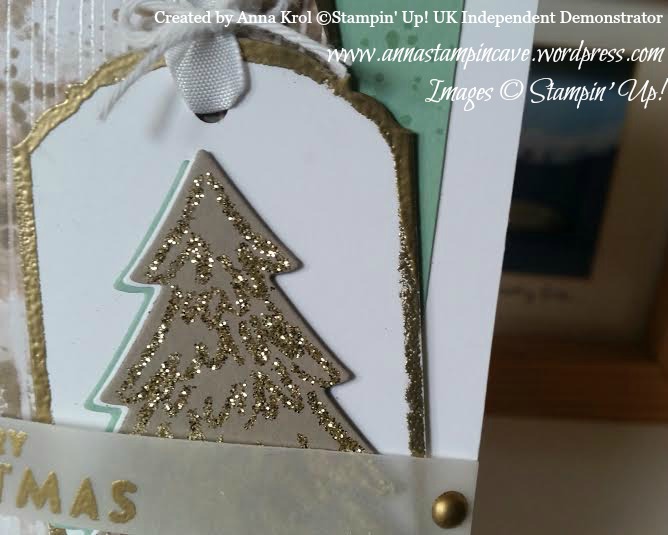
To create my tag I cut a piece of Whisper White card that measures 2″ x 4″ and punch it with Ornate Tag Topper punch. Then I dabbed the edges in Versamark and heat emboss it with gold embossing powder.
I stamped Christmas tree from Peaceful Pines stamp set in Versamark on a piece of Tip Top Taupe card stock. I heat embossed it with Heat & Stick powder and when it got sticky I sprinkled gold glitter over it (I must say that I’m in love with Gold Stampin’ Glitter). Then I die cut it using coordinating framelits. I also die cut half of the tree from Whisper White and Mint Macaron to layer them together. When the tree was ready I assemble my tag and finish it with a piece of ribbon and bakers twine. Finally, I could assemble my card. Now just sentiment left.
The sentiment comes from Flurry of Wishes stamp set. I embossed it in gold on a strip of vellum and attached to my card with edges of dimensionals (folded in half). To finish it off I coloured two White Perfect Accents using gold Sharpie and added them where the adhesive was. Taa-daah!
Now, be sure to hop along and see more inspiring projects. Your next stop is Suzanne at Hullahbaloo. Thank you for stopping by and have a blessed day
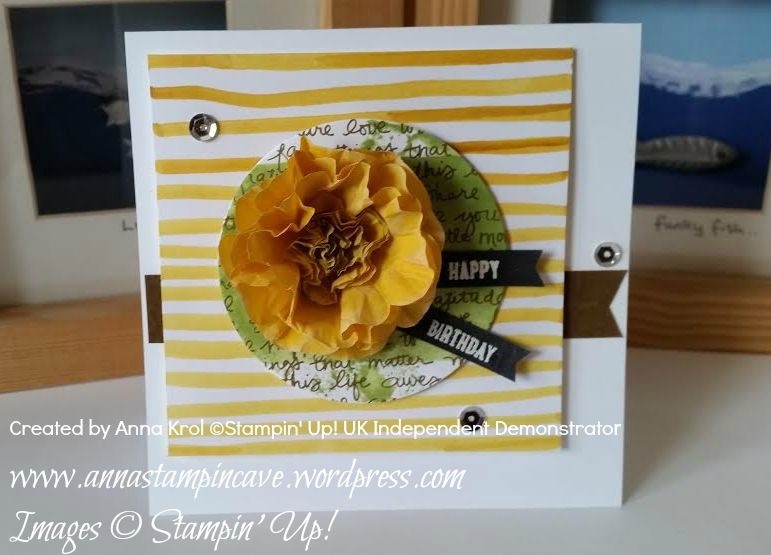
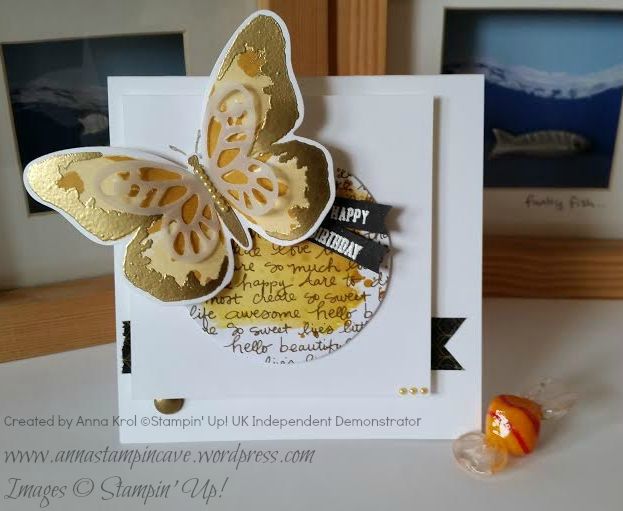
Hello everyone! Today I wanted to share with you couple of cards I created a few weeks back. In August we had two birthdays in close family: my niece had her 15th birthday, and my little sister was celebrating her round 20 🙂
For both cards, I’ve used the same layout, but by simply changing focal point and embellishments I created two cards that looked completely different 🙂
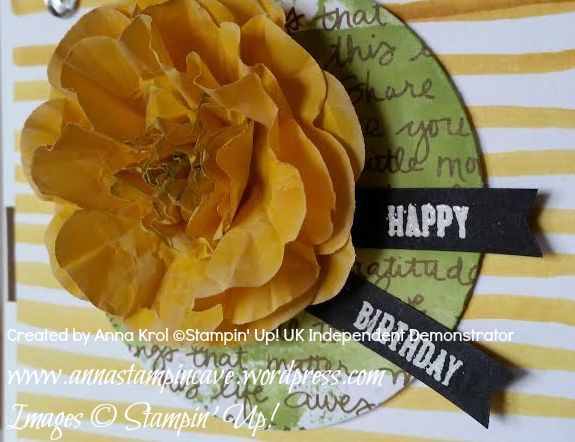
The first card I’ve made for my niece and I was dying to use our new Cotton Paper. With Floral Frames framelits, Pansy Punch and Petite Petals Punch I created this amazing 3D flower.
I’ve sponged edges of petals with Whisper White Craft ink and close to center slightly in Wild Wasabi. The sentiment comes from Sprinkles Of Life; stamped in Versamark and heat embossed in white on a piece of Basic Black.
The base for a card is 4×4″. The first layer is 3×3″ and I created this patterned paper myself. I simply used Stampin’ Write Marker in Crushed Curry and hand-drawn horizontal lines – cool, isn’t it? The second layer is a circle cut out from a piece of Neutrals DSP Stack (Soft Suede) with Wild Wasabi watercolour “wash”. For more interest, I added a banner underneath my layers and few sequins.
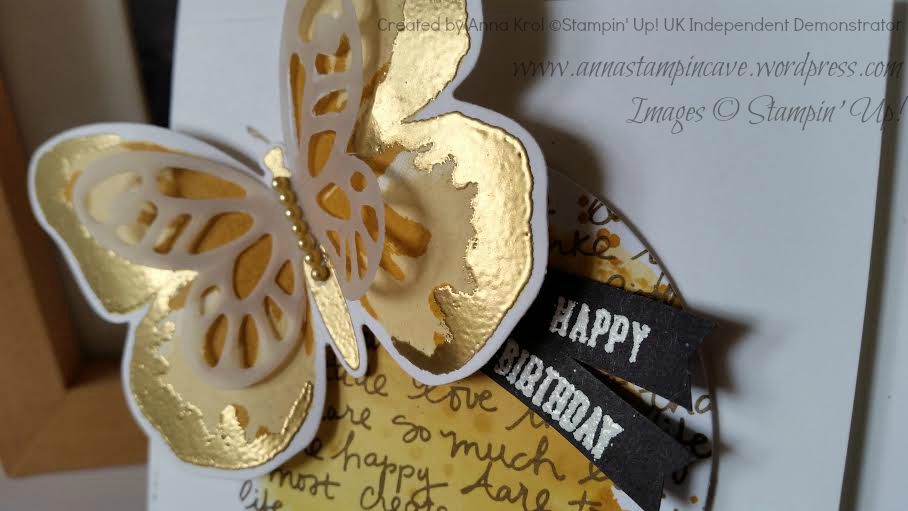
The second card I’ve made for my sister’s birthday. As I mentioned it’s the same design. The only difference is that I kept 2nd layer clean and for the circle, I used So Saffron, Hello Honey and Delightful Dijon “wash”. Same colours I’ve used for this gorgeous butterfly from Watercolor Wings.
The edges of wings and the body of butterfly I heat embossed in gold. On top, I added small vellum butterfly. Tiny yellow pearls, as well as a piece of black/gold washi tape, comes from my stash. Can you see little gold “bauble” peeking from underneath white layer? It’s one of White Perfect Accents, heat embossed in gold.
So what do you think about my cards? My niece and sister loved them to bits, so I really hope you like them too.