Dragonfly Dreams Stamp Set & Coordinating Dies

Anna’ Stampin’ Cave – Dragonfly Dreams Stamp Set & coordinating dies
anna-stampin-cave-ink-smooshing-technique-with-dragonfly-dreams-stamp-set-coordinating-dies

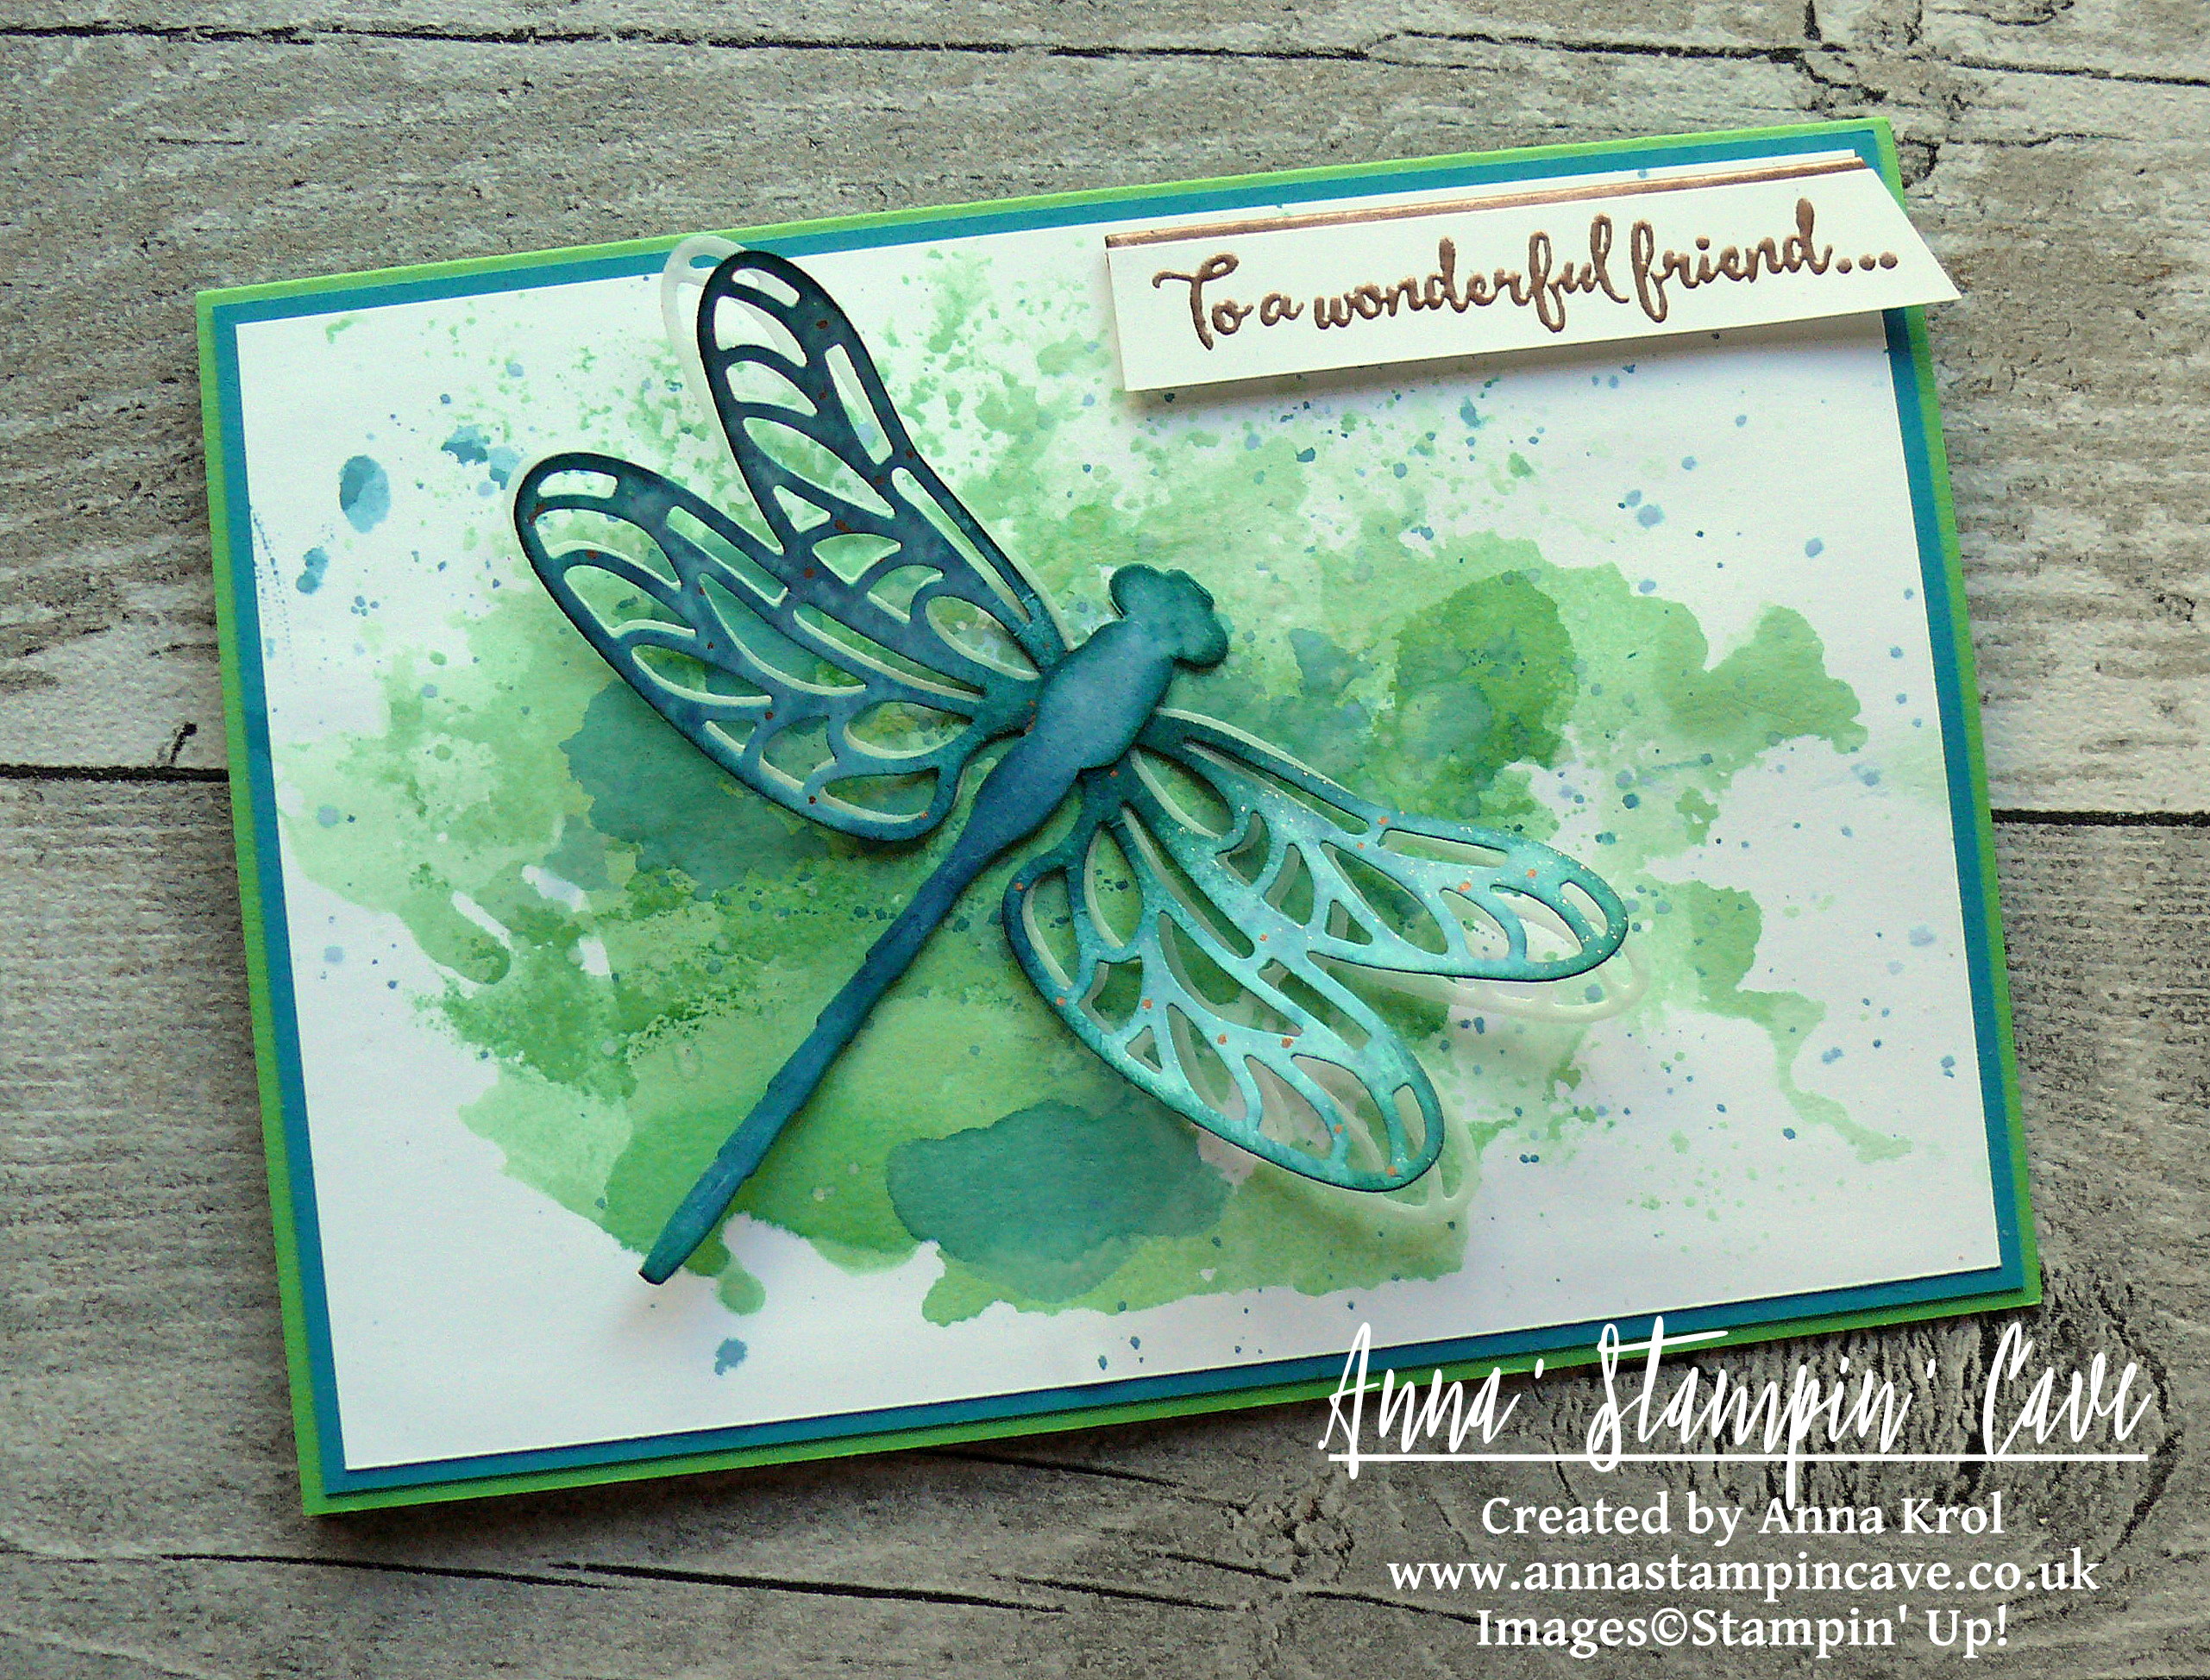
For today’s project, I have used once again Dragonfly Dreams Stamp Set and Detailed Dragonfly Thinlits Dies. I love this bundle and either together or separate, I just can’t get enough of it. This time though I decided to revisit two of my favourite techniques: watercolour and ink smooching. Bright colours, Cucumber Crush and Island Indigo, seemed perfect combination for a dragonfly card.
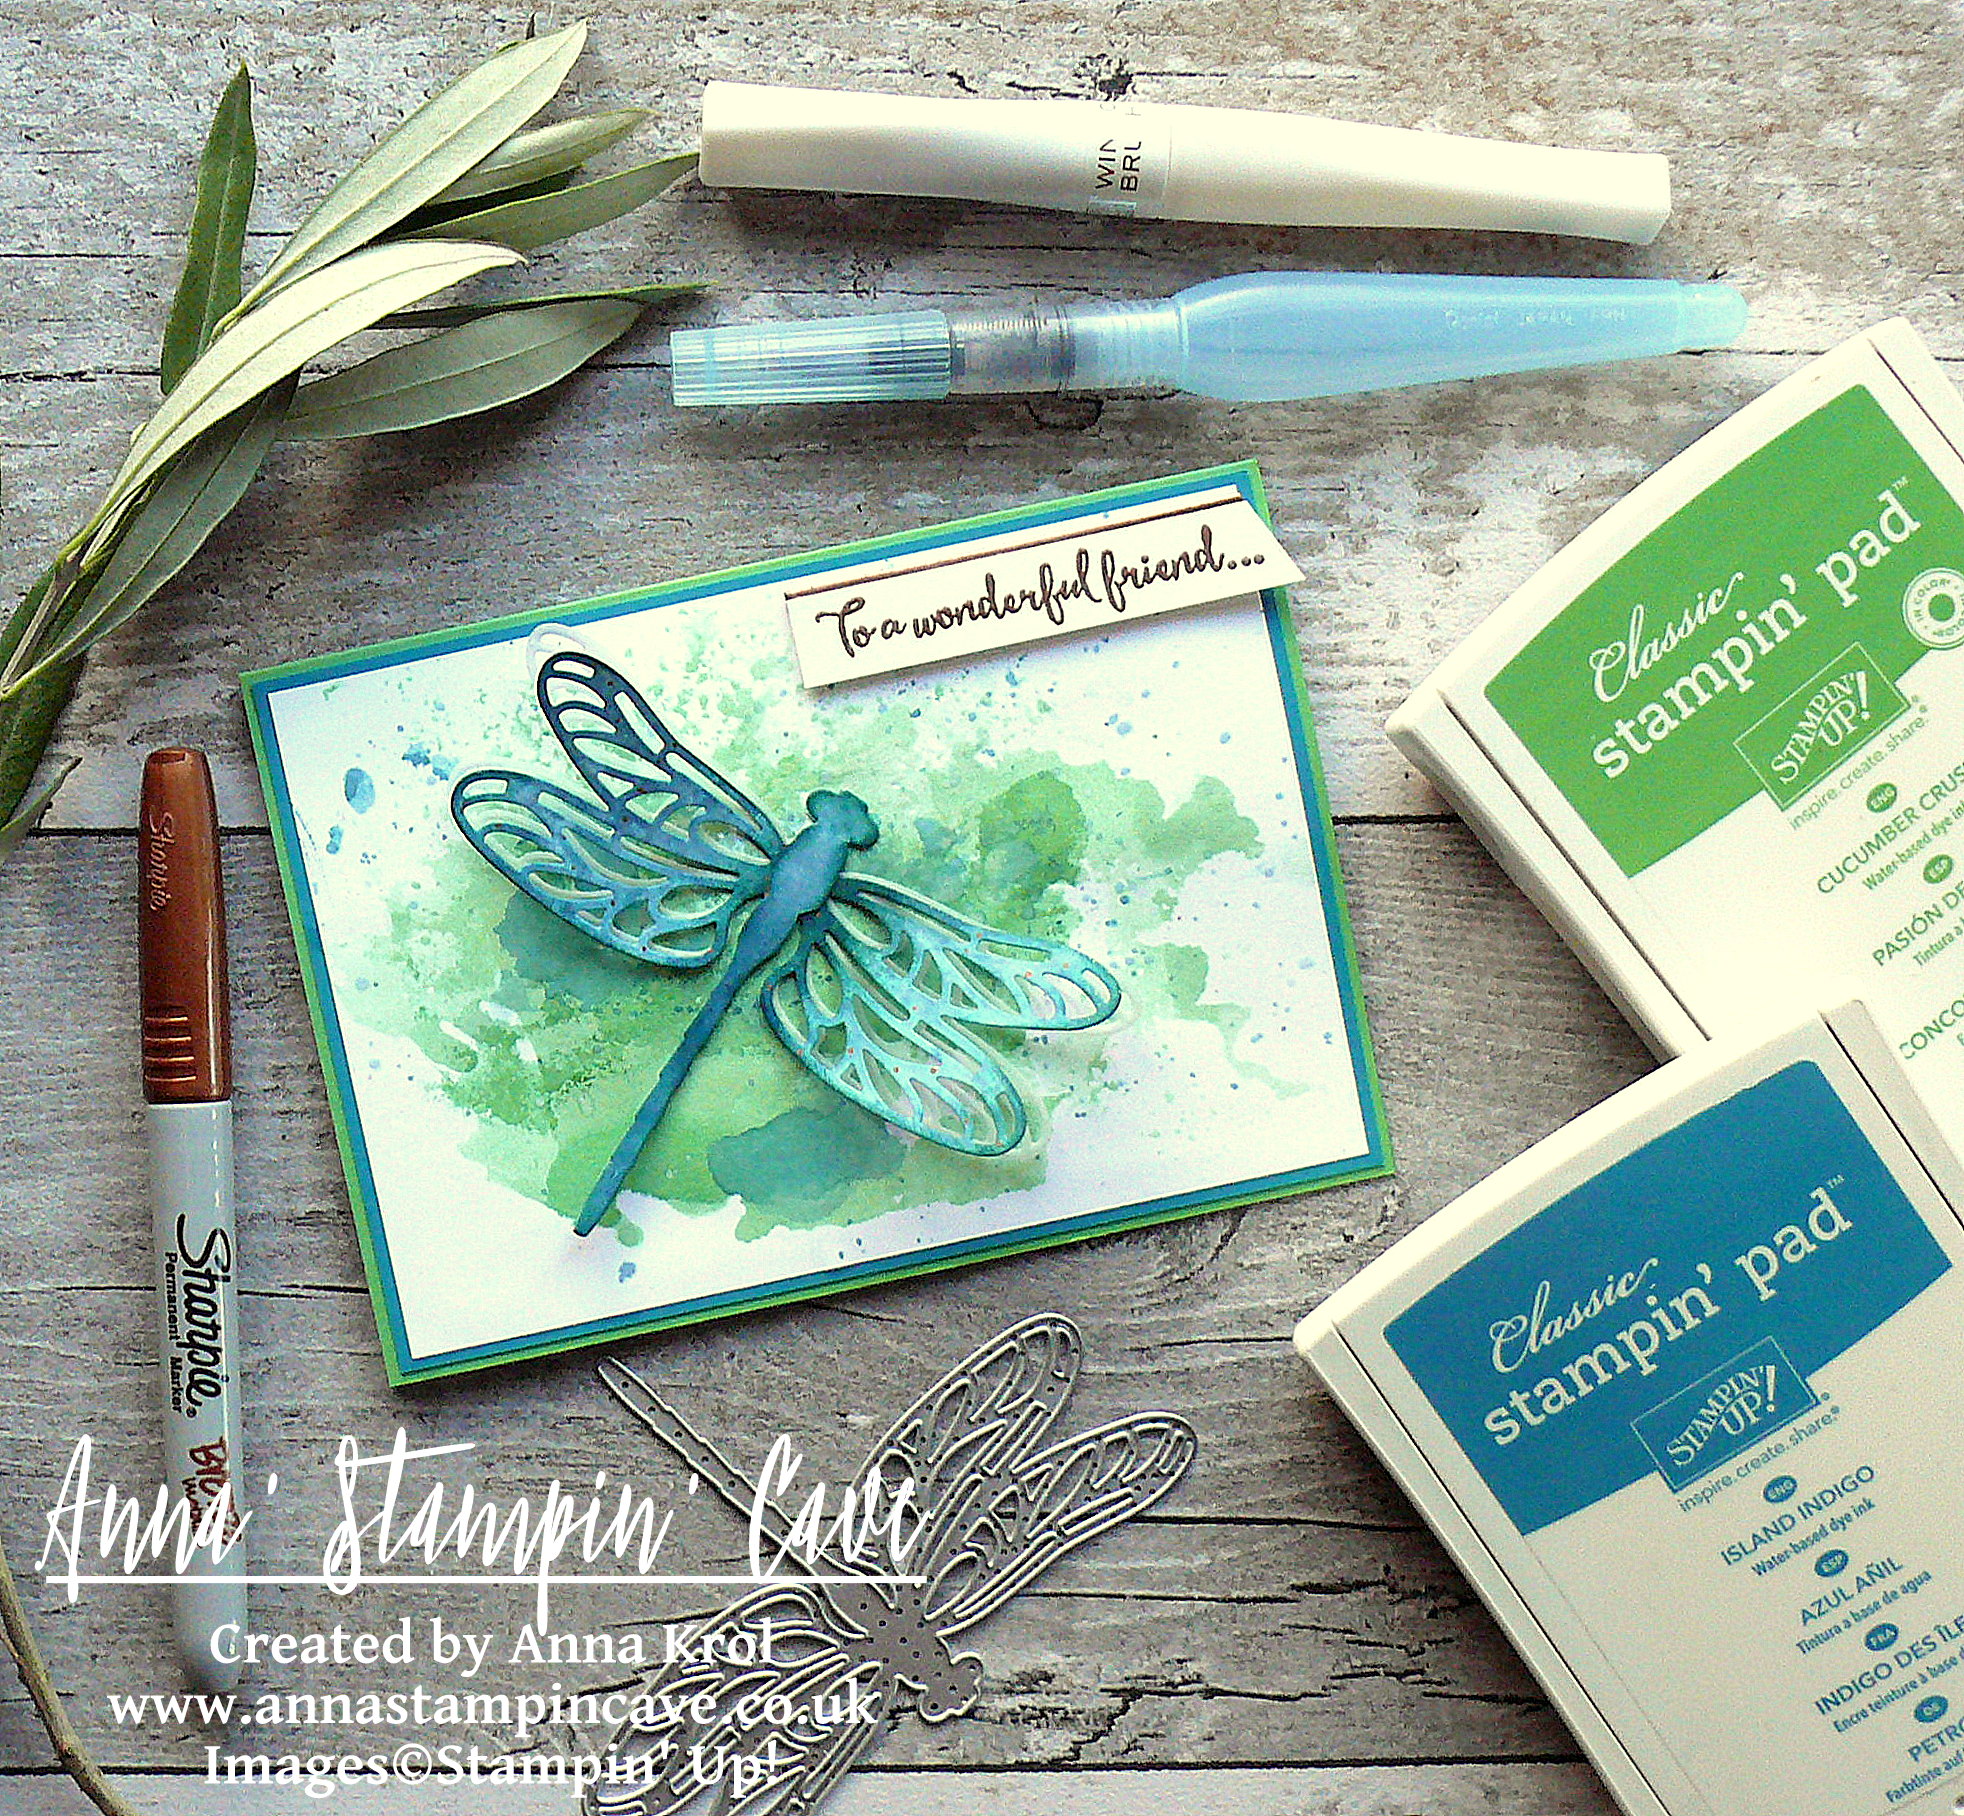
anna-stampin-cave-ink-smooshing-technique-with-dragonfly-dreams-stamp-set-detailed-dragonfly-thinlits-dies

Watercolour Dragonfly card dimensions:

  • Cucumber Crush cardstock: 8-1/4″ x 5-7/8″ scored in half at 4-1/8″ (21 x 14.8 cm scored in half at 10.5 cm)
  • Island Indigo cardstock: 4″x 5-6/8″(10,2 x 14,5 cm)
  • Whisper White cardstock: 3-7/8″ x 5-5/8″ (9.8 x 14.2 cm) and 2-7/8″ x 1/2″(7.4 x 1.3 cm) for a sentiment
  • Scraps of Whisper White, Shimmery White and White Vellum cardstock for die-cutting

First thing first I had to prepare my watercolour panel. And to be honest I risked a bit using regular Whisper White cardstock here.

If you are not confident with water colouring and don’t want to risk, please always use watercolour paper with ink smooshing technique.

I pressed Cucumber Crush ink pad on a craft mat, spritz it with water (not too much) and took a piece of acetate to lift some of this puddle of colour. I smooshed it on my panel and dried it with a heat gun. I repeat this process couple of times, every time drying my panel in-between until I was happy with layers of colour. Next, I switched to Island Indigo but I only added one layer of colour. The last touch was to add few splotches of ink to my panel with help of aqua painter.
anna-stampin-cave-ink-smooshing-technique-with-dragonfly-dreams-stamp-set-detailed-dragonfly-dies

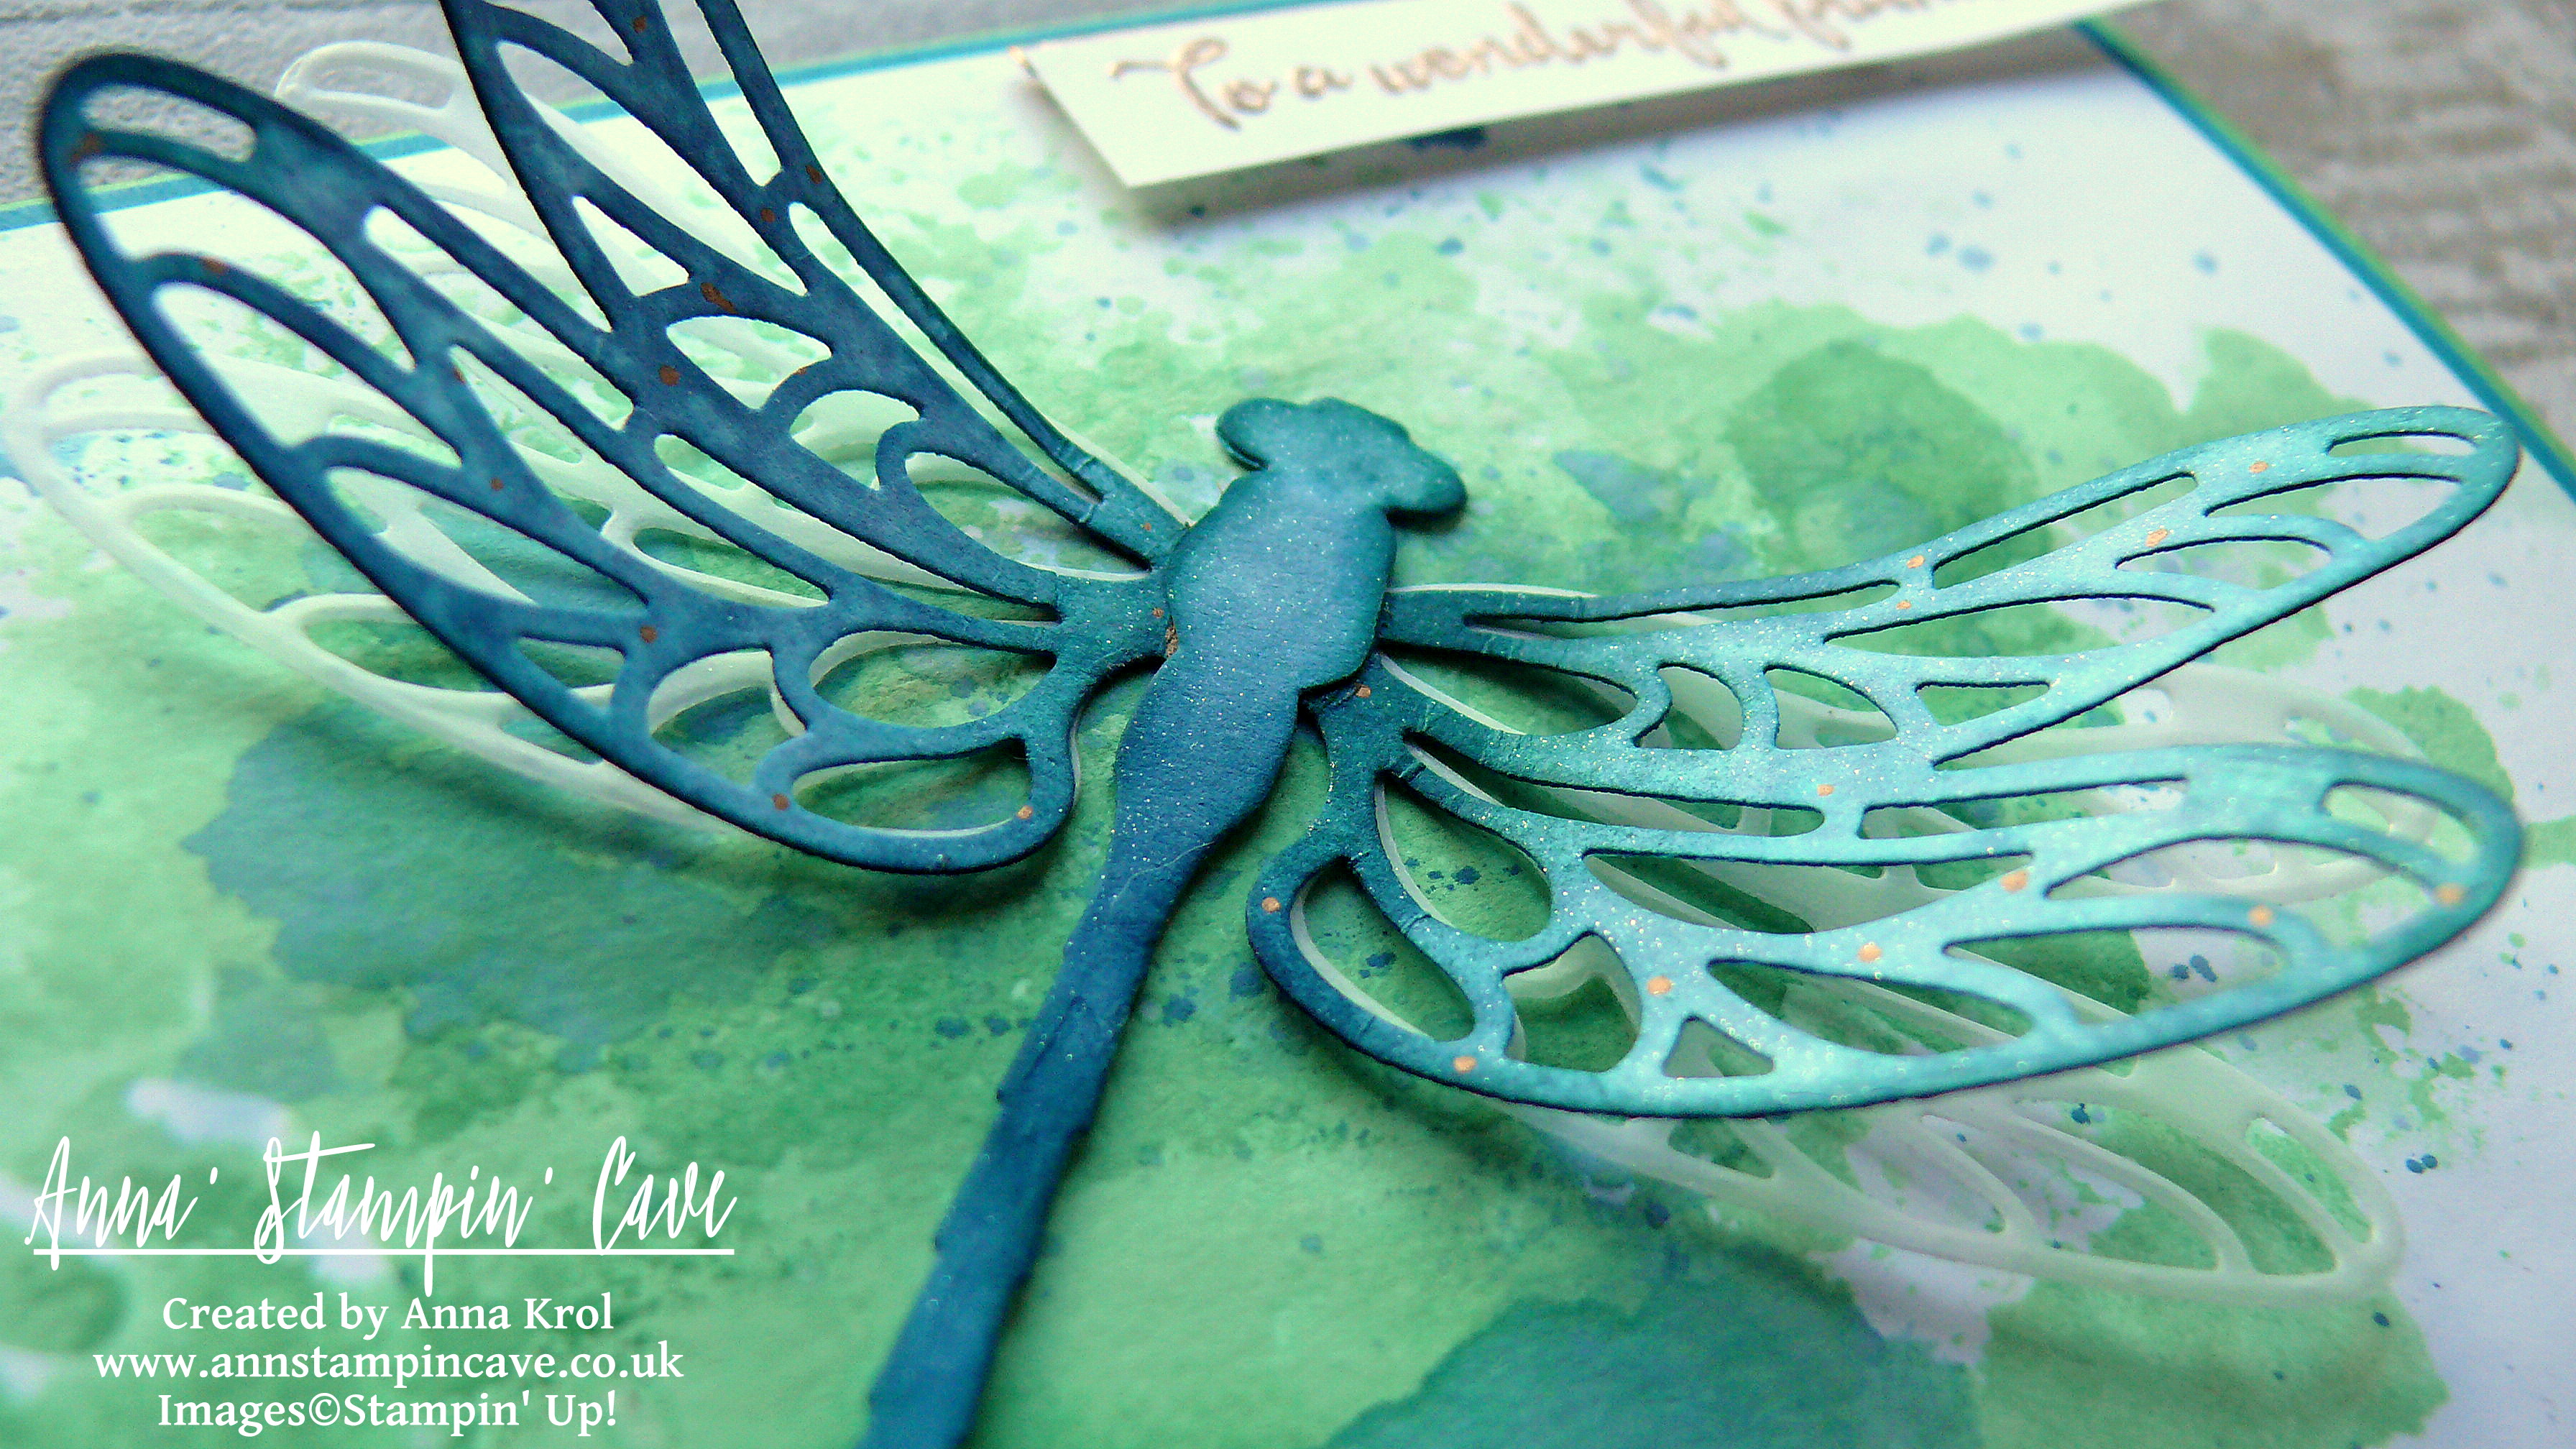
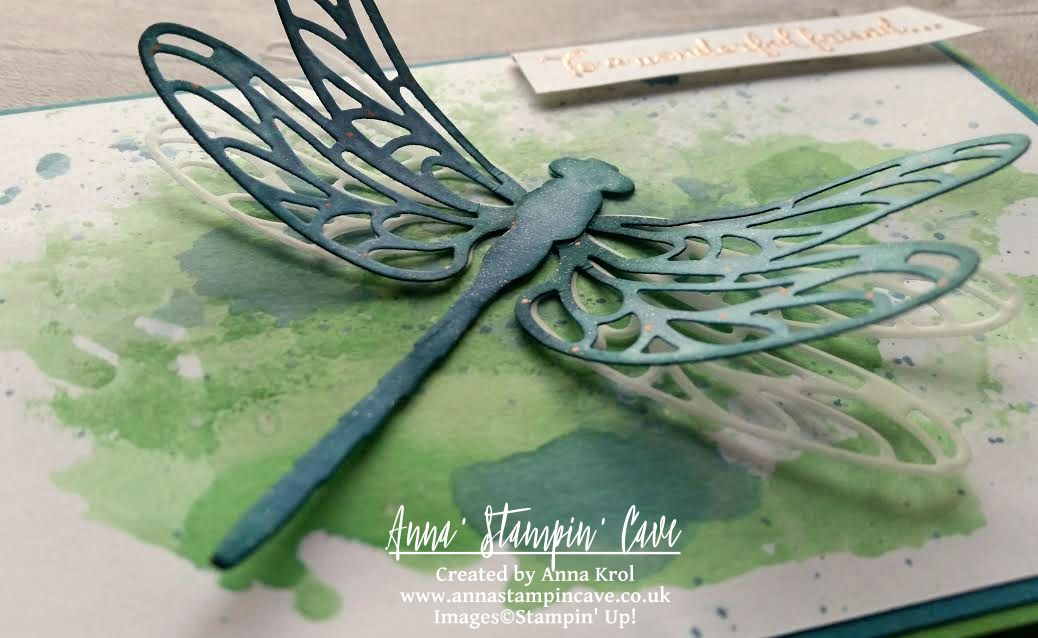
I die cut two dragonflies, one from Whisper White cardstock and one from vellum (without the head) for 3D effect. To colour in cardstock dragonfly I used a very similar technique as previously. I pressed some more of Island Indigo ink on the craft mat, spritz it with water and dabbed the dragonfly straight in the puddle, dried and repeat until I was happy with the colour.

I wanted to add more depth and ‘life’ to my dragonfly, so I sponged the edges of wings and the body with Island Indigo ink. I also added few speckles with bronze metallic Sharpie marker.

While sponging I’ve noticed that the dragonfly was bit ‘flimsy’ (note to myself: if you plan to dab your intricate die-cuts in the puddles of coloured water, use paper with the higher grammage, like watercolour perhaps(!?) lol. So I die-cut just the body of a dragonfly from Shimmery White cardstock, watercolour it, sponged the edges and adhered on top of the dragonfly with liquid adhesive. Next, I adhered the vellum dragonfly underneath, offsetting slightly.
anna-stampin-cave-ink-smooshing-technique-with-dragonfly-dreams-stamp-set-detailed-dragonfly-thinlits

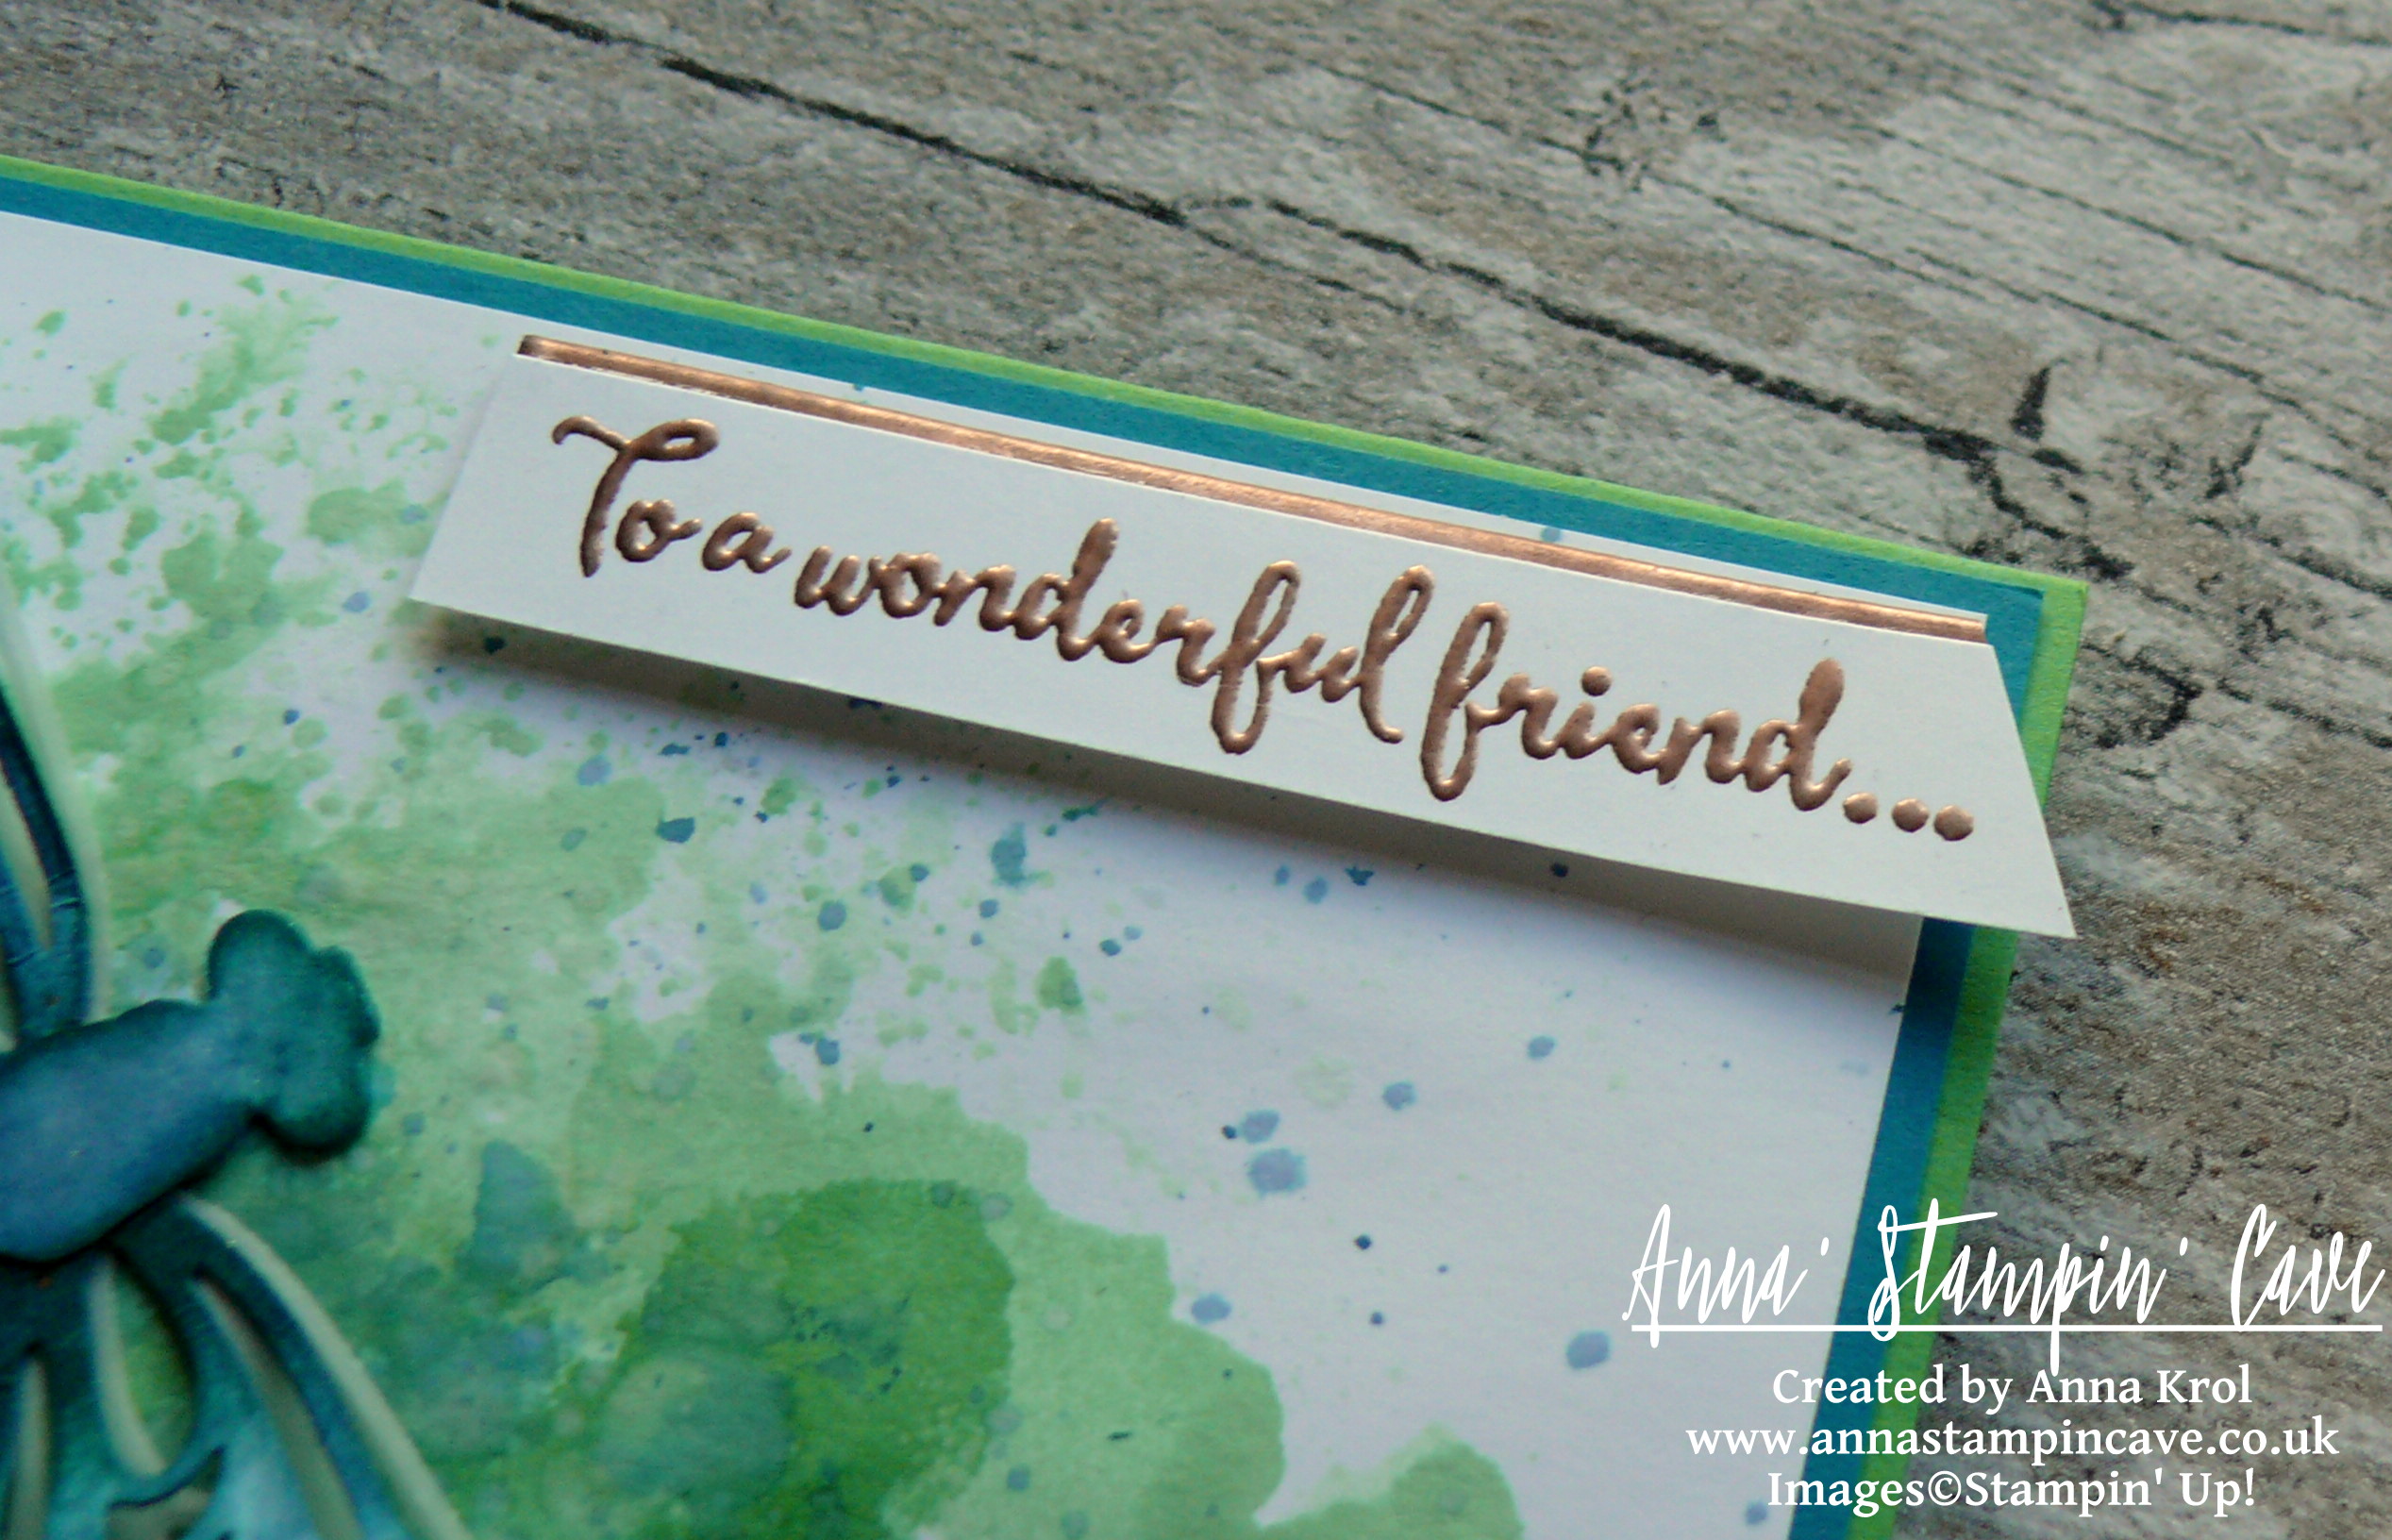
The sentiment I chose comes from the same Dragonfly Dreams stamp set. I stamped it in Versamark on the strip of Whisper White, heat embossed it using Copper Embossing Powder and trimmed it diagonally. The sentiment alone seemed a bit dull so I took a very narrow strip of Whisper White (around 1/8″), dabbed it in Versamark and heat embossed in copper as well. Next, I trimmed it and adhered it to the sentiment, underneath the top edge, so it peeks out slightly.
anna-stampin-cave-ink-smooshing-technique-with-dragonfly-dreams-bundle

To assemble the card I’ve used my favourite Tombow liquid adhesive. I love it because it gives you some wiggle room before it sets. Also, it’s the best for those slightly warped watercolour panels. Next, I’ve added my sentiment in the top right corner using dimensionals. For dragonfly, I’ve used Tombow again. The last touch was to add some extra shimmer to the dragonfly with Clear Wink of Stella Glitter Brush. You can’t go wrong with this stuff right?!

I hope you’ve enjoyed my project and that it will give some extra ideas of how to use this beautiful Dragonfly Dreams Bundle. I would love to hear what you think in comments below. As always, if you wish to purchase any of products I have used, simply click the images below to go directly to my online shop.

Thank you for stopping by and have a blessed day

Dragonfly Dreams Photopolymer Bundle

Dragonfly Dreams Photopolymer Bundle
[144728]
£42.25

Detailed Dragonfly Thinlits Dies

Detailed Dragonfly Thinlits Dies
[142749]
£28.00

Dragonfly Dreams Photopolymer Stamp Set

Dragonfly Dreams Photopolymer Stamp Set
[142924]
£19.00

Cucumber Crush A4 Cardstock

Cucumber Crush A4 Cardstock
[138342]
£7.25

Island Indigo A4 Card Stock

Island Indigo A4 Card Stock
[124390]
£7.25

Whisper White A4 Card Stock

Whisper White A4 Card Stock
[106549]
£8.25

White Vellum A4 Card Stock

White Vellum A4 Card Stock
[106584]
£6.00

Shimmery White A4 Card Stock

Shimmery White A4 Card Stock
[121717]
£7.25

Cucumber Crush Classic Stampin' Pad

Cucumber Crush Classic Stampin’ Pad
[138324]
£6.00

Island Indigo Classic Stampin' Pad

Island Indigo Classic Stampin’ Pad
[126986]
£6.00

Versamark Pad

Versamark Pad
[102283]
£7.75

Embossing Buddy

Embossing Buddy
[103083]
£5.50

Copper Stampin' Emboss Powder

Copper Stampin’ Emboss Powder
[141636]
£4.50

Aqua Painters

Aqua Painters
[103954]
£15.50

Clear Wink Of Stella Glitter Brush

Clear Wink Of Stella Glitter Brush
[141897]
£7.25

Liquid Multipurpose Glue

Liquid Multipurpose Glue
[110755]
£3.75

Stampin' Dimensionals

Stampin’ Dimensionals
[104430]
£3.75

Paper Snips Scissors

Paper Snips Scissors
[103579]
£9.00

Stampin' Trimmer

Stampin’ Trimmer
[129722]
£27.00

Big Shot

Big Shot
[143263]
£99.00

…And The Greatest Of These Is Love – Embossed Impression Technique

Hello and welcome!

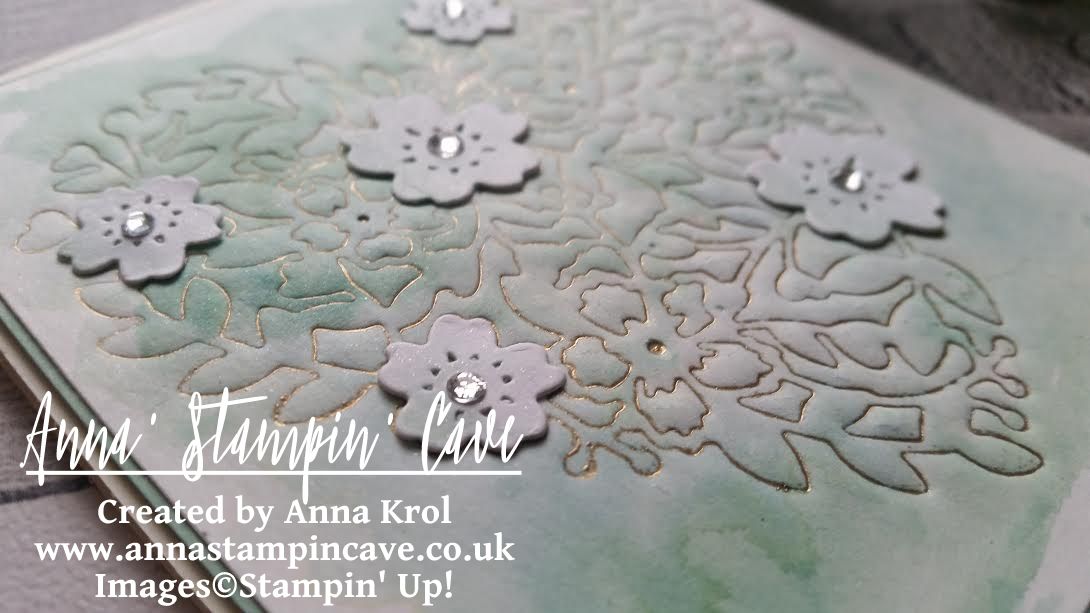
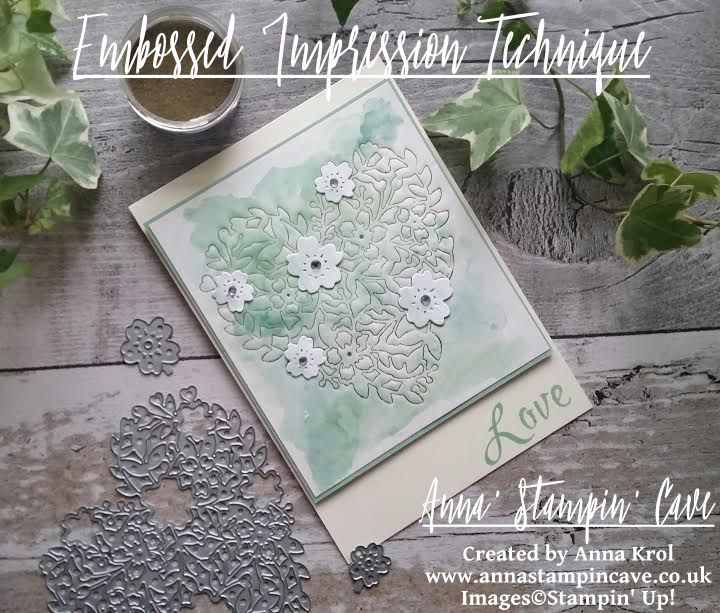
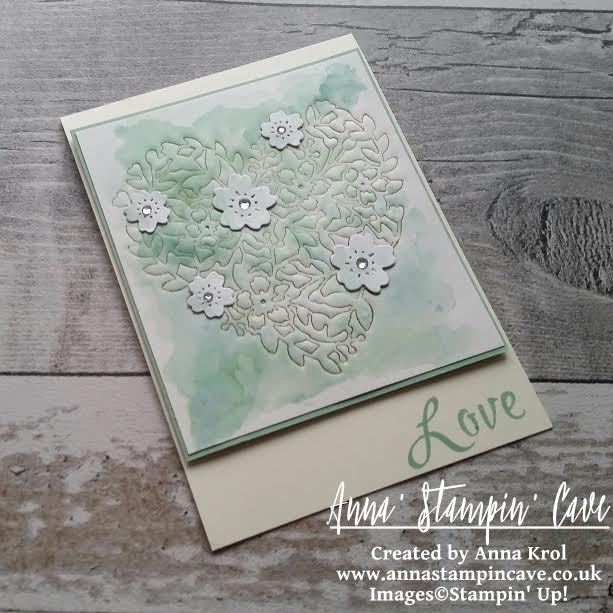
Today, I’ve got for you card using beautiful Bloomin’ Heart Thinlits Dies. I’ve made various cards using this die in the past, but this time I wanted to try something new: an Embossed Impression Technique. This is very easy, yet effective technique. And great way to stretch your dies too.

stampin-up-embossing-stamping-with-bloomin-heart-thinlits-dies

I’ve used Stampin’ Up! White Shimmery cardstock for this technique, as I planned to do a bit of water colouring later on. I prepared my Big Shot sandwich: Big Shot on Tab 1 -> Cutting Plate -> Silicon {embossing) mat -> cardstock (I swiped the cardstock with embossing buddy). Next, I tapped Versamark over the cutting edge of the die very gently, and placed the die, cutting edge down, on my cardstock. Remember, once it’s on the paper don’t move it or you will mess up your image. I then carefully placed the second cutting plate over the top and run it through the big shot.

Because I put Versamark Ink on the die, now I had that ink in all the ‘valleys’ of the impression I just made. So I sprinkled Gold Stampin’ Emboss Powder over it and heat embossed it.

stampin-up-embossing-stamping-with-bloomin-heart-thinlits-dies

I love those tiny gold lines! Next, I made few watercolour washes over my piece, using Mint Macaron ink pad and Pool Party reinker. Once dry, I cut my panel to 3-7/8″x 4-3/8″.

I also die cut five flowers, two large and three small, from Whisper White cardstock (I probably should have used Shimmery White cardstock for them too), and adhered them to my piece with glue dots. I’ve added some soft Mint Macaron watercolour wash to the flowers to add some depth to them

stampin-up-embossing-stamping-with-bloomin-heart-thinlits-dies

My card base is Very Vanilla. I stamped ‘Love’ in Mint Macaron using Brushwork Alphabet stamp set. I adhered my embossed panel with liquid glue to a piece of Mint Macaron mat (4″x 4-1/2″), and add them both to the card base with dimensionals.

To finish off my card I’ve added some shimmer to the flowers with Clear Wink of Stella Glitter Brush and put a rhinestone in each flower centre.

I hope you like my card, and that you give this technique a try.

As always, if you wish to purchase any of the products I have used, simply click the images below to go directly to my online shop.

Thank you for stopping by and have a blessed day

Brushwork Alphabet Photopolymer Stamp Set

Brushwork Alphabet Photopolymer Stamp Set
[141772]
£23.00

Bloomin' Heart Thinlits Dies

Bloomin’ Heart Thinlits Dies
[140621]
£22.00

Very Vanilla A4 Card Stock

Very Vanilla A4 Card Stock
[106550]
£8.25

Shimmery White A4 Card Stock

Shimmery White A4 Card Stock
[121717]
£7.25

Mint Macaron A4 Cardstock

Mint Macaron A4 Cardstock
[138344]
£7.25

Whisper White A4 Card Stock

Whisper White A4 Card Stock
[106549]
£8.25

Mint Macaron Classic Stampin' Pad

Mint Macaron Classic Stampin’ Pad
[138326]
£6.00

Pool Party Classic Stampin' Ink Refill

Pool Party Classic Stampin’ Ink Refill
[122933]
£3.00

Versamark Pad

Versamark Pad
[102283]
£7.75

Embossing Buddy

Embossing Buddy
[103083]
£5.50

Clear Wink Of Stella Glitter Brush

Clear Wink Of Stella Glitter Brush
[141897]
£7.25

Gold Stampin' Emboss Powder

Gold Stampin’ Emboss Powder
[109129]
£4.50

Rhinestone Basic Jewels Embellishments

Rhinestone Basic Jewels Embellishments
[119246]
£4.50

Aqua Painters

Aqua Painters
[103954]
£15.50

Stampin' Dimensionals

Stampin’ Dimensionals
[104430]
£3.75

Liquid Multipurpose Glue

Liquid Multipurpose Glue
[110755]
£3.75

Silicone Craft Sheet

Silicone Craft Sheet
[127853]
£5.50

Heat Tool - Uk Plug

Heat Tool – Uk Plug
[129054]
£27.00

Big Shot

Big Shot
[143263]
£99.00


Simply Sketched Saturday Challenge #12 – Watercolour Birthday Blooms

Anna’ Stampin’ Cave – Watercolour Birthday Blooms

SSSC Header

Thank you for joining us for another Simply Sketched Saturday Challenge!  We’re so excited to be sharing this hop with you. The products used are all available in the current Annual, or seasonal, Stampin’ Up!®  Catalogues*. Simply use the buttons at the bottom of the post to keep hopping!

Today’s sketch was designed by very talented and lovely Louise from Whiteflag Designs, who sadly couldn’t take a part in the challenge today. But we hope she’ll be back with us soon.

SSSC 12

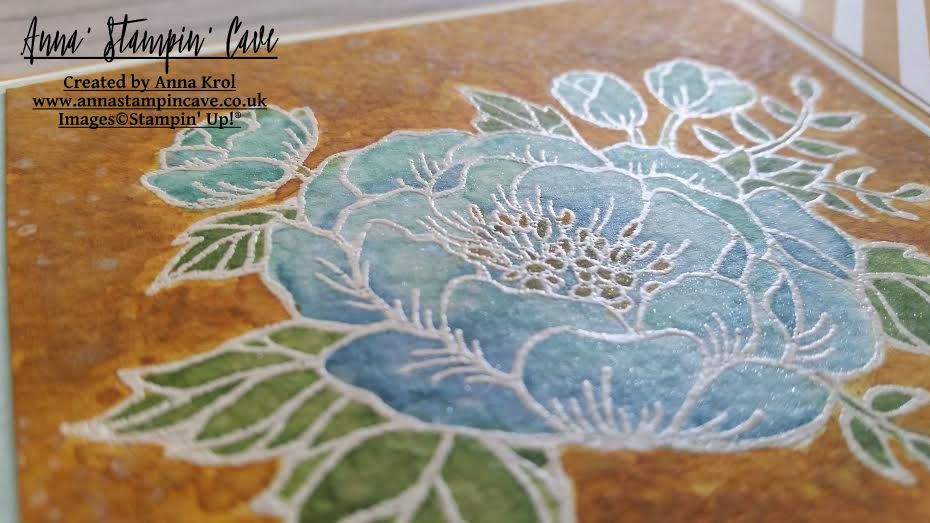
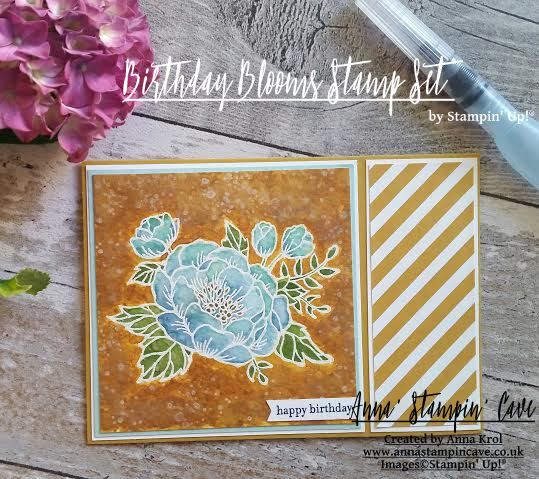
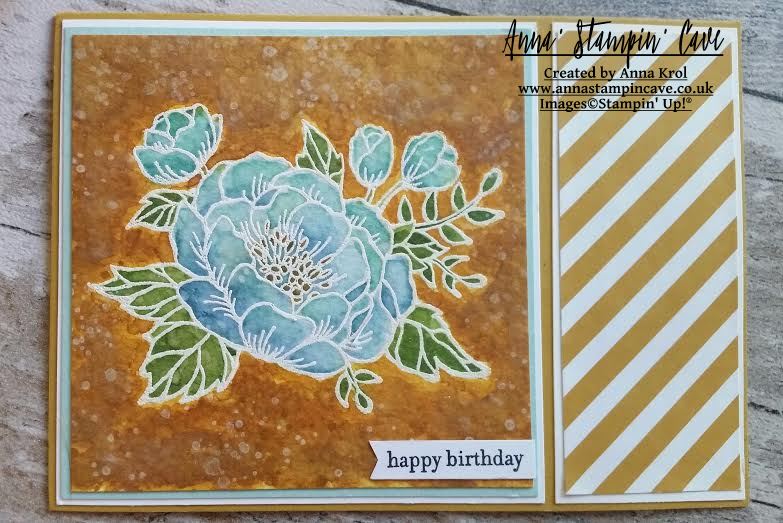
For today’s card I’ve used Birthday Blooms stamp set but in a rather unexpected colour scheme. Since I can remember I always loved blue and yellow colour combination. Firstly, these were the colours of my town’s sports club Avia Świdnik. These were also the colours of my favourite radio station RMF FM, back when I was a teenager. And it’s not surprising that, when I first moved out from my mum’s, I repainted all cabinets in my new kitchen yellow and blue. Even a fridge, that’s how much I loved these two together 🙂 But enough of my babbling, here’s the card I’ve made:

Stampin' Up Birthday Blooms

I slightly alternated the sketch: I created landscape fold card instead of portrait one. I also decided to mirror the image, so the largest ‘panel’ is on the right side of the focal point. For the base, I’ve used beautiful but sadly underrated Delightful Dijon. I truly love its deep, earthy shade. I added two panels of Whisper White to the base: a square that measures 4″x 4″, and a strip that measures 4″x 1-5/8″. For next panels, I’ve used a square piece of Pool Party card stock and a piece of a striped pattern paper from Designer Series Paper Stack in Delightful Dijon. And these are accordingly 1/8″ smaller than Whisper White pieces.

Stampin Up Birthday Blooms

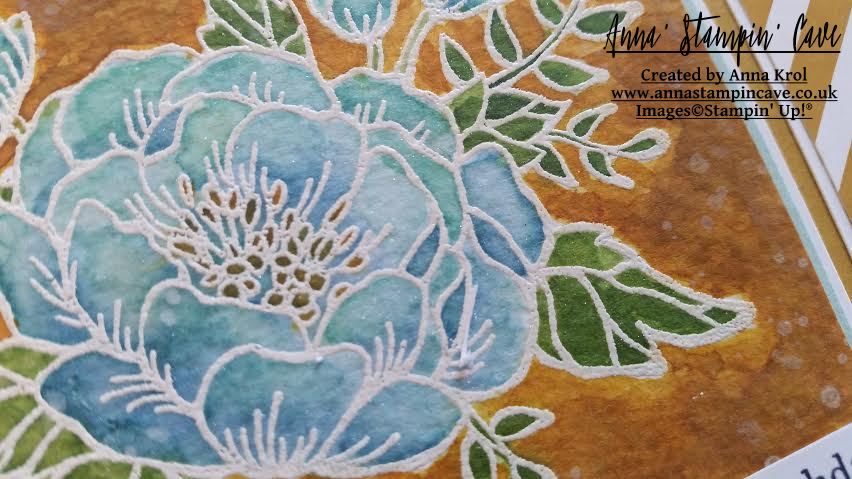
Now for the watercolour. I stamped the flower on a piece of watercolour paper using Versamark, and heat embossed it in white. Using aqua painter, I added water to the petals first and started adding the colour. For the first layer of colour, I’ve used Pool Party. I started really light and added more colour along the way. Next, to add more definition to the flower, I added some shading with Marina Mist. For the leaves, I’ve used a combination of Pear Pizzazz and Wild Wasabi. And again I started light and built up the colour.

Stampin' Up! Birthday Blooms

When I was happy with the flower it was time to create the background. I added water to my watercolour piece. I had to be really careful to not let the colours from the flower bleed into the background. I’ve used same technique like with the petals: I started with a light wash of Delightful Dijon and I kept adding more colour along the way until I was happy with the results. Next, I’ve used aqua painter to “flick” few droplets of water to the surface of the panel. I think will never get tired of seeing how ink reacts with water and create interesting organic texture. To jazz it up a little more I used Gorgeous Grunge stamp set to stamp some splashes in Delightful Dijon first, followed by Whisper White Craft Ink. When the panel was completely dry I adhered it to my card base. I kept the sentiment really simple: I stamped Happy Birthday from Teeny Tiny Sentiments in Basic Black on a strip of Whisper White and glued it to the card using liquid glue.

Birthday Blooms & Wink of Stella

To finish off my card I decided to add Delightful Dijon to the centre of the flower with a blender pen, as I don’t own the markers. And the very last touch was to add Clear Wink Of Stella Glitter Brush Pen to the petals and leaves.

I’m so chuffed how this card turned out: beautiful bold colours and textures. I just love how these blue flowers stand out from their deep yellow background. I really hope you like my project too.

Now, be sure to hop along and see more inspiring projects. Your next stop is Karen’s blog  go and see what she has made for you.

Thank you for stopping by and have a blessed day

SSSC Previous   SSSC Next Blog

Pinkies Annual Catalogue Blog Hop – Tuscan Vineyard

blog hop logo

Thank you for joining us on another Pinkies Blog Hop! We’re showcasing lots of gorgeous projects using products from the new Stampin’ Up!® Annual Catalogue. Simply use the buttons at the end of each post to keep hopping!

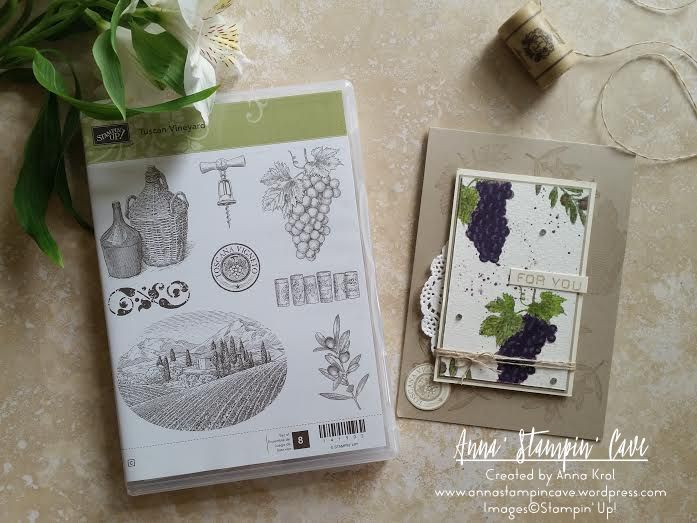
Tuscan Vineyard Stamp Set

When Chris, my husband, saw Stampin’ Up! Tuscan Vineyard Stamp Set he said: “we have to have it” ;). In our home, we love to have a glass of good wine on special occasion, or when friends come over. We also make our own wine from the fruits of our garden. Chris (my husband) is very passionate about it. When he was young he’s spent some time on a French vineyard, and he fell in love with the art of making wine.

Tuscan Vineyard for you card

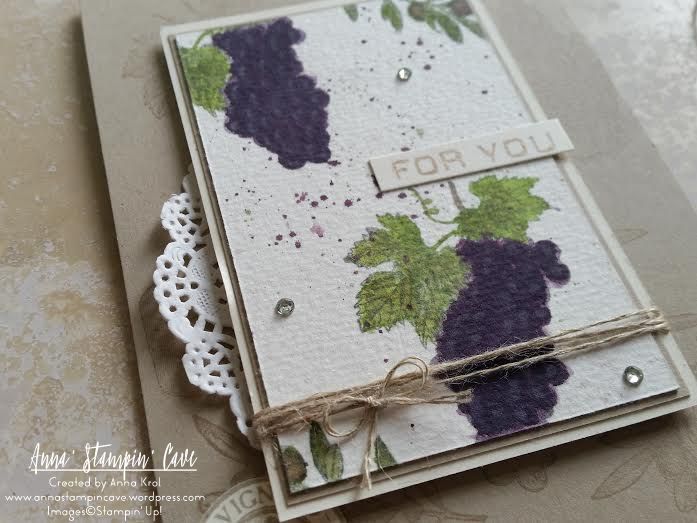
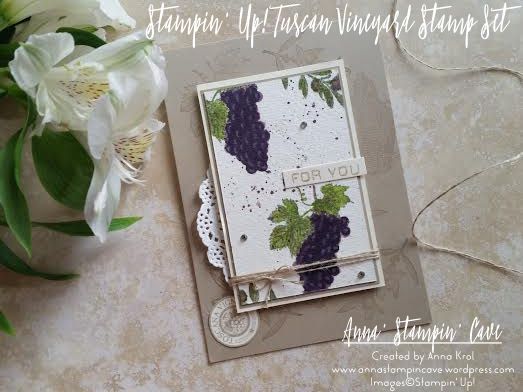
I think this set is perfect for collages, but I decided to use my favourite technique – watercolour. First, I randomly stamped the base of my card using various images from the stamp set. I used Crumb Cake cardstock and ink pad for tone on tone look. Next, I took a piece of watercolour paper and I stamped bunches of grapes and olive branches using Basic Grey Archival ink and water coloured them with an aqua painter. For fine lines, I’ve used Blender Pens.

Tuscan Vineyard for you card - close up

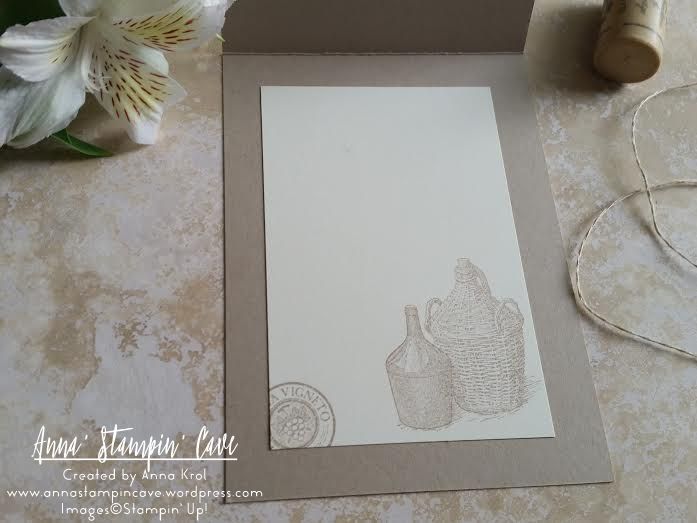
When I was happy with the results I made some random splotches with Perfect Plum and Wild Wasabi. To assemble my card I backed my watercolour panel with a piece of Crumb Cake and Very Vanilla. I wrap linen thread around the panel, added a piece of new doily underneath, and adhere it to the card base using dimensionals. I stamped round image from the same set, that reads Toscana Vigneto on a piece of Very Vanilla and tucked it underneath the panel. Few rhinestones, simple sentiment, and my card was done. I also stamped inside of the card.

Tuscan Vineyard - inside of the card

I truly hope you enjoyed coming to my blog today and see my card. As always, if you wish to purchase any of the products I have used, simply click the images below to go directly to my online shop.

Now, be sure to hop along and see more inspiring projects. Your next stop is lovely Kim  go and see what she has made using the new products.

next

previous

Thank you for stopping by and have a blessed day! Product List

Aqua Painters

£15.50

Blender Pens

£10.75

Linen Thread

£4.25

Something Old, Something New…Kind Koala Birthday Card

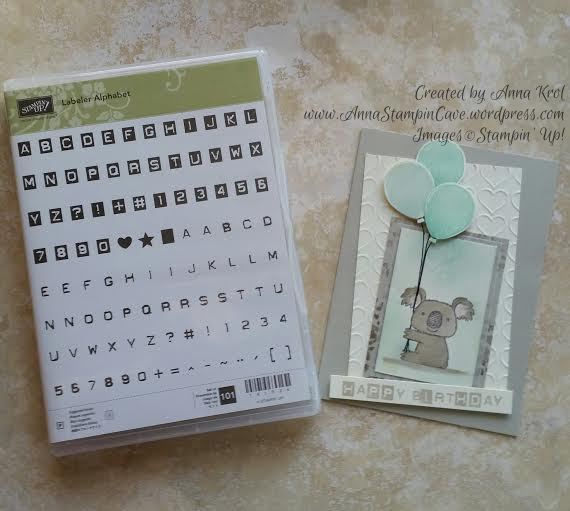
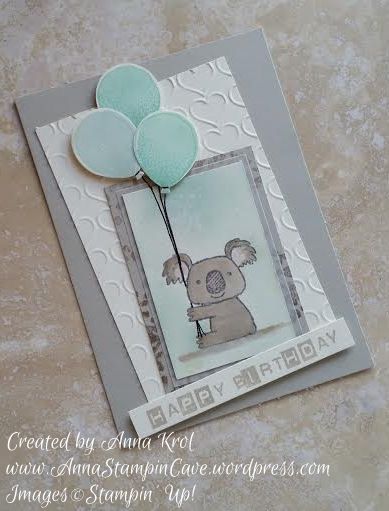
Hello, everyone! Something old, something new…Today I’ve got for you really adorable birthday card using sadly retiring Kind Koala stamp, and also a sneak peek at new Labeler Alphabet stamp set.


Kind koala

Isn’t this little koala cutest ever!? The base of my card is standard, top folded A6 in Sahara Sand. For the background, I’ve used Very Vanilla and dry embossed it with Happy Heart embossing folder.

Because I wanted this card to be a birthday card I used washi tape to cover the flower and a sentiment on my stamp before I inked it up in Basic Grey Archival Ink. Next, I stamped my cute koala on a piece of Very Vanilla. Just remember to take off the washi tape first or you will have a disaster. Guess how I know lol I also stamped him on a scrap of paper to create a mask I will need later.

Kind koala 4

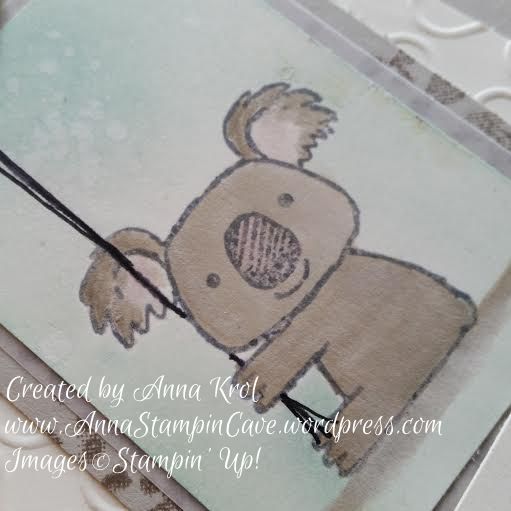
I watercolour my little fella in Sahara Sand and added some shadow underneath him. I also added a touch of Blushing Bride to his nose and inside of his ears. When I was happy with the results I masked my koala and sponged the background with Soft Sky and Pool Party. Then I used the aqua painter to add few droplets of water to the background and took off a little bit of the colour.

Kind koala 2

Next, I matted my koala panel with a piece of vellum and a slightly bigger piece of Sahara Sand. But to add some more interest to this panel I stamped it with Tip Top Taupe using the foliage stamp from Sheltering Tree. I assembled all my panels.Now was time for balloons!

Kind koala 5

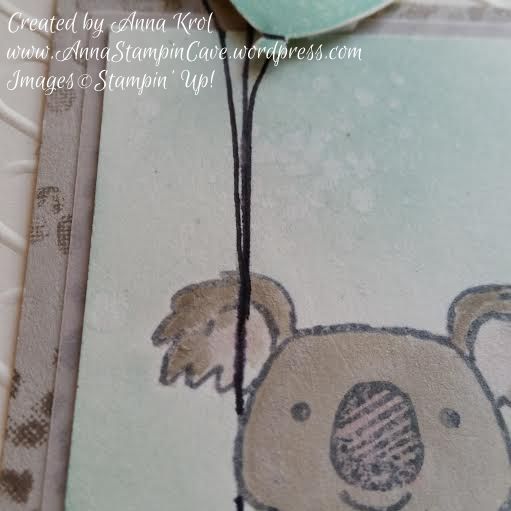
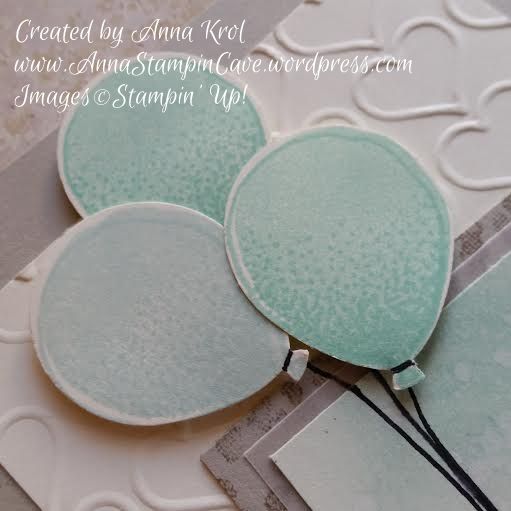
I stamped three smaller balloons from Balloon Celebration, two in Pool Party and one in Soft Sky, punch them with Balloon Bouquet punch and arrange them on the card using dimensionals. I also hand-drew balloon strings with Project Life pen (and yes, I know, I probably should have used a lighter colour, maybe Basic Grey or Smoky Slate marker) so it looks like koala is holding them in his paw.

kind koala 3

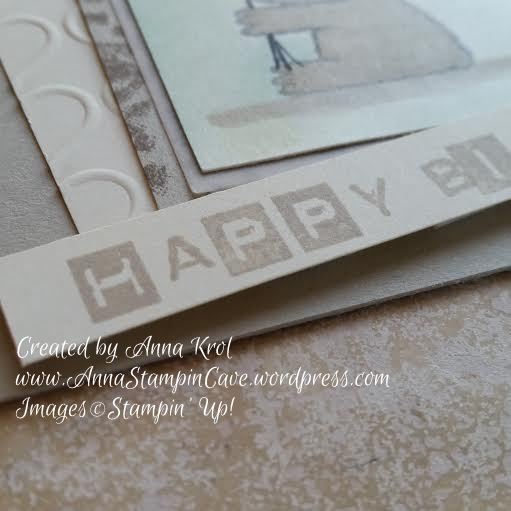
The card was busy enough so I kept the sentiment simple. I cut a strip of Very Vanilla and stamped my sentiment in Sahara Sand, using Labeler Alphabet stamp set. To keep it fun I mixed both types of letters and add it at wonky angle to my card.

Kind koala 6

Dimensions:

Very Vanilla:

  • 3-1/8 x 4-6/8″
  •  2 x 3-2/8″
  • 1/2 x 3-5/8″

Sahara Sand:

  • 2-2/8 x 3-4/8″

Vellum:

  • 2-1/8 x 3-3/8″

I’m adding my card to

Do you like my little card? I truly hope you do. Please let me know in the comments below.

Thank you for stopping by and have a blessed day,