Simply Sketched Saturday Challenge #16 – I’m Here For You

Anna’ Stampin’ Cave – Simply Sketched Saturday Challenge #16 – I’m Here For You

SSSC Header

Thank you for joining us for another Simply Sketched Saturday Challenge!  We are so excited to be sharing this hop with you. The products used are all available in the current Annual, or seasonal, Stampin’ Up!®  Catalogues*. Simply use the buttons at the bottom of the post to keep hopping!

Welcome to our 16th sketch challenge blog hop! Today’s sketch has been designed by Amanda Charlesworth.

sssc16

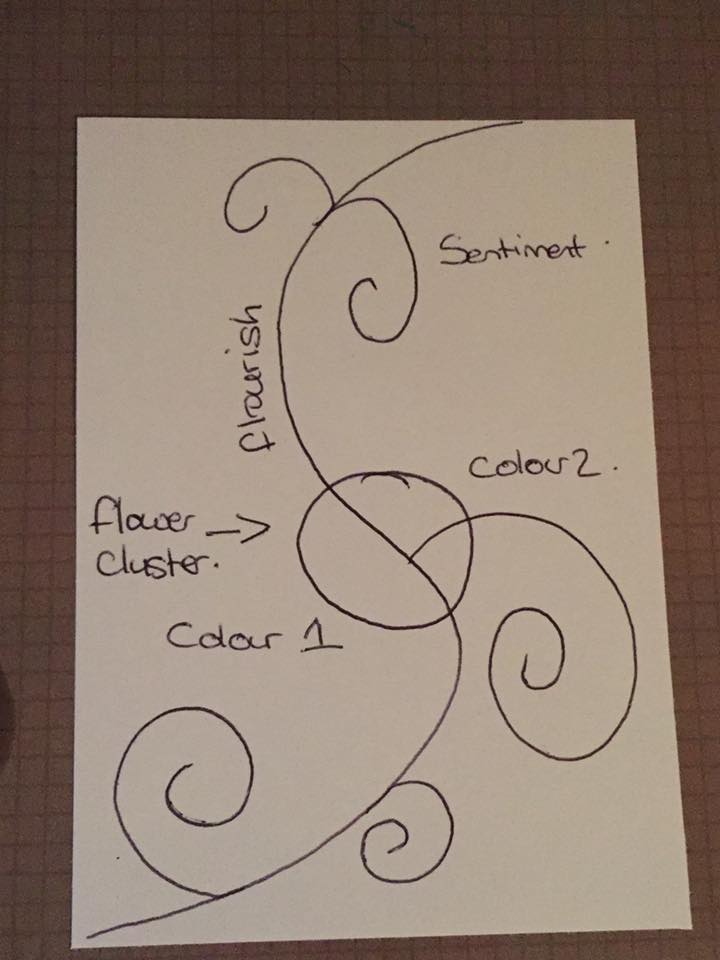
For a long time, I couldn’t decide if I wanted to create a 3D project or a card for this sketch. But because I definitely feel more confident as a card maker, I saved myself some stress and decided to make a card.

stampin-up-swirly-bird-photopolymer-bundle-monochromatic-im-here-for-you-card

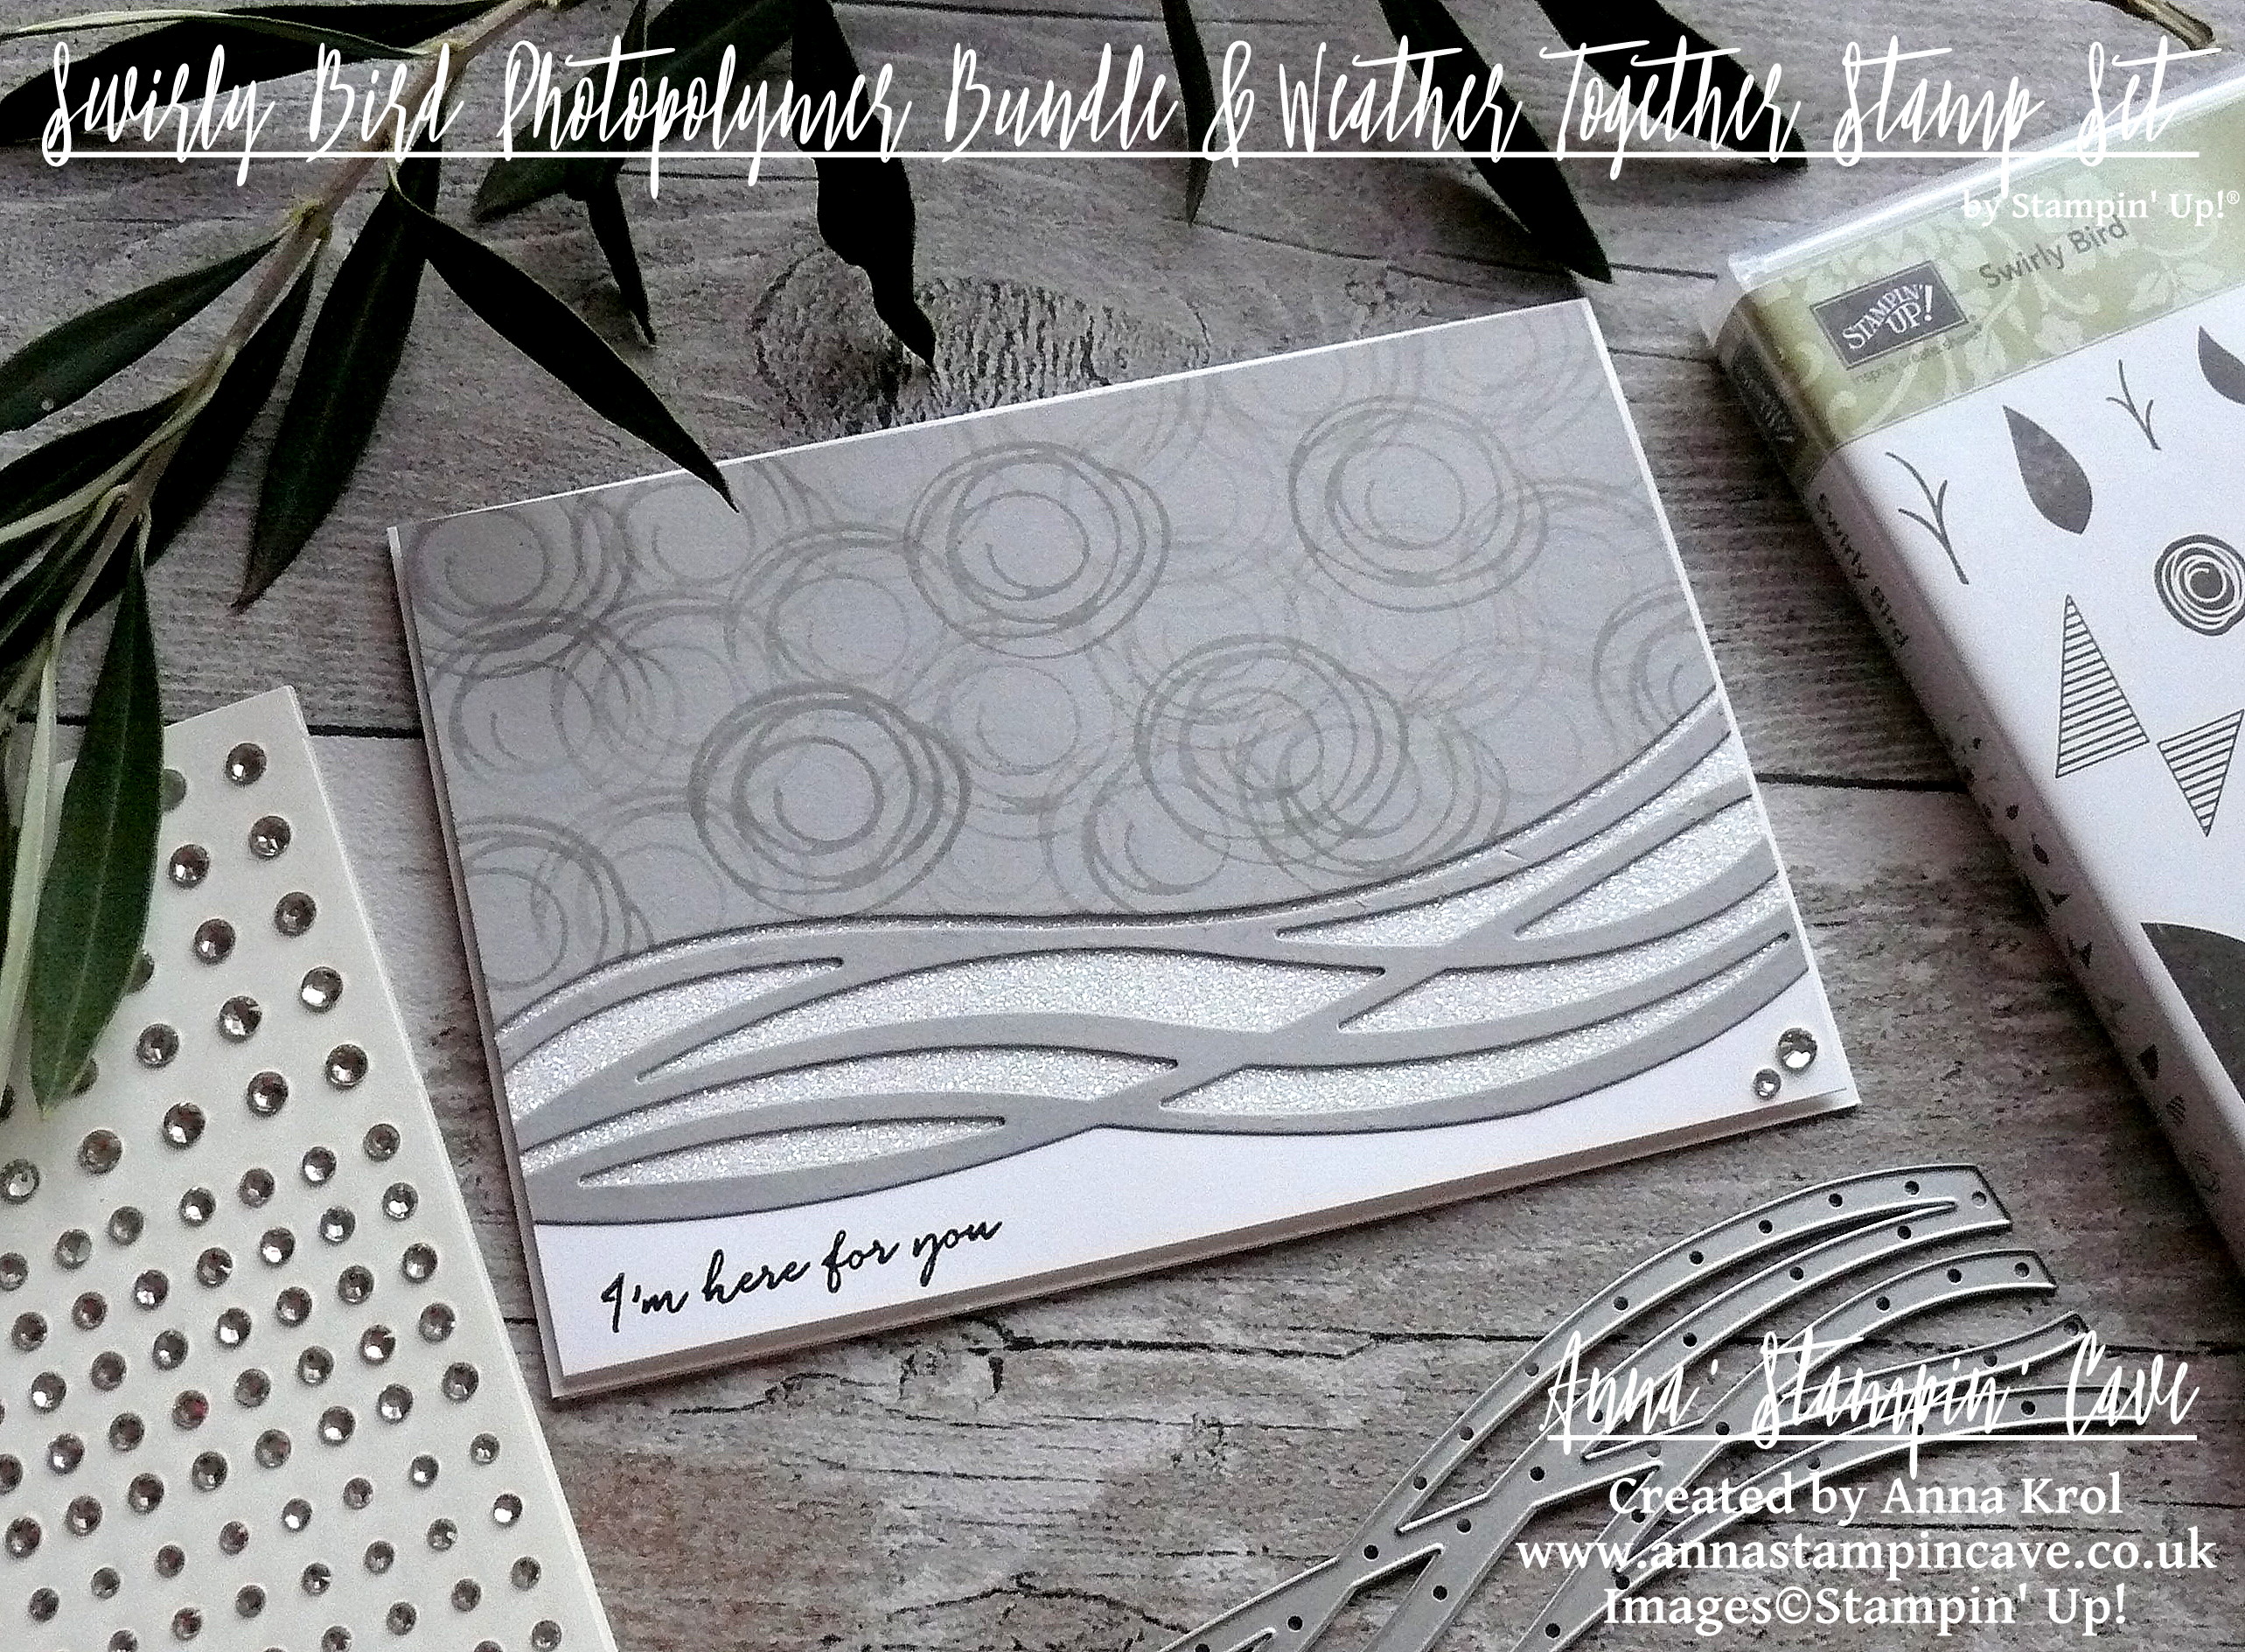
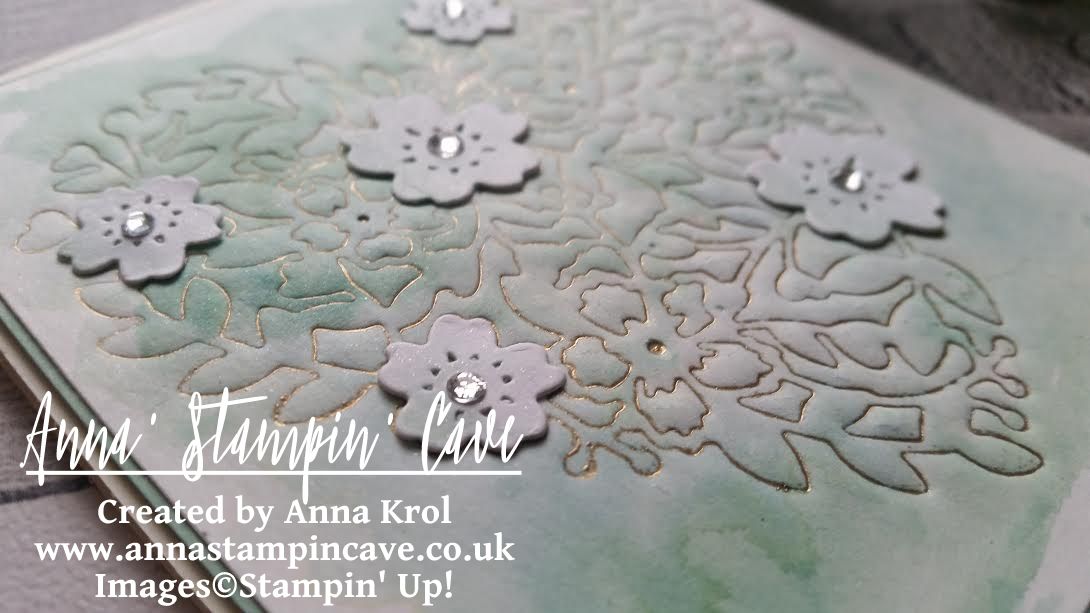
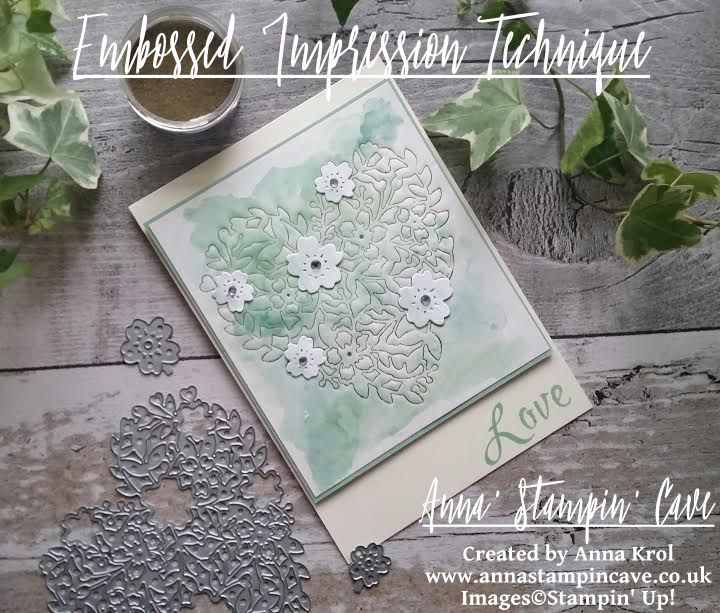
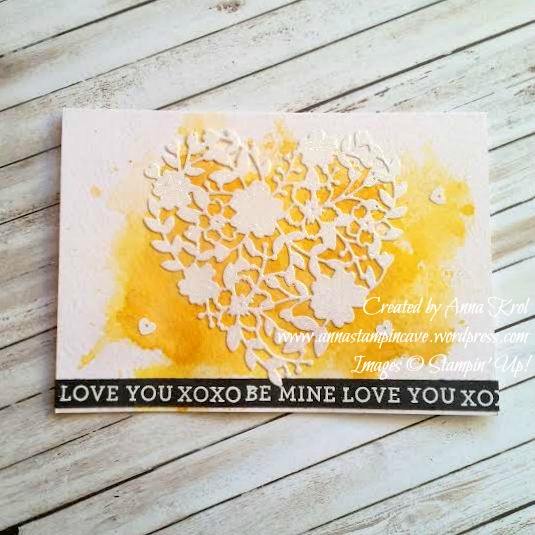
I altered the sketch a little bit and added my own twist to it. The base of my card is Whisper White Thick A4 cardstock that measures 8-1/4″x 5-7/8″, and folded in half at 4-1/8″. Next, I cut two panels: one from regular Whisper White and one Smoky Slate. Both measured 4″x 5-6/8″. I took the Smoky Slate panel and using a multi-wave die from Swirly Scribbles Thinlits Dies, I die cut one piece of ‘waves’.

Savvy Tip: Save the bottom scrap piece for some masking later on.

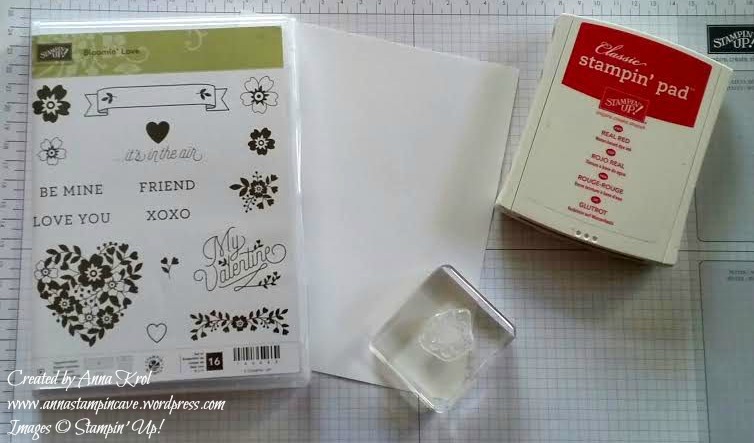
I took scribble circle stamp from Swirly Bird Stamp Set and stamp it repeatedly in Smoky Slate over the Smoky Slate panel, overlapping and stamping off until the whole piece was covered.

stampin-up-swirly-bird-photopolymer-bundle-monochromatic-card

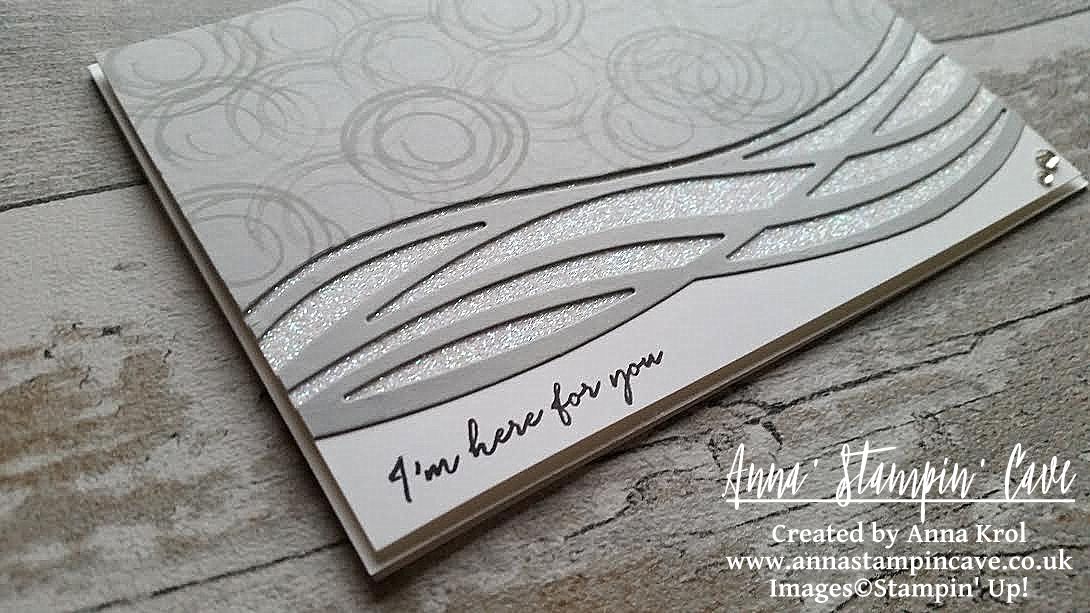
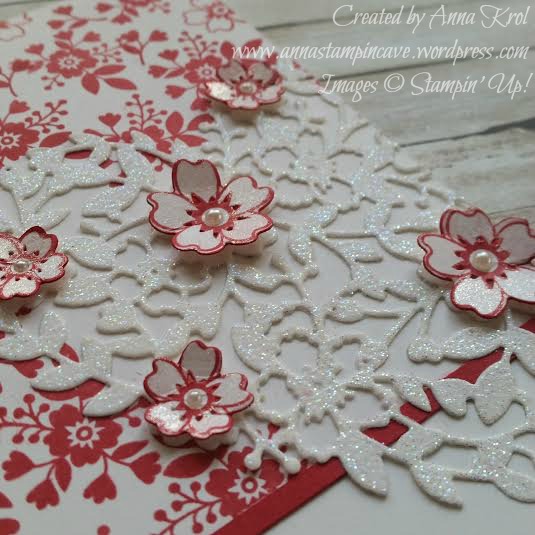
Now I took Whisper White panel and that Smoky Slate scrap piece I saved earlier to create glimmer bottom layer for my wavy die-cut. I lined up the straight edge of my scrap with a bottom edge of Whisper White and squished Versamark pad over the bottom piece of that Whisper White panel. I didn’t want to cover entire panel, only the part that will be peaking through the ‘wavy’ piece. I sprinkled Heat & Stick Powder over it and heat embossed until melted. Next, I added Dazzling Diamond Glitter over it and heat embossed again to secure glitter in place. But why I used that leftover scrap of Smoky Slate, you may wonder? I’ve used it to make sure the very bottom of my WW panel won’t be covered in glitter, so I had a nice spot for my sentiment.

stampin-up-swirly-bird-photopolymer-bundle-monochromatic-card

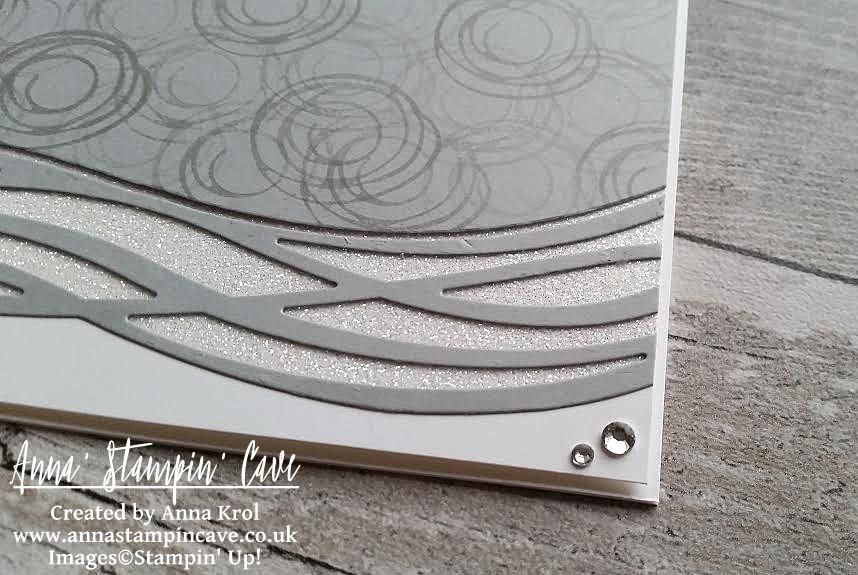
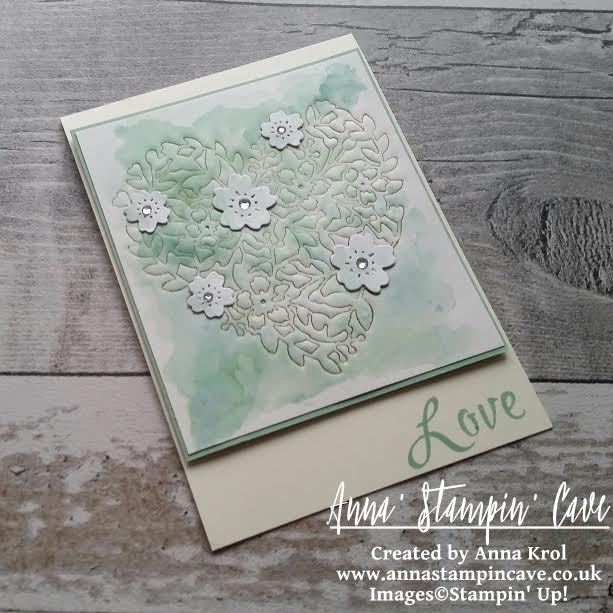
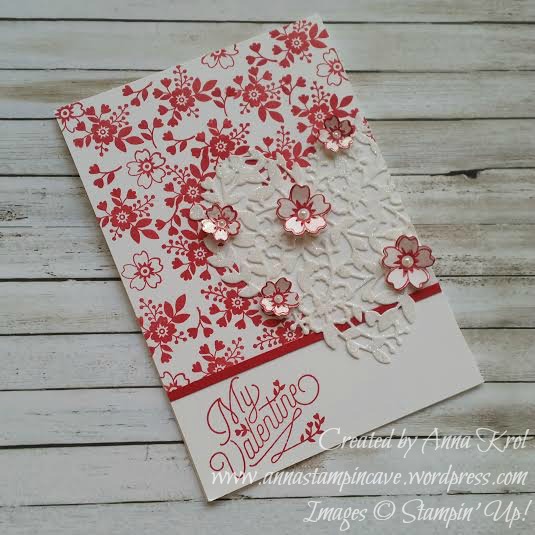
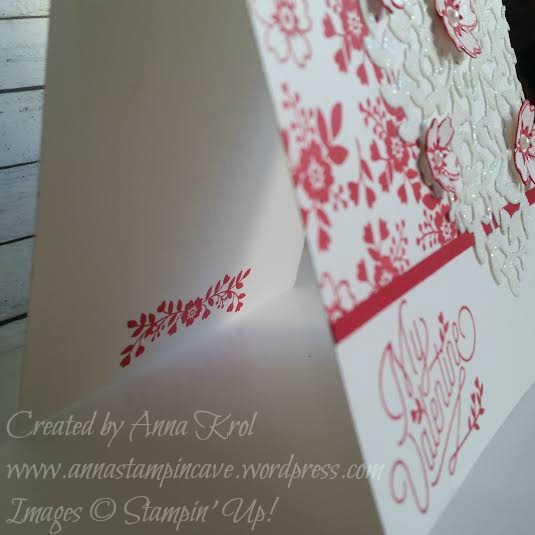
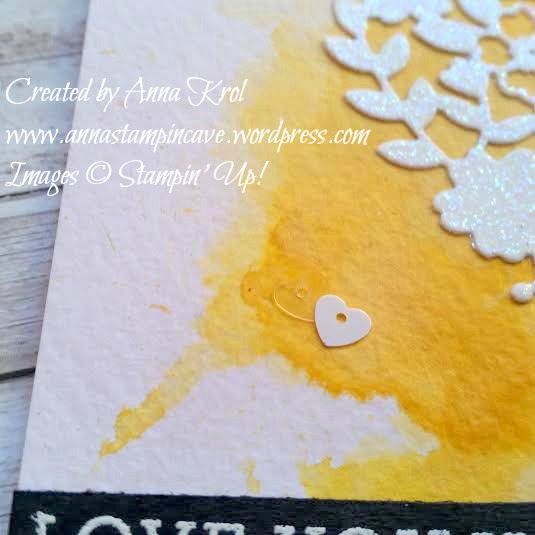
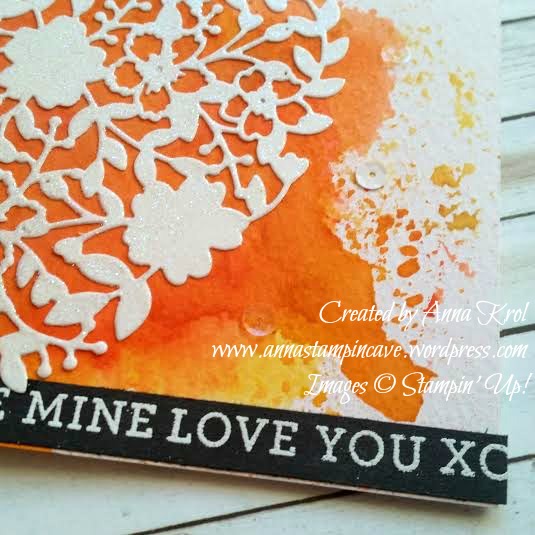
I adhered Smoky Slate panel and ‘waves’ to the Whisper White panel. To finish off my card, I took a beautiful ‘I’m here for you’ sentiment from Weather Together Stamp Set and stamped it in Basic Black at the bottom left corner of my panel. I also added a couple of rhinestones at bottom right corner for a good measure. I’ve mounted the whole piece to the card base using dimensionals.

stampin-up-swirly-bird-photopolymer-bundle-monochromatic-card

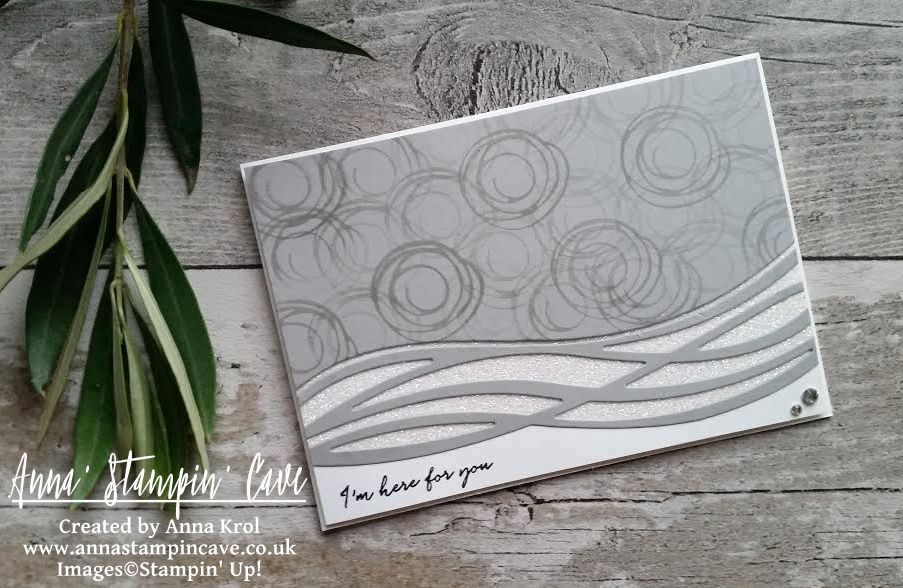
I really like how this card turned out. Clean and simple. I hope you like my take on the sketch too.

As always, if you wish to purchase any of the products I have used, simply click the images below to go directly to my online shop.

Now, be sure to hop along and see more inspiring projects. Your next stop is lovely Jillian.

Thank you for stopping by and have a blessed day,

SSSC Previous   SSSC Next Blog

Swirly Bird Photopolymer Bundle

Swirly Bird Photopolymer Bundle
[142353]
£42.25

Swirly Scribbles Thinlits Dies

Swirly Scribbles Thinlits Dies
[141497]
£24.00

Swirly Bird Photopolymer Stamp Set

Swirly Bird Photopolymer Stamp Set
[141749]
£23.00

Weather Together Photopolymer Stamp Set

Weather Together Photopolymer Stamp Set
[141543]
£19.00

Whisper White A4 Thick Cardstock

Whisper White A4 Thick Cardstock
[140490]
£6.50

Whisper White A4 Card Stock

Whisper White A4 Card Stock
[106549]
£8.25

Card Stock A4 Smoky Slate

Card Stock A4 Smoky Slate
[131291]
£7.25

Smoky Slate Classic Stampin' Pad

Smoky Slate Classic Stampin’ Pad
[131179]
£6.00

Basic Black Archival Stampin’ Pad

Basic Black Archival Stampin’ Pad
[140931]
£6.50

Versamark Pad

Versamark Pad
[102283]
£7.75

Heat & Stick Powder

Heat & Stick Powder
[100625]
£4.00

Dazzling Diamonds Stampin' Glitter

Dazzling Diamonds Stampin’ Glitter
[133751]
£4.50

Rhinestone Basic Jewels Embellishments

Rhinestone Basic Jewels Embellishments
[119246]
£4.50

Liquid Multipurpose Glue

Liquid Multipurpose Glue
[110755]
£3.75

Stampin' Dimensionals

Stampin’ Dimensionals
[104430]
£3.75

Heat Tool - Uk Plug

Heat Tool – Uk Plug
[129054]
£27.00

Big Shot

Big Shot
[143263]
£99.00


…And The Greatest Of These Is Love – Embossed Impression Technique

Hello and welcome!

Today, I’ve got for you card using beautiful Bloomin’ Heart Thinlits Dies. I’ve made various cards using this die in the past, but this time I wanted to try something new: an Embossed Impression Technique. This is very easy, yet effective technique. And great way to stretch your dies too.

stampin-up-embossing-stamping-with-bloomin-heart-thinlits-dies

I’ve used Stampin’ Up! White Shimmery cardstock for this technique, as I planned to do a bit of water colouring later on. I prepared my Big Shot sandwich: Big Shot on Tab 1 -> Cutting Plate -> Silicon {embossing) mat -> cardstock (I swiped the cardstock with embossing buddy). Next, I tapped Versamark over the cutting edge of the die very gently, and placed the die, cutting edge down, on my cardstock. Remember, once it’s on the paper don’t move it or you will mess up your image. I then carefully placed the second cutting plate over the top and run it through the big shot.

Because I put Versamark Ink on the die, now I had that ink in all the ‘valleys’ of the impression I just made. So I sprinkled Gold Stampin’ Emboss Powder over it and heat embossed it.

stampin-up-embossing-stamping-with-bloomin-heart-thinlits-dies

I love those tiny gold lines! Next, I made few watercolour washes over my piece, using Mint Macaron ink pad and Pool Party reinker. Once dry, I cut my panel to 3-7/8″x 4-3/8″.

I also die cut five flowers, two large and three small, from Whisper White cardstock (I probably should have used Shimmery White cardstock for them too), and adhered them to my piece with glue dots. I’ve added some soft Mint Macaron watercolour wash to the flowers to add some depth to them

stampin-up-embossing-stamping-with-bloomin-heart-thinlits-dies

My card base is Very Vanilla. I stamped ‘Love’ in Mint Macaron using Brushwork Alphabet stamp set. I adhered my embossed panel with liquid glue to a piece of Mint Macaron mat (4″x 4-1/2″), and add them both to the card base with dimensionals.

To finish off my card I’ve added some shimmer to the flowers with Clear Wink of Stella Glitter Brush and put a rhinestone in each flower centre.

I hope you like my card, and that you give this technique a try.

As always, if you wish to purchase any of the products I have used, simply click the images below to go directly to my online shop.

Thank you for stopping by and have a blessed day

Brushwork Alphabet Photopolymer Stamp Set

Brushwork Alphabet Photopolymer Stamp Set
[141772]
£23.00

Bloomin' Heart Thinlits Dies

Bloomin’ Heart Thinlits Dies
[140621]
£22.00

Very Vanilla A4 Card Stock

Very Vanilla A4 Card Stock
[106550]
£8.25

Shimmery White A4 Card Stock

Shimmery White A4 Card Stock
[121717]
£7.25

Mint Macaron A4 Cardstock

Mint Macaron A4 Cardstock
[138344]
£7.25

Whisper White A4 Card Stock

Whisper White A4 Card Stock
[106549]
£8.25

Mint Macaron Classic Stampin' Pad

Mint Macaron Classic Stampin’ Pad
[138326]
£6.00

Pool Party Classic Stampin' Ink Refill

Pool Party Classic Stampin’ Ink Refill
[122933]
£3.00

Versamark Pad

Versamark Pad
[102283]
£7.75

Embossing Buddy

Embossing Buddy
[103083]
£5.50

Clear Wink Of Stella Glitter Brush

Clear Wink Of Stella Glitter Brush
[141897]
£7.25

Gold Stampin' Emboss Powder

Gold Stampin’ Emboss Powder
[109129]
£4.50

Rhinestone Basic Jewels Embellishments

Rhinestone Basic Jewels Embellishments
[119246]
£4.50

Aqua Painters

Aqua Painters
[103954]
£15.50

Stampin' Dimensionals

Stampin’ Dimensionals
[104430]
£3.75

Liquid Multipurpose Glue

Liquid Multipurpose Glue
[110755]
£3.75

Silicone Craft Sheet

Silicone Craft Sheet
[127853]
£5.50

Heat Tool - Uk Plug

Heat Tool – Uk Plug
[129054]
£27.00

Big Shot

Big Shot
[143263]
£99.00


Halloween Treat Holders With Popcorn Box Thinlits Dies

Hello, everyone! From today, for every Thursday, for the next 5 weeks, I’m gonna showcase My Hero Stamp Set by Stampin’ Up!Stampin' Up! My Hero Stamp Set

The stamp set is called ‘My Hero’ and what’s amazing about this particular set is that it’s a Ronald McDonald House Charities Stamp Set.

If you haven’t heard about it, here’s how it works: through the Making a Difference program, which Stampin’ Up! launched back in 2003, we partnered with Ronald McDonald House Charities (RMHC). Each year, Stampin’ Up! design an exclusive stamp set to promote the partnership with RMHC, and donate a portion of the proceeds from each sale of that set. To date over $1.5 million has been donated from RMHC stamp set sales!

But let’s get back to my project. For this week I’ve decided for something fun and created these Halloween treat holders using Popcorn Box Thinlits Dies.

Anna' Stampin' Cave Stampin Up Popcorn Box Die Halloween Treat Holders

Aren’t these cute?!! You won’t believe how quick and easy they are to make. For each holder, you only need one die-cut piece (for the box you need two). Next, you trim the larger flap, varnish well all the score lines and use a strong adhesive. I’ve used Tombow Multipurpose glue.

Anna' Stampin' Cave Stampin Up Popcorn Box Thinlit Dies Halloween Treat Holder

To create panels from Designer Series Paper you just simply die-cut the box and hand cut them following shallow lines created by the die.

For my treat holders, I’ve used two different colour combinations: Basic Black with Pumpkin Pie and Elegant Eggplant with Old Olive. I think these colours suit Halloween perfectly.

I’ve used ‘face’ stamp from My Hero Stamp Set, which I believe supposed to be a pumpkin face (!!?), and created these uber cute spiders. For their legs, I’ve used a wavy die from Popcorn Box Thinlits Dies. And yes, I know that spiders supposed to have 8 legs, but come on! These are mine and they only have six lol The sentiment is stamped using  Brushwork Alphabet Stamp Set and the panels underneath are just cut-outs I have left after die-cutting the box itself. These tiny strips of paper in my treat holders are also created using cut-offs. I love it – cute and frugal! For a final touch, I’ve added a piece of Metallic Foil Doily in Silver and also Basic Black and Silver Metallic Threads under the sentiment.

Anna' Stampin' Cave Stampin Up Popcorn Box Die Halloween Treat Holders Basic Black Pumpkin Pie

Elegant Eggplant with Old Olive treat holders I have turned into cute Frankenstein. For the hair, I die-cut a circle from a piece of Basic Black cardstock and gave him a trim with scissors. Not that I’m talented hairdresser but hey, for Frankenstein it’s just perfect.

Anna' Stampin' Cave Stampin' Up Popcorn Box Die Halloween Treat Holders Elegant Eggplant Old Olive

To create black doilies I took the smallest of Metallic Foil Dollies and deepen them in Basic Black Archival ink pad. Remember to set them aside for a while, as it takes some time before the ink dries. I also added few loops of Gold Metallic Thread under the doily. For the sentiment, I’ve stamped (randomly) ‘sweet treats’ from Teeny Tiny Sentiments Stamp Set on the diagonal white stripes. I put some purple tissue paper into my treat holders. I coloured the smallest dot from White Perfect Accents, using a golden sharpie – it holds the overhung tissue paper in place.

Anna' Stampin' Cave Stampin Up Popcorn Box Die Halloween Treat Holders Pumpkin Pie Basic Black

Anna' Stampin' Cave Stampin Up Popcorn Box Die Halloween Treat Holders Old Olive Elegant Eggplant

So here they are! I really hope you like my little project and that you will try to make these cute treat holders yourself. These would be super cute for Christmas treats too.

Thank you for stopping by and have a blessed day,

Bloomin’ Love Valentine’s Day Gift Set

Today I’ve got for you beautiful Valentine’s Day card I’ve made to match cute Valentine’s Day gift box I posted two weeks ago. Again I’ve used Bloomin’ Love stamp set and Real Red Stampin’ Pad. This time I also used matching Bloomin’ Heart Thinlit Dies.

The card is a standard A6 top folded card. Because I didn’t want the stamping underneath the heart, I die-cut my heart first and used it as a stencil to lightly mark where the heart will be. I also masked around 1-1/2″ of the bottom of the card base using post-it notes. I wanted to keep it clean for the sentiment.

Valentines Day card 8

I stamped the base carefully around the marked line first, and then just filled in the rest of the space. Next, I stamped the sentiment. I cut a tiny strip of Real Red cardstock and adhered it just above the sentiment to hide where the stamping ends.

Valentines Day card 2

I also stamped the inside of the card using this cute floral stamp.

Valentines Day card 6

When I put my card together I decided to add some pop to it.

I stamped 3 small and 2 large flower outlines on the piece of Whisper White and die-cut them. I sponged their edges and attached them to the heart with glue dots. Just a little touch of Clear Wink of Stella glitter pen and few mini pearls and the card was ready.

Valentines Day card 3

I love how this card turned out and how it matches the box. Perfect little gift for Valentine’s Day.

Thank you for stopping by and have a blessed day,

Ink Smooshing With Bloomin’ Hearts Thinlits Dies

I have to say when I first saw Bloomin’ Hearts Thinlits Dies in new Stampin’ Up! Spring Summer Catalogue I couldn’t wait to put my hands on them and try ink smooshing technique.

bloomin love 2

Aren’t these awesome?! And ink smooshing is childishly easy. All you need is a piece of acetate or craft mat, you can use a plastic packaging too (any sleek surface works really).

bloomin love yellow 2

Then you choose the colours you want to use on your card and you simply smoosh them onto your surface. Spritz it with water and dip your card into the ink droplets. Let your card dry completely before you add more colour.

bloomin love yellow

For my cards, I decided for really bright, intense colours. But you can make it as soft as you wish just add less ink and more water. And I have to say here I highly recommend using watercolour paper with this technique.

bloomin love orange 2

I’ve used the same design for all my cards. I die-cut hearts from a piece of Whisper White cardstock using Precision Base Plate. Trust me you need this plate! It’s perfect for more detailed thinlits dies to give you extra fine cuts. I saved the negatives (not tiny bits just “frames”) for another project.

bloomin love orange

I then dabbed my die-cuts in Versamark and heat-embossed it with Iridescent Ice embossing powder. I love the gentle bling/shimmer it gives.

bloomin love blue 2

I wanted the sentiment to really stand out so I took a strip of Basic Black c/s and stamped my sentiments in Versamark and heat embossed them in white.

bloomin love blue

To finish off my cards I added few white and clear sequins from Metallics Sequin Assortment.

I love how these turned out,  really pleased! I know these are not typical cards you would think off for Valentine’s Day, but I love the unusual.

Thank you for stopping by,