Thank You Notes Using Botanical Blooms & What I Love Stamp Sets

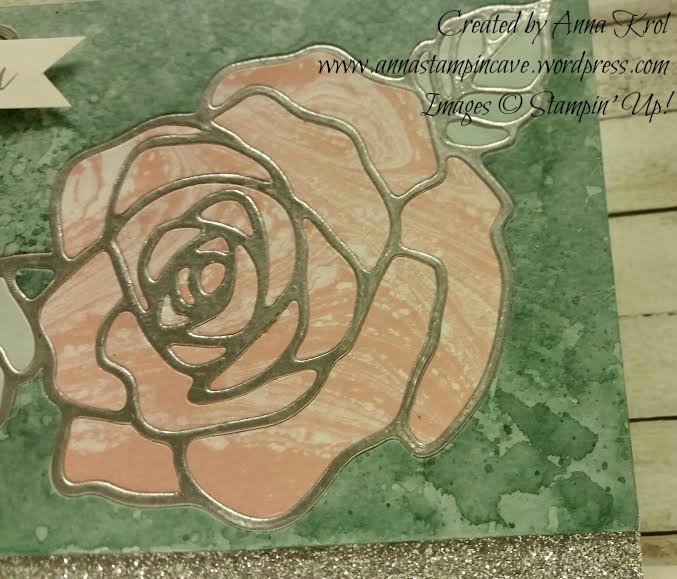
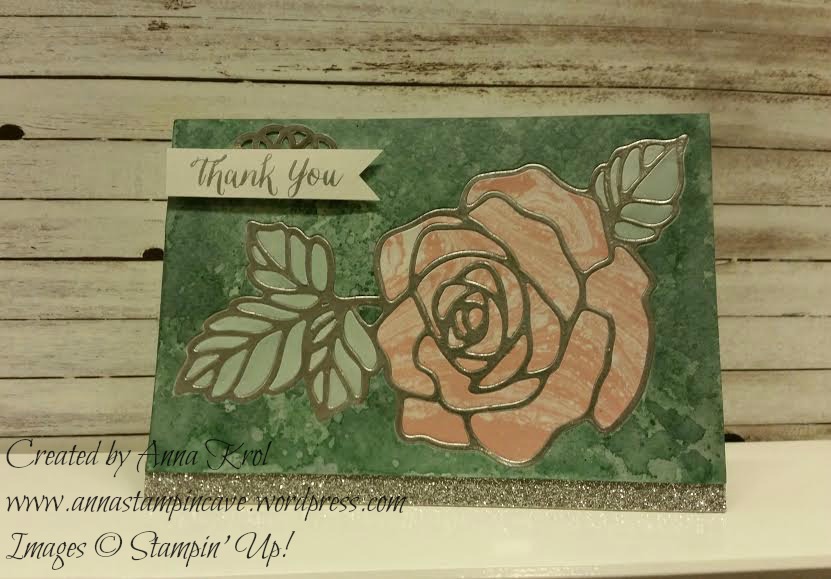
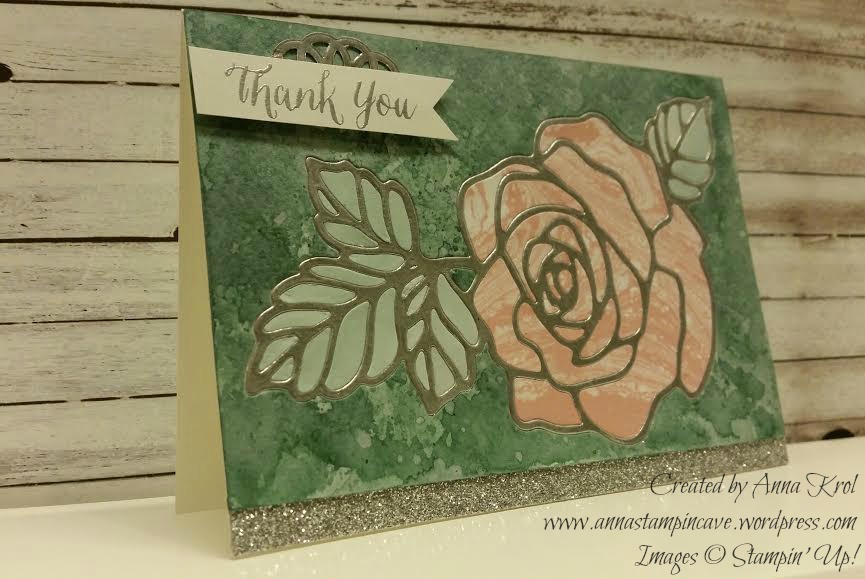
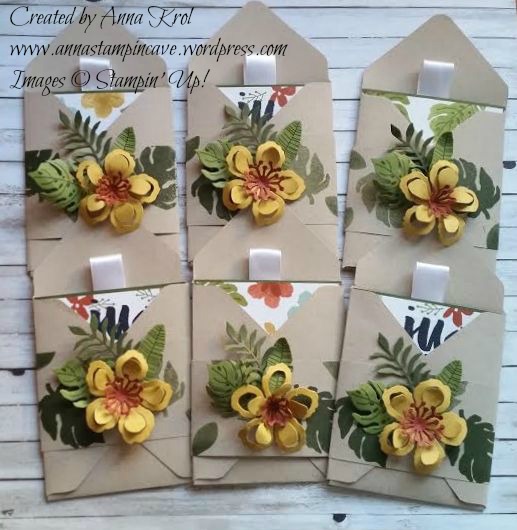
Today I decided to show you some thank you notes I’ve made using Botanical Blooms Stamp Set and coordinating Botanical Builder Framelits Dies.

customer gifts botanicals 5

I just love how these turned out! 

The idea behind these note cards was pretty simple. I wanted to create a panel card with floral design on one side and plain on the back, where you could leave a private message. Sentiments come from two different stamp sets: on the left from Rose Wonder Stamp Set and the other one is from Botanicals For You Stamp Set.

customer gifts botanicals 3

As my note cards aren’t typical size, they measure 3×4″, I created little holders for them using envelope punch board.

customer gifts botanicals 4

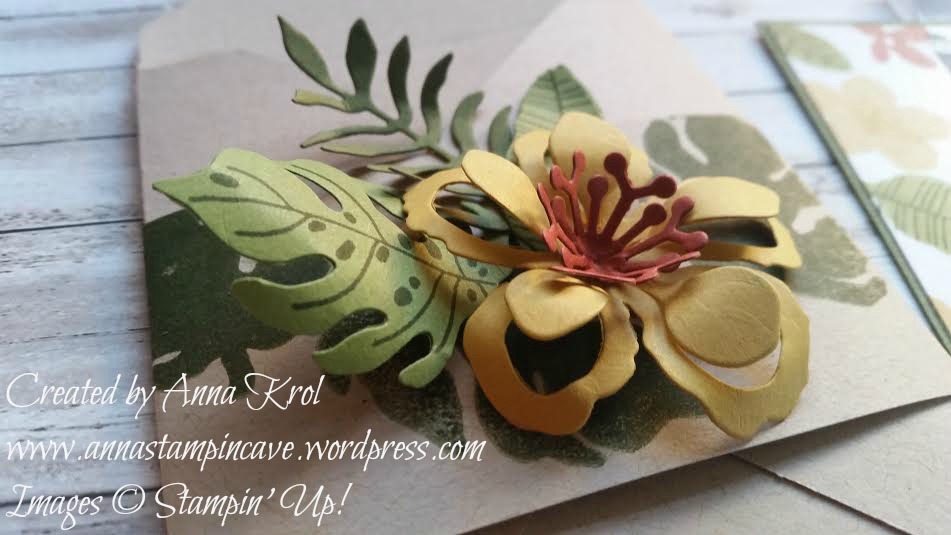
Now just a belly band to wrap it up together. Aren’t these A W E S O M E!!! I love love love these dies so much!

For a second lot, I have used the same idea just different stamp set and colours.

customers thank you notes 3

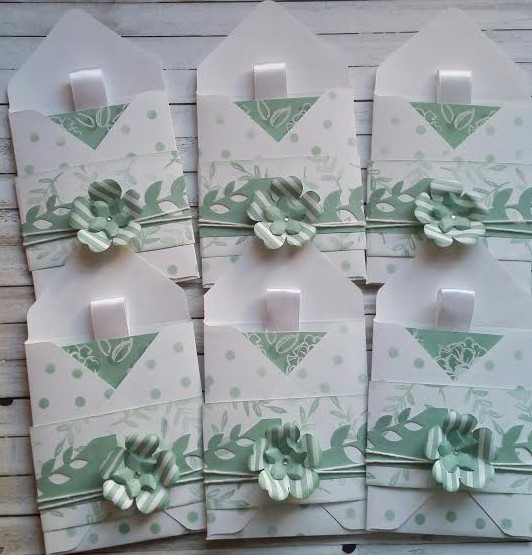
To create these I’ve used What I Love stamp set.

customers thank you notes 2

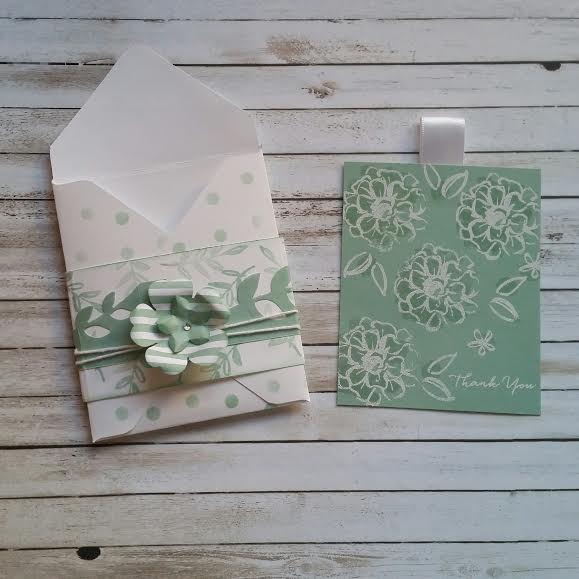
I love this three-step stamp set. It’s got a WOW factor without much effort. All I have done is to stamp step nr 3 & 2 in Mint Macaron, and nr 1 heat embossed in white. And voila!

customers thank you notes

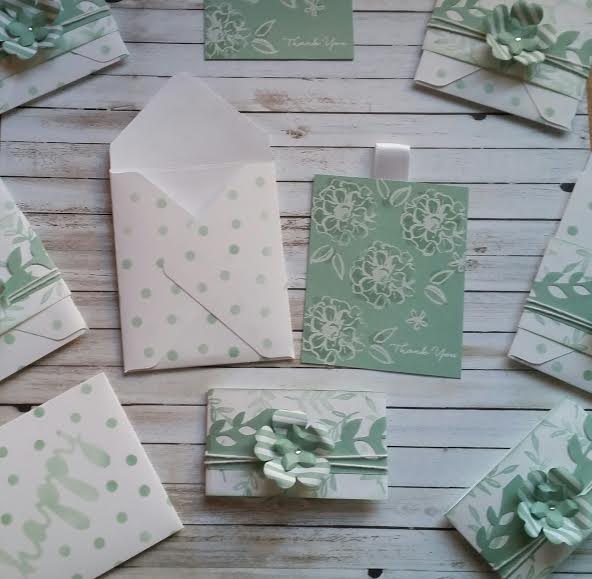
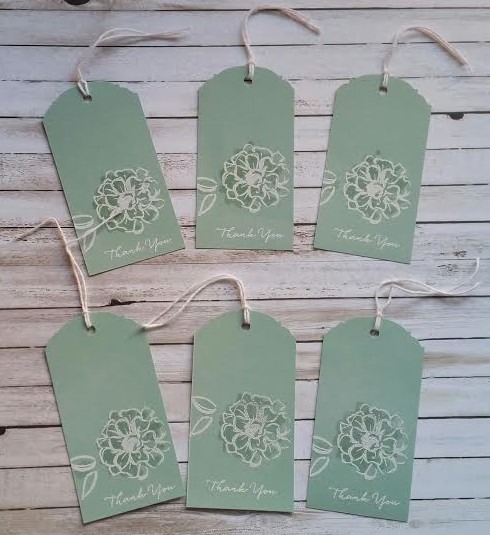
To “break” all that white I decorated the holder using sponges and one of Happy Patterns stencils. To decorate belly band I’ve used a border die from Botanical Builder and few punches: Petite Petals and Pansy punch. Super easy! As I was on the roll 😉 I also made these super lovely tags.

tags

Hope you like my note cards. They are super easy and what fun to make! And you?

Have a blessed day,

Crazy Crafters & Pootlers Spring/Summer & Sale-A-Bration Catalogue Blog Hop

blog hop header

Hello everyone! Welcome to the Crazy Crafters / Pootlers Blog Hop. We are super excited to share with you lots of new products from the soon to be launched seasonal catalogue. We hope you’ll find great inspiration from our projects. If you have arrived here from Stephanie Fischer, a big welcome to you. Be sure to click on the buttons further down to continue your journey on this blog hop.

This blog hop is very exciting not only for the sneak peeks. This is our first collaboration with amazing Kylie Bertucci and her lovely team of Crazy Crafters all the way from Australia! We are thrilled that they invited us to play along. Thank you, Kylie and her team.x

In my project today I decided to incorporate two of my favourite techniques: watercolour and inlaid die-cutting. I have used a brand new set called Rose Wonder with coordinating Rose Garden Thinlit Dies – perfect for techniques!

Stampin' Up! Rose Wonder Bundle

We’ve been given a theme ONE, to use only one stamp set, one ink pad, one DSP, one cardstock etc. Luckily we could also use heat embossing and embellishments. I had to come up with some smart idea how to create my watercolour card with just one ink pad.

For a watercolour panel, I’ve used Lost Lagoon ink pad. It’s such a beautiful shade of blue. But how to create a rose if you only have one ink colour? Perfectly Artistic DSP came as a rescue! All inner pieces of my flower and leaves were die-cut from this DSP and “inlaid” into the rose frame. I love this beautiful paper. It has a marbled effect design on one side, while the reverse side has a watercolour wash. And what’s even better, this paper will be available as a FREEBIE during Sale-a-bration!

Stampin' Up! Rose Wonder Bundle

The frame of the flower, as well as sentiment, are heat embossed in silver. A glittery strip of paper is heat embossed too, using Heat and Stick powder and silver glitter.

Stampin' Up! Rose Wonder Bundle

For my sentiment, I created simple, little banner with a piece of silver doily underneath to add some dimension. Don’t you just love this beautiful font? I’m in love with sentiments in this set.

I truly hope you enjoyed coming to my blog and see my card.

Now, be sure to hop along and see more inspiring projects. Below is the list of all the participants but you can also use the buttons to keep hopping. Your next stop is lovely Emilie Robinson – go and see what she has made using the new items.

Thank you for stopping by and have a blessed day!

previous button   next button

Full Blog Line Up:

Sam Hammond Donald
Angela Lorenz
Angelina Clark
Nicole Spicer
Lea Denton
Bruno Bertucci
Angela Westland
Wendy Boag
Jessie Holton
Camille Moriarty
Stephanie Fischer

New Butterfly Basics Stamp Set and Framelits by Stampin’ Up!

Oh, so happy I finally get to play with some new products: Butterfly Basics stamp set and coordinating thinlits.The cards I’ve made today are bit edgy because I really like a slightly distressed look. Backgrounds for all cards are sponged using different shades of green. For some of those cards, I’ve used colour resist technique. I’ve stamped leaves with Versamark and then heat embossed them with clear embossing powder.

butterfly basic 3

With second card I also stamped leaves with Versamark but this time I didn’t heat-emboss it. As you can see Versamark resist colour even if it’s not embossed, but the effect is more gentle. The only layer in this card is a butterfly 🙂

butterfly basic 4

Some leaves have been also stamped off first to get a lighter shade. Filigree honeycomb-kind-of image and little circle are stamped in Hello Honey.

butterfly basic 5

To add some interest to the cards I’ve stamped some “splatters” from Gorgeous Grunge (Hello Honey again)

butterfly basic 6

I just love this sentiment! So versatile. You can use it for thank you cards, birthdays, scrapbook pages, decorations, frames, shadowboxes, etc

butterfly basic 7

For a final touch, I’ve added some beautiful sequins from In Color Sequin Assortment. Easy yet effective 🙂

butterfly basic 8

 Last two cards are mounted on black base. I just couldn’t decide which one I like the most: white, black or none 🙂 And which one is your favourite?

I hope you like my today’s cards. I surely had lots of fun making them.

Thank you for stopping by, happy crafting