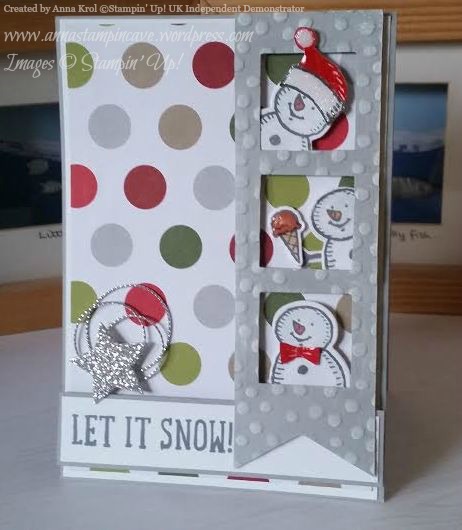
Simply Sketched Saturday Challenge Blog Hop #4 – Let It Snow

SSSC Header

Thank you for joining us for another Simply Sketched Saturday Challenge!  We’re so excited to be sharing this hop with you. The products used are all available in the current Annual, or seasonal, Stampin’ Up!®  Catalogues*. Simply use the buttons at the bottom of the post to keep hopping!

Welcome to our 4th sketch challenge, and this week it was my turn (and pleasure) to design a sketch. Here it is:

4

I truly hope this sketch will ignite your creativity.

Do you know it’s less than three weeks till Christmas?! It’s crazy how time flies by. And although I had pretty few ideas with this sketch in mind, I decided to go with a winter theme. Well…little crazy & fun winter theme 😉

Let it snow

Finally had a chance to play with Snow Place photopolymer bundle. It was one of those products in Autumn/Winter catalogue that didn’t catch my attention at first. I couldn’t see me using it at all: my daughter will be 16 y.o soon and you know teenagers, she thinks she’s so grown up 😉 But hey, once she knew there’s a snowman to build…yep! She’s a little crazy chicken about Frozen haha.

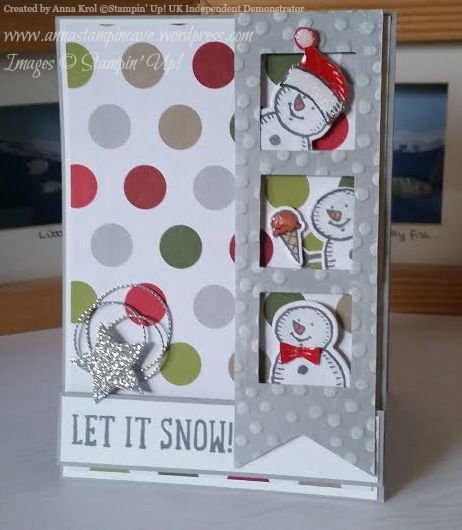
The base of the card is Smoky Slate. A layer of Whisper White measures 4″ x 5-3/4″ and the top layer of designer paper measures 3-7/8″ x 5-5/8″. I picked big dots design from Merry Moments DSP but it’s also available in 6×6″ paper stack. I chose big dots design as I thought it will go well with this fun card. Banner is cut from a piece of Smoky Slate (5-1/2″ x 1-3/4″) with three “windows” created using the smallest square from Squares Collection Framelits Dies and run it through the big shot with Decorative Dots Embossing Folder. If you don’t have squares framelits you could use punches instead. And it does not have to be square either. You could use circles or stars. To add some interest to the banner I sponged some Whisper White Craft Ink over the embossed area.

And now let’s meet my friends: crazy snowmen 🙂 I stamped snowmen and their accessories in Basic Grey Archival Ink. I was planning to do a little water-colouring, and our new Archival Inks are perfect for this technique. To add some dimension to these guys I coloured them with an aqua painter and Soft Sky. Noses are water-coloured in Calypso Coral and Pumpkin Pie.

Let it snow 5

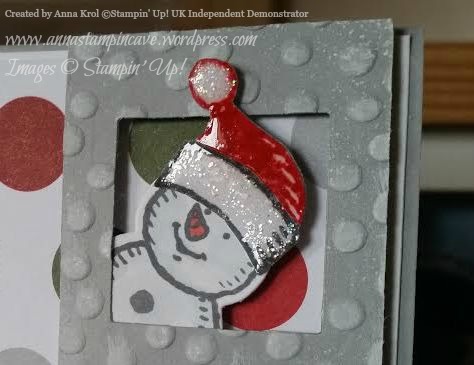
My first little fella wears Santa’s hat. Firstly I die-cut two hats: one in Basic Grey, and the other one in Real Red. Then I cut out just the top from a red hat and glued it on the top of grey one. I didn’t like the white border on my die cuts so I fussy cut it. To add some sparkle to the hat I used Dazzling Details, and once it was dry I add Crystal Effects on top.

Let it snow 4

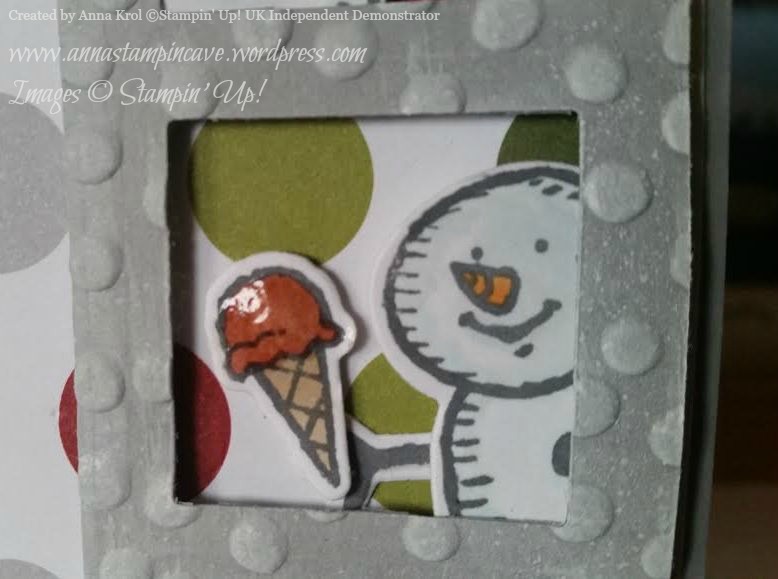
My second little friend looooves ice-creams. He could eat them all day long 🙂 I love how Crystal Effects makes the scoop of ice-cream pops!

Let it snow 3

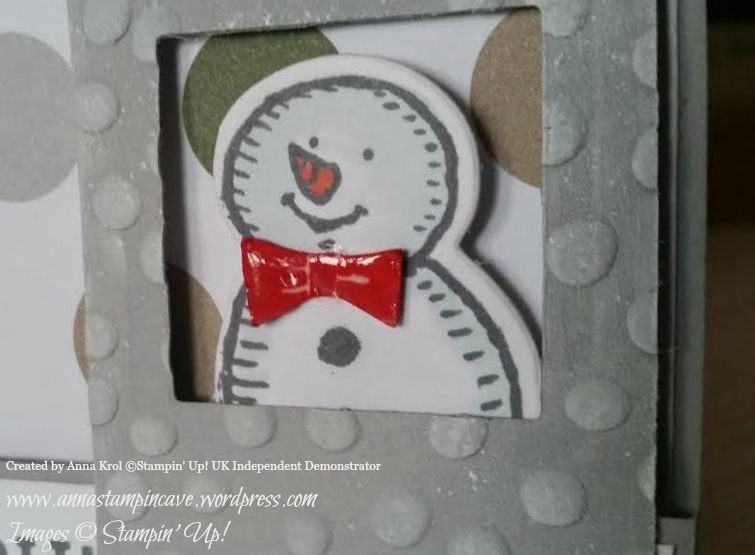
My third guy looks very elegant with this Real Red shiny bow-tie 😉

Let it snow 2

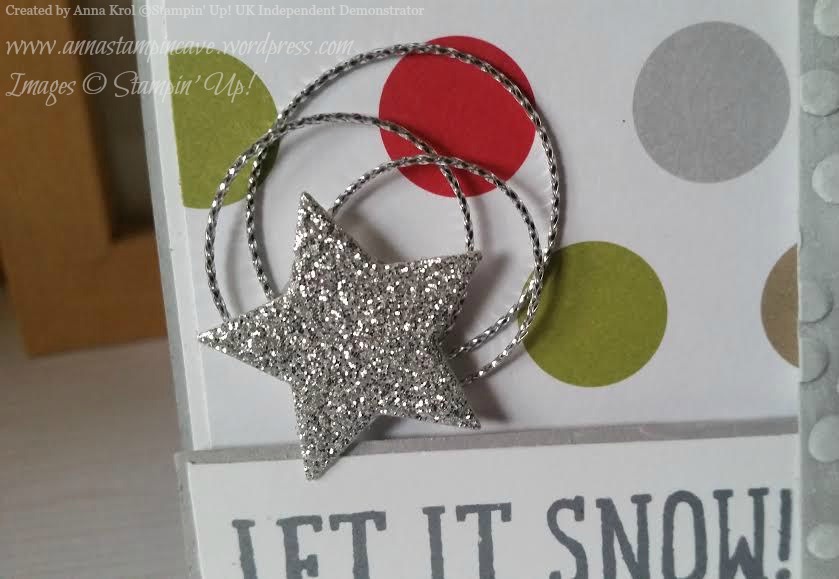
To finish off my card I die-cut a little star from silver glimmer paper. I used silver cording trim to create few fancy loops and glued them to the card with a glue dot, and added glimmer star on top. The sentiment “Let It Snow” comes from the same stamp set.

Now, be sure to hop along and see more inspiring projects. Thank you for stopping by and have a blessed day!

SSSC Previous   SSSC Next Blog

Beautiful Birthday Card Using Circle Of Spring Stamp Set By Stampin’ Up!

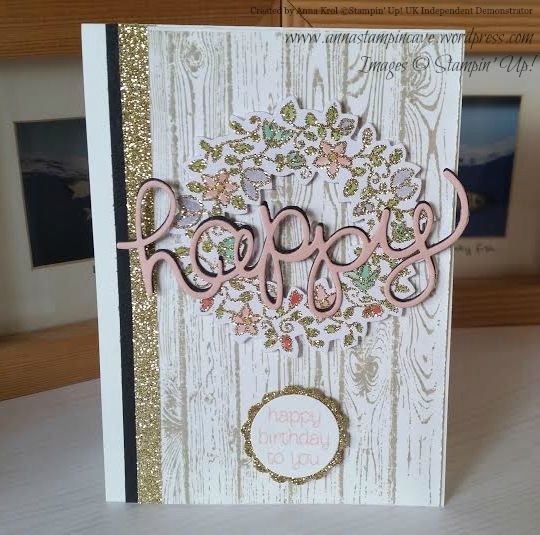
I love to make birthday cards for friends and family. Makes me so happy to see their smiles, it makes my day. And when the card I make is a challenge and turn out better then I hoped for?! Well, I nearly squealed with excitement when I finished this card for my friend’s birthday. She received the card already so I can share it with you now.

Spring wreath

My friend Linda is an amazing crafter and she makes the most beautiful, feminine cards ever. So no pressure there, haha

I wanted to create a card that is soft, feminine and exciting. Plus I wanted to use some cool techniques.

Spring wreath 4

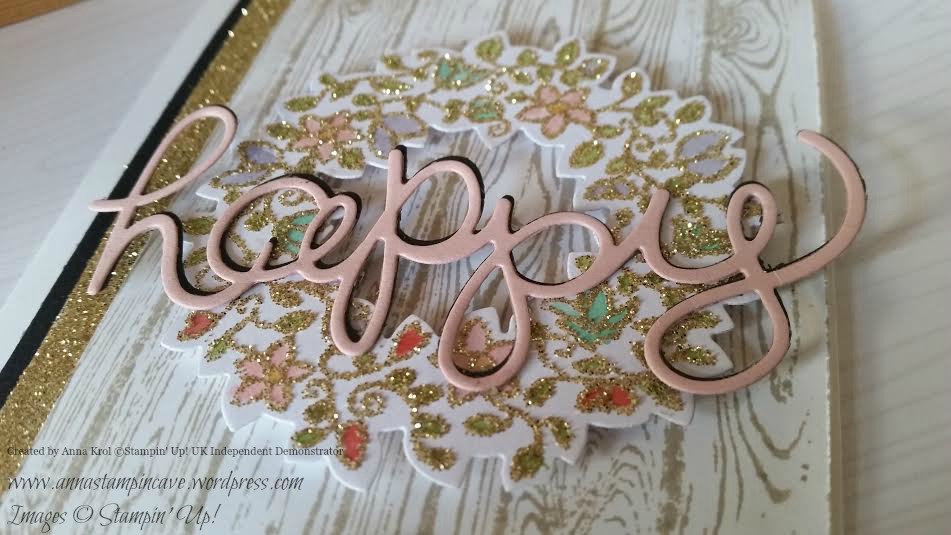
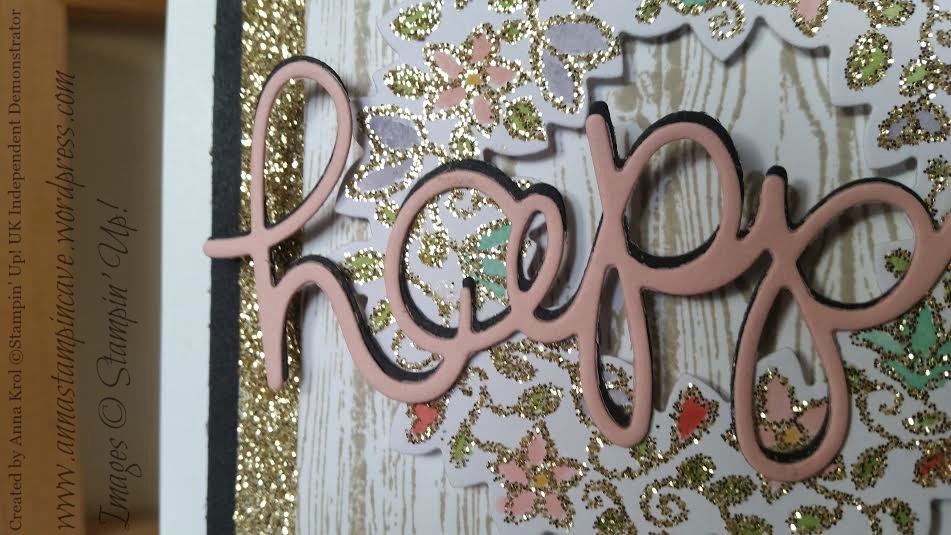
I stamped this beautiful wreath in Versamark, heat embossed with Heat & Stick powder and sprinkled with Gold Stampin’ Glitter. I heat set it again and watercoloured flowers and leaves. Then I die-cut ‘happy’ twice: in basic black and blushing bride, and glue them together. I slightly offset both pieces for ‘shadow’ effect.

Spring wreath 3

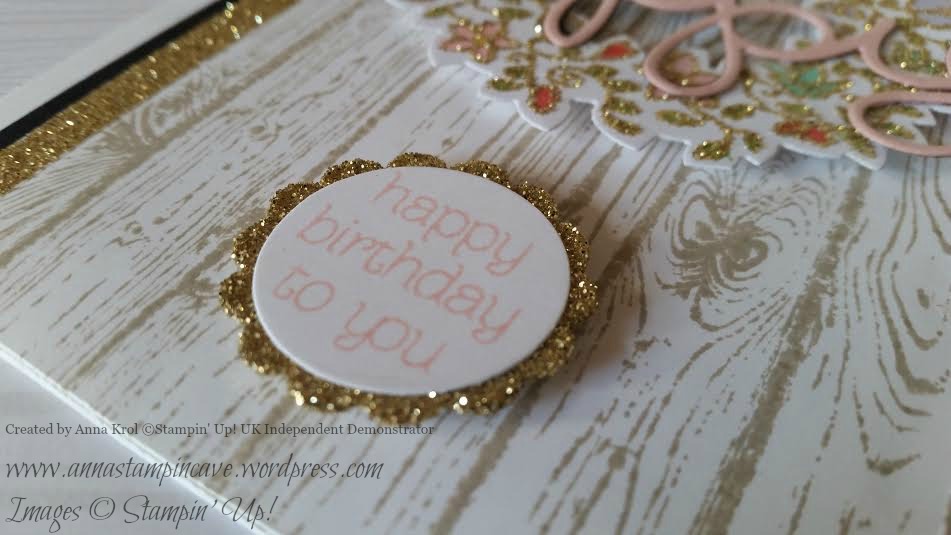
I love this cute sentiment from Circle of Spring. I do not own many punches, so I had to cut it out with Circle Framelits Dies. But I believe you could use 1″ Circle punch too. The glittery scalloped circle is 1-1/4 Scallop Circle punch. To make it I didn’t use glimmer paper. I punched it from a piece of paper, squashed it into Versamark and again used Heat & Stick powder and gold glitter. It’s so easy to make your own glimmer paper, and I love it.

Spring wreath 6

Just look at all this sparkle ✨✨✨ I love it!

Hope you like my little card, and maybe you will try to add some sparkle to your projects too.

Thank you for stopping by and have a blessed day,


Sprinkles Of Life – New Stampin’ Up! Stamp Set For Ronald McDonalds House Charities

Stampin’ Up!’s mission statement, called its Statement of the Heart, reads: “To love what we do and share what we love, as we help others enjoy creativity and worthwhile accomplishments . . . in this we make a difference.”

To help fulfil this statement, Stampin’ Up! launched Making a Difference program in 2003. This program facilitates corporate giving and promotes service among demonstrators and employees.

Through the Making a Difference program, Stampin’ Up! partnered with Ronald McDonald House Charities (RMHC). Each year, we design an exclusive stamp set to promote the partnership with RMHC and donate a portion of the proceeds from each sale of that set. To date, more than $95,000 has been donated from RMHC stamp set sales.

Stampin’ Up!’s demonstrators are also encouraged to volunteer their time teaching local Ronald McDonald House guests the creative art of rubber stamping through the Making a Difference program. Demonstrators also create cards at training events which are donated to Ronald McDonald Houses. Those staying at the Houses then use the cards to keep in touch with loved ones while they are away from home.

And this year is no different…except now there is a matching Tree Builder Punch that coordinate with RMHC stamp set “Sprinkles Of Life”.

1


Isn’t it awesome! First of all this stamp set consists of a whopping number of 22 stamps! Yep! You hear me. And it’s so versatile. You can create cupcakes, ice-creams, trees, flower pots, piles of leaves, clouds…and many, many more. With just one stamp set. Pretty amazing, right? So let me share my little make. 5

And truly, I won’t tell you how many techniques I’ve used on this single card: watercolouring, heat embossing, clear heat embossing on the stamped image, using glitter, sequins, washi tape… and I had tonnes of fun creating it!

4

It just looks yummy! Oh, and cherry on top?!

6

Cherry is made from an apple, water coloured and clear embossed to add a little bit of shine.

Hope you like my little project.

Thank you for stopping by,


He Is Risen Card Using Hardwood Stamp By Stampin’ Up! And Acrylic Block Stamping Technique

Today I’ve got for you a card that is very special for me.

I’m a Christian, but I do not belong to any denomination. Long story short: I try my best to follow Jesus, my saviour, and his teachings, not human traditions, in everything I do. So at the time when nearly all christian world celebrate Easter, I and my family, simply commemorate anniversary of Jesus’s death according to the Bible’s lunar calendar. But lets back to the card.

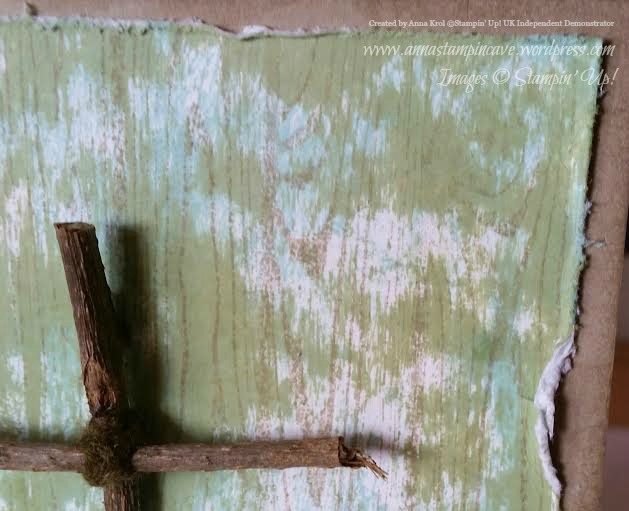
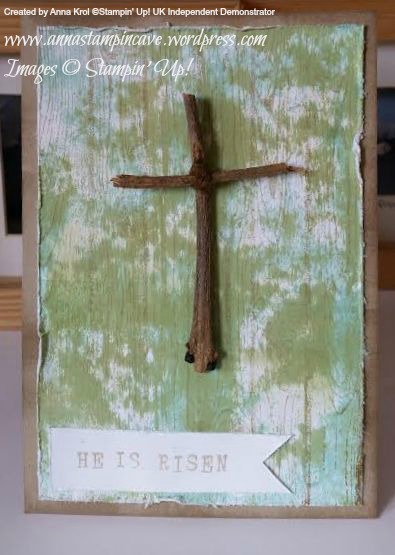
I love all things nature and had this idea for some time now. So went to my garden for a little “foraging” and brought myself few twigs. No, no plant gets hurt 😉 For the base for my card I choose Crumb Cake card stock. Sponged the edges to add a little depth.

he is risen 7

My background is created using acrylic block stamping technique. This technique is really easy. Take an acrylic block and ink pads of your choice. I used Pear Pizzazz and Pool Party. Then just press or tap (gently) your acrylic block into the pad. When you’ve got the ink transferred on your block (as much or as less as desired) swipe the block across your card stock. Repeat these steps until you’re happy with a result. You can use just one colour, or as many as you wish. There’s no right or wrong if it comes to this technique.

he is risen

I was really pleased how my background turned out. I inked Hardwood stamp in Crumb Cake, added some Soft Suede on edges and stamped it onto my background. Before adhered it to the base I distressed all edges with scissors.

he is risen 4

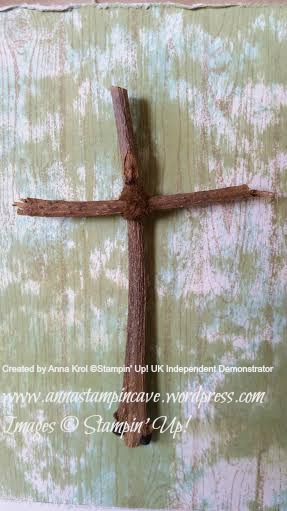
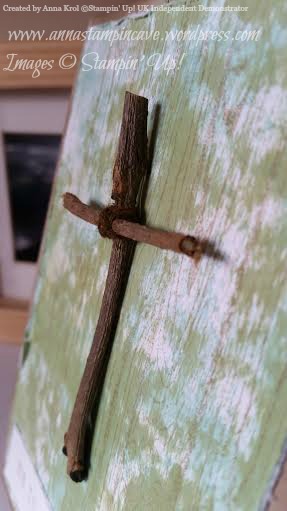
To form the cross I tied my twigs with piece of white baker’s twine. I coloured twine with Soft Suede marker after, because I wasn’t sure how much of a twine I will need in first place. Added my cross to the card using sticky strip. Hot glue would be better idea but my hands are not “safe” to hold glue gun 😉

he is risen 3

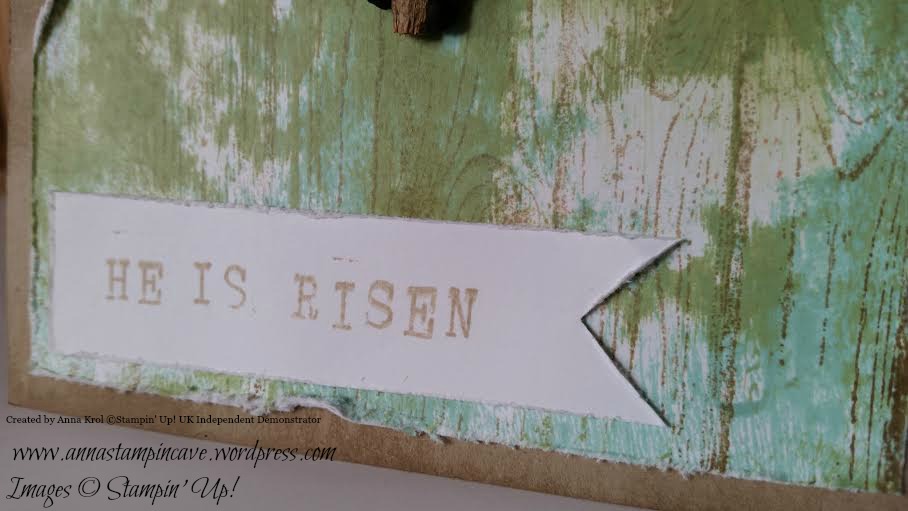
Long time I couldn’t decide what sentiment to use. I even thought about printing something from the internet. But then I had a lightbulb moment: Alphabet Rotary Stamp! It’s font is simple and rough – perfect for my card! I created my phrase “he is risen” in no time. Stamped on piece of card stock with Crumb Cake again and cut it into a banner. First I thought to rise a sentiment with dimensionals, but I really wanted the cross to stand out.

he is risen 6

I’m really pleased with my card. With acrylic block stamping technique I made it in no time. Hope you like this technique and that I inspired you to give it a try. If so please give me a “like” or live a comment below. Thank you for stopping by and happy crafting!

Thank You Card Using Crazy About You Stamp Set & Irresistibly Yours Specialty DSP by Stampin’ Up!

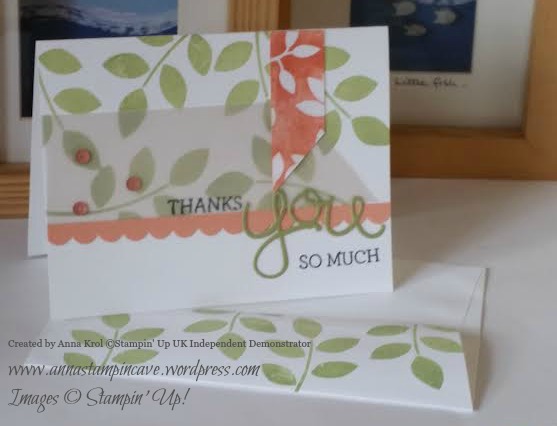
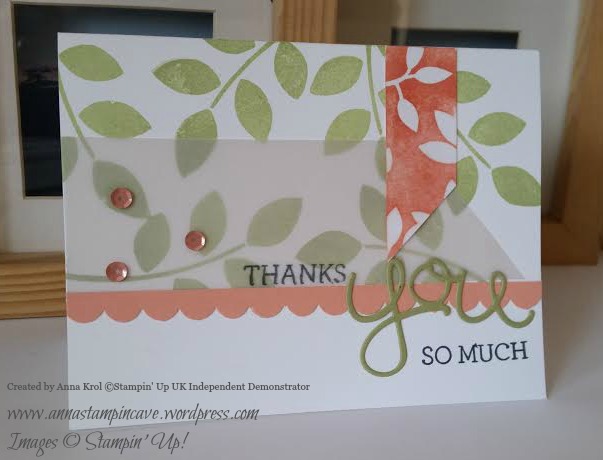
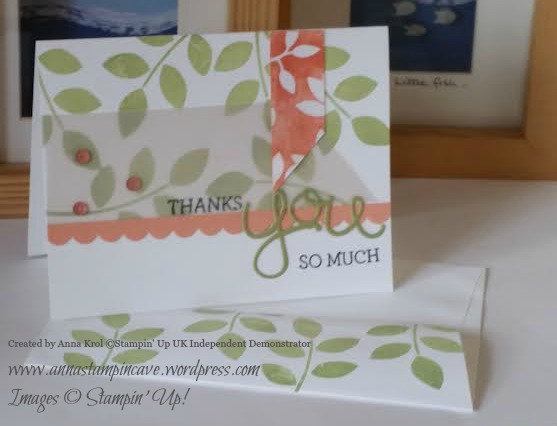
My card today uses Crazy About You stamp set and one of the Sale-A-Bration free items: Irresistibly Yours Specialty Designer Series Paper. I love the fresh look of this card as I really wanted to create card that is fresh and spring-ish, while not compromise on my beloved layers 🙂

thanks you

For the background I created a border with Scallop Edge Border punch and piece of Crisp Cantaloupe card stock. Then I randomly stamped leaves from Crazy About You. I chose Pear Pizzazz for that as it’s such a lush yet soft green.

thanks you 3

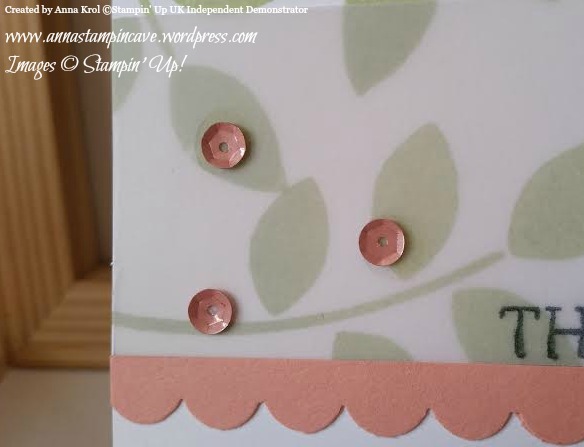
Above that border I added a piece of vellum. Vellum is quite tricky to attach as you always can see the adhesive trough. So I added few sequin to hide glue dots 🙂

thanks you 2

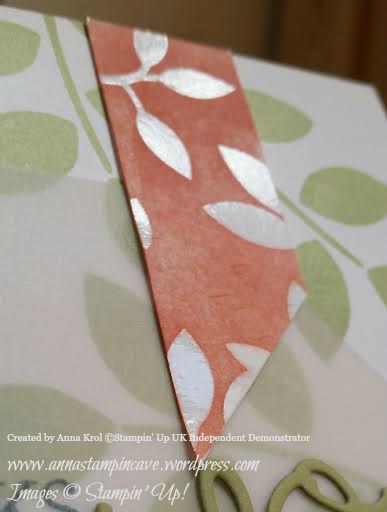
My little banner is created using a piece of Irresistibly Yours specialty paper. I spritz it with water and added Crisp Cantaloupe ink. This paper is so much more than just a paper. Glossy designs look great alone but they also resist ink. You can try it with spritzers, brayers, sponges, watercolour techniques and more. You can make it bold or subtle as you wish. This paper is a must-have for your paper stash. Check the video HERE

thanks you 1

Now, for the sentiment I cut “you” using Hello You thinlits and adhere it on the border. I stamped “thanks” just above that “you” and “so much” a little below. For a final touch I also made coordinating envelope. Isn’t it springy, fresh-looking card? I love it!

Hope you like this project and as always thank you for stopping by