Gorgeous Wedding Card Using ‘On Your Perfect Day’ Stamp Set By Stampin’ Up!

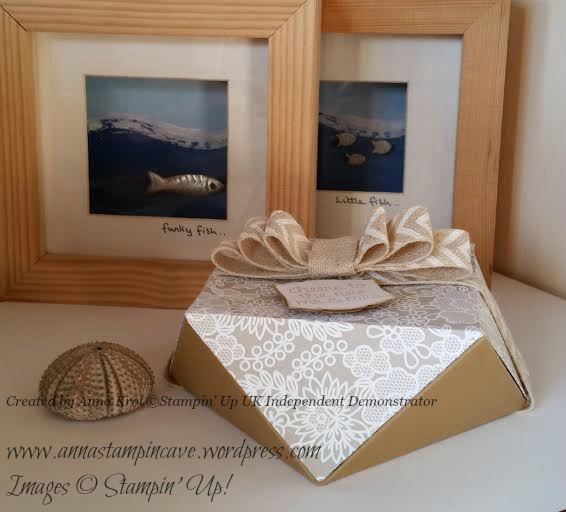
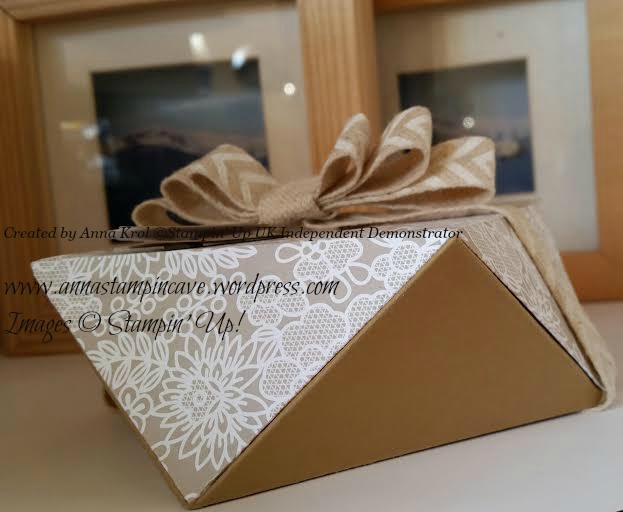
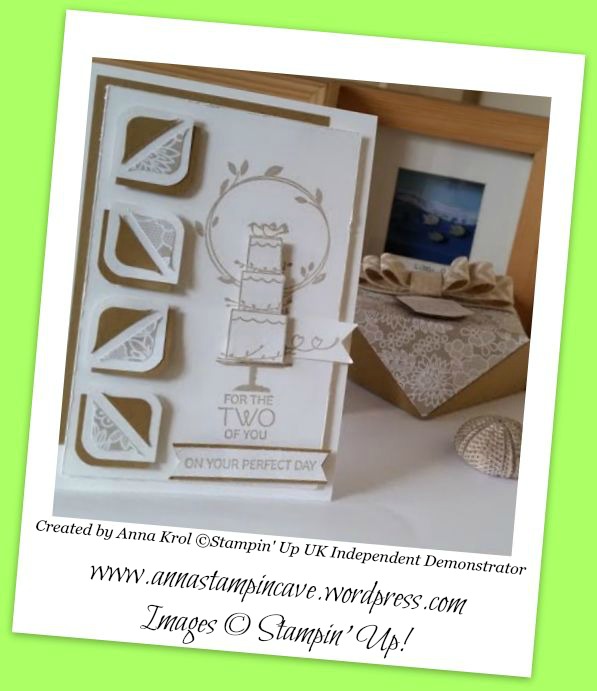
Hello world! Today I’ve got for you absolutely gorgeous wedding card. But it’s not just a gorgeous card. This card is matching Faceted Gift Box I’ve shared with you few days ago. And I will show you how I’ve used some scraps I had after making a box.

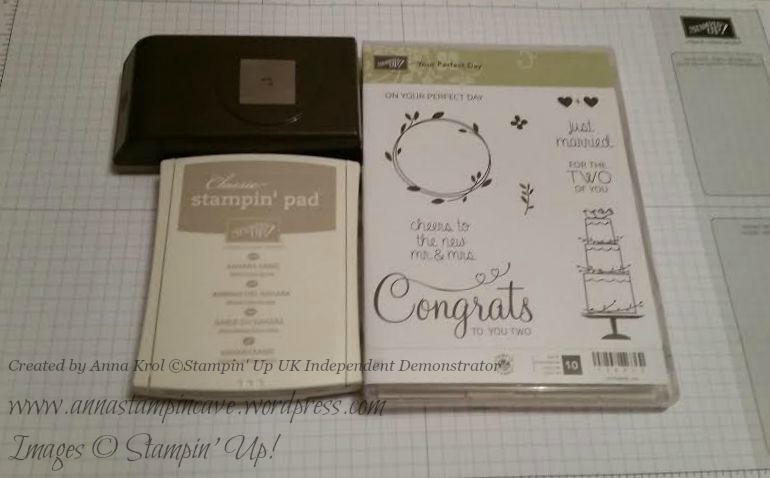
I tried not to use too many supplies ( I usually use way too many in one project) so except from card stock and adhesives these are the only products I’ve used. Cool hey? 🙂

weds 1

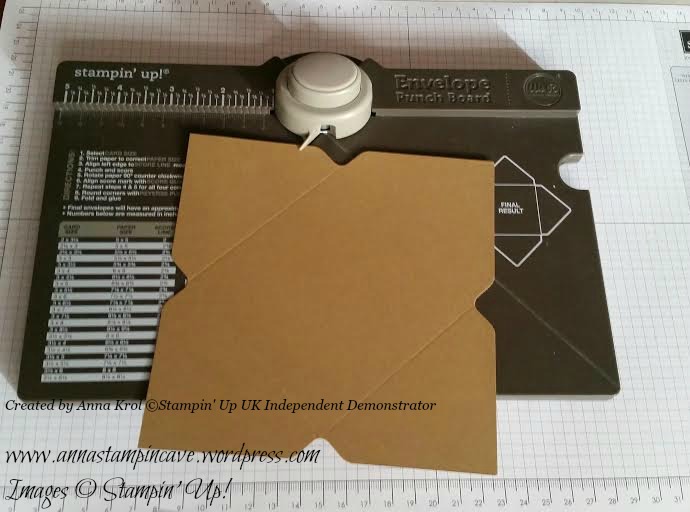
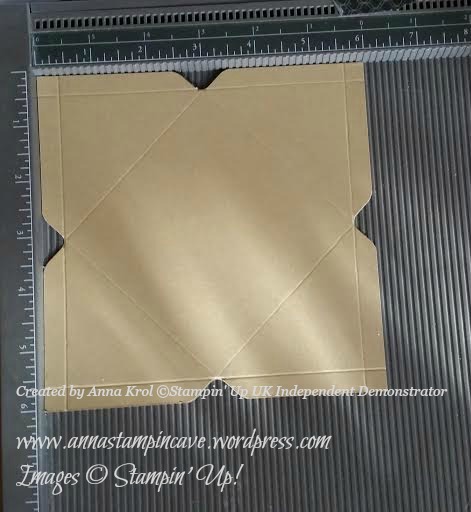
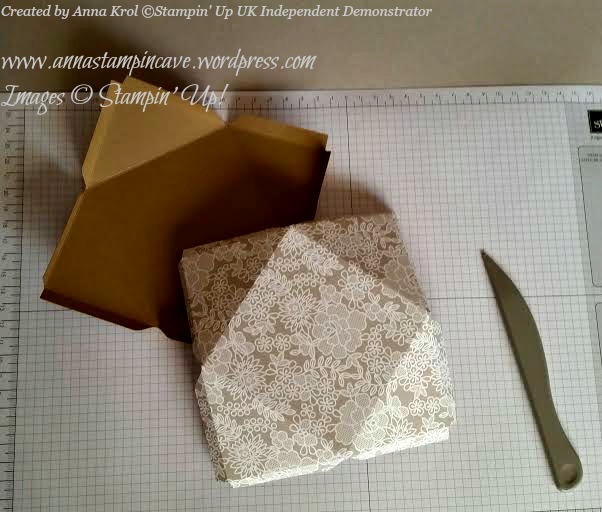
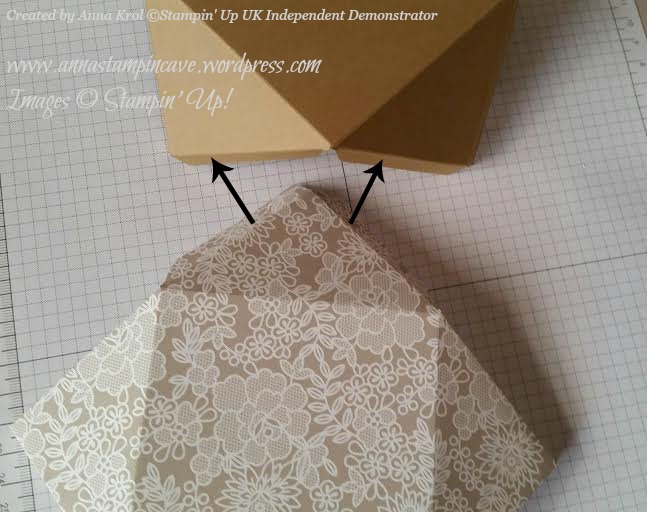
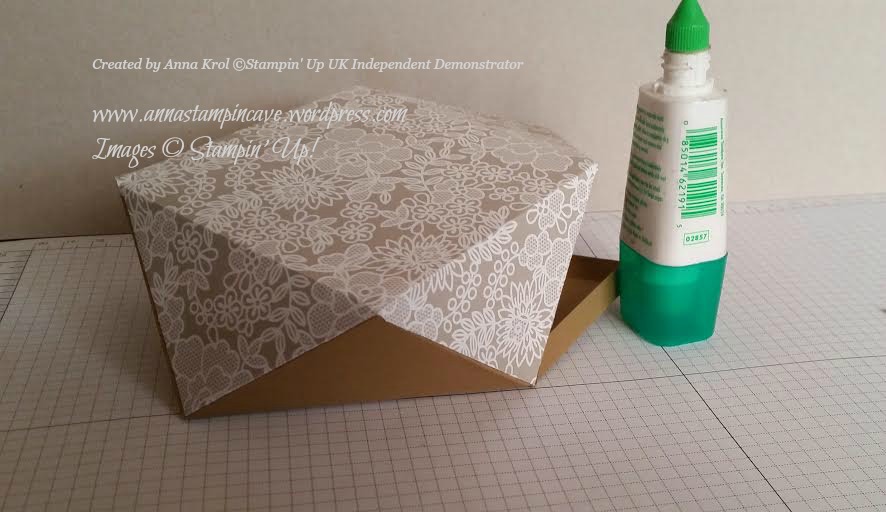
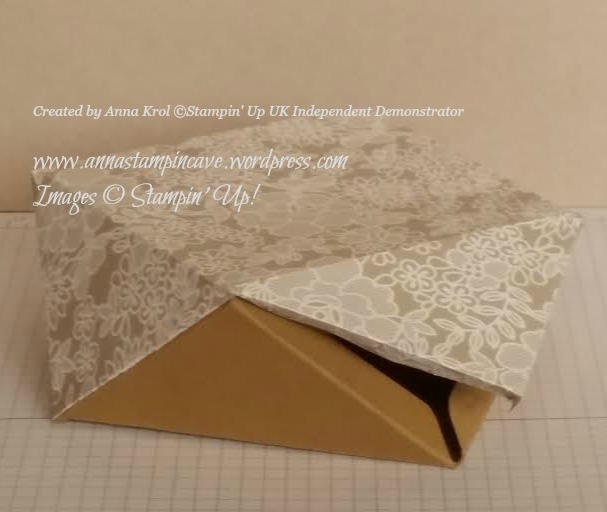
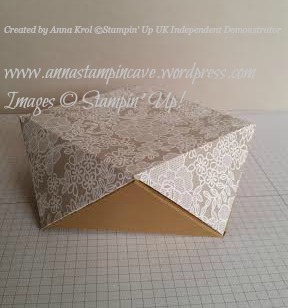
  You know when using Envelope Punch Board we are left with lots of tiny pieces of scrap paper. You can’t really use them for any project can you? Of course you can! So I’ve made this cute box and I had this pieces left:

weds 2

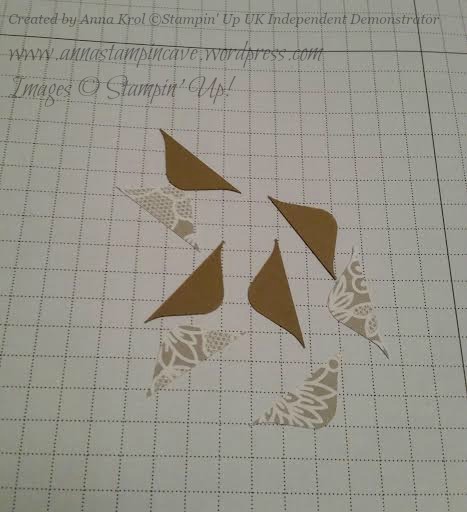
I’m always trying to be savvy person, I love recycling and I’m always looking for a good way to use all my scraps. Plus Something Borrowed DSP is so absolutely gorgeous I simply couldn’t throw those pieces to the bin. So I decided to use them in my card.

weds 9a

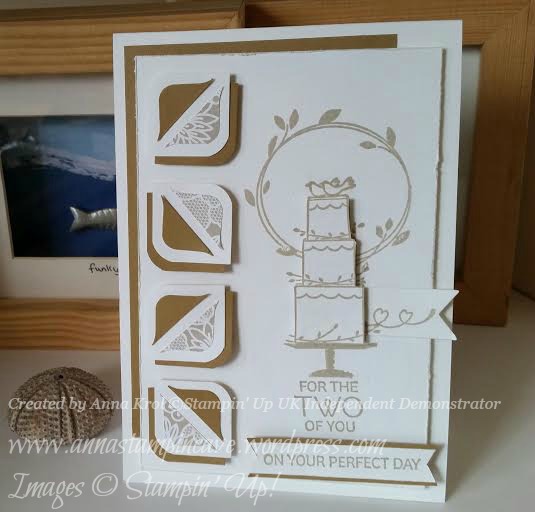
For the base I’ve used a piece of Whisper White card stock: took A4 , cut it in half on a long side and the fold it in half. Baked Brown Sugar panel measure 5 x 3 2/8″ and Whisper White panel measure 5 3/8 x 3 4/8″ ( I distressed it with scissors)

weds 6

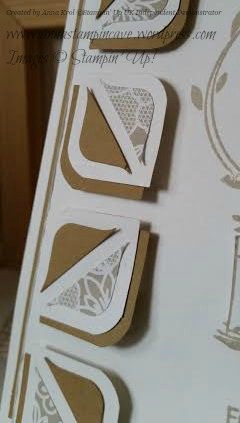
To make these cute sort of embellishments I punched four squares from piece of Whisper White. Four squares of Baked Brown Sugar has been punched from the panel I used on the card same as the banner piece. Why? Because you can only see two edges of the panel, so why not? 🙂 Then I rounded two opposite corners of my square pieces, layered them together and glued my scrap pieces I had left after making a box – Awesome! I love how these turned out 🙂

weds 4

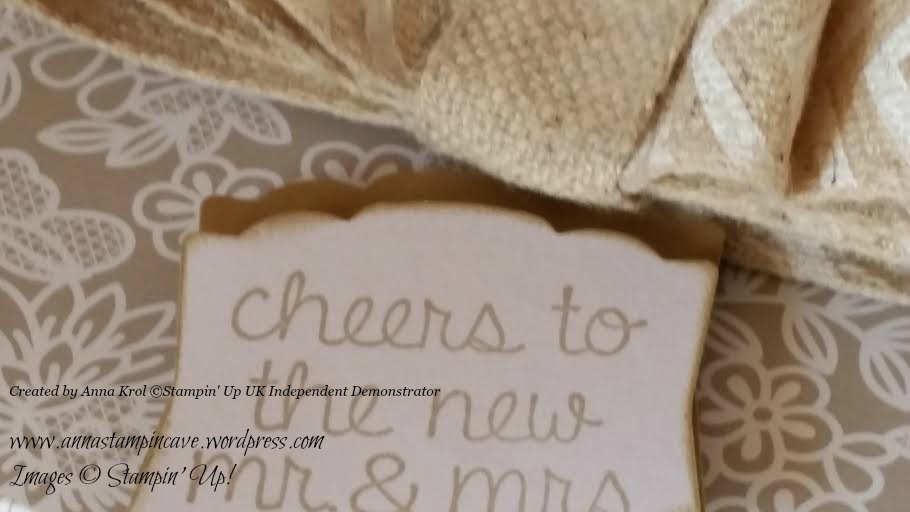
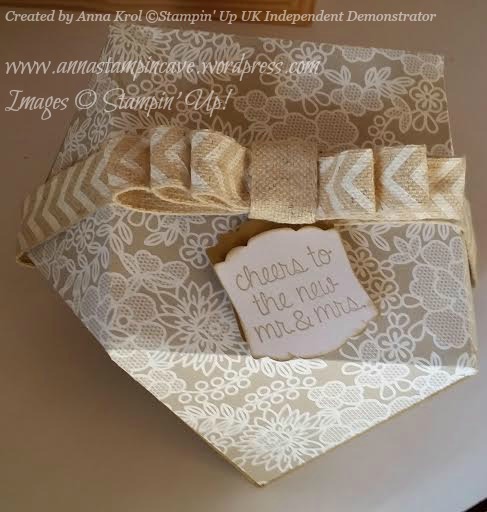
The focal point of my card is a wreath and gorgeous wedding cake from Your Perfect Day. This little banner wasn’t in my plans but I’ve made a little boo boo while stamping a cake, and I stained edge of my panel. My fingers are still pretty numb and got problems to hold acrylic blocks :/ But problem was solved and I think it looks pretty cool 🙂

weds 3

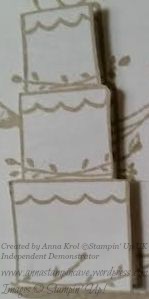
I stamped second cake on scrap piece of cs, cut out just a cake bit and layered it with foam adhesive onto cake on my panel. Sentimet “For The Two Of You” and “On Your Special Day” on a little banner comes from same stamp set. The last thing to do was to assemble the card. I’ve used foam adhesive for squares and top panel and snail for Baked Brown Sugar piece. I love this card and how it complement the box.

weds 8

What do you think? Do you like this card? How about my savvy ideas? Please let me know in the comments below. And share share share! 🙂

Thank you for stopping by,

Extraordinary Faceted Gift Box Using Envelope Punch Board

Look at this beautiful faceted box I’ve made today! I absolutely love it! Feels so good to be able to do a little crafting at last. Some of you who follows me on facebook knows the reason I was absent, but some of you don’t, so I owe you an explanation. I had a relapse of Multiple Sclerosis. Yep I know :/ I couldn’t walk, didn’t feel my legs at all, same with arms and hands. I get to hospital and after nearly two weeks of painful injections and few doses of steroids I finally can walk a little. my hands are still a pain though. So while it’s really hard for me to stamp (but I will have a little card for you in a day or two) I’ve decided to try a little bit of papercrafting.  This idea isn’t mine. I followed a tutorial of Australian demo Leonie Schroder.

10

To make this box all you need is Envelope Punch Board, scoring board, Tombow glue, 6×6″ piece of cardstock and 6×6″ piece of DSP. For my box I’ve used stunning Something Borrowed Designer Series Paper from new Spring/Summer Catalogue and Baked Brown Sugar cs for the base. I know that the colour on DSP is Sahara Sand, but with Baked Brown Sugar they make very elegant combination.

1

First take your EPB and punch and score both pieces of cardstock at 3″ on all sides. Thats it! Now bring your scoring board.

2

Score at 3/8” (where the notch is) on each side. Remember you do exactly the same with DSP just for the teaching purposes I only show the cardstock. You wouldn’t see it clearly on DSP anyway.

3

Now you need to cut out these little corners. You can use scissors for that but as I mentioned my hands are affected so I can’t hold a scissors. I’ve decided to use square punch instead.

4

Barnish all of the score lines. And now the trickies part: assemble the box.

5

You need to adhere the flaps of one triangle from the top piece to the flaps in a gap between two triangles on the base. I hope that make sense if not check the picture below.

6

You can use any adhesive but I truly recommend using a tombow glue. It gives you more flexibility, while sticky strip adhere immediately so once it stick it holds, period. And trust me with this box you need that flexibility.

7

Leave last section (triangle) if the lid open, do not glue it as it’s gonna be your opening. Just tuck tabs in and they will hold your box closed. Also when you tie ribbon around the box make sure it holds the opening corner.

8  9

And Taa Daah! Your box is done! Easy hey?! 😉

11

Now just a little bit of decoration. And with such a bold deign on DSP less is more. I only used fancy folded Natural Chevron Ribbon.

12


Sentiment comes from Your Perfect Day Stamp Set. It’s brand new set from Spring/Summer Catalogue; same as DSP. And it’s absolutely gorgeous! I’ve stamped “cheers to the new mr & mrs” in Sahara Sand, punched it with Artisan Label  punch, and sponged the edges. That sponging came a little bit messy – my hands again – but I’ve decided to leave it this way (second time wouldn’t get better anyway)

13

I’ve layered the sentiment with piece of Baked Brown Sugar and attached it with dimensionals.

I really hope you like this project and that it tackle your creativity 🙂

Thank you for stopping by