Inside The Lines Altered Photo Frame

Anna’ Stampin’ Cave – Inside The Lines Altered Photo Frame

In my project today I decided to create altered photo frame with beautiful, Inside The Lines Designer Series Paper. With an ever-growing trend in adult colouring books, this paper is just spot on.

inside-the-lines-dsp

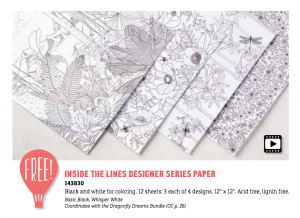
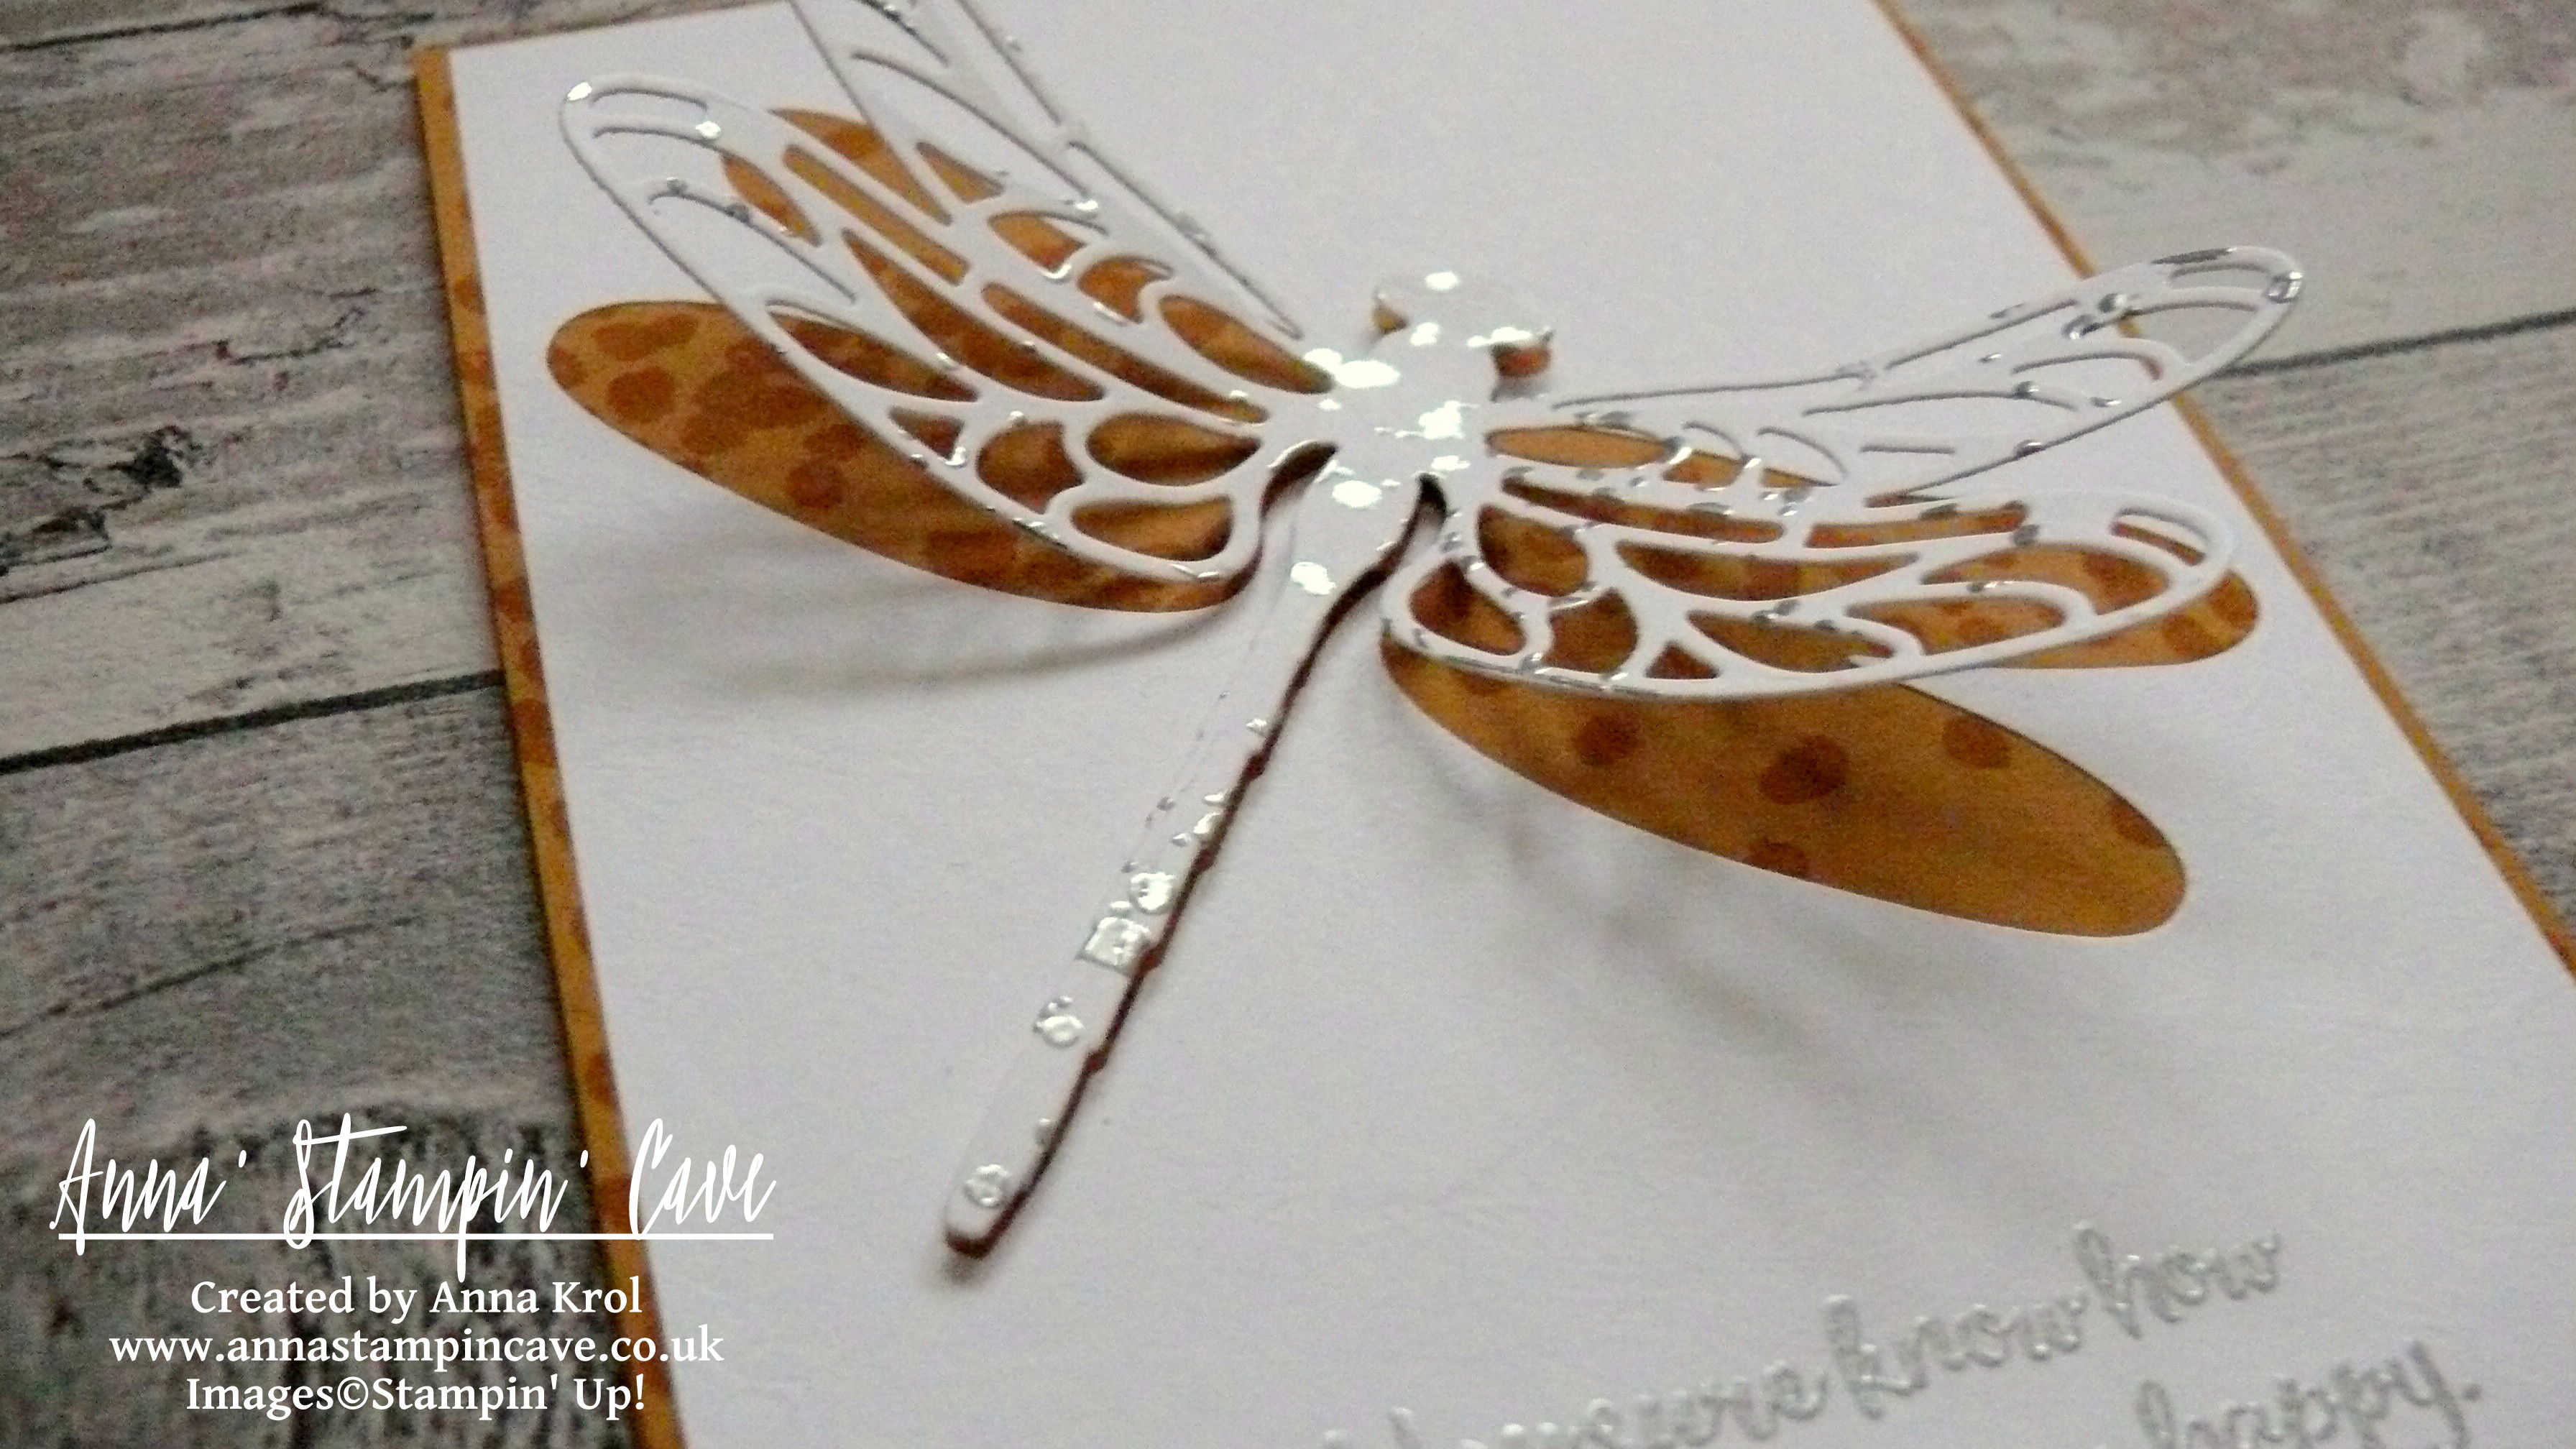
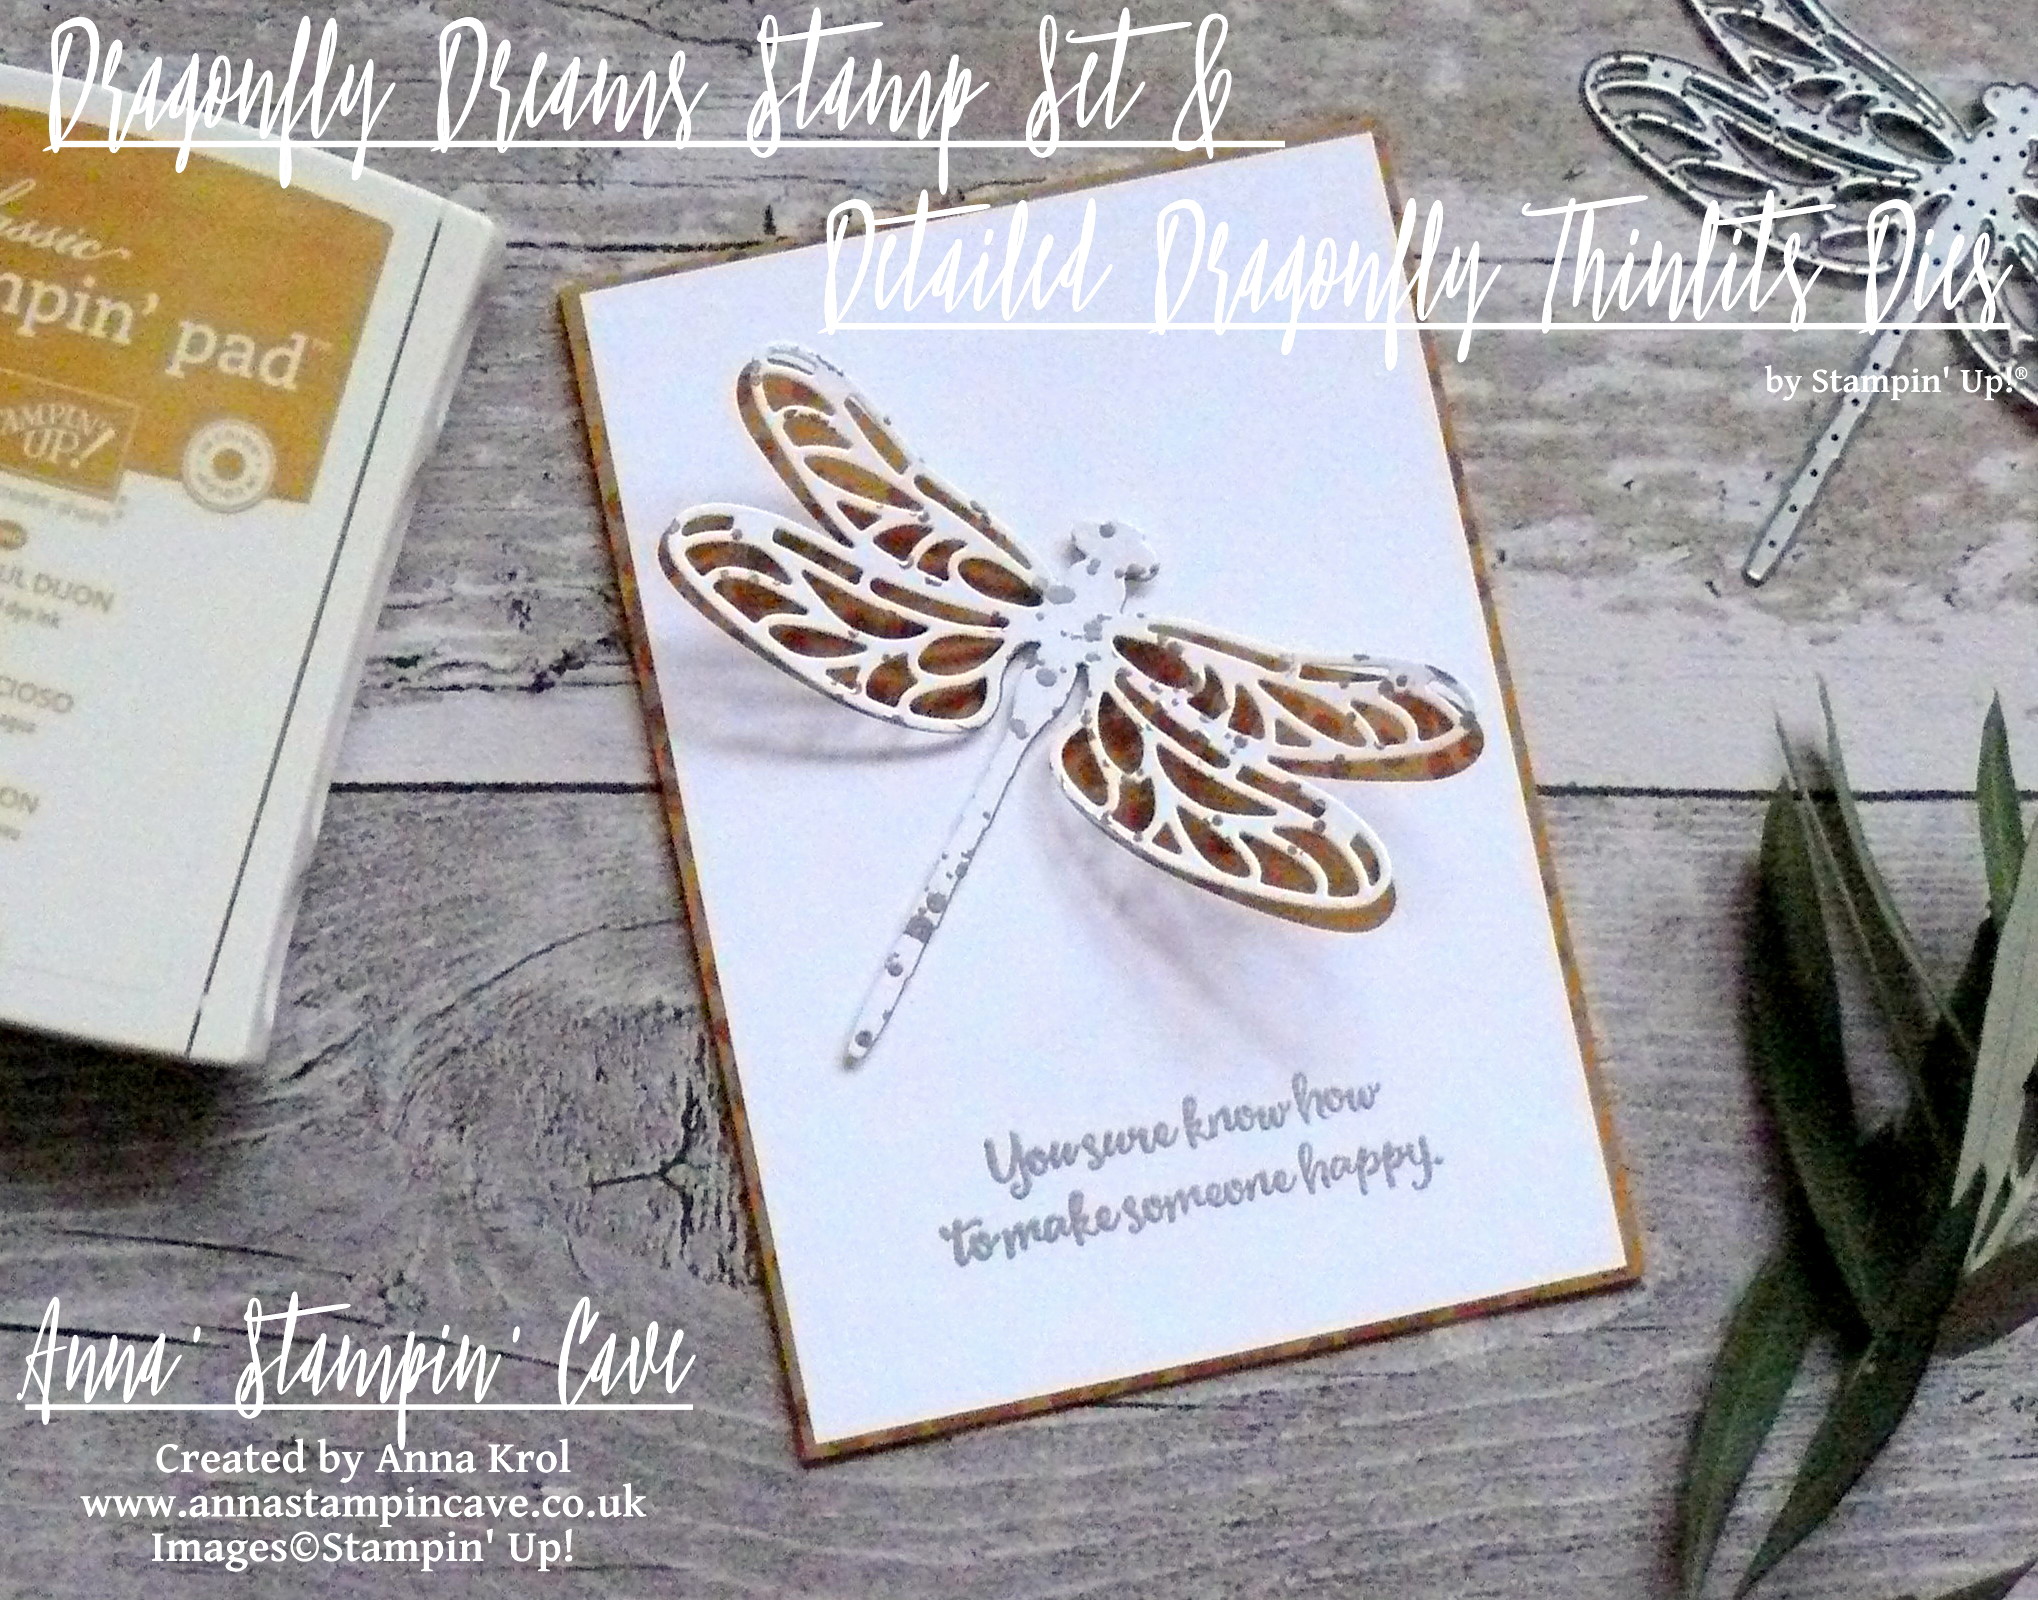
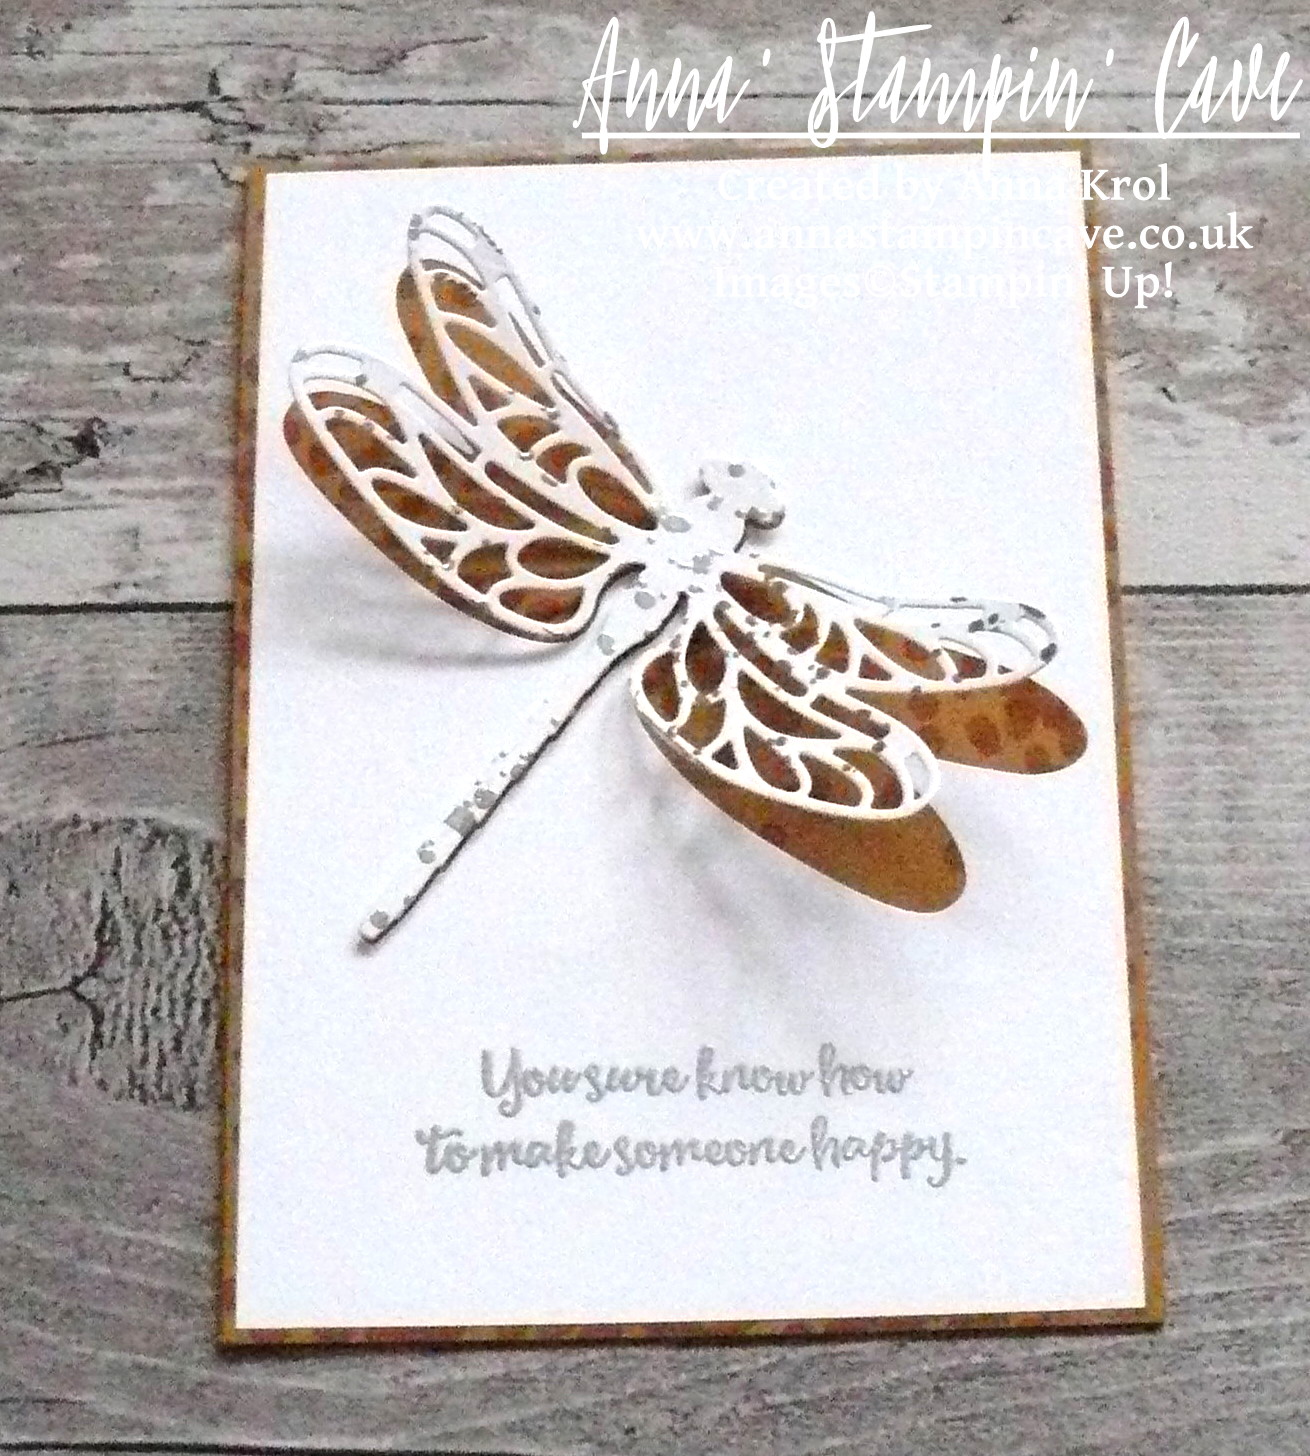
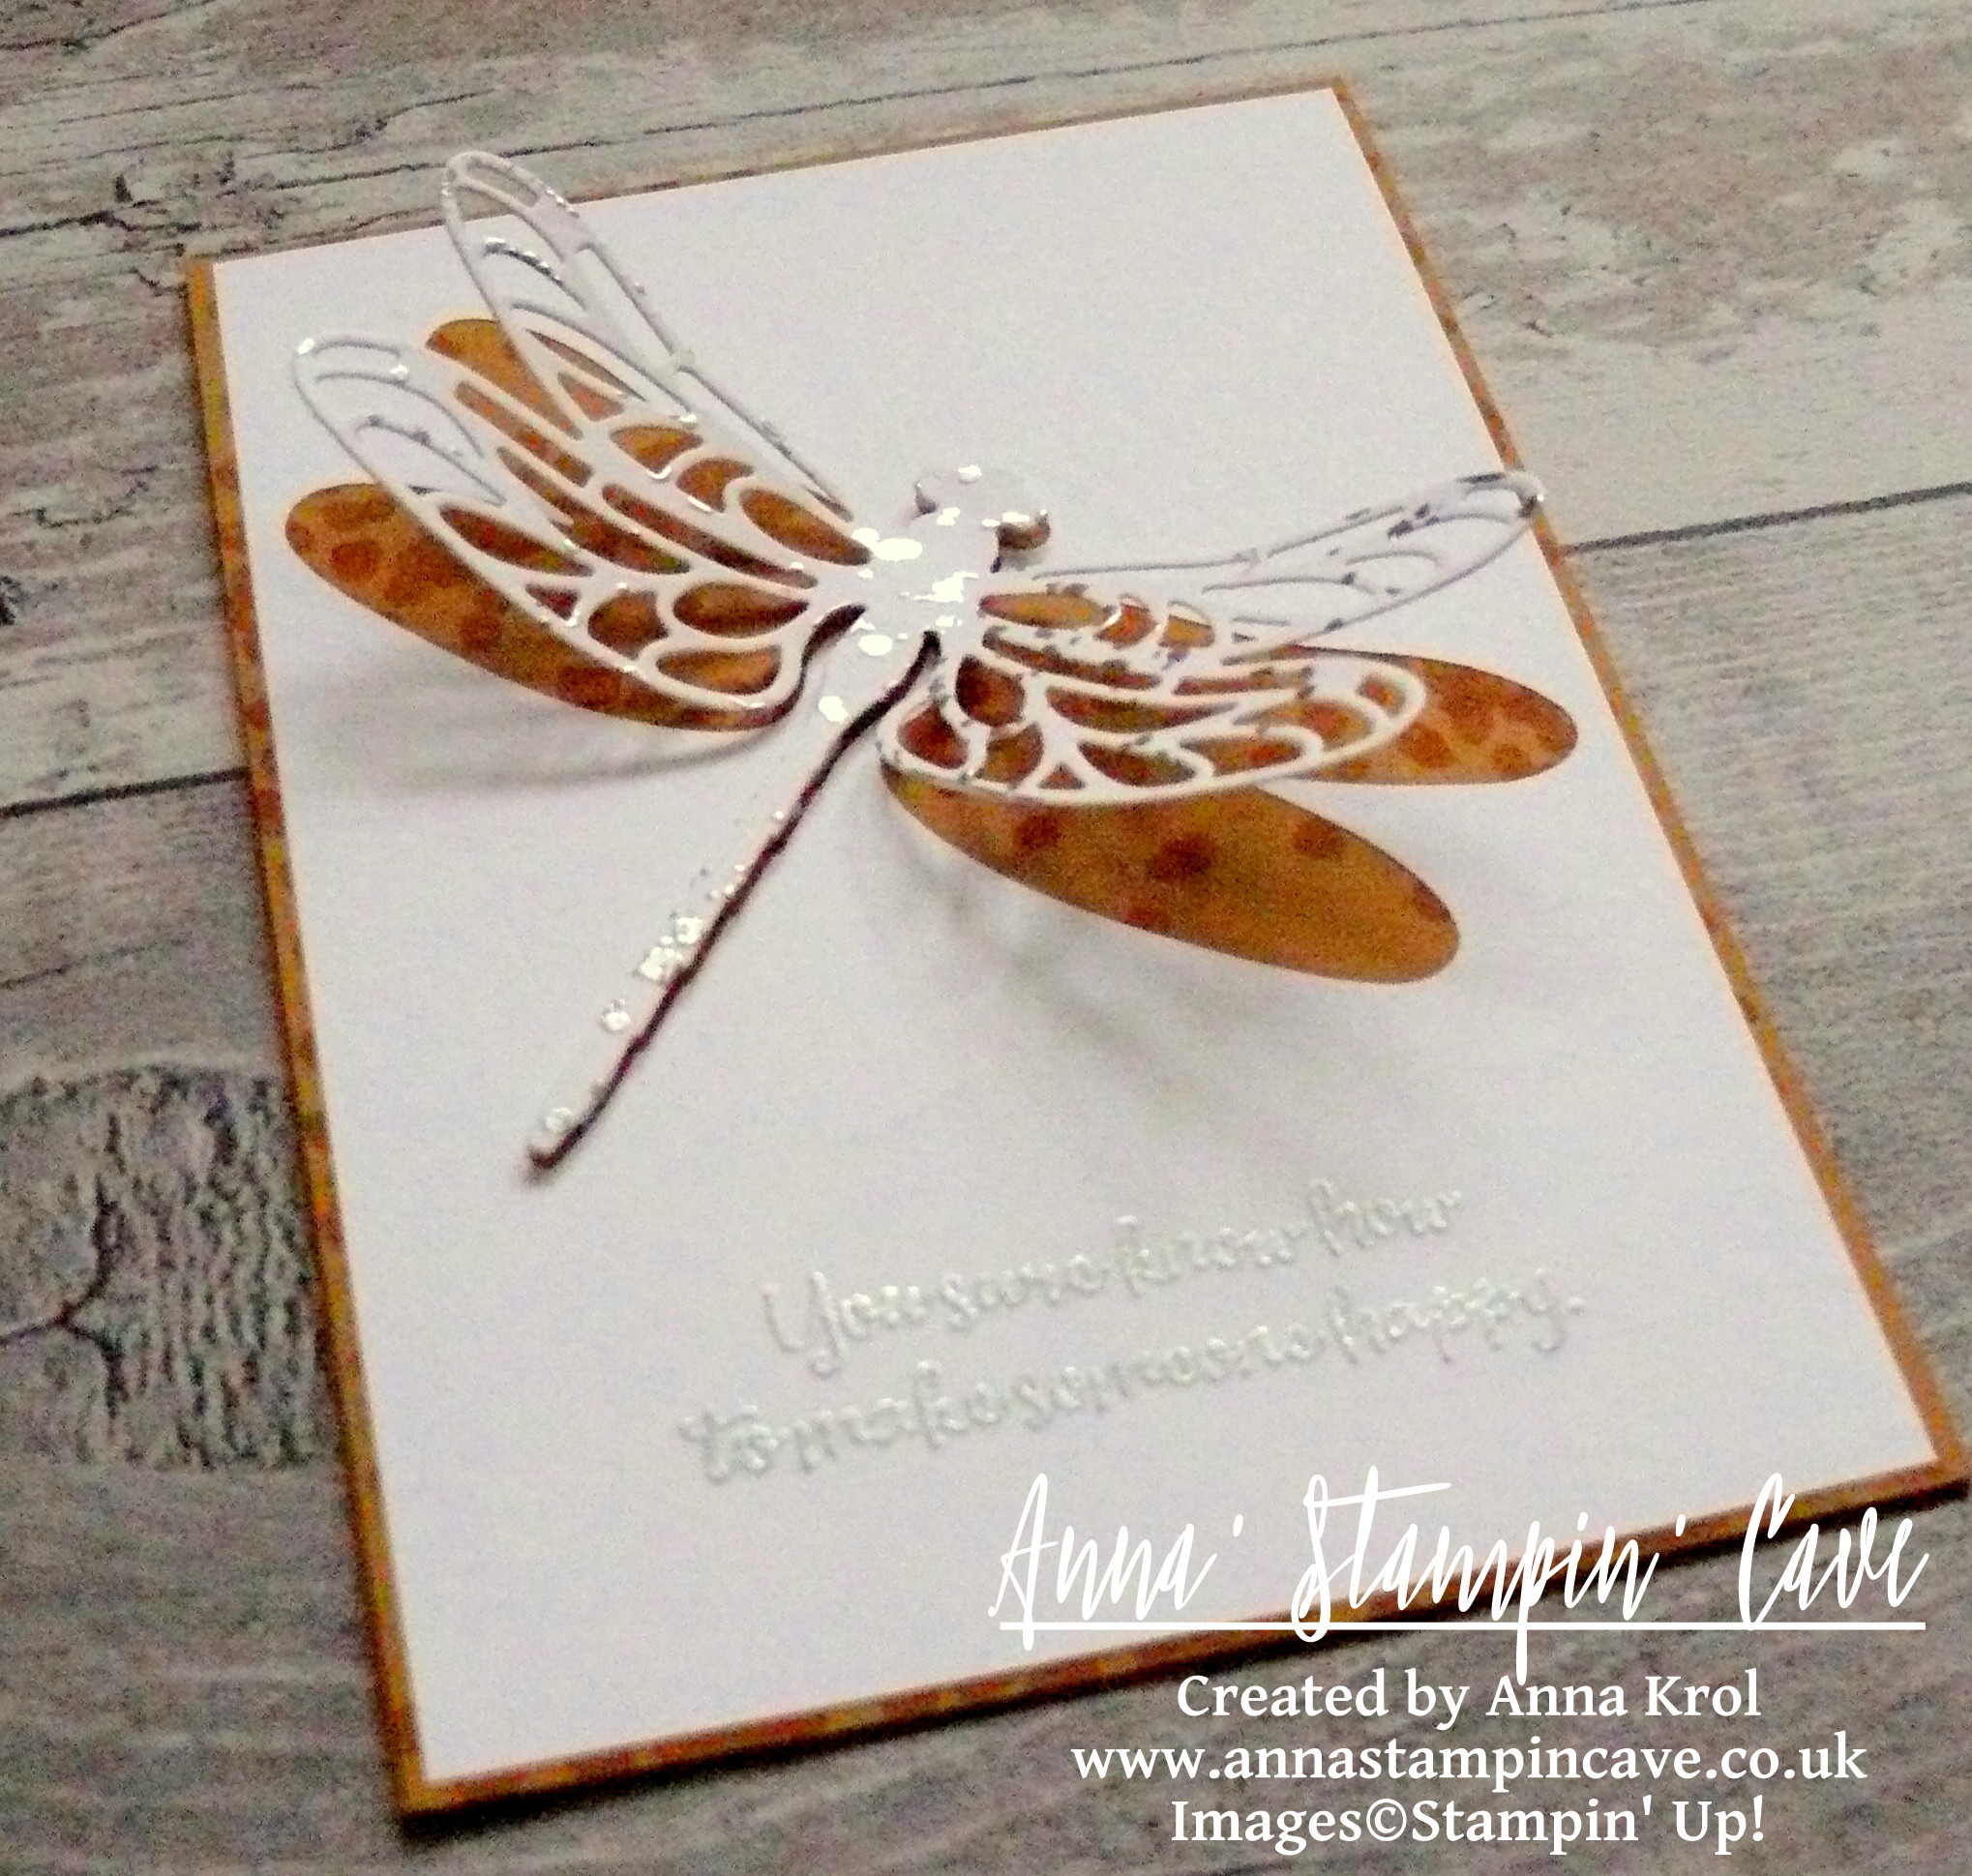
I don’t know about you, but I love these bold botanical designs. They coordinate with Dragonfly Dreams Stamp Set & Dies, but you can use them on their own too. Colour them in with markers, inks or watercolour pencils – it’s fun and very therapeutic…or leave them black&white. Whatever tickles your fancy.

anna-stampin-cave-stampin-up-sale-a-bration-inside-the-lines-dsp-frame

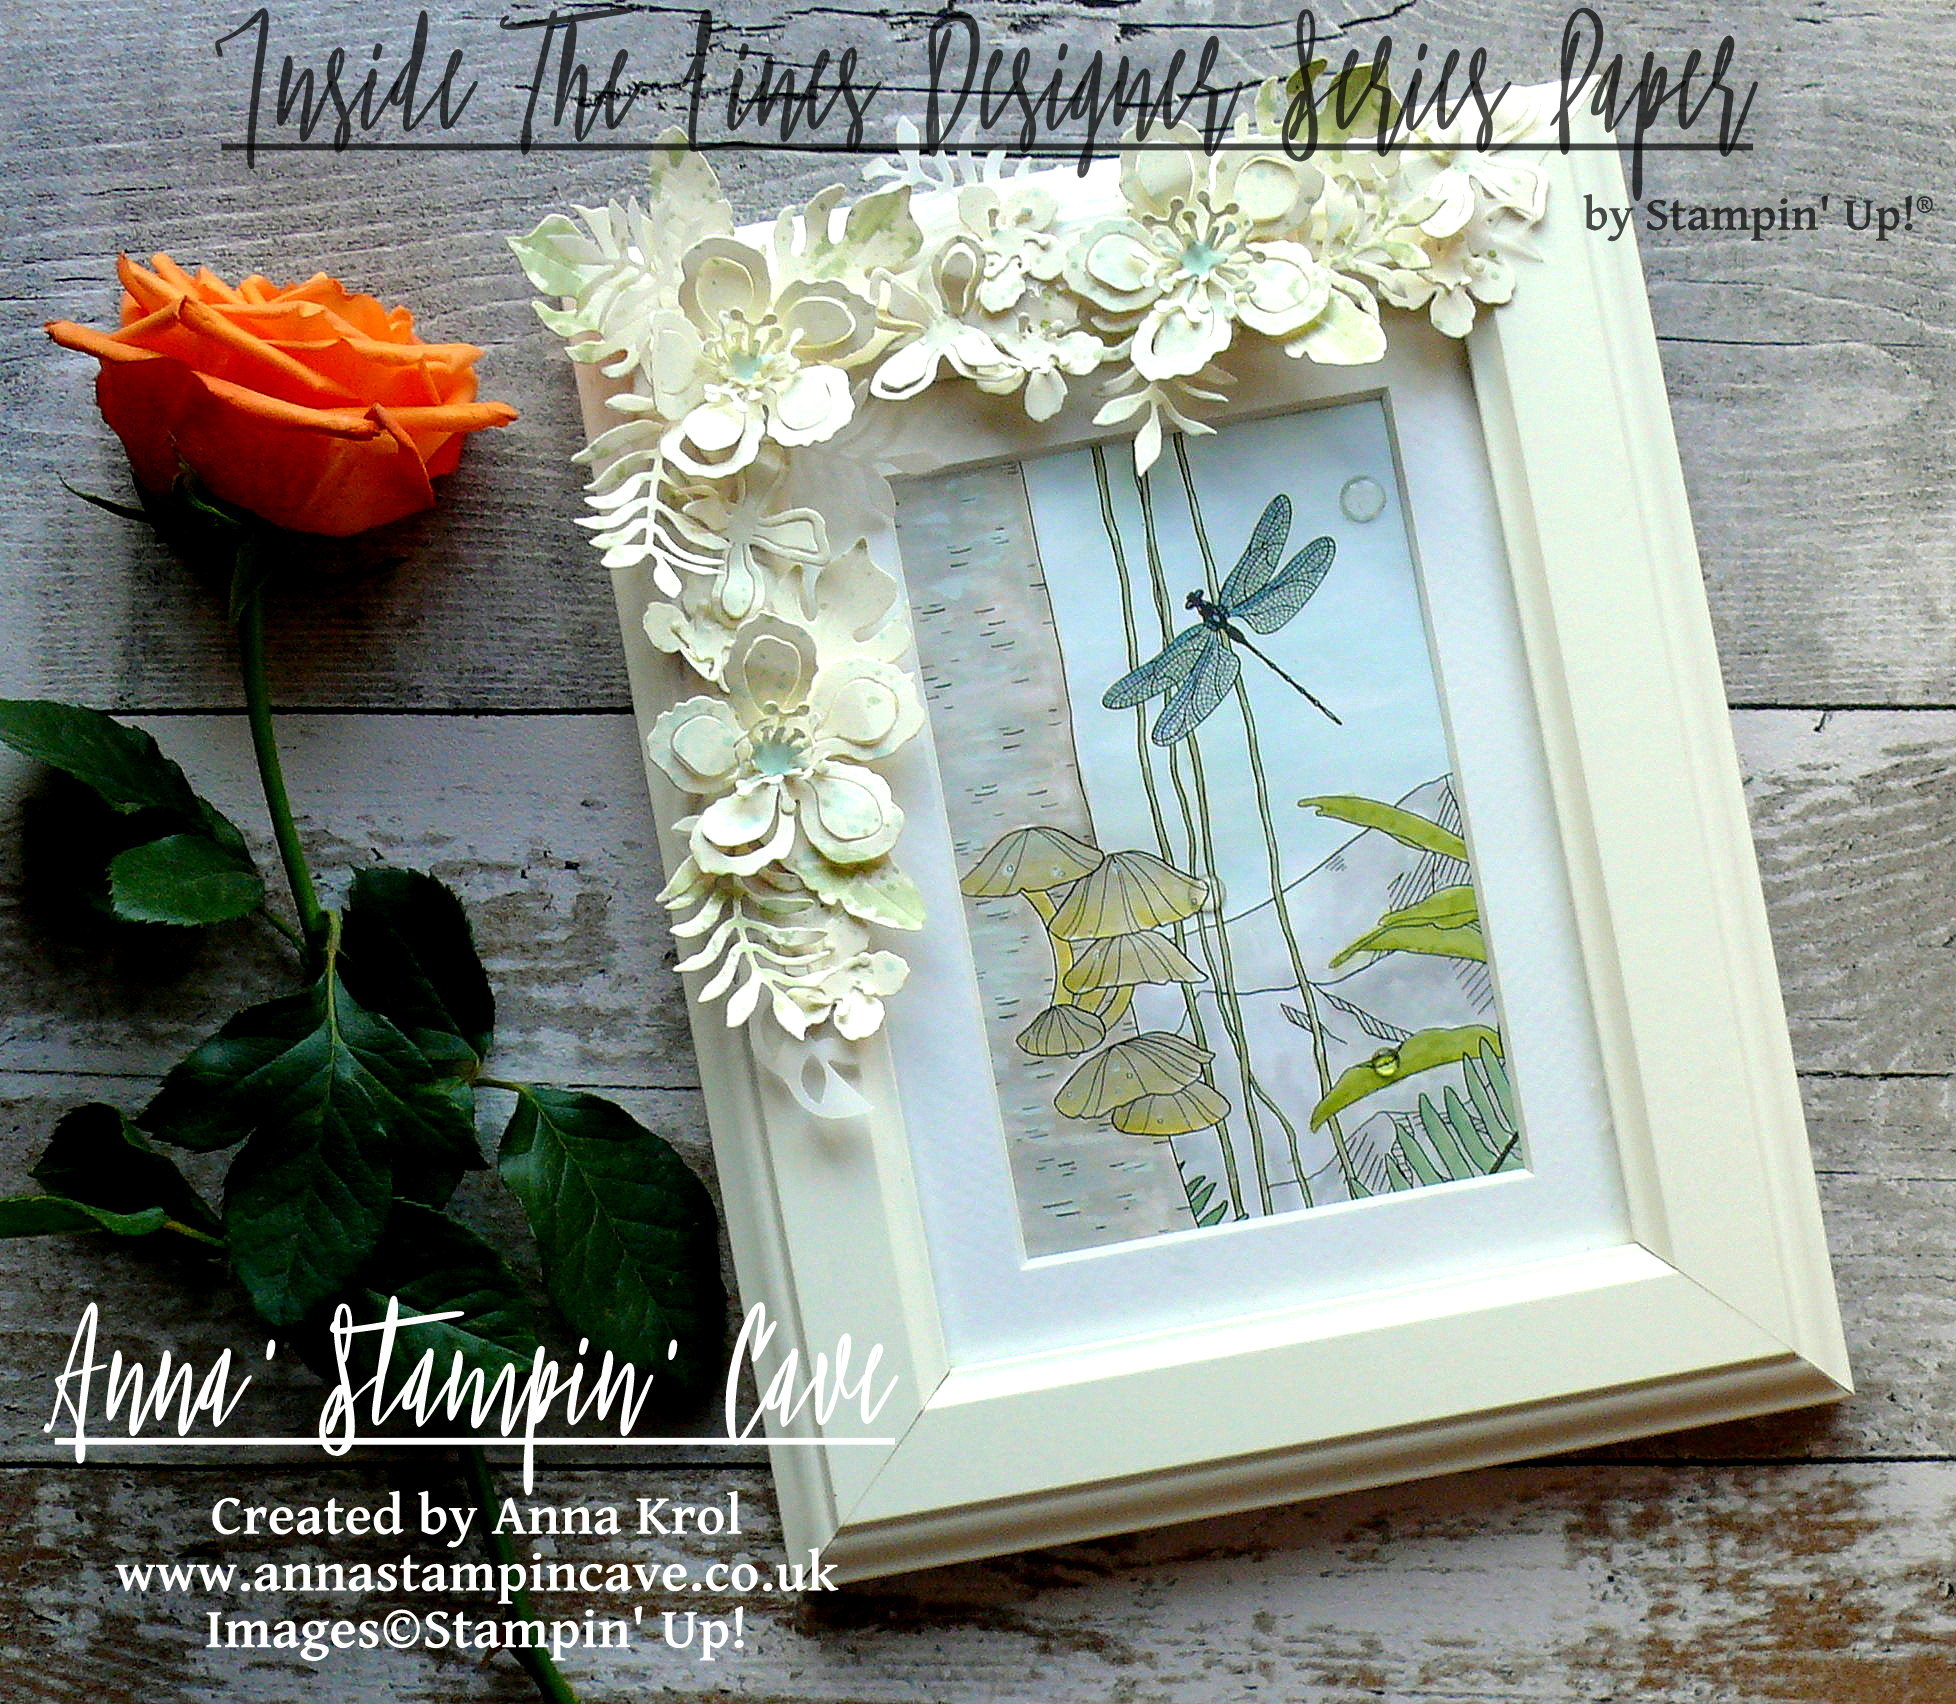
The frame is from Ikea and is called Virserum. It measures 7-1/2 x 9-1/2″ (19 x 24 cm) and comes with inside mount, hence I only needed 4″x 6″ (10 x 15 cm) piece of DSP to fit inside.

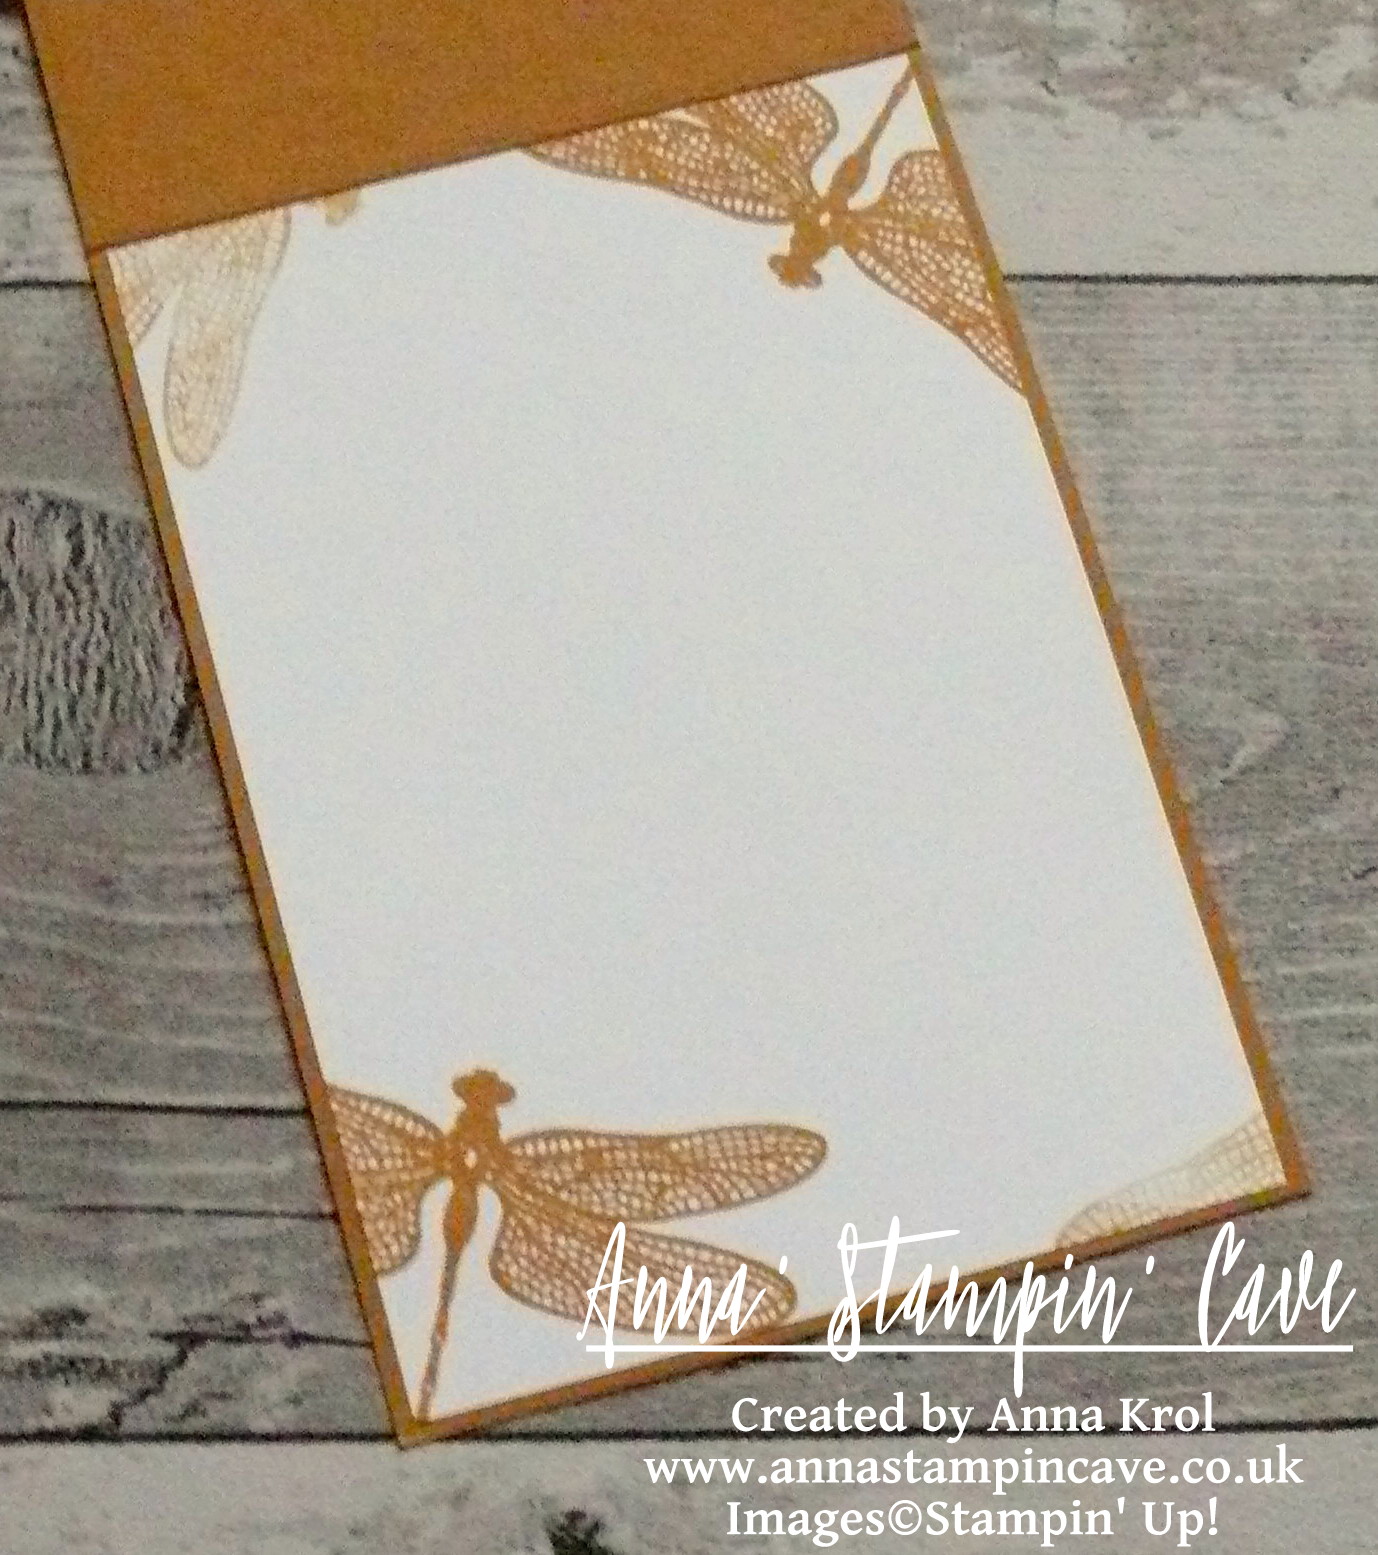
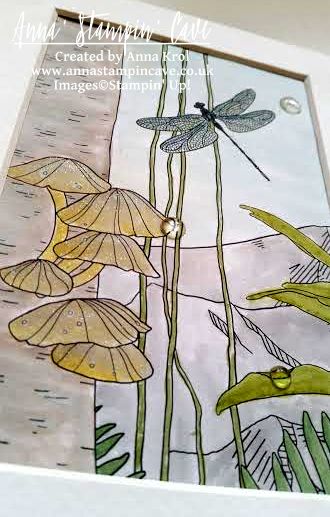
I’ve chosen this lovely, jungle-like design and cut it into 4″x 6″ rectangle. Because I was aiming for a subtle look I decided to watercolour my piece.

Bear in mind this is not watercolour paper so you can’t add too much water to it.

For the foliage, because it’s such a small area, I’ve used Stampin’ markers: Pear Pizzazz, Wild Wasabi, Old Olive, Garden Green and Always Artichoke. First, I scribbled my markers on a craft mat. I also spritz some water on my craft mat, next to the markers. I did it deliberately, to have more control of how much water I use. Next, I took dry aqua painter, picked up some water with its brush, next picked up some colour from the mat and started colouring my foliage. I was adding more colour and more water to the mat when needed. There are 4-5 layers of colour on leaves, each layer added when the first one was dry.

anna-stampin-cave-stampin-up-sale-a-bration-dsp-inside-the-lines

To colour in the rest of the image, I’ve used ink pads as my palettes.

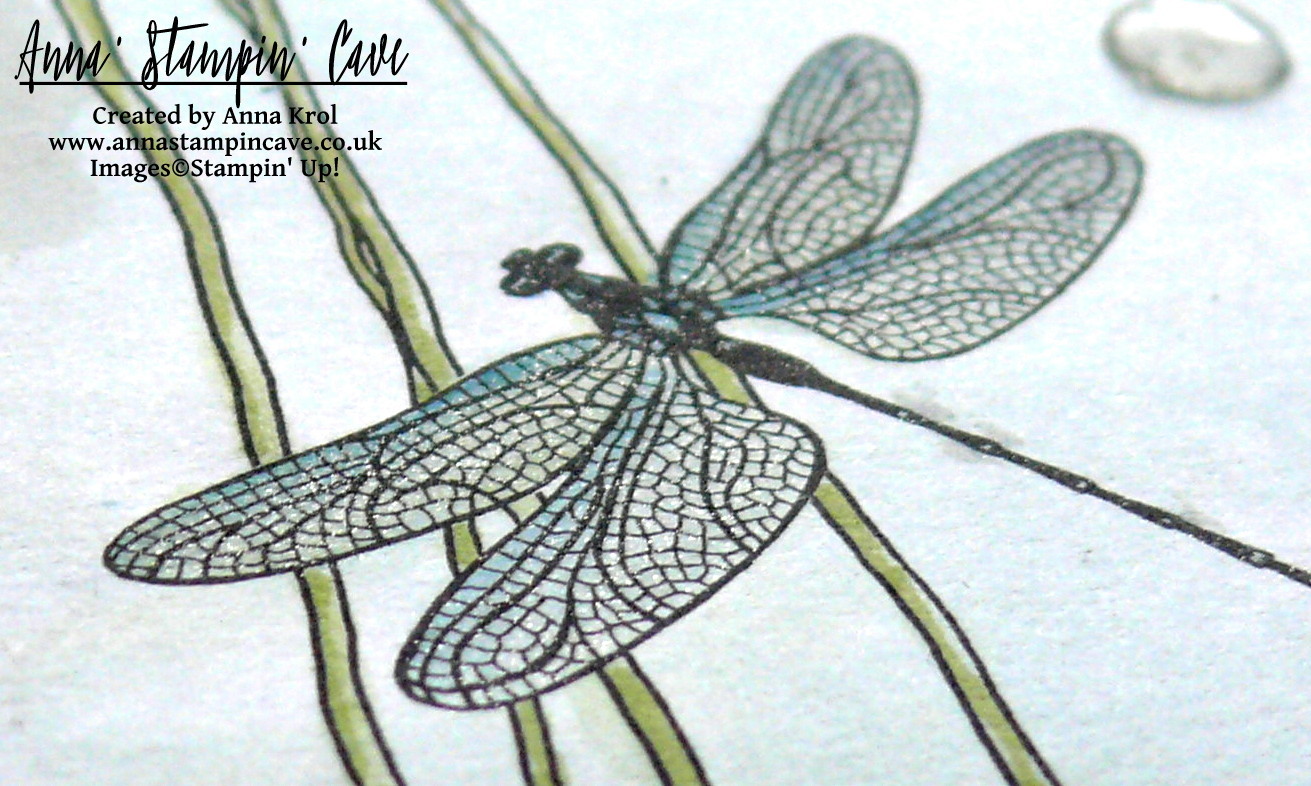
I’ve used Soft Sky for sky and dragonfly (with a little dab of Island Indigo marker). Mountains are coloured with Smoky Slate.

For the tree trunk, I’ve used Tip Top Taupe ink pad. To add some highlights I’ve used Whisper White Craft Ink (yes, I’ve used it with aqua painter too).

anna-stampin-cave-stampin-up-sale-a-bration-inside-the-lines

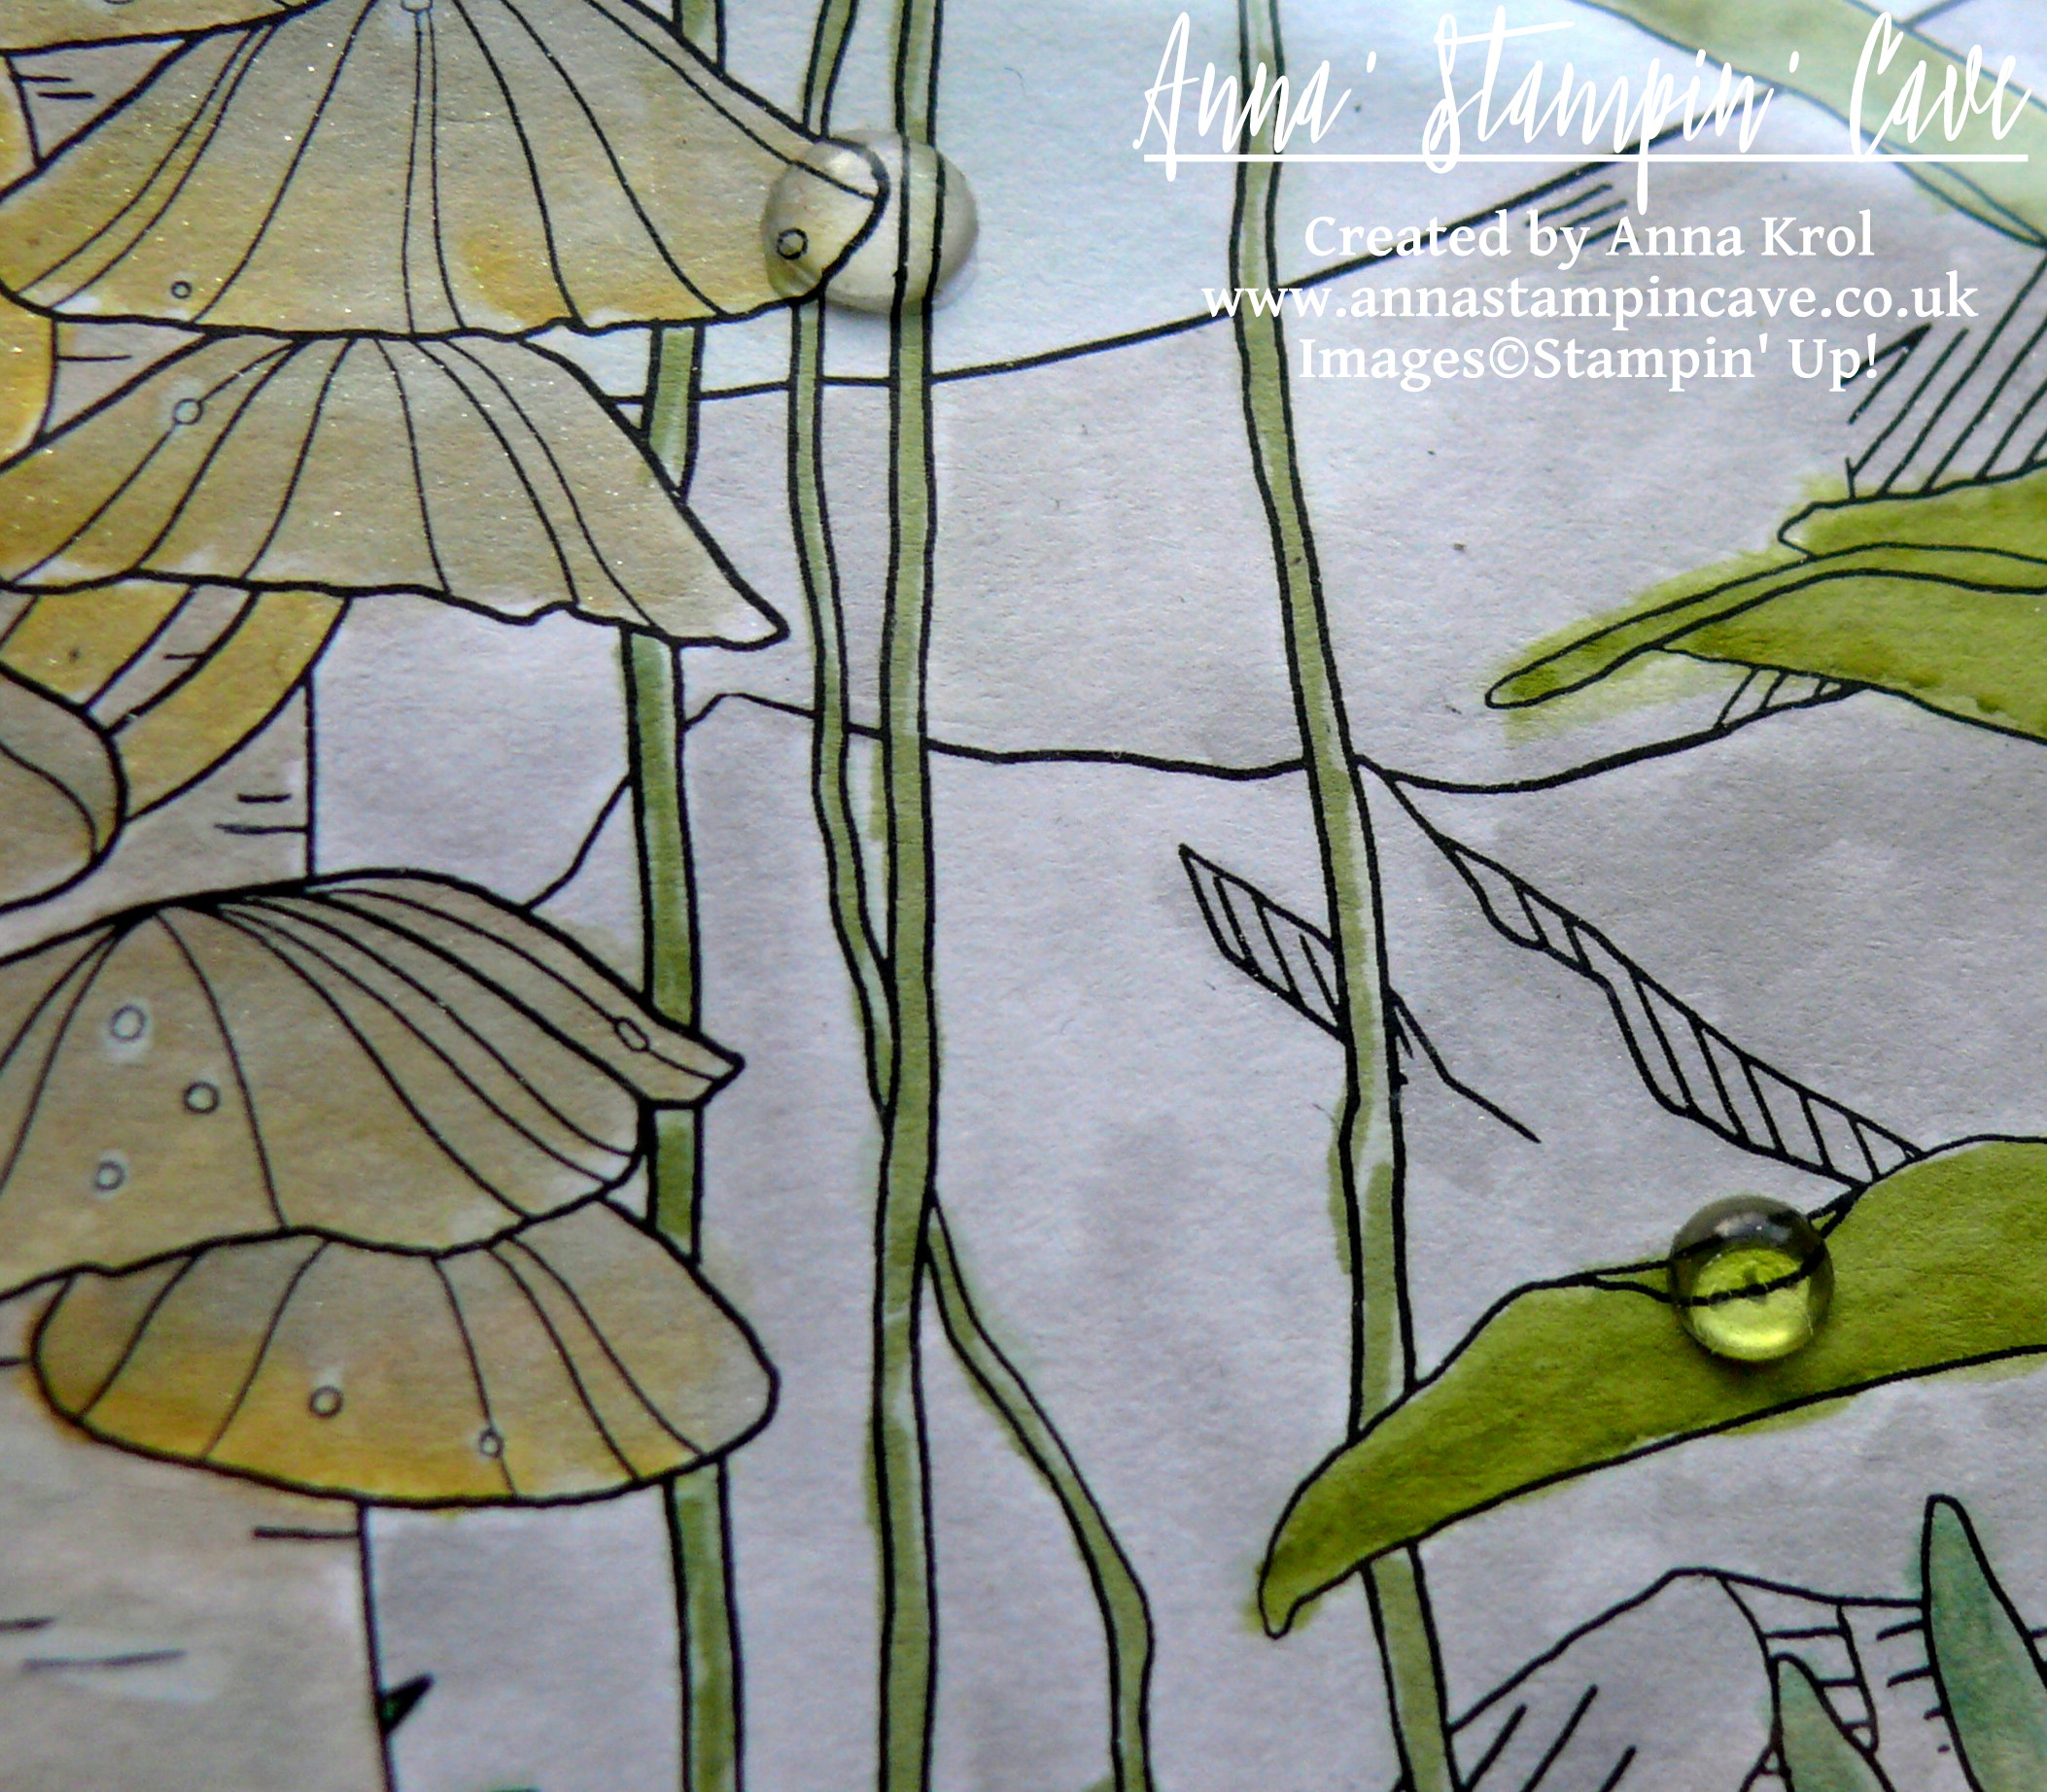
Polypores or conks (I’m not sure how they are called in the UK so forgive me if I’m wrong) are watercoloured with a mix of Sahara Sand, Crushed Curry and again some white craft ink for highlights.

For the final touch, I’ve added White Perfect Accents as dew drops (one on the sky is hiding a little boo-boo). And as a must, I had to add some shimmer with clear of Wink of Stella to the dragonfly, mountain tops, and polypores. Sadly it’s really hard to capture this lovely shimmer on photos. But now to the frame.

anna-stampin-cave-stampin-up-sale-a-bration-inside-the-lines-dragonfly

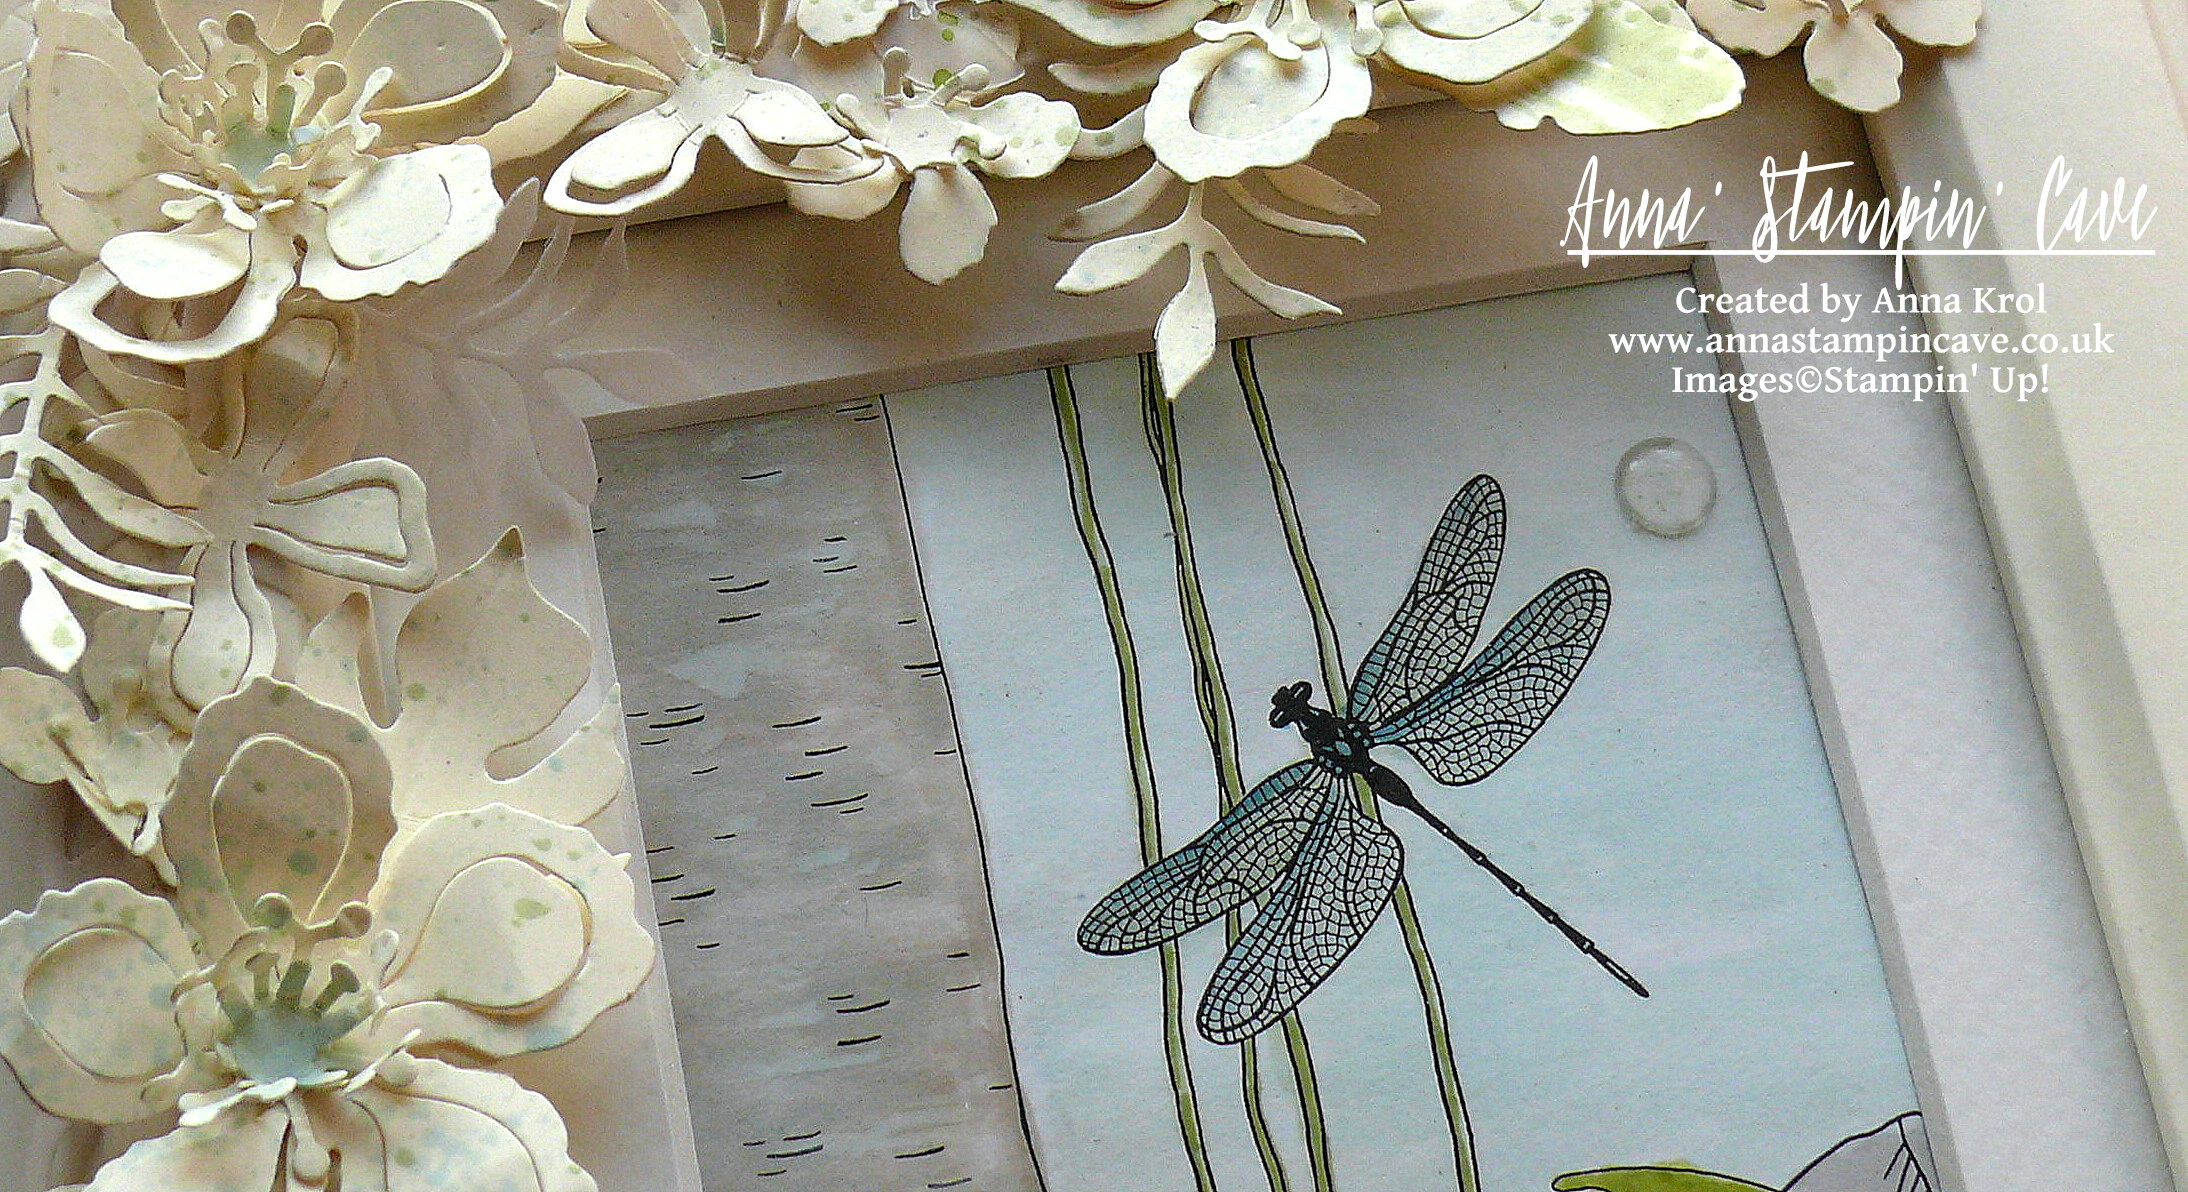
Believe it or not, this is my first ever altered photo frame. I knew I want flowers, but for a long time, I couldn’t decide on a colour. First, I wanted to go with quite a feminine look, so pinks and oranges. But once I had all my flowers ready I didn’t really like it. Typical haha. But no worries, I will use them to something else. And then I had this revelation: how about Very Vanilla?! Genius!

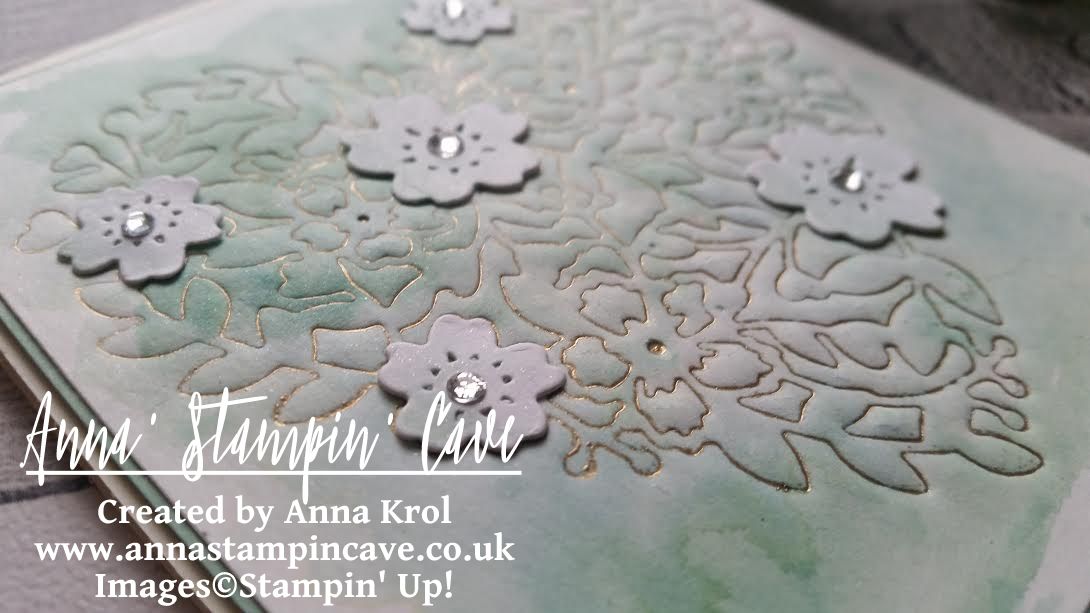
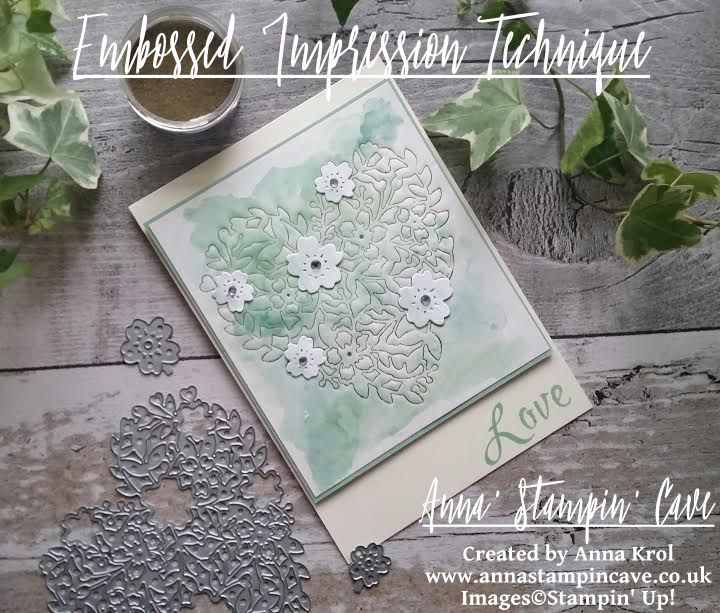
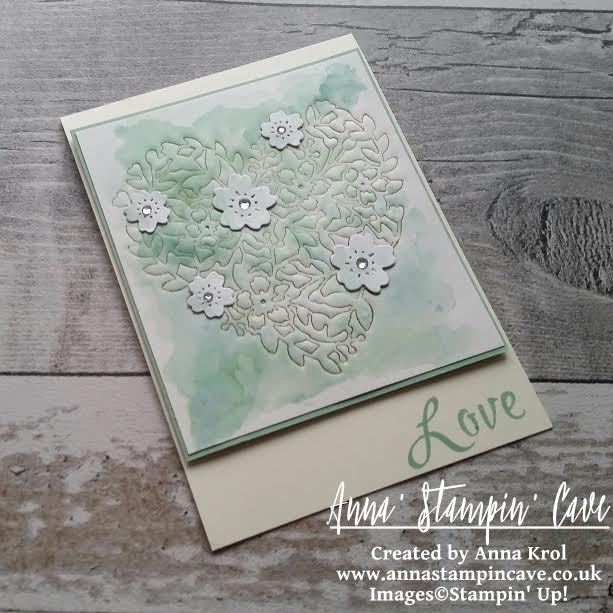
I die-cut oodles of flowers and leaves from Very Vanilla and Vellum cardstock. Arranged them around the frame and once I was happy with the placing, I adhered them with glue dots.

anna-stampin-cave-stampin-up-sale-a-bration-inside-the-lines-dsp-picture-frame

But as you may know me already, nothing can be too easy haha And when I looked at my frame something was missing, in my humble opinion. Oh right, it was too ‘clean’, too ‘white’. I needed some ‘controlled mess’.

I pressed Pear Pizzazz and Soft Sky ink pads next to each other on the craft mat and spritz it with water. I covered the glass with a piece of paper, and using a clean brush I added random and less random splatters to the flowers and leaves. And I have to say I love it now! And I hope you like my little project too.

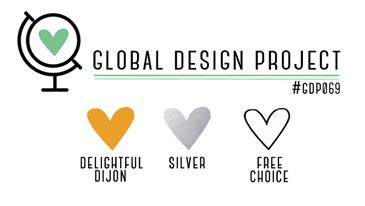
I also want to add this project to the #071 Theme Challenge over at Global Design Project Challenge Blog. This weeks theme is ‘3D Or Off The Page’

gdp071

As always, if you wish to purchase any of products I have used, simply click the images below to go directly to my online store.

Thank you for stopping by and have a blessed day!


Inside The Lines Designer Series Paper

Inside The Lines Designer Series Paper
[143830]
£0.00

Botanical Builder Framelits Dies

Botanical Builder Framelits Dies
[140625]
£30.00

Very Vanilla A4 Card Stock

Very Vanilla A4 Card Stock
[106550]
£8.25

White Vellum A4 Card Stock

White Vellum A4 Card Stock
[106584]
£6.00

Many Marvelous Markers

Many Marvelous Markers
[131264]
£99.00

Crushed Curry Classic Stampin' Pad

Crushed Curry Classic Stampin’ Pad
[131173]
£6.00

Pear Pizzazz Classic Stampin' Pad

Pear Pizzazz Classic Stampin’ Pad
[131180]
£6.00

Tip Top Taupe Classic Stampin' Pad

Tip Top Taupe Classic Stampin’ Pad
[138325]
£6.00

Sahara Sand Classic Stampin' Pad

Sahara Sand Classic Stampin’ Pad
[126976]
£6.00

Smoky Slate Classic Stampin' Pad

Smoky Slate Classic Stampin’ Pad
[131179]
£6.00

Soft Sky Classic Stampin' Pad

Soft Sky Classic Stampin’ Pad
[131181]
£6.00

Whisper White Craft Stampin' Pad

Whisper White Craft Stampin’ Pad
[101731]
£7.25

Clear Wink Of Stella Glitter Brush

Clear Wink Of Stella Glitter Brush
[141897]
£7.25

Aqua Painters

Aqua Painters
[103954]
£15.50

White Perfect Accents

White Perfect Accents
[138416]
£4.50

Liquid Multipurpose Glue

Liquid Multipurpose Glue
[110755]
£3.75

Glue Dots

Glue Dots
[103683]
£4.75

Stampin' Trimmer

Stampin’ Trimmer
[129722]
£27.00

Big Shot

Big Shot
[143263]
£99.00

Dragonfly Dreams Clean & Simple For GDP#069 Colour Challenge

Anna’ Stampin’ Cave – Dragonfly Dreams Clean & Simple For GDP#069 Colour Challenge

gdp069

Hello and welcome everyone! Something new from me today as it’s the first time when I bite the bullet and decided to take a part in Colour Challenge over at Global Design Project.

I’ve been following this blog for some time now, just never felt confident enough to join in the fun. But hey! It’s just for fun, right?! And when I saw Delightful Dijon (I really, really love this colour) amongst other colours in this week’s challenge, I just knew: now or never. It’s a great colour combination and as my free choice, I simply used Whisper White.

I didn’t craft much lately due to health issues, but I was eager to use a new stamp set from Stampin’ Up! Spring Summer 2017 Catalogue, called Dragonfly Dreams. It comes with coordinating Detailed Dragonfly Thinlits Dies, as a bundle, and is just beautiful. It seemed perfect for the idea I had in my head.

Just forgive me poor photos. I don’t have any fancy equipment and take my photos in the daylight. But the weather is so miserable since few days down here in Midlands, UK, that it was just impossible to take any decent picture.

anna-stampin-cave-stampin-up-dragonfly-dreams-stamp-set-and-dies-bundle-clean-and-simple-card

‘Nearly Inlay’ Dragonfly Dreams card dimensions:

  • Delightful Dijon cardstock: 11-6/8″ x 4-1/8″ scored in half at 5-7/8″ (29.7 x 10.5 cm scored in half at 14.8 cm)
  • Whisper White cardstock: 2 panels 4″x 5-5/8″(10,2 x 14,3 cm)

First, I stamped the card base with the polka dot (kinda) background stamp from Dragonfly Dreams Stamp Set until it was all covered. I’ve used Delightful Dijon ink for a tone on tone effect.

anna-stampin-cave-stampin-up-dragonfly-dreams-bundle-clean-and-simple-card

Next, I die-cut the largest detailed dragonfly, using Detailed Dragonfly Thinlits Dies, from one of the  Whisper White panels and adhered that panel (without dragonfly) to the card base. Of course, I forgot to stamp my sentiment before adhering the panel to the card front.  Typical, right?! LOL But nothing was lost yet. I picked the beautiful ‘You sure know how to make someone happy’ sentiment from Dragonfly Dreams Stamp Set (I love sentiments and the fonts in in this set) and heat embossed it on my card base with silver embossing powder. Seemed easy, but while heat embossing it, the base ‘curled up’ a bit. So I run it through my Big Shot to straighten it up. Bear in mind if you’ve got worn out plates they will leave an impression on your cardstock – ask how do I know.

For the inside panel, I stamped few dragonflies in Delightful Dijon in the corners before adhered it with liquid adhesive.

anna-stampin-cave-stampin-up-dragonfly-dreams-bundle-clean-and-simple-card-inside

I wanted for my dragonfly to carry some silver detail too, so I stamped tiny splotches/dots from Gorgeous Grunge Stamp Set all over the die-cut, using Versamark ink, and heat embossed it with silver embossing powder.

Anna' Stampin' Cave Dragonfly Dreams Bundle Clean and Simple Card.JPG

My original idea was to inlay the dragonfly die-cut back to the negative on the card base. But I’ve changed my mind along the way as the stamped detail on the card base wouldn’t be really visible through the die cut. So I decided to adhere my dragonfly only on the body length but it didn’t look good either. At the end, I’ve used tiny pieces of dimensionals to pop the dragonfly up.

anna-stampin-cave-stampin-up-dragonfly-dreams-bundle-cas

I’m really pleased how this card turned out and I hope you like it too.

I really want to encourage you to check the Global Design Project challenge blog. They have a new challenge every week with various themes and extremely talented Design Team – they will simply blow your mind with their creativity! Just click on their logo below to visit the website

gdp_blog_header

As always, if you wish to purchase any of the products I have used, simply click the images below to go directly to my online shop.

Thank you for stopping by and have a blessed day

Dragonfly Dreams Photopolymer Bundle

Dragonfly Dreams Photopolymer Bundle
[144728]
£42.25

Detailed Dragonfly Thinlits Dies

Detailed Dragonfly Thinlits Dies
[142749]
£28.00

Dragonfly Dreams Photopolymer Stamp Set

Dragonfly Dreams Photopolymer Stamp Set
[142924]
£19.00

Gorgeous Grunge Clear Stamp Set

Gorgeous Grunge Clear Stamp Set
[130517]
£18.00

Delightful Dijon A4 Cardstock

Delightful Dijon A4 Cardstock
[138345]
£7.25

Whisper White A4 Card Stock

Whisper White A4 Card Stock
[106549]
£8.25

Delightful Dijon Classic Stampin' Pad

Delightful Dijon Classic Stampin’ Pad
[138327]
£6.00

Embossing Buddy

Embossing Buddy
[103083]
£5.50

Versamark Pad

Versamark Pad
[102283]
£7.75

Silver Stampin' Emboss Powder

Silver Stampin’ Emboss Powder
[109131]
£4.50

Stampin' Dimensionals

Stampin’ Dimensionals
[104430]
£3.75

Liquid Multipurpose Glue

Liquid Multipurpose Glue
[110755]
£3.75

Stampin' Trimmer

Stampin’ Trimmer
[129722]
£27.00

Big Shot

Big Shot
[143263]
£99.00

The Creative Flow Blog Hop – Cookie Cutter Peek-A-Boo Baby Cards

Anna’ Stampin’ Cave – The Creative Flow Blog Hop – Cookie Cutter Peek-A-Boo Baby Cards

the-creative-flow-header

Thank you for joining us on our Creative Flow Blog Hop. Each month we are set a challenge to creatively stretch our imaginations. To hop along, please use the buttons at the bottom of the post to keep hopping.

For this month we’ve been set a challenge to use any carry-over holiday-themed stamps to create a non-Christmassy project.

stampin-up-carry-over-stamp-sets

I knew straight away I wanted to use Cookie Cutter Christmas Stamp Set to create some super cute baby cards.

anna-stampin-cave-cookie-cutter-peek-a-boo-baby-card

I chose rather traditional baby colours: pink and blue. For the pink, I’ve used beautiful dusty Blushing Bride, and Pool Party seemed just perfect for a baby boy card.

anna-stampin-cave-cookie-cutter-peek-a-boo-baby-card-baby-girl

Peek-A-Boo Baby Girl card dimensions:

  • Blushing Bride cardstock: 8-1/4″ x 5-7/8″ scored in half at 4-1/8″ (21 x 14.8 cm scored in half at 10.5 cm)
  • Whisper White cardstock: 4-3/8″ x 3-5/8″ (11.1 x 9.2 cm)
  • Blushing Bride Designer Series Paper from Subtles Designer Series Paper Stack: 4-2/8″ x 3-1/2″ (10.7 x 8.8 cm)
  • Scraps of Whisper White and White Vellum cardstock for die-cutting and sentiment
  • Whisper White Organza Ribbon: approx 6″

First, I stamped the little bear from Cookie Cutter Christmas Stamp Set, in Blushing Bride, onto a piece of Whisper White cardstock. For the little face, I’ve used Basic Black Archival Ink Pad. I die-cut the bear image using the second largest oval from Stitched Shapes Framelits Dies. I also die-cut the same size stitched oval shape from White Vellum. Next, I stamped ‘peek-a-boo’ sentiment from Suite Sayings Stamp Set, also in Blushing Bride, on a strip of Whisper White, and cut it into a banner. A baby card can’t go without a little bling so I added a tiny rhinestone to the sentiment banner.

To add some interest (and cuteness) to the card base, I pull out long forgotten Hearts & Stars Decorative Masks. For the girly card, I’ve used hearts stencil. First, I thought to add some sparkle through the stencil, but at the end, I decided for tone on tone effect and sponged hearts with Blushing Bride Ink.

anna-stampin-cave-cookie-cutter-peek-a-boo-baby-card-pool-party

Peek-A-Boo Baby Boy card dimensions:

  • Whisper White cardstock: 8-1/4″ x 5-7/8″ scored in half at 4-1/8″ (21 x 14.8 cm scored in half at 10.5 cm)
  • Pool Party cardstock: 4-3/8″ x 3-5/8″ (11.1 x 9.2 cm)
  • Pool Party Designer Series Paper from Subtles Designer Series Paper Stack: 4-2/8″ x 3-1/2″ (10.7 x 8.8 cm)
  • Scraps of Whisper White and White Vellum cardstock for die-cutting and sentiment
  • Whisper White Organza Ribbon: approx 6″

This card was made similarly to the baby girl one. The only significant change, except colour combo obviously,  was that I stamped the bear and his ears separately as I planned to punch the bear using Cookie Cutter Bilder Punch. 

It turned out that the bear has a slightly wider ‘body’ than the other images from this stamp set and you can’t punch it without losing a little bit of his chubby shape.

At the end, I had to fussy-cut the bear but it’s quite a straightforward process. I punched out his ears and using snail adhesive I glued his ears behind his head and next I glued the bear flat onto the stitched oval shape.

Assembling these cards was pretty easy. First I adhered DSP panels to the cardstock. I added the ribbon at the bottom of my panels. I secured it at the back of the panels using snail adhesive and glued it to the card base.

Next step was to assemble my little bears. I glued the ovals with bears to the vellum ovals, offsetting them slightly. I adhered them to the card with Stampin’ Dimensionals for some extra dimension. Sentiments are adhered using Stampin’ Dimensionals too.

anna-stampin-cave-cookie-cutter-peek-a-boo-baby-cards

I truly hope you like my cute ‘peek-a-boo’ baby cards. They are not only adorable but also very easy to recreate.

Now, be sure to hop along and see more inspiring projects. Your next stop is lovely and talented Heidi.

Thank you for stopping by and have a blessed day

the-creative-flow-previous-button the-creative-flow-next-button

The Creative Flow Blog Hop -Shaun The Sheep Punch Art

Anna’ Stampin’ Cave – The Creative Flow Blog Hop -Shaun The Sheep Punch Art

the-creative-flow-header

Thank you for joining us on our Creative Flow Blog Hop. Each month we are set a challenge to creatively stretch our imaginations. The products we have used are all available in the current Annual and/or seasonal Stampin’ Up!® catalogues. To hop along, please use the buttons at the bottom of the post to keep hopping.

Hello hello! This is our very first The Creative Flow Blog Hop, and I’m really excited to be a part of it. Today’s theme was a quite a stumper. We’ve been set a challenge to create an ‘animal’ project using Pretty Pines Thinlits Dies. Yes, I know!?!? How is that even possible!!! 😀 But hey, with a little bit of imagination everything is possible!

anna-stampin-cave-shaun-the-sheep-bah-humbug-christmas-card-punch-art-stampin-up

Because not every one of us had these dies, our lovely Jerim has sent some of us (including me) a foam die-cuts so we could actually use them as stamps! How cool! Thank you, Jerim, you are a ⭐

So I’ve spent some time looking at these shapes and…nothing sparked! Typical, right? And then one day: Eureka!!! I saw a sheep 😉 But not just normal, ordinary sheep. I saw Shaun the Sheep, how wicked is that lol Yet I had to figure out how to bring him to life, not literally of course 😉 After few attempts and different combinations I knew exactly which shapes will become Shaun the Sheep. At this point, I wasn’t sure yet what occasion for this card would be.


First, for tummy, ‘curls’ and tail, I stamped one of the large pinecones twice, using Smoky Slate Ink Pad. I stamp-it-off twice for a lighter shade. To create ‘curls’ for my Shaun the Sheep I cut off the bottom of one of the pinecones. I used what’s left to hand cut his little tail. For the head, I stamped the smallest pinecone using Basic Black Archival Ink Pad. To create legs, rams and ears I’ve used larger mistletoe branch. I stamped it three times, also in Basic Black Archival Ink and cut them apart. For his eyes, I punched two 3/16″ circles from Whisper white cardstock using Crop-a-Dile, and two Basic Black tiny circles using Owl Builder Punch. When I had all my pieces ready I assembled my Shaun the Sheep using liquid glue. To make his eyes ‘pop’ I added Fine-Tip Glue to them. I also used Fine-Tip Glue Pen to create his nostrils.

anna-stampin-cave-shaun-the-sheep-punch-art-stampin-up

So now, when I had my sheep created I had to decide what kind of card/sentiment I want to make. And I have to tell you my mind went blank. I only knew it has to be something fun. And while looking for some fun ‘sheepy’ sentiment (if it’s even a word lol) I came across this ‘Christmassy’ sentiment: ‘Bah humbug’ or even ‘Baa humbug’ haha. Yes! That was it! Let it be a Christmas (kinda) card then.

I took a piece of Whisper White cardstock that measures 4″ x 5-6/8″ and stamped a wreath using following colours: Pear Pizzaz and Wild Wasabi for fir branches, Mint Macaron for mistletoe and Cajun Craze for twigs. Mint Macaron and Cajun craze has been stamped off. The sentiment is stamped at the bottom of my panel using Labeler Alphabet stamp set in Basic Black Archival Ink.

anna-stampin-cave-shaun-the-sheep-bah-humbug-christmas-card-punch-art-stampin-up

I die-cut two ovals: one from vellum using largest of the Layering Ovals Framelits Dies, and the second one from Whisper White cardstock using the largest Oval Stitched Die. I assembled them using dimensionals and adhered Shaun the Sheep on top. I adhered my panel to the Cajun Craze card base.

anna-stampin-cave-shaun-the-sheep-bah-humbug-christmas-card-punch-art-stampin-up

For the final touch, I took three White Perfect Accents, paint them in black using nail polish (couldn’t find my sharpie doh) and added them to the card. I think it really finished the look of the card. I like how this card turned out. It’s quirky and fun. I hope you like it too. Please let me know in the comments below. I would love to hear from you.

Your next stop is lovely Keila  go and see what she has made for you. Thank you for stopping by and have a blessed day

the-creative-flow-previous-button the-creative-flow-next-button

…And The Greatest Of These Is Love – Embossed Impression Technique

Hello and welcome!

Today, I’ve got for you card using beautiful Bloomin’ Heart Thinlits Dies. I’ve made various cards using this die in the past, but this time I wanted to try something new: an Embossed Impression Technique. This is very easy, yet effective technique. And great way to stretch your dies too.

stampin-up-embossing-stamping-with-bloomin-heart-thinlits-dies

I’ve used Stampin’ Up! White Shimmery cardstock for this technique, as I planned to do a bit of water colouring later on. I prepared my Big Shot sandwich: Big Shot on Tab 1 -> Cutting Plate -> Silicon {embossing) mat -> cardstock (I swiped the cardstock with embossing buddy). Next, I tapped Versamark over the cutting edge of the die very gently, and placed the die, cutting edge down, on my cardstock. Remember, once it’s on the paper don’t move it or you will mess up your image. I then carefully placed the second cutting plate over the top and run it through the big shot.

Because I put Versamark Ink on the die, now I had that ink in all the ‘valleys’ of the impression I just made. So I sprinkled Gold Stampin’ Emboss Powder over it and heat embossed it.

stampin-up-embossing-stamping-with-bloomin-heart-thinlits-dies

I love those tiny gold lines! Next, I made few watercolour washes over my piece, using Mint Macaron ink pad and Pool Party reinker. Once dry, I cut my panel to 3-7/8″x 4-3/8″.

I also die cut five flowers, two large and three small, from Whisper White cardstock (I probably should have used Shimmery White cardstock for them too), and adhered them to my piece with glue dots. I’ve added some soft Mint Macaron watercolour wash to the flowers to add some depth to them

stampin-up-embossing-stamping-with-bloomin-heart-thinlits-dies

My card base is Very Vanilla. I stamped ‘Love’ in Mint Macaron using Brushwork Alphabet stamp set. I adhered my embossed panel with liquid glue to a piece of Mint Macaron mat (4″x 4-1/2″), and add them both to the card base with dimensionals.

To finish off my card I’ve added some shimmer to the flowers with Clear Wink of Stella Glitter Brush and put a rhinestone in each flower centre.

I hope you like my card, and that you give this technique a try.

As always, if you wish to purchase any of the products I have used, simply click the images below to go directly to my online shop.

Thank you for stopping by and have a blessed day

Brushwork Alphabet Photopolymer Stamp Set

Brushwork Alphabet Photopolymer Stamp Set
[141772]
£23.00

Bloomin' Heart Thinlits Dies

Bloomin’ Heart Thinlits Dies
[140621]
£22.00

Very Vanilla A4 Card Stock

Very Vanilla A4 Card Stock
[106550]
£8.25

Shimmery White A4 Card Stock

Shimmery White A4 Card Stock
[121717]
£7.25

Mint Macaron A4 Cardstock

Mint Macaron A4 Cardstock
[138344]
£7.25

Whisper White A4 Card Stock

Whisper White A4 Card Stock
[106549]
£8.25

Mint Macaron Classic Stampin' Pad

Mint Macaron Classic Stampin’ Pad
[138326]
£6.00

Pool Party Classic Stampin' Ink Refill

Pool Party Classic Stampin’ Ink Refill
[122933]
£3.00

Versamark Pad

Versamark Pad
[102283]
£7.75

Embossing Buddy

Embossing Buddy
[103083]
£5.50

Clear Wink Of Stella Glitter Brush

Clear Wink Of Stella Glitter Brush
[141897]
£7.25

Gold Stampin' Emboss Powder

Gold Stampin’ Emboss Powder
[109129]
£4.50

Rhinestone Basic Jewels Embellishments

Rhinestone Basic Jewels Embellishments
[119246]
£4.50

Aqua Painters

Aqua Painters
[103954]
£15.50

Stampin' Dimensionals

Stampin’ Dimensionals
[104430]
£3.75

Liquid Multipurpose Glue

Liquid Multipurpose Glue
[110755]
£3.75

Silicone Craft Sheet

Silicone Craft Sheet
[127853]
£5.50

Heat Tool - Uk Plug

Heat Tool – Uk Plug
[129054]
£27.00

Big Shot

Big Shot
[143263]
£99.00