Roses & Dragonfly No°2 – Inlaid & Partial Die-cutting Birthday Card

Anna’ Stampin’ Cave – Roses & Dragonfly No°2 – Inlaid & Partial Die-cutting Birthday Card

And here I am again with Rose Wonder and Detailed Dragonfly Thinlits Dies!

My little sister (well not that little, she’s nearly 22 y.o. But hey! she will always be my little sister) came to last week and said she and her friends wanted me to make a birthday card for their girlfriend.

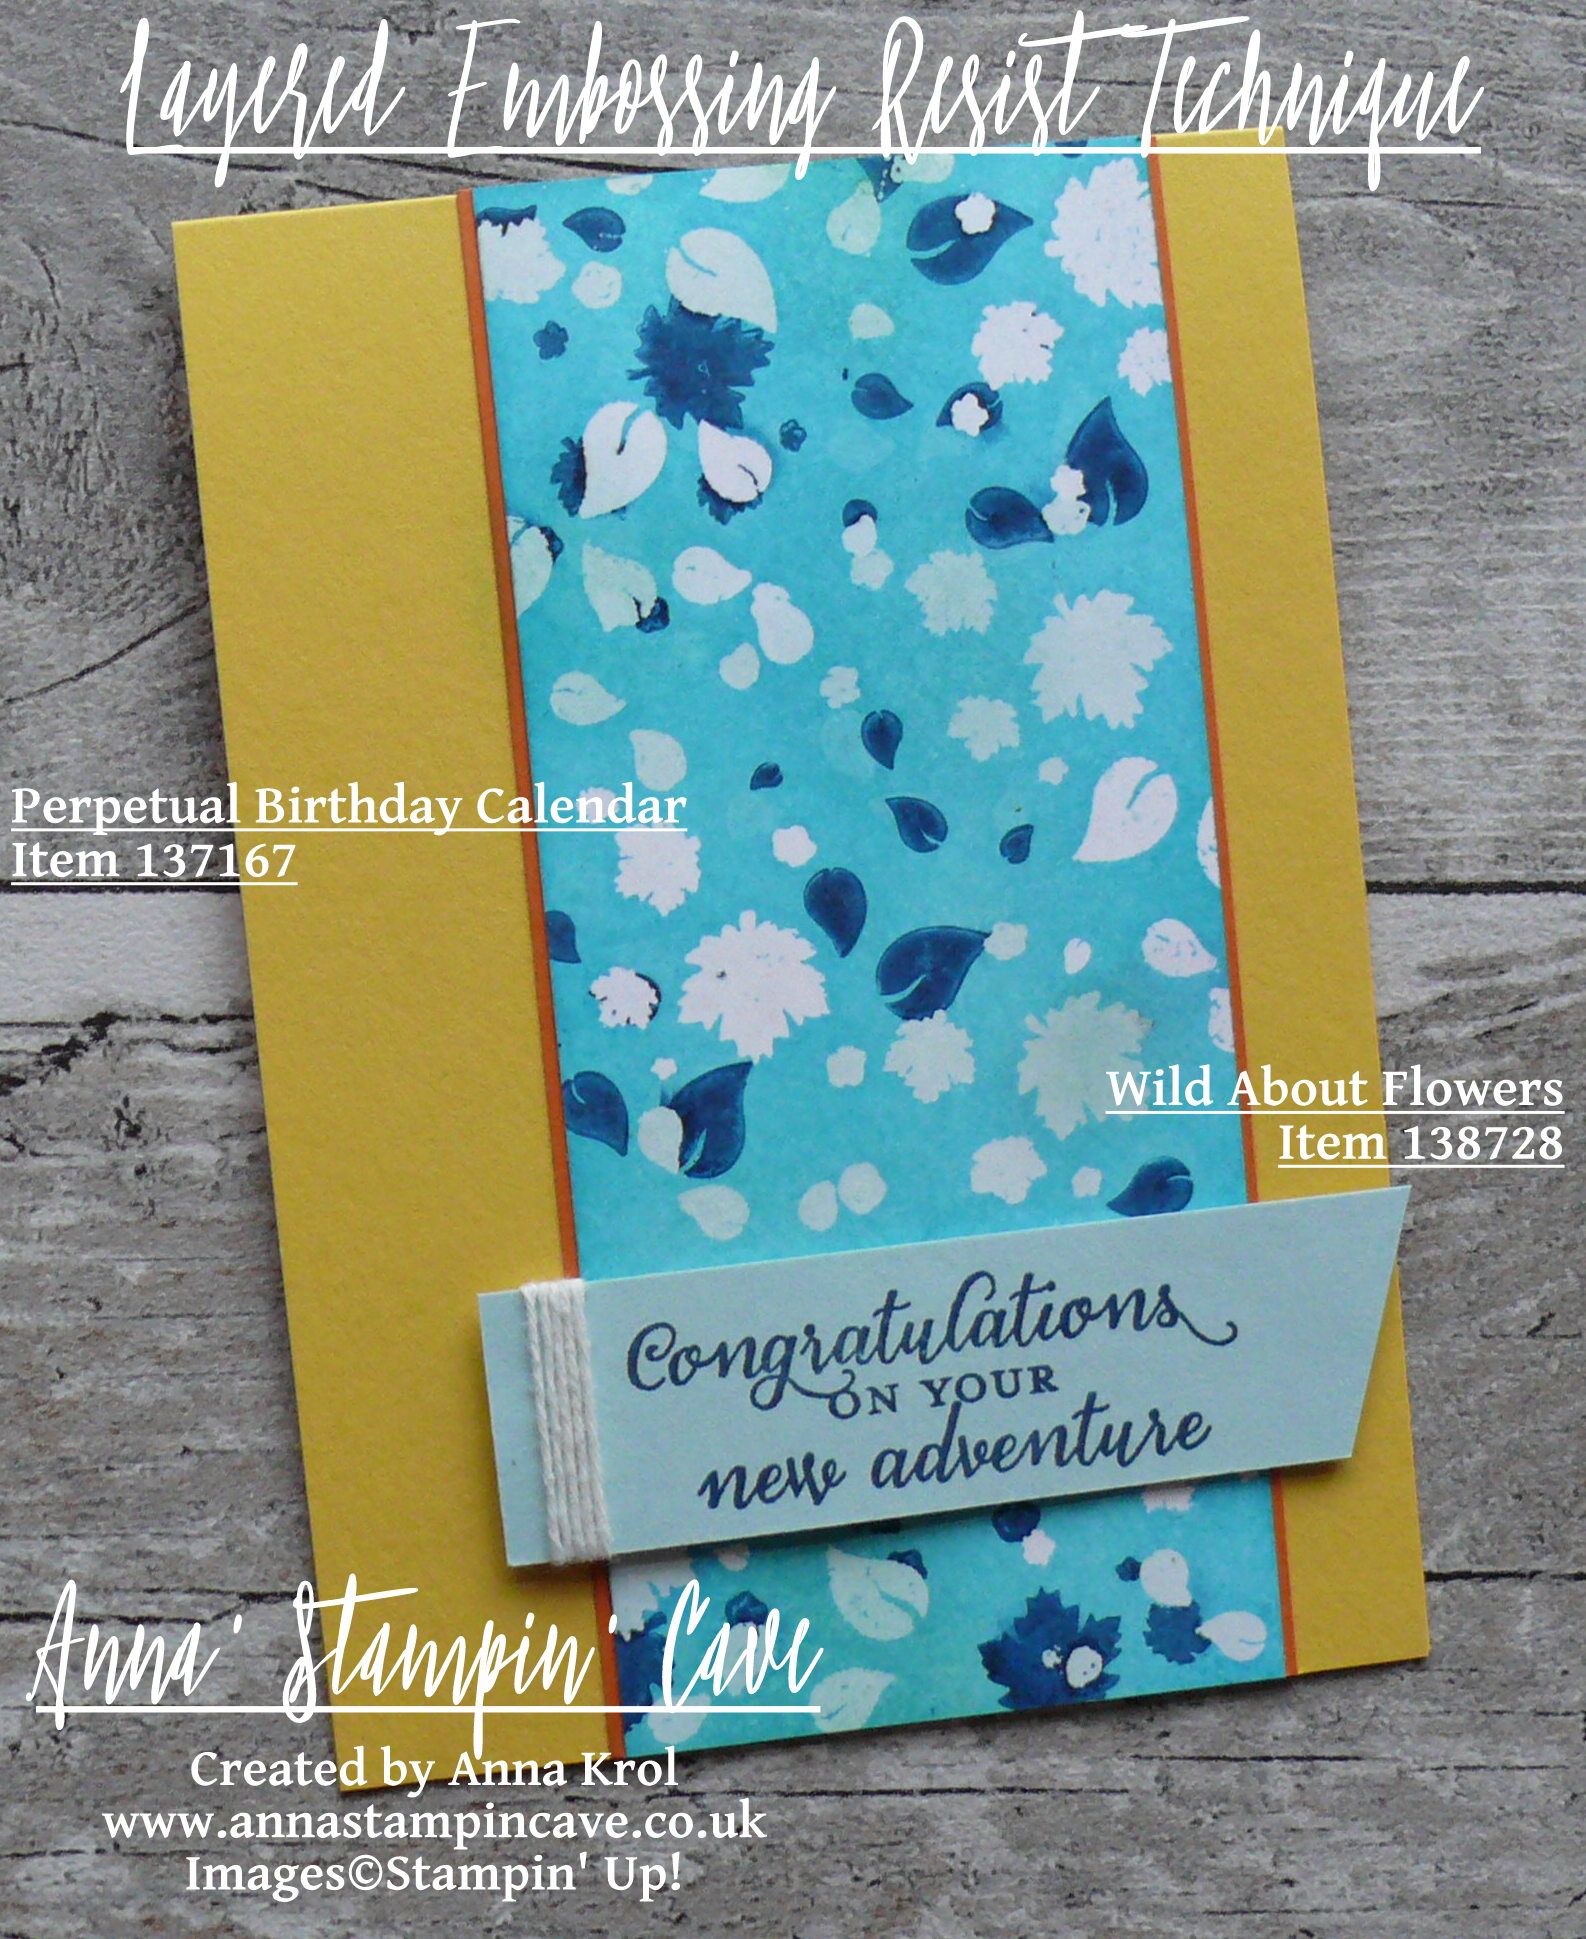
They really liked this card I’ve made a few weeks back…

anna-stampin-cave-stampin-up-dragonfly-dreams-bundle-and-rose-garden-thinlits-dies-inlaid-partial-die-cutting-technique

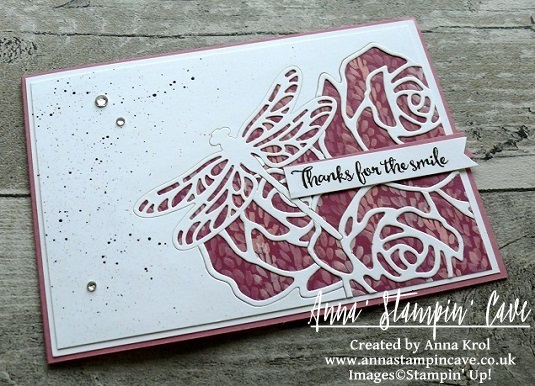
…and wanted something similar hence No°2 in the title 🙂

The base colour they wanted was orange with silver details, as these are the colours their friend loves. So fun and challenging as I don’t create much in orange! But I love challenges. I love to sit down and design, create something unusual; not just grab a card, two or three colours one stamp and bah! – five minutes later the card is done! I do clean & simple sometimes but that’s not my concept of creativity 🙂 I am an artist at heart. It have to be a process, it have to be messy and a little bit crazy too; so when I’m done my soul sings…

…and this is exactly how this card came to life

Anna' Stampin' Cave - Roses And Dragonfly Birthday Card using Inlaid Partial Die Cutting_Stampin' Up! Rose Garden Thinlits Dies_Detailed Dragonfly Thinlits Dies

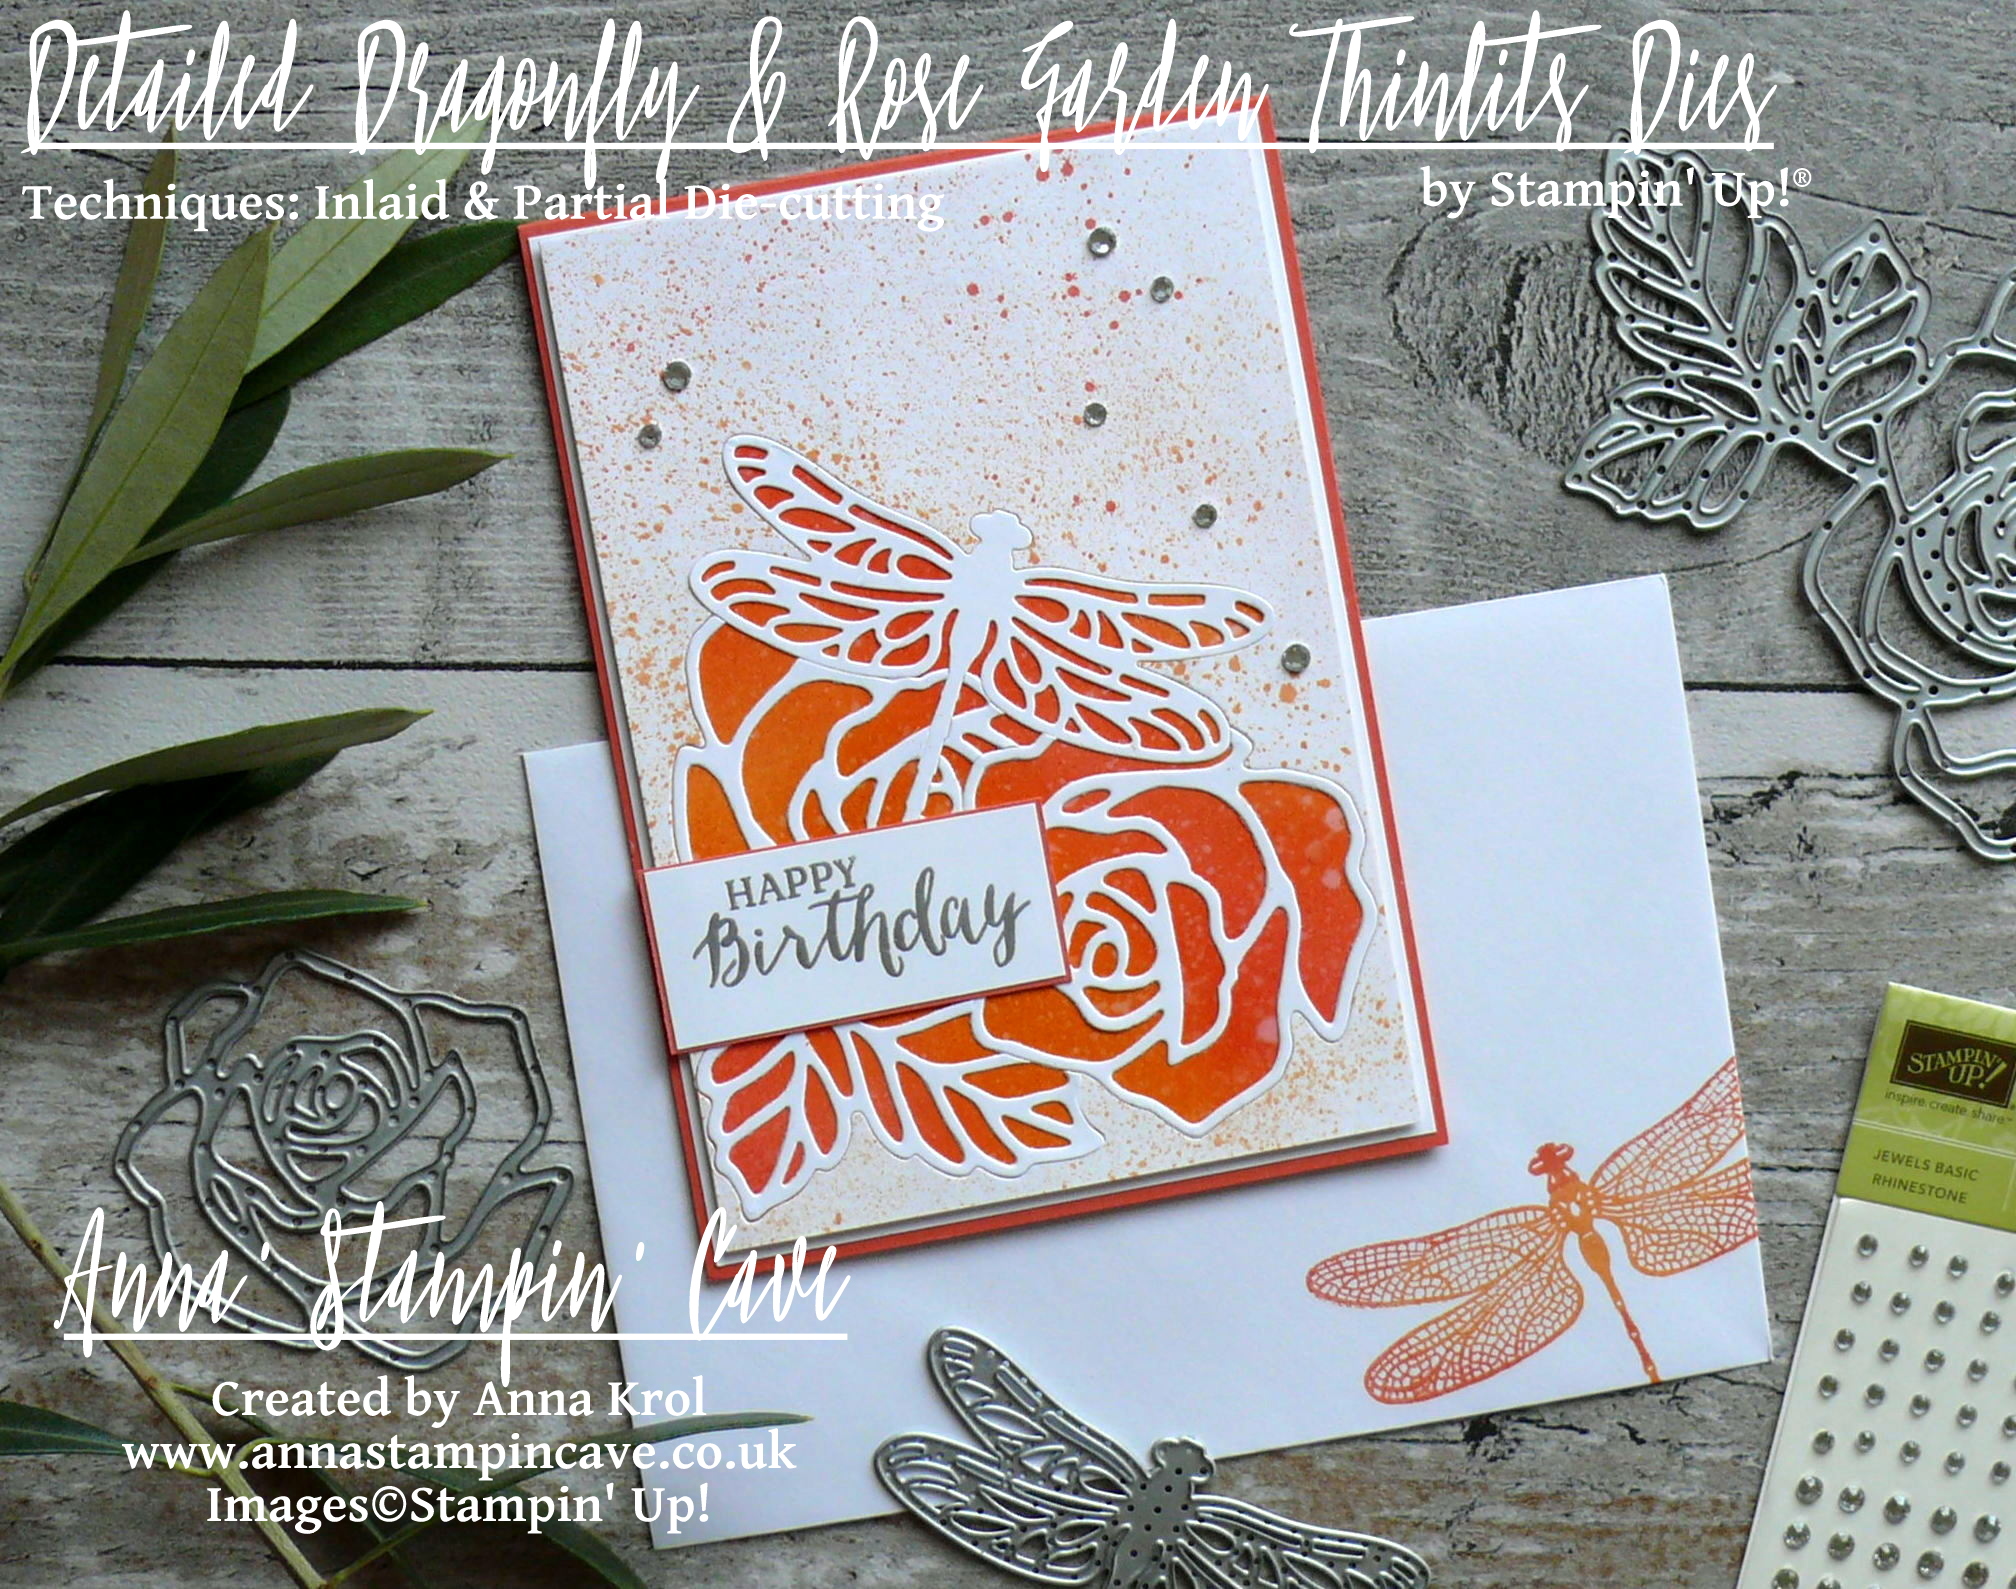
Roses & Dragonfly No°2 card dimensions:

  • Calypso Coral cardstock card base: 11-6/8″ x 4-1/8″ scored in half at 5-7/8″ (29.7 x 10.5 cm scored in half at 14.8 cm)
  • Whisper White cardstock: 5-6/8″ x 4″ (14.6 cm x 10.2 cm)
  • Whisper White cardstock: 2 panels 5-5/8″ x 3-7/8″ each (14.3 cm x 9.8 cm); one for blending and one for die-cutting
  • strips of Calypso Coral and Whisper White cardstock for sentiment

First I adhered panel of Whisper White cardstock to the card base using snail adhesive. Next, I took one of the smaller panels and using ink pads and sponges I created a backing panel for the die-cut piece.

Anna' Stampin' Cave - Roses And Dragonfly Birthday Card using Inlaid Partial Die Cutting_Stampin' Up! Rose Garden Thinlits Dies_Detailed Dragonfly Thinlits Dies 4

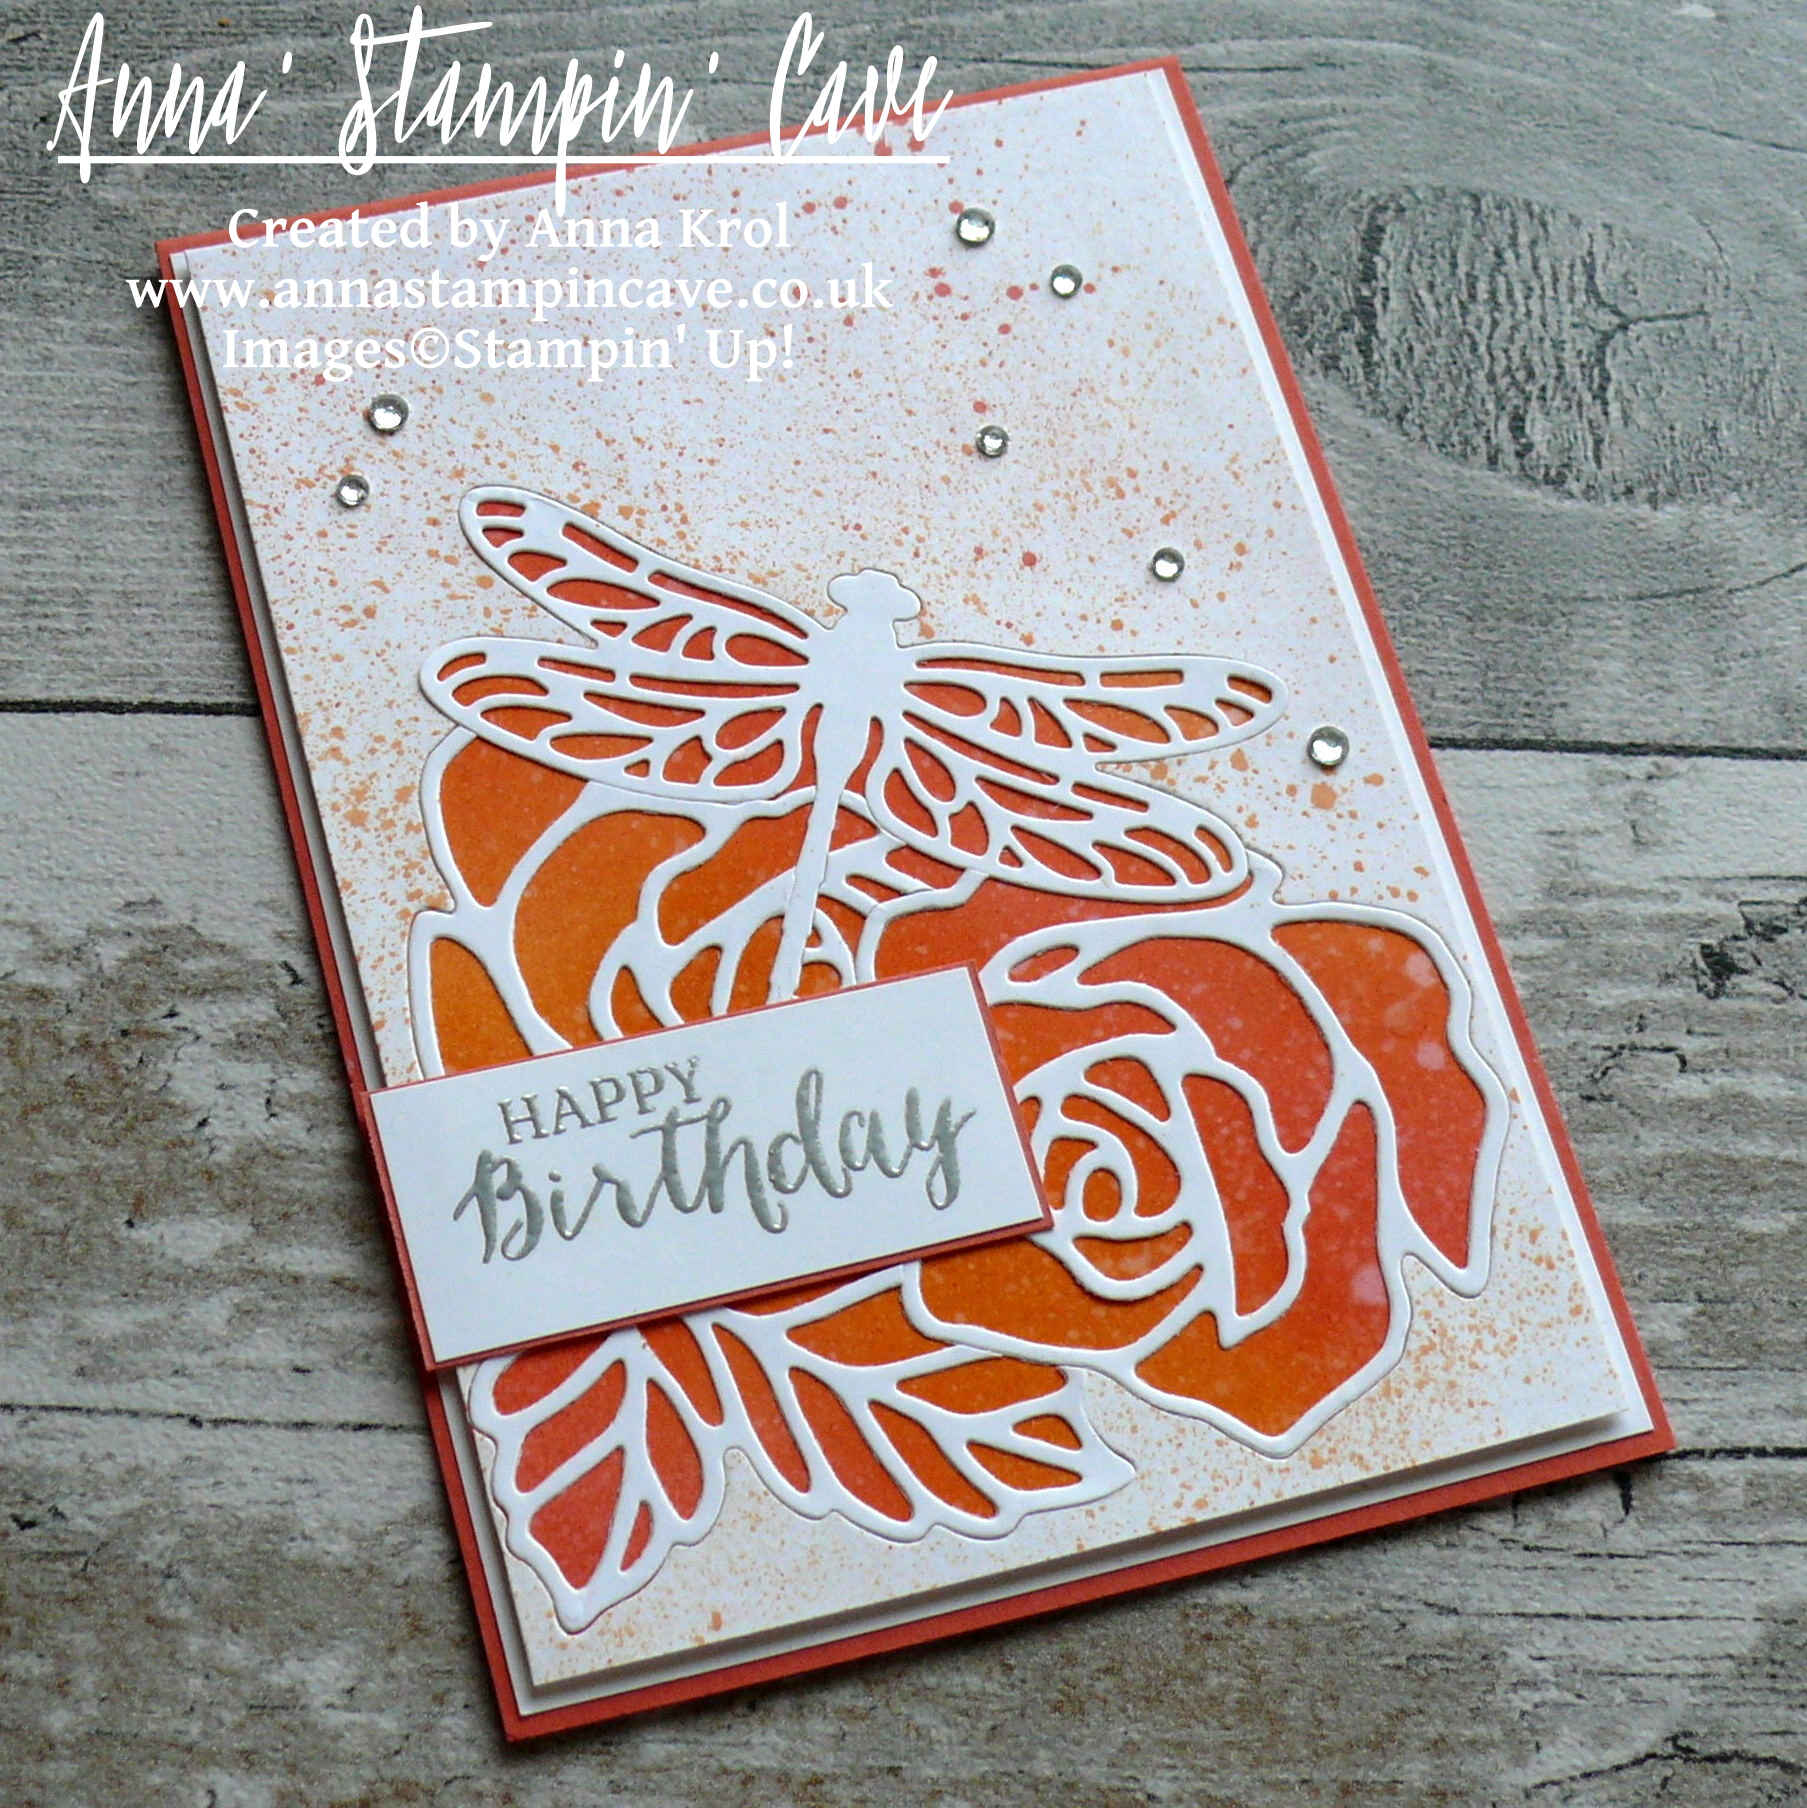
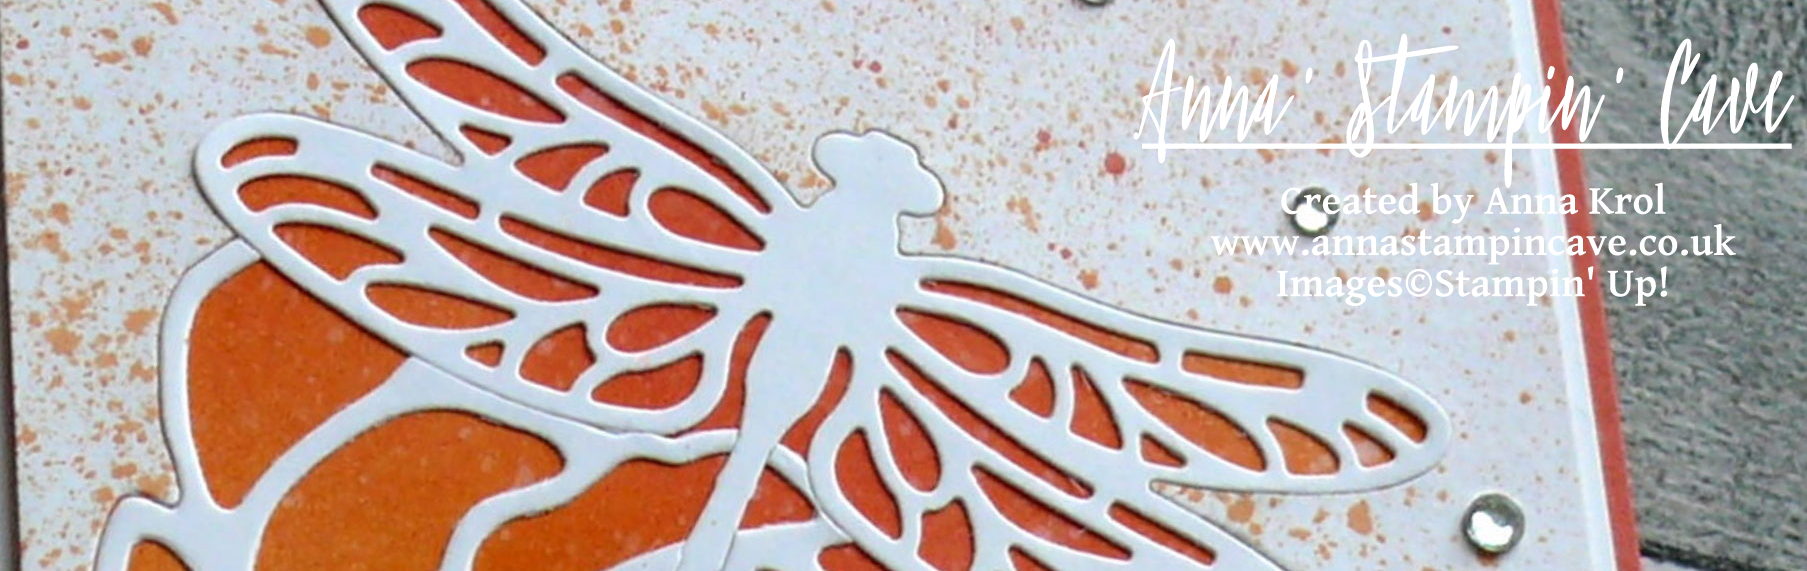
As first, I blended in my darkest colour, Calypso Coral, followed by Pumpkin Pie and Peekaboo Peach. But you can start with the lightest shade first, it doesn’t really matter. I continued adding more colour until I was happy with the depth. To add more interest I flicked few droplets of water to my panel.

Water react with ink creating this beautiful, distressed look. Bear in mind that for the best results you have to do it when the ink is freshly blended.

I took the second Whisper White panel and arranged the dies how I wanted them to go. Next, I die-cut all elements, one at a time and put them away on a flat surface so I don’t lose any of the small pieces. Once everything been die-cut I adhered what’s left of the panel to the orange background. I’ve added some splatters of ink all over it and inlaid all my die-cut pieces back in. More detailed explanation can be found here ->

I added this panel to the card base with Foam Adhesive Strips for extra dimension.

Anna' Stampin' Cave - Roses And Dragonfly Birthday Card using Inlaid Partial Die Cutting_Stampin' Up! Rose Garden Thinlits Dies_Detailed Dragonfly Thinlits Dies 3

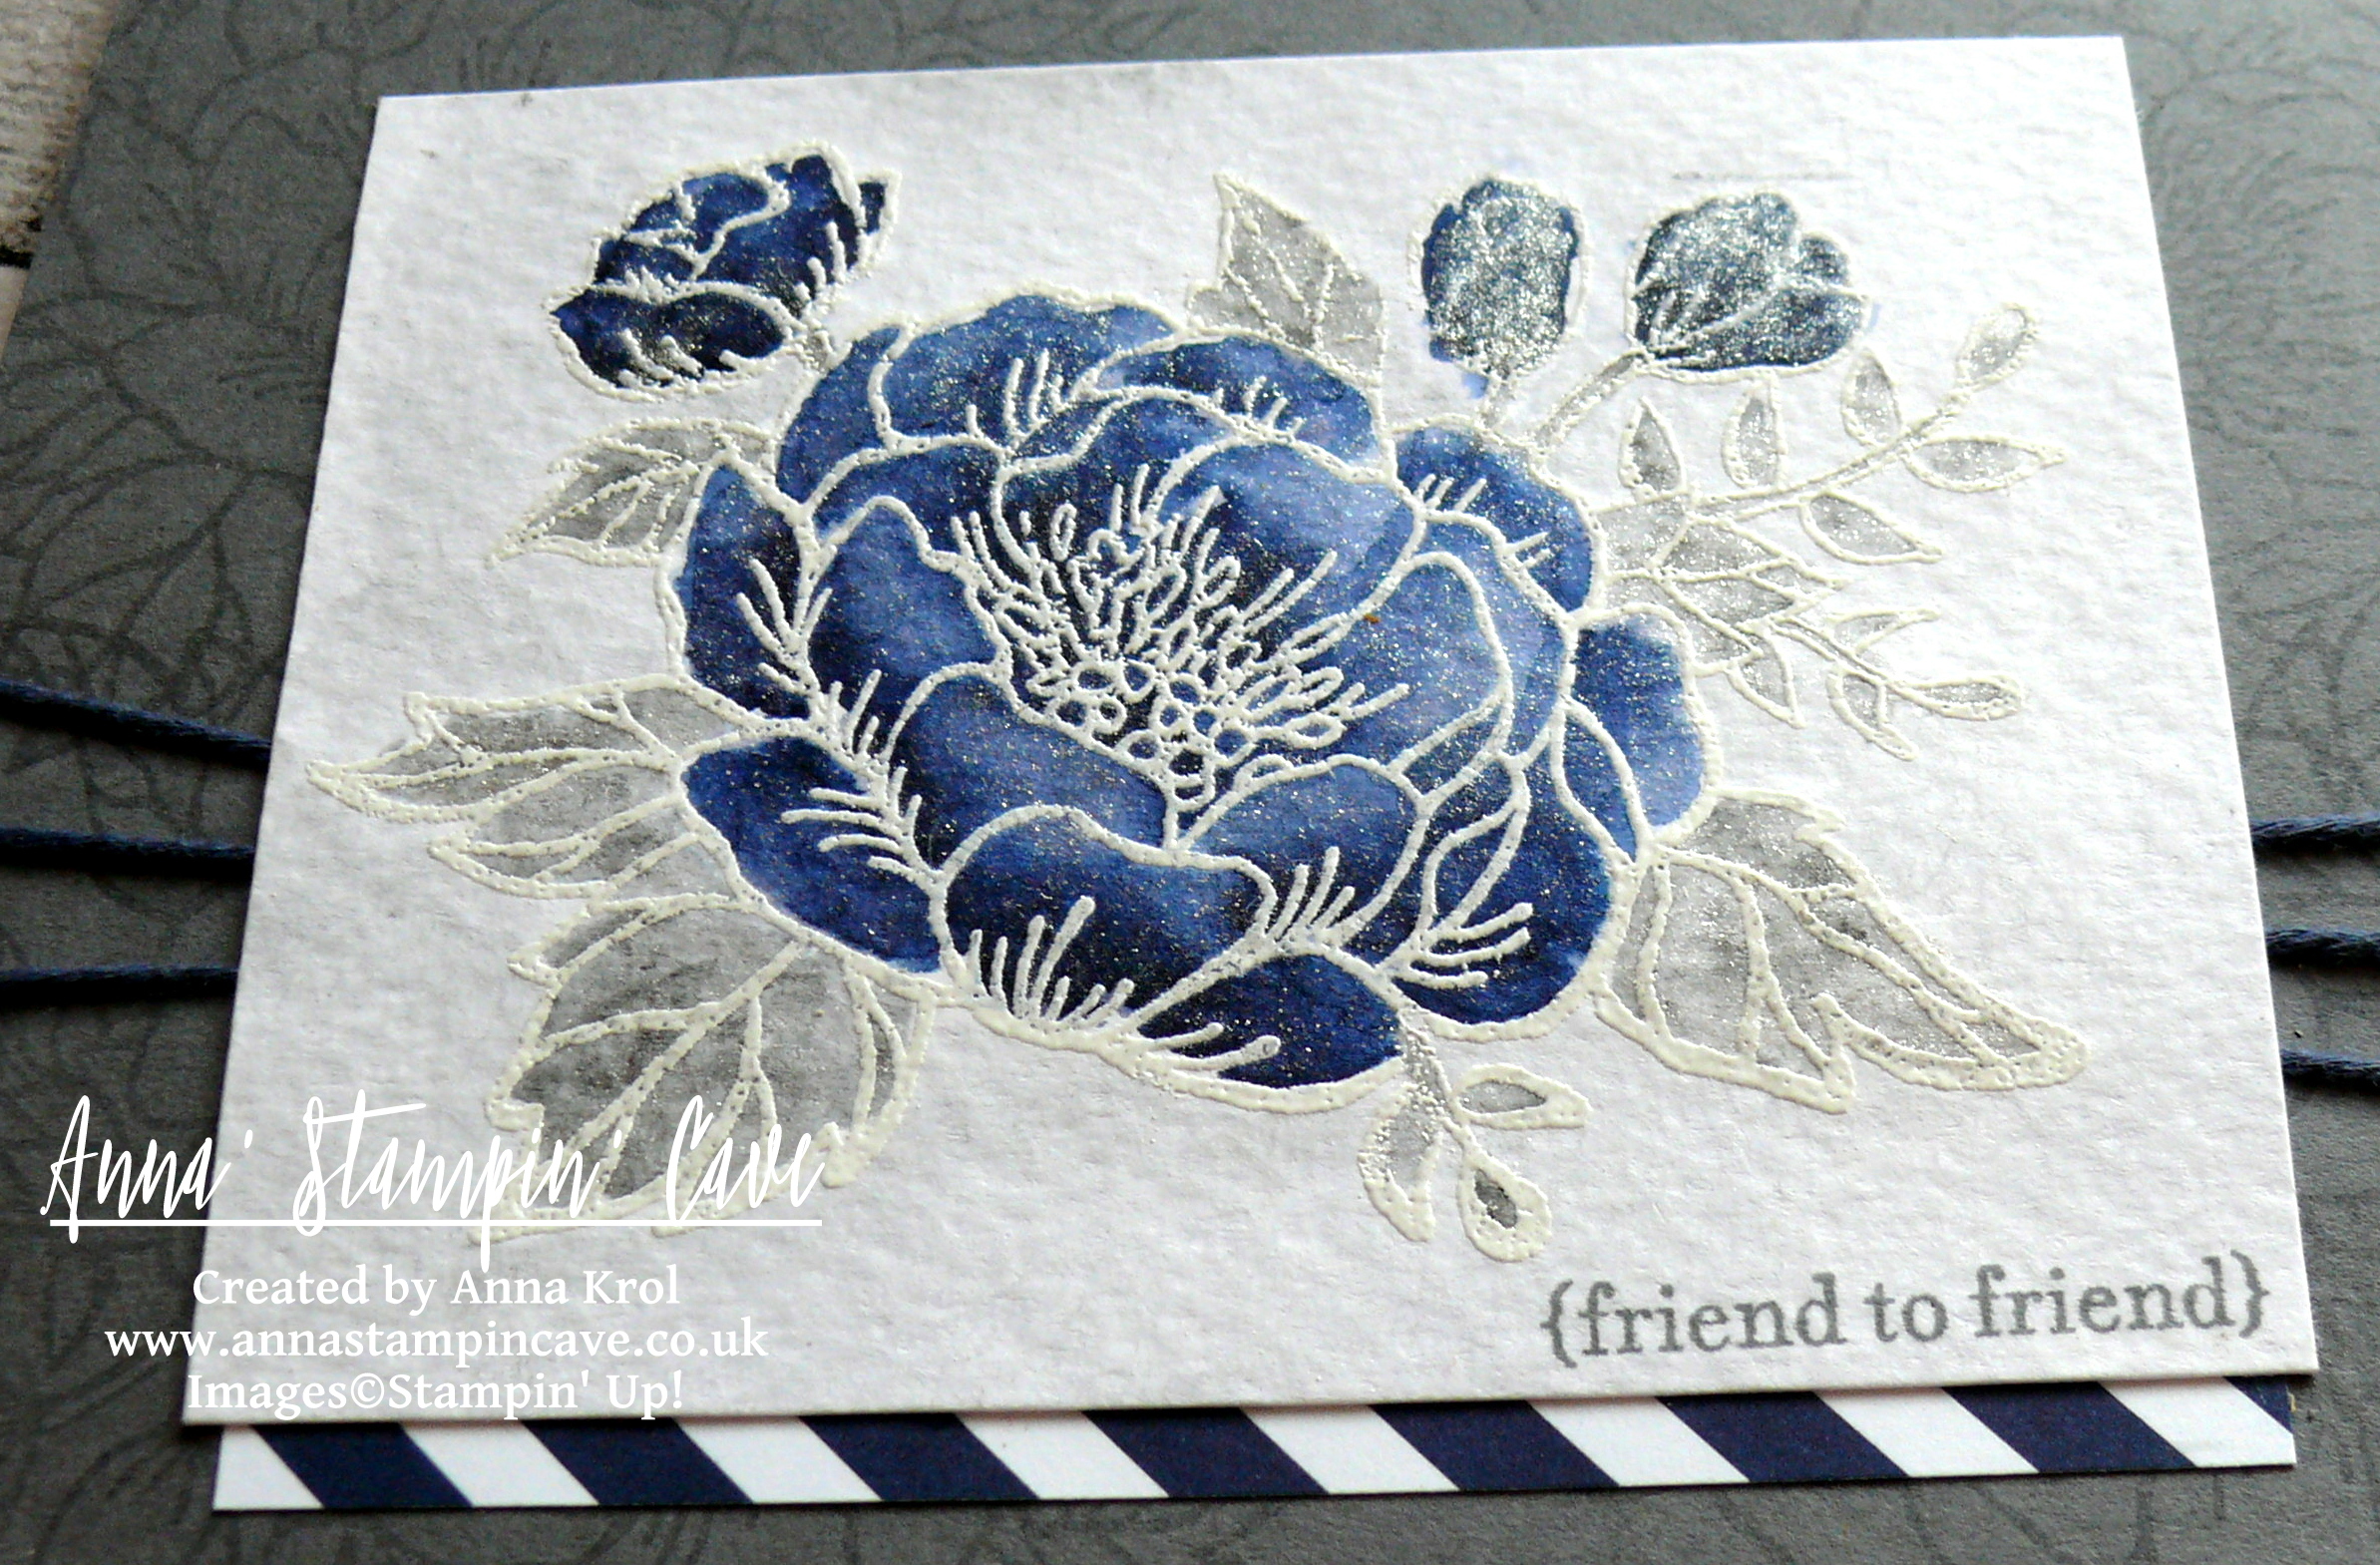
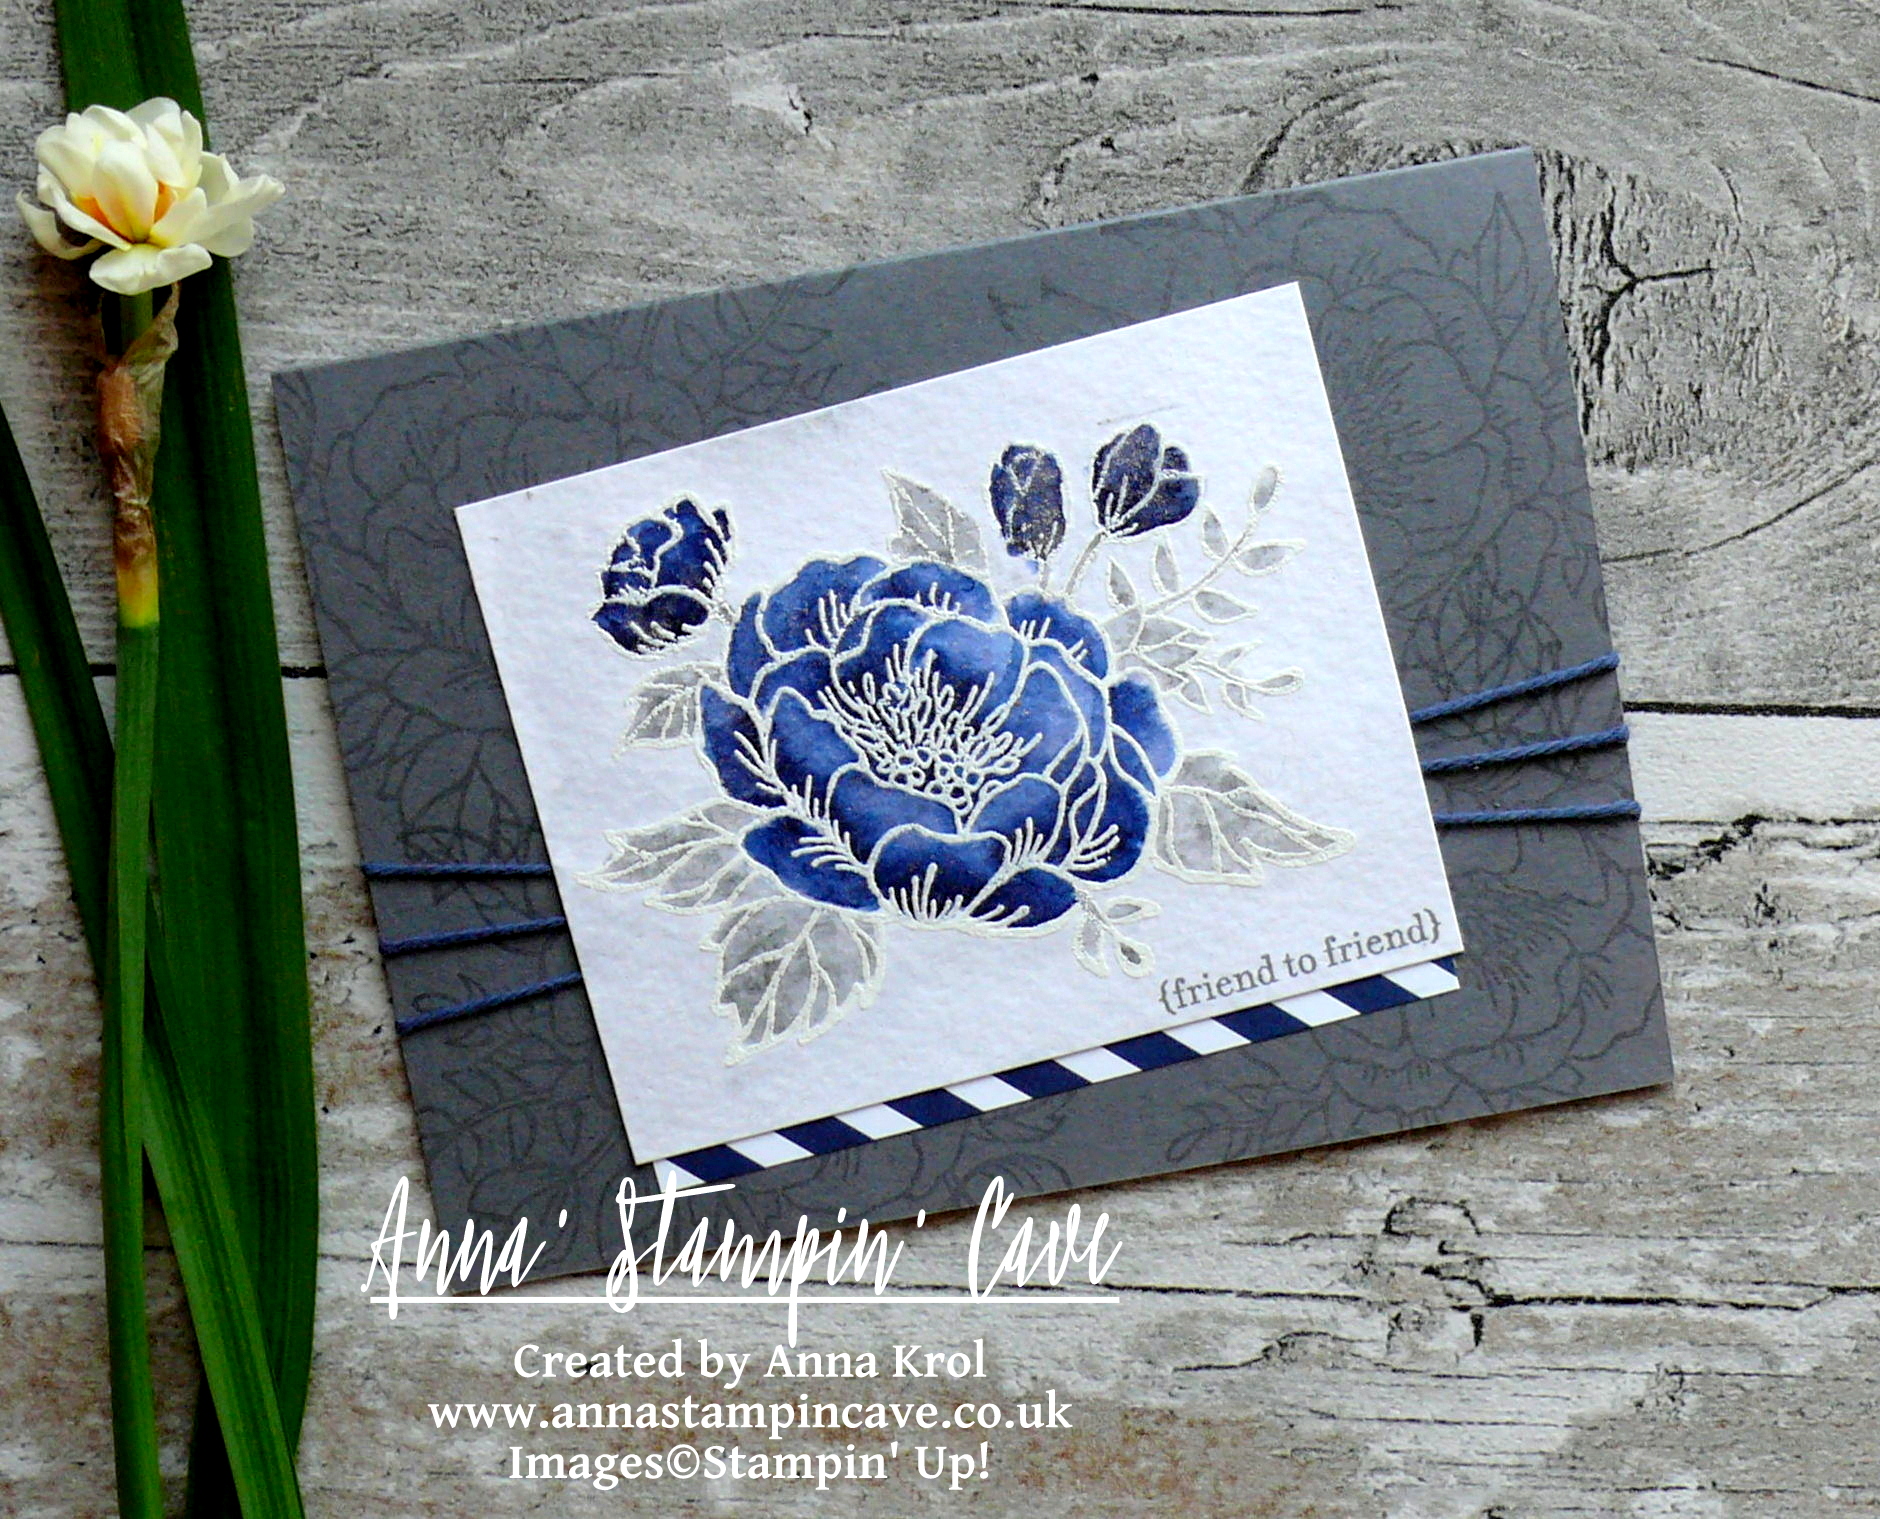
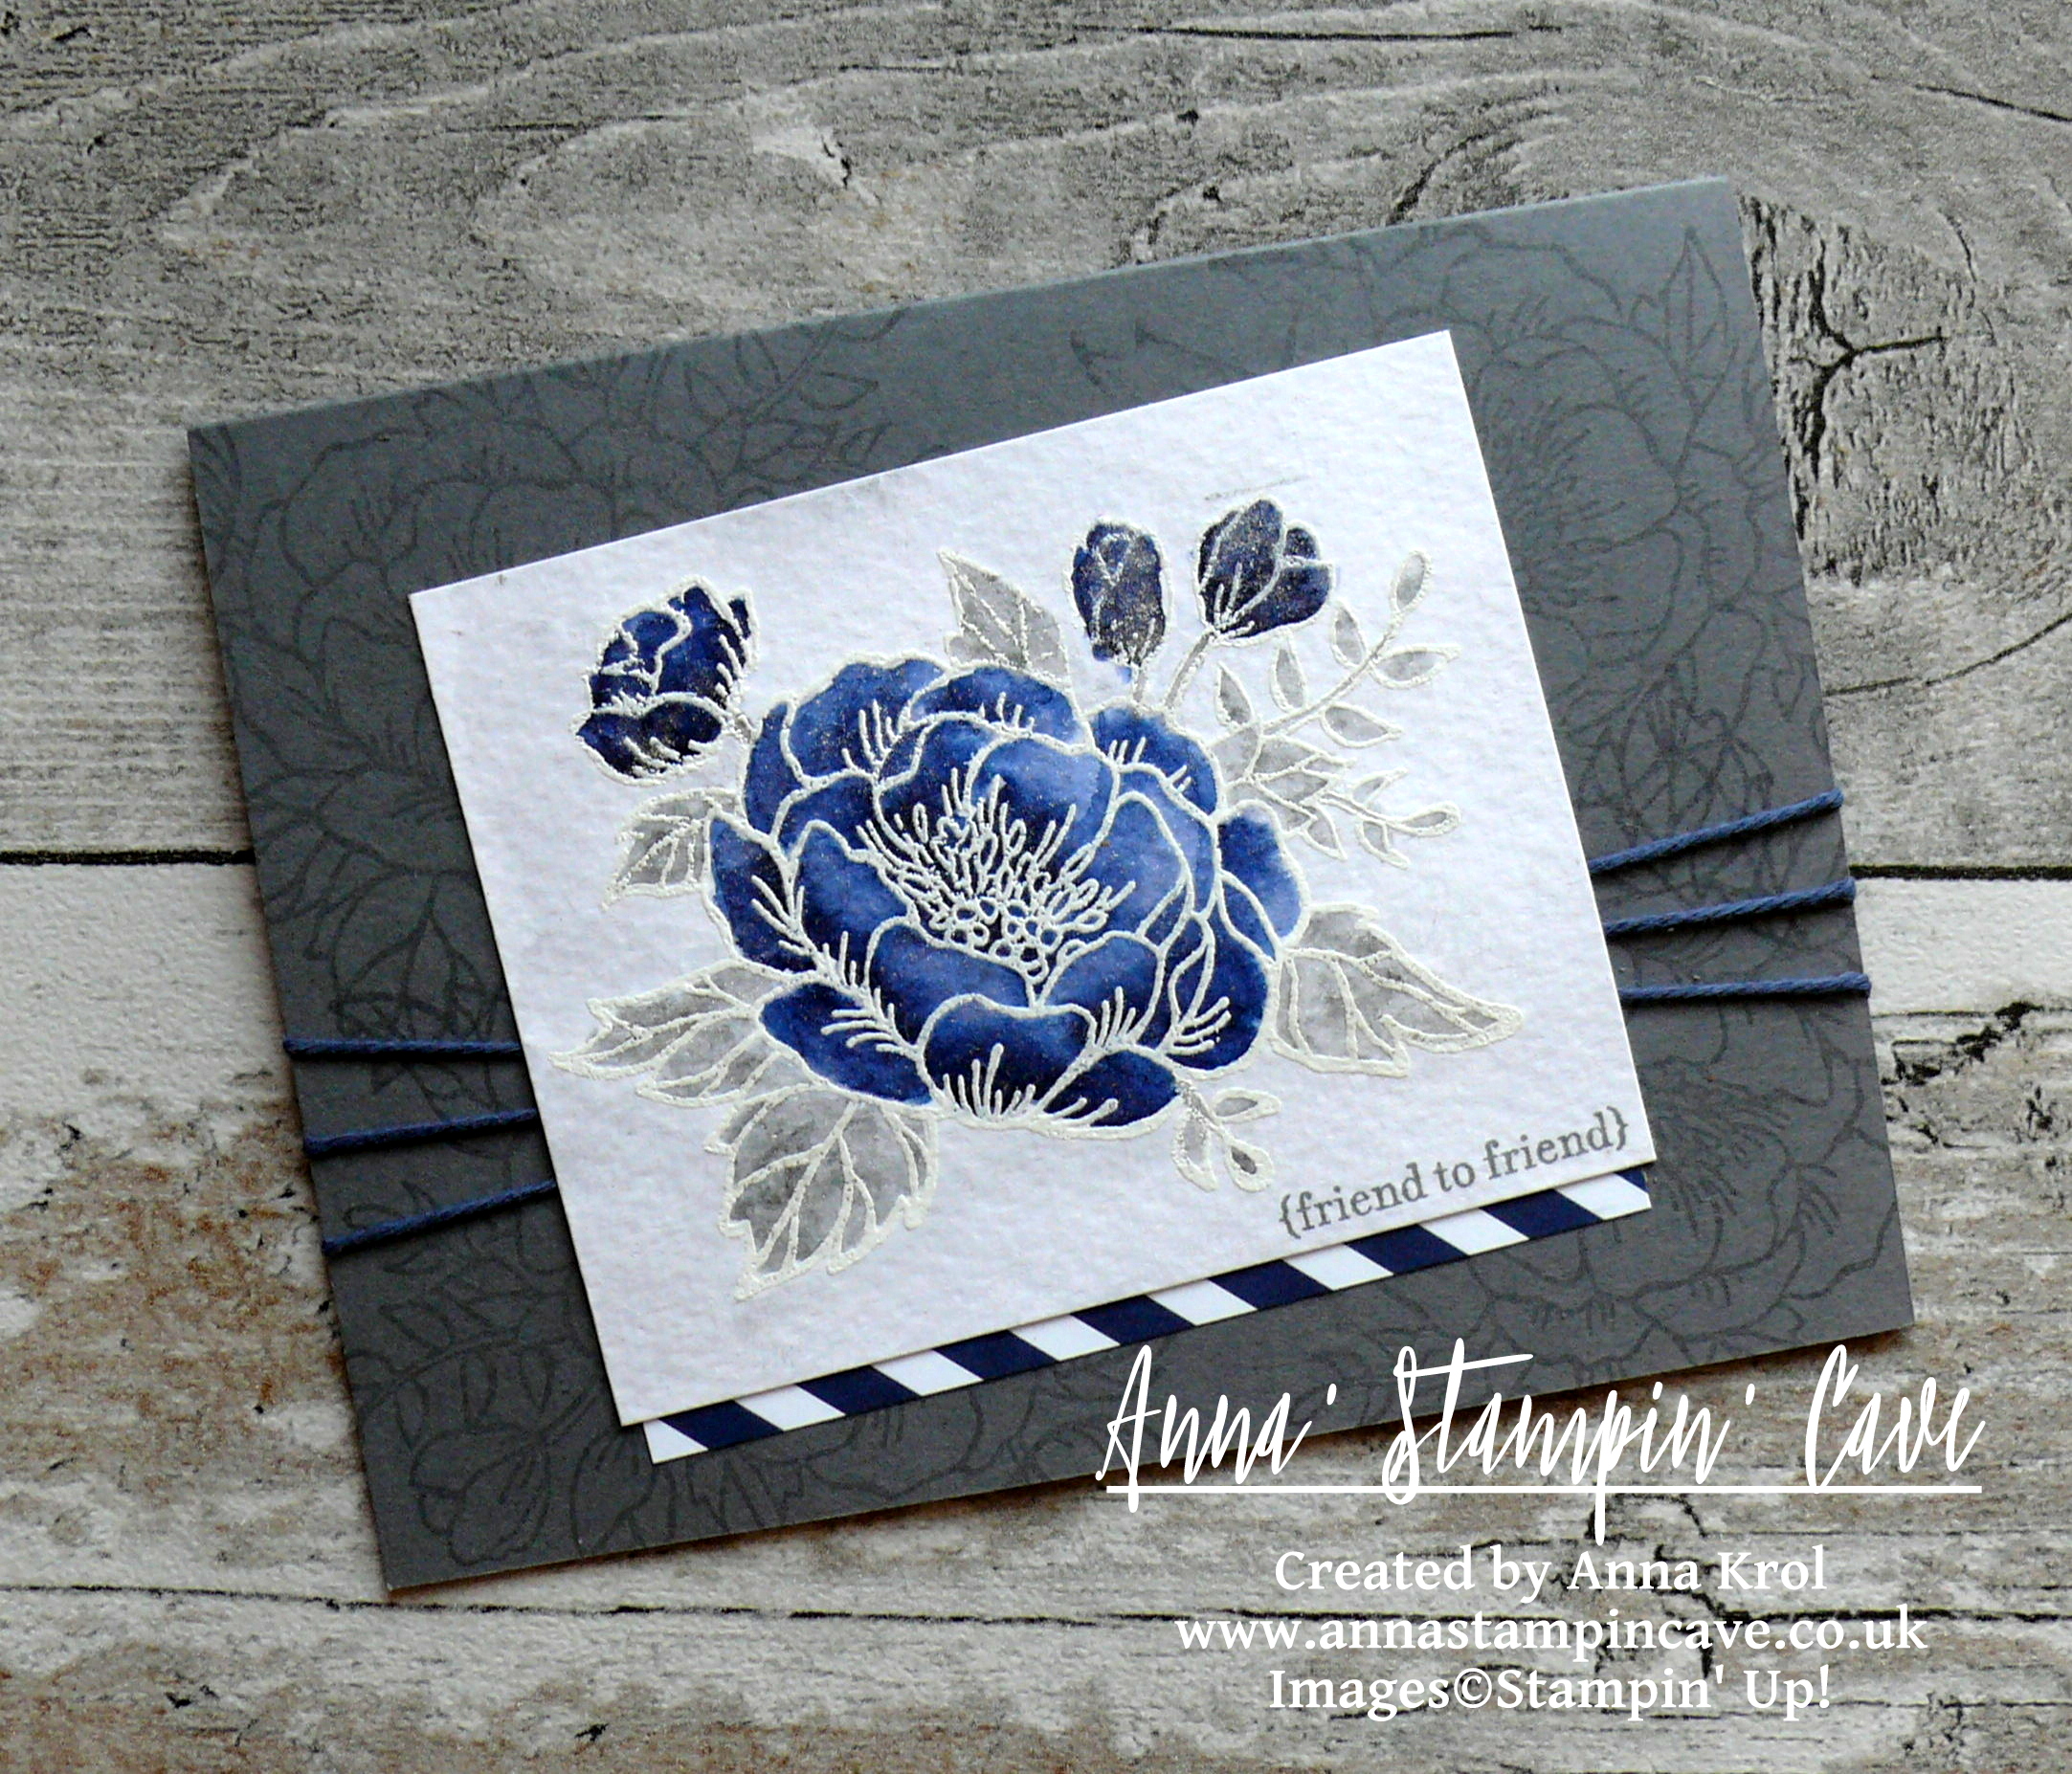
The sentiment I’ve used comes from Rose Wonder Stamp Set. I stamped it on Whisper White cardstock with Versamark ink. I heat embossed it in silver, mounted on a slightly wider piece of Calypso Coral cardstock and add it to the card.

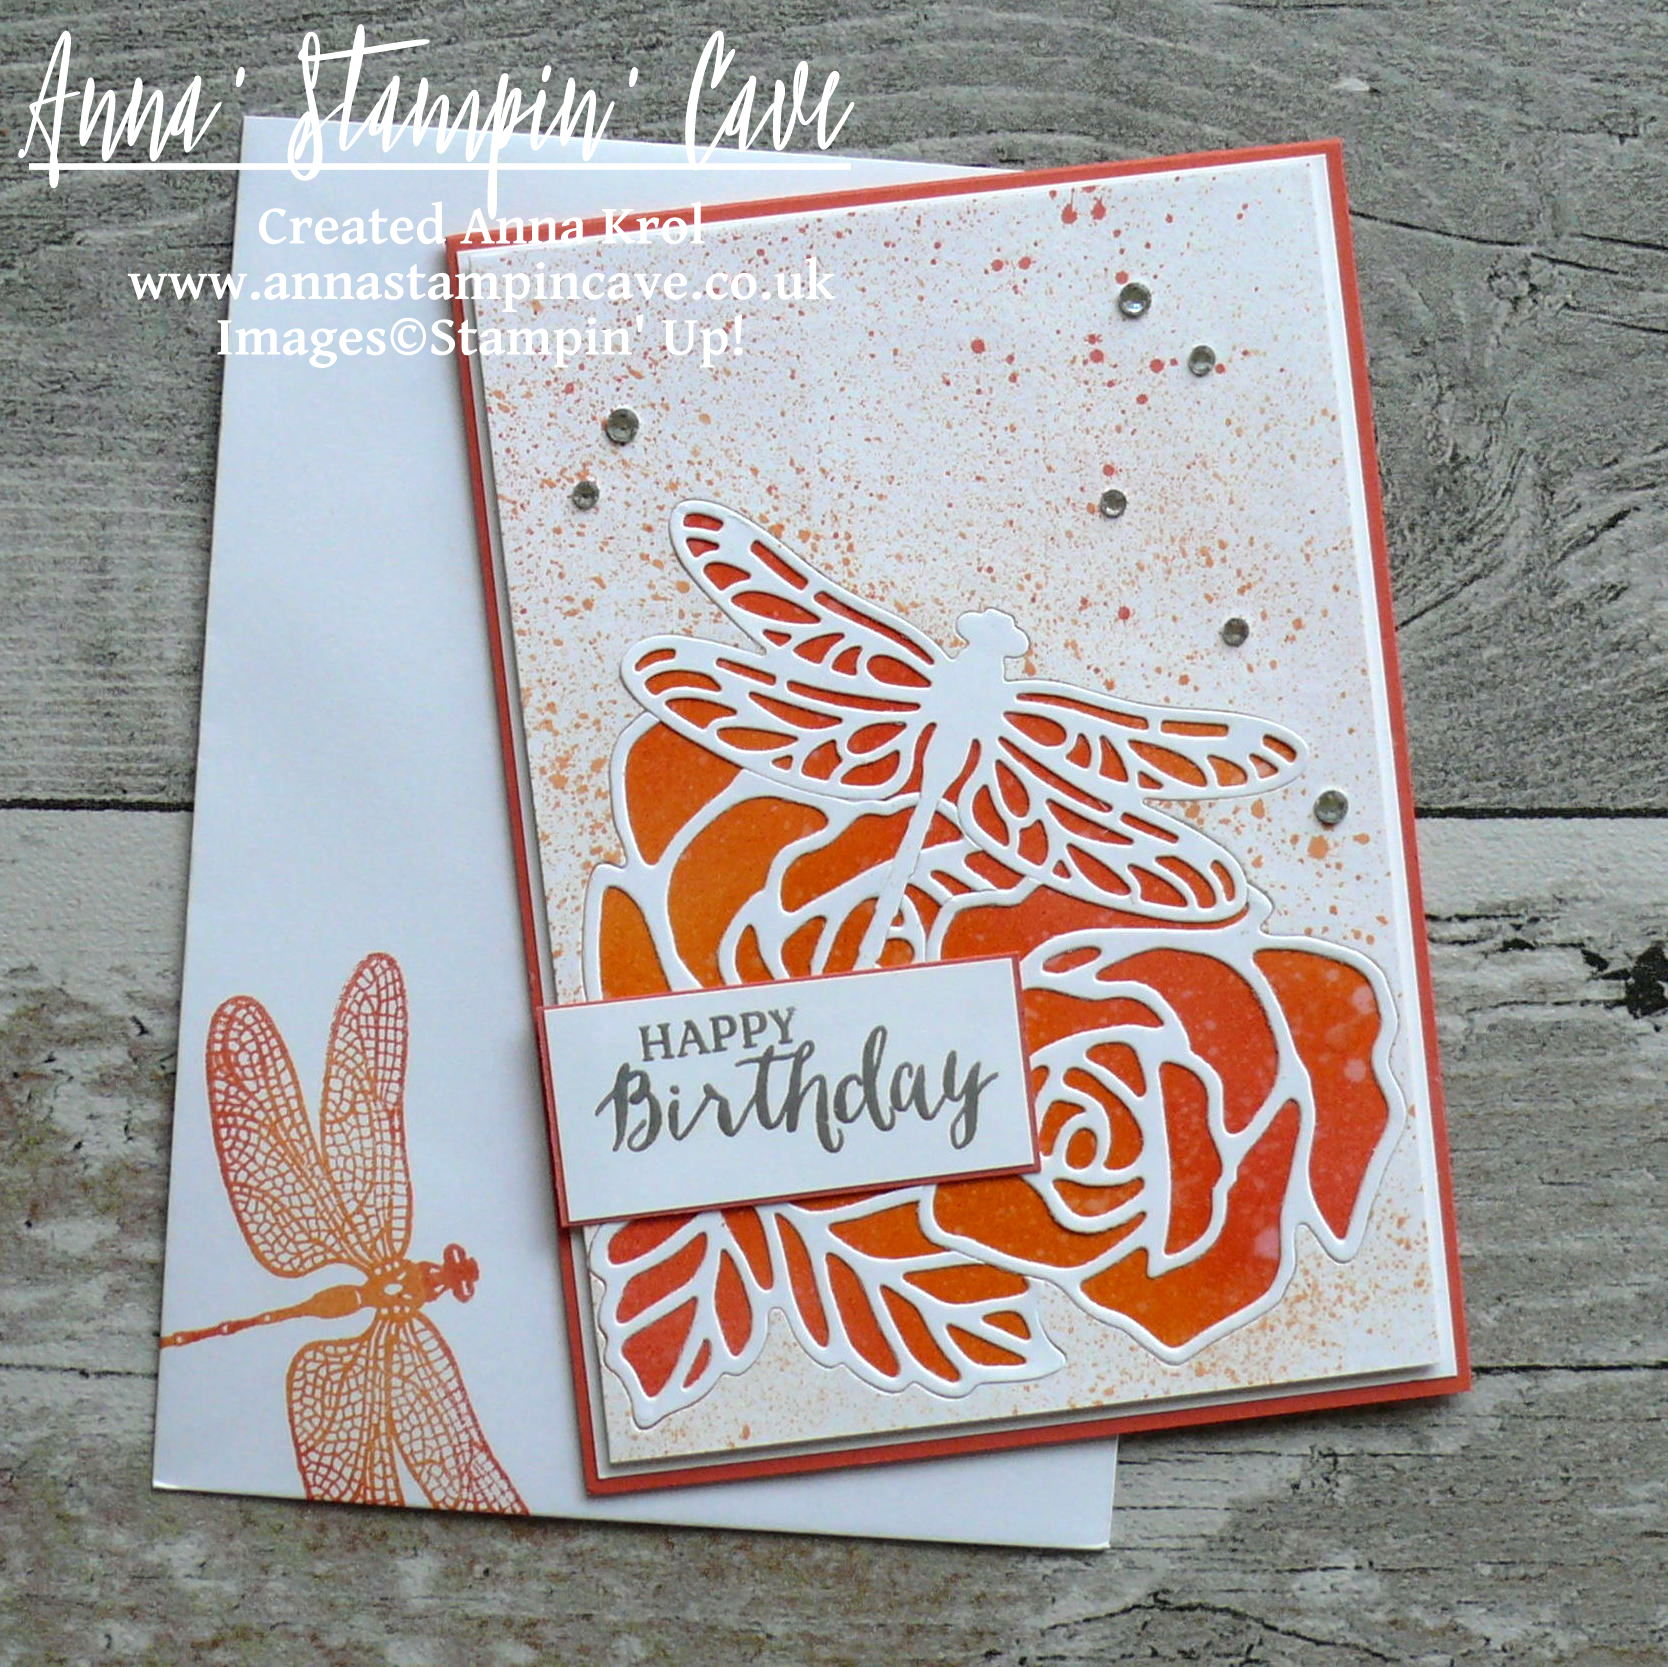
To make the card looks even more pretty, I scattered rhinestones all over the panel. To wrap it up, I stamped dragonfly image inside the card and on the envelope. It’s hard to see but I’ve used all three colours of ink on this little creature.

The card has been given already and I know the girl loved it to bits. That is my biggest reward 🙂 But I hope you like it too. Would love to hear your opinion it the comments below.

If you wish to purchase any of products I have used, simply click the images below to go directly to my online store and don’t forget to enter the hostess code for the month of April XMAJ4CYX to receive a gift from me.

Thank you for stopping by and have a blessed day,

Just a note: the Dragonfly Dreams as a Bundle at 10% discount is available only until 31 May. After that date, you will be able to purchase Dragonfly Dreams Stamp Set and Detailed Dragonfly Thinlits Dies only separately, not as a bundle.

Don’t forget to check:

Stampin’ Up! Spring Summer & Annual Catalogue 2016 2017 Retiring List

Anna' Stampin' Cave Stampin' Up! Retiring Products 2017

It’s that time of the year again, when Stampin’ Up! is getting ready to retire stamps and accessories from both the Annual and Spring Summer catalogues. As sad as it is to see these products go, there’s still time for you to get them before they’re gone. Retiring products will only be available until 31 May, or while supplies last. So if there’s something from retiring products on your wishlist, don’t wait until last day – once they’re gone, they’re gone. And they are selling fast! Click here for more details ->

Global Design Project #081 Colour Challenge – Watercolour Birthday Blooms

Anna’ Stampin’ Cave – Global Design Project #081 Colour Challenge – Watercolour Birthday Blooms

GDP81

Hello and welcome! Today I decided to play along with Global Design Project and their Colour Challenge. I love that one of the colours can be our own choice.

I had couple of ideas which colour to use, but because I couldn’t decide which one to choose I created two cards instead of one 🙂

Anna' Stampin' Cave_Stampin' Up! Birthday Blooms Stamp Set_Watercolour Card_Basic Grey Night Of Navy

Basic Grey/Night of Navy ‘Friend To Friend’ card dimensions:

  • Basic Grey cardstock: 8-1/4″ x 5-7/8″ scored in half at 4-1/8″ (21cm x 14.8 cm scored in half at 10.5 cm)
  • Watercolour Paper: 3-6/8″ x 3″  (9.5 cm x 7.6 cm)
  • Regals Designer Series Paper Paper Stack: 3-5/8″ x 3/8″ (9.2 cm x 1 cm) strip of diagonal stripes design paper in Night of Navy
  • Night of Navy Solid Baker’s Twine: approx 33″ (84 cm) + strip of Basic Grey cardstock to secure/hide the twine ends inside the card

For this first card, I decided to use rather classic Night of Navy with Basic Grey colour combination.

Anna' Stampin' Cave_Stampin' Up! Birthday Blooms Stamp Set_Watercolour Card_Basic Grey Night Of Navy 2.JPG

I heat embossed beautiful floral image from Birthday Blooms Stamp Set on a piece of Watercolour Paper in Whisper White Embossing Powder. Next, I watercolour the image using my ink pads as palettes.  For the flower, I’ve used Night of Navy ink pad. For the leaves, I’ve used Basic Grey Archival ink pad, which was a little bit tricky but doable. Just had to work really fast once I squished some ink onto my ink pad cover flap. When finished my leaves, I’ve added more water to the ink that left on the cover and I’ve done a quick wash of light grey around the flower.

For the sentiment, I chose sweet ‘friend to friend’ from Teeny Tiny Wishes Stamp Set and stamped it in Basic Grey Archival Ink in the bottom right corner of my watercolour panel.

Tip: If using clear mount or wood mount stamp sets, always use Stamp-A-Ma-Jig to align your sentiment. It’s best tool ever!

Anna' Stampin' Cave_Stampin' Up! Birthday Blooms Stamp Set_Watercolour Card_Basic Grey Night Of Navy 3.JPG

To prepare my base I stamped the same floral image all over the card front with Versamark ink. Next, I wrapped Night Of Navy Solid Baker’s Twine around the front of the card and secured it at the back with a piece of cardstock.

I adhered a strip of DSP underneath the watercolour piece and added it to the card base, slightly offsetting my piece. The final touch was to add Clear Wink Of Stella to my floral.

For my next card colour combination, I took an idea from Stampin’ Up!’s Annual Catalogue, page 76.  I love how Night of Navy and Delightful Dijon complement each other creating distinguished look.

Anna' Stampin' Cave_Stampin' Up! Birthday Blooms Stamp Set_Watercolour Card_Delightful Dijon Night Of Navy

Delightful Dijon/Night of Navy ‘Friend To Friend’ card dimensions:

  • Delightful Dijon cardstock: 8-1/4″ x 5-7/8″ scored in half at 4-1/8″ (21cm x 14.8 cm scored in half at 10.5 cm)
  • Regals Designer Series Paper Paper Stack, Night of Navy diagonal stripes design: 4-2/8″ x 3-5/8″ (10.8 cm x 9.2 cm)
  • Watercolour Paper: 3-6/8″ x 3″  (9.5 cm x 7.6 cm)
  • Night of Navy Solid Baker’s Twine: approx 12″ (30 cm)

Same as with my first card, I stamped the whole card front with a floral image from Birthday Blooms Stamp Set in Versamark Ink and adhered the piece of DSP in the middle of my card base.

Anna' Stampin' Cave_Stampin' Up! Birthday Blooms Stamp Set_Watercolour Card_Delightful Dijon Night Of Navy 2

Next, I stamped and heat embossed the same image on the watercolour panel in Whisper White. Flowers, as before, are watercoloured with Night of Navy ink, just this time I decided for darker, deeper shade. For the leaves, however, I’ve used Delightful Dijon ink, with a very light wash of DD in the background.

Anna' Stampin' Cave_Stampin' Up! Birthday Blooms Stamp Set_Watercolour Card_Delightful Dijon Night Of Navy 3

A sentiment, same again, is stamped in Night of Navy ink in the top right corner of the panel. I took a piece Night of Navy Solid Baker’s Twine, wrapped it at the bottom of my watercolour piece and tied a little bow. I adhered my panel to the card base, offsetting again. Clear Wink of Stella finishes off the look.

And here are both of my cards together:

Anna' Stampin' Cave_Stampin' Up! Birthday Blooms Stamp Set_Watercolour Card_Delightful Dijon with Night Of Navy_Basic Grey with Night Of Navy

I love how they turned out! Same stamp set, same technique, and same design but two completely different looks. Which one do you like the most? Please let me know in comments below.

As always, I really want to encourage you to visit the Global Design Project challenge blog to see other beautiful projects from all around the world. Just click on their logo below to visit the website

Thank you for stopping by and have a blessed day,


One Wild Ride For GDP078

Anna’ Stampin’ Cave – One Wild Ride for GDP078

GDP078

Hello, everyone! Today I’m playing along with Global Design Project’s Sketch Challenge. And oh how cool this sketch is – endless possibilities, honestly. It looks so soft and feminine to me yet I decided to go on the ‘dark side’ as there are always shortages in masculine cards.

Anna' Stampin' Cave - Stampin' Up! One Wild Ride - masculine congratulations card for GDP078

One Wild Ride card dimensions:

  • Crumb Cake cardstock: 8-1/4″ x 5-7/8″ scored in half at 4-1/8″ (21cm x 14.8 cm scored in half at 10.5 cm)
  • Basic Black cardstock: 2-1/4″ x 5-7/8 and 3-6/8 x 2-1/8″ (5.7 cm x 14.8 cm and 9.5 cm x 5.4 cm)
  • Whisper White cardstock: 2″ x 3-5/8″ and 1-1/2″ x 2-1/2″ (5 cm x 9.2 cm and 3.8 cm x 6.3 cm) + a strip for a sentiment

Anna' Stampin' Cave - Stampin' Up! One Wild Ride - masculine congratulations card for GDP sketch challenge

I started with stamping card front with this gravel-splatter kinda stamp from One Wild Ride stamp set, in Crumb Cake for soft, tone on tone effect. Next, I embossed it with Brick Wall Textured Impressions Embossing Folder.

I took 2-1/4″ x 5-7/8 piece of Basic Black cardstock and distressed it by tearing the edge of the panel. Using the same ‘gravel’ stamp I stamped the whole panel in Versamark, heat embossed it in silver and adhered it to the card base.

Anna' Stampin' Cave - Stampin' Up! One Wild Ride - masculine congratulations card for GDP

Next, I stamped motorcycle in Basic Black on a piece of Whisper White cardstock. It looked too ‘clean’ so once again I’ve used the gravel stamp. This time I stamped it in Basic Grey. I also distressed the edges of the panel using scissors.

I matted my Harley image with Basic Black cardstock and a smaller piece of Whisper White and adhered it flat to the base.

Anna' Stampin' Cave - Stampin' Up! One Wild Ride - masculine congratulations card for GDP#078

I kept sentiment simple, just Basic Black ‘congratulations’ on a strip of Whisper White popped out with dimensionals.

I hope you like my card and that maybe, just maybe, it inspired you and gave you some ideas for a surprisingly tough subject called ‘masculine cards’.

As always, I really want to encourage you to visit the Global Design Project challenge blog to see other beautiful projects from all around the world. Just click on their logo below to visit the website

Thank you for stopping by and have a blessed day,

New Adventure Card For GDP076 Case The Designer Challenge

Anna’ Stampin’ Cave – New Adventure Card For GDP076 Case The Designer Challenge

gdp076

Hello and welcome everyone! Today I’m back with my entry for Global Design Project. This week’s challenge is to CASE lovely and talented Kylie Bertucci. And oh, boy! What a brilliant card it is!

Phew, I did it! To be honest I really thought I won’t make it this week. Lately, I’m so exhausted it’s unbelievable. Living with MS alone isn’t easy, but working night shifts on top of that truly wreak a havoc in my body. And even though I only work two shifts per week, sometimes I am so drained I need to recover for a couple of days before I get back on track. Then I have to pick up on things at home that have to be done, spend some quality time with hubby and daughter…and by the time I’m ready to sit down and create, another week roll on…crazy vicious cycle isn’t it haha

But today I woke up with ‘this idea’ that I just had to turn it into a card. So I jumped out of bed, brew myself a cup of chicory coffee, done my Bible reading and sneaked straight into my ‘cave’. I’ve used a really fun technique called ‘layered embossing resist’.

anna-stampin-cave-layered-embossing-resist-using-perpetual-birthday-calendar-and-wild-about-flowers-stamp-sets

New Adventure Card dimensions:

  • Daffodil Delight cardstock: 11-6/8″ x 4-1/8″ scored in half at 5-7/8″ (29.7 x 10.5 cm scored in half at 14.8 cm)
  • Whisper White cardstock: 5-7/8″ x 2-1/2″ (14.8 cm x 6.4 cm)
  • Pumpkin Pie cardstock: 2 strips 5-7/8″ long and 1/2″ wide approx (14.8 cm x 1.3 cm)
  • Soft Sky cardstock: 3-1/2″ x 1″ (9 cm x 2.6 cm)
  • Whisper White Baker’s Twine: 6″

The bright colour combination I’ve used is inspired by this month’s Colour Your World Challenge.

colour-your-world-challenge

To create this fun background (and a focal point of my card) I decided to use the clusters of leaves from Perpetual Birthday Calendar Stamp Set.

For the first layer, I randomly stamped few clusters of leaves using Versamark ink on Whisper White panel and heat embossed them in clear. Once it’s done, I inked the panel using Soft Sky Ink Pad.

To create the second layer I stamped and heat embossed my leaves in clear again and sponged my panel in Tempting Turquoise. For the last layer, I stamped my leaves in Dapper Denim. Next, I used iron and regular copy paper to remove embossing from the panel.

anna-stampin-cave-layered-embossing-resist-using-perpetual-birthday-calendar-wild-about-flowers-stamp-sets

I added strips of Pumpkin Pie cardstock under my panel and adhered it all to the card base.

The sentiment is from Wild About Flowers Stamp Set. I stamped it in Dapper Denim on a piece of Soft Sky cardstock and cut one of the ends diagonally creating and wrapped white baker’s twine around the other end. I adhered it to the card base with dimensionals.

anna-stampin-cave-layered-embossing-resist-technique-using-perpetual-birthday-calendar-and-wild-about-flowers-stamp-sets

So this is it from me for today. Very simple card and so different from my usual style, but I quite like it. And I hope you like it too.

As always, I really want to encourage you to visit the Global Design Project challenge blog to see other beautiful projects from all around the world. Just click on their logo below to visit the website

Thank you for stopping by and have a blessed day,

Simply Sketched Saturday Challenge #17 – Paisleys & Posies

Anna’ Stampin’ Cave – Simply Sketched Saturday Challenge #17 – Paisleys & Posies

SSSC Header

Thank you for joining us for another Simply Sketched Saturday Challenge!  We are so excited to be sharing this hop with you. The products used are all available in the current Annual, or seasonal, Stampin’ Up!®  Catalogues*. Simply use the buttons at the bottom of the post to keep hopping!

Hello and welcome after a long break. Today’s brilliant sketch has been designed by lovely Sam from Sam’s Sentiments blog. Just check how beautiful this sketch is?! Sadly Sam wasn’t able to take a part in the hop. Such a shame.

sssc-17

I’ve been so busy lately with home renovating and night shifts, that only a couple of days ago I realised our monthly blog hop is today. I panic slightly first but the moment I sit down to the sketch, I knew exactly what I wanted to make. I decided to ‘dig out’ my favourite stamp set from Autumn-Winter catalogue: Paisleys & Posies, as it seemed perfect for the technique I wanted to try: watercolour with markers. Well, it’s kinda watercolour. Anyhow. I had so much fun that I created not one but three cards.

anna-stampin-cave-stampin-up-paisleys-posies-stamp-set-diy-watecolour-dsp

Aren’t these gorgeous?! Such bold designs! And they really super easy to make.

Paisleys & Posies cards dimensions:

  • 3x Basic Black cardstock: 11-6/8″ x 4-1/8″ scored in half at 5-7/8″ (29.7 x 10.5 cm scored in half at 14.8 cm) + 2 x strips 1″x 4-1/8″ + 1 stripe 3/8″x 5-2/8″
  • 3x White Vellum cardstock: 3-5/8″ x 5-3/8″(9,2 x 13,6 cm)
  • 3x Water Colour Paper: 3-1/2″ x 5-2/8″ (8,9 x 13,3 cm)
  • 3x Very Vanilla cardstock: 3-1/2″ x 5″ for the inside panels + scraps for sentiments
  • scraps of the following cardstocks for die-cutting: Basic Black, Rich Razzleberry, Melon Mambo, Tempting Turquoise, Old Olive, Pool Party & Pear Pizzazz

To start off, I stamped various images from Paisleys & Posies Stamp Set onto the watercolour panel in Basic Black Archival Ink.

Tip of the day: Because I did my cards late at night, I had no time for the ink to dry completely but I didn’t want to smear black all over my watercolour panels. So I sprinkled clear embossing powder over the whole piece once I was done with stamping. But I didn’t heat set it, I just let embossing powder to ‘soak in’ all the ‘moisture’. I let it sit for couple of minutes and then brush off the powder.

When my panels were ready I started to colour them in with Stampin’ Markers. Nothing fancy really, and no need to stay in lines either.

anna-stampin-cave-stampin-up-paisleys-posies-stamp-set-diy-watecolour-dsp-vivid-brights

For the first card, I’ve used Melon Mambo, Tangerine Tango, Daffodil Delight, Old Olive and Tempting Turquoise. When all the images were coloured in, I spritzed the whole panel with water. And that’s when all the ‘magic’ happen, as all the colours blend together nicely creating a beautiful watercolour piece. It’s like making your own watercolour DSP. And each piece is different.

To add more colour I dried my panel with a heat tool. Next,  I colour it in again with markers and spritz it with water. You can build up the colour as much as you wish, just remember to dry your panel in-between.

For my next card, I decided to use all markers from Brights family. But this time I only spritz it once, hence much more subtle look.

anna-stampin-cave-stampin-up-paisleys-posies-stamp-set-diy-watecolour-dsp-brights

For the last cardI’ve used Subtles Stampin’ Markers and I have to say they needed the most work. I had to dry my piece and keep adding more colour several times until I was happy with the outcome. Once all my panels were created I decided to add some shimmer to them. I added few drops of Clear Wink of Stella to the water in my spritzer, and I spritzed all the panels.

anna-stampin-cave-stampin-up-paisleys-posies-stamp-set-diy-watecolour-dsp-subtles

Once the panels were dry I die-cut three circles from each panel: full circle using 1-7/8” circle from Stitched Shapes Framelits Dies and two ‘partial’ circles using Layered Circle Framelits Dies. I also die-cut slightly bigger scalloped circles from Basic Black cardstock to go underneath.

anna-stampin-cave-stampin-up-paisleys-posies-stamp-set-subtles

To assemble my cards I adhered vellum to card bases and watercolour panels on top. Next, I glued black scalloped circles underneath the watercolour ones and in-laid them back into the panels. I also adhered Basic Black strips, sliding them slightly underneath the die-cut circles.

anna-stampin-cave-stampin-up-paisleys-posies-stamp-set-vivid-brights

I stamped my sentiments (masking a part of it) on a 3/8″ strip of Very Vanilla cardstock, and adhered it to the card with liquid glue. The full sentiment is stamped inside of the card.

anna-stampin-cave-stampin-up-paisleys-posies-stamp-set-brights

For the final touch, I die-cut some leaves and flowers using a couple of intricate dies from Paisleys Framelits Dies and adhered them to the black stripes.

And these are my cards for today. I hope you like my take on the sketch. Now be sure to hop along to see more inspiring projects. Your next stop is very talented Hannah.

Thank you for stopping by and have a blessed day,

SSSC Previous  SSSC Next Blog