Inside The Lines Altered Photo Frame

Anna’ Stampin’ Cave – Inside The Lines Altered Photo Frame

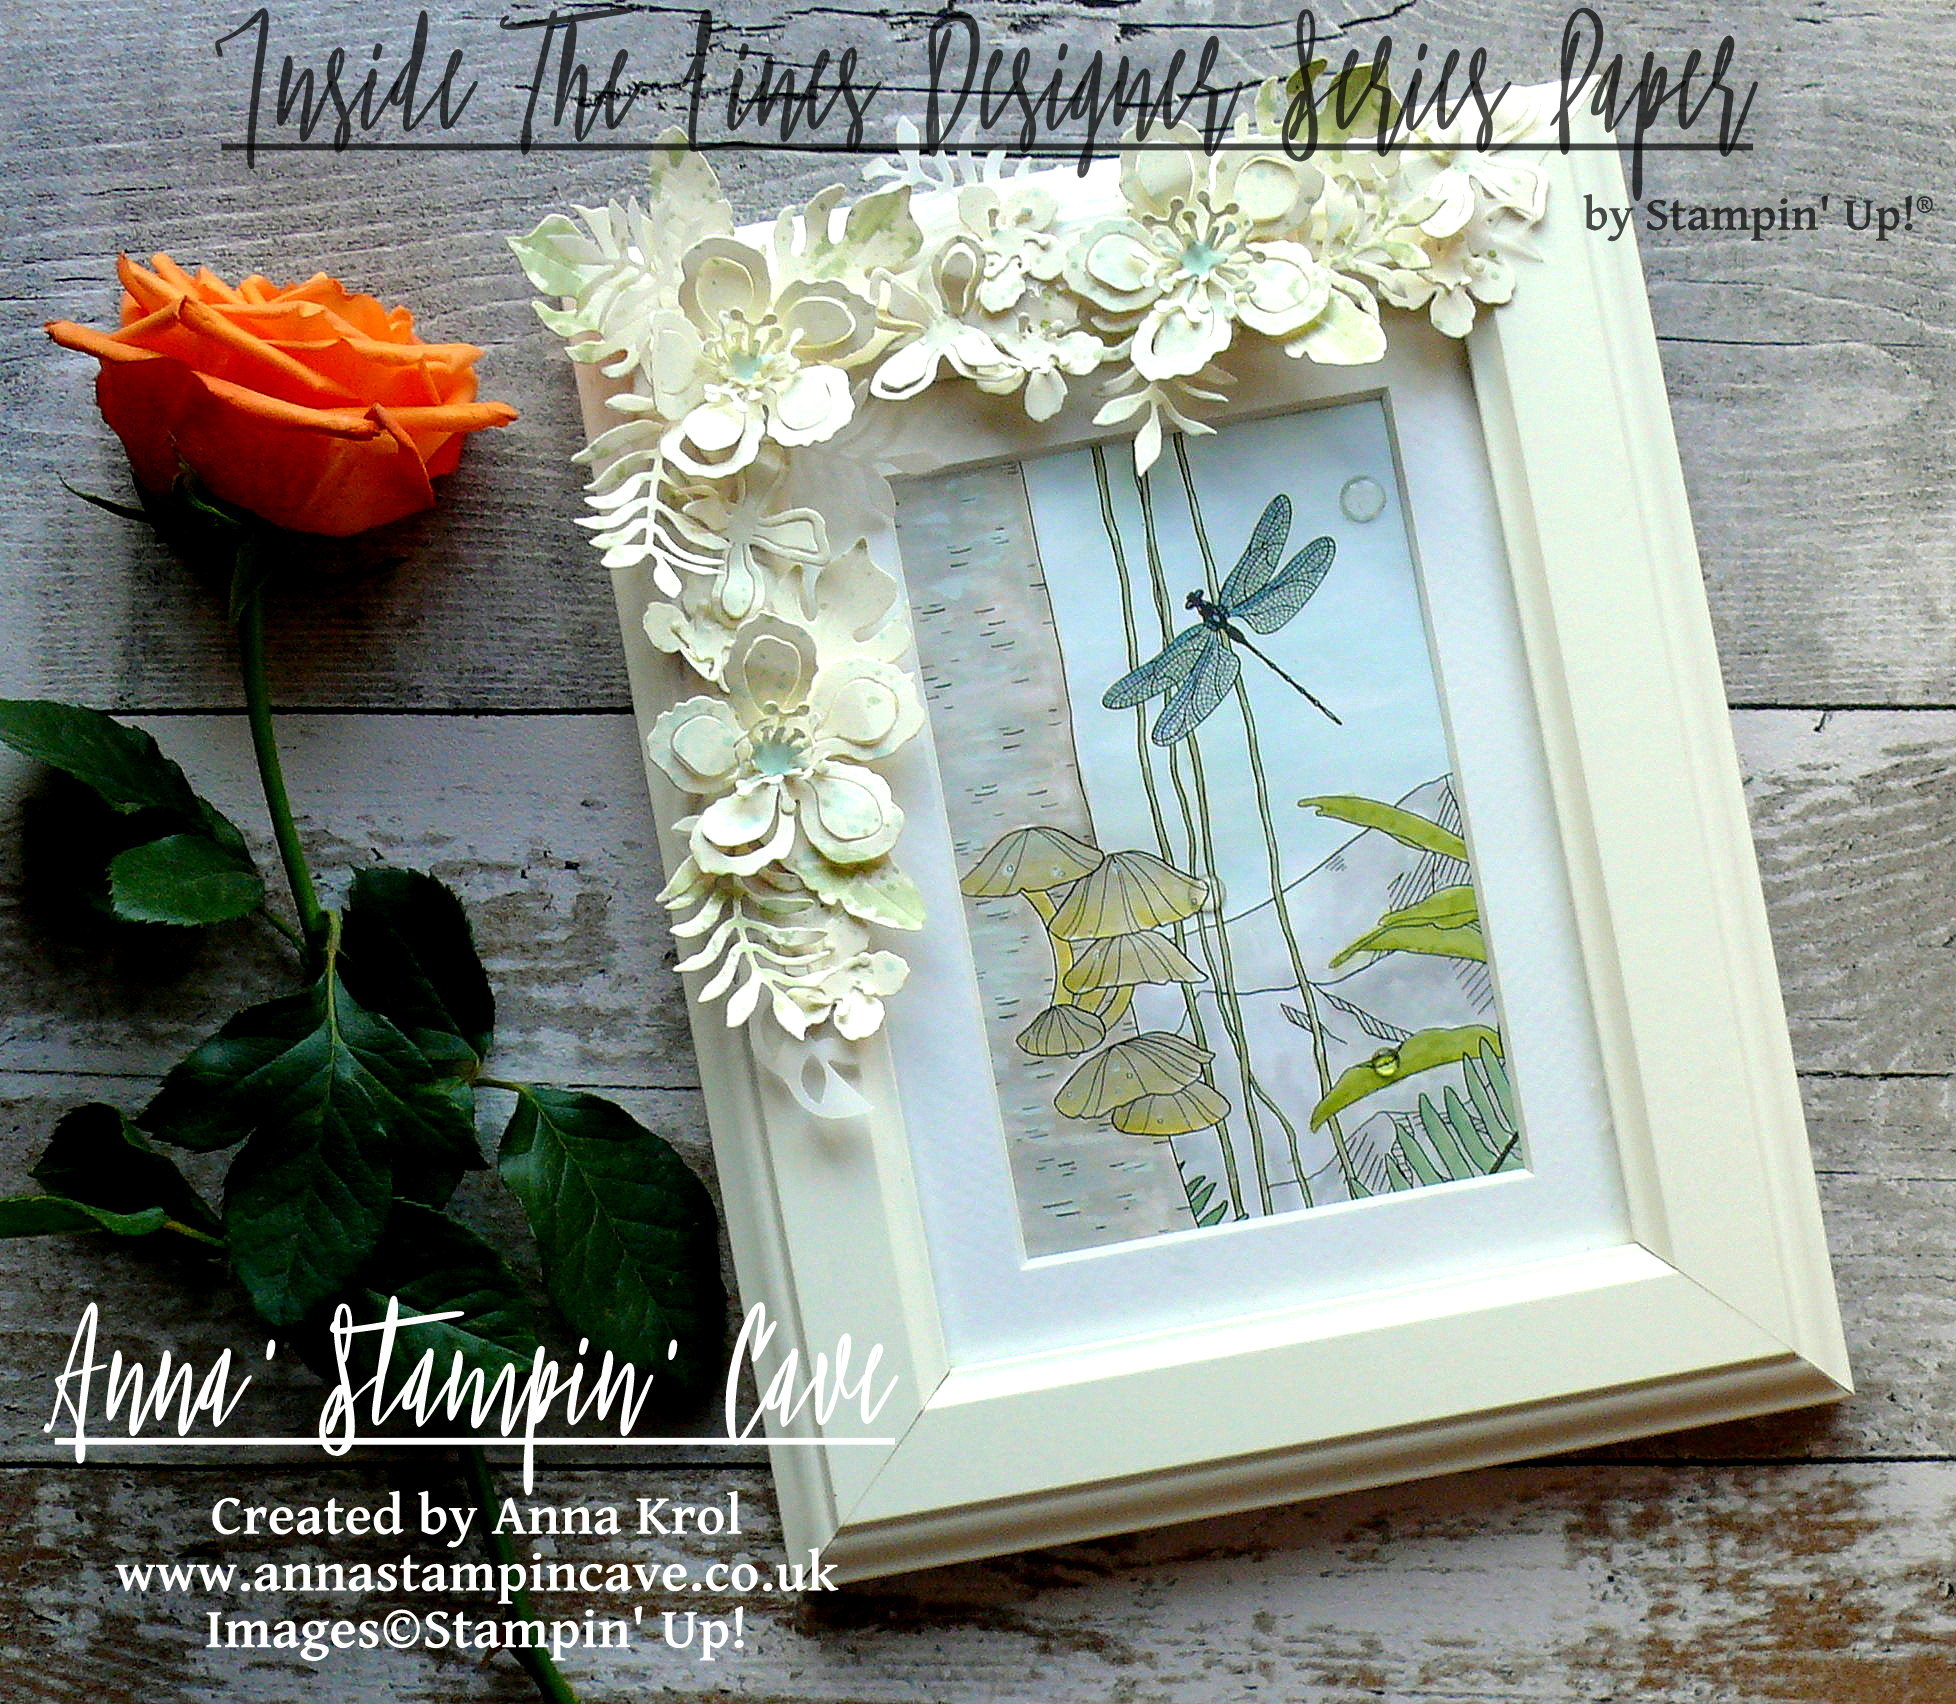
In my project today I decided to create altered photo frame with beautiful, Inside The Lines Designer Series Paper. With an ever-growing trend in adult colouring books, this paper is just spot on.
inside-the-lines-dsp

I don’t know about you, but I love these bold botanical designs. They coordinate with Dragonfly Dreams Stamp Set & Dies, but you can use them on their own too. Colour them in with markers, inks or watercolour pencils – it’s fun and very therapeutic…or leave them black&white. Whatever tickles your fancy.
anna-stampin-cave-stampin-up-sale-a-bration-inside-the-lines-dsp-frame

The frame is from Ikea and is called Virserum. It measures 7-1/2 x 9-1/2″ (19 x 24 cm) and comes with inside mount, hence I only needed 4″x 6″ (10 x 15 cm) piece of DSP to fit inside.

I’ve chosen this lovely, jungle-like design and cut it into 4″x 6″ rectangle. Because I was aiming for a subtle look I decided to watercolour my piece.

Bear in mind this is not watercolour paper so you can’t add too much water to it.

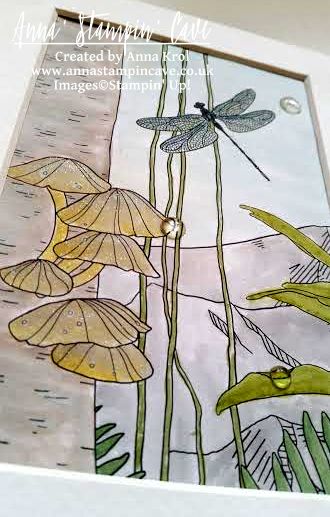
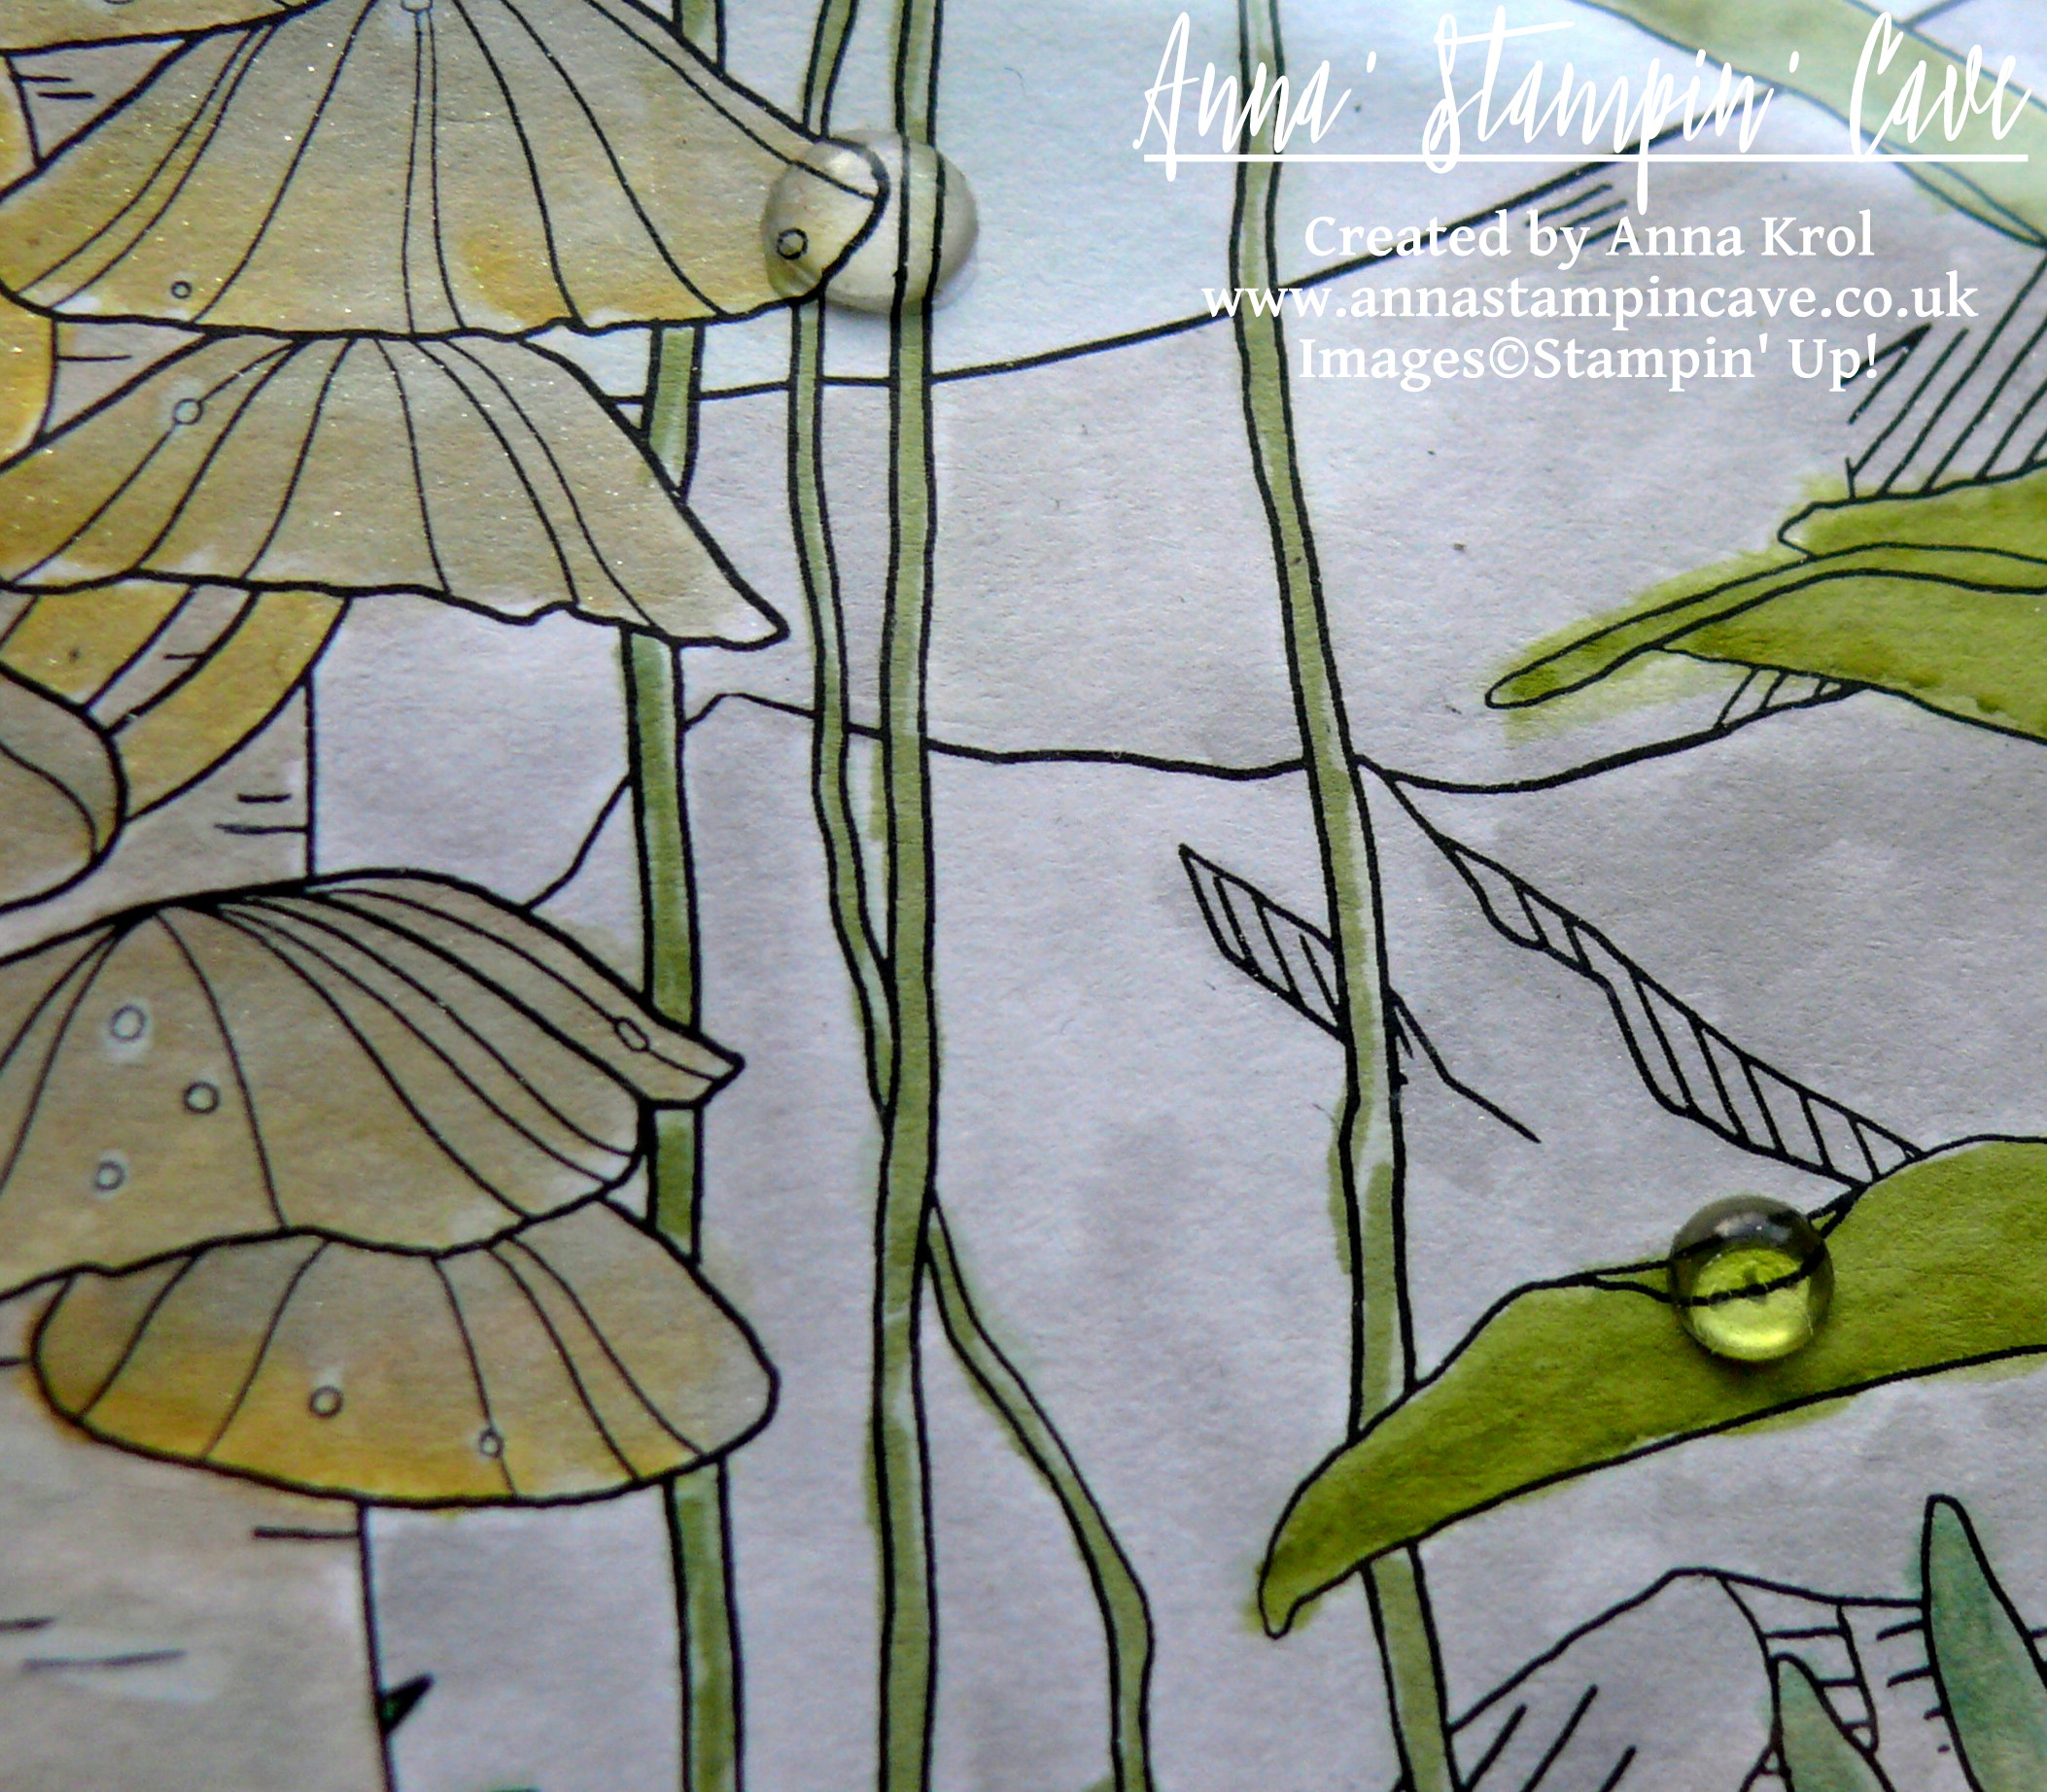
For the foliage, because it’s such a small area, I’ve used Stampin’ markers: Pear Pizzazz, Wild Wasabi, Old Olive, Garden Green and Always Artichoke. First, I scribbled my markers on a craft mat. I also spritz some water on my craft mat, next to the markers. I did it deliberately, to have more control of how much water I use. Next, I took dry aqua painter, picked up some water with its brush, next picked up some colour from the mat and started colouring my foliage. I was adding more colour and more water to the mat when needed. There are 4-5 layers of colour on leaves, each layer added when the first one was dry.
anna-stampin-cave-stampin-up-sale-a-bration-dsp-inside-the-lines

To colour in the rest of the image, I’ve used ink pads as my palettes.

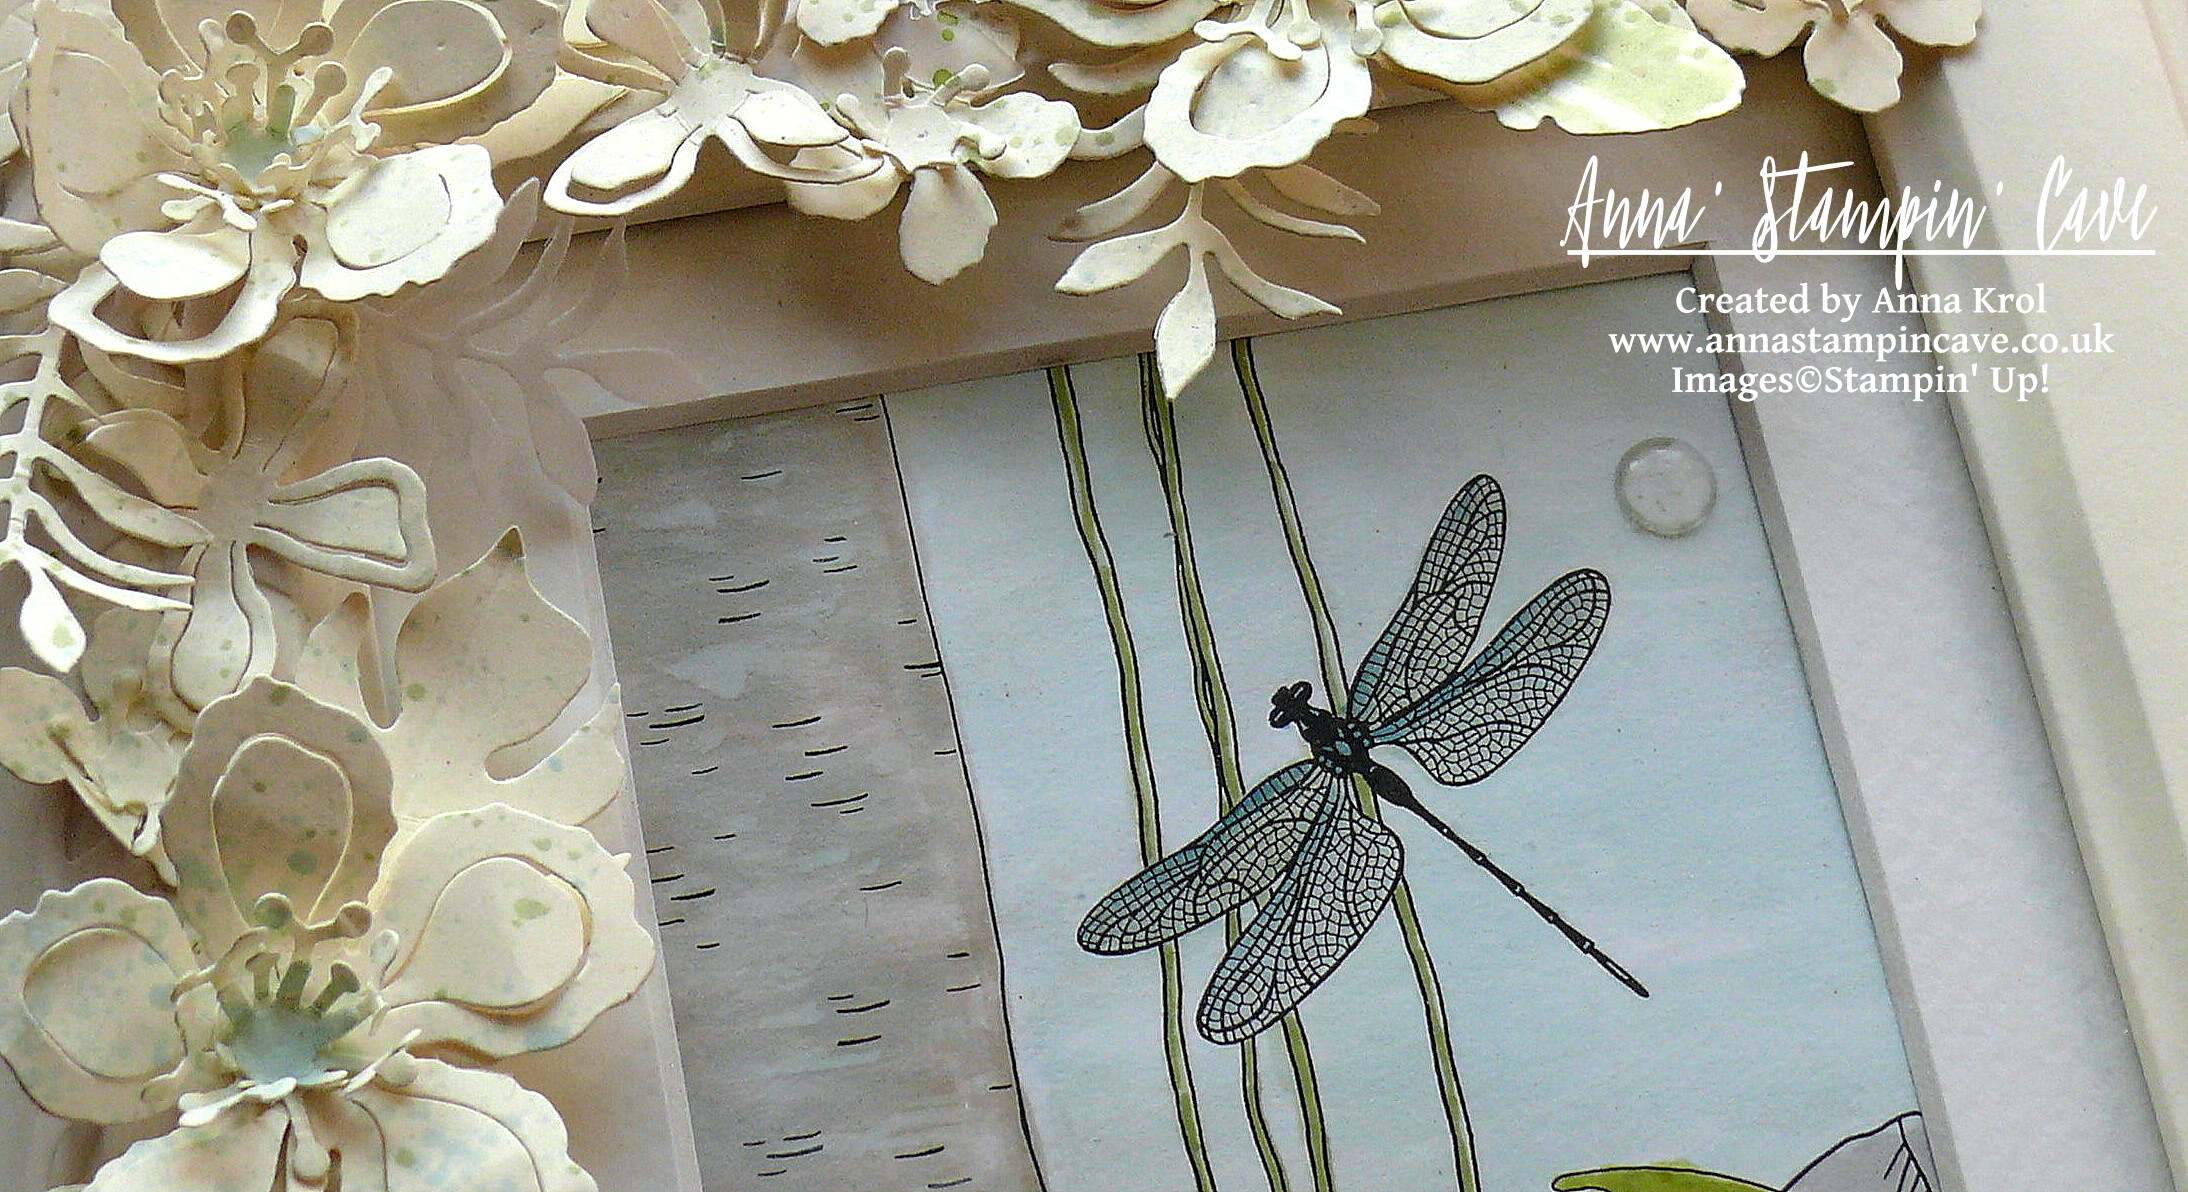
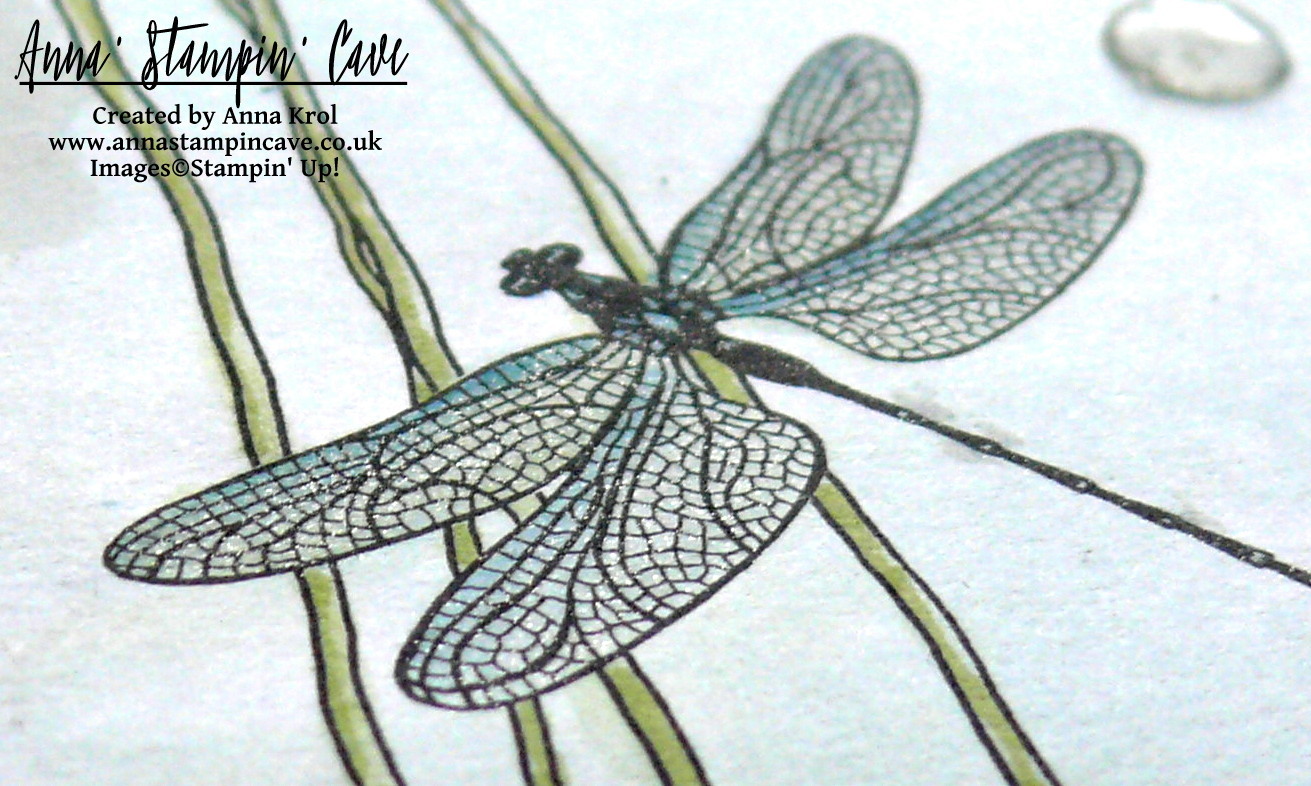
I’ve used Soft Sky for sky and dragonfly (with a little dab of Island Indigo marker). Mountains are coloured with Smoky Slate.

For the tree trunk, I’ve used Tip Top Taupe ink pad. To add some highlights I’ve used Whisper White Craft Ink (yes, I’ve used it with aqua painter too).
anna-stampin-cave-stampin-up-sale-a-bration-inside-the-lines

Polypores or conks (I’m not sure how they are called in the UK so forgive me if I’m wrong) are watercoloured with a mix of Sahara Sand, Crushed Curry and again some white craft ink for highlights.

For the final touch, I’ve added White Perfect Accents as dew drops (one on the sky is hiding a little boo-boo). And as a must, I had to add some shimmer with clear of Wink of Stella to the dragonfly, mountain tops, and polypores. Sadly it’s really hard to capture this lovely shimmer on photos. But now to the frame.
anna-stampin-cave-stampin-up-sale-a-bration-inside-the-lines-dragonfly

Believe it or not, this is my first ever altered photo frame. I knew I want flowers, but for a long time, I couldn’t decide on a colour. First, I wanted to go with quite a feminine look, so pinks and oranges. But once I had all my flowers ready I didn’t really like it. Typical haha. But no worries, I will use them to something else. And then I had this revelation: how about Very Vanilla?! Genius!

I die-cut oodles of flowers and leaves from Very Vanilla and Vellum cardstock. Arranged them around the frame and once I was happy with the placing, I adhered them with glue dots.
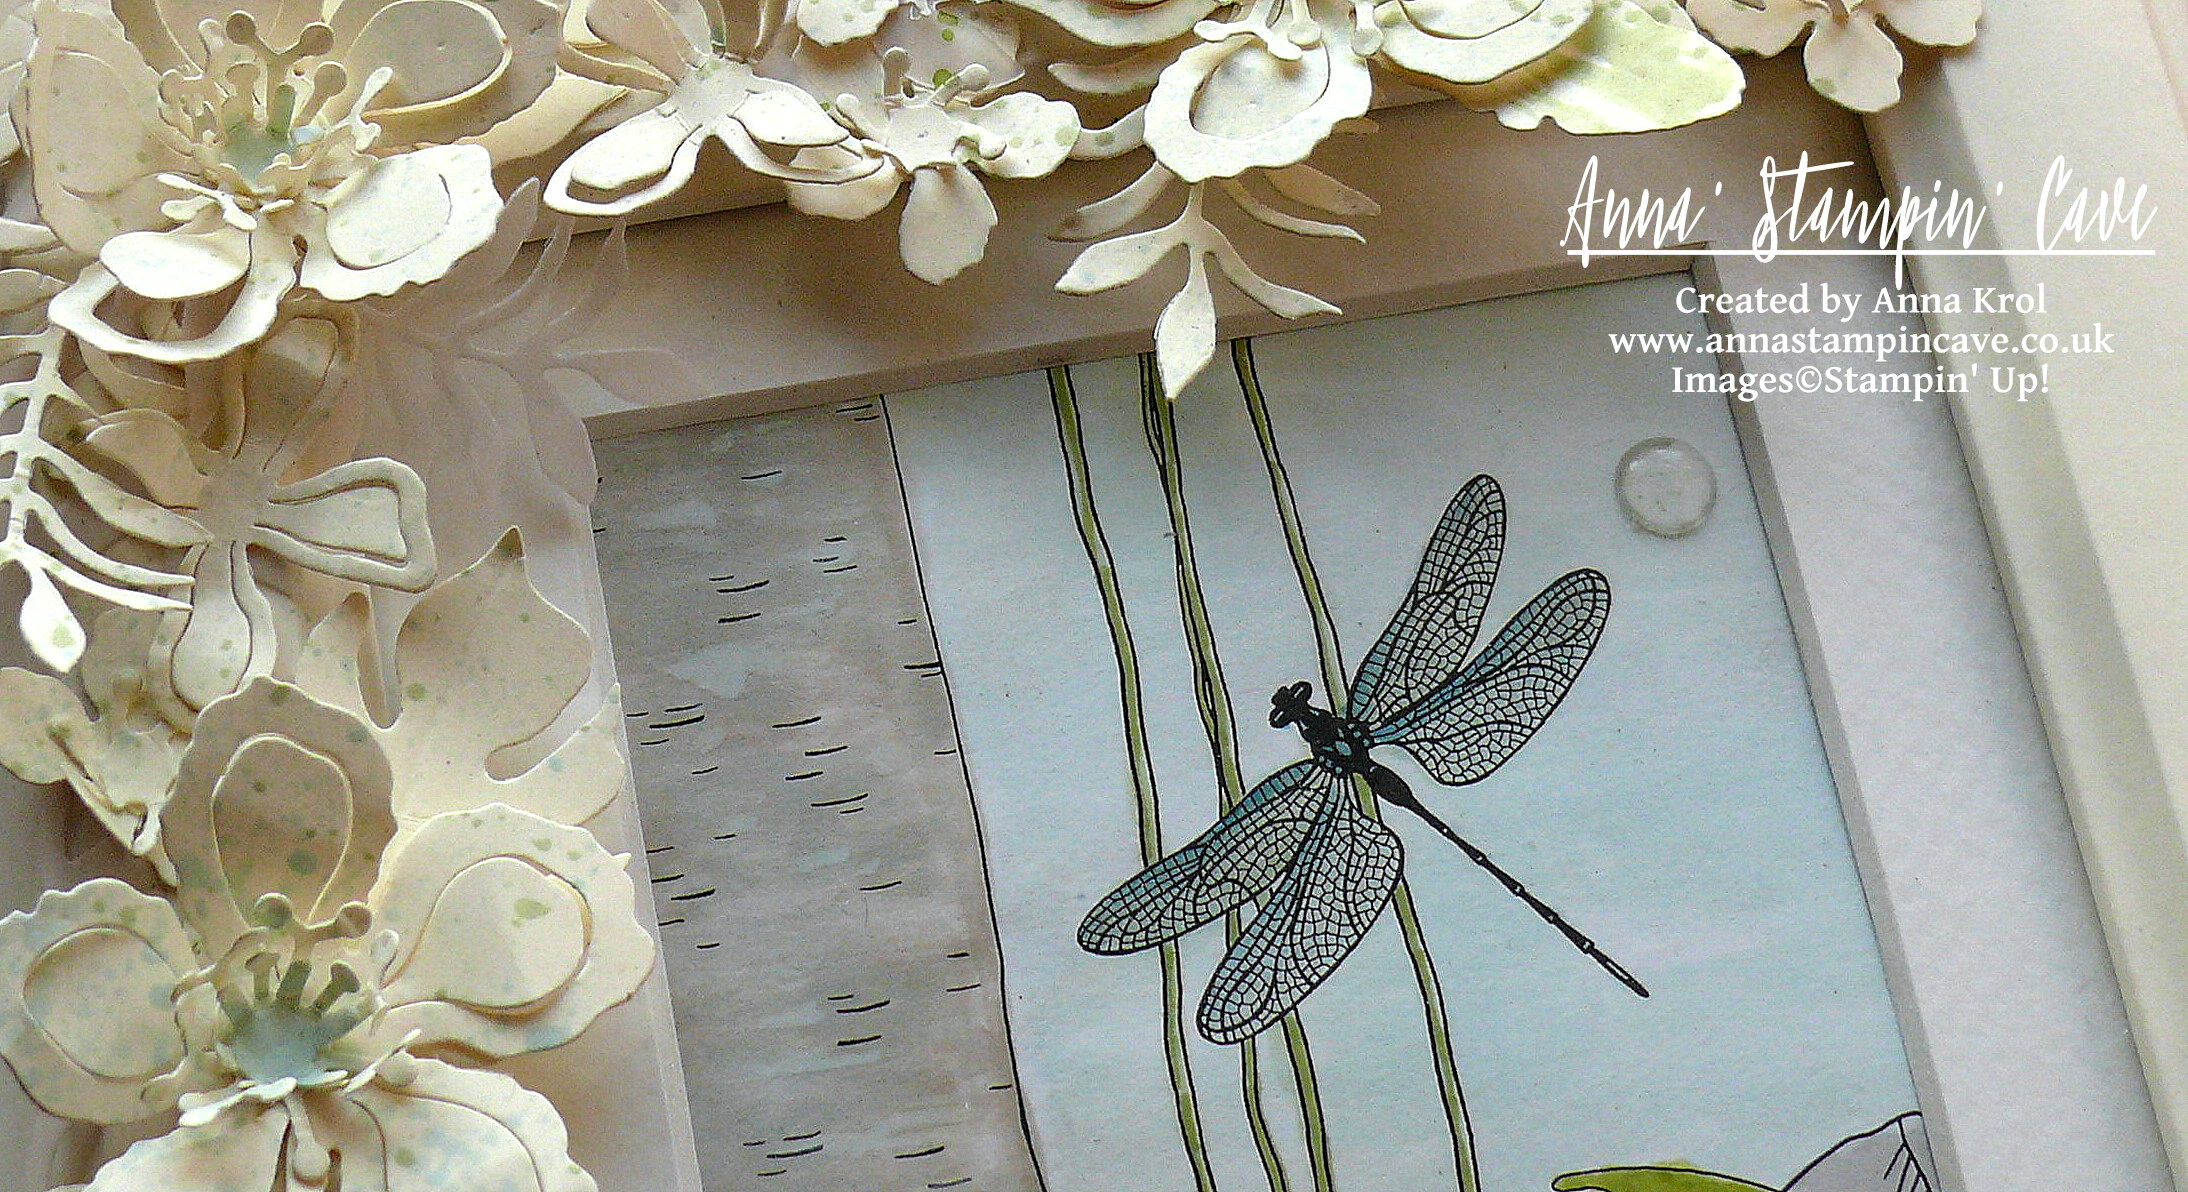
anna-stampin-cave-stampin-up-sale-a-bration-inside-the-lines-dsp-picture-frame

But as you may know me already, nothing can be too easy haha And when I looked at my frame something was missing, in my humble opinion. Oh right, it was too ‘clean’, too ‘white’. I needed some ‘controlled mess’.

I pressed Pear Pizzazz and Soft Sky ink pads next to each other on the craft mat and spritz it with water. I covered the glass with a piece of paper, and using a clean brush I added random and less random splatters to the flowers and leaves. And I have to say I love it now! And I hope you like my little project too.

I also want to add this project to the #071 Theme Challenge over at Global Design Project Challenge Blog. This weeks theme is ‘3D Or Off The Page’

gdp071

As always, if you wish to purchase any of products I have used, simply click the images below to go directly to my online store.

Thank you for stopping by and have a blessed day!


Inside The Lines Designer Series Paper

Inside The Lines Designer Series Paper
[143830]
£0.00

Botanical Builder Framelits Dies

Botanical Builder Framelits Dies
[140625]
£30.00

Very Vanilla A4 Card Stock

Very Vanilla A4 Card Stock
[106550]
£8.25

White Vellum A4 Card Stock

White Vellum A4 Card Stock
[106584]
£6.00

Many Marvelous Markers

Many Marvelous Markers
[131264]
£99.00

Crushed Curry Classic Stampin' Pad

Crushed Curry Classic Stampin’ Pad
[131173]
£6.00

Pear Pizzazz Classic Stampin' Pad

Pear Pizzazz Classic Stampin’ Pad
[131180]
£6.00

Tip Top Taupe Classic Stampin' Pad

Tip Top Taupe Classic Stampin’ Pad
[138325]
£6.00

Sahara Sand Classic Stampin' Pad

Sahara Sand Classic Stampin’ Pad
[126976]
£6.00

Smoky Slate Classic Stampin' Pad

Smoky Slate Classic Stampin’ Pad
[131179]
£6.00

Soft Sky Classic Stampin' Pad

Soft Sky Classic Stampin’ Pad
[131181]
£6.00

Whisper White Craft Stampin' Pad

Whisper White Craft Stampin’ Pad
[101731]
£7.25

Clear Wink Of Stella Glitter Brush

Clear Wink Of Stella Glitter Brush
[141897]
£7.25

Aqua Painters

Aqua Painters
[103954]
£15.50

White Perfect Accents

White Perfect Accents
[138416]
£4.50

Liquid Multipurpose Glue

Liquid Multipurpose Glue
[110755]
£3.75

Glue Dots

Glue Dots
[103683]
£4.75

Stampin' Trimmer

Stampin’ Trimmer
[129722]
£27.00

Big Shot

Big Shot
[143263]
£99.00

Simply Sketched Saturday Challenge #15 – Follow Your Dreams

Anna’ Stampin’ Cave – Simply Sketched Saturday Challenge #15 – Follow Your Dreams

SSSC Header

Thank you for joining us for another Simply Sketched Saturday Challenge!  We are so excited to be sharing this hop with you. The products used are all available in the current Annual, or seasonal, Stampin’ Up!®  Catalogues*. Simply use the buttons at the bottom of the post to keep hopping!

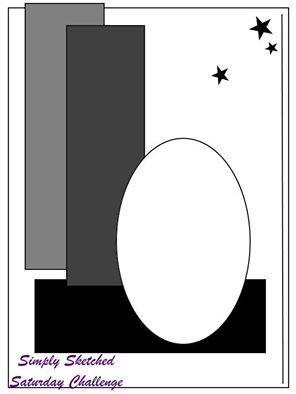
Welcome to our 15th sketch challenge blog hop! This month it was me who had a pleasure to create a sketch we are gonna work with. Here it is:

sssc-15

When creating this sketch, I won’t be lying, I had our new Stitched Shapes Framelits Dies in mind. And however I don’t have these dies yet myself, I hope to see them used a lot through this blog hop.

I know that in the ‘age’ of everything ‘clean and simple‘ and ‘less is more‘ in crafting world, layered, ‘busy’ and distressed cards are kinda faux pas. But I can’t help I love them the most! I love all the organic, (sometimes messy) creative process of designing a card.

stampin-up-follow-your-dreams

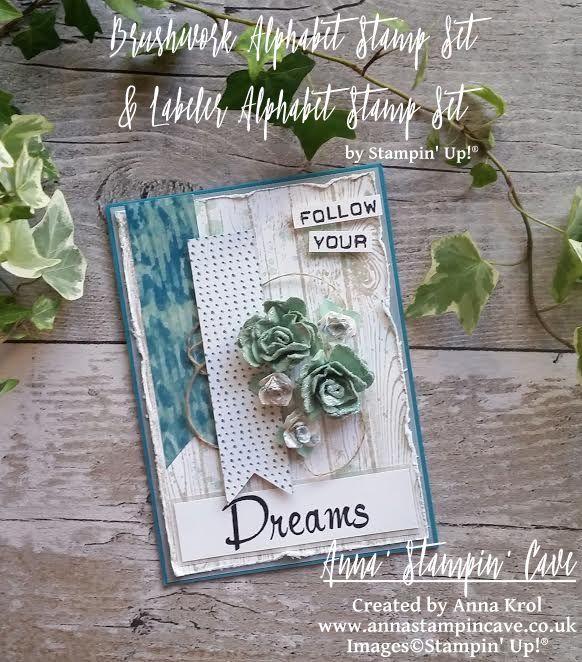
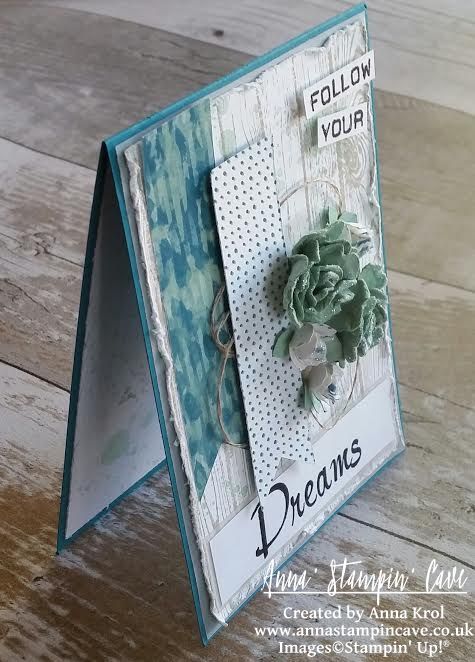
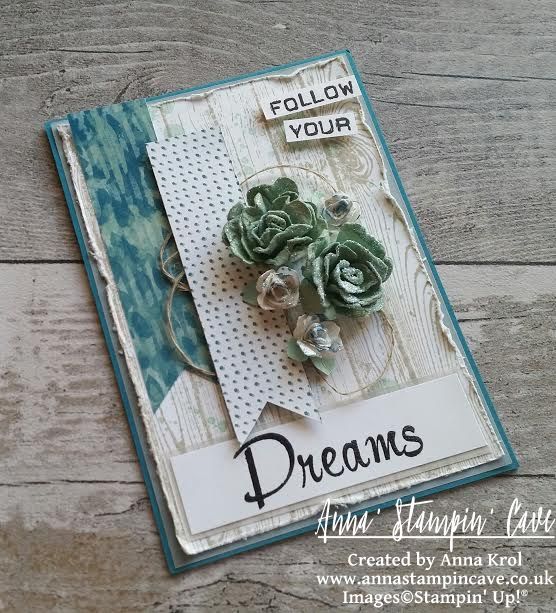
For my card base, I’ve used Island Indigo cardstock (standard top folding A6 size). The first layer is Vellum that measures 4”x 5-5/8” and next one is Whisper White 3-7/8”x 5-1/2” panel which I stamped using Hardwood background stamp in Sahara Sand. But because it felt rather ‘boring’ I also added few ‘splotches’ from Gorgeous Grunge stamp set in Mint Macaron, stamping them off a couple of times. I distressed the edges of my panel using regular scissors.

I also created a similar panel for the inside of the card, but this time I also stamped off the Hardwood image few times, so it wasn’t as crisp as the one on the card front.

follow-your-dreams

I took two pieces of Blooms & Bliss DSP, which measure 4”x 1” each, and cut them into banners. One of the banners I adhered flat down using a fast fuse and a second one I pop with dimensionals with few lengths of Linen Thread underneath.

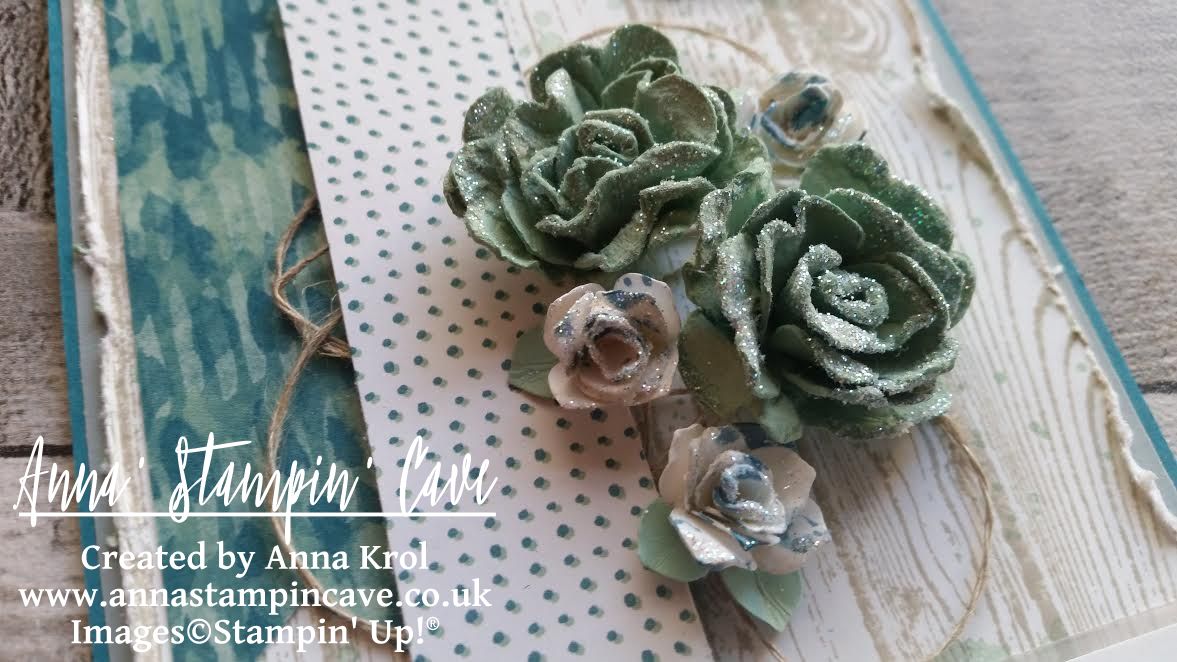
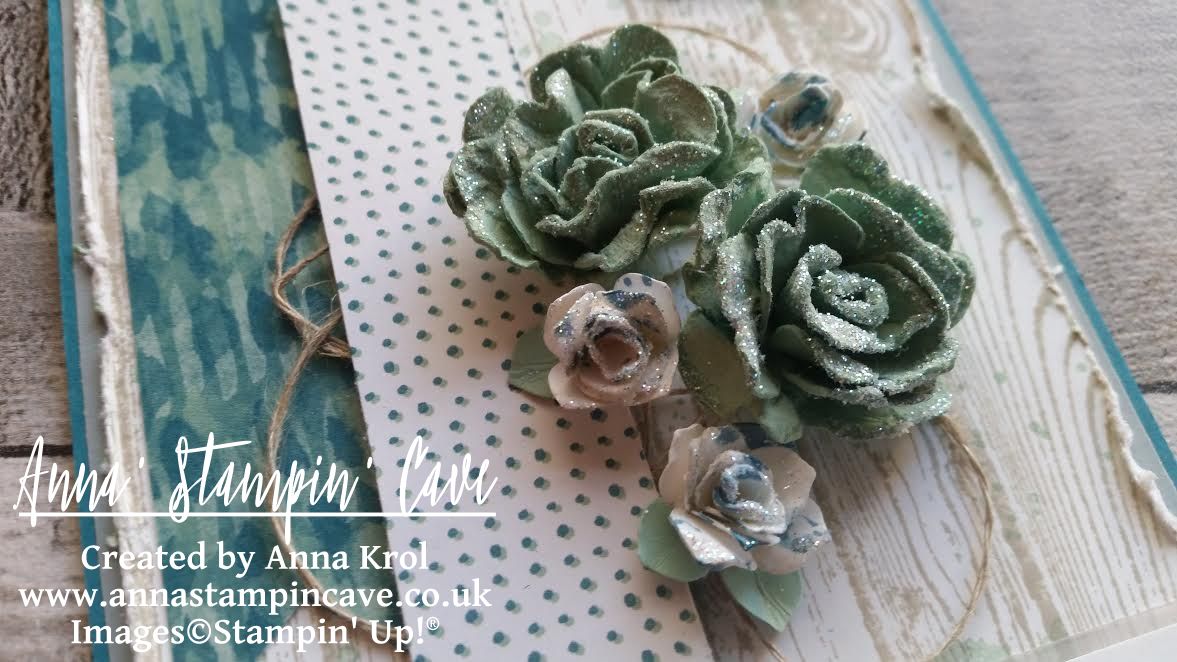
To create large roses I punched six flowers using Pansy punch from Mint Macaron cardstock (three flowers create one rose). For white tiny roses, I punched nine flowers using Petite Petals punch (again three flowers create one rose). I also punched one petite petals flower from Mint Macaron cardstock to create tiny leaves: I cut the shape apart so I end up with two double ‘leaves’ and one single ‘leaf’. White roses appeared bit ‘blunt’ so I decided to add some interest to them: using Island Indigo ink and a small paint brush I added some ‘speckles’ to them.

I also decided to add some sparkle to my flowers. I dipped the edges of petals first in watered-down Multipurpose Liquid Glue and next in Dazzling Diamonds glitter, and let it dry. Once they were ready I adhered them to the card with glue dots.

stampin-up-follow-your-dreams-handmade-roses

For the sentiment, I decided to use this awesome quote you probably have seen many times on the net: “Follow your dreams”. We might don’t have a stamp set with this sentiment, but this is where our amazing various alphabet sets come in handy.

Using Labeler Alphabet stamp set and Basic Black Archival ink pad, I stamped “follow your” on a 2/8” wide strip of Whisper White cardstock and cut it apart. Next, using Brushwork Alphabet stamp set and Basic Black Archival ink pad again, I stamped “Dreams” on a Whisper White panel that measures 7/8”x 3-1/2”, and heat embossed it with clear embossing powder for extra oomph. I pop ‘narrow’ part of the sentiment with dimensionals. For a wider piece, I created a vellum mat that measures 3-5/8”x 1”, and adhered them to the card front with a fast fuse.

anna-stampn-cave-stampin-up-follow-your-dreams

Do you like my project?! If so, please leave me a comment. I would love to hear from you!

Now, be sure to hop along and see more inspiring projects. Your next stop is Jillian’s blog  go and see what she has made for you.

Thank you for stopping by and have a blessed day,

SSSC Previous   SSSC Next Blog

Elegant Monochromatic With Pop Of Colour

Anna’ Stampin’ Cave – Elegant Monochromatic With Pop Of Colour

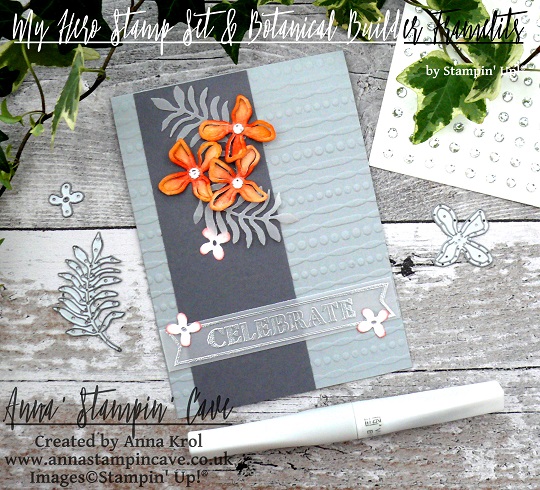
Wow! It’s hard to believe, but today is last day with My Hero Stamp Set from Stampin’ Up! Yep, 5 weeks have passed!

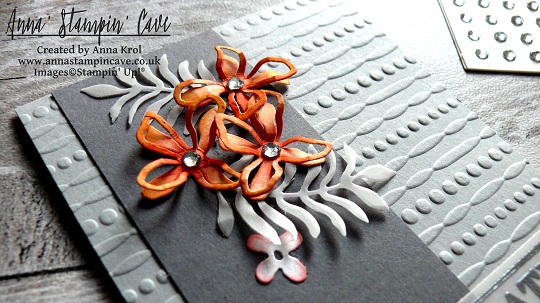
For my final project, I’ve created this striking yet elegant, almost monochromatic card, in shades of grey but with a pop of colour in form of dainty orange flowers.

stampin-up-botanical-builder-framelits-my-hero-stamp-set

For the base of my card I took an A4 sheet of Smoky Slate cardstock, cut it in half at 4-1/8″ and folded in half at 5-7/8″. I run the front of the base through Big Shot with Festive Embossing Folder. The panel is a piece of Basic Grey cardstock that measures 2″ x 5-7/8″. I adhere it to the base with Multipurpose Liquid Adhesive.

Next, I created my floral composition using Botanical Builder Framelits Dies. I die cut a couple of leaves from vellum and six flowers: three tiny flowers and three small 3D flowers from a scrap of Whisper White cardstock.

Savvy Tip: Don’t know what to do with random off cuts that are to small to use on cards or to punch anything out of them? Don’t throw them away! I save all my off cuts and use them up when need to die cut small elements, flowers, etc using framelits dies
To add a little bit of colour to my flowers I sponged the edges of the tiny flowers with Watermelon Wonder. For 3D flowers, I decided for more ‘dramatic’ look I sponged entire flowers using Pumpkin Pie ink pad and a dab of Watermelon Wonder to the centres. I also added a large rhinestone to each centre. You can’t really tell from the photos (blame the awful English weather) but I’ve added a touch of shimmer using Clear Wink Of Stella Glitter Brush to each flower (tiny ones too).

stampin-up-botanical-builder-framelits-my-hero-stamp-set

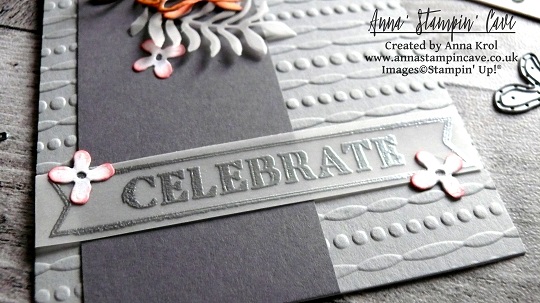
Next, I took a strip of vellum ( 1/2″ x 4-1/8″) and stamped a ‘Celebrate’ from My Hero Stamp Set in Versamark. Of course, I’ve used an Embossing Buddy prior to stamping. I heat embossed the sentiment with Silver Stampin’ Emboss Powder.

Tip: For best results with heat embossing always treat your cardstock, dsp, vellum, etc with embossing buddy. I takes off the statick from the surface of your paper, and makes the powder stick only to the areas you stamped.
Tip 2: If you don’t have an embossing buddy or any other antistatic tool you can use cornflour instead. Just sprinkle a little amount of flour over the surface of your cardstock, spread it with fingers or paint brush, and shake off the excess. Now you can stamp and heat emboss.

I assembled my composition using Glue Dots and liquid adhesive. Two tiny flowers on the vellum banner are hiding adhesive that I’ve used to adhere the banner to the card base.

stampin-up-botanical-builder-framelits-my-hero-stamp-set

I really like how this card turned out. I love the monochromatic, cold look of greys with a pop of bright orange. And what do you think about this colour combination? Do you like it? I would love to hear from you in comments below.

Thank you for stopping by and have a blessed day,

Pootler’s Autumn-Winter Catalogue Blog Hop – Christmas Bauble Shaker Card!

pootler's blog hop

Thank you for joining us again on Pootler’s Blog Hop! This is our team Blog Hop to showcase products from new Stampin’ Up!® Autumn-Winter Catalogue. So prepare yourself for lots of beautiful projects and tonnes of inspiration. Simply use the buttons at the end of each post to keep hopping!

If you have arrived here from Lea’s blog thank you for stopping by. I hope you enjoy seeing the inspiration from our team and continue to hop through to see what everyone has made.

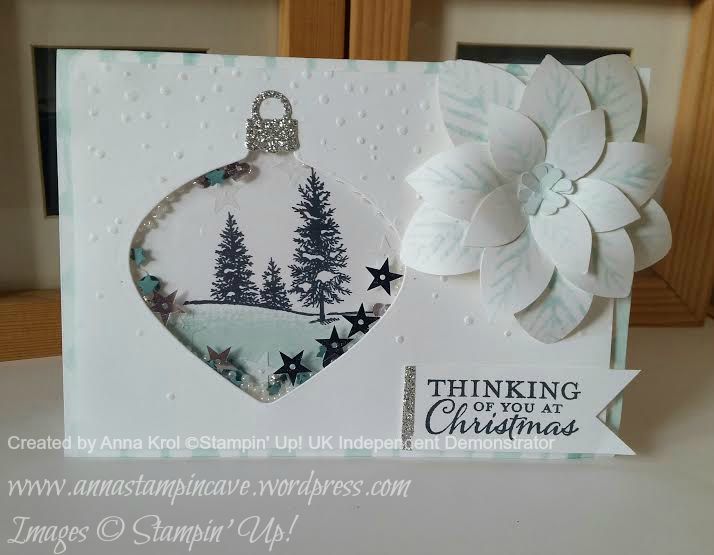
My little project features pretty few of new products from our seasonal catalogue, but I just simply couldn’t decide which one to choose 🙂

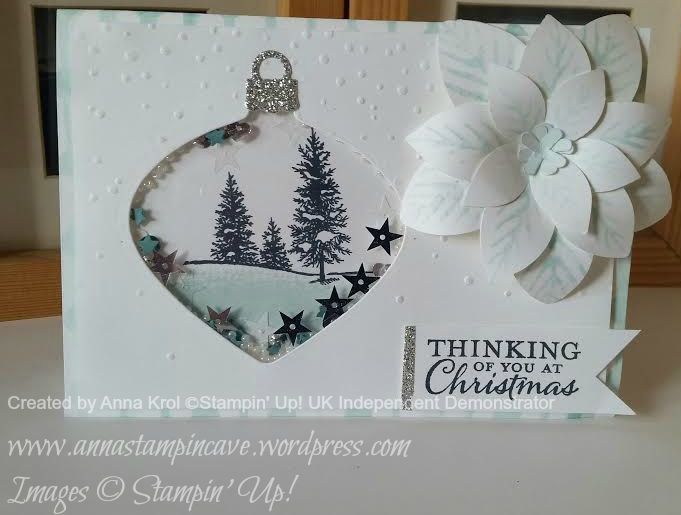
Does it happen to you that when you see a new product, it “talk to you”? haha. No, I’m not crazy! Just the moment I saw Delicate Ornaments Thinlits Dies it screamed to me: shaker card!
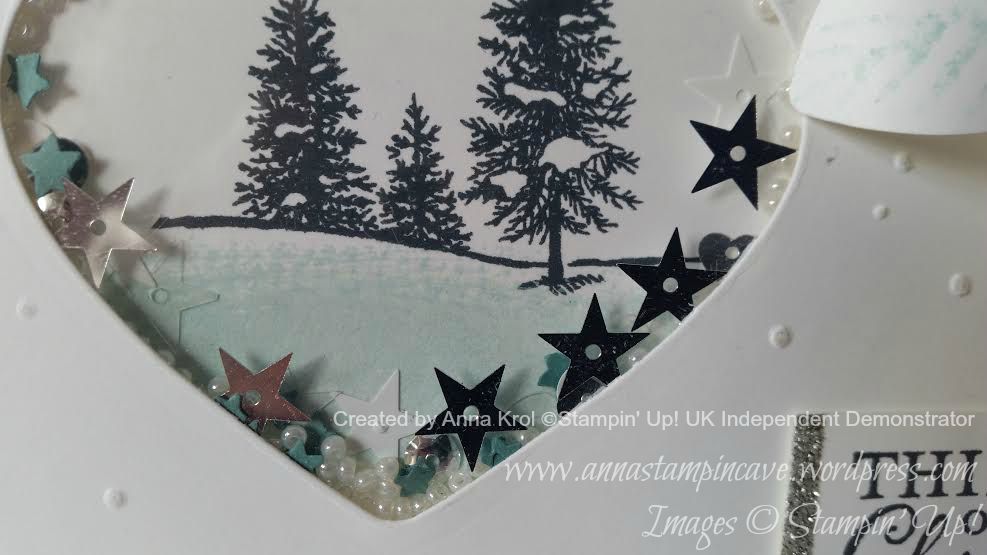
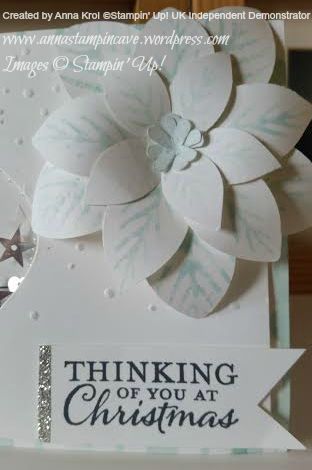
Christmas Bauble Shaker Card 2.1

I wanted to keep my card in soft, washed colours. The base of the card, as well as the top layer, is Whisper White. To break a little bit all the whiteness I added pattern to my base. I took one of the stencils (fancy dots) from Happy Patterns set and sponged over the stencil with Soft Sky. But I only sponged on the edges, leaving the centre white for stamping.

For the layer, I took a piece that measures 5-3/8 x 3-6/8″ so my sponged base could slightly peek around the edges. I run it through Big Shot with new Softly Falling 6×6″ Embossing Folder. I love how it adds gentle texture to the card. Next, I run it through the Big Shot with a bauble die from Delicate Ornament Thinlits Dies, to create a “window” for my shaker.

Christmas Bauble Shaker Card 4

Winter scene comes from Happy Scenes stamp set. Snow on the ground is “swoosh” stamp from Work Of Art. For my shakers I used Metallics Sequin Assortment, Lost Lagoon stars punched with Confetti Stars Border punch and seed beads from my stash. To create shaker I used edges from dimensionals and a piece of acetate. If you don’t have dimensionals you could use foam tape.

Christmas Bauble Shaker Card 3

To keep rest of the card simple the only “embellishment” on my card is Poinsettia flower. I was so excited to use Festive Flower Builder Punch together with Reason for the Season stamp set. I punched poinsettia leaves from Whisper White cardstock. I used five large leaves, five medium, five small ones (I cut them in half) and three centres to build my poinsettia. Each leaf was stamped in Sky Blue but I stamp it off first so the colour was even softer. I curl each leaf with a bone folder and assembled it using Tombow glue.

Christmas Bauble Shaker Card 2.2

This gorgeous sentiment comes from Embellished Ornaments stamp set. I cut it into a banner and backed it with a piece of silver glimmer paper. As I had it out I also die-cut a little fixing for my bauble from glimmer paper too.

Now that you’ve seen my project please use the buttons below to keep “hopping”. Next in our hop is Sarah, and I know she has a lovely project to share with you. Once again thank you for stopping by.

Have a blessed day,

previous pootler blog 

Floral Wings By Stampin’ Up! And Pootlers Blog Hop

pootlers blog hop

Thank you for joining us on our second Pootler’s Blog Hop! This Blog Hop is all about new Stampin’ Up!® Annual Catalogue so prepare yourself for lots of beautiful projects and tonnes of inspiration. Simply use the buttons at the end of each post to keep hopping!

If you have arrived here from Keren’s blog thank you for stopping by. I hope you enjoy seeing the inspiration from our team and continue to hop on through to see what everyone has made.

It’s actually my very first blog hop so I’m a little bit nervous but hey – let’s have some fun!

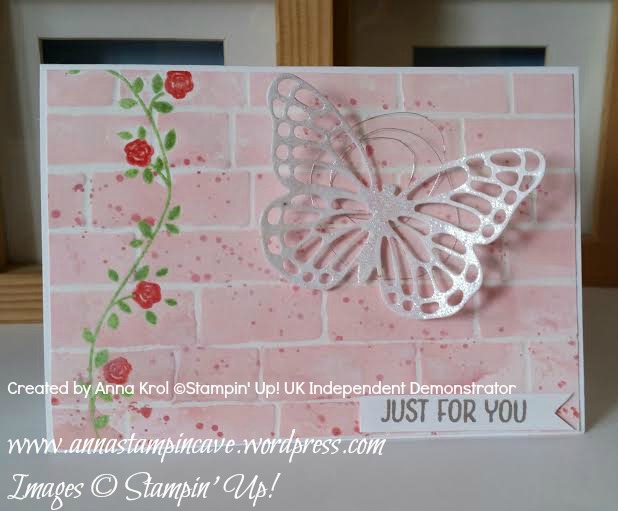
For today’s projects, I’ve chosen gorgeous new hostess set Floral Wings. The idea for today’s cards was born the minute I saw our new 6×6″ Brick Wall Embossing Folder.

blog hop roz 2

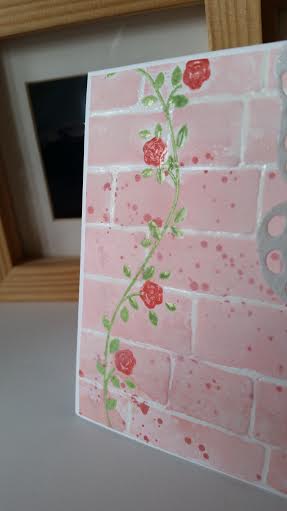
For my top layer, I stamped the vine and roses first before embossing it with Brick Wall TIEF. But I wanted to watercolour my panel so needed my images to be water-proof. To achieve it I ink vines stamp in Versamark first, followed by Pear Pizzazz ink pad – this way once stamped Versamark was on top and I could emboss it with clear embossing powder. I did the same with roses, just used one of our new In Colors: Watermelon Wonder ink pad. The sentiment is stamped in another new In Color: Tip Top Taupe.

Floral Wings Stamp Set

I’ve used embossing resist technique to create the background. I applied Versamark onto the ridges of embossing folder ( on the side that says Sizzix) and run it through the Big Shot with a piece of Whisper White. Then I heat embossed it with clear embossing powder. I used Pink Pirouette, Blushing Bride and Watermelon Wonder to watercolour my panel, and added few Gorgeous Grunge splotches.

Floral Wings Stamp Set

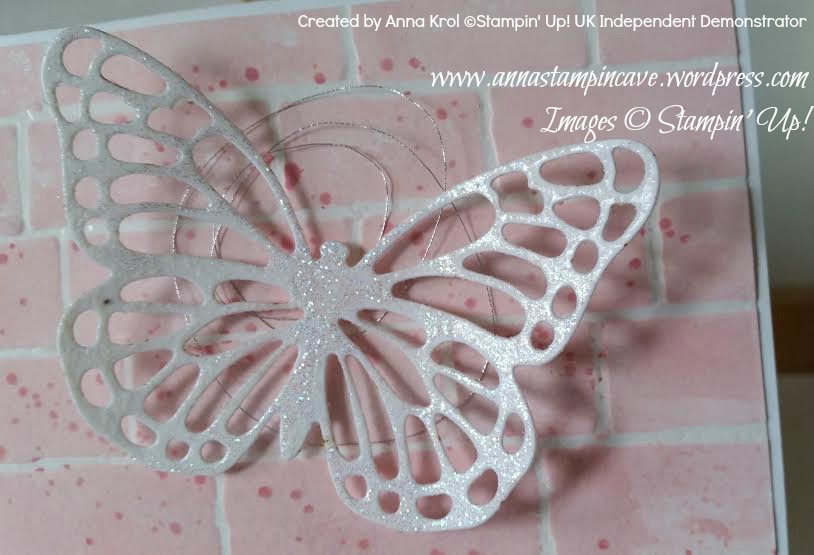
I die cut butterfly from Whisper White and embossed it using Iridescent Ice embossing powder for some sparkle. Tiny bit of new Silver Metallic Thread (L.O.V.E. this stuff!!!) and my card was done 🙂

My second card measures 4×4″ and background (panel) is made using the same technique.

blog hop square 2

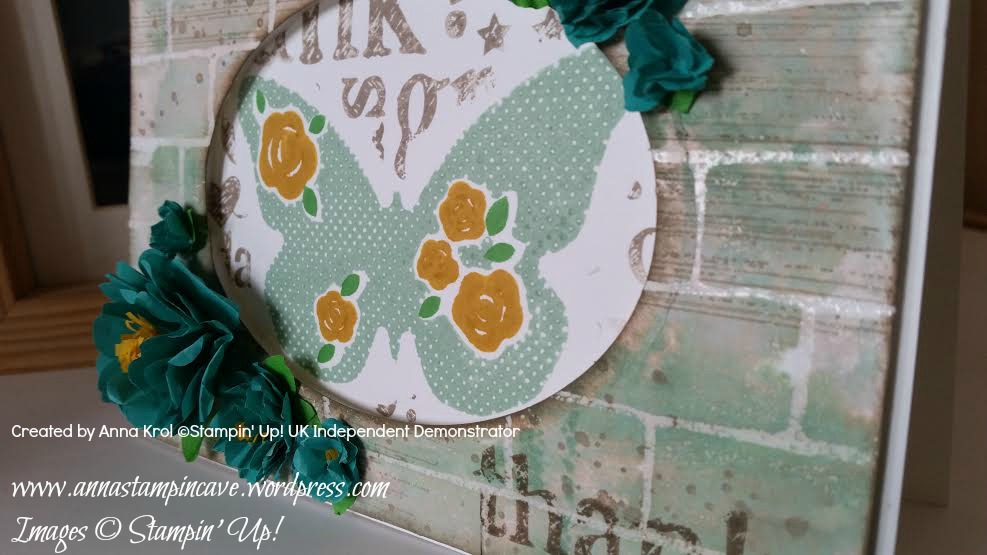
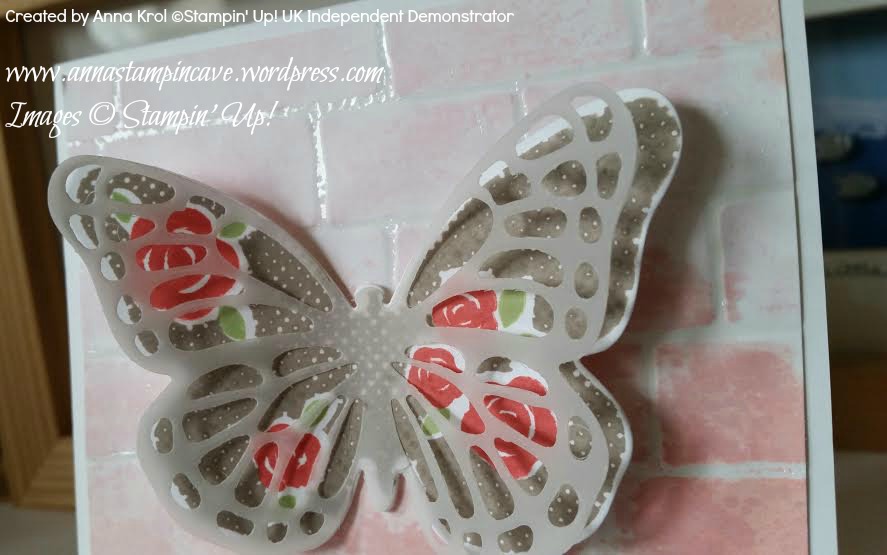
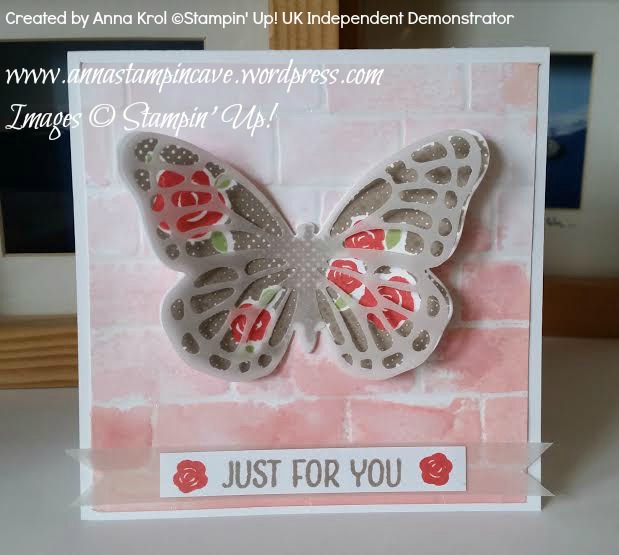
This time for the focal point I’ve used this gorgeous three-step butterfly stamp from Floral Wings set. First I stamped wings in Tip Top Taupe. Next roses in Watermelon Wonder. Leaves are the third step. I’ve used (again) Pear Pizzazz. I die cut the butterfly using new Bold Butterfly Framelits, but if you don’t have dies you can also fussy cut it. The second butterfly is die cut from vellum, this time with Butterfly Thinlits Die. I layered them together to add some more interest and dimension to the card.

blog hop square

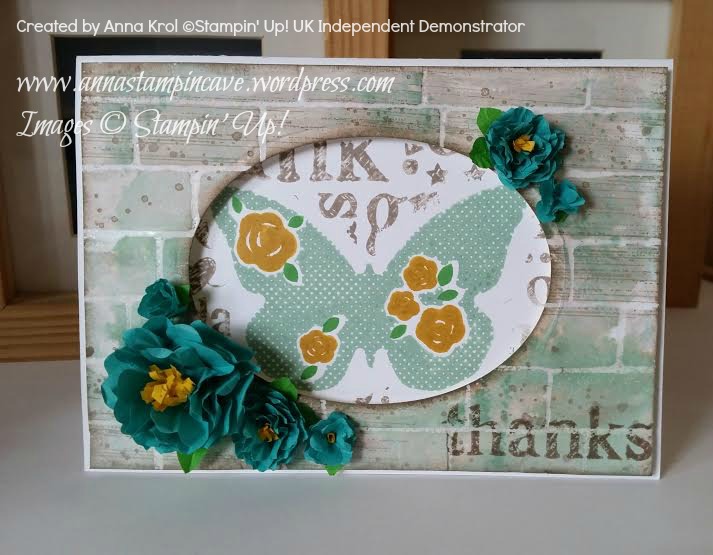
My last card for today uses same technique and stamp set like previous cards – just completely different style and different colours. I also used new background stamp A World Of Thanks and Cotton Paper. And again – I love this stuff! I know that many people got mixed feelings about it but I truly, deeply love it 🙂 Cotton paper is quite thin, like a tissue paper, but is much, much stronger. Really hard to tear it’s perfect for making flowers. It die-cuts beautifully but if you want to use punches (like me in this project) bear in mind that you need to punch through several layers at a time, otherwise it won’t punch. But enough talking – here’s my card:

blog hop blue 2

I won’t go into details how I made the entire card, but…

blog hop blue

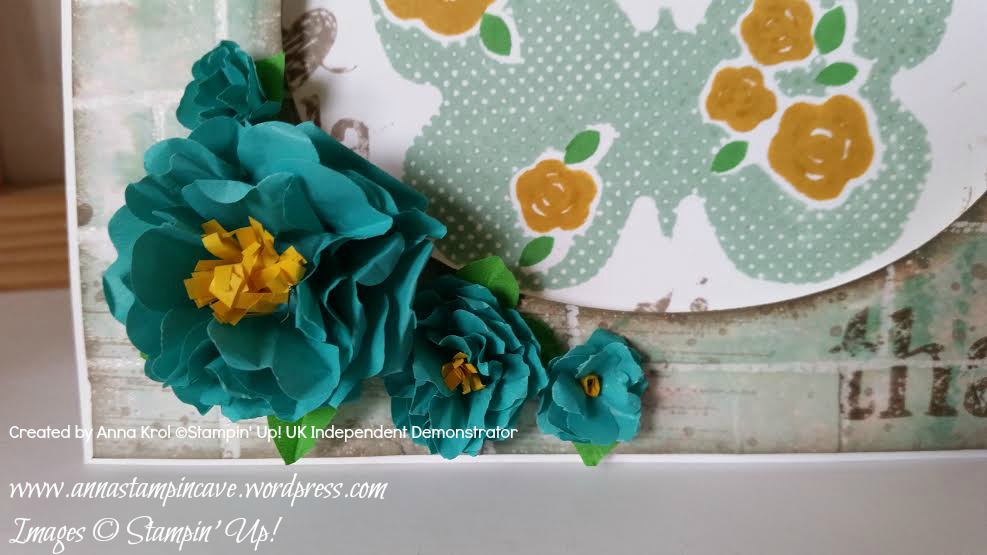
For flowers, I’ve used Bermuda Bay cotton paper and three different punches: Pansy Punch for the largest one (six layers), Petite Petals Punch for medium flowers (six layers) and little flower from Itty Bitty Accents Punch Pack for the tiny ones (three layers for each flower).

blog hop blue 3

To make leaves I’ve used Petite Petals and Flower Medallion punches and Cucumber Crush cotton paper. For the flower centres, I’ve used 2/8″ wide and around 2″ long strips of Crushed Curry cotton paper. I do not own fringe scissors however it wasn’t that hard to make tiny cuts (halfway) through those strips. Adhered them with Tombow glue.

I really hope you’ve enjoyed my projects today. Which one is your favourite? Feel free to leave a comment below. Next stop is lovely Jerim at Willow Piggy. I’m sure she’s made something beautiful for you.

   next blog

previous blog

Thank you for stopping by,